CE LINK WIFISW06 WIFI 2.4GHz IEEE802.11b/g/n User Manual
CE LINK LIMITED WIFI 2.4GHz IEEE802.11b/g/n
CE LINK >
Manual
Wi-Fi 2.4GHz IEEE802.11 b/g/n
USER MANUAL
CONTENTS
1.Introduction ........................................................... 1
2.Features ................................................................ 1
3.Specifications ......................................................... 2
4. Package Contents .................................................. 2
5. Product Show ........................................................ 2
6. Operation for Wi-Fi Smart Socket ............................. 3
7. Opeartion for CE-LINK App ...................................... 3
8.Operation Notes and Safety .................................... 10
9.Warnings ............................................................. 11

1
Wi-Fi 2.4GHz IEEE802.11 b/g/n
DEAR CUSTOMER
Thank you for purchasing this product. For optimum performance and
safety, please read these instructions carefully before connecting,
operating or using this product. Please keep this manual for future
reference.
1. INTRODUCTION
This Wi-Fi Smart Socket is a smart device that allows you to monitor
and control your home’s electronic devices from anywhere via your
smart phone or tablet. You can create On/Off schedules, set timer or
check real-time energy usage for every individual home appliance
connected to the socket. Compact and convenient to use, it makes
your life much easier and smarter!
2. FEATURES
Industrial-grade relay ensures stable and durable performance of
the socket;
Physical power button supports local control;
Wi-Fi communication modular system supports Wi-Fi network;
Works with your current home Wi-Fi network and mobile Internet
(GPRS/3G/4G);
Measurement modular system allows you to add new smart socket
any time;
Free CE-LINK App for iOS 7.0 or later and Android 4.2.2 or later
operating systems;
App can work on multiple smart devices simultaneously;
Easy setup and easy to use;
Compliant with FCC、UL、ROHS certifications;
2
3. SPECIFICATIONS
Input V/A
120~240V /10A (50/60Hz)
Output Current
10A (60Hz)
Color
White
Size(L-W-H)
60×60×37mm
Weight(Net)
150g
Operating
Temperature
0℃ to +40℃
Operating Humidity
10% to 90 % RH (no condensation)
Storage
Temperature
-20℃ to +65℃
Storage Humidity
5% to 95 % RH (no condensation)
Limited Warranty
1 Year
User Manual
English Version
4. PACKAGE CONTENTS
Before attempting to use this unit, please check the packaging and
make sure the following items are contained in the shipping carton:
Wi-Fi Smart Socket×1
User Manual×1
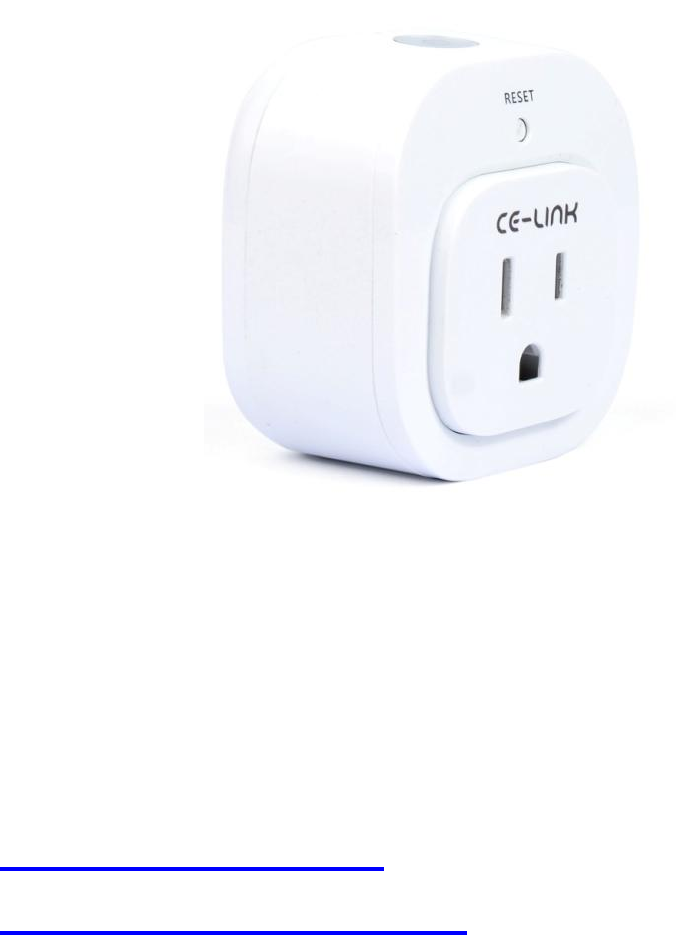
5. PRODUCT SHOW
3
6. OPERATION FOR WI-FI SMART SOCKET
Plug the socket into an outlet in your home, and plug any devices into
the socket. Then you will be able to control their power in two ways:
Local Control
Simply press the power button on the socket to turn on/off the power.
Remote Control
The CE-LINK Smart Socket works with the free CE-LINK App to give
you wireless control of your electrical devices. Simply download and
install the free CE-LINK App to your smart phone or tablet. Once
installed, you can control your devices remotely over GRPS/ 3G/ 4/G/
Wi-Fi connection, and set schedules, timer, and check real-time
working status of connected devices.
7. OPERATION FOR CE-LINK APP
Download the CE-LINK App from the download link
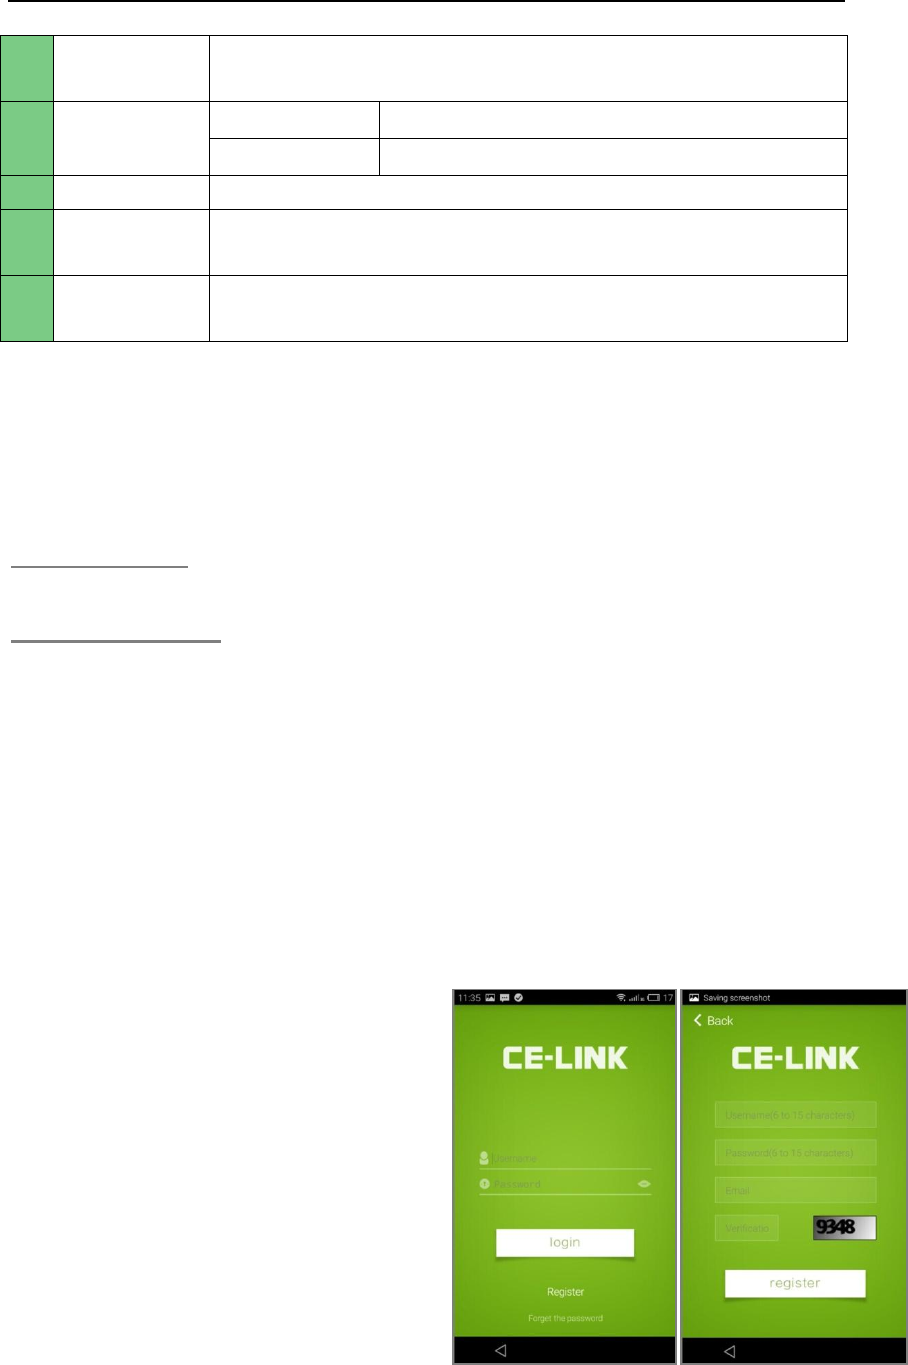
7.1 Register
1) Launch the App to enter the
interface;
2) Tap Register to enter the
registration interface for a free
CE-LINK account;
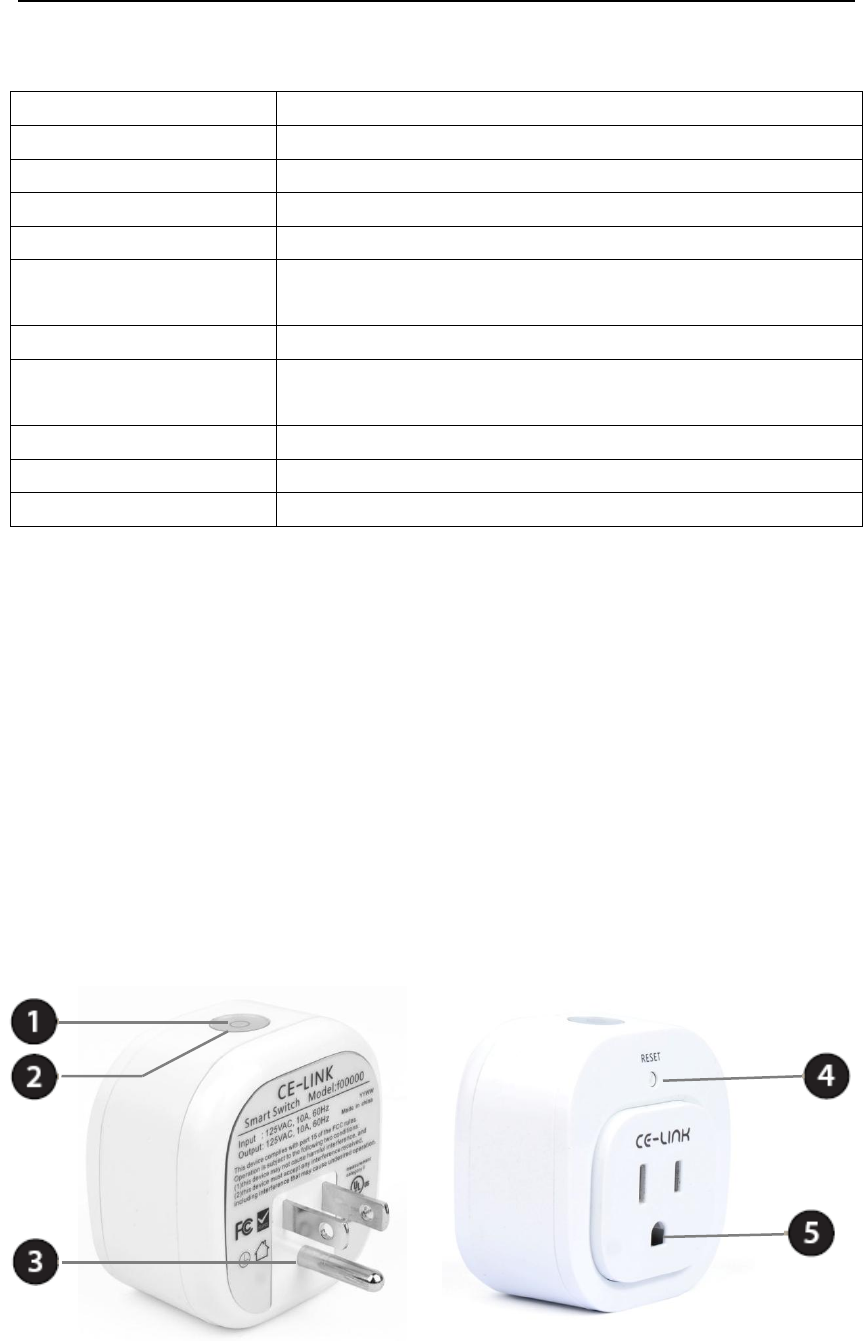
1
Power
Button
Press the button to turn connected device on or off.
2
Status LED
Red
The smart socket is powered off.
Blue
The smart socket is powered on.
3
Power Plug
Plug the Smart Socket plug into a wall power socket
4
Reset
Button
Press to start the Wi-Fi connection process or to
reset the socket to factory defaults.
5
Power
Socket
Connect your electronic devices you wish to control.

4
3) Enter the information and then tap the “register” to complete the
registration;
4) Once the registration is successful, it will show the message
Registration Succeeded and return to the home screen
automatically in a few seconds.
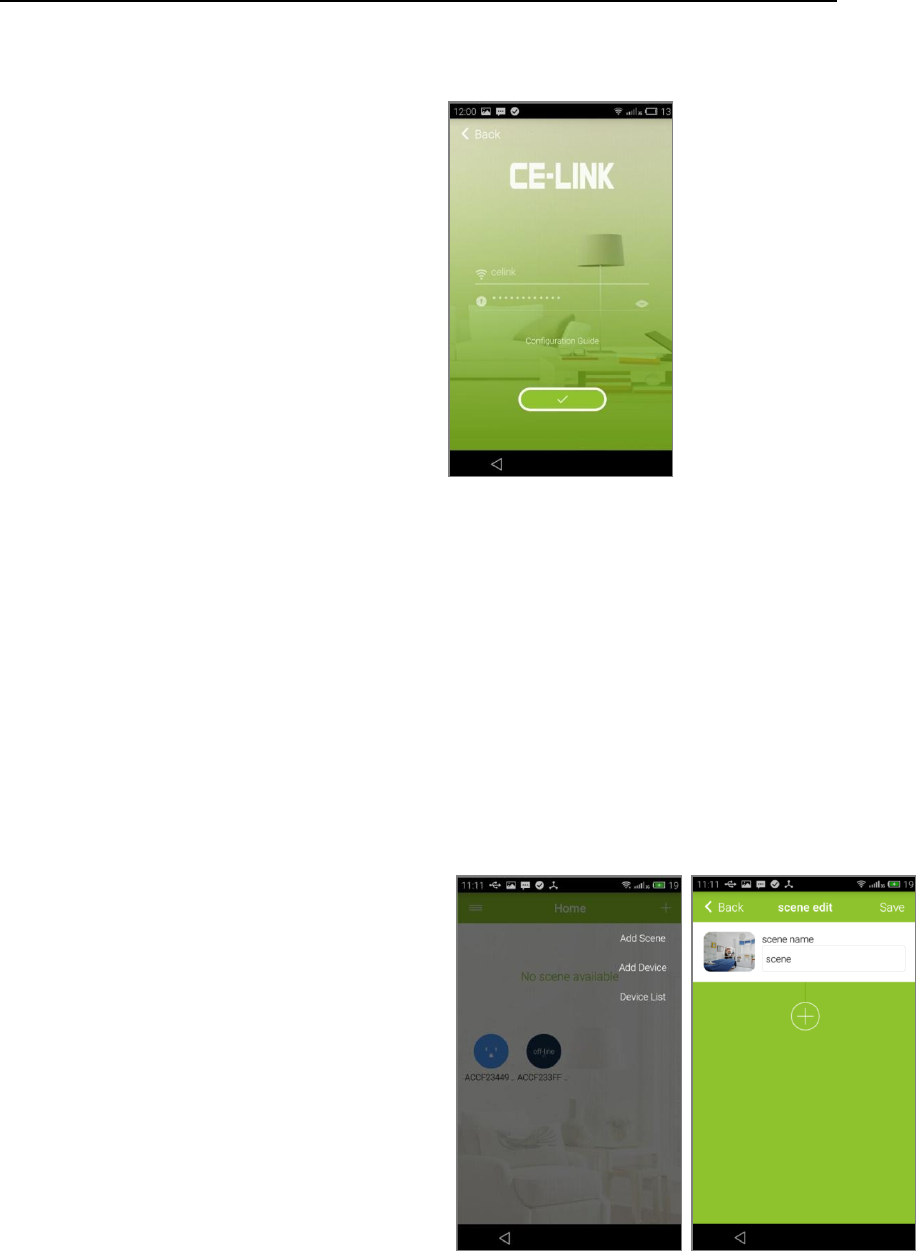
5) Tap the“+” in the top- right to
cycle between Add Scene, Add
Device and Device List.
6) Swipe right on the home screen
to Add device, Shop,
Demonstrate, view Help
information, or Set. Tap the
image to edit user information or
log out.
7.2 Add device
1) You can enter “Add devices” page in two ways:
1: Home screen > Swipe right > Tap Add device;
2: Home screen > Tap“+” in the top- right >Tap Add device;
2) Tapping the Add device will take you to the configuration page.
Then follow the following
instructions:
a) Enter the Wi-Fi password;
Note: App will automatically
connect to the current Wi-Fi that
your smart phone or tablet has
been connected.
b) Long press the set button on
the top of the socket for 6~9
seconds, and check the
configuration Status LED on the
socket. If it is blinking alternately
blue and red, release the set button.
5
c) Tap “Configuration” on the
App screen, and wait 8~20
seconds for the configuration
process to complete.
Note: 1.During the configuration process, keep the range between
the socket and smart phone or tablet as short as possible (the best is
within 1 m). 2. If the configuration fails, please make sure to un-plug
the socket (power off) first and then re-plug (power on). Then repeat
the above steps to restart configuration.
3) Return to home screen after successful configuration, and you will
see the new device name. Tapping on the device will take you to
the device’s settings.
7.3 Add Scene
1) Go to Home screen > Tap“+”
in the top- right > Tap Add
scene.
2) Tapping Add scene will take
you to the next page where
you can edit scenes.
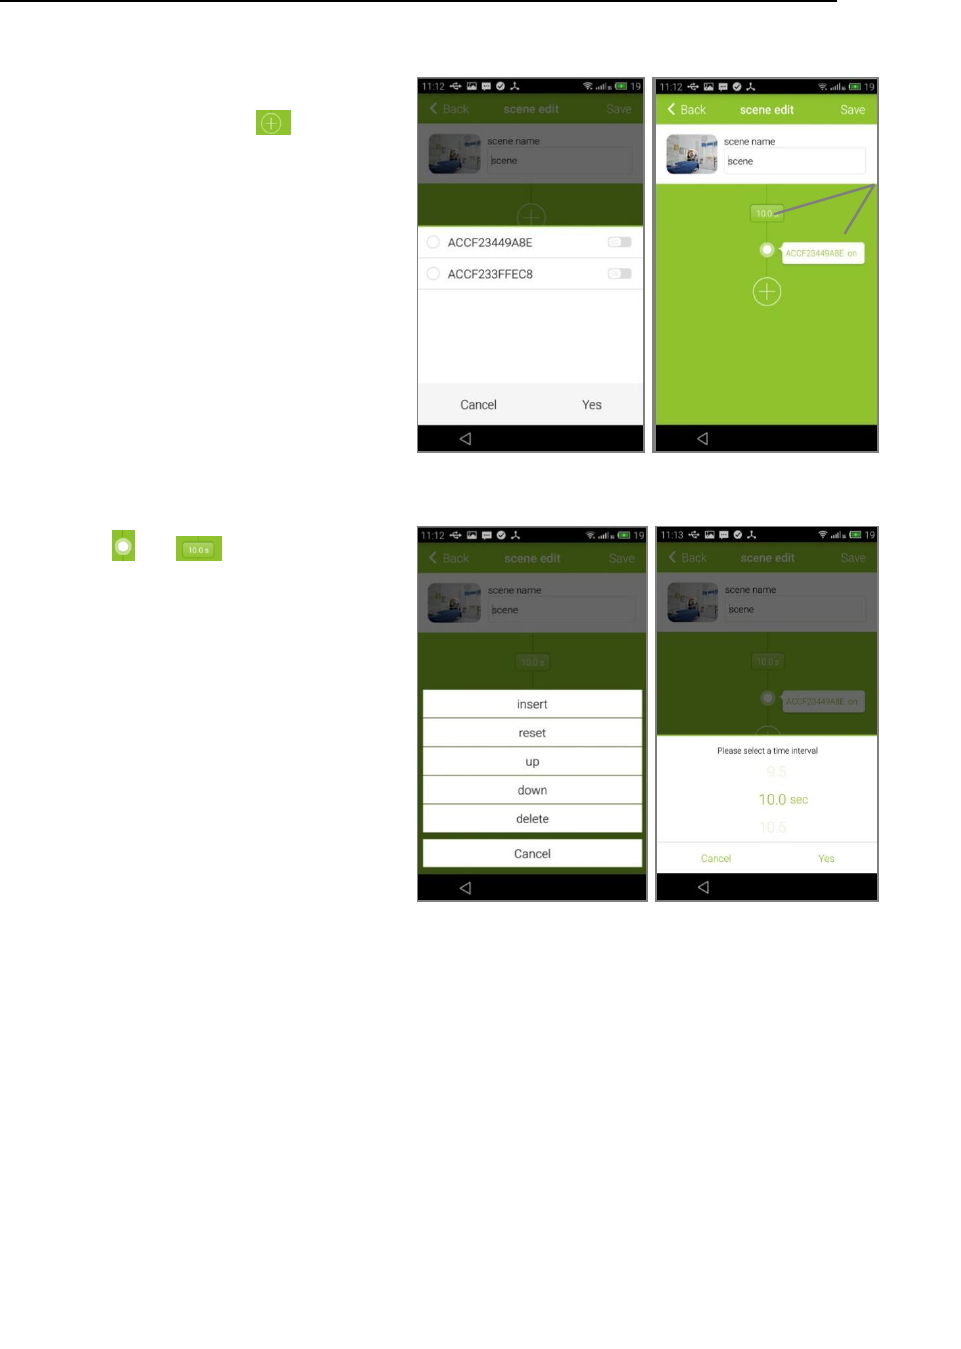
6
3) Type in a name for the
scene; then tap , you will
find the connected devices
and their on/off status.
4) Tap on the device and
choose its on/off status as
of your choice, and tap Yes
to complete or tap Cancel
to select another device.
Then the task axis will
appear.
5) Tap or , you can edit
task or select time interval.
They
indicate
that the
device will
turn on
after 10s.
7
6) Tap Yes in the top-right to
save all settings, and you
will be back to the Home
Screen, where you can see
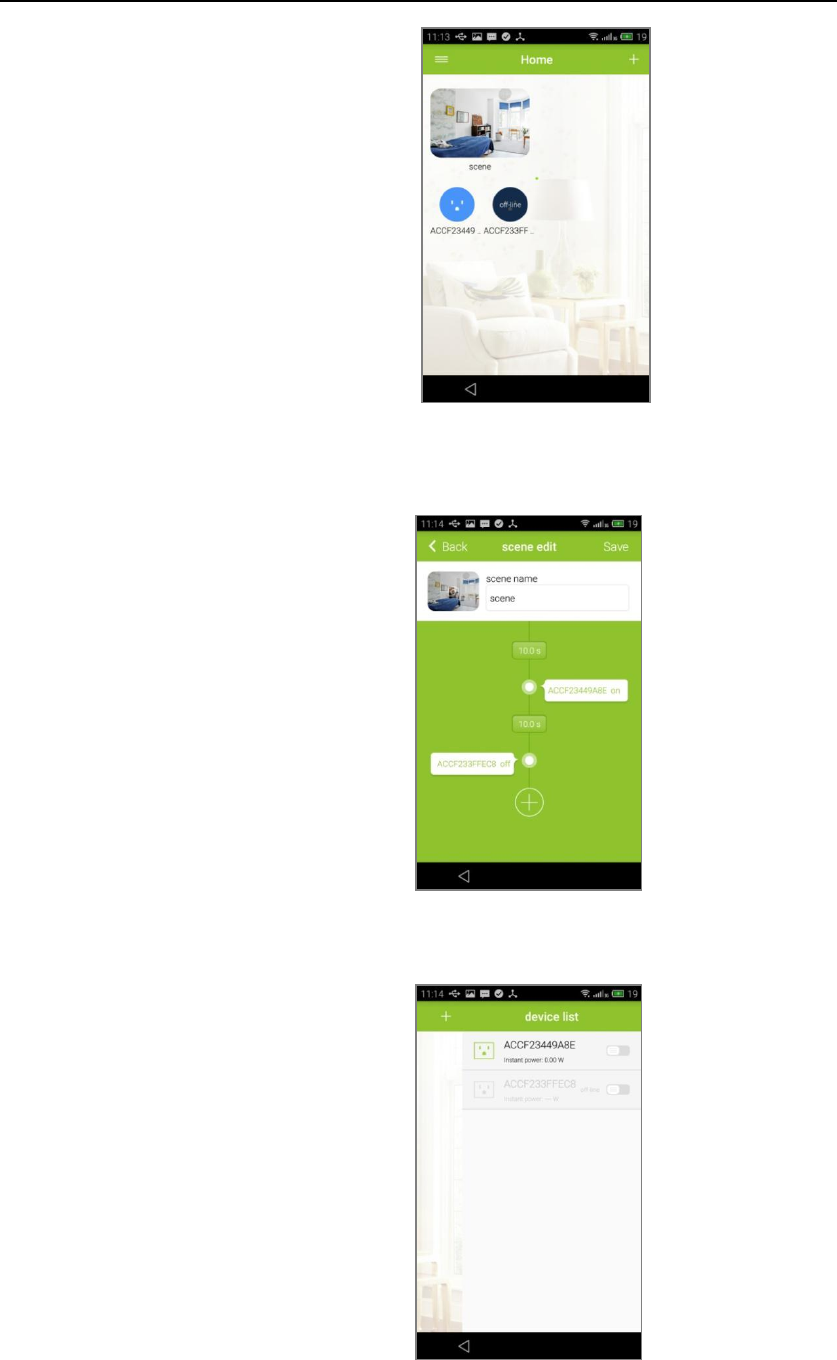
the device and the scene.
7) You can also add two or
more devices under one
scene or add a new scene
according to the steps
described above.
8) Long press the scene icon
to edit it, copy or delete.
7.4 Set Device List
Go to Home screen> Swipe left
to see Device List.
8
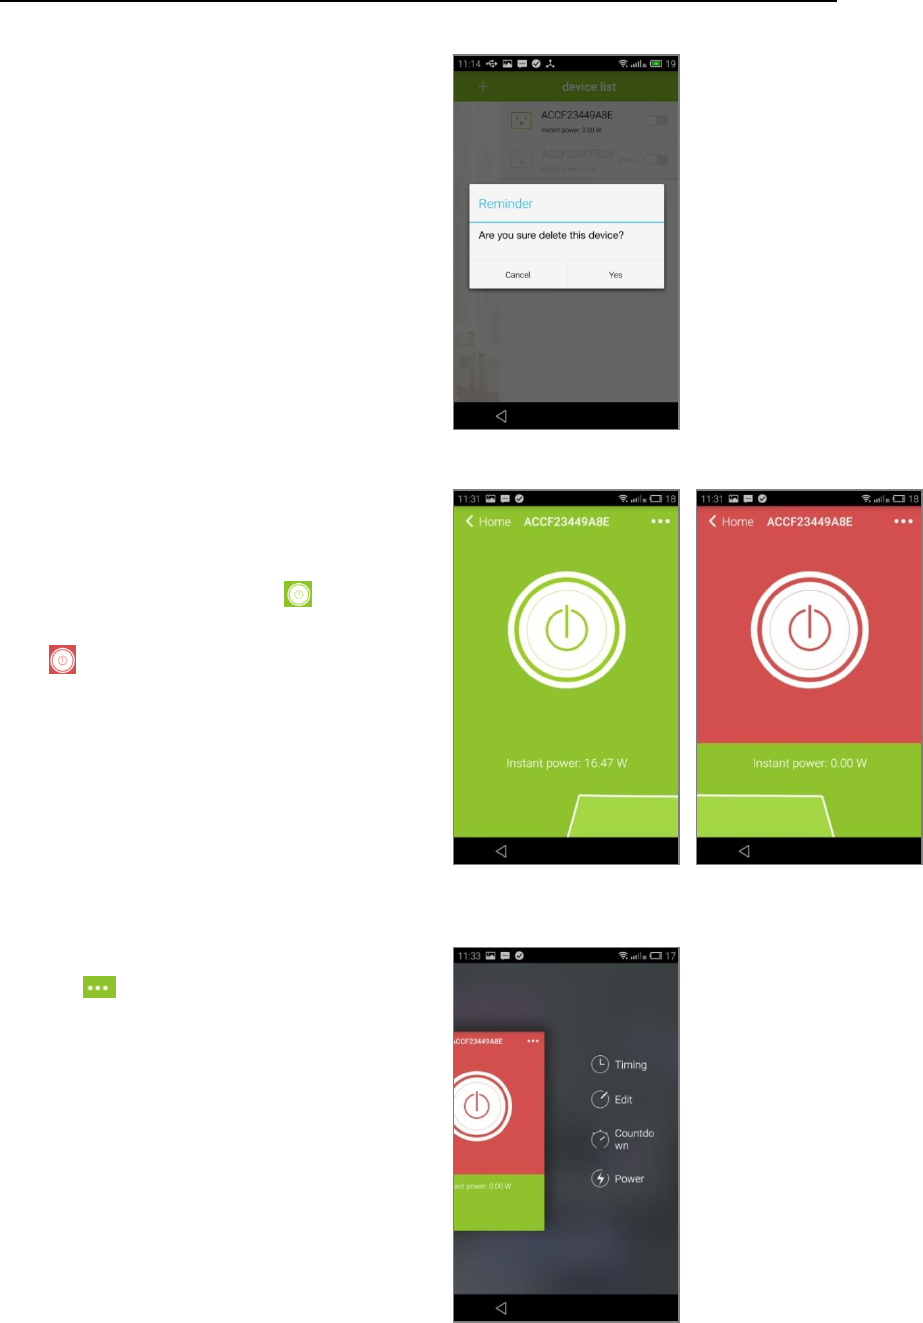
1) Turn on/off any devices you want.
Long press or swipe left, you can
delete the device.
2) Tapping on the device on the
Connected List page will take you to
the device’s settings. When it is in
ON status, you can tap to turn it
off. When it is in OFF status, you can
tap to turn it on. The instant
power output of the connected
device is displayed as well.
3) Tap in the top-right or swipe
left to set Timing, Edit the device,
set Countdown, or check Power.
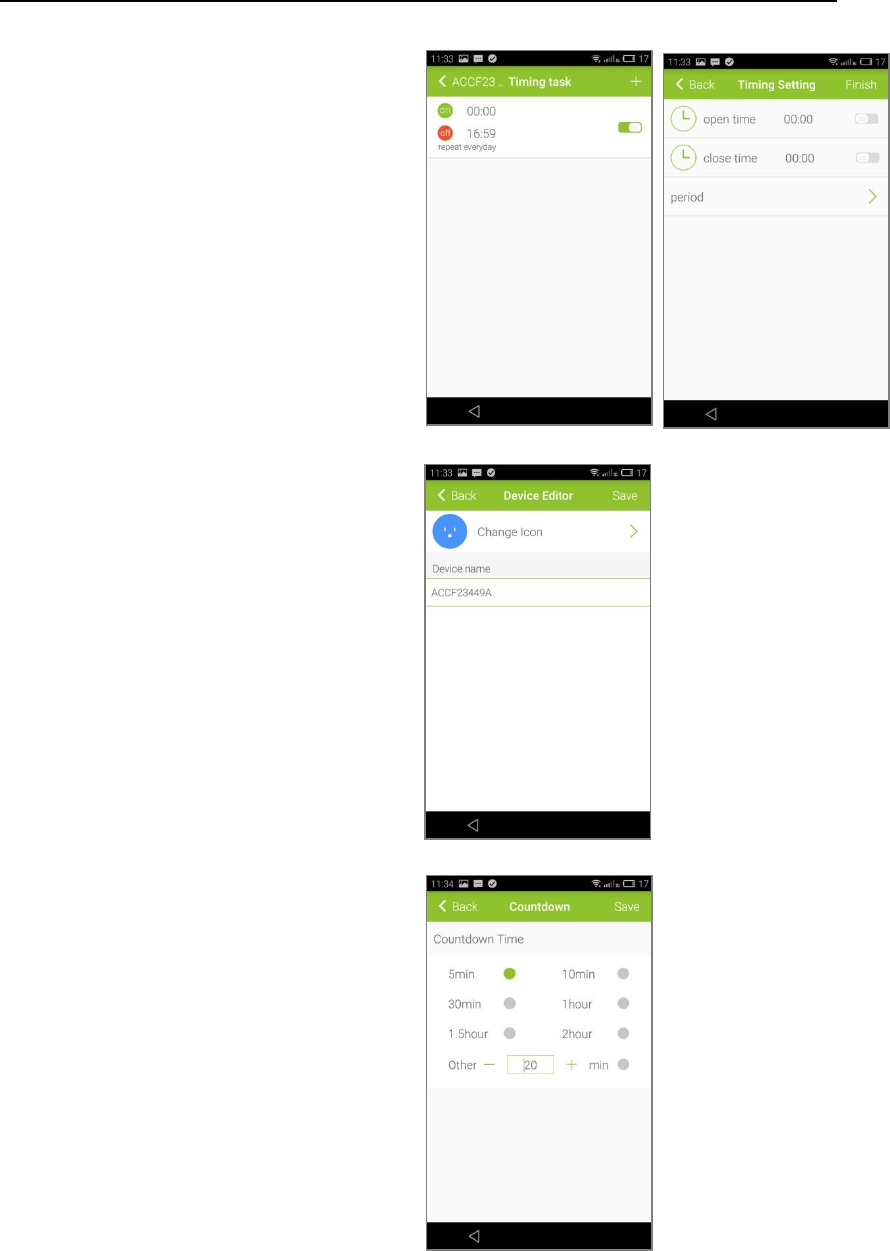
9
Set Timing: Tap Timing, then tap
+. Then you will enter into the
next page where you can set
Open and Close time, and Period.
Tap Finish to save the settings.
Edit devices: Tap Edit to edit the
name and set a new icon for the
smart socket.
Countdown: Tap Countdown to
set a countdown time.
10
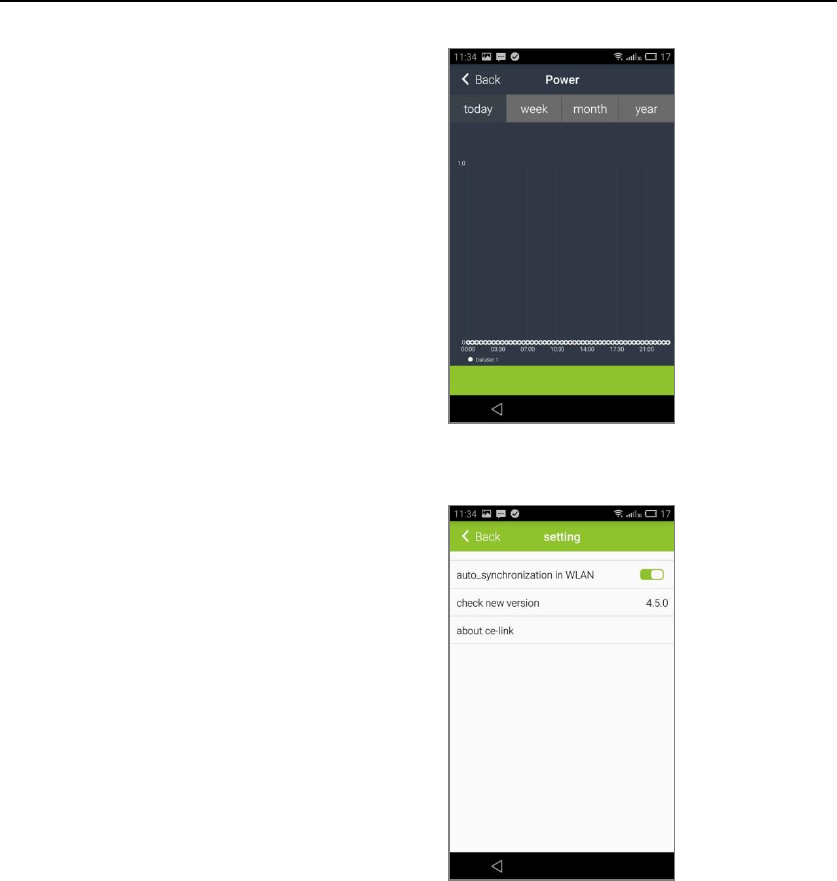
Power: Go to Settings>Power,
then you can check the power
consumption by day, week, month
or year.
7.6 Upgrade
Home screen > Swipe right, and
then tap Setting >Tap Check new
version to upgrade for the latest
version.
8. OPERATION NOTES AND SAFETY
8.1 Operation Notes
1. When the smart phone and the Wi-Fi Socket are connected to the
same Wi-Fi network, switching between power on and power off of the
socket as well as schedules would be smooth in good network
condition; otherwise, operation would be delayed for about 5 seconds
due to bad network condition;
2. When the smart phone and the Wi-Fi Socket are not connected to
the same Wi-Fi network, switching between power on and power off of
the socket as well as schedules would be delayed for 4~6 seconds in
good network condition; otherwise, operation would be delayed for
about 15 seconds due to bad network condition;
3. In both two situations, please check the network to ensure good

11
network condition if the smart socket remains slow in action, or even
no action for a long time. Re-launch the App if nothing is improved.
8.2 Safety
Please read all of the safety before using:
1. The power of all connected devices combined shall not exceed the
rated power of the Wi-Fi Socket.
2. Make sure that the plug of the socket is fully connected to the
outlet so as to avoid any electric shock as well as to ensure stability
of the electrical devices connected to the socket.
3. Keep the Wi-Fi Socket away from places which are accessible to
children so as to avoid electric shock.
4. Avoid placing the Wi-Fi Socket in a humid environment; if
unavoidable, separation measures should be taken.
5. Should there be any foreign matters such as water or dust in the
socket of the Wi-Fi Socket, clean the socket before connecting.
6. Do not open the socket or attempt to repair or service it if not
authorized.
9 Warnings
FCC Statement
This equipment has been tested and found to comply with the limits for a Class B digital devic
e, pursuant to Part 15 of the FCC Rules. These limits are designed to provide reasonable prot
ection against harmful interference in a residential installation.
This equipment generates uses and can radiate radio frequency energy and, if not installed a
nd used in accordance with the instructions, may cause harmful interference to radio commun
ications.
However, there is no guarantee that interference will not occur in a particular installation. If thi
s equipment does cause harmful interference to radio or television reception,
which can be determined by turning the equipment off and on, the user is encouraged to try to
correct the interference by one or more of the following measures:
-- Reorient or relocate the receiving antenna.
-- Increase the separation between the equipment and receiver.
-- Connect the equipment into an outlet on a circuit different from that to which the receiver is
connected.
-- Consult the dealer or an experienced radio/TV technician for help.
This device complies with part 15 of the FCC Rules. Operation is subject to the following two
conditions:
(1) This device may not cause harmful interference, and (2) this device must accept any interf
erence received, including interference that may cause undesired operation.

12
Changes or modifications not expressly approved by the party responsible for compliance cou
ld void the user's authority to operate the equipment.
The antenna(s) used for this transmitter must be installed to provide a separation distance
of at least 20 cm from all persons and not be co-located with any other transmitters except in
accordance with multi-transmitter product procedures.
P/N9005
sddsdsds