CE and IT UC1 Happi Amp Ultimate Control User Manual SZM P3058 BH MANUAL 1
Shenzhen CE and IT Limited Happi Amp Ultimate Control SZM P3058 BH MANUAL 1
UserManual.wiki
>
CE and IT
>
UC1 User Manual
Manual
Navigation menu
Upload a User Manual
Namespaces
Wiki Guide
HTML
PDF
Info
Views
User Manual
Discussion / Help
Navigation


![10Where you see >>> it denotes a long button press of 2-5 seconds. UC stands for Ultimate Control and refers to the mp3 player. RC stands for Remote Control and refers to the remote control. Check www.HappieAmp.com for video instructions. Button Function (MP3) [↑] Top of circle: move cursor up / prev. track [↓]Bottom of circle: move cursor down / next track [M] Left of circle (menu): up one menu option / move slide bar to left (some screens) >>>[M]: Remember that means press [M] for 2-5 seconds. That’s the last time I tell you. >>>[M]: Go to main menu / when connected to the computer it will disconnect from the computer.](https://usermanual.wiki/CE-and-IT/UC1/User-Guide-1780609-Page-10.png)
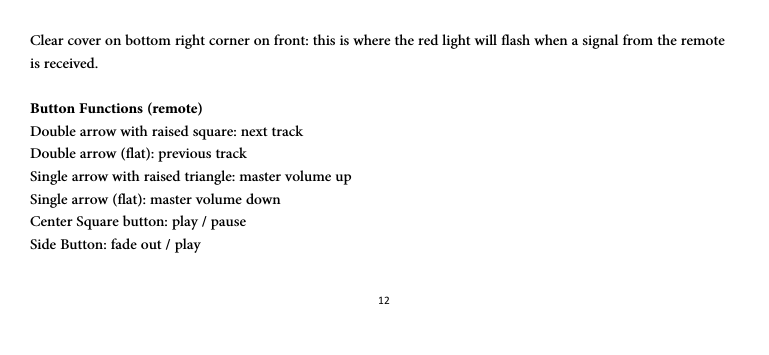
![11[E] Right of circle (edit): edit screen / move bar to right (some screens) [~]Center circle: select / enter [F] Right bottom corner button: fade out >>>[F]: device off / when plugged into a computer it switches back to computer connection. On/Off switch on left side: On/Off (duh) mSD (on right side of UC): MicroSD™ card USB (port on top): micro USB for computer connection Headphones jack on top: for headphones or auxiliary out to amplifier Reset hole: press with paperclip to reset factory settings on device. Memory is retained but you should always have a backup copy!](https://usermanual.wiki/CE-and-IT/UC1/User-Guide-1780609-Page-11.png)
![14Insert a paperclip into the reset hole in the back of the UC or go to SETUP>RESTORE DEFAULT >OK. Memory will be retained but you should always have a backup copy! Connecting to a computer Using the provided micro USB cord, insert the small end into the top of the UC. Insert the large end into a USB port on your computer. Yep, that’s all. The drive (MAC) or auto play window (windows) will pop up on the screen. Switching between computer and device usage There is no need to disconnect the USB cord each time you want to work directly on the UC. >>> [M] to “disconnect”. >>> [F] to reconnect to the computer.](https://usermanual.wiki/CE-and-IT/UC1/User-Guide-1780609-Page-14.png)


![19 Loading from external devices Any device that shows up as an external drive on your computer can be used as a source for your UC. Drag and drop files onto the UC as mentioned in Device memory usage section of the manual. Inserting a CD will work as well. Go to Windows Explorer then to the drive representing the CD and drag mp3 and .wma files to the UC window. Making Playlists On the UC go to Playlists > [E] > add playlist. Add as many as you want. They will show up as default names. Naming Playlists](https://usermanual.wiki/CE-and-IT/UC1/User-Guide-1780609-Page-19.png)
![20Connect the UC to your computer. Open the folder for the UC. Open the “Playlists” folder. Highlight the “USRPL…..” file then click it again to edit the name or right click and then click on rename. You cannot see or organize the files within the playlists on your computer. This must be done in the device. Adding tracks On the UC go to playlists > on the playlist to add songs to. If it is empty it will prompt you to add a song. Otherwise >[E] >Add track. Select song to add. Deleting Tracks On the UC highlight the track to delete >[E] >delete track.](https://usermanual.wiki/CE-and-IT/UC1/User-Guide-1780609-Page-20.png)
![21 Track sequence On the UC highlight the track to move. >[E] >Track sequence >move the track up, down, to the first spot, or last spot. Music Options Track Volume This feature is unique to UC. It allows you to change the % of the master volume of a certain song in a certain playlist. Each time that song plays in that playlist it will play at the specified volume selected instead of the master volume. From the playlist highlight the song to edit. >[E] go to Track volume. Make adjustment as needed >[~]. Track Volume can also be entered while a track is playing from a playlist. >>>[E] go to Track](https://usermanual.wiki/CE-and-IT/UC1/User-Guide-1780609-Page-21.png)
![22volume. Adjust as needed >[~]. Since it is adjusting the % of the master volume, it will automatically adjust based on your master volume setting. So, if you are in a large room with the music loud or a small room with the music low, it will adjust properly. Play mode This feature is unique to UC. If “cue and play” is selected for a track, when the track ends the next track will begin playing as other mp3 players do. (That’s not the unique part). If “cue and pause” is selected for a track, when the track ends the next track will cue up and wait for your command. >pause/play or [F] on the device or the remote to begin the next track when you are ready for it. If you want to skip the next track go to next track. To set the play mode >>>[E] while a song is playing go to play mode or from the playlist menu, select the track to edit >[E] go to play mode.](https://usermanual.wiki/CE-and-IT/UC1/User-Guide-1780609-Page-22.png)
![23 EQ mode This allows you to change between equalizer presets for the best sound quality for your music, venue, and sound system. >>>[E] while a song is playing go to EQ mode or from the playlist menu select the track to edit >[E] go to EQ mode. Other equalizer settings can be found by going into the music menu and playing a song >>>[E] go to SRS WOW > go to user settings > go to SRS 3D, True Bass, or Focus. Try them all to see how they affect the sound. Connecting to an amp Plug an audio cable with a 3.5mm (1/8”) male end into the UC and the appropriate connection on the other side into your amp. Happie Amp® is also 3.5mm (1/8”). Turn the volume all the way down on the amp before](https://usermanual.wiki/CE-and-IT/UC1/User-Guide-1780609-Page-23.png)
![24turning on your UC. Begin playing a song. Adjust the volume level on the UC to about 30. Slowly turn up the amp volume until it reaches the level you desire. This is important because low volume on the UC paired with high volume on the amp will cause more white noise (this is true with all devices). During use you can adjust the sound level with the remote triangle buttons or on the UC with [M] and [E] buttons. Screen Menus MUSIC All music on your device is stored here. Many options are not available if playing music from this list. It is recommended to use playlists. Depending on the setting you have the UC on, you will see the music on the card or device. Not both.](https://usermanual.wiki/CE-and-IT/UC1/User-Guide-1780609-Page-24.png)
![25 PLAYLIST All your playlists are here. There is no limit to the number of playlists or number of songs in each playlist. See “Making Playlists” to learn to create playlists. To add or delete playlists >>>[E] go to add / delete playlist SETUP Many important features are under setup. Backlight: Set how long the screen will stay lit during use. Select “always on” if you don’t want the screen to shut off during use. This uses more battery life. Power Off:](https://usermanual.wiki/CE-and-IT/UC1/User-Guide-1780609-Page-25.png)
![26Off timer: Set the amount of time the UC will sit idle before shutting off. Set this timer to “off” and the device will not shut off at all. Sleep Timer: Set the amount of time the UC will sit idle before going into sleep mode. Select “off” so it does not ever go into sleep mode. Device will “wake” with a button press. Memory Info: This screen shows what percentage of the internal 2GB memory and mSD card is full. Memory select: Choose which memory to use. Select Music on device or Music in card. You cannot use both at the same time. Remote Control Settings: This screen allows you to pair your RC to your UC. Go to Add remote No. 1 >[~] then press a button on the remote. If you have more than one remote, you can add the second remote by going to Add remote No. 2 >[~] and press any button on remote No. 2.](https://usermanual.wiki/CE-and-IT/UC1/User-Guide-1780609-Page-26.png)

![29Indicators The triangle in the upper right corner shows the cue and pause or cue and play status of the song. A black triangle indicates cue and play. Two small black lines (pause symbol) indicates cue and pause. The black lines in the far upper right corner indicate battery life. 6 lines is a full battery. The track name scrolls across the screen at the bottom middle. The M and E indicate how to control the master volume. [E] turns up the volume and [M] turns it down. Tips Maintenance Do not leave the headphones or 3.5mm cord in the headphones jack when not in use. It can get bumped and damage the jack. Store device in a dry location between 33-85 degrees.](https://usermanual.wiki/CE-and-IT/UC1/User-Guide-1780609-Page-29.png)
![32Check HappieAmp.com >Other Products>Ultimate Control for up to date troubleshooting tips and video tutorials. A quick fix to many problems within the device is to restore factory settings. SETUP go to restore default >[~] or push a paperclip in the reset hole until you hear a click. Don’t forget to reset settings such as sleep time and off time so the device doesn’t shut off unexpectedly. UC is not responding to the RC: On the UC go to SETUP go to Remote Control Settings >[~] go to Add No. 1 Remote Control >[~] then press any button on your remote. If still not working, replace the battery in the remote. Make sure the (+) side is facing out. If it still doesn’t work, I hope you have the UNLIMITED warranty!](https://usermanual.wiki/CE-and-IT/UC1/User-Guide-1780609-Page-32.png)
![34I dropped my remote/UC in water: It’s not a 100% fix but your best chance is to put the RC/UC in a bag of rice overnight. The rice draws out the moisture. This is a good fix for cell phones and other electronics as well. The screen shuts off unexpectedly: OK, obviously you didn’t read the manual but I will help you anyway. Go to SETUP > power off > Off timer > off >[~]. Then SETUP power off > sleep timer > off >[~]. If this doesn’t work the battery might be dead. I’ve loaded songs but they are not showing up: Songs must be in mp3 (MPEG) and Windows media Audio (.wma) format. Other files will transfer but will not show up.](https://usermanual.wiki/CE-and-IT/UC1/User-Guide-1780609-Page-34.png)