CEIVA Logic SHR558 CEIVASHARE In-Home Display User Manual users manual
CEIVA Logic, Inc. CEIVASHARE In-Home Display users manual
users manual

••••••
CEIVA
Welcome to CEIVA
Homeview
Display
with
Smart
Meter
Connection!
Hello!
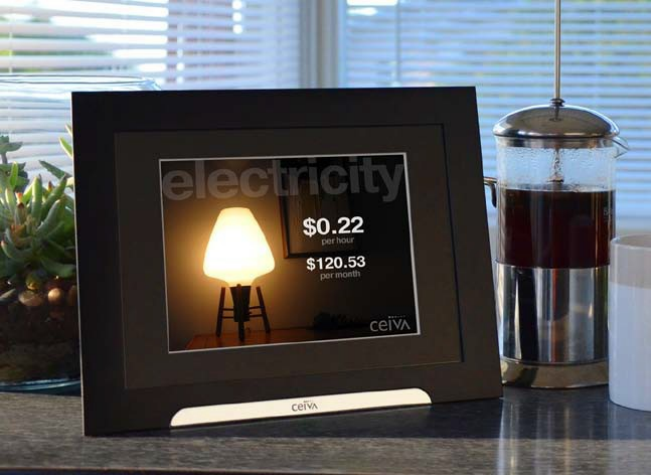
W ith your
CEIVA
Homeview display, you get a never-before possible view
of
your home’s utilities. Now you can keep an eye on your electricity use as
it
happens.
Getting Started
……………............................................…............................1
Connecting to
Y
our Smart Meter
…….............................................................3
CEIVA
Enhanced
Experience..................................................
.....................1
2
Connecting to
Y
our
W
ireless….................................................
....................1
8
Contact Information
…………...................................................
...................25

Getting Started
Getting Started
Setting
up your CEIVA Homeview
Display
Lift up and remove the back panel of your
CEIVA
Homeview display
.
Plug the power adapter into the specified port. Replace the back panel and
align the display’s stand with the marker and turn clockwise into place.
Find a spot in your home that is both near an outlet and within range of your
smart meter
.
1
The CEIVA
Homeview
Remote
Y
our
CEIVA
Homeview comes with a six button remote that will help you
navigate your energy information.
2
Connecting
Your CEIVA
Homeview
Display
to Your Smart
Meter
Connect
to Your Smart
Meter
CEIVA
Homeview gets instant updates directly from your electricity smart meter
through a wireless connection. Establishing a connection with your smar
t
meter will give you a real-time snapshot of your electricity consumption.
Before
You
Begin
For your convenience the In-Home Display and your smart meter have been
preconfigured for smart meter network. Follow the remainder of the steps to
complete your
set-up.
Connecting
to Your Smart
Meter
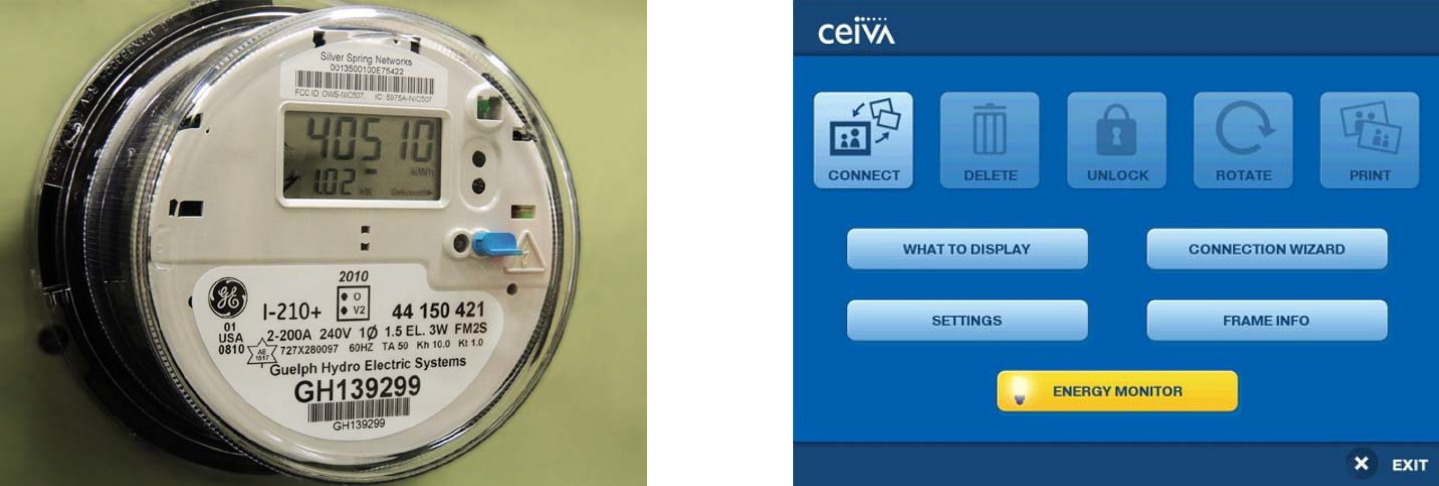
Step
One
Press the MENU button on your remote. Use the navigation arrows to highlight
the ENERGY MONITOR button. Press the SELECT button on the remote
to
enter the energy dashboar
d.
3
4
Connecting
to Your Smart
Meter
Connecting
to Your Smart
Meter
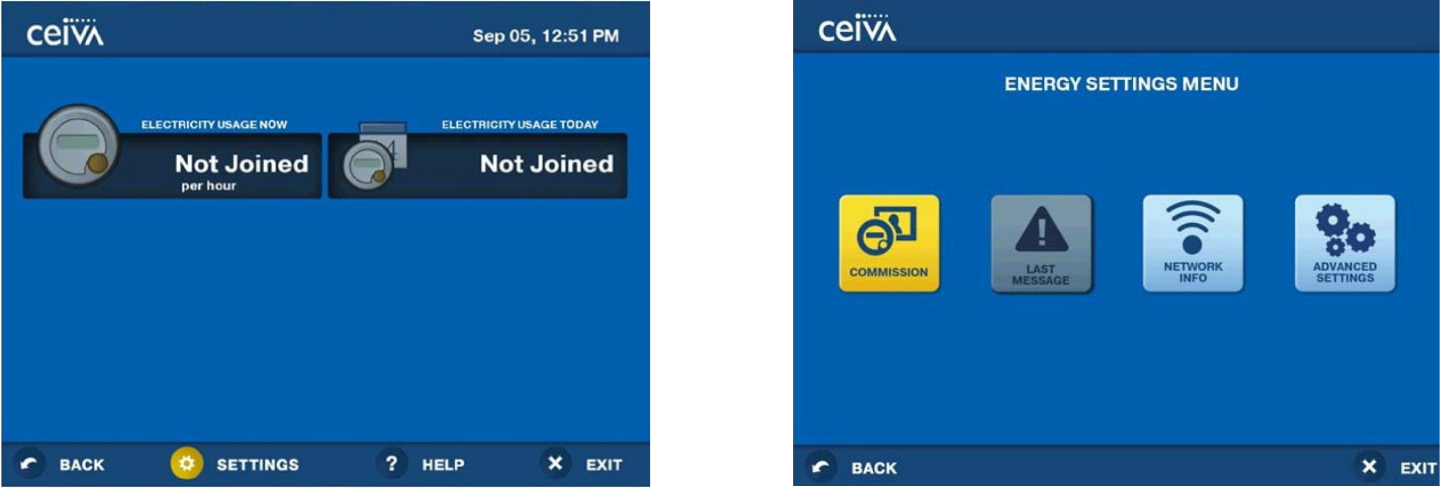
Step
T
wo
Use the navigation arrows to highlight the SETTINGS button located at the
bottom of the screen. Press the SELECT button on the remote to enter the
energy settings menu.
5
Step
Thr
ee
If not already highlighted use the navigation arrows to highlight the
COMMISSION button. Press the SELECT button on the remote to enter the
commission screen.
6
Connecting
to Your Smart
Meter
Connecting
to Your Smart
Meter
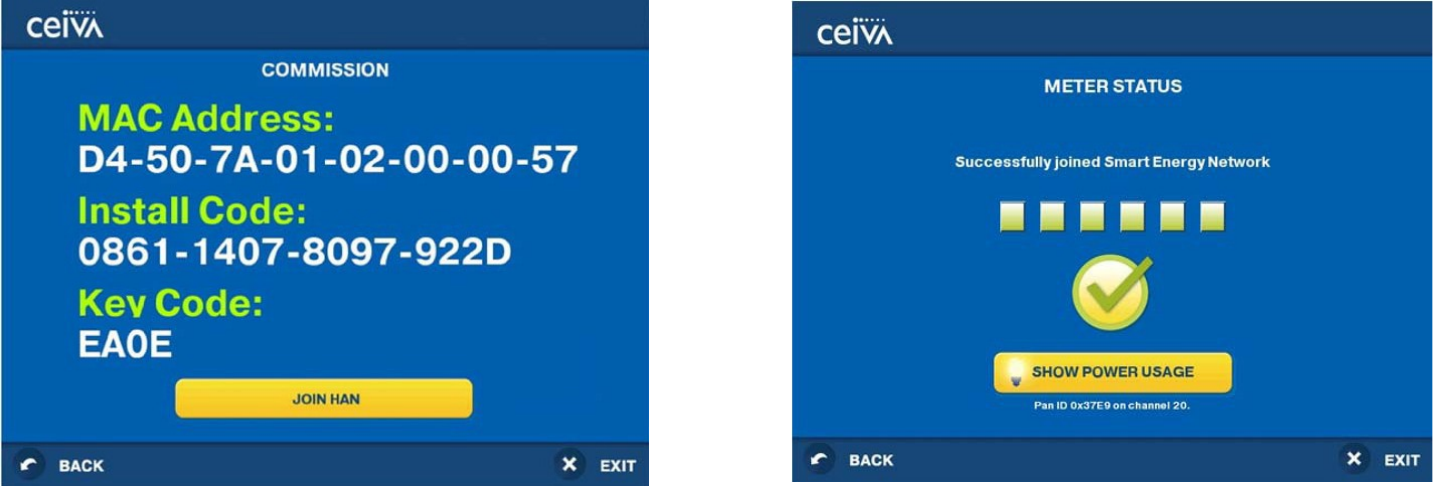
Step
F
our
Use the navigation arrows to highlight JOIN HAN button. Press the SELECT
button on the remote to “join” the units.
Step
Five
The “join” process may take as little as 1 minute or as long as 15 minutes
to
complete. The progress bar will advance and messages tracking progress will
be displayed.
7
8

Connecting
to Your Smart
Meter
Connecting
to Your Smart
Meter
Step
Six
When
the “join” process has successfully completed the SHOW POWER
USAGE BUTTON will be highlighted. Press the SELECT button on the
r
emote
to enter the Energy Dashboar
d.
If the Join process is not successful, try relocating the In-Home Display closer
to your smart meter location. Please repeat steps 4 and 5.
9
Step
Seven
The Energy Dashboard displays information instantly from your smart meter
.
ELECTRICITY USAGE NOW* – electricity the home is using right now
ELECTRICITY USAGE TODAY* – electricity that your home has used so far
today
.
10

Enhanced
E
xperience.
12
Register
Your CEIVA
Homeview
F
r
ame
Register
Your CEIVA
Homeview
F
r
ame
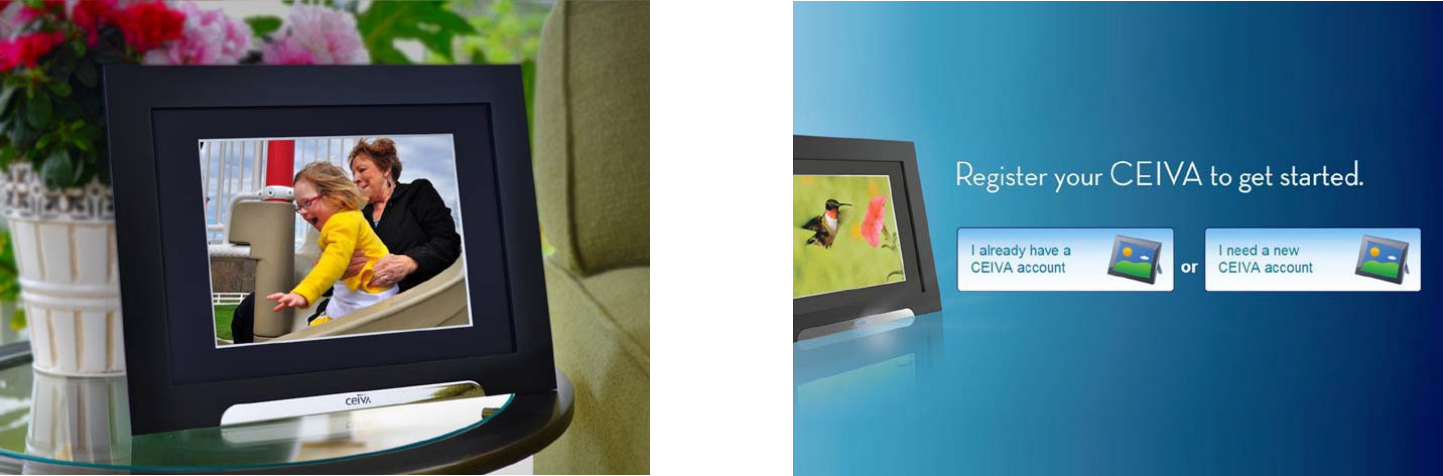
This is Where The Magic
Happens!
Make the snapshots of your home’s Energy even more compelling by adding
pictures of your life. By creating a
CEIVA
account and registering your
Homeview frame you will be able
to:
- Store and send an unlimited number of digital photos.
- Invite guests to send photos directly to your
CEIVA
Homeview frame.
- Add content channels and customize your photos.
Getting started is easy. Just create a
CEIVA
account and register your CEIVA
Homeview frame to start bring the magic into your life.
Setting
Up Your CEIVA
Account
Getting your
CEIVA
Homeview account set up is easy. First, go
to
www.ceiva.com and click on the “Register a Frame” link located at the top
of
the web page.
Unless you are already a
CEIVA
customer, select “I need a new
CEIVA
account”.
13
14
Register
Your CEIVA
Homeview
F
r
ame
Register
Your CEIVA
Homeview
F
r
ame
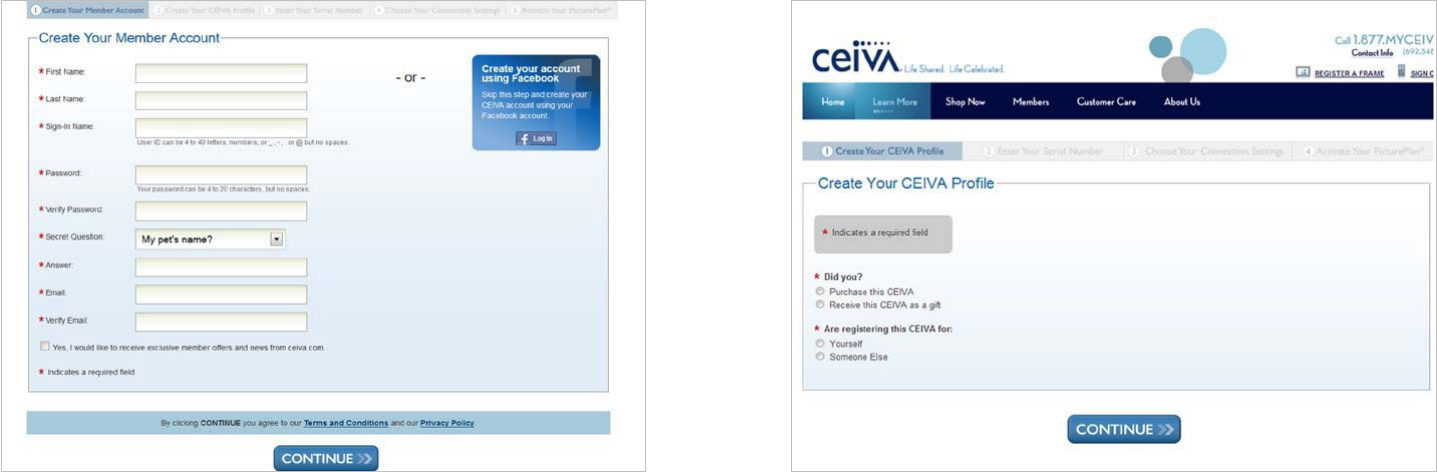
Creating
Your
Member Account
To create your Member Account simply enter your information into the
form
and click
“continue”.
Alternatively, Login with your Facebook account.
Register
a
F
r
ame
Once you have created your
CEIVA
account, you will be prompted to complete
a profile setup sur
vey
.
Complete the survey and click Continue.
Next you will be asked to enter your frame’s serial number. The serial number
can be found on the back of the frame (under the back cover), and on the back
of the
CEIVA
Homeview box.
On the following page, choose your form of connection and press “Continue”.
15
16
Register
Your CEIVA
Homeview
F
r
ame
Connect
to Your
Wireless
Network
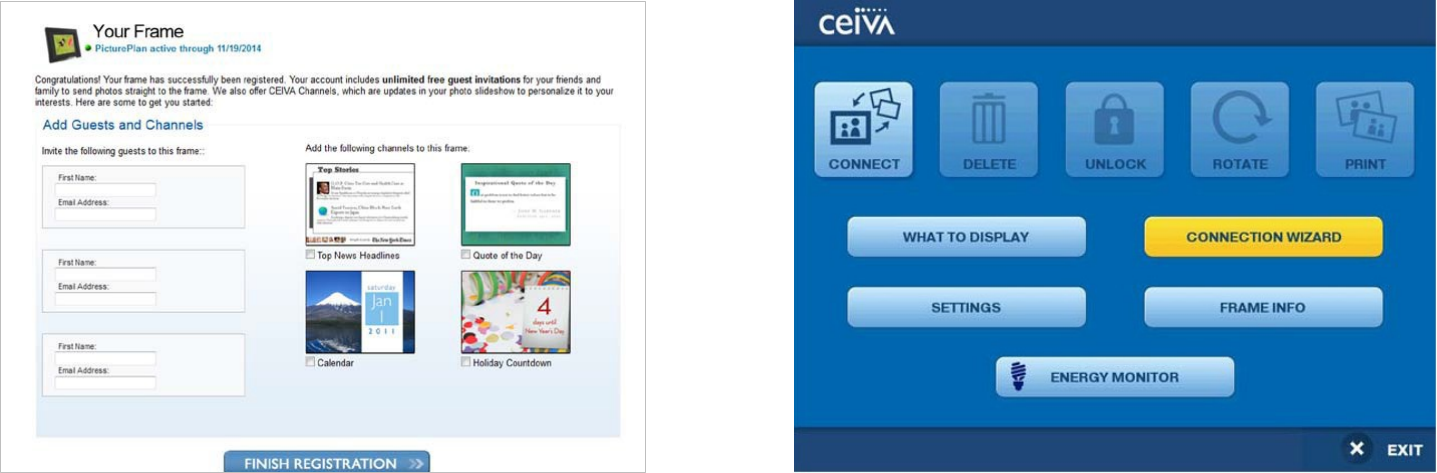
Invite Guests to Your
F
r
ame
Congratulations, your frame is now
r
egistered.
Get the most out of your
CEIVA
frame by inviting friends and family to send
photos directly to your
CEIVA
Homeview Frame. Also – don’t forget to add
content channels. Content channels will deliver daily updates of anything
fr
om
recipes to local news.
Last but not least, don’t forget
CEIVA
Snap.
CEIVA
snap is a free mobile app
that allows you to send pictures to your
CEIVA
Homeview frame from anywhere
in the world! Find it in your app store today
.
Now That You’ve
Registered, Connect
Y
our
CEIVA Homeview Frame to Your WiFi
Net
work
.
Step
One:
Press the MENU button on the
CEIVA
Homeview frame’s remote. Use the
navigation arrows to highlight the CONNECTION WIZARD button. Press the
SELECT button on the remote to start the connection
pr
ocess.
17
18
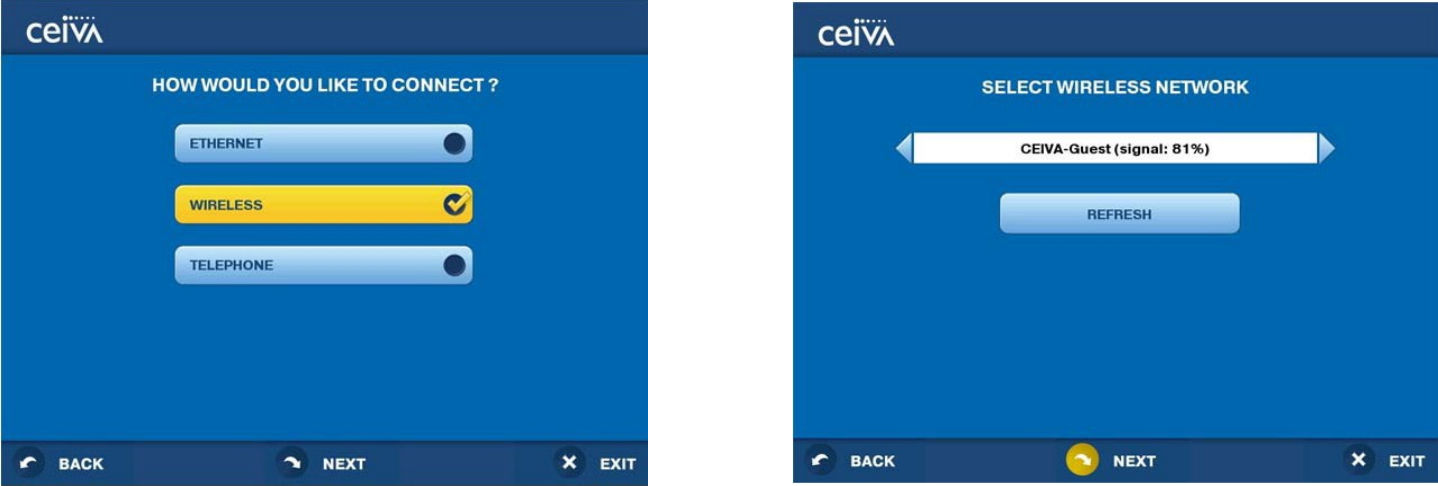
Connect
to Your
Wireless
Network
Step
T
wo:
Use the navigation arrows to highlight the WIRELESS button. Press the
SELECT button on the remote to check the WIRELESS button. The NEXT
button will automatically be highlighted. Press the SELECT button on the
remote to move to the next screen.
Connect
to Your
Wireless
Network
Step
Thr
ee
Use the left and right arrow buttons on the remote to select your wireless
network. Highlight the NEXT button in the navigation menu and press SELECT
to move to the next screen.
If your wireless network is not listed, use the remote to highlight the REFRESH
button. Press the SELECT and repeat the step above.
19
20
Connect
to Your
Wireless
Network
Connect
to Your
Wireless
Network
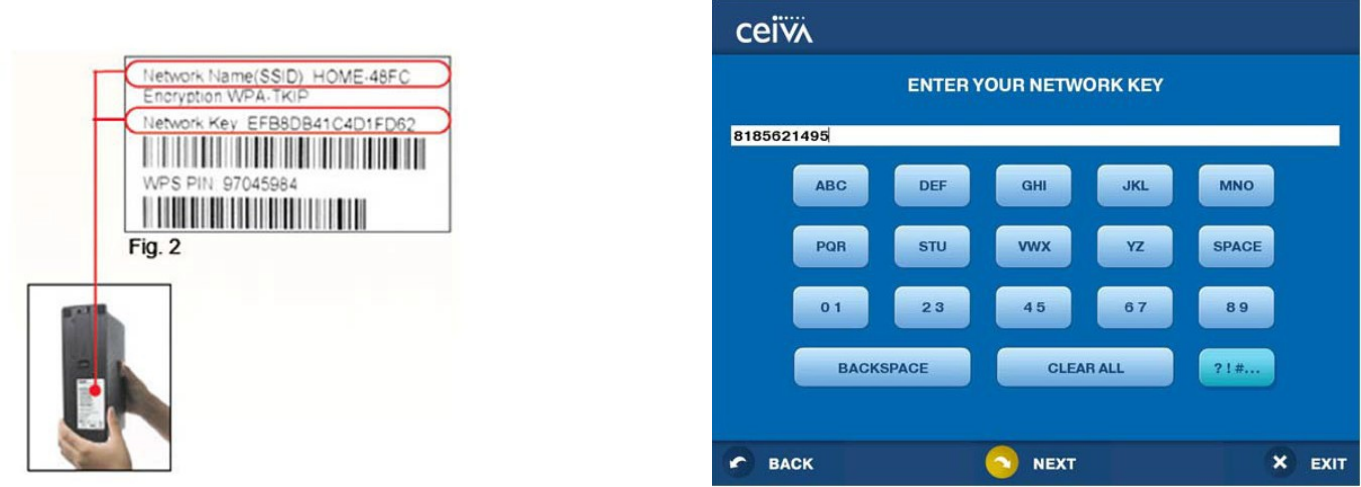
Utilize the same wireless network you use in your home for your computer and
other devices that utilize wireless connections.
Step
F
our
Use the remote to enter the wireless network key for the access point.
For capital letters, select the button that contains the letter you need and
pr
ess
SELECT until the capital letter appears.
When
done use the navigation arrows
on the remote to highlight the NEXT button and press SELECT
.
21
22
Connect
to Your
Wireless
Network
Connect
to Your
Wireless
Network
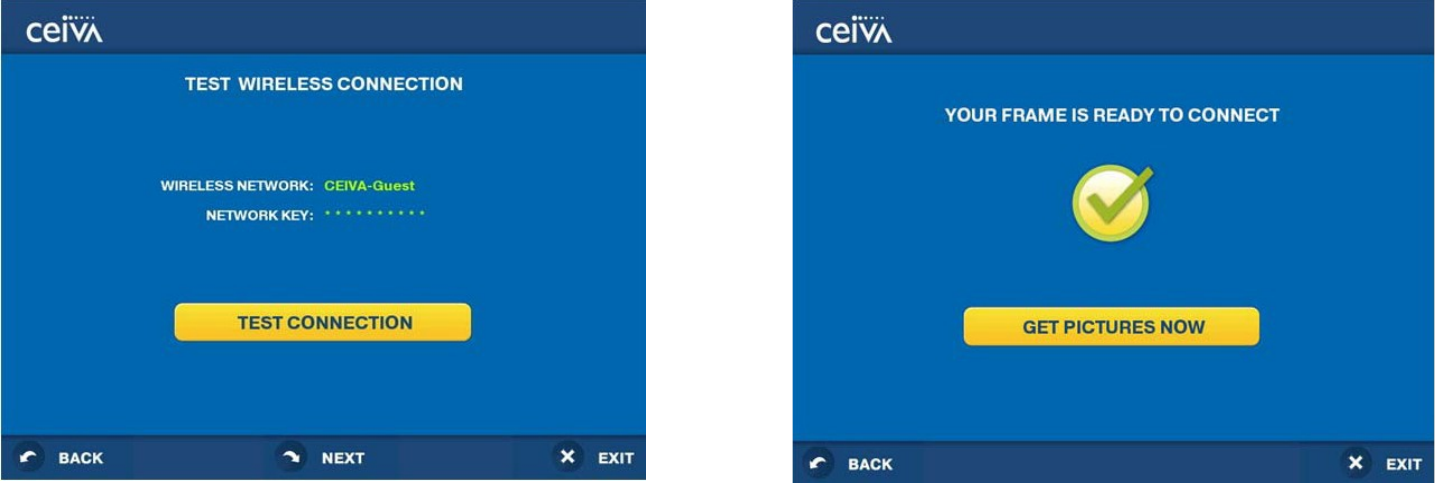
Step
Five
Press the SELECT button on the remote to TEST CONNECTION
.
Step
Six
Press the SELECT button on the remote to GET PICTURES NOW
.
23
24
Contacts
CEIVA
Customer
Car
e
For
CEIVA
Enhanced Experience, including connecting Homeview display
to
your home wireless network, questions with the photo sharing service, CEIVA
channels, or accessing and using the Homeview Energy Monitor pages in the
display, please visit www.ceiva.com, or contact
CEIVA
Customer Care at
1-888-6
70-3580.
CEIVA’s WARRANTIES
With
CEIVA,
there are two warranties; there is the basic Limited Warranty that comes with the purchase of a frame (the Frame Limited Warranty is
set forth below) and then there is
CEIVA’s
PicturePlan® Lifetime
Warr
anty
.
CEIVA’s
PicturePlan Lifetime Warranty comes with
CEIVA’s
optional PicturePlan® membership. As long as you have a PicturePlan subscription,
if
your frame breaks,
CEIVA
will fix it for free. All you have to do is pay the postage to return it to us. We’ll repair or replace it and pay to ship it
back
to you. That’s it. For more information on all of the benefits you receive from PicturePlan, visit
www
.ceiva.com/pictur
eplan.
Frame Limited Warr
ant
y
THIS
IS TO
CERTIFY
that the
CEIVA
Digital Photo Frame products,
CEIVA
Broadband™ adapter and
CEIVA Wireless™
adapter (hereafter
r
eferred
to as the
“CEIVA
Product”) are warranted to be free of all defects in material and workmanship for one year (365 days) from the date of
pur
chase
if proof of purchase is presented within the warranty period to the manufacturer,
CEIVA
Logic, Inc.
(“manufactur
er”).
Manufacturer’s
sole obligation under this express warranty shall be, at
manufacturer’s
option and expense, to repair the defective product
or
part, deliver to buyer an equivalent product or part to replace the defective item, or if neither of the two foregoing options is
r
easonably
available, manufacturer may, in its sole discretion, refund to buyer the purchase price paid for the defective
product.
The repaired or replaced item will be shipped to buyer, at
manufacturer’s
expense, not later than ninety (90) days after seller or
manufacturer
receives the defective product. All products that are replaced will become the property of manufacturer. Replacement parts may be new
or
reconditioned. Manufacturer warrants any replaced or repaired product or part(s) for one year (365 days) from shipment, or the
r
emainder
of the initial warranty period, whichever is longer. This warranty is valid for purchases within the United States only. Manufacturer shall not
be
responsible for software, firmware, information, or memory data of buyer contained in, stored on, or integrated with any products returned
to
manufacturer for repair, whether under warranty or
not.
OBTAINING WARRANTY REPAIR SERVICE
Y
ou
must contact the
CEIVA
Customer Care Department at
1-877-692-3482
to receive an RMA (Return Merchandise Authorization). Returned
CEIVA
products should be sent, by the buyer,
postage-prepaid
and packaged appropriately for safe shipment. It is highly recommended
that
products you return be insured or sent by a method that provides for tracking of the package. Responsibility for loss or damage does
not
transfer to manufacturer until the returned item is
r
eceived.
WHAT THIS WARRANTY DOES NOT COVER
This limited warranty does not apply to the battery contained in any remote control device and/or to any defects caused by negligence, misuse,
accidents, acts of God, commercial use, improper operation or maintenance, connection to improper electrical supply, or attempted repair
by
anyone other than a facility authorized by manufacturer to service the
CEIVA
Product, or modification to any part of the
CEIVA
Product,
including
AC adapter, glass or telephone cable, or accessories. This warranty is invalid if the factory applied serial number has been altered or
r
emoved
from the
CEIVA
Product. This warranty does not apply to
CEIVA
Products after the first purchase. Units purchased second hand on trading web
sites (like eBay) are NOT covered by this warranty. Such products are subsequently sold “as is” or “with all faults.”
We
reserve the right to make
changes or improvements in our products without incurring any obligation to similarly alter products previously
purchased.
DISCLAIMER OF WARRANTIES
EXCEPT
AS
EXPRESSL
Y
PROVIDED HEREIN
AND TO
THE
MAXIMUM
EXTENT PERMITTED
BY
APPLICABLE LAW, CEIVA DISCLAIMS ALL OTHER WARRANTIES
WITH
RESPECT
TO
THE PRODUCT, WHETHER EXPRESS, IMPLIED, STATUTORY OR OTHERWISE, INCLUDING
WITHOUT LIMITATION, SATISFACTORY QUALIT
Y
,
COURSE
OF DEALING, TRADE USAGE OR PRACTICE OR THE WARRANTIES OF
MERCHANT
ABILIT
Y
,
FITNESS FOR
A
PARTICULAR PURPOSE, TITLE, OR
NON-INFRINGE
-
MENT
OF THIRD PARTY
RIGHTS.
LIMITATION OF REMEDIES
TO
THE FULL EXTENT ALLOWED BY
LAW, MANUFACTURER ALSO EXCLUDES FOR ITSELF
AND ITS
SUPPLIERS ANY
LIABILIT
Y
,
WHETHER BASED
IN
CONTRACT
OR
TORT (INCLUDING NEGLIGENCE), FOR INCIDENTAL, CONSEQUENTIAL, INDIRECT, SPECIAL, OR PUNITIVE DAMAGES OF
ANY
KIND,
OR FOR LOSS OF
REVENUE
OF PROFITS, LOSS OF BUSINESS, LOSS OF INFORMATION OR DATA, OR OTHER FINANCIAL LOSS ARISING OUT OF OR
IN
CONNECTION WITH THE
SALE,
INSTALLATION, MAINTENANCE, USE, PERFORMANCE, FAILURE, OR INTERRUPTION OF
ITS
PRODUCTS, EVEN
IF
MANUFACTURER OR
ITS AUTHORIZED
RESELLER HAS BEEN ADVISED OF THE POSSIBILITY OF SUCH DAMAGES,
AND LIMITS ITS
LIABILITY
TO
REPAIR, REPLACEMENT, OR REFUND OF THE
PURCHASE
PRICE PAID, AT MANUFACTURER’S OPTION. THIS DISCLAIMER OF
LIABILITY FOR DAMAGES WILL
NOT BE
AFFECTED
IF
ANY
REMED
Y
PROVIDED HEREIN
SHALL
FAIL OF
ITS
ESSENTIAL
PURPOSE.
LIMITATION OF
DISCLAIMER
SOME
STATES
DO NOT
ALLOW THE EXCLUSION OR LIMITATION OF INCIDENTAL OR CONSEQUENTIAL DAMAGES, OR ALLOW LIMITATIONS
ON
HOW LONG
AN
IMPLIED WARRANTY LASTS
SO
THE ABOVE LIMITATIONS OR EXCLUSIONS MA
Y
NOT
APPL
Y
TO
Y
OU.
THIS WARRANTY GIVES
Y
OU
SPECIFIC LEGAL RIGHTS,
AND
Y
OU
MA
Y
ALSO HAVE OTHER RIGHTS, WHICH
VARY
FROM
STATE
TO STATE.
MANUFACTURER, WARRANTOR
CEIVA
Logic,
Inc.
12455 Branford Street, Unit
#24
Arleta, CA
91331
IMPORTANT SAFEGUARDS
When
using an electrical appliance, basic safety precautions should be followed including the
following:
1. To prevent against the risk of electrical shock, do not put your
CEIVA
Digital Photo Frame in water or other
liquid.
2. Do not use this product where it could fall into water
.
3. Do not operate any appliance with a damaged cord or plug, or after it malfunctions, or becomes damaged in any manner. Contact CEIVA
Customer Care at
1-877-MYCEIVA
(1-877-692-3482)
for proper return and repair or replacement of the
CEIVA
frame.
4.
WARNING:
TO
REDUCE THE RISK OF ELECTRICAL SHOCK OR FIRE,
DO NOT
REMOVE THE
BACK PANEL. NO
USER SERVICEABLE
PARTS
ARE INSIDE. REPAIR SHOULD
BE
DONE ONL
Y
BY AUTHORIZED
PERSONNEL.
5. Remote Control Devices, if any, contain a battery that can be harmful if swallowed.
Product Information
FCC
Statement
REGULATORY COMPLIANCE INFORMATION
FCC Compliance Statement
This device complies with part 15 of the
FCC
rules. Operation is subject to the following two conditions: (1) this device may not cause
harmful
interference, and (2) this device must accept any interference received, including interference that may cause undesired
operation.
This equipment has been tested and found to comply with the limits for a Class B digital device, pursuant to part 15 of the
FCC
Rules. These
limits
are designed to provide reasonable protection against harmful interference in a residential installation. This equipment generates, uses
and can radiate radio frequency energy and, if not installed and used in accordance with the instructions, may cause harmful interference
to
r
adio
communications. However, there is no guarantee that interference will not occur in a particular installation. If the equipment does cause
harmful interference to radio or television reception, which can be determined by turning the equipment off and on, the user is encouraged to
tr
y
to correct the interference by one of the following measures with respect to radios or televisions: Reorient or relocate the receiving antenna.
Increase the separation between the equipment and frame. Connect the equipment into an outlet on a circuit different from that to which
the
frame is connected. Ensure that card mounting screws, connector attachment screws and all ground wires are secured and tight. Consult
the
dealer or an experienced radio/TV technician for
help.
This device and its antenna(s) must not be co-located or operating in conjunction with any other antenna or transmitter.
For product available in the USA/Canada market, only channel 1~11 can be operated. Selection of other channels is not possible.
IMPORTANT NOTE:
FCC Radiation Exposure Statement: This equipment complies with FCC radiation exposure limits set forth for an uncontrolled environment. This
equipment should be installed and operated with minimum distance 20cm between the radiator & your body.
Changes or modifications not expressly approved by CEIVA Logic, Inc. could void the user’s authority to operate the equipment.
Canadian Compliance Statement
This device complies with Industry Canada license-exempt RSS standard(s). Operation is subject to the following two conditions: (1) this device may
not cause interference, and (2) this device must accept any interference, including interference that may cause undesired operation of the device.
Cet appareil est conforme aux normes CNR exemptes de licence d’Industrie Canada. Le fonctionnement est soumis aux deux conditions suivantes :
(1) cet appareil ne doit pas provoquer d’interférences et (2) cet appareil doit accepter toute interférence, y compris celles susceptibles de provoquer
un fonctionnement non souhaité de l’appareil.
This Class B digital apparatus complies with Canadian ICES-003. Cet appareil numérique de la classe B est conforme à la norme
NMB-003 du Canada
IMPORTANT NOTE:
IC Radiation Exposure Statement: This equipment complies with IC RSS-102 radiation exposure limits set forth for an uncontrolled environment.
This equipment should be installed and operated with minimum distance 20cm between the radiator & your body.
This device and its antenna(s) must not be co-located or operating in conjunction with any other antenna or transmitter.
The Country Code Selection feature is disabled for products marketed in the US/Canada
CUSTOMER INFORMATION
If you experience trouble with this equipment, please contact CEIVA Logic, Inc. at 1-877-MYCEIVA (1-877-692-3482) for information on obtaining
service or repair. There are no user serviceable parts in this equipment.
© 2014
CEIVA
Logic, Inc., Burbank, CA 91502. All Rights Reserved. Protected by United States Patent No. 6,442,573. Other Patents
P
ending.
12192013