CHOICE FORTUNE SC-32HK860N LED TV User Manual
CHOICE FORTUNE HOLDINGS LIMITED LED TV Users Manual
UserManual.wiki
>
CHOICE FORTUNE
>
SC 32HK860N User Manual
User Manual
Navigation menu
Upload a User Manual
Namespaces
Wiki Guide
HTML
PDF
Info
Views
User Manual
Discussion / Help
Navigation
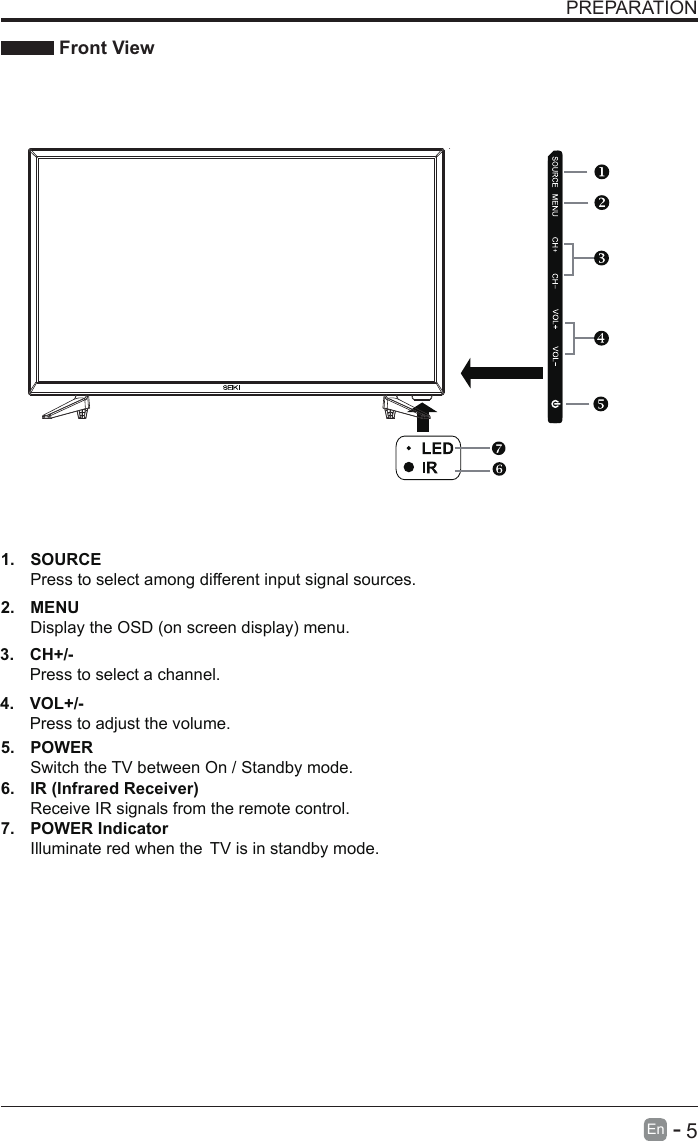
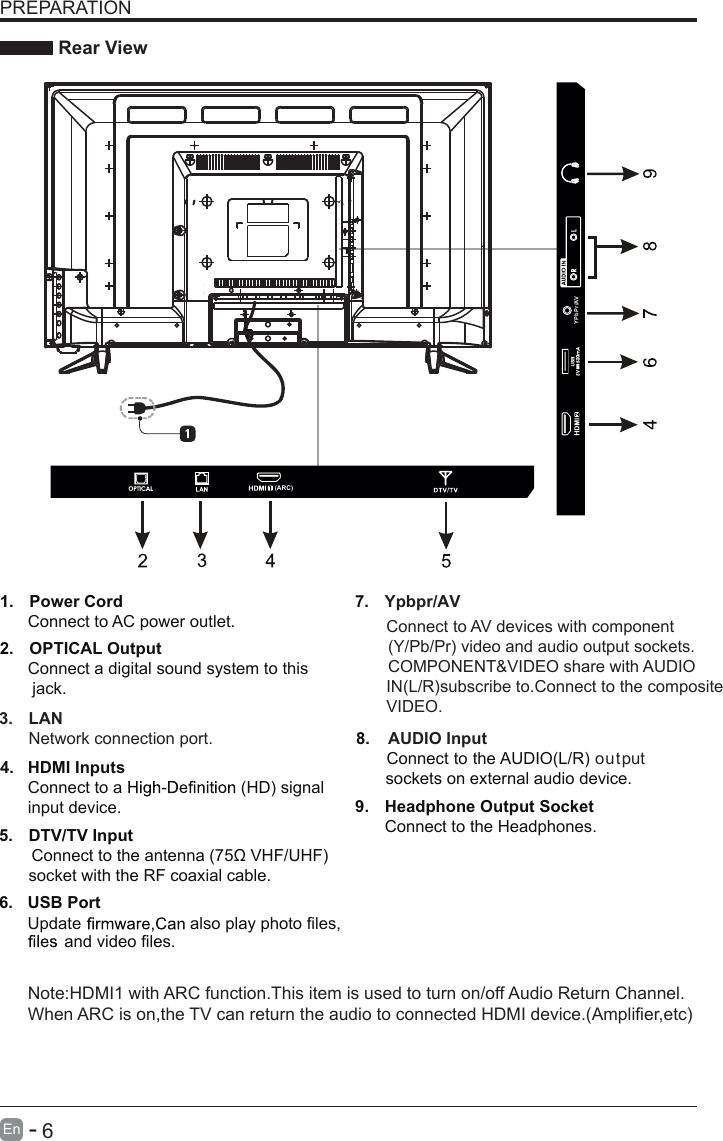
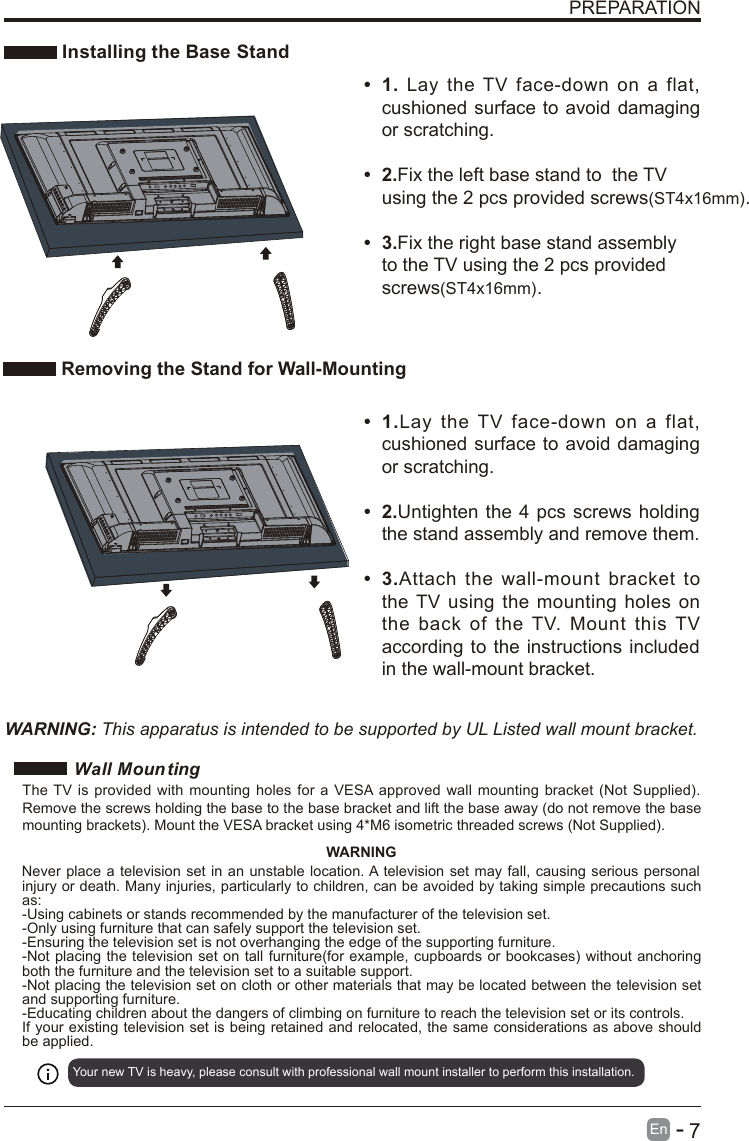
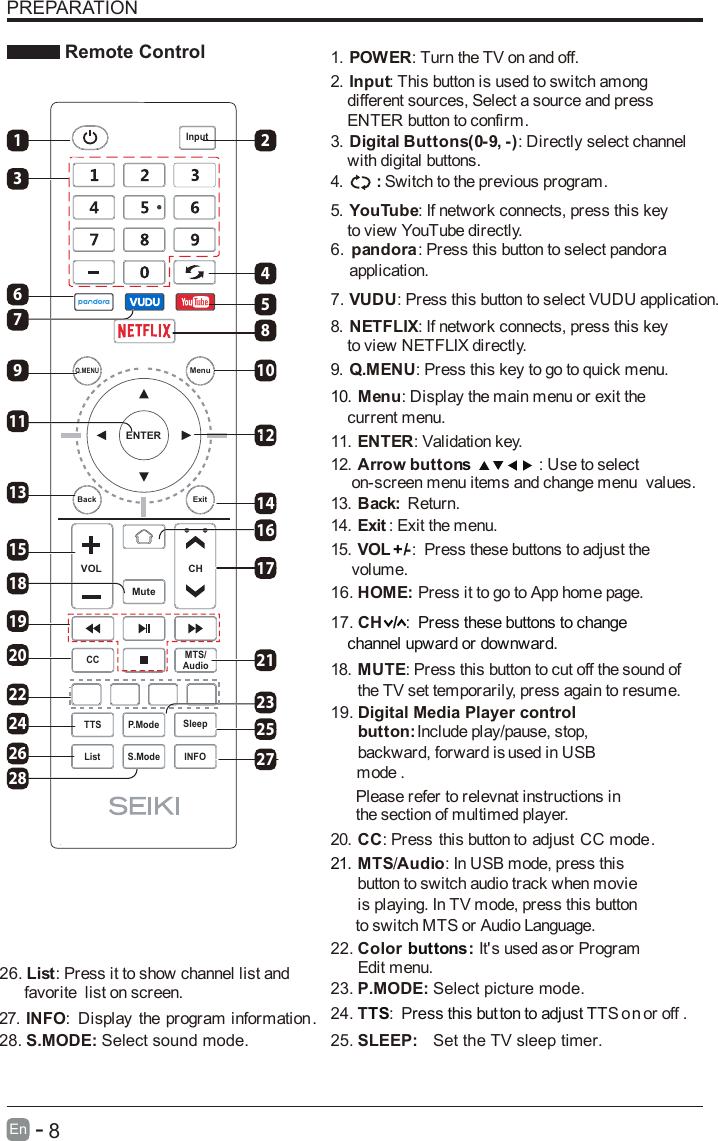
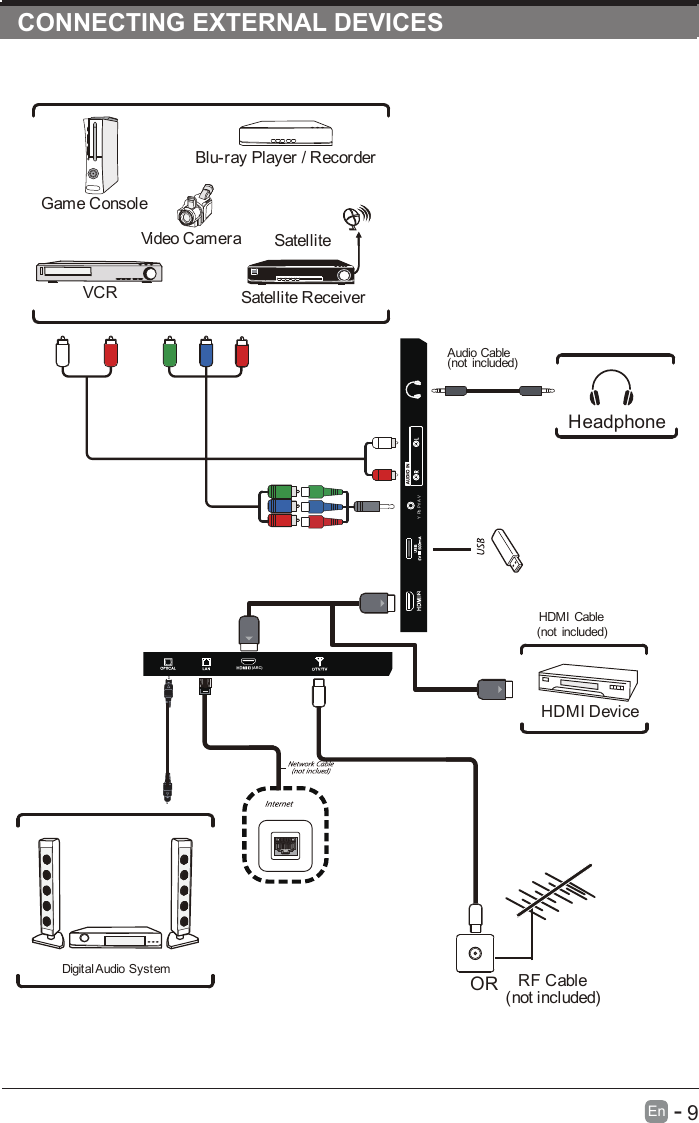
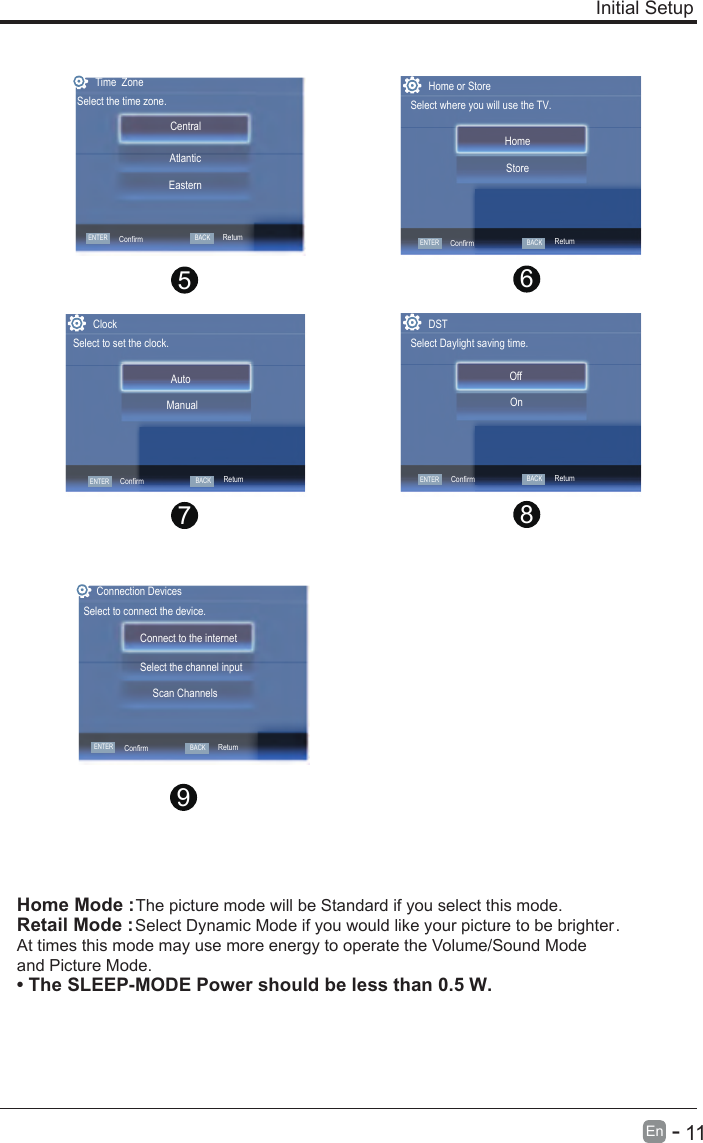
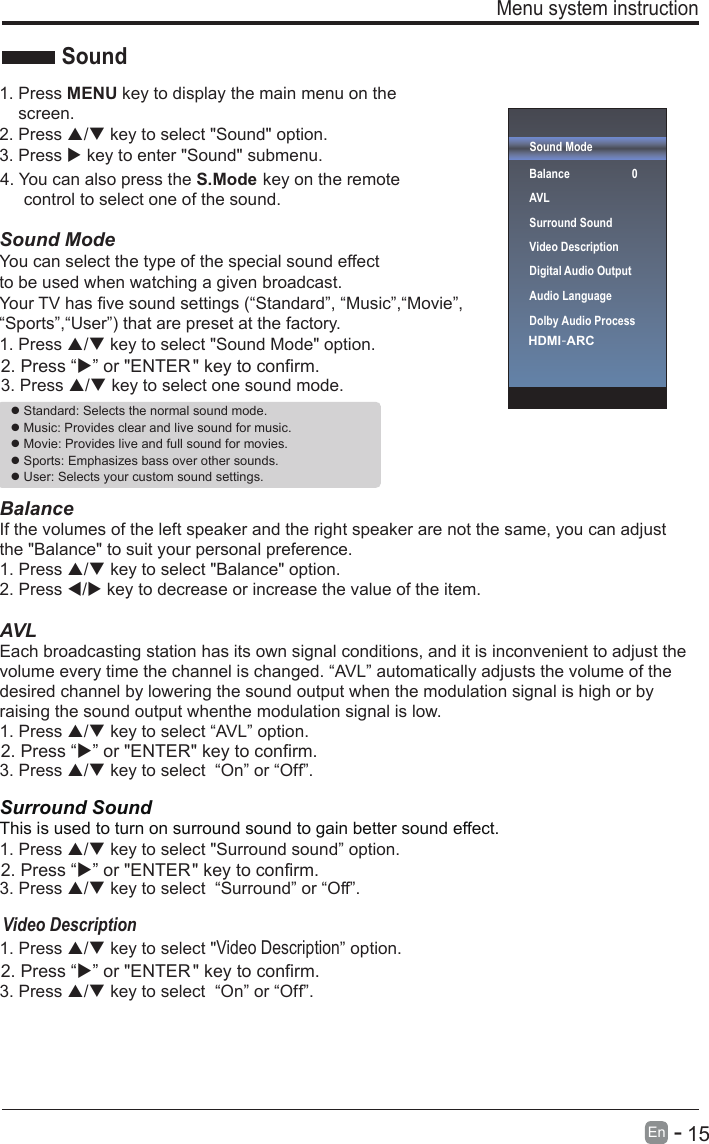
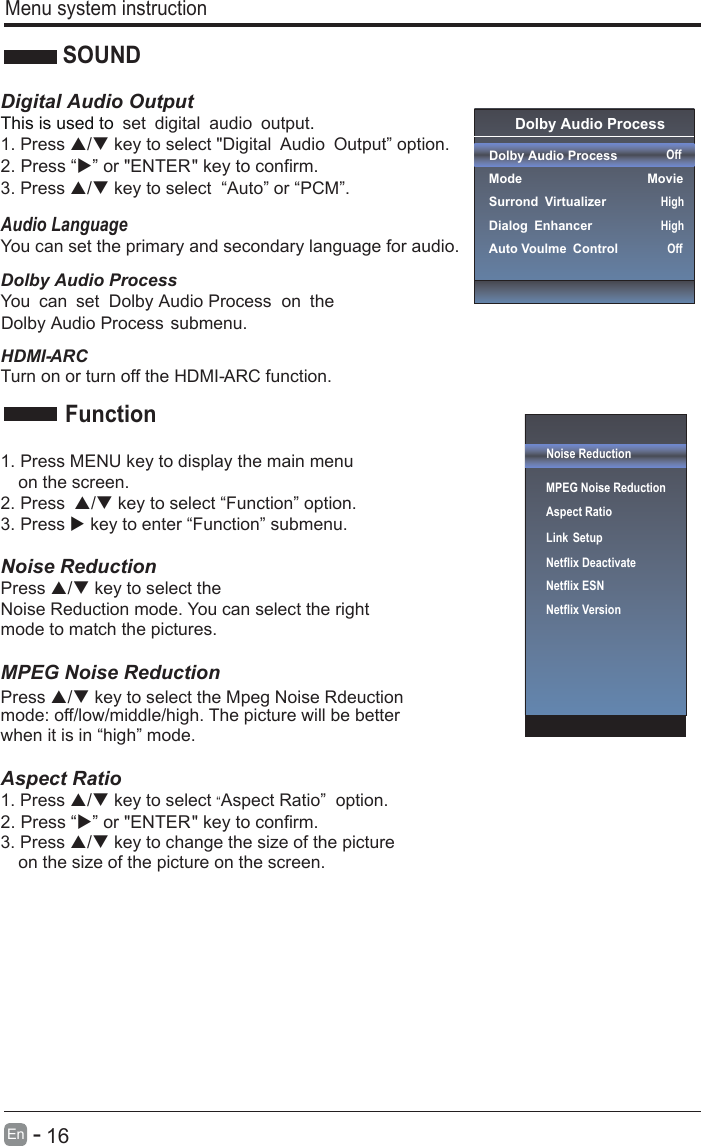
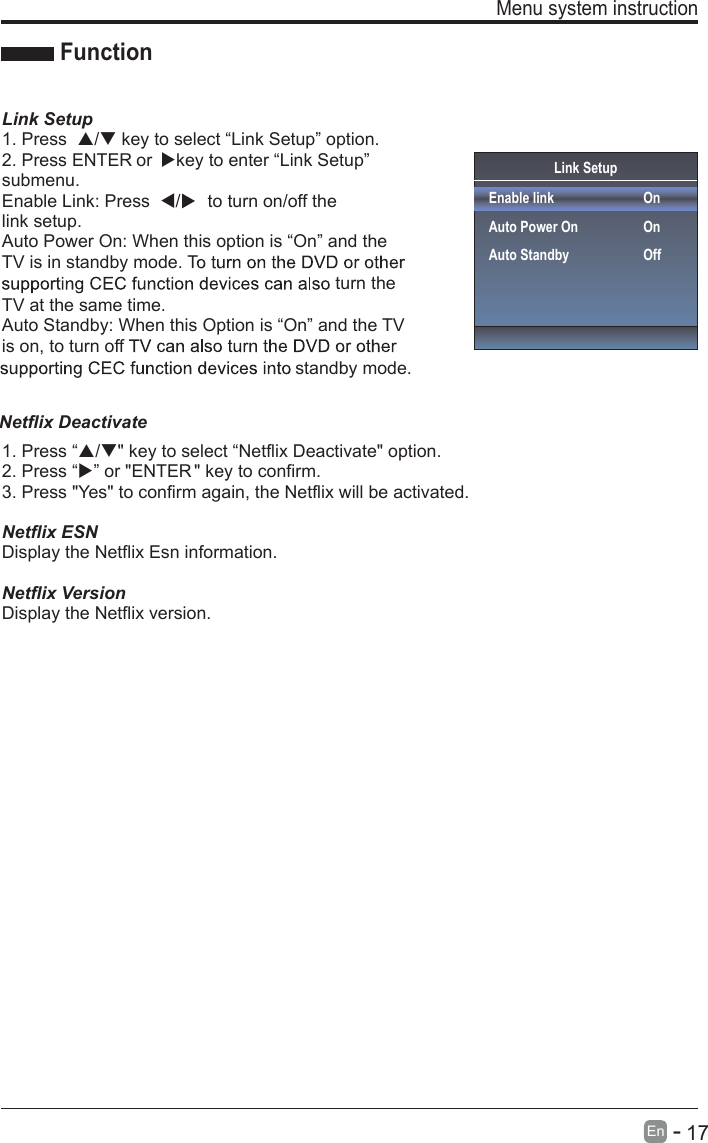
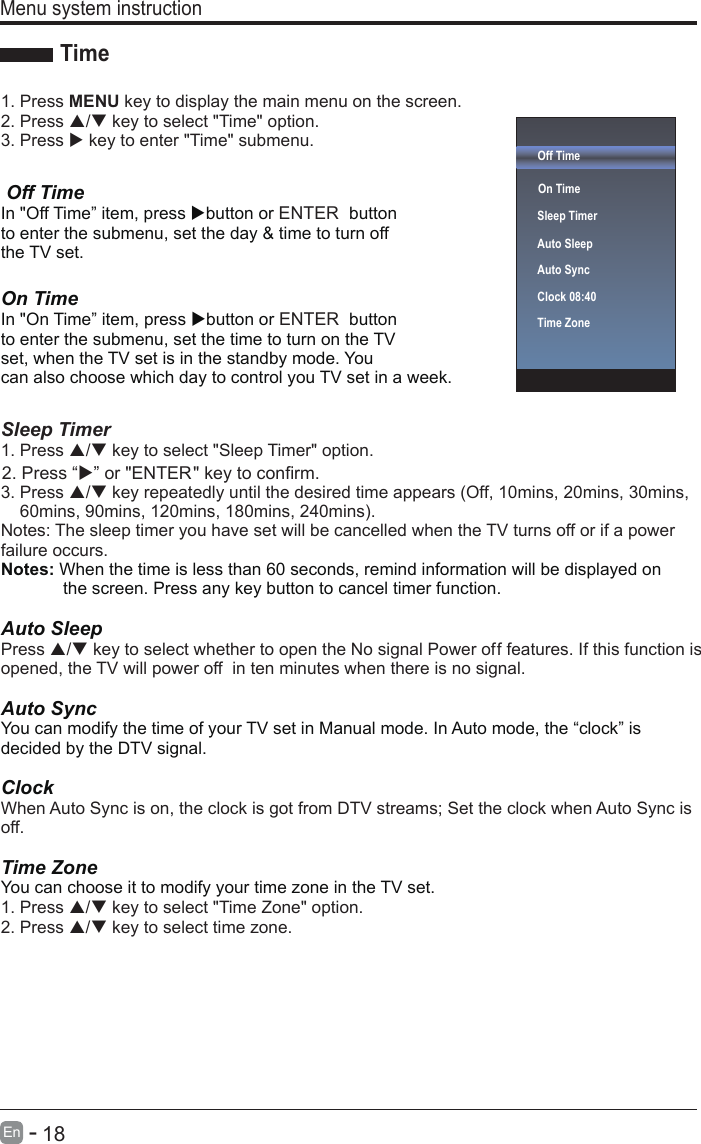
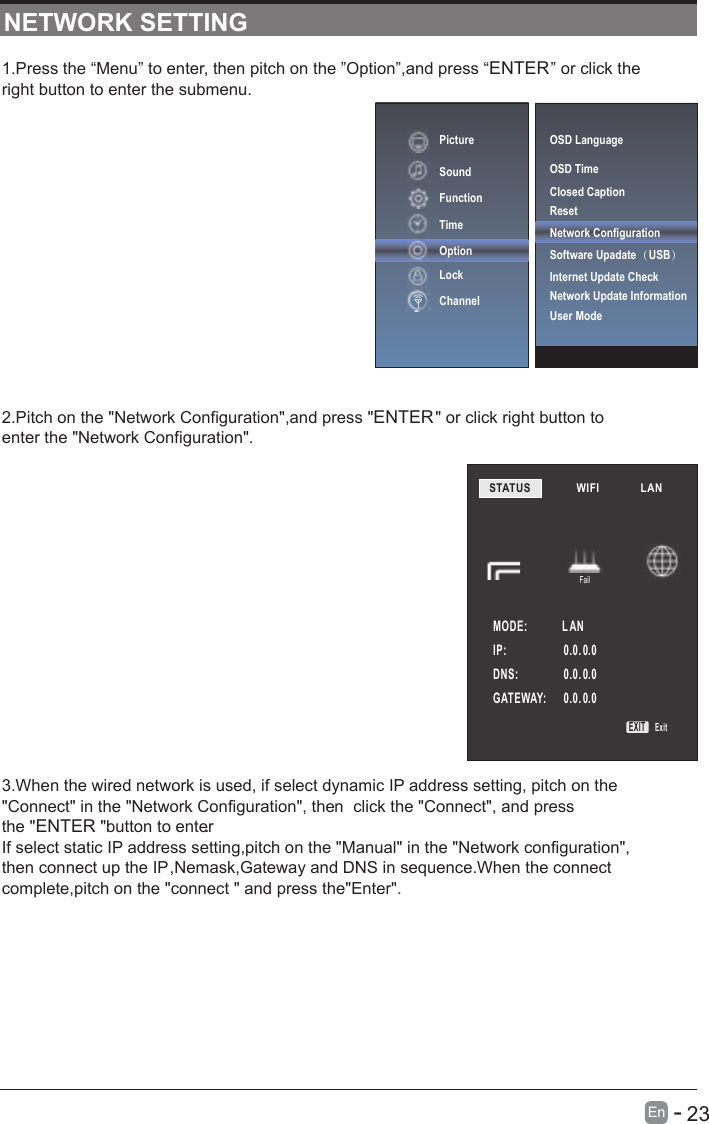
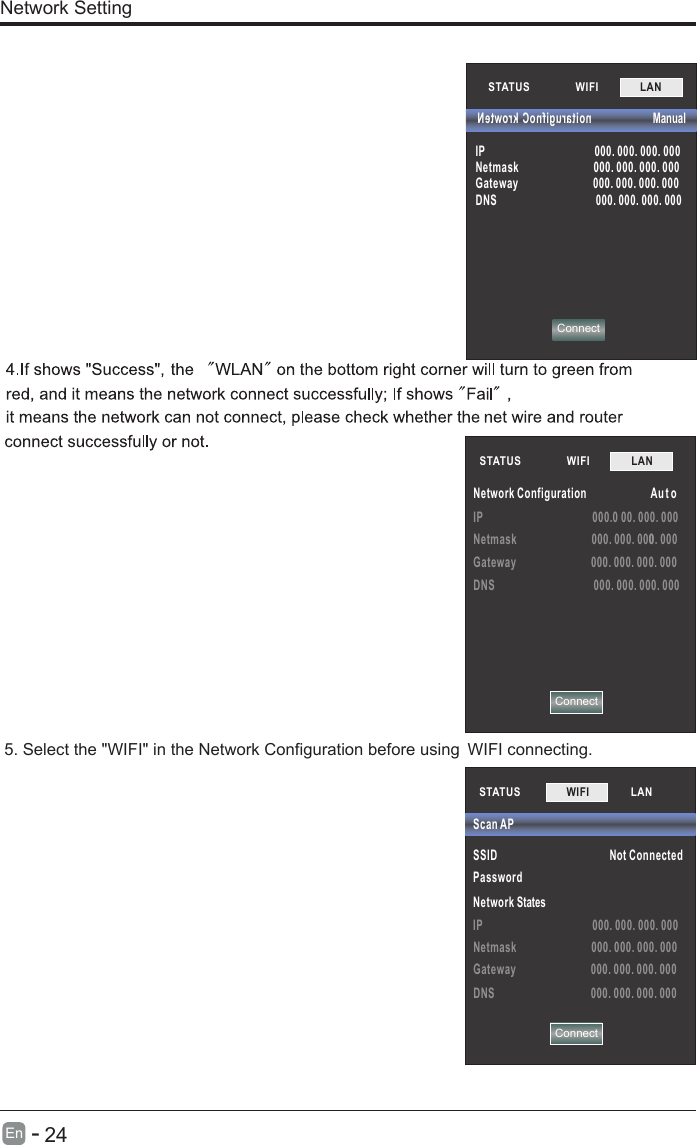
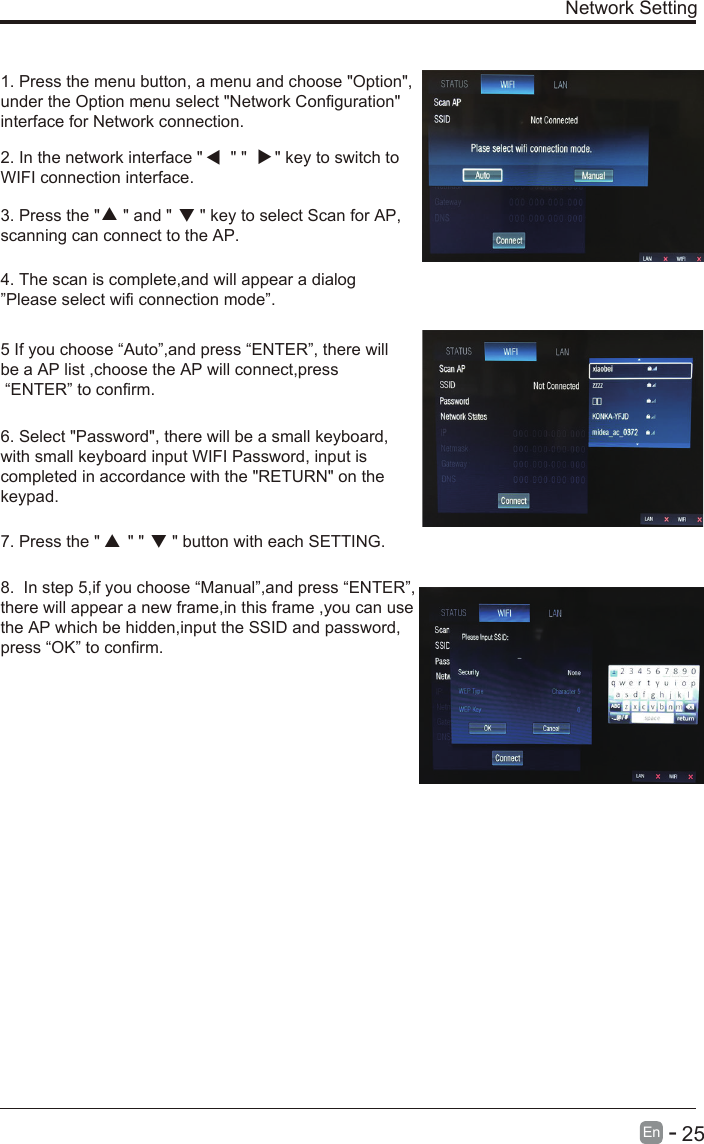
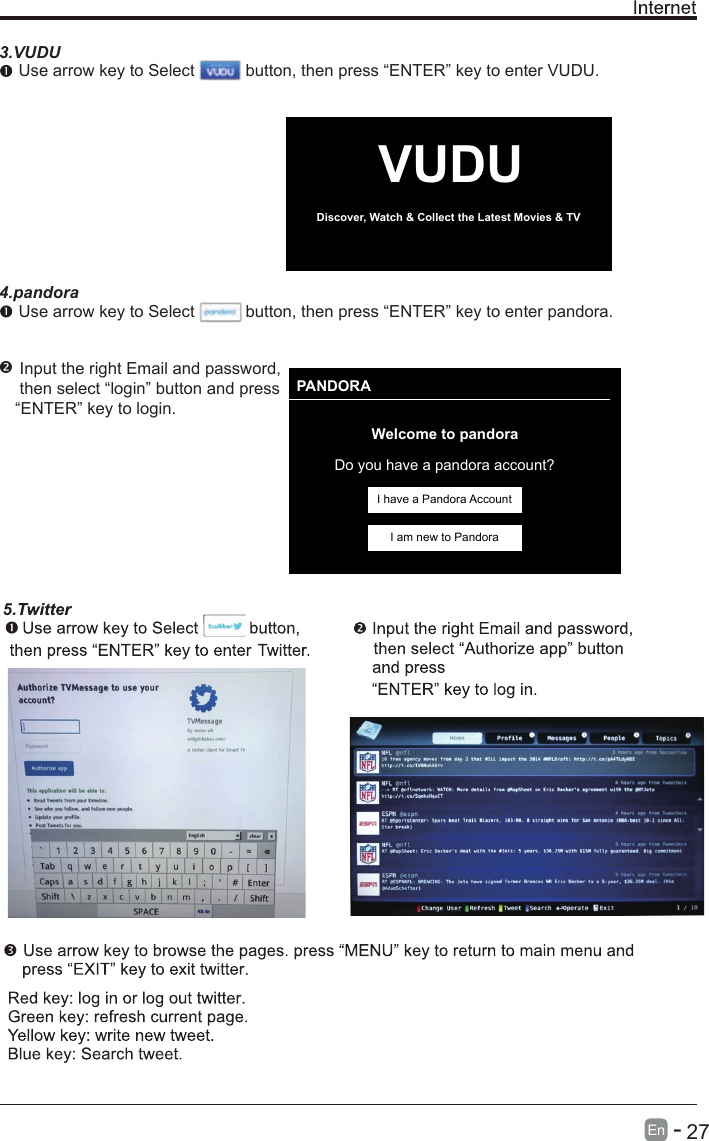
![10En - Initial Setup• Connect the power cord to the power socket after you have completed all thephysical connections. At this stage, the TV will enter Standby Mode and the redLED indicator will illuminate.• In Standby Mode, press the button on the main unit or on the remote control toturn the TV on. The red LED indicator will turn off.• The first time you turn the TV on, it will go into the Setup Wizard. Press buttons to select your desired mode and press ENTERBasic OperationsCountrySelect the country.USCanadaMexicoConfirmOSD languageConfig Menu language.ENTER ENTERConfirmEnglish FrenchEspañolBACKRetum DATA COLLECTION AND FIRMWARE UPDATES NOTICEWhen this television is connected to the internet, it will collect limited, non-personally identifiable information which will be sent to MStar Semiconductor Inc. ("MStar") and its service providers. Certain of this information may be aggregated and shared with third party partners for business and product analysis purposes. By clicking "Accept" you acknowledge and agree to the collection and sharing of this information as described in more detail in the "View Additional Details" section, as well as the automatic download of essential firmware/software updates.[VIEW ADDITIONAL DETAILS] [ACCEPT] DATA COLLECTION AND FIRMWARE UPDATES NOTICE VIEW ADDITIONAL DETAILSWhen this television is connected to the internet, it will collect limited, non-personally identifiable information which will be sent to MStar Semiconductor Inc. ("MStar") and its service providers. Certain of this information may be aggregated and shared with third party partners for business and product analysis purposes. By clicking \"Accept\" you acknowledge and agree to the collection and sharing of this information as described below, as well as the automatic download of essential firmware/software updates.This information consists of: confirmation of initial television start up (year/month only) and country/region of launch, device information that indicates television manufacturer and model, and number and launch of pre-loaded internet connected applications within a calendar month ("Usage Information"). This Usage Information will be collected and stored by MStar and its service providers. Where MStar shares information with third party partners, it will do so in an aggregated form that [ ] ACCEPT AUTOMATIC UPDATES [ ] ACCEPT ALL[ ] DECLINE ALL [ ] ACCEPT USAGE INFOMATION COLLECTION](https://usermanual.wiki/CHOICE-FORTUNE/SC-32HK860N/User-Guide-3939098-Page-11.png)