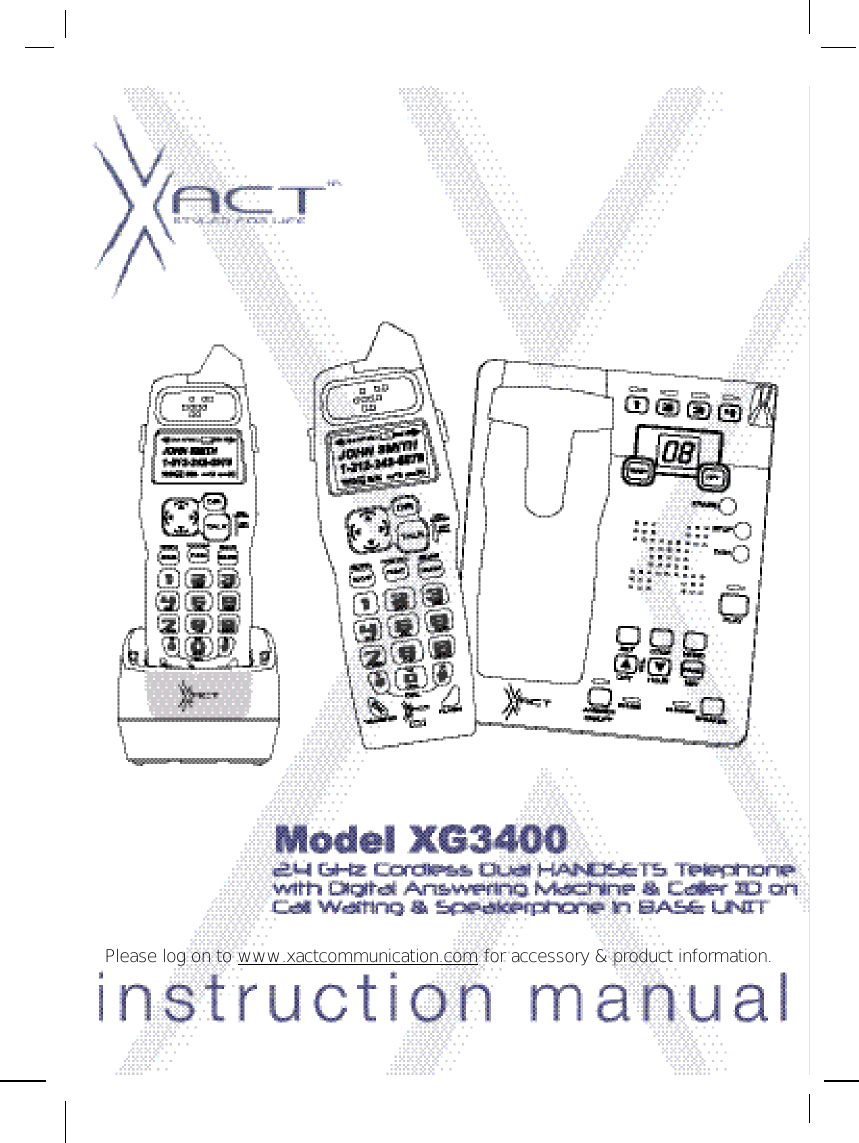
CIDMATE Technology XG34001 2.4GHz ANALOG CORDLESS PHONE User Manual XG3400 IB 0606

CIDMATE International Technology Inc. 2.4GHz ANALOG CORDLESS PHONE XG3400 IB 0606

MANUAL

Please log on to www.xactcommunication.com for accessory & product information.
1Safety Instructions ------------------------------------------------------------------------------------------4Getting Started -----------------------------------------------------------------------------------------------6Desk Mounting -----------------------------------------------------------------------------------------------9Wall Mounting -----------------------------------------------------------------------------------------------10Cordless Telephone Operation ------------------------------------------------------------------------- 12Preparing for Use ---------------------------------------------------------------------------------------12NO LINE Indicator --------------------------------------------------------------------------------------12Receiving Calls From the HANDSET --------------------------------------------------------------12Receiving calls From the BASE UNIT -------------------------------------------------------------13Placing Calls --------------------------------------------------------------------------------------------- 14Transferring Calls ---------------------------------------------------------------------------------------  14Headset Feature ----------------------------------------------------------------------------------------15Redial Feature -------------------------------------------------------------------------------------------15Caller ID System Operation ----------------------------------------------------------------------------- 16Caller ID System ----------------------------------------------------------------------------------------16Viewing Caller Information During Incoming Calls ----------------------------------------16MSG WAITING (Message Waiting) -----------------------------------------------------------16Call Waiting ------------------------------------------------------------------------------------------17Voice Mail Function --------------------------------------------------------------------------------17C-F (Forwarded Call) -----------------------------------------------------------------------------17L-D-C (Long Distance Call) ---------------------------------------------------------------------17Caller List -------------------------------------------------------------------------------------------------17Viewing the Caller List ---------------------------------------------------------------------------- 18Placing a Call From the Caller List ------------------------------------------------------------ 18Editing the Caller List before Dialing ---------------------------------------------------------18Saving the Name and Number in the Caller List into the DIRECTORY -------------19Deleting All Records in the Caller List -------------------------------------------------------- 19Selective Deleting in the Caller List ----------------------------------------------------------- 19Name and Telephone Number DIRECTORY ---------------------------------------------------19Contents
2Viewing the DIRECTORY -----------------------------------------------------------------------19Speed Viewing the DIRECTORY --------------------------------------------------------------20Saving in the DIRECTORY ---------------------------------------------------------------------- 20PREFERRED CALLS -----------------------------------------------------------------------------20BLOCKED CALLS ---------------------------------------------------------------------------------20Editing a Name and Number in the DIRECTORY -----------------------------------------21Editing the Number in the DIRECTORY before Dialing ----------------------------------22Placing Calls from the DIRECTORY ----------------------------------------------------------23Deleting All Records in the DIRECTORY ----------------------------------------------------23Selective Deleting in the DIRECTORY ------------------------------------------------------- 23Function Operation -------------------------------------------------------------------------------------24A.  Language ----------------------------------------------------------------------------------------25B.  First Ring/Silent On or Off ------------------------------------------------------------------- 25C.  Time Set -----------------------------------------------------------------------------------------25D.  Ringer Volume ---------------------------------------------------------------------------------26E.  LCD Contrast ----------------------------------------------------------------------------------- 26F.  PBX Number ------------------------------------------------------------------------------------26G.  Flash Time --------------------------------------------------------------------------------------27H.  Pause Time -------------------------------------------------------------------------------------27I.  Voice Mail --------------------------------------------------------------------------------------- 28J.  MSG Waiting (Message Waiting) ---------------------------------------------------------28Telephone Keypad Characters ----------------------------------------------------------------------29Answering System Operation ---------------------------------------------------------------------------30Resetting the Answering System -------------------------------------------------------------------30Setting the Day/Time Stamp-------------------------------------------------------------------------30Recording your Outgoing Messages --------------------------------------------------------------31Adjusting the speaker VOLume --------------------------------------------------------------------  32Turning the Answering System ON/OFF ---------------------------------------------------------32Setting to Answer Calls -------------------------------------------------------------------------------33Contents
Setting to Announce Only ----------------------------------------------------------------------------33Screening Incoming Calls ----------------------------------------------------------------------------33Message Alert -------------------------------------------------------------------------------------------33Setting Ring Select ------------------------------------------------------------------------------------- 33Recording a Memo -------------------------------------------------------------------------------------34Playing of Messages/Memos ------------------------------------------------------------------------ 34Saving Messages ---------------------------------------------------------------------------------------35Erasing Messages --------------------------------------------------------------------------------------36When the Memory is Full -----------------------------------------------------------------------------36Two-Way Recording -----------------------------------------------------------------------------------36Remote Control Operation ------------------------------------------------------------------------------- 37Remote Operation through a Tone Telephone --------------------------------------------------37Remote Access Codes -------------------------------------------------------------------------------- 37Changing of the Remote Access Code -----------------------------------------------------------37Using the Remote Instruction Code ---------------------------------------------------------------38Security -------------------------------------------------------------------------------------------------------39Recharging the Battery Pack ---------------------------------------------------------------------------40Changing the Battery Pack ------------------------------------------------------------------------------41Problem Solving -------------------------------------------------------------------------------------------- 42Technical Information -------------------------------------------------------------------------------------44FCC Requirements ----------------------------------------------------------------------------------------45Warranty ------------------------------------------------------------------------------------------------------47Wall Mounting Template ---------------------------------------------------------------------------------- 523Contents
4IMPORTANT SAFETY INSTRUCTIONSTo reduce the risk of fire, electric shock and/or injury, always follow thesebasic safety precautions when using your cordless telephone equipment.1. Read and understand all instructions.2. Follow all warnings and instructions marked on the telephone.3. Unplug this telephone from the wall outlet before cleaning or replacing the BATTERY PACK.Do not use liquid cleaners or aerosol cleaners on the telephone. Use a damp cloth forcleaning.4. Do not use this telephone near water, for example, near a bath tub, wash bowl, kitchen sink,or laundry tub, in a wet basement, or near a swimming pool.5. Place this telephone on a stable surface. Serious damage and/or injury may result if thetelephone falls.6. Do not cover the slots and openings on this telephone. This telephone should not be placednear or over a radiator or heat register. This telephone should not be placed in a built-ininstallation unless proper ventilation is provided.7. Operate this telephone using the electrical voltage as stated on the BASE UNIT of thetelephone or in the Owner’s Manual. If you are not sure of the voltage in your home, consultyour dealer or local power company.8. Do not place anything on the power cord. Install the telephone where no one will step or tripon the cord.9. Do not overload wall outlets or extension cords as this can increase the risk of fire or electricshock.10. Never push objects of any kind through the slots in the telephone. They could touchdangerous voltage points or short out parts that could result in a risk of fire or electric shock.Never spill liquid of any kind on the telephone.11. To reduce the risk of electric shock, do not disassemble this telephone. Take it to a qualifiedservice representative when service or repair work is required. Opening or removing coversmay expose you to dangerous voltages or other risks. Incorrect reassembly can causeelectric shock when the telephone is subsequently used.12. Unplug this telephone from the wall outlet and consult a qualified service representative inany of the following situations:A. When the power supply cord is frayed or damaged.B. If liquid has been spilled into the telephone.C. If the telephone has been exposed to rain or water.D. If the telephone does not operate normally by following the operating instructions.Adjust only those controls that are covered by the operating instructions. Improperadjustment of other controls may result in damage and will often require extensive workby a qualified technician to restore the telephone to normal operation.Safety Instructions
E. If the telephone has been dropped or the case has been damaged.F. If the telephone exhibits a distinct change in performance.13.  Do not use the telephone to report a gas leak in the vicinity of the leak.14.  Never install telephone wiring during a lightning storm.15.  Never install telephone jacks in wet locations unless the jack is specifically designed for wetlocations.16.  Never touch uninsulated telephone wires or terminals unless the telephone line has beendisconnected at the network interface.17.  Use caution when installing or modifying telephone lines.Battery SafetyCAUTION:Danger of explosion if the BATTERY PACK is replaced with incorrect type.Replace only with the same or equivalent type. To reduce the risk of fire orpersonal injury, read and follow these instructions:1.  Use only the following type and size of BATTERY PACK:Cordless Telephone BATTERY PACK3.6V, 600mAhXACT CommunicationNi-MH BATTERY PACK: Model B655(See page 40 for ordering information.)2.  Do not dispose of the BATTERY PACK in a fire. The BATTERY PACK may explode. Checkwith local codes for possible special disposal instructions.3.  Do not open or mutilate the BATTERY PACK. Released electrolyte is corrosive and maycause damage to the eyes or skin. Electrolyte may be toxic if swallowed.4.  Exercise care in handling the BATTERY PACK to prevent shorting the BATTERY PACKwith conductive materials such as rings, bracelets, and keys. The BATTERY PACK orconductor may overheat and cause burns.5.  Charge the BATTERY PACK provided with (or identified for use with) this telephone only inaccordance with the instructions and limitations specified in this manual.6.  Observe proper polarity orientation between the BATTERY PACK and BATTERYCHARGER.SAVE THESE INSTRUCTIONSATTENTION:The telephone that you have purchased contains a rechargeable BATTERY PACK. TheBATTERY PACK is recyclable. At the end of its useful life, under various state and local laws, itmay be illegal to dispose of this BATTERY PACK into the municipal waste stream. Check withyour local solid waste officials for details in your area for recycling options or proper disposal.5Safety Instructions
6Connecting Your PhoneThis section is a reference guide to the basic functions and operations of your cordlesstelephone. For more detailed descriptions of the operations and features of this telephone, referto the Contents on page 1.1.  Carefully remove your cordless telephone from its shipping carton. If there is any visibledamage, do not attempt to operate this equipment. Return it to the place of purchase.2.  Check to be sure you have all items that come with this cordless telephone system. Youshould have two HANDSETS, BASE UNIT, two AC ADAPTER, MOUNTING BRACKET, oneCHARGER UNIT, TELEPHONE LINE CORD, SHORT TELEPHONE LINE CORD, twoBELT CLIP, and an Owner’s Manual.3.  Insert the small plug on the end of the AC ADAPTER into the POWER-IN CONNECTIONJACK at the back of the BASE UNIT.4.  Plug the AC ADAPTER into a 120V AC wall outlet.USE ONLY WITH CLASS 2 POWER SOURCE 9V DC, 500 mA.5.  Insert one plug of the TELEPHONE LINE CORD into the house TELEPHONE JACK and theother end into the TELEPHONE LINE CONNECTION JACK at the back of the BASE UNIT.(If you have an older 4-prong TELEPHONE JACK, you will need an RJ-11C TELEPHONEJACK ADAPTER. This adapter is available at the same place you purchased yourtelephone.)6. Connect the other AC ADAPTER to CHARGER UNIT.7.  We recommend not placing this unit next to appliances. Doing so may cause interference.Getting StartedTELEPHONE LINE CORD SHORT TELEPHONE LINE CORDMOUNTINGBRACKET BELT CLIP X 2AC ADAPTER X2BATTERYPACK X 2HANDSET X 2 BASE UNIT!
8. Install the HANDSET BATTERY PACK byplugging it into the BATTERY CONNECTORinside the BATTERY COMPARTMENT. TheHANDSET LCD Screen will display “RING: HI”.9. Place the BATTERY PACK inside the BATTERYCOMPARTMENT.10. Slide the HANDSET BATTERY COMPARTMENTCOVER firmly into place in its closed position.11. Place one HANDSET to cradle of BASE UNIT (Donot charge the HANDSET with the KEYPADface down), and the other one to the CHARGERUNIT.12. IMPORTANT: Before initial use, charge theHANDSET for 12 hours. 13. TONE/PULSE Select Switch:A. If your home is equipped with a tone dialingsystem, set the TONE/PULSE Select Switchto the TONE position.B. If you have a rotary dialing system, set theTONE/PULSE Select Switch to the PULSEposition.C. If you are unsure which system you have, setthe TONE/PULSE Select Switch to the TONEposition. Press the button on theHANDSET to get a dial tone and make a call.If the call connects, leave the switch as is;otherwise set to the PULSE position.TALK7Getting StartedRING: HI
14. Set the date and time on the HANDSET. (See page 25 for details.)15. Press and hold the  button to initiate your Answering System. (See details on page30.)16. Set the date and time on the BASE UNIT. (See page 30 for details.)You are now ready to use your newXact Cordless Telephone.STOP8Getting StartedPress the  button to confirm thatyou have a dial tone. If you do not get a dialtone, review steps 3 through 13. If you stilldo not have a dial tone, refer to theProblem Solving section on page 42.With the back of the HANDSET facing up,insert one side of the BELT CLIP HOOKinto the matching slot at the top side of theHANDSET. Press down on the oppositeside of the BELT CLIP until the otherHOOK locks into the slot on the side of theHANDSET.TALKIMPORTANTIn order to utilize the Caller ID feature, you mustsubscribe to Caller ID service from your localtelephone company.ANTENNAHANDSETBELT CLIP HOOK
Desk MountingOne of the special features of your telephone is the unique design of the MOUNTING BRACKETwhich can hold your phone at an angle when desk mounting or wall mounting.With the back of the BASE UNIT facing up, rotate the MOUNTING BRACKET to the position asin Figure 1 (follow the arrow direction for the DESK MOUNT). Place your telephone on any flatsurface of desk as in Figure 2. IMPORTANT: Attach the MOUNTING BRACKET when using your phone on a desk.9Desk MountingFIGURE 2FIGURE 1IMPORTANTPlacing your BASE UNIT near appliances such astelevisions, refrigerators, radios, or microwave ovensmay cause interference.
Wall MountingYou may choose to put the BASE UNIT of your cordless telephone on a wall.1. With the back of the BASE UNIT facing up, rotate the MOUNTING BRACKET to the positionshown in Figure 1 (follow the arrow direction for the WALL MOUNT).2. Insert the small plug on the end of the AC ADAPTER into the POWER-IN CONNECTIONJACK at the back of the BASE UNIT.3. Plug the AC ADAPTER into a 120V wall outlet.4. Connect the SHORT TELEPHONE LINE CORD to the TELEPHONE LINE CONNECTIONJACK. Put the SHORT TELEPHONE LINE CORD inside the MOLDED WIRING CHANNELas shown in Figure 2.5. Plug the free end of the SHORT TELEPHONE LINE CORD into the MODULAR WALLJACK.10Wall MountingFIGURE 1FIGURE 2
IMPORTANT:A “beep”will be heard when the HANDSET is properly positioned in theBASE UNIT CHARGE CRADLE and charging. Securely positioning theHANDSET in the BASE UNIT will also prevent the HANDSET from falling.IMPORTANT:The CHARGER UNIT does not have theWALL MOUNTING Feature. Place theCHARGER UNIT on a stable surface andcharge the HANDSET. The POWER LEDindicates the AC ADAPTER installedproperly. The CHARGER LED lights upwhen the HANDSET is charged properly.11Wall Mounting
Preparing for UseBefore you can use your cordless telephone, you must charge the HANDSET for 12 hours.Failure to do so will require recharging of the BATTERY PACK more often.1. Place the HANDSET on the BASE UNIT for 12 hours.2. After 12 hours, remove the HANDSET from the BASE UNIT.Before you can use your cordless telephone, you must charge the HANDSET for 12hours. Failure to do so will require more frequent charging of the BATTERY PACK. Seepage 40 for more information on the BATTERY PACK.NOTE:Depending on the frequency of use, once the HANDSET is fully charged, it remains functionalfor approximately 4 hours of continuous use and approximately 5 days when the HANDSET isoff the BASE UNIT in STANDBY mode.NO LINE IndicatorThis telephone checks for an active TELEPHONE LINEconnection. If “NO LINE”appears on the LCD Screen,when the HANDSET is in STANDBY mode, no calls canbe made or received from this telephone. Check that theTELEPHONE LINE CORD plugs are connected to thewall TELEPHONE JACK and the BASE UNITTELEPHONE LINE CONNECTION JACK. If “NO LINE”continues to be displayed, check that the other phones inthe house are working. If none of the phones work,contact your local phone company.Receiving Calls From the HANDSET1. When the phone rings, lift the HANDSET and pressthe  button. The HANDSET LCD Screen willdisplay  “CALLS”and  “TALKING”, and the BASEUNIT IN USE LED indicator will light up.2. Start your conversation.3. To end your conversation, either press the button or place the HANDSET on the BASE UNIT. Ifyou place the HANDSET on the BASE UNITCHARGE CRADLE, you activate the automaticSTANDBY feature.TALKTALK12Cordless Telephone OperationNO LINETALKING....CALLS
NOTE:1. The Call Timer will start to count once you press the  button.2. The LCD Screen emits light for 5 seconds every time you press any buttons on theHANDSET.3. When “CALLS”appears on the LCD Screen, it means that the HANDSET is OFF-HOOK(connected to the telephone line).Receiving Calls From the BASE UNIT1. When the phone rings, press the  buttonand begin speaking.2. The LED Message Display will show “ ” toindicate.3. To control the speaker volume, adjust the  andas desired. The LED Message Display willdisplay the level you adjusted. “0”- Speaker off“1~8” - Volume from low to high4. To hang up, press the  button again.SPEAKERSPEAKERTALK13Cordless Telephone OperationCALLS00MIN         1SEC 14MinutesSecondsChannelIMPORTANTIn order to utilize the Caller ID feature, you mustsubscribe to Caller ID service from your localtelephone company.
Placing Calls1. Press the  button, the Call Timer starts to count.The  HANDSET LCD Screen will display “CALLS”, and“TALKING”, and the BASE UNIT IN USE LED indicatorwill light up.2. Listen for a dial tone.3. Dial the phone number.4. When you have finished with your call, press the button again or place the HANDSET on the BASE UNIT.OR1. Dial the phone number.2. Press and hold down the DIAL 7  or the DIAL 10or the DIAL 1+  button. The BASE UNIT INUSE LED indicator will light up.3. When you have finished with your call, press the button again or place the HANDSET on the BASE UNIT.Transferring CallsYou can directly transfer any active call to anotherHANDSET.1. HANDSET must be on an active call.2. Press the  button.3. When the other HANDSET  answers, the call willautomatically be connected to the other HANDSET.4. An unanswered call will ring back to the originatingHANDSET if not answered within 20 seconds.EDITTRANSFERTALK1+ #TALKTALK14Cordless Telephone OperationTALKING....CALLS
Headset FeatureYour telephone can utilize a headset (not included) to beconnected to your HANDSET for you to enjoy hands-freecommunication. Pull out the HEADSET JACK COVER, theninsert the small plug at the end of the headset into theHEADSET JACK at the right side of the HANDSET. Follow theprocedures discussed in “Receiving Calls”and “Placing Calls”to receive and place a call.NOTE:When you plug the headset plug into the HEADSETJACK it automatically mutes the MICROPHONE andSPEAKER of the HANDSET. Unplug the headset toreturn the HANDSET to normal use.Headsets are available at most retail outlets that sell telephoneequipment. The HEADSET JACK is compatible with 2.5mmheadset plugs only.Redial Feature1. If you get a busy tone, press the button orplace the HANDSET on the BASE UNIT to hang up.2. Later, press the  button again.3. Listen for a dial tone.4. Press the  button. This will automatically redialthe last telephone number you called in TALK mode.5. When you have finished with your call, press thebutton again (the BASE UNIT IN USE LEDindicator will turn off) or place the HANDSET on theBASE UNIT.NOTE:If you are too far away from the BASE UNIT, the HANDSET emits “beep”sounds to warn youthat the background noise level is too high for proper communication between the HANDSETand the BASE UNIT. When you hear this sound, you should move closer to the BASE UNIT toreduce the noise level. Otherwise, the call will automatically cut off.TALKRE/PASAVETALKTALK15Caller ID System Operation
Caller ID SystemThis telephone automatically displays an incoming caller’s name and telephone number togetherwith the date and time of the call. It records up to 80 calls and stores the data in Memory.IMPORTANT: You must subscribe to the Caller ID service from your local telephone company toutilize this feature.Viewing Caller Information During Incoming Calls1. When there is an incoming call, the name and the telephone number of the caller willautomatically appear after the first ring. Press the SHIFT RIGHT  button to view aname of more than 11 characters.ORCaller’s telephone number will appear if the caller’s name is not available.OR“OUT OF AREA”will appear if the origin of theincoming call does not support the Caller ID system.OR“UNKNOWN”will appear if the origin of the incomingcall has no name and does not support the Caller IDsystem.OR“PRIVATE”and/or “P---------”will appear if the caller’sname and/or telephone number is blocked.OR“DATA ERROR”will appear if wrong data was received from the telephone line.ORThe name stored in the DIRECTORY will appear for an incoming call with matchingtelephone numbers.MSG WAITING (Message Waiting)The MSG WAITING GREEN LED indicator will blink when there is a message for you fromyour telephone company if you have subscribed to Voice Mail message service and if youhave requested Visual Message Indication from your local telephone company. “MSGWAITING”will appear on the LCD Screen in STANDBY mode. (To remove the MESSAGEWAITING indicator, see page 28 for detail.)16Caller ID System OperationMICHAEL BROW604-555-121210:00AM        8/24 NEW #1TimeBROWING604-555-121210:00AM       8/24 NEW #1Month/Date Number of calls recordedOUT OF AREAO----------10:00AM        8/24 NEW #13 TOTAL 42e.g.UNKNOWNU----------10:00AM        8/24 NEW #13 TOTAL 42e.g.
Call WaitingWhen you subscribe to a Call Waiting service from your local telephone company, thistelephone will display the name and number of the second caller while you are having aconversation with your first caller.1. When you are having a conversation, this telephonewill automatically display the name and number ofthe second caller. The name will  blink.2. Press the button to answer the secondcaller. The first caller’s name and number will bedisplayed. The name will  blink.3. When you have finished, press the  buttonto continue your conversation with the first caller. If you do not want to interrupt your phone conversationwith the first caller, you can advise the second caller toleave a Voice Mail message instead. Voice Mail FunctionWhen there is a Voice Mail message for you, this telephone detects a Stutter Dial Tone (ifapplicable) and the “MSG”icon on the LCD Screen and the MESSAGE WAITING LEDindicator will blink.1. To access your Voice Mail message, press the  button.2. After you hear a dial tone, press the  button. This will automatically dial theVoice Mail Post Code in your area and connect you to the Voice Mail service provider.NOTE:You must store the Voice Mail Post Code number by using the VOICE MAIL functionon page 28. You can also call your Voice Mail service provider by dialing the VoiceMail Access Code number after pressing the  button.C-F (Forwarded Call)Appears on the upper left hand side of the LCD Screen, when the incoming call has beenassigned to your telephone number.L-D-C (Long Distance Call)Appears on the upper left hand side of the LCD Screen, when the incoming call is a longdistance call and the service is provided by your local telephone company.Caller ListRecords call information for up to 80 incoming calls such as caller’s name and telephone numbertogether with the date and time of the call. After recording a new incoming call, the NEW CALLindicator will blink and the LCD Screen will display:TALKFUNCVOICE MAILTALKFLASHFLASH17Caller ID System OperationJOHN BROWN235-607-551210:00AM        8/24 NEW 13 e.g.ALEX BROWTH504-555-121210:00AM        8/24 NEW 14 e.g.1st Caller2nd CallerRING: HI10:00AM        8/24 NEW 13 TOTAL 42 No. of new callsMaximum calls= 80
Viewing the Caller List1. Press the SCROLL DOWN  button to view the latest Caller ID record, or press theSCROLL UP  button to view the first Caller ID record, press the SHIFT RIGHT button if the name has more than 11 characters.2. Press the  button to return to STANDBY mode. (If no active buttons are pressed for20 seconds or you have viewed the last Caller ID record in the Caller’s List, the LCDScreen will automatically return to STANDBY mode.)Placing a Call from the Caller List1. With the HANDSET in STANDBY mode, press the SCROLL DOWN  button to selectfrom the latest Caller ID record, or press the SCROLL UP  button to select from thefirst Caller ID record.2. Press and hold down the DIAL 7 button for a local call, or the DIAL 10 button for a local call with area code, or the DIAL 1+  button for a long distance call.3. To end your conversation, either press the  button or place the HANDSET on theBASE UNIT.To place a call from the Caller List while in TALK mode, press the  button, thenfollow steps 1 through 3.NOTE:You can edit the number before dialing, but you can not SAVE any changes in theCaller List.Editing the Caller List before Dialing1. Press the SCROLL UP  or DOWN  button to find the Caller ID record.2. Press the  button.3. Move the cursor by pressing the SHIFT LEFT  or RIGHT  button to the digit youwant to change. To erase digits, press the button. To add digits, usetheTELEPHONE KEYPAD  ~  buttons.4. Press and hold down the DIAL 7  button for a local call, the DIAL 10  buttonfor a local call with area code, or the DIAL 1 +  button for a long distance call.5. To end your conversation, either press the  button or place the HANDSET on theBASE UNIT. To save the edited record from the Caller List, follow steps 1 through 3 then press and holddown the  button.RE/PASAVETALK1+ #WXY 9DELETESCANEDITTRANSFERTALKTALK1+ #DIR18Caller ID System OperationMICHAEL BROW604-555-121210:00AM       8/24 NEW#1BROWING604-555-121210:00AM        8/24 NEW#1
Saving the Name and Number in the Caller List into the DIRECTORY1. Press the SCROLL UP  or DOWN  button to find the Caller ID record.2. Press and hold down the  button. The LCD Screen will show “SAVED”.NOTE:It is not advisable to save a telephone number without the corresponding name.This will lead to improper display on PRIVATE and OUT OF AREA calls.Deleting All Records in the Caller List1. Press and hold down the  button for at least3 seconds while in STANDBY mode.2. The LCD Screen will automatically return toSTANDBY mode.Selective Deleting in the Caller List1. Press the SCROLL UP  or DOWN  button to find the Caller ID record while inSTANDBY mode.2. Press and hold down the  button for at least3 seconds, then the LCD Screen will display thenext Caller ID record in the CALLER LIST.3. Press the button to return to STANDBYmode.Name and Telephone Number DIRECTORYThis DIRECTORY lets you scroll through the list to find the record you need for one touch dialing.You can store up to 40 names and telephone numbers in the memory.Viewing the DIRECTORY1. Press the  button.2. Press the SCROLL UP UP  or DOWN button to find the record you wish to view. Press theSHIFT RIGHT button to view a name ortelephone number of more than 11 characters.NOTE:To exit the DIRECTORY List at anytime, pressthe  button.DIRDIRDIRDELETESCANDELETESCANRE/PASAVE19Caller ID System OperationALL DELETE10:00AM       8/24 NEW 0 TOTAL 0 DELETE10:00AM       8/24  #  2  DIRECTORY10:00AM        8/24  TOTAL 12  DIRNo. of records storedMICHAEL BROW604-555-1212#  8    TOTAL12BROWING604-555-1212#  8    TOTAL12DIR DIR
Speed Viewing the DIRECTORY1. Press the  button.2. Enter the first letter of a name. (See Page 29 for detail of entering a letter.)3. Press the SCROLL UP  button to view all names with the same first letter. Saving in the DIRECTORY1. Press the  button.2. Press the  button.3. Use the TELEPHONE KEYPAD  ~  buttons to enter the name, (see page29 for detail) you can store up to 15 characters. To move the cursor to the right, create aspace, or to enter a new letter, press the SHIFT RIGHT  button.4. Press the SCROLL DOWN  button once.5. Enter the telephone number using the TELEPHONE KEYPAD  ~  buttons.You can store up to 16 digits.6. Press and hold down the  button.7. Press the  button to go back to STANDBY mode.(If no active buttons are pressed for 20 seconds, the LCD Screen will automatically returnto STANDBY mode.)NOTES:1. It will not save a duplicate telephone number or a name without thecorresponding telephone number in the DIRECTORY.2. To delete a character or number inside the cursor, press the  button.PREFERRED CALLSYou can assign stored numbers a PREFERRED CALL status which will generate a specialringer sound at the start of the second ring to any welcome caller in the DIRECTORY. When you are saving the name and number into the DIRECTORY, add a “#”symbol at thebeginning of the name by pressing the  button.BLOCKED CALLSYou can assign stored numbers a BLOCKED CALL status which will disable the ringersound after the second ring to any caller in the DIRECTORY. When you are saving the name and number into the DIRECTORY, add an “*”symbol at thebeginning of the name by pressing the 7  button.1+ #DELETESCANDIRRE/PASAVEWXY 9WXY 9EDITTRANSFERDIRDIR20Caller ID System Operation
Editing a Name and Number in the DIRECTORY1. Press the  button. The LCD Screen will display “DIRECTORY”.2. Press the SCROLL UP  or DOWN  button to find the record you want to edit.3. Press the button to edit the name, and the cursor will blink over the firstcharacter.4. Press the SCROLL LEFT  or RIGHT  button to move the cursor to the letter ornumber you want to change. To erase, press the button. To add, use theTELEPHONE KEYPAD  ~  buttons. (See page 29 for details.)5. Press the SCROLL UP  or DOWN  button to edit the number.6. Press the SCROLL LEFT  or RIGHT  button to move the cursor to the digit youwant to change. To erase, press the button. To add, use the TELEPHONEKEYPAD  ~  buttons. (See page 29 for details.)7. Press and hold down the  button to confirm.IMPORTANT:It is not advisable to save a telephone number without the correspondingname in the DIRECTORY. This will lead to improper displays on PRIVATEand OUT OF AREA calls.NOTE:When no active buttons are pressed for 20 seconds, the LCD Screen willautomatically return to STANDBY mode.RE/PASAVEWXY 9DELETESCANWXY 9DELETESCANEDITTRANSFERDIR21Caller ID System OperationMICHAEL BROW604-555-1212#  8    TOTAL12DIRMICHAEL BROW604 555 1212#  8    TOTAL12DIRcursor is blinkingMICHAEL BROW604 555 1212#  8    TOTAL12DIR6  cursor is blinking
Editing the Number in the DIRECTORY before Dialing1. Press the  button. The LCD Screen will display “DIRECTORY”.2. Press the SCROLL UP  or DOWN  button to find the caller.3. Press the  button to edit the name.4. Press the SCROLL DOWN  button.e.g.5. Press the SCROLL LEFT  or RIGHT  button to move the cursor to the numberyou want to change.To erase, press the  button.To add, use the TELEPHONE KEYPAD  ~  buttons.6. Press and hold down the DIAL 7  button for a local call, or press and hold down theDIAL 10  button for a local call with area code, or press and hold down the DIAL1+  button for a long distance call.7. To end your conversation, either press the  button or place the HANDSET on theBASE UNIT.NOTE:If you want to save the edited number in the DIRECTORY, follow steps 1 through 5and then press and hold down the  button.RE/PASAVETALK1+ #WXY 9DELETESCANEDITTRANSFERDIR22Caller ID System OperationMICHAEL BROW604 555 1212#  1    TOTAL12DIR6  cursor is blinkingIMPORTANTPlacing your BASE UNIT near appliances such astelevisions, refrigerators, radios, or microwave ovensmay cause interference.
Placing Calls from the DIRECTORY1. Press the  button. The LCD Screen will display “DIRECTORY”.2. Press the SCROLL UP  or DOWN  button to find the record you want to call.3. Press and hold down the DIAL 7  button for a local call, or press and hold down theDIAL 10  button for a local call with area code, or press and hold down the DIAL1+  button for a long distance call.4. To end the call, either press the  button or place the HANDSET on the BASEUNIT.Deleting All Records in the DIRECTORY1. Press the  button. The LCD Screen will display “DIRECTORY”.2. Press and hold down the button for at least 3 seconds while in DIRECTORYmode.3. Press the  button to return to STANDBY mode.Selective Deleting in the DIRECTORY1. Press the  button. The LCD Screen will display “DIRECTORY”.2. Press the SCROLL UP  or DOWN  button to find the record you want to delete.3. Press and hold down the  button for at least 3 seconds, then the LCD Screen willdisplay the next record in the DIRECTORY.4. Press the  button to return to STANDBY mode.DIRDELETESCANDIRDIRDELETESCANDIRTALK1+ #DIR23Caller ID System OperationALL DELETE10:00AM        8/24  TOTAL 0 DELETE#5  TOTAL 12
Function OperationYou can change the settings on the HANDSET through the functions menu.This unit contains the following special functions:A. LANGUAGE  F. PBX NUMBERB. SILENT ON/OFF  G. FLASH TIMEC. TIME SET  H. PAUSE TIMED. RINGER VOLUME  I. VOICE MAILE. LCD CONTRAST  J. MSG WAITINGTo access, press the button at STANDBY mode, then press the TELEPHONEKEYPAD  ~  button or the SCROLL UP  or DOWN  button.WXY 9FUNCVOICE MAIL24Caller ID System OperationENGLISH#1    TOTAL 10KEYPAD  Button1SILENT OFF#2    TOTAL 10KEYPAD  ButtonABC 2TIME SET10:00AM             8/24  #3      TOTAL 10KEYPAD  ButtonDEF 3RING: HI#4      TOTAL 10KEYPAD  ButtonGHI 4CONTRAST 5#5      TOTAL 10KEYPAD  ButtonJKL 5PBX NO. OFF        #6      TOTAL10KEYPAD  ButtonMNO 6FLASH TIME 600#7      TOTAL 10KEYPAD  ButtonPRS 7PAUSE TIME 4#8      TOTAL 10KEYPAD  ButtonTUV 8VOICE MAIL#9      TOTAL10KEYPAD  ButtonWXY 9MSG WAITINGOFF#10     TOTAL 10KEYPAD  Button
A. LanguageThis telephone offers English, Spanish, and French languages for your convenience.1. Press the  button.2. Press the TELEPHONE KEYPAD  button.3. Press the  button.4. Press the SCROLL UP  or DOWN  button to select the language you desire.You can also set the language by pressing the following TELEPHONE KEYPAD buttons;for English, for Spanish, or for French. English is the presetlanguage.5. Press and hold down the  button.6. Press the  button to return to STANDBY mode.B. FIRST RING/Silent On or OffThis telephone will generate the first ring sound even in the BLOCKED CALL mode toindicate that you have an incoming call. To keep the ringer silent in BLOCKED CALL mode,you can turn off the first ring sound.1. Press the  button.2. Press the TELEPHONE KEYPAD  button.3. Press the  button.4. Press the SCROLL UP or DOWN button to select the SILENT ON/OFFsetting. You can also press the TELEPHONE KEYPAD buttons;  for ON or for OFF. SILENT OFF is the preset mode.5. Press and hold down the  button.6. Press the  button to return to STANDBY mode.C. Time SetSet the date and time.1. Press the  button.2. Press the TELEPHONE KEYPAD  button.3. Press the  button.4. Use the TELEPHONE KEYPAD button to enter the month, date, hour, and minute. Thecursor moves automatically after entering each item. Press the TELEPHONE KEYPADfor AM setting, or press the TELEPHONE KEYPAD  for PM setting.ABC 21EDITTRANSFERDEF 3FUNCVOICE MAILFUNCVOICE MAILRE/PASAVEABC 21EDITTRANSFERABC 2FUNCVOICE MAILFUNCVOICE MAILRE/PASAVEDEF 3ABC 21EDITTRANSFER1FUNCVOICE MAIL25Caller ID System Operation
5. Press and hold down the  button.6. Press the  button to return to STANDBY mode.NOTE:The date and time will automatically set, if you have subscribed to the Caller IDservice from your local telephone company.D. Ringer VolumeThis function enables you to adjust the ringer volume to HI, LOW, or OFF as desired.1. Press the  button.2. Press the TELEPHONE KEYPAD  button.3. Press the  button.4. Press the SCROLL UP or DOWN button to adjust the ringer volume asneeded. You can also adjust the ringer volume by pressing the following TELEPHONEKEYPAD buttons;  for HI,  for LOW, or  for OFF. HI is the preset ringervolume.5. Press and hold down the  button.6. Press the  button to go back to STANDBY mode.E. LCD ContrastThis unit enables you to select 8 brightness levels for the Large LCD Screen.1. Press the  button.2. Press the TELEPHONE KEYPAD  button.3. Press the  button.4. Press the SCROLL UP  or DOWN  button to adjust the brightness of the LCDScreen. Level 1 is the preset brightness.5. Press and hold down the  button.6. Press the  button to go back to STANDBY mode.F. PBX NumberThis unit enables you to preset the PBX number (such as an 8 or 9) while you are using aswitchboard system.1. Press the  button.2. Press the TELEPHONE KEYPAD  button.3. Press the  button.EDITTRANSFERMNO 6FUNCVOICE MAILFUNCVOICE MAILRE/PASAVEEDITTRANSFERJKL 5FUNCVOICE MAILFUNCVOICE MAILRE/PASAVEDEF 3ABC 21EDITTRANSFERGHI 4FUNCVOICE MAILFUNCVOICE MAILRE/PASAVE26Caller ID System Operation
4. Press the SCROLL UP  or DOWN  button. (OFF is the preset PBX number.)PBX MODE OFF - set for direct line access.5. Press and hold down the  button.6. Press the  button to go back to STANDBY mode.NOTE:When placing a call by using the DIAL 7  , or the DIAL 10  , or theDIAL 1+  button, this telephone will automatically add the PBX number and apause time before the dialed telephone numbers.G. Flash TimeThis unit enables you to select the standard FLASH TIME applicable to your calling area. Ifyou are not sure of the FLASH TIME you are using, call your local telephone company.1. Press the  button.2. Press the TELEPHONE KEYPAD  button.3. Press the  button.4. Press the SCROLL UP  or DOWN  button to select the FLASH TIME. You canalso set the FLASH TIME by entering the FLASH TIME number using the TELEPHONEKEYPAD  ~  buttons. The preset FLASH TIME is 600 milliseconds.5. Press and hold down the  button.6. Press the  button to go back to STANDBY mode.H. Pause TimeThis unit enables you to adjust the PAUSE TIME when placing a call using a switchboardsystem or dialing long distance calls.1. Press the  button.2. Press the TELEPHONE KEYPAD  button.3. Press the  button.4. Press the SCROLL UP or DOWN button to adjust the PAUSE TIME. Thepreset PAUSE TIME is 4 seconds.5. Press and hold down the  button.6. Press the  button to return to STANDBY mode.FUNCVOICE MAILRE/PASAVEEDITTRANSFERTUV 8FUNCVOICE MAILFUNCVOICE MAILRE/PASAVEWXY 9EDITTRANSFERPRS 7FUNCVOICE MAIL1+ #FUNCVOICE MAILRE/PASAVE27Caller ID System Operation
I. Voice MailThis telephone enables you to store the Voice Mail Access Code number in your area. Thiswill automatically connect you to the Voice Mail service provider with one-touch dialing.1. Press the  button.2. Press the TELEPHONE KEYPAD   button.3. Press the  button.4. Enter the Voice Mail Post Code number by using the TELEPHONE KEYPAD  ~buttons.5. Press and hold down the  button.6. Press the  button to go back to STANDBY mode.J. MSG Waiting (Message Waiting)To turn off the Message Waiting LCD Screen indicator.1. Press the  button.2. Press the TELEPHONE KEYPAD  button.3. Press the  button.4. Press the SCROLL UP  or DOWN  button.5. Press and hold down the  button.6. Press the  button to go back to STANDBY mode.IMPORTANT:The Message Waiting LCD indicator will automatically turn ON, if you havesubscribed to Voice Mail message service and if you have Visual MessageIndication from your local telephone company.FUNCVOICE MAILRE/PASAVEEDITTRANSFERFUNCVOICE MAILFUNCVOICE MAILRE/PASAVEWXY 9EDITTRANSFERWXY 9FUNCVOICE MAIL28Caller ID System OperationIMPORTANTIn order to utilize the Caller ID feature, you mustsubscribe to Caller ID service from your localtelephone company.
Telephone Keypad CharactersThe TELEPHONE KEYPAD ~  buttons are used to enter characters whenentering names. Press the appropriate TELEPHONE KEYPAD button to get the followingcharacters.EXAMPLE:If you want to enter the characters “ACE”on the HANDSET LCD Screen.1. Press the  button. The LCD Screen will display “DIRECTORY”.2. Press the  button.3. Press the TELEPHONE KEYPAD  button,  “A”will be displayed. Press the SHIFTRIGHT  button to move the cursor to the right to enter the next character (See NOTESbelow.).4. Press the TELEPHONE KEYPAD  button three times to display “C”.5. Press the TELEPHONE KEYPAD  button two times to display “E”.NOTES:1. To enter the next character, press the appropriate button. If, however, the next character ison the same button as the previous character, you will first need to press the SHIFT RIGHTbutton. Pressing the SHIFT RIGHT  button a second time will produce a space.2. If you want to change any character, you can go back to the incorrect character by pressingthe SHIFT LEFT button. To delete the character inside the cursor “ ”, press thebutton.3. You can store a maximum of 15 characters on the letter icon.4. You can store a maximum of 16 digits on the number icon.DELETESCANDEF 3ABC 2ABC 2EDITTRANSFERDIRWXY 929Answering System OperationKEYPADBUTTONS123456789*0#CHARACTERSSPACE & ?( ) * . 1A B C 2D E F 3G H I 4J K L 5M N O 6P Q R S 7T U V 8W X Y Z 9*0#
Resetting the Answering SystemAfter connecting your phone, press and hold down the  button for at least 3 seconds.Release the button and the unit will “beep”. Your unit will now reset itself. Then your unit willannounce,  “Please enter new time and record your announcement.”You can now set theday/time and record your new announcement. See the details in the following paragraphs.NOTE:If the Answering System stops functioning or is not functioning normally, unplug andthen plug the AC ADAPTER into its power source. Then follow the procedure in thepreceding paragraph to reset the Answering System.Setting the Day/Time StampPress and hold down the  button until you hear the announcement “Time is off, pleaseenter new time.”Then enter the current day and time.1. Day SettingPress and hold down the button. Release the button when the desired day isannounced.2. Hour SettingPress and hold down the button. Release the button when the desired hour isannounced.3. Minute SettingPress and hold down the button. Release the button when the desired minute isannounced.Press the  button to confirm the selected day and time. The system will announce the dayand time.You must set the Day and Time in order to have a correct Day/Time stamp at the end of eachincoming message. Anytime you have a power failure or power interruption, you must reset theDay and Time.SETMINPAGESETSTOP30Answering System Operation
Recording Your Outgoing MessagesYour Answering System provides one PRIMARY MAILBOX and four individual MAILBOXES (1,2, 3, 4) which can receive their own Incoming Messages (ICM). Before using your AnsweringSystem, it is suggested that you record an Outgoing Message (OGM). This is the announcementcallers will hear when the system answers a call.A pre-recorded system announcement “Please record your message after the beep”is availableif you choose not to record your own OGM.A. Recording your OGM in the PRIMARY MAILBOX1. Press and hold down the  button to record your message.2. Begin speaking immediately after you hear, “Please record your announcement after thebeep”. Continue to depress the button. One second after completing your OGM,release the  button. Your recorded message will be played after releasing the button.NOTE: Your OGM must be at least 3 seconds and no more than 30 seconds in length.If you wish to change your OGM, repeat steps 1 through 2.After recording an OGM, you can choose to use the pre-recorded announcement for yourAnswering System.1. Press the  button, while the OGM is playing, press the  button.2. After “You have no announcement”is played, the system generated “Please record yourmessage after the beep”will replace the locally recorded Answering System’s OGM.NOTE:To obtain a better sound quality for locally recorded (OGMs and Memos) messages,speak directly into the MICROPHONE from a distance of 9 to 12 inches.It is recommended that you record an OGM on your PRIMARY MAILBOX instructing a caller toleave an ICM in one of the four mailboxes. If the caller is using a Touchtone telephone, this willenable the caller to record an ICM directly into one of the four mailboxes by dialing “11”forMAILBOX 1, “22”for MAILBOX 2, “33”for MAILBOX 3, or “44”for MAILBOX 4.Example of a Primary OGM: “Hello, please leave a message after the tone, or if you are usinga Touchtone telephone, please Dial 11 for Beth, Dial 22 for Jenny, Dial 33 for Jonathan, or Dial44 for Esson.”ERASEOGMOGMOGMOGMOGM31Answering System Operation
NOTE:To check your OGM, press the button. If you did not record an OGM, yourAnswering System will announce, “You have no announcement.”B. Recording your OGM to Individual MAILBOX 1, 2, 3 or 41. Press a mailbox button, the corresponding MAILBOX LED indicator will blink.2. Press and hold down the  button to record your message.3. Begin speaking immediately after you hear, “Please record your announcement after thebeep”. Continue to press the  button.One second after completing your OGM, release the  button. Your recorded messagewill be played after releasing the  button.NOTE:Your OGM must be at least 3 seconds and no more than 30 seconds in length. If youwish to change your OGM, repeat steps 1 through 3.NOTE:To check your OGM in a mailbox, press a mailbox button and then press the button. If you do not have an OGM in a mailbox, it will announce “You have noannouncement.”Once a mailbox is activated, its corresponding MAILBOX LEDindicator blinks slowly to show that the mailbox is active. If you do not press a buttonto activate another function within 12 seconds, the Answering System will return tothe PRIMARY MAILBOX. You may return to the PRIMARY MAILBOX at anytime bypressing the  button.Adjusting the Speaker VolumeWhile your Answering System play back your message, you can adjust the speaker volume bypressing the and  button. The LED Message Display will display the level youadjusted.“0”- Speaker off“1~8”- Volume from low to highTurning the Answering System ON/OFF1. Press the button to turn ON the Answering System. You will hear the followingmessage, “Answering machine is ON.”2. Press the  button again to turn OFF the Answering System. You will now hear thefollowing message, “Answering machine is OFF.”NOTE:Once turned OFF, the Answer function will answer only on the tenth ring, allowingyou to turn the Answering System ON from a remote location.ANSWERON/OFFANSWERON/OFFSTOPOGMOGMOGMOGMOGMOGM32Answering System Operation
Setting to Answer CallsThe ANSWER ON/OFF LED indicator must be ON for the Answering System to answer calls.Depending on the setting of the ANNC/ICM switch, the Answering System will either hang upafter your announcement (ANNC) or begin to record your caller’s messages (ICM). After thecaller leaves an ICM, the time and day will be stamped at the end of each recorded ICM. TheICM is stored in the MEMORY and the LED Message Display shows the total number of ICMscurrently stored.NOTE:ICMs are limited to a maximum of 2 minutes. If the ICM is more than 2 minutes, thesystem “beeps”twice and hangs up; or if the Answering System’s memory runs out, theAnswering System announces, “Memory full,”and hangs up.Setting to Announce OnlyDuring ANNC (Announce) mode, your system answers incoming calls with your recordedannouncement but will not record any ICMs.1. Set the ANNC/ICM select switch to ANNC.2. Press and hold down the  button to record your announcement.3. Begin speaking after you hear, “Please record your announcement after the beep.”Do notrelease the  button until you have completed your announcement OGM.NOTE:Your OGM must be at least 3 seconds and no more than 30 seconds in length.4. Release the  button one second after your announcement is completed, and the LEDMessage Display will show “”. NOTE:If you have not recorded an announcement for ANNC mode, even if the switch is setto ANNC mode, the Answering System will automatically operate in ICM mode andwill record all ICMs.Screening Incoming CallsThe Answering System allows you to listen to a caller leaving an ICM. Once the AnsweringSystem starts answering a call, press the  button (or pick up any extension telephone onthe same line), the Answering System will stop recording and you may converse with your caller.Message AlertWhen the message alert switch is “ON,”the unit will generate a “beep”sound every 15seconds after a new message has been recorded. If you do not want to hear the “beep,”set theswitch to the OFF position.Setting Ring SelectTo choose the number of times the phone rings before the Answering System responds, set theRing Select switch to 3R, 5R, or TS (TOLL SAVER).Set to 3R - System answers call after the third ring.Set to 5R - System answers call after the fifth ring.Set to TS - Use “TOLL SAVER”(TS) when you will be checking your system for messagefrom a remote location using long distance services or from a pay phone. TheAnswering System responds on the third ring only if you have new messagewaiting. If there are no new messages, the phone will answer after the fifth ring.You can hang up on the fourth ring to avoid paying for the call.TALKOGMOGMOGM33Answering System Operation
Recording a MemoA. To record a Memo in the PRIMARY MAILBOX1. Press and hold down the  button to record your Memo.2. Begin speaking immediately after you hear, “Please record your message after the beep.”Continue to depress the  button. One second after completing your Memo, releasethe  button. Day and time are automatically stamped at the end of the message.NOTE:The Answering System advances the message count automatically after the actualmessage is recorded.B. To record a Memo in an individual MAILBOX (1, 2, 3, 4)1. Press a mailbox button, the corresponding MAILBOX LED indicator will blink.2. Press and hold down the  button to record your Memo.3. Begin speaking immediately after you hear, “Please record your message after the beep”.Continue to depress the  button. One second after completing your Memo, releasethe  button. Day and time are automatically stamped at the end of the message.NOTE:The Answering System advances the message count automatically after the actualmessage is recorded.NOTE:To obtain a better sound quality for locally recorded (OGMs and Memos) messages,speak directly into the MICROPHONE from a distance of 9 to 12 inches.Playing of Messages/MemosA. To play messages/memos in the PRIMARY MAILBOX1. Press the  button, the system will play all NEW messages/memos.2. After playing all NEW messages/memos, press the button again, the system willplay all of its messages.PLAYPLAYMEMOMEMOMEMOMEMOMEMOMEMO34Answering System Operation
B. To play messages/memos in an individual MAILBOX (1, 2, 3, 4)1. Press a mailbox button, the corresponding MAILBOX LED indicator starts to blink.2. Press the  button. The system will play all NEW messages/memos.3. After playing all NEW messages/memos, press the  button again, the system willplay all of its messages/memos.NOTE:  When the MAILBOX LED indicators are lit, messages are present.C. To interrupt a message1. Press the  button once to pause a message while it is being played, “ ” will bedisplayed.2. Press the  button to continue playing the current message.3. Press the  button twice to end the playing of a message.D. To repeat a message/memo1. Press the  button while playing a message. The system repeats the current messagein its entirety.E. To skip message/memo1. Press the button once. The Answering System stops playing, moves to the nextmessage/memo and resumes playback. The system advances one message/memo eachtime you press the  button.Saving MessagesThe Answering System saves your messages automatically. After playing all of your messages,the Answering System announces, “End of messages”and the total number of messagesstored in the memory will be indicated on the LED Message Display.SKIPSKIPRPTSTOPPLAYSTOPPLAYPLAY35Answering System Operation
Erasing MessagesA. To erase all of the messages in the PRIMARY MAILBOX1. Press and hold down the button until you hear the announcement, “Messageserased, you have no messages.”If you have a new message in the PRIMARY MAILBOX,you will hear, “You have # new messages.”B. To erase all of the messages in an individual MAILBOX (1, 2, 3, 4)1. If you want to erase all of the messages in a mailbox, activate the desired mailbox.2. Press and hold down the button until you hear the announcement, “Messageserased MAILBOX #, you have no messages.”If you have a new message in the MAILBOX#, you will hear, “You have # new messages.”C. To erase selected messages/memos1. While the unwanted message is playing, press the  button. The Answering Systemannounces erasure of the selected message/memo, and the LED Message Display showsthe symbol of “.”After the erasure is complete, the numeric order of the remainingmessages will be rearranged.When the Memory is FullWhen there is no memory available for additional messages, the Answering System willannounce, “Memory full,”but will not save any new messages. NOTE:When the Answering System memory is full, previously reviewed messages must bedeleted so that the system can record new messages.NOTE:You must enter your Remote Access Code within 10 seconds of activating the RemoteControl function to maintain your connection with the Answering System. (Refer toRemote Control Operation on page 37.)Two -Way RecordingTwo-way recording allows you to record your conversation with another caller.In order to have 2-way recording, you must use the cordless HANDSET of the AnsweringMachine while recording the conversation.1. During conversation, press a mailbox button (MAILBOX 1, 2, 3, or 4) where you want torecord your conversation. The corresponding MAILBOX LED indicator will blink.2. Press and hold down the button. The LED Message Display will show “ ” toindicate the RECORDING mode.3. Release the  button to end your conversation recording.4. Also you can record on the PRIMARY MAILBOX, just follow steps 2 and 3.NOTE:Recording two-way conversations may be subject to local, state or federal laws andregulations. Consent of both parties is required when a conversation will be recorded.MEMOMEMOERASEERASEERASE36Remote Control Operation
Remote Operation through a Tone TelephoneYou can use many Answering System features when you are away from home. To protect yourprivacy, most of the features can be used only after you enter the three-digit Remote AccessCode.Remote Access CodesThe Remote Access Codes are preset at the factory as below. You can use the preset codes orchoose your own.PRIMARY MAILBOX: 999MAILBOX 1: 555MAILBOX 2: 666MAILBOX 3: 777MAILBOX 4: 888NOTE:If there is a power failure of the BASE UNIT, the Remote Access Codes return to thefactory preset codes.Changing of the Remote Access CodesAll of the digits of the Remote Access Codes are a combination of the numbers 5, 6, 7, 8, 9, and0.IMPORTANT:Digits 1, 2, 3, and 4 cannot be used when changing the Remote Access Codesfor any mailbox (including the PRIMARY MAILBOX).1. Press a mailbox button for MAILBOX 1, 2, 3, or 4. For the PRIMARY MAILBOX, followsteps 2 to 6.2. Press and hold down the button until you hear the announcement, “Pleaseenter new password.”3. Press and hold down the  button. Release the button when you hear the desired firstdigit of the code.4. Press and hold down the button. Release the button when you hear the desiredsecond digit of the code.5. Press and hold down the  button. Release the button when you hear the desiredthird digit of the code.6. Press the  button, the 3-digits you have selected will be announced.7. If your new Remote Access Code is the same as that of another mailbox, the AnsweringSystem will not record your password and will announce, “Please try again.”CODEMINPAGECODE37Remote Control Operation
Using the Remote Instruction Code1. Dial your telephone number.2. Listen to or bypass the OGM in the PRIMARY MAILBOX by entering your Remote AccessCode.3. A  “beep”will sound when your Remote Access Code is correctly accepted by yourAnswering System.4. If the announcement does not stop, enter the Remote Access Code again.5. The Answering System will request that you enter the Instruction Code or press “0”for help.A. If you do not know the Instruction Code, press the “0”button immediately. The AnsweringSystem will announce the Instruction Codes. Otherwise, if a command is not received bythe Answering System within 10 seconds, it will signal 3 “beeps”and hang up.The following is the Remote Instruction Code Help Menu:Instruction CodesTo playback announcement press “5.”To record memo press “6.”(Press “0”for PRIMARY MAILBOX, press “1”for MAILBOX1, press “2”for MAILBOX 2, press “3”for MAILBOX 3, and press “4”for MAILBOX 4.)To record announcement press “7.”To turn answering machine OFF or ON press “8.”To change mailbox press “(star).”To playback message press “2.”While message playback:To repeat message press “1.”To skip message press “3.”To stop press “4.”To erase message press “9.”B. Press the corresponding number of the Instruction Code you wish to activate. You do nothave to listen to the entire Instruction Code Help Menu before giving a command. You mayenter the desired Instruction Code Number at any given time.C. After accessing the Answering System, you must enter the next command within 10seconds after the end of each operation. Otherwise, your Answering System will hang upthe phone automatically.38Remote Control Operation
Security SystemYour cordless telephone uses a digital coding security system to prevent unauthorized use ofyour telephone line by another nearby cordless telephone. The system has its own identifyingsignal created by microcomputers in both the BASE UNIT and the HANDSET.Security CodeThis telephone has an internal security code with 65,536 possible combinations. Resetting Security Code and Channel InformationCommunication between the HANDSET and the BASE UNIT may not be possible in any of thefollowing situations:1. After a power failure.2. After relocating the BASE UNIT by disconnecting the AC ADAPTER.3. After replacing the HANDSET BATTERY PACK.To reset, place the HANDSET on the BASE UNIT for 2 to 5 seconds.Multi-Channel AccessYour cordless telephone lets you select a channel from the 40 frequencies available to transmitsignals between the BASE UNIT and  HANDSET. When you notice interference from othercordless telephones, change to another channel by pressing the button on theHANDSET.DELETESCAN39SecurityIMPORTANTWhen you hear interference, press thebutton to change the operatingchannel.DELETESCAN
Battery TypeUse the following type and size of BATTERY PACK:Cordless Telephone BATTERY PACK3.6V, 600mAhXACT CommunicationNi-MH Battery Pack: Model B655This BATTERY PACK is available through:XACT Communication Service Center105 Madison AvenueNew York, NY 100161-866-466-XACT (9228)NOTES: 1. During a power interruption, the BASE UNIT does not operate, and a phoneconversation cannot be made on the HANDSET.2. A  “beep”will be heard when the HANDSET is properly positioned in theBASE UNIT CHARGE CRADLE and charging. Securely positioning theHANDSET,  KEYPAD face up, in the BASE UNIT will also prevent theHANDSET from falling.Recharging the Battery PackThe nickel metal hydride (Ni-MH) BATTERY PACK in the HANDSET can be recharged manytimes using the built-in charger in the BASE UNIT.When the BATT LOW symbol appears on the LCD Screen, a “beep”sound will be heard every10 seconds. This indicates that the BATTERY PACK needs to be recharged.Charge the BATTERY PACK at least once every 90 days of non-use to avoid battery failure.When the BATTERY PACK can no longer be charged, replacement of the BATTERY PACK willbe necessary.The BATTERY PACK used in your telephone may develop a condition known as “MEMORY”.Once subjected to a regular short discharging routine, the BATTERY PACK assumes thedischarging pattern it was subjected to. This is known as a “MEMORY”condition which causesrapid discharging thereby shortening the BATTERY PACK charge span. If you believe yourBATTERY PACK has developed a “MEMORY”condition, do not charge the HANDSET until theBATT LOW symbol appears on the LCD Screen. When the BATT LOW symbol appears on theLCD Screen, charge the HANDSET fully for 12 hours.40Recharging the BATTERY PACKIMPORTANTIn order to get maximum life from the HANDSETBATTERY PACK, be sure to charge the HANDSET for 12hours before initial use.
Changing the Battery PackThe BATTERY PACK provides power for the HANDSET of your cordless telephone.To Replace BATTERY PACK:1. Remove the HANDSET BATTERY COMPARTMENT COVER by sliding it down.2. Pull out the BATTERY PACK PLUG and remove the BATTERY PACK.3. Plug the new BATTERY PACK into the BATTERY CONNECTOR.4. Slide the HANDSET BATTERY COMPARTMENT COVER firmly into place in its closedposition.5. Before use, charge the new BATTERY PACK for 12 hours.ATTENTION:The telephone that you have purchased contains a rechargeable BATTERY PACK. TheBATTERY PACK is recyclable. At the end of its useful life, under various state and local laws, itmay be illegal to dispose of this BATTERY PACK into the municipal waste stream. Check withyour local solid waste officials for details in your area for recycling options or proper disposal.41Changing the BATTERY PACKIMPORTANTIn order to get maximum life from the HANDSETBATTERY PACK, be sure to charge the HANDSET for 12hours before initial use.
Problem Solving SectionFor your assistance, we have listed below a few common problems.Phone does not work, check the following:1. BASE UNIT is plugged into a power source.2. HANDSET is charged.3. TONE/PULSE Select switch is in the right position.4. TELEPHONE LINE CORD is plugged into the TELEPHONE JACK.Range of phone limited, check the following:1. BASE UNIT is centrally located in your residence.2. BASE UNIT is not located near appliances.No dial tone, check the following:1. TELEPHONE LINE CORD plugs are connected to the TELEPHONE JACK andTELEPHONE LINE CONNECTION JACK.2. BASE UNIT is plugged into a power source.3. If you had a power failure or had unplugged the BASE UNIT, replace the HANDSET on theBASE UNIT for 2 to 5 seconds to reset the system.Received signal flutters or fades, check the following:1. BATTERY PACK in the HANDSET is fully charged.2. HANDSET is not too far from the BASE UNIT.Interference on reception, check the following:1. Noise may be picked up from electrical products in the home or electrical storms. Generally,this noise is a minor annoyance and should not be interpreted as a defect in your system.(See Technical Information on page 44.)2. Choose an alternate channel using the  button on the HANDSET.3. Do not use this telephone within 20 ft. of a microwave oven while it is working, as you mayexperience interference. This is a normal occurrence with 2.4 GHz phones and should not beinterpreted as a defect in the product.Long Distance “L-D-C”indicator is not ON when receiving a long distancecall, check the following:1. Your local telephone company can provide the Area Code on an incoming long distance call.Excess static, check the following:1. Check to see that the ANTENNA is not touching another metal object.If after pressing the  button, you receive three “beeps”and no dialtone, check the following:1. BASE UNIT is plugged into a power source.2. If you had a power failure or had unplugged the BASE UNIT, replace the HANDSET on theBASE UNIT for 2 to 5 seconds to reset the system.TALKDELETESCAN42Problem Solving
Answering System does not work, check the following:1. BASE UNIT is plugged into a power source.2. Reset the system by pressing and holding the  button for at least 3 seconds. Releasethe button and the unit will “beep”.Answering System does not answer calls, check the following:1. ANSWER ON/OFF LED indicator is lit.Answers calls only after 10 rings, check the following:1. ANSWER ON/OFF LED indicator is lit.2. Message Memory is not full.Does not respond to remote commands, ensure the following:1. Correct Remote Access Code is entered.2. A TONE telephone is being used.Message is incomplete, ensure the following:1. Message Memory is not full.2. Caller may be hesitating and pausing for more than 7 seconds.Answer calls but does not record messages, check the following:1. ANNC/ICM switch is set to ICM.2. Memory is not full.3. Extension telephone was not picked up.Answering System announces “Time is off”at the end of each message,check the following:1. Have you set the Day/Time?2. Was there a power interruption?No Sounds on the BASE UNIT:1. Adjust the volume by using  and  button and make usre the volume level is not “0”.Reset your cordless telephone:1. You can reset your unit if the unit is not working properly. Unplug and then plug the ACADAPTER into its power source, then press and hold down the  button for at least 3seconds, then release the button and the unit will “beep”. (See detail operations in page 30.)NOTE:If none of telephones in the house are working, disconnect one set at a time to verifythat none of the phones are causing the problem. If you still have a problem after doingthis, and your telephone still does not work, please contact your local phone company.STOPSTOP43Problem Solving
Technical InformationThis cordless telephone uses radio frequencies to allow mobility. There are certain difficulties inusing radio frequencies with a cordless telephone. While these are normal, the following couldaffect the operation of your system.NoiseElectrical pulse noise is present in most homes at one time or another. This noise is most intenseduring electrical storms. Certain kinds of electrical equipment such as light dimmers, fluorescentbulbs, motors, and fans also generate noise pulses. Because radio frequencies are susceptibleto these noise pulses, you may occasionally hear them in your HANDSET. Generally they are aminor annoyance and should not be interpreted as a defect in your system.RangeBecause radio frequency is used, the location of the BASE UNIT can affect the operating range.Try several locations in your home or office and pick the one that gives you the clearest signal tothe HANDSET.InterferenceElectronic circuits activate a relay to connect the cordless telephone to your telephone line.These electronic circuits operate in the radio frequency spectrum. While several protectioncircuits are used to prevent unwanted signals, there may be periods when these unwantedsignals enter the BASE UNIT. You may hear clicks or hear the relay activate while you are notusing the HANDSET. If the interference occurs frequently, it can be minimized or eliminated byrelocating the BASE UNIT. You can check for interference before selecting the final BASE UNITlocation by plugging in the telephone.NOTICE:This cordless telephone uses radio communication between the HANDSET and the BASE UNITand may not ensure privacy of communication. Other devices, including another cordlesstelephone, may interfere with the operation of this cordless telephone or cause noise duringoperation. Units not containing coded access may be accessed by other radio communicationsystems. Cordless telephones must not cause interference to any licensed radio service.44Technical InformationIMPORTANTWhen you hear interference, press thebutton to change the operatingchannel.DELETESCAN
Federal Communications Commission RequirementsThis equipment complies with Part 68 of the FCC rules. A label on the BASE UNIT of theequipment contains, among other information, the ACTA Product Number and the RingerEquivalence Number (REN) for this equipment. You must, upon request, provide this informationto your telephone company.The REN is also useful in determining the number of devices that you may connect to yourtelephone line and still allow all of these devices to ring when your telephone number is called.In most, but not all areas, the sum of the RENs of all devices connected to one line should notexceed five (5.0). To be certain of the number of devices that you may connect to your line,contact your local telephone company.If your equipment should cause harm to the telephone network, the telephone company maytemporarily disconnect your service. If possible, they will notify you in advance that temporarydiscontinuance of service may be required.However, when advance written notice is not possible, the telephone company may temporarilydiscontinue service without notice if such action is necessary under the circumstances. Thetelephone company may make changes in its communication facilities, equipment, operations,or procedures where such action is reasonably required in the operation of its business and isnot inconsistent with the rules and regulations of the Federal Communications Commission.Do not attempt to repair or modify this equipment.Warning: Changes or modifications not expressly approved by the party responsible for itscompliance could void the user’s authority to operate the equipment.Some cordless telephones operate at frequencies that may cause interference to nearby TV’sand VCR’s. To minimize or prevent such interference, the BASE UNIT of the cordless telephoneshould not be placed on or near a TV or VCR. If interference is experienced, moving the cordlesstelephone farther away from the TV or VCR will often reduce or eliminate the interference.This equipment should not be used on coin telephone lines. Connection to party line service issubject to state tariffs. If trouble is experienced, disconnect this equipment from the telephoneline to determine if it is causing the malfunction. If the equipment is determined to bemalfunctioning, its use should be discontinued until the problem has been corrected.45FCC RequirementsIMPORTANTPlacing your BASE UNIT near appliances such astelevisions, refrigerators, radios, or microwave ovensmay cause interference.
Federal Communications Commission Requirements (continued)NOTE: This equipment has been tested and found to comply with the limits for a Class B digitaldevice, pursuant to Part 15 of the FCC Rules. These limits are designed to provide reasonableprotection against harmful interference in a residential installation. This equipment generates,uses, and can radiate radio frequency energy and, if not installed and used in accordance withthe instructions, may cause harmful interference to radio communications. However, there is no guarantee that interference will not occur in a particular installation. If theequipment does cause harmful interference to radio or television reception, which can bedetermined by turning the equipment off and on, the user is encouraged to try to correct theinterference by one or more of the following measures:-Reorient or relocate the receiving ANTENNA.-Increase the distance between the equipment and the receiver.-Connect the equipment into an outlet on a circuit different from that to which the receiver isconnected.-Consult the dealer or an experienced radio/TV technician for help.This device complies with Part 15 of the FCC Rules. Operation is subjected to the following twoconditions:(1) this device may not cause harmful interference, and(2) this device must accept any interference received including interference that may causeundesired operation.46FCC Requirements
Warranty InformationXACT CommunicationOne-Year Limited WarrantyThis limited warranty sets forth all XACT Communication  responsibilities regarding yourtelephone. There are no other expressed or implied warranties from XACT Communication.Warranty Service ProvidedIf you purchased the telephone new from a retail vendor, XACT Communication warrants thetelephone against defects in material and workmanship for a period of one (1) year from theoriginal date of purchase. This warranty is in lieu of all other express warranties. This warrantybegins when you purchase the telephone and continues for one (1) year unless you sell or rentthe telephone, in which case the warranty stops.XACT Communication disclaims any implied warranty, including the warranty ofmerchantability and the warranty of fitness for a particular purpose, as of the date of 90 daysfrom your original purchase of the telephone. XACT Communication assumes no responsibilityfor any special, incidental, or consequential damages. This warranty gives you specific legal rights and you may have other rights which vary from stateto state. Some states do not allow the exclusion or limitations of special, incidental orconsequential damages, or limitations on how long a warranty lasts, so the above exclusion andlimitation may not apply to you.Warranty Service Not ProvidedThis warranty does not cover damage resulting from accident, misuse, abuse, improperinstallation or operation, lack of reasonable care, unauthorized modification, or the affixing ofany attachment not provided by XACT Communication with the telephone, and/or loss of parts.This warranty is voided in the event any unauthorized person opens, alters or repairs thetelephone.All XACT Communication equipment being returned for repair must be suitably packaged.Telephone companies use different types of equipment and offer various types of services tocustomers.  XACT Communication does not warrant that this telephone is compatible with thetype of equipment of any particular telephone company or the services provided by it.47Warranty
What To Do for Warranty ServiceDuring the first thirty (30) days, a defective product is eligible for over-the-counter exchange atthe retailer from whom it was purchased. After thirty (30) days, the defective product should bereturned to the authorized service center. Please allow 2-3 weeks for the return of yourtelephone product. The shipping address of the authorized service center is:XACT Communication Consumer CenterC/O Southern Bonded Warehouse7137 Southlake ParkwayMorrow, GA 30260NOTE: A telephone product received which was not made for XACT Communication or whichis not defective as determined by our test procedures will not be repaired and will be returnedto you C.O.D., freight collect.To Obtain Warranty Service•Provide proof of the date of purchase within the package.•Prepay all shipping costs to the authorized service center.•Include a return shipping address within the package.Please retain your sales receipt, the carton, the packing materials, and the printed material. Theoriginal carton is the best shipping container for the telephone should you have to return it.For your reference:Serial NumberDate of PurchaseName of DealerCustomer Service Telephone Number:U.S.A. & Canada 1-866-466-XACT (9228)OUTSIDE THE U.S.A. & Canada CALL 1-212-481-7950Visit Us on the Web:www.xactcommunication.com48Warranty
49Notes
50Notes
51Notes
52Wall Mounting TemplateThis page serves as a template for attachment of screws to the wallwhen mounting this telephone on the wall.1. Cut out this page.2. Use this template to determine the distance between screwswhen mounting this phone on the wall. The two cross hairsidentify where to attach the screws.
53IMPORTANTIn order to get maximum life from the HANDSETBATTERY PACK, be sure to charge the HANDSET for 12hours before initial use.IMPORTANTPlacing your BASE UNIT near appliances such astelevisions, refrigerators, radios, or microwave ovensmay cause interference.IMPORTANTWhen you hear interference, press thebutton to change the operatingchannel.DELETESCANIMPORTANTThe AC ADAPTER must always be plugged into anelectrical outlet.IMPORTANTIf you live in an area which gets frequentthunderstorms, we strongly recommend plugging yourAC ADAPTER into a surge protector.IMPORTANTIn order to utilize the Caller ID feature, you mustsubscribe to Caller ID service from your localtelephone company.
Make certain you receive the bestperformance from your telephone.Read this manual first.STOPMade in ChinaCM03-23www.xactcommunication.com
Congratulations on your selection of a quality XACT Communication product. With proper care,and by following the set-up and user instructions in this Owner’s Manual, this unit will provideyou with years of trouble-free service.XACT is committed to providing quality products that fit your needs. We would like to have anycomments or suggestions you might have on this product. You may mail your comments to:XACT Communication, LLC105 Madison AvenueNew York, NY 10016When examining your new XACT cordless telephone, you will find an array of special featuresincluding:CORDLESS TELEPHONE FEATURESFiltered SoundTM System - Gets considerably less noise than conventional cordless telephonesbecause of a special circuit which delivers the clearest possible reception.40 Channel Auto Scan - Press the  button on the HANDSET to find and lock on to theclearest channel for any call.Dual HANDSETS with Call Transfer FeatureDesk or Wall Mount - Use this equipment as a desk phone or as a wall phone.TONE or PULSE Dialing - Use this phone for either TONE (push-button) or PULSE (rotary)dialing.Automated Functions - Redial the last number called and automatic STANDBY mode.Security - Ensures greater privacy because a built-in security code with 65,536 combinationsprevents use of your telephone line by another nearby cordless phone.Dependable Battery - Recharge your BATTERY PACK many times with the built-in charger. Thebattery low warning tone tells you when the BATTERY PACK needs recharging. (See page40.)Special Services - Use the  button to access special services such as Call Waitingsupplied by your telephone company or company switchboard.STANDBY Mode - When in STANDBY mode (ON-HOOK), the phone is capable of receiving acall. When the HANDSET is on the BASE UNIT, it is automatically in the STANDBY mode(ON-HOOK). When the HANDSET is taken off the BASE UNIT, it remains in the STANDBYmode until you activate the  button.Battery Power Saver - Once fully charged, in STANDBY mode, the HANDSET canreceive/send calls for a maximum of five days without the need for recharging. Length ofcharge depends on frequency of use.Luminous LCD Screen - The LCD Screen emits light for 5 seconds every time you press anyof the buttons on the HANDSET.HANDSET Ringer Level - Select the ringer volume level (HI, LOW, OFF).HANDSET VOLUME CONTROL Switch - Select the receiver volume level (HI, MID, LOW).HEADSET JACK - Your telephone can utilize a headset for hands-free communication.BELT CLIP - Use the BELT CLIP to hang your HANDSET on your belt.TALKFLASHDELETESCANSpecial Features
CALLER ID SYSTEMMulti-Function Large LCD Screen - Shows the number you are dialing, and with Caller IDservice (available through subscription from your local telephone company), displaysinformation about the caller before you answer the call.Name and Number DIRECTORY - Stores up to 40 names and numbers so that you can callthem with a single key stroke.Caller List - Available with Caller ID service. Stores up to 80 calls to keep track of everyone whocalled. The name, phone number, time, and date of the call are recorded. Allows you to returntheir calls with a single key stroke.Preferred Calls - You can mark the name and number of a welcome caller in the DIRECTORY.When that number calls in, the caller ’s name will appear on the LCD Screen and a specialring sound will be heard.Blocked Calls - You can mark the name and number of an unwelcome caller in theDIRECTORY. When that number calls in, the caller’s name will appear on the LCD Screenand the ringer will be disabled.Repeat Call Indicator - Shows if a new incoming call has called more than once. Out of Area Call Indicator - Advises you that the incoming call is not in a Caller ID service area,or does not support the Caller ID system.Private Call Indicator - Advises you that the caller’s name and/or telephone number of theincoming call is blocked by the system.Call Waiting Service - Displays the name and number of the second caller, if you havesubscribed to call waiting service from your local telephone company (See page 17).Voice Mail - Indicates message waiting signal if you subscribed to Voice Mail message serviceand requested Visual Message Indication from your local telephone company (see page 17).This telephone also detects a Stutter Dial Tone signal every time there is a Voice Mailmessage for your Voice Mail message provider if you have subscribed to Voice Mail messageservice.ANSWERING SYSTEM FEATURESFully Digital Answering System - Provides a full range of answering functions without usingcassette tapes.Digital Memory - Allows recording of memos and messages.Two Digit LED Message Display - Indicates the number of messages, indicates the status ofthe system.Ring-Detection Selectable - Choose the number of times the telephone rings before thesystem answers.Voice Day/Time Stamp - Systems tells the day and time of each received message or recordedmemo.Message Alert - The ability to generate a sound signal when new messages are recorded.Call Screening - The ability to intercept a call when the unit is recording an incoming message(ICM).Mailboxes - Allows four separate individuals to receive their own incoming messages.Auto Disconnection - Will automatically stop answering when HANDSET of any phone on thesame line is lifted.Fast Message Skip Function - Skips to the next message.Remote Control Capable - Can be accessed through an outside line (Tone telephone) via 3-digit access code.BASE UNIT SPEAKERPHONE FEATURESpecial Features
HANDSET Controls1. HANDSET ANTENNA2. LCD Screen: Shows call information, phone status, prompts, and DIRECTORY items.3. SCROLL UP-DOWN, SHIFT LEFT-RIGHT  Button: Press to move around the largeLCD Screen.4. HANDSET VOLUME CONTROL (HI, MID, LOW) Switch: Select the receiver volume level(HI, MID, LOW).HANDSET Controls11. NEW CALL/MESSAGEWAITING INDICATORPg. 162. LCD SCREEN1. HANDSET ANTENNA12. TALK BUTTON Pg. 7, 8, 12~15, 17~18,22~23, 33, 42 3. SCROLL UP-DOWN/SHIFT LEFT-RIGHTBUTTON Pg. 16, 18~294. VOLUME CONTROL(HI, MID, LOW) SWITCH6. DIAL 10 BUTTONPg. 14, 18, 22~23, 277. DIAL 7/TEMPORARYTONE(*) BUTTONPg. 14, 18, 20, 22~23, 275. REDIAL/PAUSE/SAVEBUTTON Pg. 15, 18~22, 25~288. EDIT/TRANSFER BUTTONPg. 14, 18, 20~22, 25~299. DIR BUTTON Pg. 18~23, 2914. FUNCTION/VOICE MAILBUTTON Pg. 17, 24~2810. HEADSET JACK Pg. 1517. FLASH BUTTON Pg. 1718. CHARGE CONTACTS15. TELEPHONE KEYPADPg. 18, 20~22, 24~2916. DIAL 1+/# BUTTONPg. 14, 18, 20, 22~23, 2713. DELETE/SCAN BUTTONPg. 18~19, 21~23, 29, 39,42, 44, 53
5. SAVE/RE(REDIAL)/PA(PAUSE)  Button: (SAVE) Press and hold down to save thechanges on the listed items. (REDIAL) Press to redial the last number you dialed. (PAUSE)Press to insert a pause while dialing. (You will need the  button to dial numberswhich use an alternative Long Distance Access Code.)6. DIAL 10/0  Button: (DIAL 10) Press and hold down to place a local call with AreaCode.7. DIAL 7/TEMPORARY TONE  Button: (DIAL 7) Press and hold down to place a localcall. (*) Press to temporarily change the DIALING mode from PULSE to TONE for RotaryService Users. (Press once before entering numbers to access the answering system orelectronic banking service, etc.)8. EDIT/TRANSFER  Button: (EDIT) Press to edit listed items. (TRANSFER) Pressto transfer a call to the other HANDSET.9. DIR (DIRECTORY) Button: Press to access names and numbers stored in theDIRECTORY. (See pages 18 to 23 for details.)10. HEADSET JACK: For connecting your headset plug to enjoy hands-free communication.(See page 15 for detail.)11. NEW CALL/MSG (MESSAGE) WAITING LED Indicator: Blinks when recording a newincoming call or when receiving a Message Waiting signal, if you have subscribed to aVoice Mail message service from your local telephone company. (See page 16 for details.)12. TALK  Button: Press to answer an incoming call or to place a call. Press to end acall.13. DELETE/SCAN  Button: (DELETE) Press and hold down to delete items orindividual characters. (SCAN) Press to change the operating channel when you hearinterference.14. FUNC (FUNCTION)/VOICE MAIL Button: (FUNCTION) Press to accessspecial functions operation in STANDBY mode. (For special functions see pages 24 ~ 28.) (VOICE MAIL) - Press to automatically dial the Voice Mail Post Code in your area to accessyour Voice Mail message.15. TELEPHONE KEYPAD  ~  Buttons: Allows you to make a call dependingon pressed button. (For TELEPHONE KEYPAD characters, see page 29.)16. DIAL 1+/#  Button: (DIAL 1+) Press and hold down to place a long distance call.(Automatically adds the number 1 at the beginning of the displayed telephone number.)17. FLASH  Button: Press to answer a call if you have Call Waiting.18. CHARGE CONTACTS: For charging the BATTERY PACK inside the HANDSET. Werecommend cleaning the CHARGE CONTACTS periodically with a damp cloth.FLASH1+ #WXY 9FUNCVOICE MAILDELETESCANTALKDIREDITTRANSFERRE/PASAVERE/PASAVEHANDSET Controls
BASE UNIT Control1. BASE UNIT ANTENNA2. TELEPHONE LINE CONNECTION JACK3. RING SELECT Switch: To select the number of rings before the Answering Systemanswers a call.3R -System answers a call after third ring.5R -System answers a call after the fifth ring.TS (TOLL SAVER) -  System answers after the third ring only if you have newmessage. Otherwise, the system will answer after the fifth ring.4. TONE/PULSE Select Switch5. RINGER ON/OFF Switch: Set switch to OFF position to disengage the ringer on the BASEUNIT.6. POWER-IN CONNECTION JACK7. ANNOUNCEMENT ONLY/INCOMING MESSAGE Switch:ICM -System records the incoming messages.ANNC -System plays your announcement and then hangs up without recordingmessages.8. MESSAGE ALERT Switch: Set switch to ON to generate a “beep”sound every 15seconds when a new message has been received.IMPORTANTPlacing your BASE UNIT near appliances such astelevisions, refrigerators, radios, or microwave ovensmay cause interference.BASE UNIT Controls1. BASE UNITANTENNA2. TELEPHONE LINECONNECTION JACKPg. 6, 7, 10, 12, 426. POWER-INCONNECTION JACKPg. 6, 74. TONE-PULSE SELECTSWITCH Pg. 7, 423. RING SELECT SWITCHPg. 338. MESSAGE ALERTSWITCHPg. 337. ANNOUNCEMENT ONLY/INCOMINGMESSAGE SWITCH5. RINGER ON/OFF SWITCH
BASE UNIT Controls - Answering System9. MAILBOX 2 LED Indicator: Lights up to indicate message(s) are present, and blinks whenMAILBOX 2 is active and ready to operate.10. MAILBOX 1 LED Indicator: Lights up to indicate message(s) are present, and blinks whenMAILBOX 1 is active and ready to operate.11. SKIP  Button: Press to skip messages.12. IN USE LED Indicator: Lights up to indicate that the HANDSET is in TALK mode.13. ANSWER FUNCTION ON/OFF Button: Press to activate or deactivate theanswer function. The ANSWER FUNCTION ON/OFF LED indicator lights when the Answerfunction is turned ON.14. MAILBOX 3 LED Indicator: Lights up to indicate message(s) are present, and blinks whenMAILBOX 3 is active and ready to operate.15. MAILBOX 4 LED Indicator: Lights up to indicate message(s) are present, and blinks whenMAILBOX 4 is active and ready to operate.16. MAILBOX 4  Button: Press to activate functions for MAILBOX 4.17. REPEAT  Button: Press to repeat messages.18. ERASE  Button: Press to erase messages.19. OUTGOING MESSAGE  Button: Press and hold down to record OGM message.20. PRIMARY MAILBOX LED Indicator:  Lights up to indicate message(s) are present, andblinks when PRIMARY MAILBOX is active and ready to operate.21. MEMO  Button: Press and hold down to record memo messages.22. MINUTE/PAGE  Button: (MINUTE) Press to set the minute during time setting, orpress to set the third digit of the access code during code setting. (PAGE) Press to pageHANDSETS.23. HOUR/VOL  Button: (HOUR) Press to set the hour during time setting, or press toset the second digit of the access code during code setting. (VOL  ) Press to lower thespeaker volume.MINPAGEMEMOOGMERASERPT4ANSWERON/OFFSKIPBASE UNIT Controls23. HOUR/VOL  BUTTON Pg. 13, 30, 32, 37, 4322. MINUTE BUTTON Pg. 30, 3712.IN USE LED INDICATOR Pg. 12, 14, 1519. OUTGOING MESSAGE BUTTONPg. 31~3321. MEMO BUTTON Pg. 34, 3613.ANSWER FUNCTION ON/OFFBUTTON Pg. 329. MAILBOX 2 LED INDICATORPg. 32, 34~3610.MAILBOX 1 LED INDICATORPg. 32, 34~3611.SKIP BUTTON Pg. 3514. MAILBOX 3 LED INDICATOR Pg. 32, 34~3615. MAILBOX 4 LED INDICATOR Pg. 32, 34~3617. REPEAT BUTTON Pg. 3518. ERASE BUTTON Pg. 31, 3620. PRIMARY MAILBOX LEDINDICATOR Pg. 32, 34, 3616. MAILBOX 4 BUTTON Pg. 32, 34~37
24. MAILBOX 2  Button: Press to activate functions for MAILBOX 2.25. MAILBOX 1  Button: Press to activate functions for MAILBOX 1.26. LED MESSAGE DISPLAY: Indicates the number of memos/messages received, status ofthe system.- Erase   - OGM is playing   ~- No. of memos/messages- Announce Only  - Memory is full  - Pause27. CODE  Button: Press to set the 3-digit Remote Access Code for remote operation.28. SET  Button: Press to set/check the day and time.29. DAY/VOL  Button: (DAY) Press to set the day during time setting, or press to setthe first digit of the access code during code setting. (VOL ) Press to higher the speakervolume.30. CHARGE TERMINALS: For charging the HANDSET BATTERY PACK. For bestperformance, clean the CHARGE TERMINALS periodically with a damp cloth.31. MAILBOX 3  Button: Press to activate functions for MAILBOX 3.32. STOP  Button: Press to stop playing a message. Press and hold down for morethan 3 seconds to initiate/re-initiate your answering machine, then release the button anda “beep”will sound.(See detail operations on pages 30 and 43.)33. PLAY Button: Press to play messages.34. CHARGE LED Indicator: Lights up when the HANDSET is placed on the BASE UNIT forcharging.35. SPEAKER  Button: Press to awswer the incoming call in BASE UNIT.36. MICROPHONESPEAKERPLAYSTOP3SETCODE12BASE UNIT Controls25.MAILBOX 1 BUTTON Pg. 32,34~3724.MAILBOX 2 BUTTON Pg. 32,34~3735. PAGE BUTTON Pg. 1331. MAILBOX 3 BUTTON Pg. 32, 34~3732. STOP BUTTON Pg. 8, 30, 32, 35, 4336. MICROPHONE Pg. 31, 3428.SET BUTTON Pg. 3027.CODE BUTTON Pg. 3734. CHARGE LED INDICATOR30.CHARGE TERMINALS26.LED MESSAGE DISPLAY Pg. 32~33, 35~3629.DAY/VOL  BUTTON Pg. 13, 30, 32, 37, 4333. PLAY BUTTON Pg. 34~35

Navigation menu