Cadi Scientific SMN870 BITS READER User Manual
Cadi Scientific Pte. Ltd. BITS READER
User Manual

SMN-870
Instruction Manual
WARNINGS
For customer in the U.S.A and Canada
You are cautioned that changes or modifications not expressly approved
by the part responsible for compliance could void the user’s authority to
operate the equipment.
This equipment has been tested and found to comply with the limits for a
Class B digital device, pursuant to part 15 of the FCC rules. These limits
are designed to provide reasonable protection against harmful interference
in a residential installation. This equipment generates, uses and can
radiate radio frequency energy and, if not installed and used in accordance
with the instructions, may cause harmful interference to radio
communications. However, there is no guarantee that interference will not
occur in a particular installation. If this equipment does cause harmful
interference to radio or television reception, which can be determined by
turning the equipment off and on, the user is encouraged to try to correct
the interference by one or more of the following measures:
- Reorient or relocate the receiving antenna.
- Increase the separation between the equipment and receiver.
- Connect the equipment into an outlet on a circuit different from that to
which the receiver is connected.
- Consult the dealer or an experienced radio/TV technician for help.
Operation is subject to the following two conditions:
1) This device may not cause interference and
2) This device must accept any interference, including interference that
may cause undesired operation of the device.
This equipment complies with FCC radiation exposure limits set forth for
an uncontrolled environment. End users must follow the specific operating
instructions for satisfying RF exposure compliance. This transmitter must
not be co-located or operating in conjunction with any other antenna or
transmitter.

For customer in Europe
This equipment has been tested and found to comply with the limits set out
in the R&TTE Directive.
Where you see this symbol on any of our electrical products/packaging in
Europe, it means that at end of life the product/battery must be disposed of
in accordance with any applicable laws or requirements for the separate
disposal of electrical equipment/batteries.
The manufacturer of this product is CADI Scientific Pte Ltd, 31 Ubi Road 1,
#03-00 Aztech Building, Singapore 408694.
PRECAUTIONS
Connect only recommended power supply to the unit.
Place the unit on a stable and non-slip surface.
SETUP
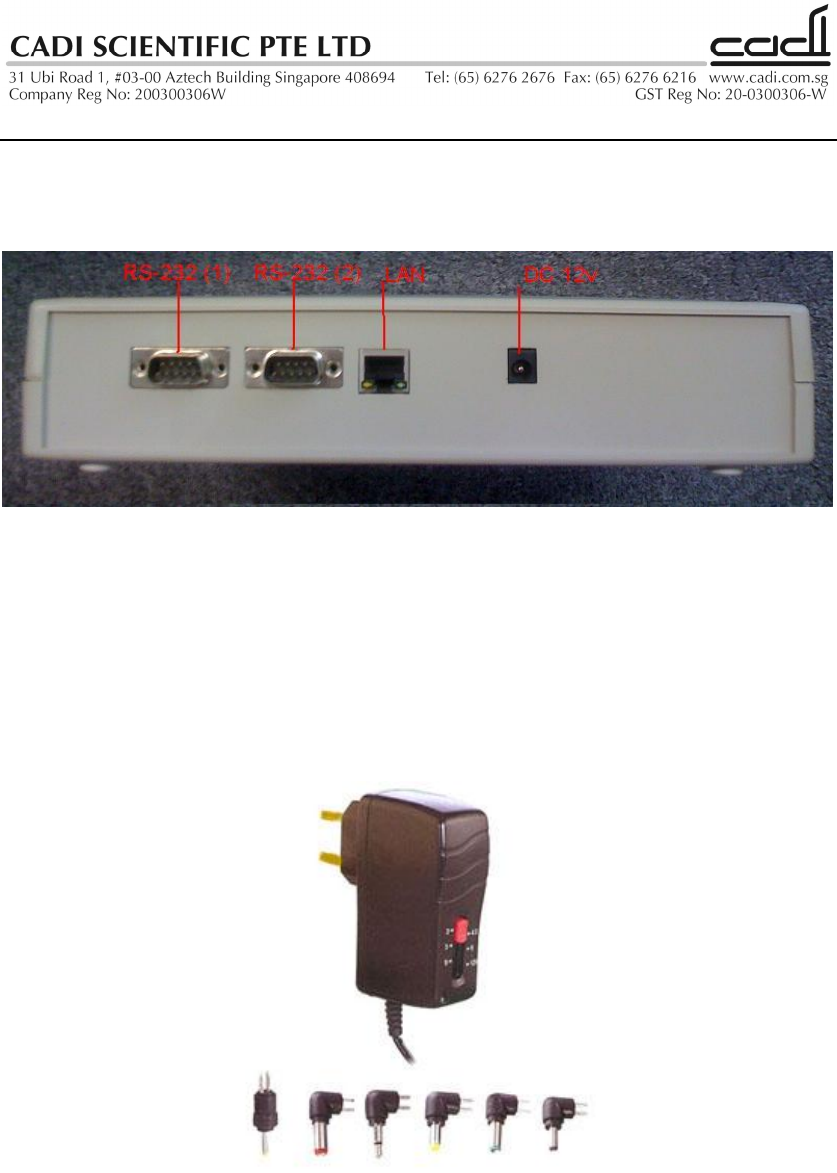
The diagram shows the available ports of the SMN-870. They are located on
the back of the unit.
The SMN-870 can be powered in 2 ways: external powered by DC adapter or
POE (Power over Ethernet).
1. DC adapter powered
Plug a suitable adapter (e.g. 12vdc 1A) such as the one shown below
into the DC port.
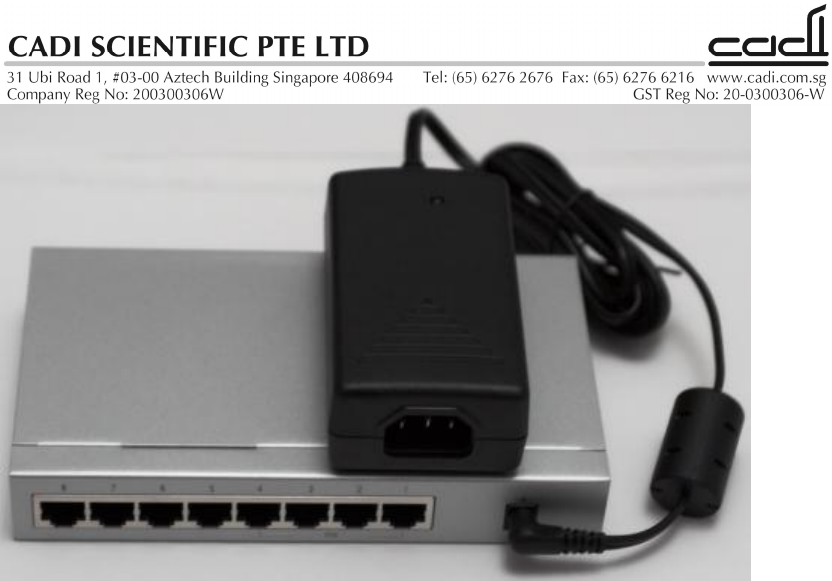
2. POE powered
Plug the LAN cable into the LAN port, making sure the line is a
standard 802.3af POE source such as the one shown below.
Once the power is supplied and the LAN is plugged in, the SMN-870 will
automatically turn on and start searching for a server connection. To configure
the device, connect a RS-232 null-modem cable to port 1. Open a serial
terminal program (e.g. Hyper Terminal for Windows) at 19200bps/N/1 and
type in the appropriate information e.g.:
SS=10.0.0.64<enter> (the server IP address)
PP=25004<enter> (the port to connect)
NM=255.0.0.0<enter> (the netmask address)
GW=10.0.0.1<enter> (the gateway IP address)
DHCP=True<enter> (for dynamic IP address)
Or
DHCP=False<enter> (for fixed IP address)
Note: for fixed IP address, the user must configure an IP address by typing e.g.:
IP=10.0.0.65<enter>
When the parameters are correctly entered, the Hyper Terminal will echo back
the message. Alternatively, to check if the parameters have been entered
correctly, use the “?” operator to query e.g.:
SS=?<enter> (to display the currently configured server IP addresses)
PP=?<enter> (to display the currently configured port)
NM=?<enter> (to display the current netmask address)
GW=?<enter> (to display the current gateway IP address)
DHCP=?<enter> (to display the current DHCP status)
IP=?<enter> (to display the current IP address of the device)
MAC=?<enter> (to display the device MAC address)
DID=?<enter> (to display the device serial number)
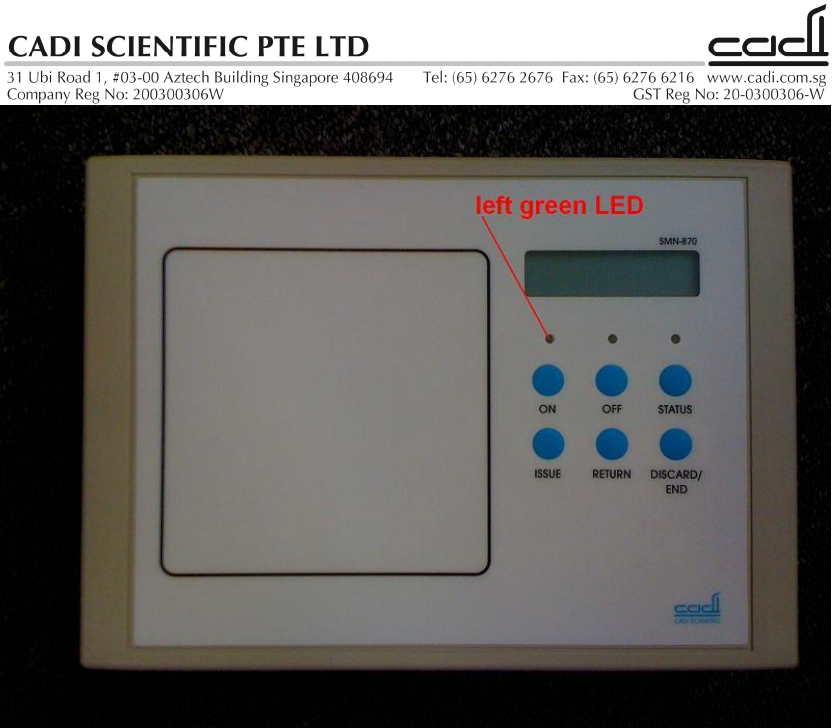
When the server connection is successful, the left green LED will light up. The
device is now ready for use.
Description
The SMN-870 SmartNODE is designed as part of the SmartSense suite of
products as an interface to communicate with tags such as TSS-870. It
transmits LF frequencies, and transmits and receives UHF signals.
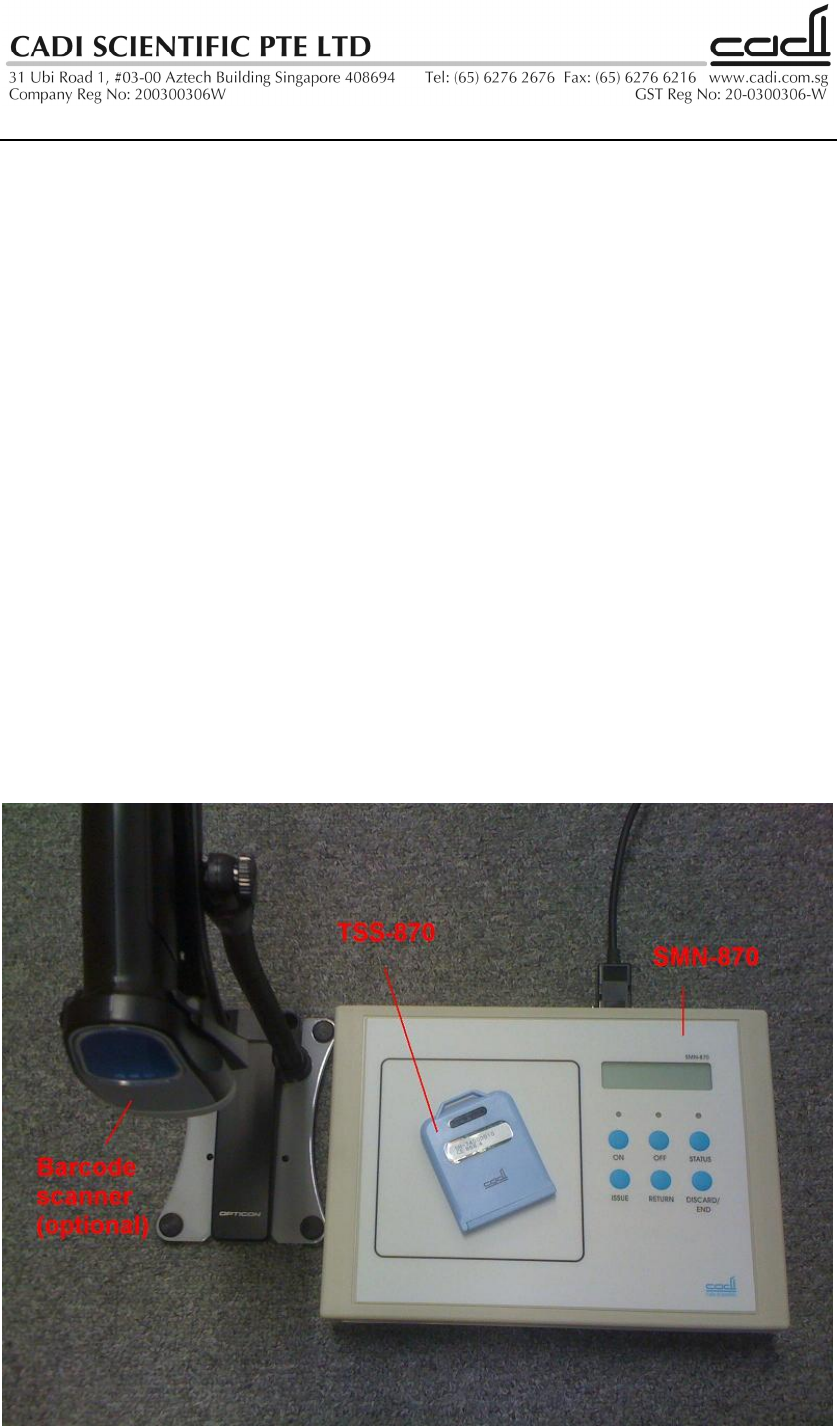
The SMN-870 has a user interface consisting of a LCD display, 3 bi-colour
LEDs, and 6 pushbuttons. The descriptions are as follows:
1. Left wireless zone box: proximity communication surface
2. Buzzer(internal): To serve as alert for positive keypress or
notification
3. LCD: To display information
4. Left LED: server connection status indicator
5. Centre LED: Tag communication indicator
6. ON button: To turn on a tag
7. OFF/END button: To turn off a tag or end a process
8. STATUS button: To check the status of the tag
9. ISSUE button: to issue a tag
10. RETURN button: to return a tag
11. DISCARD button: to discard a tag
In some installations, the SMN-870 is provided with a barcode scanner to
supplement its operation. For these cases, the barcode scanner should be
connected to RS-232 port 2.
USAGE
The SMN-870 works in 2 modes: HSA mode and Hospital mode. In HSA
mode, only the ON, OFF, and STATUS buttons are available. In Hospital
mode, only ISSUE, RETURN, STATUS, and DISCARD buttons are available.
Note: the unit will not respond to user input if server connection is not
detected (i.e. left green LED is not lit up)
HSA mode operation
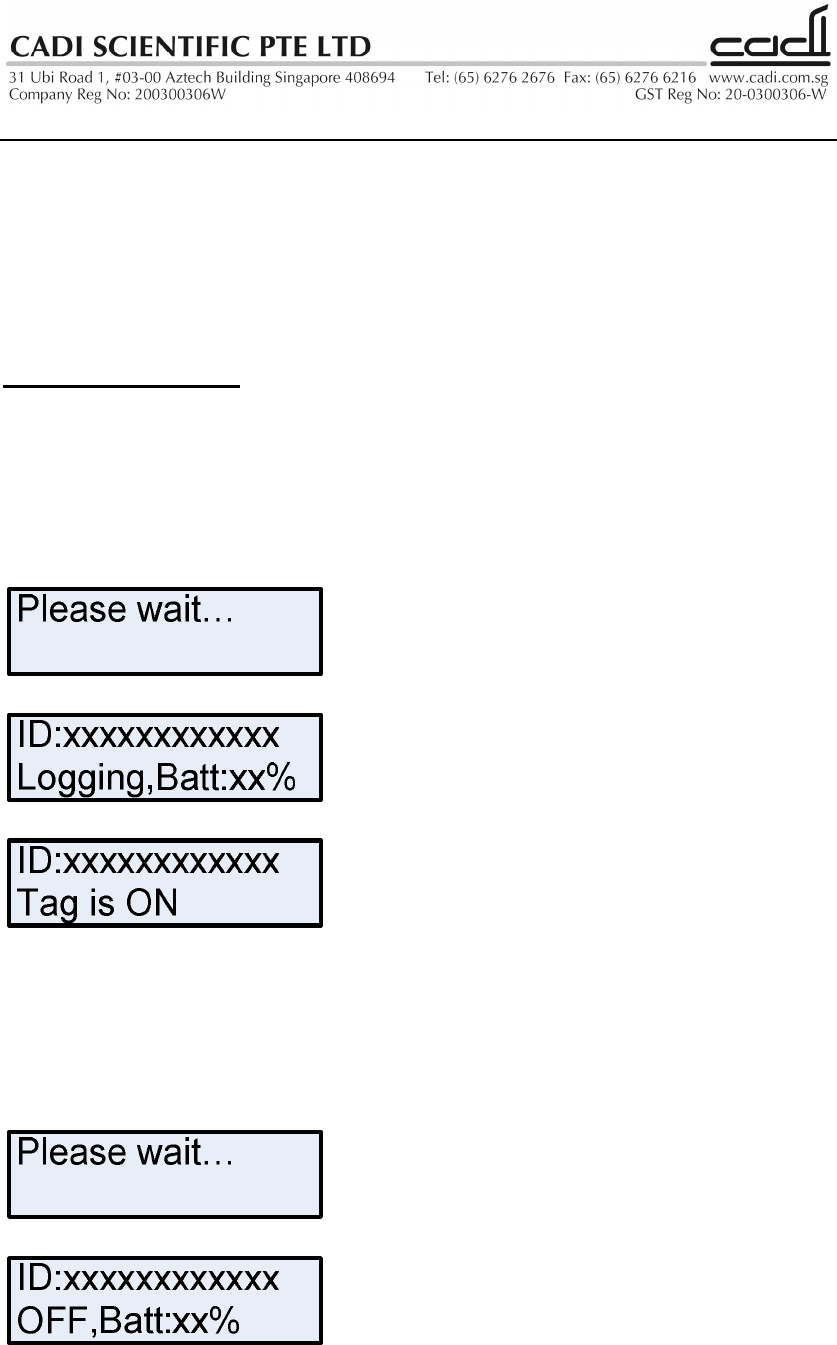
Turn On tags
Place a tag (e.g. TSS-870) onto the box on the left. Press ON to turn on the
tag. LCD display shows “Please wait…”, then switches to “ID:xxxxxxxxxxxx”
“Logging,Batt:xx% (centre green LED lights up briefly), then to
“ID:xxxxxxxxxxxx Tag is ON”
Turn Off tags
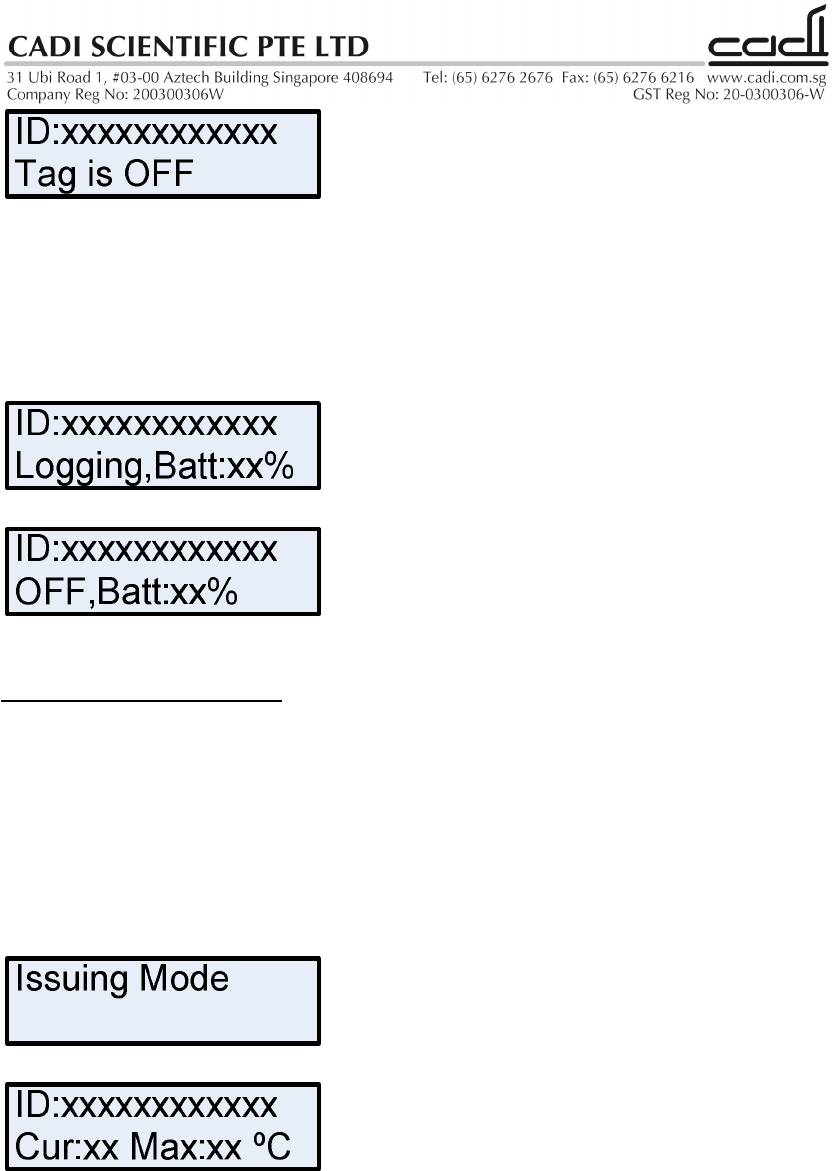
Place a tag (e.g. TSS-870) onto the box on the left. Press OFF to turn off the
tag. LCD display shows “Please wait…”, then switches to “ID:xxxxxxxxxxxx”
“OFF,Batt:xx% (centre green LED lights up briefly), then to “ID:xxxxxxxxxxxx
Tag is OFF”
Status of tags
Place a tag (e.g. TSS-870) onto the box on the left. Press STATUS to display
the tag’s current status. LCD display shows “ID:xxxxxxxxxxxx” “OFF,Batt:xx%
(centre green LED lights up briefly), or “ID:xxxxxxxxxxxx” “Logging,Batt:xx%
(centre green LED lights up briefly).
Hospital mode operation
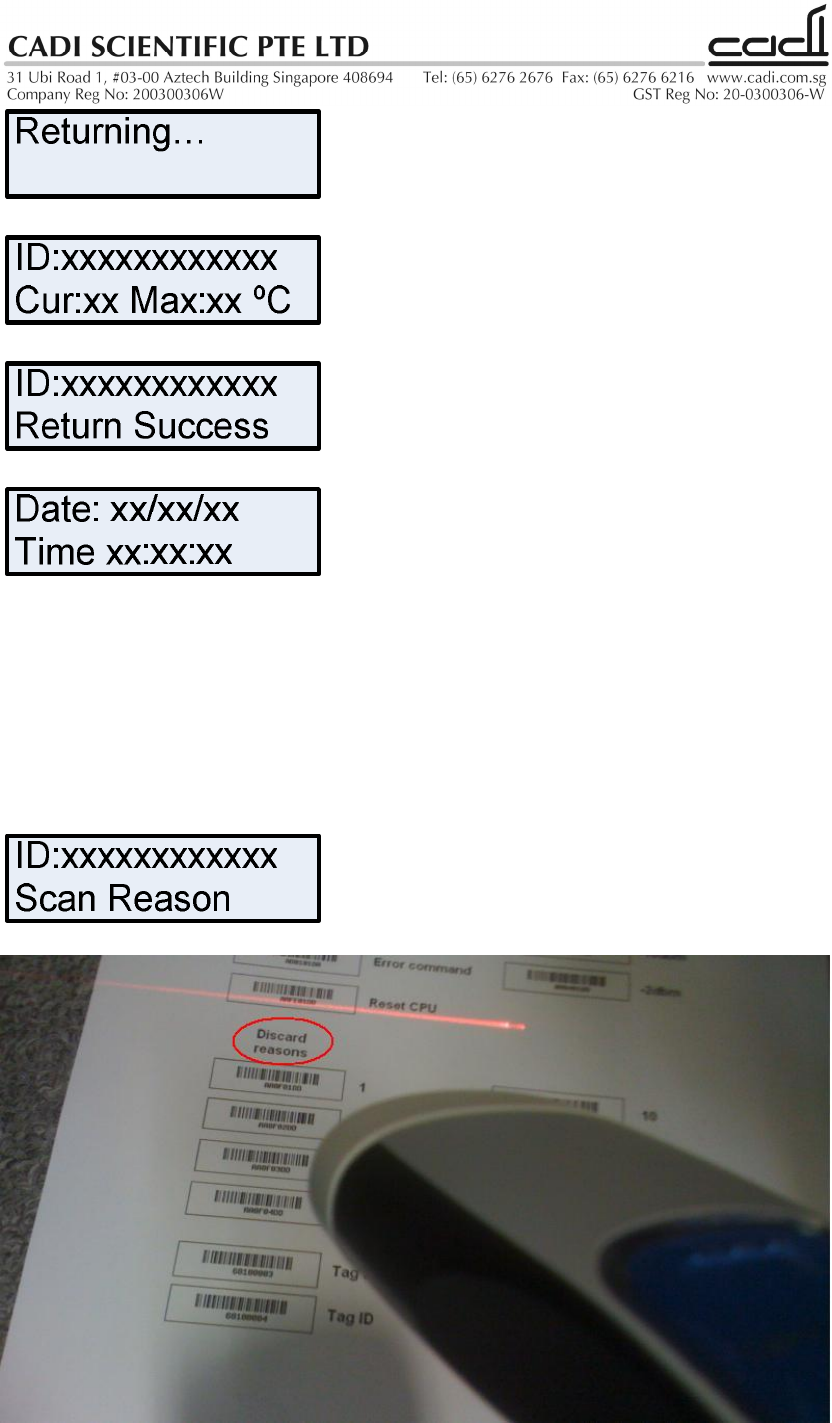
Issuing tags
Press ISSUE button to start the issue process. The LCD will display: “Issuing
Mode”. Place a tag onto the box on the left. The LCD will display:
“ID:xxxxxxxxxxxx Cur:xx Max:xx ºC”. Press ISSUE button again to confirm
issue of the tag. Remove the tag and place another tag onto the box. Press
ISSUE button again to confirm issue of the tag. Repeat by placing new tags
onto the box and pressing ISSUE. End the process by pressing END button.
Returning tags
Place a tag onto the box on the left and press RETURN button. LCD display
briefly switches to “Returning…”, then to “ID:xxxxxxxxxxxx Cur:xx Max:xx ºC”
(green LED lights up briefly), then LCD switches to “ID:xxxxxxxxxxxx Return
Success”, then to “Date: xx/xx/xx Time xx:xx:xx”. Repeat the whole process
for the next tag.
Discarding tags
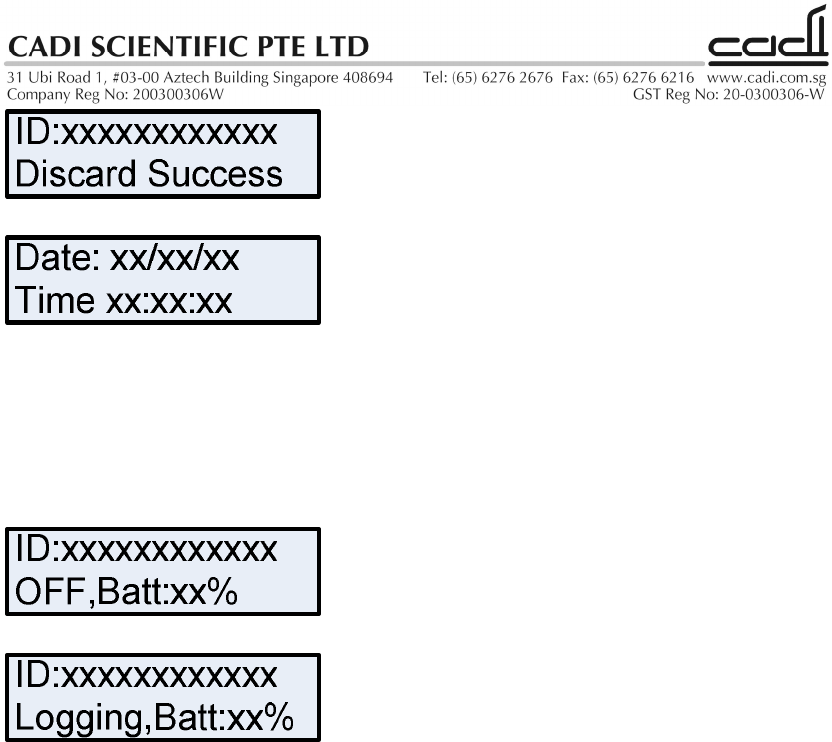
Place a tag onto the box on the left and press Discard button. LCD display
shows “ID:xxxxxxxxxxxx Scan Reason” (centre green LED lights up briefly).
Use the barcode scanner to scan a valid discard reason from the supplied
barcodes sheet. LCD switches to “ID:xxxxxxxxxxxx Discard Success”, then
back to “Date: xx/xx/xx Time xx:xx:xx” Repeat the whole process for the next
tag.
Status of tags
Place a tag (e.g. TSS-870) onto the box on the left. Press STATUS to display
the tag’s current status. LCD display shows “ID:xxxxxxxxxxxx” “OFF,Batt:xx%
(centre green LED lights up briefly), or “ID:xxxxxxxxxxxx” “Logging,Batt:xx%
(centre green LED lights up briefly).

SPECIFICATIONS
Power 12v dc
Power consumption Max 12VA
External dimensions
(excluding projecting
parts)
250w x 180d x 52h mm
Mass Approx. 700 g (1.54 lb)
Operating temperature 20°C - 50°C (68°F - 122°F)
Storage/transport
temperature 10°C - 50°C (50°F - 122°F)
Inputs/outputs RS-232 DB-9M x2
10/100Mbps LAN x1
DC connector x1
Supplied accessories Barcode scanner Opticon OPR-3201 (optional)
Transmission frequency 868.4 MHz (For customer in Europe)
919.8 MHz (For customer in U.S.A)
925.0 MHz (For customer in U.S.A)
125 kHz (all regions)