Cal Comp Electronics M330T Mobile Phone with Bluetooth User Manual imobile322 usermanual ok
Cal-Comp Electronics (Suzhou) Co. Ltd. Mobile Phone with Bluetooth imobile322 usermanual ok
UserManual.wiki
>
Cal Comp Electronics
>
M330T User Manual
Users Manual
Navigation menu
Upload a User Manual
Namespaces
Wiki Guide
HTML
PDF
Info
Views
User Manual
Discussion / Help
Navigation


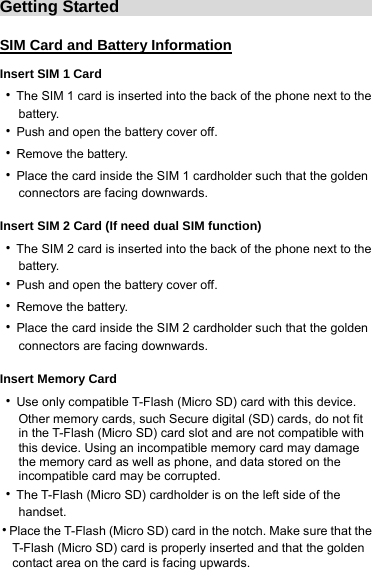
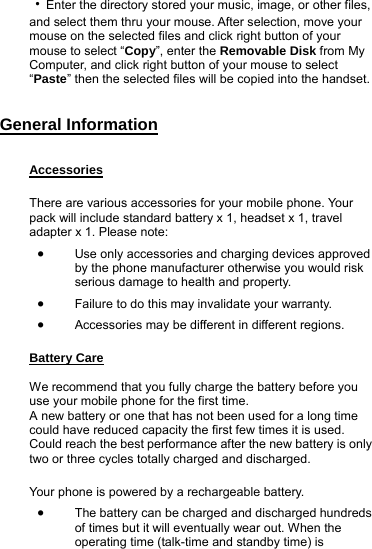
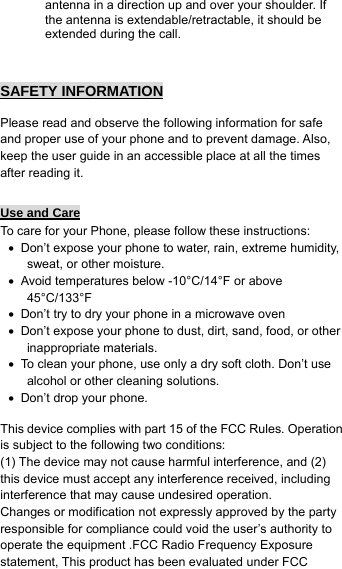
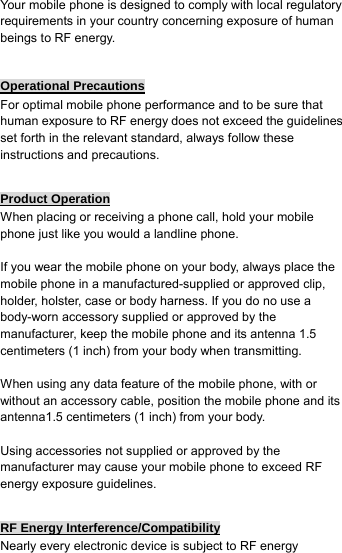
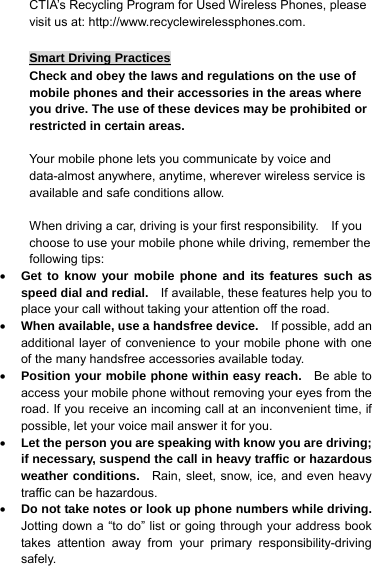
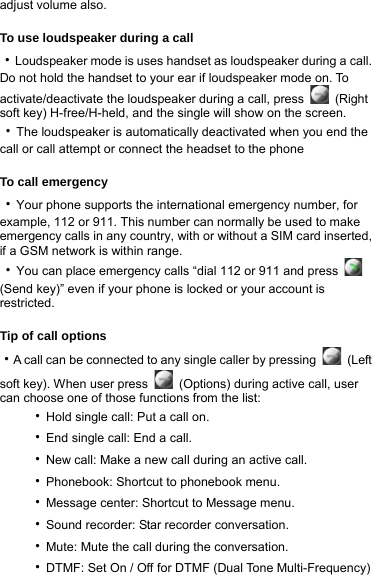
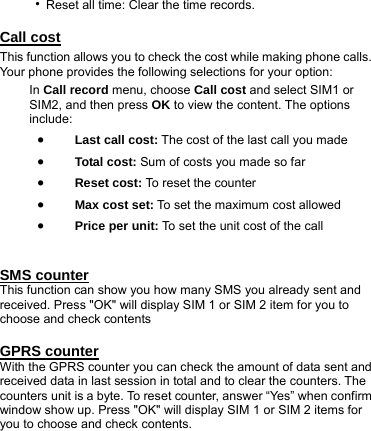
![Insert Battery [Warning]: 1. If the battery is totally empty, charging icon or LED is not on. There fore, you should charge the battery maximum up to 10-20 minutes. 2. If you turn off handset abnormally, please take out battery about 10 seconds then insert battery. Otherwise the battery will discharge and run out of power quickly ‧Slide the battery into the cradle and press the battery down flat. ‧Place the back cover and slide it into place. Charge Battery ‧Connect the USB cable the power jack on the left side of your phone. ‧Connect the charger to an AC wall socket. The charging icon is displayed briefly if the phone is switched on. If the battery is completely empty, it may take a few minutes before the charging indicator appears on the display or any calls can be made.](https://usermanual.wiki/Cal-Comp-Electronics/M330T/User-Guide-1079219-Page-10.png)
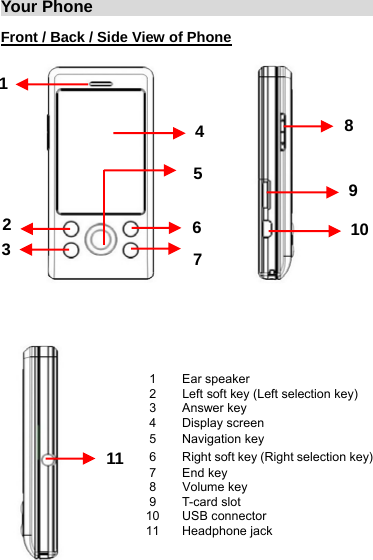
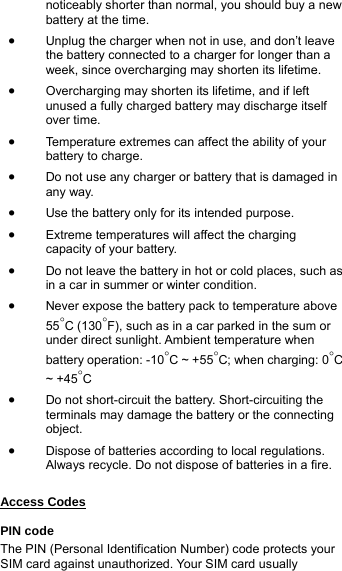
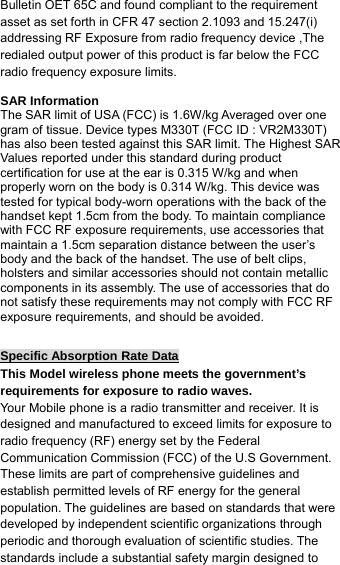
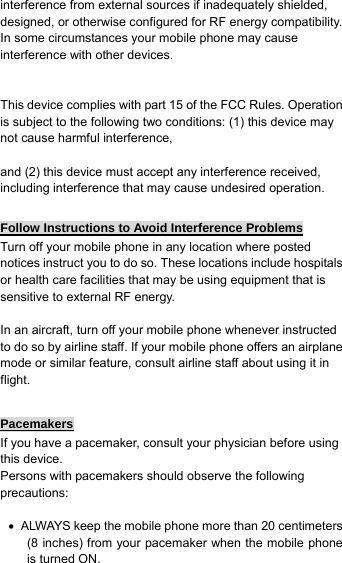
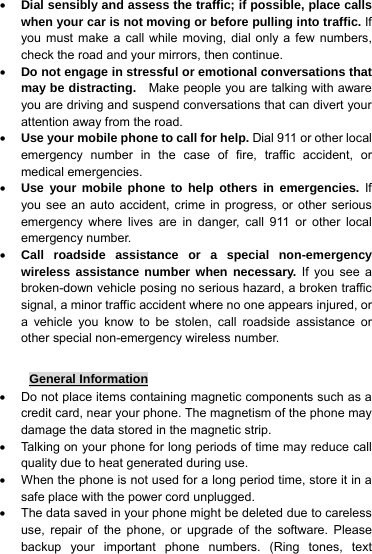
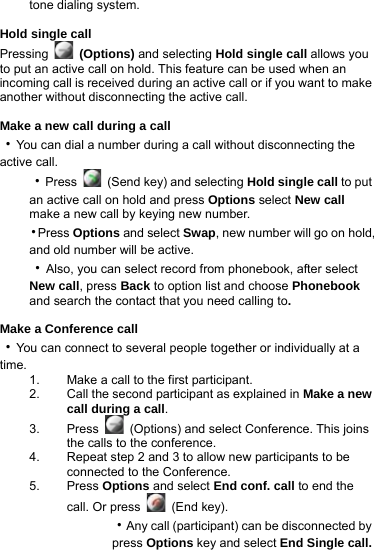
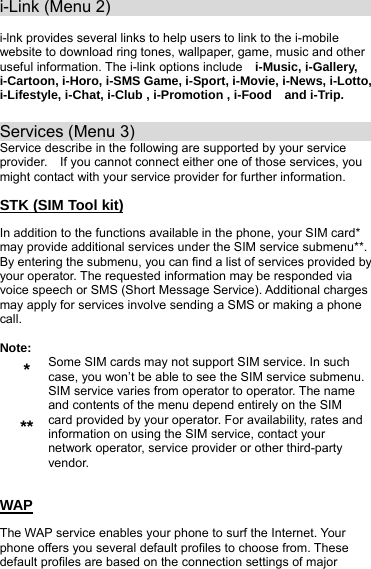
![Navigation key Use for quick access to phone functions in idle mode. -Up: Access to the Music player. -Down: Access to the Camera -Left: Access to the Shortcuts menu. -Right: Access to the Calendar menu. Use for scrolling through names stored in the contacts or through the phone’s menus, submenus, and option list. [Note]: Navigation shortcut maybe different depends on personal setting in “Phone settings/Navigator key. Send key Answer key Make and answer calls; press in idle mode to see recent dialed calls. Number keypad 0-9 input number and character Side key ‧Adjust handset volume. ‧Switch default dial mode between SIM 1 or SIM 2 on idle mode (Long time to press key).](https://usermanual.wiki/Cal-Comp-Electronics/M330T/User-Guide-1079219-Page-13.png)

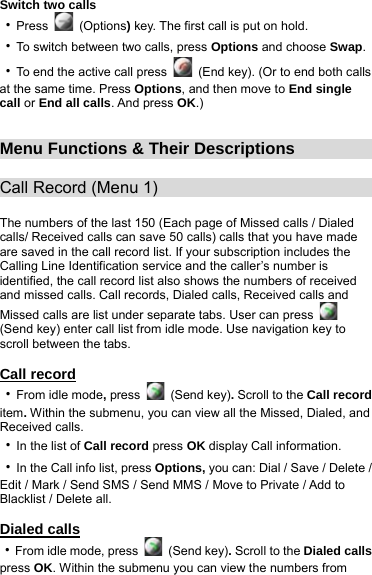
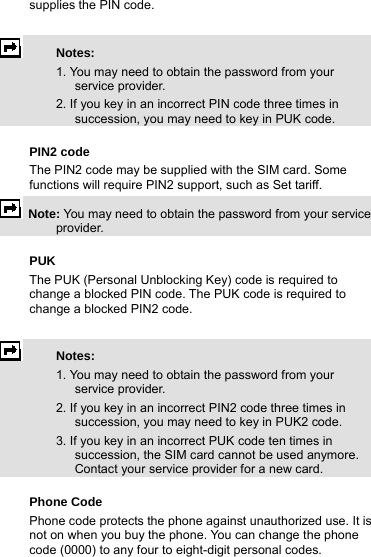
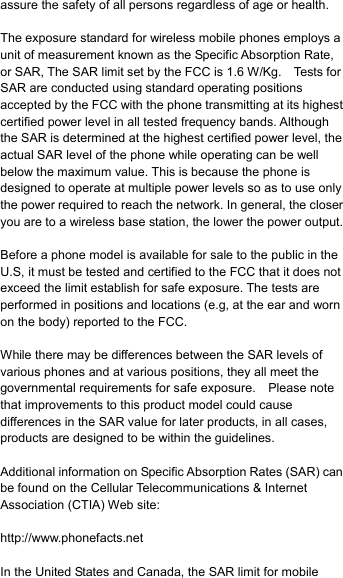
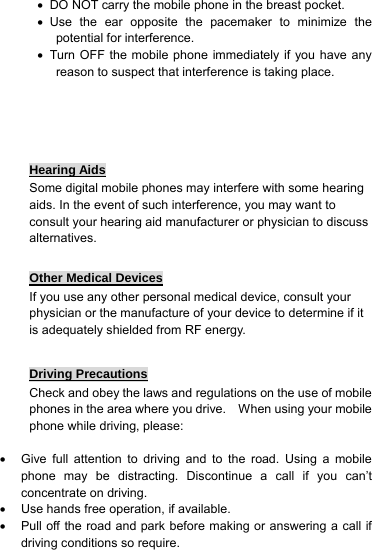
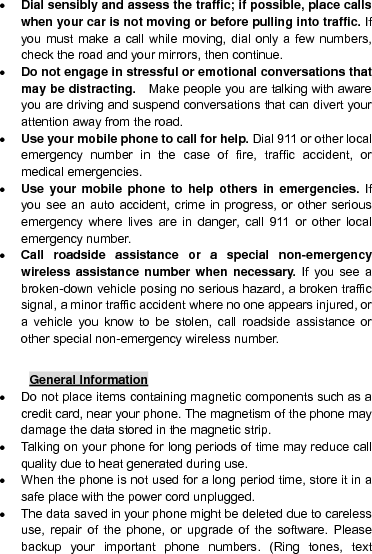
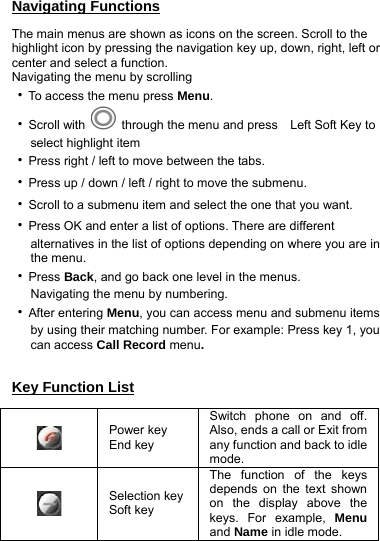
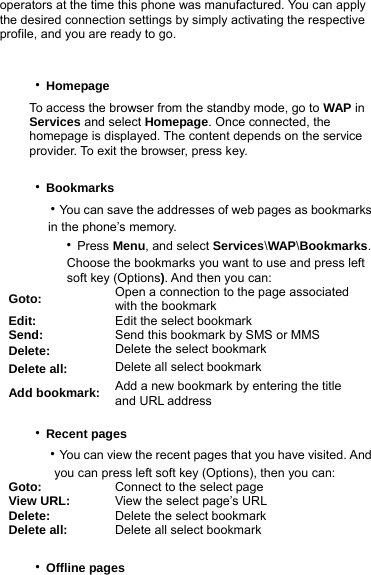
![Users also can press Menu, select Call record press OK to see all the Missed calls, Dialed calls and Received calls information in this submenu. *Users only can see Call records information by pressing (Send key) from idle mode. *If the call record is moved to the private, you can not see the detail information in the Call record---Missed calls / Dialed calls / Received calls folder, it will be find in the Organizer---Private Menu---Call record---Dialed calls / Received calls / Missed calls folder. [Note: The default password of Private Menu is 0000] Within the Call record submenu, we also have many other functions: Delete call lists ‧In this submenu, Press "OK" will display SIM 1 or SIM 2 item for you to choose the following list ‧Missed calls ‧Dialed calls ‧Received calls ‧Delete All ‧Press OK to delete all records in relevant item. Call duration ‧This function records the length of time or duration of all incoming and outgoing calls in hours, minutes, and seconds. Press "OK" will display SIM 1 or SIM 2 item for you to choose the following list ‧Last call time: Display the last one call in hours, minutes, and seconds. ‧Total dialed: Display the time for all outgoing calls in hours, minutes, and seconds. ‧Total received: Display the time for all incoming calls in hours, minutes, and seconds.](https://usermanual.wiki/Cal-Comp-Electronics/M330T/User-Guide-1079219-Page-28.png)
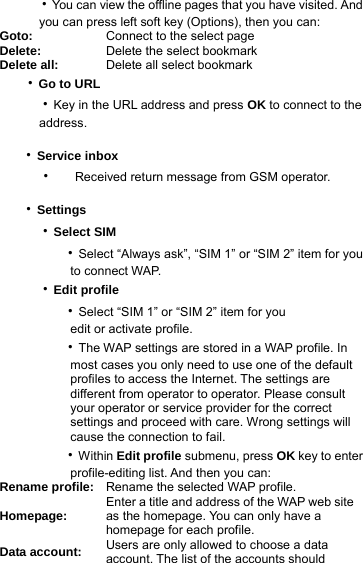
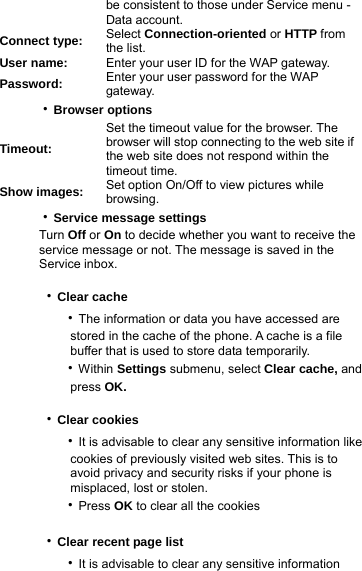
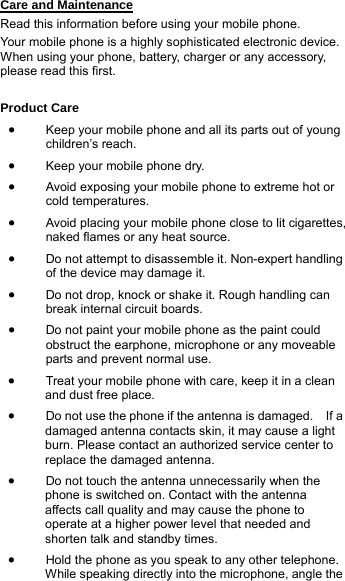
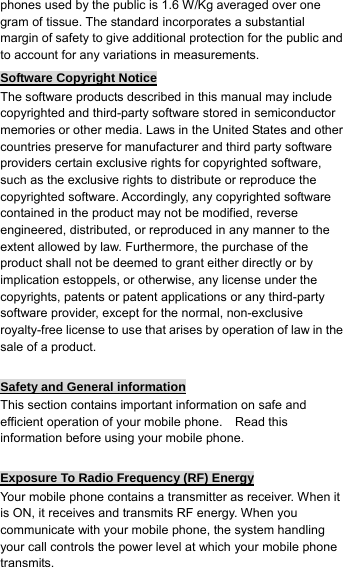
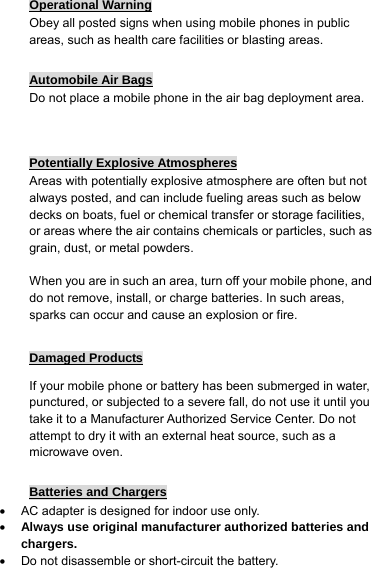
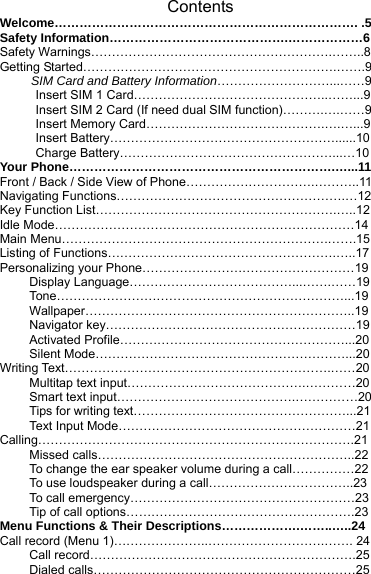
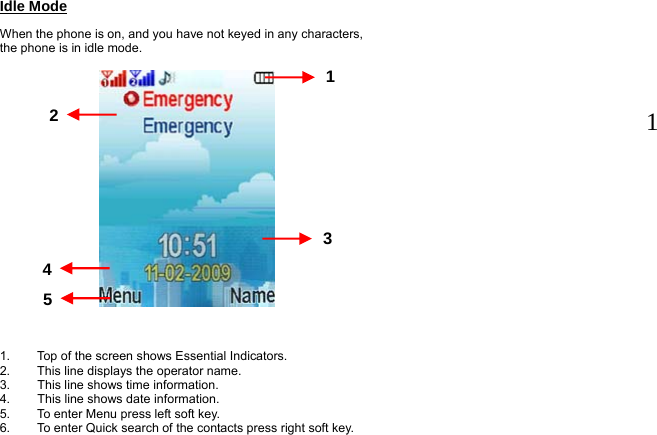
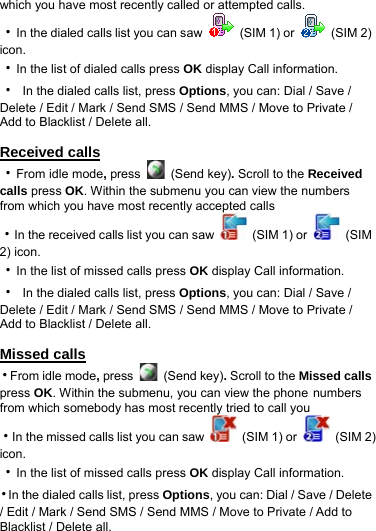
![GSM Data Press Edit to change the data account settings, including: Account Name, Number, User Name, Password, Line Type, Speed and DNS. GPRS Press Edit to change the data account settings, including: Account Name, APN, User Name, Password and Auth. type. Phonebook (Menu 4) Search You can search contacts by name characters. ‧Name and Number, allow you key in the first characters of the name for which you are searching in the editor line, the matched record will be shown. ‧To search the name, users also can put up to 9 characters in the editor line; the matched record will be shown. ‧To input or edit a searched item, press Options key to enter into the submenu. ‧You can View, Edit, Delete, Copy, Move, Send SMS, Send MMS, Send Contact, Add to Blacklist, Move to Private and Mark an entry. ** If the contact is moved to the private, you can not see the detail information in the Phonebook, it will be find in the Organizer---Private menu---Phonebook. [Note: The default password of Private menu is 0000] Smart search Allow you to search the phonebook by partial numbers you have entered. You can only input series numbers to search, and search result will display the list with matched numbers. Then select the](https://usermanual.wiki/Cal-Comp-Electronics/M330T/User-Guide-1079219-Page-35.png)
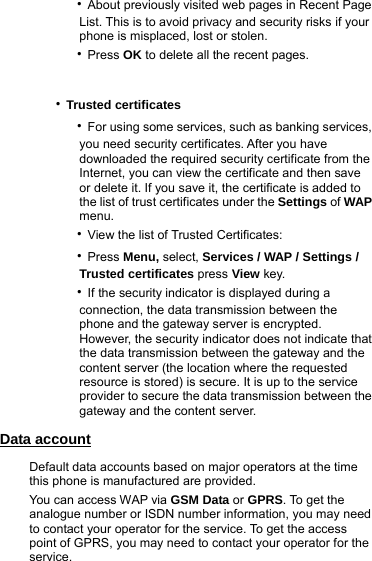
![one you would like to dial. Add new ‧It is possible to store phone numbers in three places: ‧Add to Phone ‧Add to SIM 1 ‧Add to SIM 2 ‧Add to Private ‧To store a Number in the Phone memory: In main menu, enter to Phonebook menu and select Add new. You can store 500 entries in your phone. ‧Then select Add to phone, press OK. ‧Enter the name and number, press Done. ‧For each number or text item you can choose: ‧Name / Number / Home number / Company name / Email address / Office number / Fax number / Birthday / Image / Video call / Tone / Caller group [Note] Tone support MP3, Midi, AMR, and WAV files. [Note] Image support JPEG, GIF format. The JPEG /GIF images size should be less than 200k. [Note] Video support AVI (motion JPEG) files ‧ When users select Ring tone, Image, Video, you can go to File Manager page to choose from every folder. When users use these functions, if there is an incoming call, the Video function will only be performed by Image, the ring tone will not work. The Video function can be on or off. When the Video sound is off, the Ring tone can be used. ‧ To store a Number in the SIM 1 or SIM 2: In main menu, select Phonebook, and select Add new. You](https://usermanual.wiki/Cal-Comp-Electronics/M330T/User-Guide-1079219-Page-36.png)
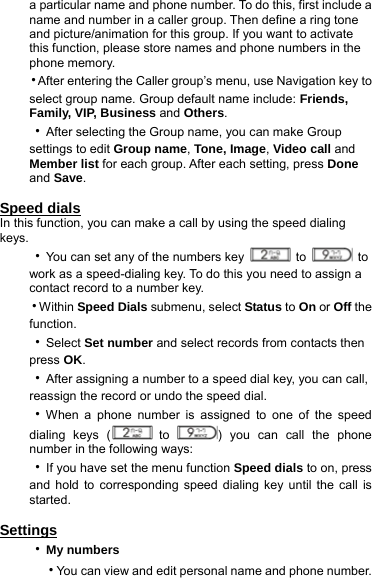
![can store 250 entries (depends on your SIM card support) in your SIM card for name, telephone number and image. ‧Then select Add to SIM 1 or Add to SIM 2, and press OK. ‧Enter the Name, Number, Caller group and Image, press Done. [Note] Image support JPEG, GIF format. The JPEG /GIF images size should be less than 200k. [Note] The number of store entries in SIM card, it may be different depend on your SIM card service provider. ‧To store a Number in the Private: In main menu, select Phonebook, and select Add new. You can store 500 entries (Maximum) in your Private. ‧Then select Add to Private, press OK. ‧Enter the Name / Number / Home number / Company name / Email address / Office number / Fax number / Birthday / Image / Video call / Tone / Caller group, press Done. [Note] Image support JPEG, GIF format. The JPEG /GIF images size should be less than 200k. Move to private You can move the data from the phone or SIM card to private. The copy options have: One by one, All from SIM1, All from SIM2 or All from Phone. Delete You can remove name and phone numbers from selected contacts all at once. ‧In the Phonebook Menu, select Delete then press OK. ‧Choose All from phone, All from SIM1, All from SIM2 or One by one press OK. User needs to enter phone code to confirmed delete then press OK.](https://usermanual.wiki/Cal-Comp-Electronics/M330T/User-Guide-1079219-Page-37.png)
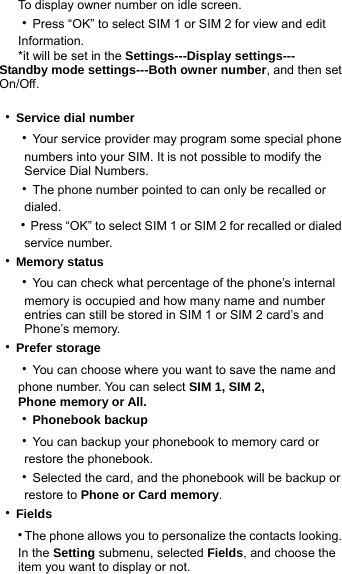
![[Note] The default phone code is 0000 Copy ‧You can copy names and phones number from the phone’s memory to SIM card’s memory or from SIM card’s memory to Phone’s memory. The copy options have: ‧All from SIM 1 to phone ‧All from SIM 1 to SIM 2 ‧All from SIM 2 to phone ‧All from SIM 2 to SIM 1 ‧All from phone to SIM 1 ‧All from phone to SIM 2 ‧Copy entry records will both save in SIM and Phone’s memory. Move ‧Your phone allow you to move all numbers and names stored in the phonebook. The move options have: ‧One by one ‧All from SIM 1 to phone ‧All from SIM 1 to SIM 2 ‧All from SIM 2 to phone ‧All from SIM 2 to SIM 1 ‧All from phone to SIM 1 ‧All from phone to SIM 2 Caller groups ‧You can set the phone to sound a specific ring tone and flash a selected graphic on the display when you receive a call from](https://usermanual.wiki/Cal-Comp-Electronics/M330T/User-Guide-1079219-Page-38.png)
![‧Save to normal: the sent message is stored in the Messages---SMS---Outbox folder. ‧Save to private: the sent message is stored in the Organizer---Private menu---SMS---Outbox. * If the message is stored in Private, users need to enter the password to view the detail information of the message. [Note] The default password is 0000. Inbox To check an unread message letter: ‧From SMS menu selects Inbox press OK. ‧Move to desired message and press OK to enter list. Press Options and inbox option list appears, you can select View, Delete, Delete all, Mark, Move to private and Detail. The message is stored in the inbox folder after you have read it. The icon is indicate whether a SMS is read or unread and also show message stored position in front of the message in the list. ‧While reading the message, press Options to select through the list of options and press OK at the highlighted option to select it. ‧The inbox message option list includes options have Reply, Delete, Forward, Edit, Copy, Move, Delete all, Copy all, Move all, Move to Private, Use number, Extract URL and Chat. Outbox ‧From SMS menu selects Outbox press OK. ‧Move to desired message and press OK to enter list. Press Options and inbox option list appears, you can select View, Delete, Delete all, Mark, Move to Private, Use number and Detail. ‧While reading the message, press Options to select through](https://usermanual.wiki/Cal-Comp-Electronics/M330T/User-Guide-1079219-Page-43.png)

![File Manager (Menu 6) In the File manager menu, you can manage images, photos, recordings, tones that you have. ‧In Main Menu, select File manager and press OK to enter submenu of File manager. ‧In the File manager screen, a list of folders is shown. ‧Scroll to the desired device Phone or Card (If you have memory card inserted) and press Options, you can choose Open, Create folder, Memory status and Format item. One of the options is available. Open: To view the files in the folder. The files in this folder have: Audio, Bluetooth, Images, My Music, Photos, Received and Video. For selected folder, press “Options”, one of the options is available: Open, Create folder, Rename, Delete, Sort and Move to private. Create folder: To add a new folder into list. Memory status:You can check what percentage of the Phone’s memory and Memory Card is occupied, and how many files can still be stored in Phone’s memory and Memory card. Format: You can format the file list. ‧Scroll to the desired file, and press Options select options, the file option have: View (Image), Play (Video, Audio), Set as (Set as Ringtone, Set as Message tone, Set as caller ring tone, Set as alarm tone), Send (MMS, Bluetooth), Detail, Rename, Copy, Move, Delete, Delete all, Sort, Move to private and Mark. Organizer (Menu 7) Private menu You can move the Call record, SMS, Phonebook and File manager to the Private menu if you do not want other people see the private data. [Note] To enter the submenu of the Private Menu, users need to](https://usermanual.wiki/Cal-Comp-Electronics/M330T/User-Guide-1079219-Page-52.png)

![Calculator ‧You can use your phone’s calculator to add, subtract, multiply and divide. ‧Press Menu, select Organizer/Calculator, and press OK. ‧With the screen showing a “0”, enter the first number in the calculation. ‧Use Navigation key to select add, subtract, multiply, and divide then press OK or center key to continue operation. ‧Press to enter a decimal point. ‧Press Clear to start the new calculation. Unit converter ‧To convert measures such as Weight from one unit (Pound) to another (Kg), press the Menu, and select Organizer then Unit converter. ‧In the Unit converter submenu, press Options to select converter options, option in Set weight converter is Reverse converter and Set converter. [Note]: the Converter option display is depending on user settings ‧In the first amount field, and enter the value you want to convert, the other amount field automatically shows the converted value. For example, in weight converter, pound units expressed in kg units, enter 110 and 49.895164 automatically show in kg field. ‧Press Navigation key up/down to reverse converter, or press Options to select reverse converter option. ‧If you want to select other converter types, press Options and select Set converter to open a list of measures. Choose the measure you want to use and press OK to enter converter unit list. ‧Choose the converter unit from which you want to converter](https://usermanual.wiki/Cal-Comp-Electronics/M330T/User-Guide-1079219-Page-58.png)
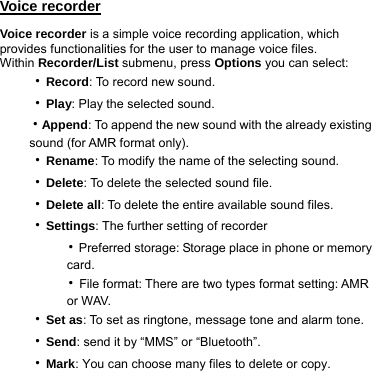
![Multimedia (Menu 8) Photo album Photo album is a folder under Multimedia; it is a folder to save the photo images. You can view image in this folder. Press Options and choice one of the following functions that may be available for the selected files: ‧View: To view the photo. When you viewing the photo, press side key to zoom in/out the image, and press navigation key (4-way key) can change the image. [Note]: Press can rotate image. ‧Set as: You can use the photo to Wallpaper and Screen saver or Caller picture. ‧Send: Yon can send the picture by MMS and Bluetooth. ‧Rename: Change the name of photo. ‧Delete: Delete selected photo. ‧Delete all: Delete all the photo files. ‧Mark: You can mark several or mark all many photos to delete, copy or move. ‧View mode: To select image display style. ‧Storage: Select storage place in phone or memory card. ‧Sort: To sort the file by File name, File type, Time, File size and None. ‧Image info: To display image detail information. Video recorder 1. Press (LSK) to choose video recorder options. 2. Use side key up/down direction to zoom in](https://usermanual.wiki/Cal-Comp-Electronics/M330T/User-Guide-1079219-Page-60.png)
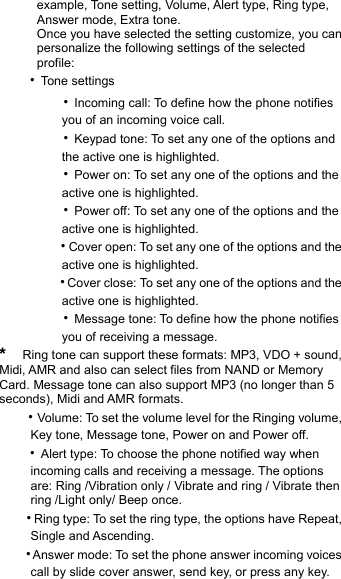
![‧Only when user chooses Headset mode, the answer mode have those options: Cover Answer, Any key and Auto (for Headset mode only). ‧Extra tone: To set the Warning tone, Error tone, Camp-on tone, Connect tone, Miss Calls and Unread Messages On or Off. For example, when set Extra tone function to on, the phone sounds a warning tone when the battery is running out of power. ‧Rename Yon can change the name of selected profiles. More detail information about writing text sees also “Writing Text”. Display settings ‧Wallpaper ‧You can set your phone to display a background picture, wallpaper, when the phone is in idle mode. You can also download wallpaper from WAP and MMS and then save them in My folder under File manager. Your phone supports JPEG, GIF formats. [NOTE]: The wallpaper and screen saver should be less than 1280x1024(for JPG) and 320x240(for GIF). In addition, the file size can’t be over 300kb. [NOTE]: If image size is over size, the image displays speed might get slow and please wait for more time to show up. ‧To select a wallpaper picture ‧Press Menu, and select Settings, Display Settings and Wallpaper. ‧Select Default and image list will be shown. Use navigation key Left ◄ and Right ►direction to select the image and press OK to choose the desired picture then press OK. ‧To set own picture for wallpaper. To select My folder and press OK. Users can select wallpaper from Images, Photos and Card folders. Scroll to desired folder and press Open.](https://usermanual.wiki/Cal-Comp-Electronics/M330T/User-Guide-1079219-Page-67.png)
![Date and time ‧Set home city This function allows you to set the home city. ‧Set the time This function allows you to set the time. The format is <HH:MM>. ‧Time format This function allows you select the format of the time display, 12 or 24. Use navigation key to change it and press OK. [Note]: The time and date format display is depending on user settings. ‧Set the date This function allows you to set the date. ‧Date format This function allows you select format of the date display, use navigation key to change it press OK. ‧Auto-update of date / time ‧Within Settings menu, select Auto-update of date / time (network service) to set the phone to automatically update the time and date according to the current time zone, select On. ‧Automatic update of date and time does not change the time you have set for the alarm clock, calendar or the alarm notes. They are in local time. Updating may cause some alarms you have set to expire. Phone settings ‧Language This function allows you to switch between different languages and to select a language for the display texts. You can set your language as Automatic, Thai or English. [NOTE]: The option of Automatic depends on your service provider](https://usermanual.wiki/Cal-Comp-Electronics/M330T/User-Guide-1079219-Page-70.png)
![‧Smart Divert Scenario (Phone A, Phone B, Phone C) Phone “A” is a Dual SIM phone. SIM 1 No. 089XXXXXXX SIM 2 No. 081XXXXXXX ‧“A” use SIM 1 to call “B” or vice versa. ‧“A” and “B” are having conversation ‧“C” call to “A” SIM 2 ‧With smart divert function “On”, “A” is able to pick up a call from “C”. ‧Smart Divert Menu ‧On: Set the smart divert function on. -Add SIM 1 phone number in SIM 1 text box -Add SIM 2 phone number in SIM 2 text box -Press “Done” key to activate smart divert function. ‧Off: Set the smart divert function off -Press “Done” key to deactivate smart divert function. ‧Status: Show status of Call waiting and Call divert function setting of two SIM cards. [Note] Following 4 actions need to be enable in operator side before user press the “OK” key to open smart divert. a) SIM 1 Call waiting function is on b) SIM 1 Call divert function is on c) SIM 2 Call waiting function is on d) SIM 2 Call divert function is on [Note]Divert function will be charged from the operator. ‧Select SIM This function allows you to set dialing path. Choose between SIM1 or SIM2 to become the default dialing path.](https://usermanual.wiki/Cal-Comp-Electronics/M330T/User-Guide-1079219-Page-72.png)
![making calls, within call setup submenu, select Line Switch, and choose Line1 or 2. ‧If you select Line2 and have not subscribed to this networks service, you will not be able to make call. However, calls on both lines can be answered regardless of the selected line. ‧Closed user group This is a network service that specifies the group of people whom you can call and who can call you. For more information place contact your network operator or service provider. ‧Call time reminder Turn function On/Off to remind duration of a call. When this option is set to On, there will be a short beep when duration of a call exceeds the reminder time. ‧Call time display Turn the function On/Off to show calling time. ‧Auto redial Select On and your phone will make a maximum of ten attempts to connect the call after an unsuccessful call attempt. Connection setting ‧Bluetooth You can utilize wireless technology of Bluetooth to connect other inclusive devices. The inclusive device may include the mobile phone, the computer and earphone, etc. You can utilize Bluetooth technology transfer image, the film, music and sound file. [NOTE]: After opening the Bluetooth function, will increase the power consumption of the battery.](https://usermanual.wiki/Cal-Comp-Electronics/M330T/User-Guide-1079219-Page-75.png)
![‧You can switch mode on and off. ‧This function dials only the numbers in the fixed dialing number (FDN). To save and edit numbers on the list, you need the PIN2 code. ‧Barred dialing ‧You can switch mode on and off. ‧Change PIN code ‧Change PIN code This allows you to change the PIN number. ‧Change PIN2 code This allows you to change the PIN2 number. ‧Phone lock You can switch When switch On / Off the Phone lock function to protect your phone. If you select When switch on, you need enter the password to set the request on. [Note]: the default password is 0000. ‧Auto keypad lock ‧This allows you to lock the phone’s keypad to prevent accidental key presses. ‧In submenu, select the time that after the last key press will be disabled, then press OK. ‧Change security code This allows you to change the password. Restore factory ‧Within this menu you can reset the menu settings to their original values. The security code is needed for this function. [Note]: The default password is 0000.](https://usermanual.wiki/Cal-Comp-Electronics/M330T/User-Guide-1079219-Page-78.png)
![‧After you select restore factory, setting values are returned default value. Those value including Profile, Ring tone, Call log, Caller group, Time format, Wallpaper, Screen saver, Themes, WAP setting etc. Camera Camera [Note]: Please obey all local laws governing the taking of picture. Your phone has a digital camera and digital video recorder. You can take pictures, record video clips, view them and send them in MMS. To do this, you must subscribe to these services. Please check with your network operator. The camera lens is on the back of the front case and the display of the handset works as viewfinder. The camera produces pictures in JPEG format and the video clips in motion JPEG format. Please pay attention; if handset is not enough memory to take a new photo, you need to free some by deleting old photos or other files in the File manager. To access this menu, press Multimedia and select Camera. ‧Taking a Photo ‧The live image appears on the display, and you can use the display as a viewfinder. ‧To take a photo press center key to capture. When taking a photo a shutter sound is heard. The phone saves the photo in the Photo album of the Multimedia menu. ‧To setup camera option Press Options in the preview mode. All options will be displayed in the bottom of screen, and you can adjust the setting through the preview mode directly and your setting will be displayed on the top of screen Use the navigation right/left key to select different camera settings and up/down keys to select your preference. You can select:](https://usermanual.wiki/Cal-Comp-Electronics/M330T/User-Guide-1079219-Page-79.png)
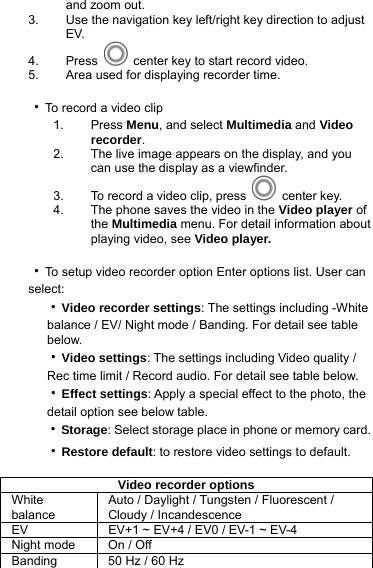
![Camera options To photo album Jump to the photo album by pressing OK. Shutter sound Sound Off / Sound 1/ Sound 2/ Sound 3 EV EV+1 ~ EV+4 / EV0 / EV-1 ~ EV-4 AE meter Auto / Spot / Weight / Average Banding 50 Hz / 60 Hz Self timer Off / 5 sec / 10 sec / 15 sec Burst Shot Off /4 shots/6 shots Image size 64*80 / 128*160 / 240*320 / 480*640 Image quality Low / Normal / High White Balance Auto / Daylight / Tungsten / Fluorescent / Cloudy / Incandescence Scene mode Auto / Night Effect settings Normal / Gray scale / Sepia / Sepia green / Sepia blue / Color invert Stick frame Off / Frame1 / Frame2 / Frame3 Storage Phone/Card Restore default Restore camera setting to default Music Player Your phone includes a Music player for listening to music tracks. MP3 files stored in the My Music folder (Default setting) will automatically be detected and added to the default play list. You can listen to the sound files via a compatible headset, or the phone’s loudspeaker. You can make or answer a call while using the music player. During a call, the playback is paused. [Note]: Because of the small dimension of the speaker, in some cases the audio could be distorted, especially at maximum volume and when there are lots of bass sounds. Therefore, we recommend you to use the stereo headset in order to appreciate the high quality of your music. The Music Player supports: AAC, AAC+, MP3, AMR, WAV, MIDI, iMelody formats. ‧Playing the audio](https://usermanual.wiki/Cal-Comp-Electronics/M330T/User-Guide-1079219-Page-80.png)
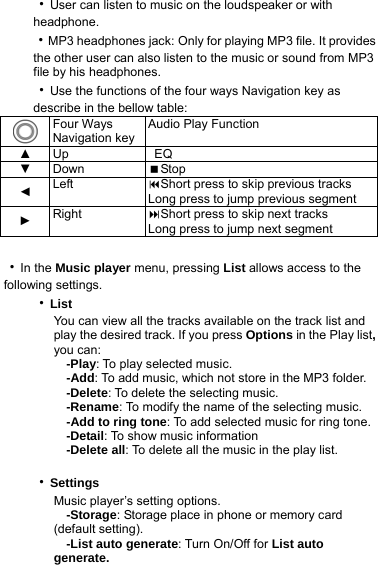
![‧When List auto generate function turns on, user can refresh the track list (for example after adding new tracks to the list) and change the track list that is shown. ‧When List auto generate functions turns off, user can add tracks from the different folder in File manager. -Repeat: To play the current track or the enter track list repeatedly. -Shuffle: Turn On/Off Shuffle function. -Background play: Turn On/Off Background plays function. -On: Allow music continuing playing when left music player. -Off: When user left music player, music will stop. -Equalizer: To change the equalizer. The function include: Normal, Bass, Dance, Classical, and Treble, Party, Pop, and Rock. [Note]: All music tracks must be storage in My Music (Default setting, user may not be change path.) ‧Add / Delete Music to play list -Please turn off the handset before Add/Delete music. -Plug in cable (USB) to handset and PC, screen show three options: ‧Mass storage mode: For add / remove music or image. In the Mass Storage mode, user can add / remove music to handset via PC. ‧COM port: as USB charger. [Note]: When you plug in USB cable, can select Mass storage, the handset will power off. But the handset will automatically connect to memory card only. If you want connect to the phone, please power off the handset. FM Radio To listen to the FM radio on your phone connects the compatible](https://usermanual.wiki/Cal-Comp-Electronics/M330T/User-Guide-1079219-Page-82.png)
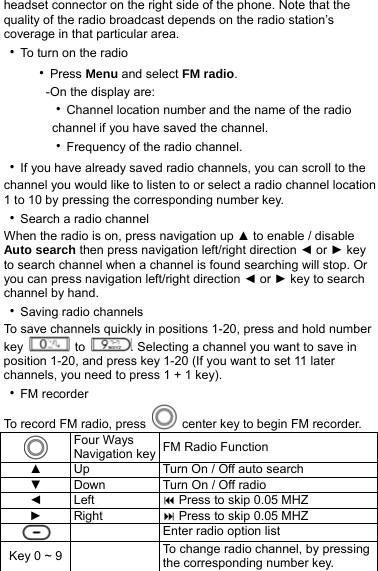
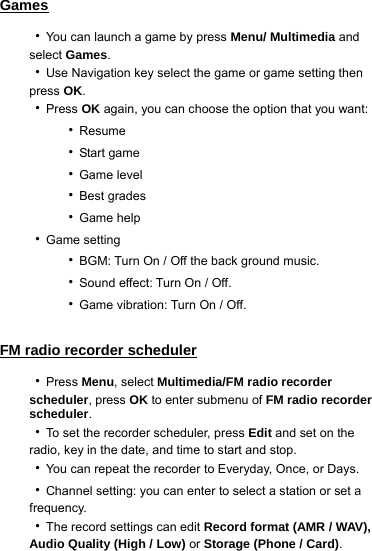
![‧Using the radio When the radio is on, press Left software key and select. ‧Stations: To save the channel you have found, press and select Edit. Key in the name of the channel and Frequency press OK. You can save 20 radio channels in the handset. ‧Set frequency: If you know the frequency of the radio channel you would like to listen to (between 87.5 MHz and 108.0 MHz), key it in and press OK. ‧Auto search: If you want to search radio channel, press Yes when Preset list confirm message show up. The search stops when channels has been found and show channel in Stations. ‧Settings: FM radio setting options: ‧Background play: Turn On/Off Background plays function. -On: allow radio continuing playing when exit FM radio. -Off: when user exits FM radio, radio will stop. ‧Record format: Select the record format, AMR/WAV. ‧Loud speaker: To turn On / Off the speaker. ‧Record Storage: Storage place in phone or memory card. ‧Record: Beginning record FM radio. ‧Append: To append new radio with the already existing file. ‧File list: Show amount of record files. [Note]: Before use FM radio option, please turn on the radio first. [Note]: You can normally make a call or answer an incoming call while listening to the radio. The volume of the radio is muted. When you end the call, the radio volume will automatically be turned up again. Also, when an application using GPRS or HSCSD connection is sending or receiving data, it may interfere with the radio.](https://usermanual.wiki/Cal-Comp-Electronics/M330T/User-Guide-1079219-Page-84.png)
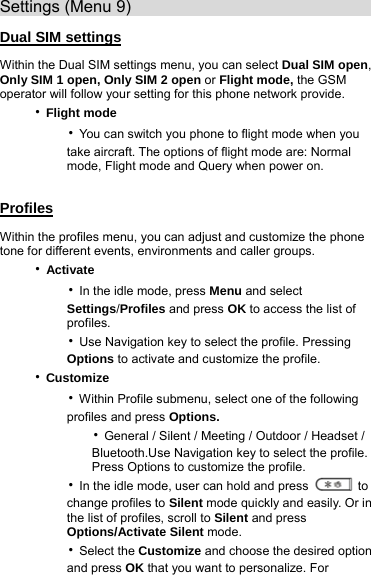
![To Use Mass storage (USB cable) [NOTE]: System default requirement: PC hardware and software for Windows 2000/XP and above. For more information, please see below “Install USB Software for Window 2000” [NOTE]: Please use USB according to the standard steps as below; otherwise the data may lose or cause damage. If you want to add/remove music and images to the Handset, connect it to a PC with USB cable. ‧Plug in cable (USB) to handset and PC, screen show three options: ‧Mass storage mode: for add / remove music or image files. ‧COM port: as USB charger. ‧Connecting the handset to PC ‧After connected the handset and PC, choice “Mass Storage” handsets will automatic turn off. ‧The OS will automatically generate two “Removable Disk” in My Computer, one for handset, one for memory card. You can enter the disk to access the data in the handset. ‧You can access to the handset from the Window Explorer (Windows 2000/XP) / File Manager or My Computer and add / erase audio, image or other files to the handset. ‧If you want to remove the USB cable from the handset after adding or erasing files ‧Double click the Remove Hardware icon in the taskbar tray. ‧Select “USB Mass Storage”, then clicks Stop when the message “You can remove hardware now” appears on the screen, and remove the handset. ‧Copy files into the handset ‧After connecting the handset to a PC successfully, there will be two new disks “Removable Disk” in My computer.](https://usermanual.wiki/Cal-Comp-Electronics/M330T/User-Guide-1079219-Page-85.png)