Calibeur Measurements RF-101-5 Wireless Thermometer Model: RF-101-5 User Manual manual
Calibeur Measurements (Hong Kong) Co., Limited Wireless Thermometer Model: RF-101-5 manual
user manual
RF-101
Wireless 433 MHz
Temperature Station
Instruction Manual
Statements
This device complies with Part 15 of the FCC Rules. Operation is subject to the
following two conditions: (1) this device may not cause harmful interference, and (2)
This device must
accept any interference received, including interference that may cause undesired
operation.
Warning: Changes or modifications to this unit not expressly approved by the
party responsible for compliance could void the user’s authority to operate the
equipment.
Note: This equipment has been tested and found to comply with the limits for a
Class B digital device, pursuant to Part 15 of the FCC Rules. These limits are
designed to provide reasonable protection against harmful interference in a
residential installation. This equipment generates, uses and can radiate radio
frequency energy and, if not installed and used in accordance with the instructions,
may cause harmful interference to radio communications.
However, there is no guarantee that interference will not occur in a particular
installation. If this equipment does cause harmful interference to radio or television
reception, which can be determined by turning the equipment off and on, the user is
encouraged to try to correct the interference by one or more of the following
measures:
- Reorient or relocate the receiving antenna.
- Increase the separation between the equipment and receiver.
- Connect the equipment into an outlet on a circuit different from that to which the
receiver is connected.
- Consult the dealer or an experienced radio/TV technician for help.

TABLE OF CONTENTS
Topic Page
Inventory of Contents 1
Quick Setup 2
Detailed Setup Guide
Battery Installation 3-4
Setting the Time 5
Selecting Units of Measurement 6
Features
Minimum and Maximum Temperatures 6-7
Resetting Minimum and Maximum Temperatures 7
Mounting 7-8
Troubleshooting 9-10
Maintenance and Care 11
Specifications 12-13
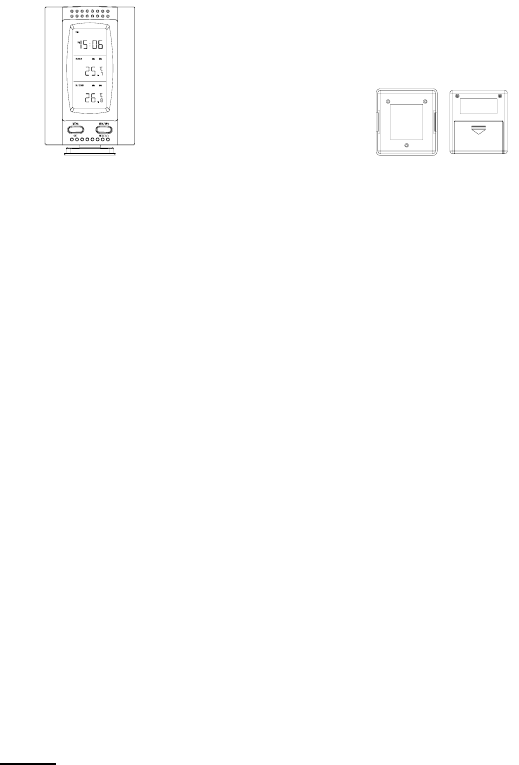
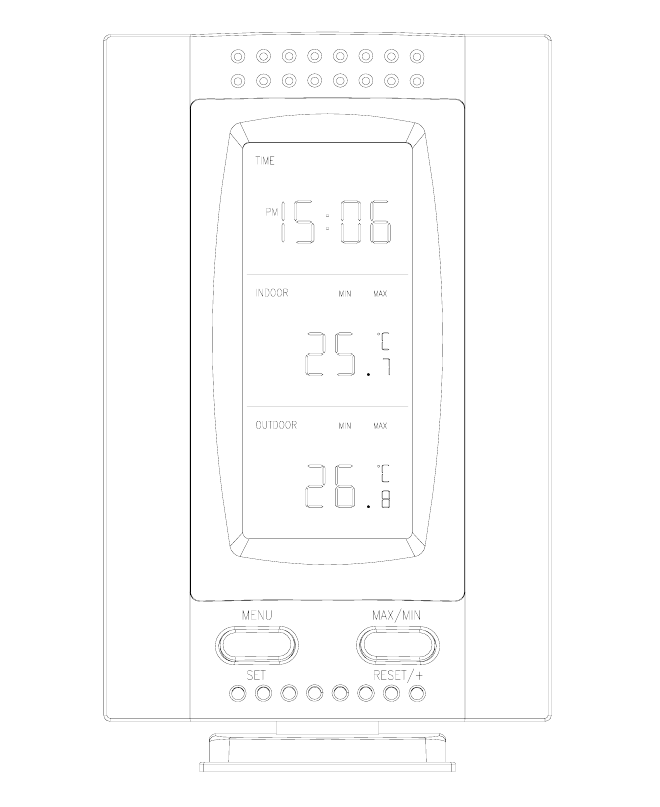
INVENTORY OF CONTENTS
1.The Indoor Temperature Station (Figure 1)
2.The Remote Control Sensor and mounting bracket. (Figure 2)
3.3 screws.
4.One strip of double sided adhesive tape.
5.Instruction Manual.
Figure 1 Figure 2
ADDITIONAL EQUIPMENT
(not included)
1. 1 Screwdriver.
2. 3 Fresh AAA 1.5V batteries.
3. 2 Fresh AAA 1.5V batteries.
QUICK SETUP
1.Insert three AAA batteries into the Indoor Temperature Station.
2.Insert two AAA batteries into the Remote Control Sender.
3.Wait 2-3 minutes, or until the outdoor temperature is displayed in the OUTDOOR
LCD of the Temperature Station.
4.Set the Time
5.Mount units.
(See complete instructions for details).
Note: The Remote Control Sender transmits a signal every 3 minutes. After the
batteries have been installed, the Indoor Temperature Station searches for these
signals for a duration of 3 minutes. If there is no temperature reading in the
“OUTDOOR” of the LCD after 3 minutes, make sure the units are within range of
each other, or repeat battery installation process.
DETAILED SETUP GUIDE
I. BATTERY INSTALLATION
A. TEMPERATURE STATION
1.Remove the battery cover on the backside. To do this, push up and pull out.
2.Observing the correct polarity, install 3 AAA batteries.
3.Replace battery cover.
4.Wait 2-3 minutes or until both indoor and outdoor temperatures are shown on the
Indoor Temperature Station.
5.The Temperature Station should now show: “0:00” in the TIME LCD, and
temperatures in the INDOOR and OUTDOOR LCD’s.
B. REMOTE CONTROL SENDER
Battery compartment
1.Remove the mounting bracket.
2.Remove battery cover
3.Observing the correct polarity, install 2 AAA batteries—make sure they do not
spring free, or start-up problems may occur. Replace cover.
Battery
cover
Battery cover
Ⅱ. TIME
A. SETTING THE TIME
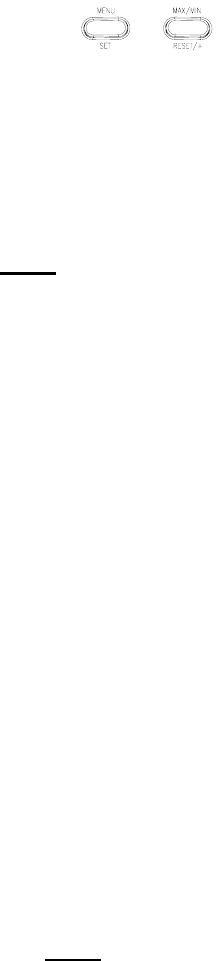
1. Press and hold the MENU/SET button for 3 seconds. “24h” will appear in the
TIME LCD.
2. Use the MAX/MIN button to select either 12h time (am/pm) or 24h time
3. Press the MENU/SET button 2 times, the hour will flash in the upper left corner.
4. Press the MAX/MIN button to set the hours, press the MENU/SET button, and
press the MAX/MIN button to set the minutes.
5. Press the MENU/SET button to activate the clock.
Note: When in 12h mode, there is only a “PM” display, which appears under
“TIME.” If there is no display here it is AM. Make sure you set the time
accordingly.
Ⅲ. UNITS OF TEMPERATURE MEASURE
A. SELECTING UNITS OF MEASUREMENT
1. Press and hold the MENU/SET button for 1 second.
2. Press the MENU/SET button again. “°F” will appear in the TIME LCD.
3. Press the MAX/MIN button to shift between °F and °C.
4. Press the MENU/SET button twice to activate settings.
Ⅳ. FEATURES
A. MINIMUM AND MAXIMUM TEMPERATURES
1. Press the MAX/MIN button. “MAX” appears in the temperature LCD’s and the
recorded maximum temperatures are displayed.
2. Press the MAX/MIN button to toggle to the minimum temperatures.
B. RESETTING THE MINIMUM AND MAXIMUM TEMPERATURES
1. To reset both the minimum and maximum temperatures—press and hold the
RESET/+ button for 3 seconds.
Ⅴ. MOUNTING
A. Note: To achieve a true temperature reading, avoid mounting in direct sunlight.
We recommend that you mount the Sender on an outside North-facing wall. The
sending range is 80ft; obstacles such as walls, concrete, and large metal objects
will reduce the range. Place both units in their desired location before
permanently mounting.
B. REMOTE CONTROL SENDER
1. Remove the mounting bracket from the Remote Control Sender and mount with
either screws or adhesive tape.
C.THE TEMPERATURE STATION
1.The Indoor Temperature Station comes with the table stand already mounted. If
you wish to use the table-stand, all that is required is to place the Indoor
Temperature Station in an appropriate location.
2.To wall mount, remove the table stand. To do this, pull down on the stand from
the rear and rotate forward.
a) Fix a screw (not included) into the desired wall, and place the Temperature
Station onto the screw using the hanging hole on the backside. Gently pull the
Station down to lock the screw into place.
TROUBLESHOOTING
Problem: The LCD is faint
Solution:
1) Set the LCD contrast to a higher number
2) Replace batteries
Problem: No outdoor temperature is displayed.
Solution:
1) Remove all batteries, reinsert into display first, and then sender.
2) Place remote sender closer to display.
3) Be sure all batteries are fresh.
4) Place Remote Control Sender and Weather Station in position so the straight-line
signal is not passing through more than two or three walls.
Problem: Temperatures do not match if units are placed next to each other.
Solution: Each temperature sensor is manufactured to be accurate to within 1 degree
plus or minus and under normal conditions; so two sensors could be as much as 2
degrees different. However, the difference can be exaggerated further because the
sensors are designed for different working environments. The indoor sensor is less
responsive to ambient air currents because of the shielding effect of the display's case.
In addition, the case can act as a heat sink to absorb and store heat from external
sources (i.e. handling of the case or radiant heat). In addition, the much greater range
of the outdoor temperature sensor requires a different calibration curve than the
indoor range. Error is usually greater at the extreme ends of a range, making it harder
to compare different ranges with different curves. Under non-laboratory conditions, it
is difficult to compensate for the above factors and obtain an accurate comparison.
MAINTENANCE AND CARE INSTRUCTIONS
• Extreme temperatures, vibration, and shock should be avoided to prevent damage
to the units.
• Clean displays and units with a soft, damp cloth. Do not use solvents or scouring
agents; they may mark the displays and casings.
• Do not submerge in water.
• Do not subject the units to unnecessary heat or cold by placing them in the oven or
freezer.
• Opening the casings invalidates the warranty. Do not try to repair the unit.
SPECIFICATIONS
Transmitting Frequency 433MHz
Measuring Temperatures
Temperature Station: Indoor 32°F to 140°F with 0.2°F resolution.
(0°C to 60.0°C with 0.1°C resolution).
Temperature Station: Outdoor -21.8 °F to 157.2°F with 0.2°F resolution.
(-29.9°C to 69.9°C with 0.1°C resolution).
Temp accuracy +/- 1°F (+/- .5°C).
Transmitting range Maximum 80 feet (25m) open space.
Temperature check
Indoor Every 60 seconds.
Outdoor Three times in 10 minutes.
Batteries—(Alkaline recommended)
Remote Sender 2 x AAA, 1.5V
Temperature 3 x AAA, 1.5V
Dimensions: (L x W x H)
Temperature
Station
2.75 x 0.92 x 4.25 in.
(excluding table stand) (70 x 23.5 x 108 mm).
Remote
Control
Sender
2.56 x 0.90x 2.79 in.
(65 x 23 x 71 mm).
Battery life More than ten months.