Carrier Fire and Security Americas 10103379G1 Electronic Access Key for Real Estate Professionals User Manual user guide
UTC Fire & Security Americas Corporation, Inc Electronic Access Key for Real Estate Professionals user guide
UserManual.wiki
>
Carrier Fire and Security Americas
>
10103379G1 User Manual
user guide
Navigation menu
Upload a User Manual
Namespaces
Wiki Guide
HTML
PDF
Info
Views
User Manual
Discussion / Help
Navigation


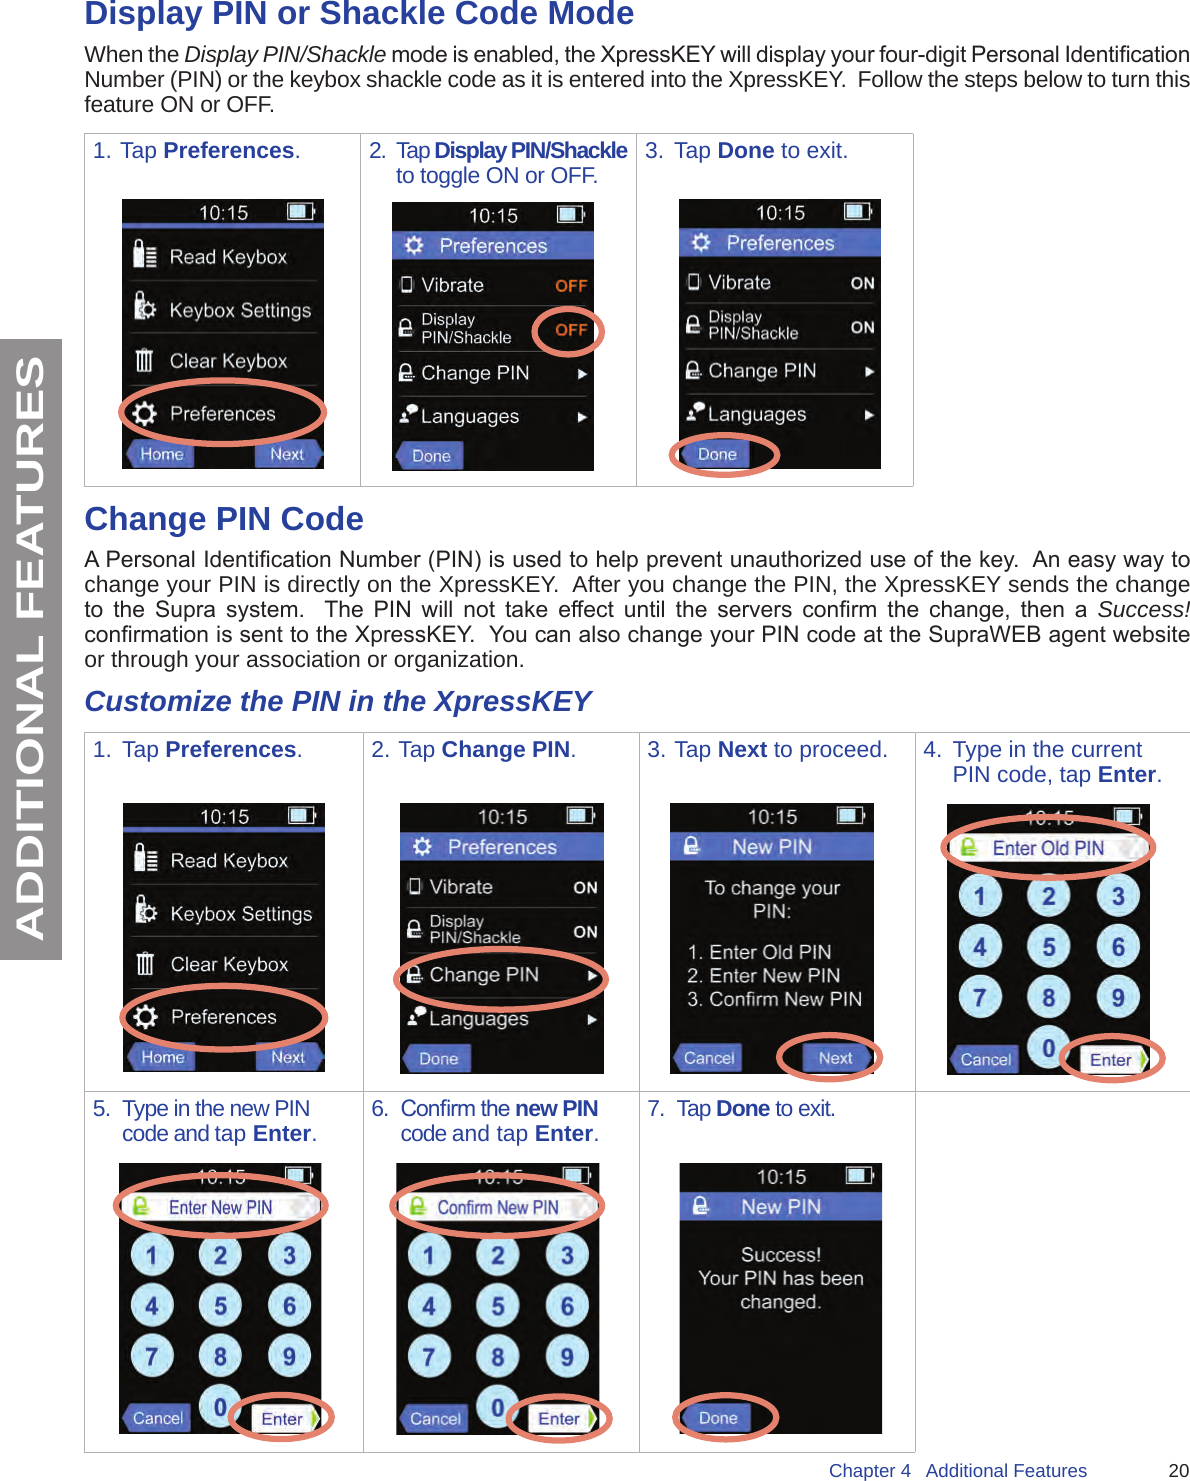


![28Chapter 5 Manage XpressKEY in SupraWEBSUPRAWEBEnd of Showing NoticationThe XpressKEY uses GPS to determine when a showing is complete by moving away from the approximate keybox area. End of showing information includes the keybox serial number, the property address, date and time of the end of the showing. End of Showing (EoS) notication allows the listing agent and designated recipients to see when the showing begins and ends for a property. If the EoS notication is not enabled by the association, the box in the Showing Notications (for all keyboxes): Send me showing notications for all keyboxes in my inventoryIf the EoS notication is enabled by the association, the box in the Showing Notications (for all keyboxes) will say: Send me beginning and estimated end of showing notications for all keyboxes in my inventoryBelow is an example of an EoS notication message that is transmitted to the designated recipients:From: ShowingValue [mailto:ShowingValue.UnmonitoredMailbox@fs.utc.com] Sent: Monday, August 10, 2015 4:12 PMTo: Jones, BriaSubject: End of Showing Notication Email from Mark JohnsonThis message is to inform you that the Supra system detected the showing has ended for Listing 4001 Fairview Industrial Drive, Salem, OR 97302 at 4:06PM on 08/10/2015 4:06PMPlease note that this notication does not guarantee that the showing agent is no longer at the listing.](https://usermanual.wiki/Carrier-Fire-and-Security-Americas/10103379G1/User-Guide-2821089-Page-34.png)