Carttronics 00001 Low Power Sensor User Manual MX01
Carttronics LLC Low Power Sensor MX01
User manual

MX01 USER MANUAL
Table of Contents
Product Description ............................................................................................................ 1
Settings................................................................................................................................1
Join A Network................................................................................................................... 2
PRODUCT DESCRIPTION
The MX01 is a low power sensor for use in retail monitoring applications. MX01 leverages the industry
standard wireless IEEE 802.15.4 to seamlessly integrate with other retail solutions. By using industry
standards and a modular sensor scheme, MX01 enables a wide range of sensing applications and network
capabilities. With MX01, real time knowledge of the retail environment becomes possible.
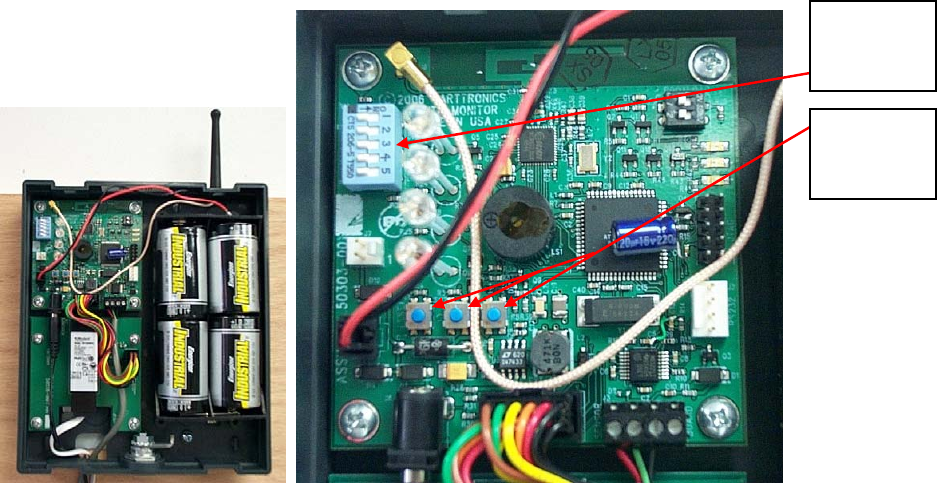
DIP
Switch,
SW4
Reset, Join,
SW B
Buttons
Figure 1a: MX01 Assembly. Figure 1b: Assembled MX01 Board.
SETTINGS
Properly assembled, the MX01 will monitor the ground loop antenna; connect to the modem or Ethernet
board, battery or wall power supply, and the radio which can be seen in figure 1a and figure 1b. The
locations of the DIP switches and the RESET, JOIN, and SW B buttons are also shown in figure 1b. Select
the appropriate DIP settings for desired functionality using the following table:

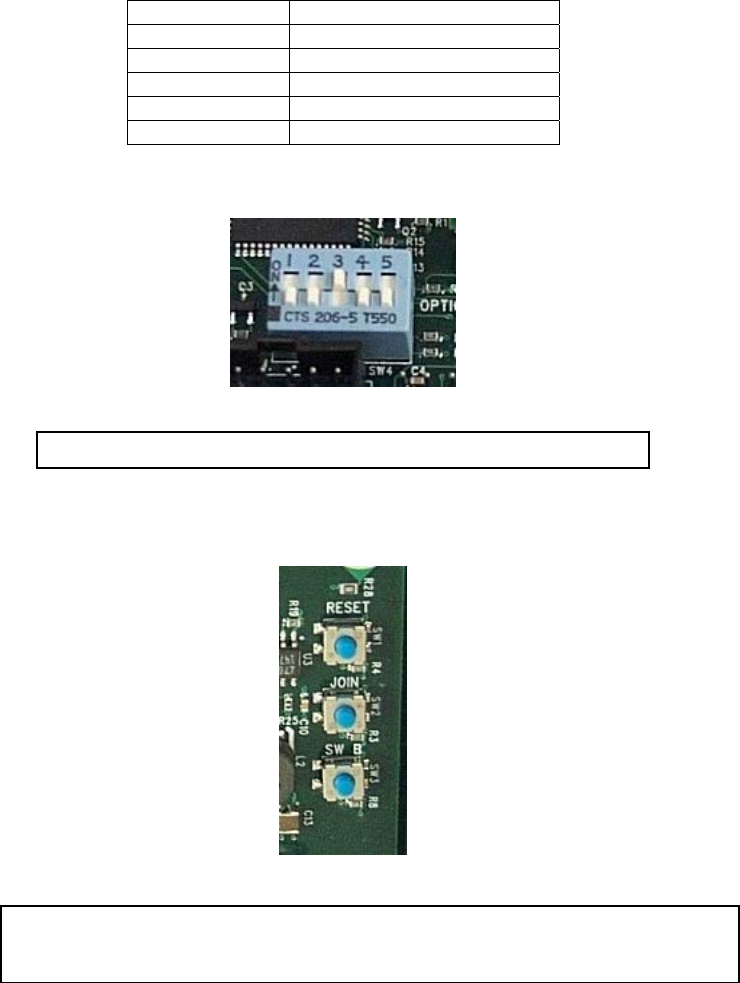
DIP Switch Operation
1 Neighbor
2 not used (off)
3 Test switch (must be off)
4 not used (off)
5 not used (off)
Table 1: DIP Switch Options Table.
Figure 2: SW 4 switch (Switch 3 is shown in the ON position).
NOTE: All DIP switches MUST BE OFF for
p
ro
p
er functionalit
y
.
JOIN A NETWORK
The following procedures outline how to join the MX01 radio board to a system network.
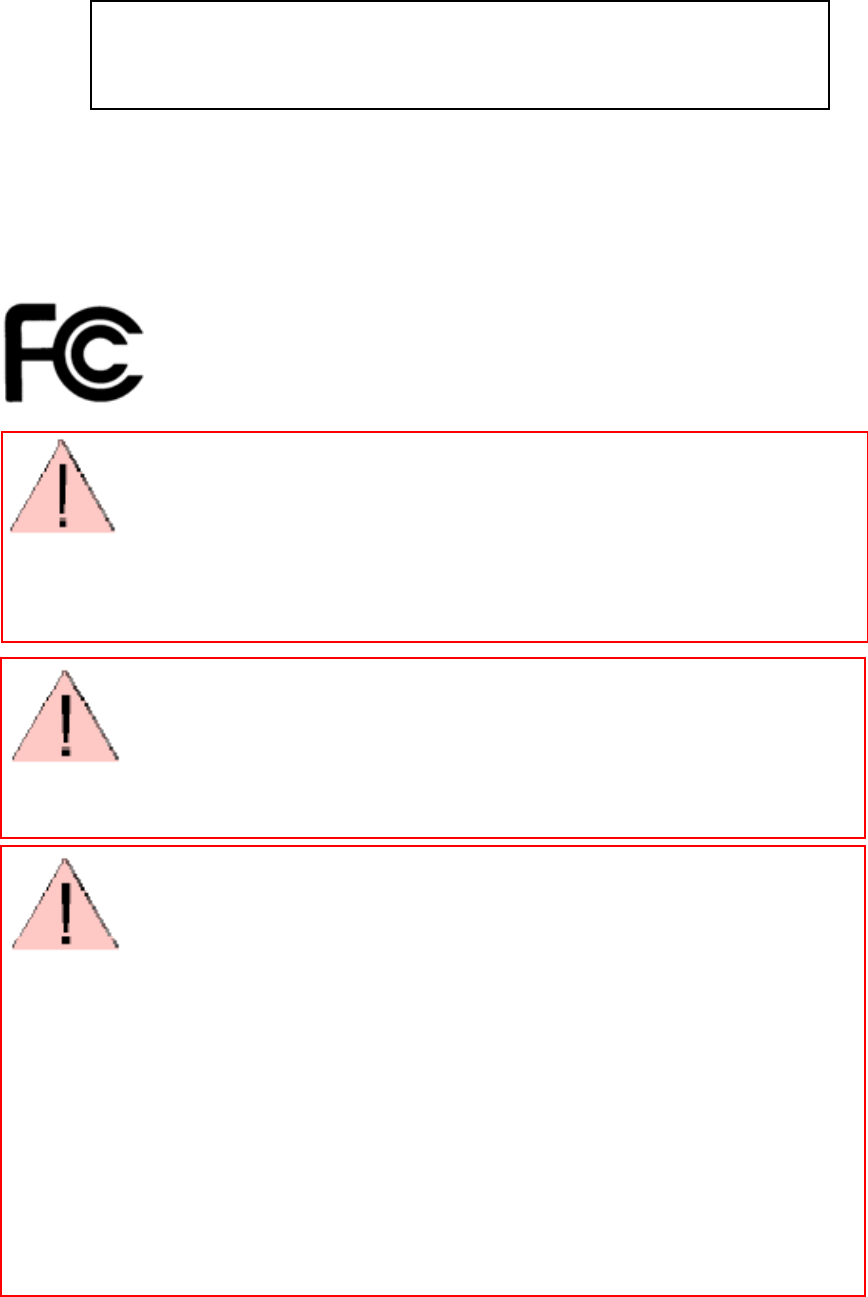
Figure 3: Reset, Join, and SW B buttons.
NOTE: Figure 4 is a rotated image of the GPRF board shown in figures 1a and
1b. Make sure to press the correct buttons when joining the system network.
Join Operation
Step 1: Find the nearest Network Router or the Network Integrator within radio range of the
network device, typically between 60’ (20m) to 300’ (150m) depending upon the number and type
of obstructions. Open the case and press and hold the Join button for at least 2 seconds. The blue
network LED will light (on but not blink.) This indicates this device will accept new network
members for 20 minutes.
Step 2: Go back to the network device and press the join button once briefly. The blue LED will go
on for 2 minutes or until the network device joins the local network. If the blue LED goes out and
does not blink, the join was not a success and there is a problem.

MT Restore Bypass
Step 1: Hold down the SW B button for two seconds then press the reset button and wait for the
green LED to flash. Once the green LED has flashed proceed with the standard Join operation
described above.
NOTE: There can be one and only one network integrator (SW4- Switch 3 ON).
NOTE: If the network device powers up with the blue LED blinking, the NV
Restore Bypass procedure must be followed to properly join the network.
Antenna Information
This device has been designed to operate with the antennas listed below, and having a maximum
gain of 1.5 dB. Antennas not included in this list or having a gain greater than 1.5dB are strictly prohibited
for use with this device. The required antenna impedance is 50ohms.
Approved Antennas:
Vendor: Centurion, Lincoln, NE. Vendor P/N: wcp2400-mmcx.
FCC ID: USH00001
IC ID: 6834A-00001
WARNING
The antenna used for this transmitter must be installed to provide a separation distance of at least 20 cm
from all persons and must not be co-located or operating in conjunction with any other antenna or
transmitter in its final installation. The installers must be provided with antenna installation instructions
and transmitter operating conditions for satisfying RF exposure compliance.
WARNING
Any changes or modifications made to the MX01 not aforementioned in the User Manual, or expressly
approved by the MX01 manufacturer, will void the user’s authority to operate the equipment.
WARNING
This equipment has been tested and found to comply with the limits for a Class B digital device, pursuant
to Part 15 of the FCC Rules. These limits are designed to provide reasonable protection against harmful
interference in a residential installation. This equipment generates, uses, and can radiate radio frequency
energy and, if not installed and used in accordance with the instructions, may cause harmful interference
to radio communications. However, there is no guarantee that interference will not occur in a particular
installation. If this equipment does cause harmful interference to radio or television reception, which can
be determined by turning the equipment off and on, the user is encouraged to try to correct the
interference by one or more of the following measures:
-Reorient or relocate the receiving antenna.
-Increase the separation between the equipment and receiver
-Connect the equipment into an outlet on a circuit different from that to which the receiver is
connected.
-Consult the dealer or an experienced radio/TV technician for help