Cellon Communications Technology PCD1012B MOBILE PHONE User Manual T38PCD1012B

Cellon Communications Technology (Shenzhen) Co.,Ltd. MOBILE PHONE T38PCD1012B
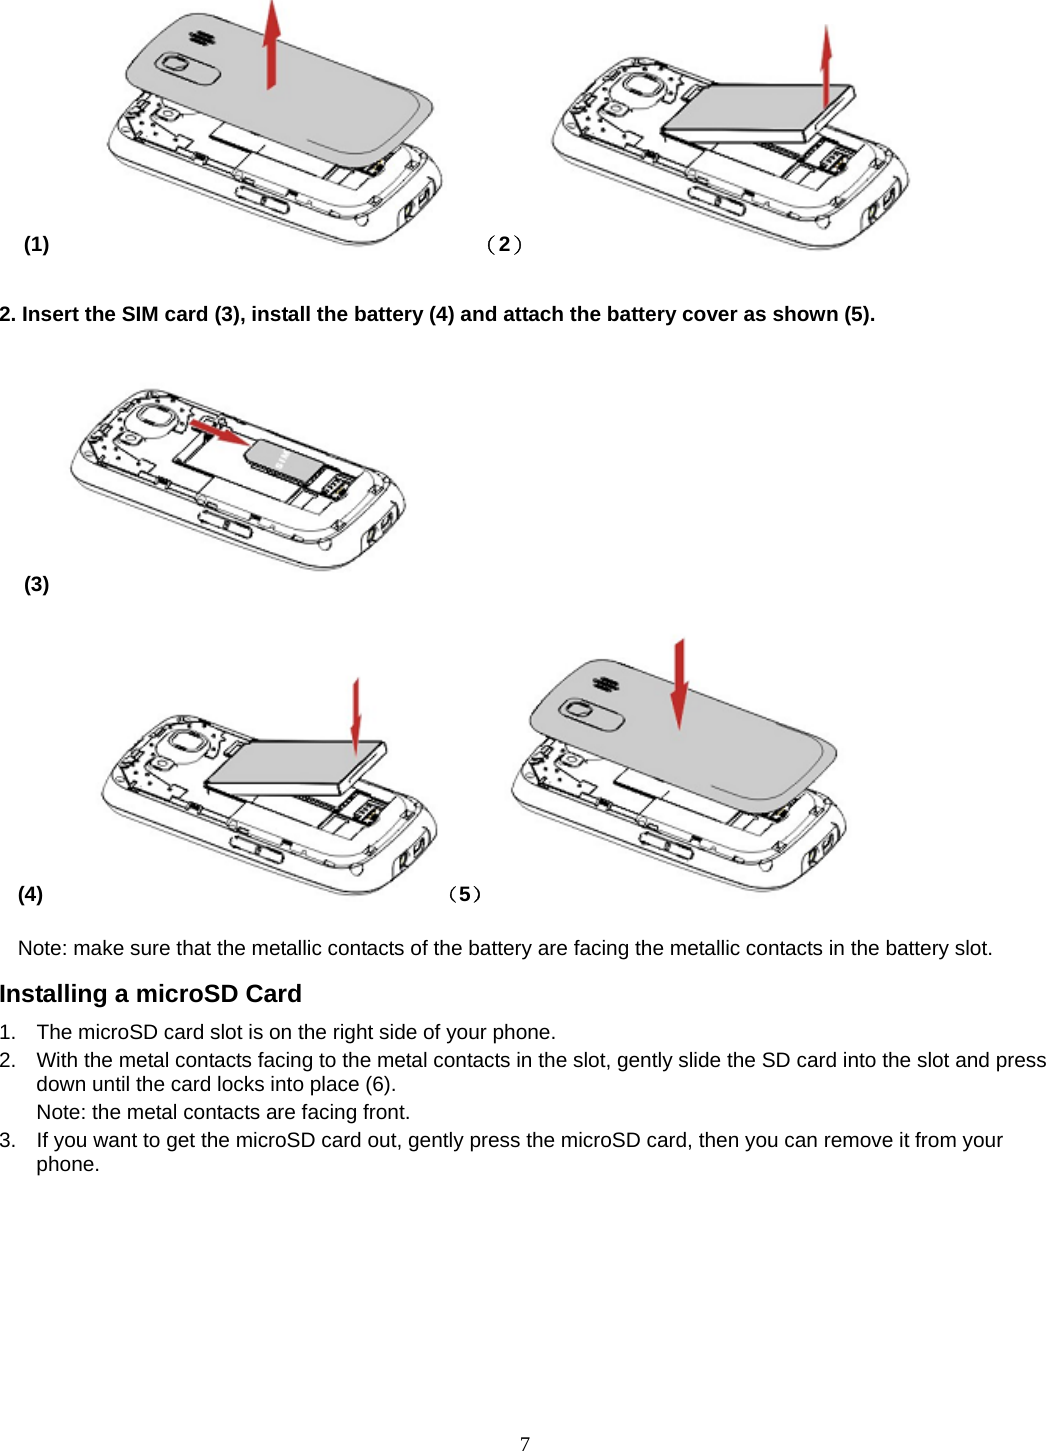
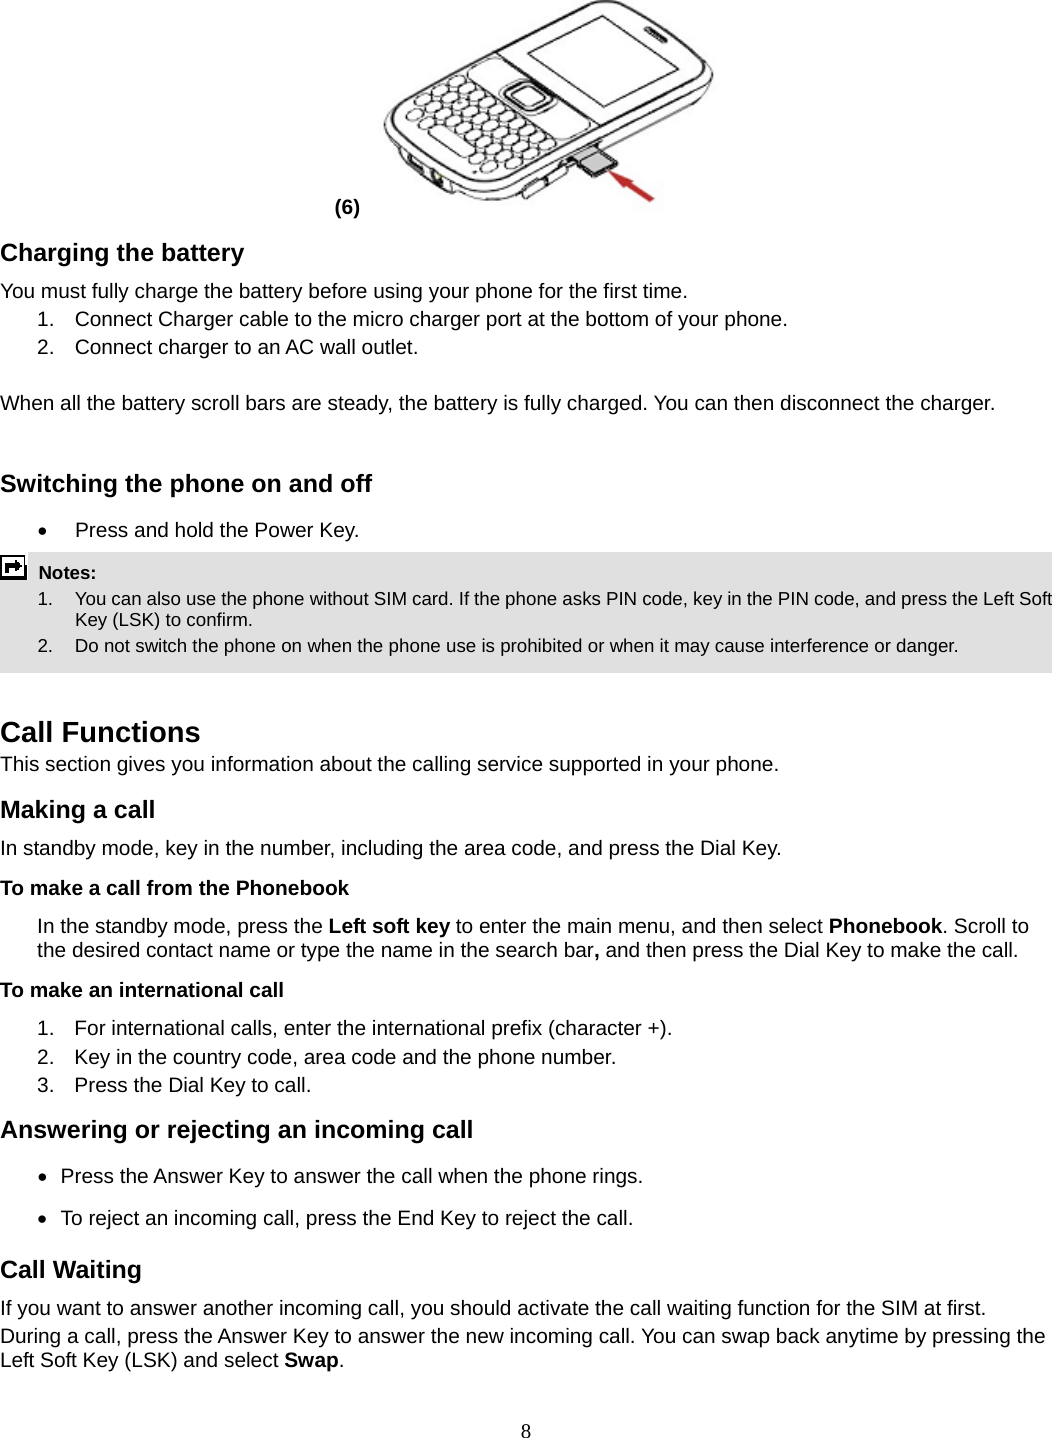
Users Manual

1          TTX28GT User Manual
2 YOUR PHONE ................................................................................................................................ 5STANDBY MODE .............................................................................................................................. 6GETTING STARTED ....................................................................................................................... 6INSTALLING THE SIM CARD AND THE BATTERY ................................................................................... 6INSTALLING A MICROSD CARD ......................................................................................................... 7CHARGING THE BATTERY .................................................................................................................  8SWITCHING THE PHONE ON AND OFF ................................................................................................. 8CALL FUNCTIONS ......................................................................................................................... 8MAKING A CALL ............................................................................................................................... 8ANSWERING OR REJECTING AN INCOMING CALL ................................................................................. 8CALL WAITING ................................................................................................................................ 8INPUT METHOD ............................................................................................................................. 9MESSAGES .................................................................................................................................... 9WRITE MESSAGE ........................................................................................................................... 9INBOX ............................................................................................................................................ 9DRAFTS ....................................................................................................................................... 10OUTBOX ...................................................................................................................................... 10SENT MESSAGES .......................................................................................................................... 10DELETE MESSAGES ...................................................................................................................... 10EMAIL .......................................................................................................................................... 10GMAIL ......................................................................................................................................... 10BROADCAST MESSAGE ................................................................................................................. 11TEMPLATES ................................................................................................................................. 11MESSAGE SETTINGS ..................................................................................................................... 11GAMES ......................................................................................................................................... 12STK ............................................................................................................................................... 12CALL CENTER ............................................................................................................................. 12CALL HISTORY .............................................................................................................................. 12Missed Calls ............................................................................................................................................ 12Dialled Calls ........................................................................................................................................... 13Received Calls ......................................................................................................................................... 13Delete call logs ....................................................................................................................................... 13Call timers ............................................................................................................................................... 13Call Cost ................................................................................................................................................. 13Text message counter .............................................................................................................................. 13GPRS Counter ......................................................................................................................................... 13CALL SETTINGS ............................................................................................................................ 13Advance settings ..................................................................................................................................... 14WAP .............................................................................................................................................. 14INTERNET SERVICE ....................................................................................................................... 14Homepage ............................................................................................................................................... 14Bookmarks .............................................................................................................................................. 14Recent Pages ........................................................................................................................................... 14Input Address .......................................................................................................................................... 14
3 Service Inbox ........................................................................................................................................... 14Settings .................................................................................................................................................... 15Data Account .......................................................................................................................................... 15PHONEBOOK ............................................................................................................................... 15SEARCH ...................................................................................................................................... 15ADD NEW CONTACT ..................................................................................................................... 16CALLER GROUPS ......................................................................................................................... 16PHONEBOOK SETTINGS ................................................................................................................ 16ORGANIZER ................................................................................................................................. 17CALENDAR ................................................................................................................................... 17TASKS ......................................................................................................................................... 17ALARM ........................................................................................................................................ 17WORLD CLOCK ............................................................................................................................ 17MULTIMEDIA ................................................................................................................................ 18AUDIO PLAYER ............................................................................................................................. 18Play the music ......................................................................................................................................... 18IMAGE VIEWER ............................................................................................................................. 18SOUND RECORDER .......................................................................................................................  18FM RADIO ................................................................................................................................... 19FILE MANAGER ............................................................................................................................ 19SETTINGS .................................................................................................................................... 19PHONE SETTING .......................................................................................................................... 19Time and date .......................................................................................................................................... 19Schedule power on/off ............................................................................................................................. 20Language ................................................................................................................................................ 20Pref. input methods: Allows you to predefine your input method. .......................................................... 20Display .................................................................................................................................................... 20Dedicated Key ......................................................................................................................................... 20Auto update of date and time .................................................................................................................. 20Flight mode ............................................................................................................................................. 20Misc. settings .......................................................................................................................................... 20NETWORK SETTINGS .................................................................................................................... 20SECURITY SETTINGS ..................................................................................................................... 20RESTORE FACTORY SETTINGS ....................................................................................................... 21EXTRA .......................................................................................................................................... 21CALCULATOR ............................................................................................................................... 21CURRENCY CONVERTER ................................................................................................................ 21STOPWATCH ................................................................................................................................ 21CAMERA ...................................................................................................................................... 22USER PROFILES ......................................................................................................................... 22GENERAL INFORMATION ........................................................................................................... 23ACCESSORIES .............................................................................................................................. 23GPRS/EDGE ............................................................................................................................. 23PRECAUTIONS ............................................................................................................................ 23
4 TROUBLESHOOTING .................................................................................................................. 24SAFETY INFORMATION AND NOTICES ..................................................................................... 25USING THE CELLULAR PHONE AND CHARGER ................................................................................. 25Danger: ................................................................................................................................................... 25Caution: .................................................................................................................................................. 25Warning:.................................................................................................................................................. 25USING THE CELLULAR PHONE ....................................................................................................... 25Warning:.................................................................................................................................................. 25Caution: .................................................................................................................................................. 26Danger: ................................................................................................................................................... 26Warning:.................................................................................................................................................. 26Caution: .................................................................................................................................................. 26USING THE CHARGER ................................................................................................................... 26Danger: ................................................................................................................................................... 26Caution: .................................................................................................................................................. 27REQUIREMENTS FOR THE BATTERY ................................................................................................ 27REQUIREMENTS FOR THE CHARGER AND AC ADAPTER .................................................................... 27SPECIFIC ABSORPTION RATE (SAR) INFORMATION ..........................................................................  27CLEANING AND MAINTENANCE ....................................................................................................... 2712 MONTH LIMITED WARRANTY ............................................................................................... 28
5 Your Phone                             Left/Right soft Key  •  Press to perform the function currently displayed in the bottom left/right corner of the screen.  Home Key Press to access main menu  Navigation Key •  In the standby mode, Navigation Key UP to access the Messages •  Press the Navigation Key Down to access the STK. •  Press the Navigation Key Left to access the write Phonebook •  Press the Navigation Key Right to access the Fun & Games.  OK Key •  In the standby mode, press to access the WAP.. •  Confirm a selection.  Dial/Answer Key •  Press to make a call. •  Press to answer a call. •  In idle mode, press to display call list •  End/ Power Key •  Press to end a call. •  Press and hold to power on/ off the phone.  Message Key •  Press to access the email.  FN Key •  Activate FN mode to enter digits or characters printed on the top part of the keys, Press the FN Key once to activate it once, press the FN Key twice can activate FN mode all the time, in this case, to deactivate the FN mode, press the FN key.
6 Standby mode In the main display, you may see several icons displayed on your status bar. The meaning for each icon is explained below:   Vertical bars indicate the signal strength of the GSM network signal.    Indicates the battery charge level.  Indicates your phone is locked.  Indicates your phone uses the alert type of “Ring”.  Indicates your phone uses the alert type of “Vibrate and ring”.  Indicates your phone uses the alert type of “Vibrate then ring”.  Indicates your phone uses the alert type of “Vibrate”.  Indicates your phone uses the headsets profile settings.  Indicates the alarm clock is set.  Indicates a missed call.  Indicates new text message(s).   Indicates new multimedia message(s).     Indicates new voice mail message(s).  Indicates WAP push messages.  Indicates stopwatch is enabled.  Indicates your phone has logged onto EDGE.  Getting started Installing the SIM card and the battery You need to insert the SIM card and charge the battery before using the phone. •  Keep all miniature SIM cards out of the reach of little children. •  Be careful to handle, insert or remove the SIM card since the SIM card and the contacts inside can easily be damaged by scratching or bending. •  Before installing/removing the SIM card, always make sure that the phone is switched off.   1. Remove the back cover (1) and lift the battery away (2).
7 (1)       (2)                  2. Insert the SIM card (3), install the battery (4) and attach the battery cover as shown (5).                                                                             (3)  (4)     (5)           Note: make sure that the metallic contacts of the battery are facing the metallic contacts in the battery slot. Installing a microSD Card 1.  The microSD card slot is on the right side of your phone. 2.  With the metal contacts facing to the metal contacts in the slot, gently slide the SD card into the slot and press down until the card locks into place (6). Note: the metal contacts are facing front. 3.  If you want to get the microSD card out, gently press the microSD card, then you can remove it from your phone.
8 (6)   Charging the battery You must fully charge the battery before using your phone for the first time. 1.  Connect Charger cable to the micro charger port at the bottom of your phone. 2.  Connect charger to an AC wall outlet.  When all the battery scroll bars are steady, the battery is fully charged. You can then disconnect the charger.  Switching the phone on and off •  Press and hold the Power Key.  Notes:   1.  You can also use the phone without SIM card. If the phone asks PIN code, key in the PIN code, and press the Left Soft Key (LSK) to confirm.   2.    Do not switch the phone on when the phone use is prohibited or when it may cause interference or danger.   Call Functions This section gives you information about the calling service supported in your phone.   Making a call In standby mode, key in the number, including the area code, and press the Dial Key.   To make a call from the Phonebook In the standby mode, press the Left soft key to enter the main menu, and then select Phonebook. Scroll to the desired contact name or type the name in the search bar, and then press the Dial Key to make the call.     To make an international call   1.  For international calls, enter the international prefix (character +). 2.  Key in the country code, area code and the phone number. 3.  Press the Dial Key to call. Answering or rejecting an incoming call •   Press  the Answer Key to answer the call when the phone rings. •   To reject an incoming call, press the End Key to reject the call. Call Waiting If you want to answer another incoming call, you should activate the call waiting function for the SIM at first.   During a call, press the Answer Key to answer the new incoming call. You can swap back anytime by pressing the Left Soft Key (LSK) and select Swap.
9   Input Method You can key in text by pressing the keypad. To select an input method Before you key in text, press Options and select Input Method, or you can press shift key to switch input Method. To insert a space You could press the space key to insert spaces.  To insert the symbols Press the symbol key can access the symbols.  To activate or deactivate the FN mode Activate FN mode to enter digits or characters printed on the top part of the keys, Press the FN Key once to activate it once, press the FN Key twice can activate FN mode all the time, in this case, to deactivate the FN mode, press the FN key.     Example: How to enter the word "Happy2010!" 1.  Press the Shift Key to activate the “ABC” mode, press the H Key to enter “H”. 2.  Press the Shift Key to activate the “abc” mode, press the a, p, p, y key to enter “appy”. 3.  Press the FN Key twice to activate FN mode, press the 2, 0, 1, 0, ! Key to enter “2010!”.  Messages Your phone supports voice mail notification messages and text messages. Voice mails, short message service (Text message) and multimedia message (MMS) are network service. Please check your service provider for further details on the fees. Write Message To write a message: 1.  From the main menu, select Messages. 2. Choose Write message > Text message / Multimedia message.  3.  In multimedia message content, you are able to add picture, sound and attachment into your message.   4.  After finished, select Options and then Send to. 5.  Add the recipient by inputting the number manually or searching them in the phonebook. 6. Finally, select Options and select the send option to send the message.   Notes:    1. To key in the content, please refer to “Input Method“.     2. To use the multimedia message function, your network operator or service provider support is necessary. Only phones equipped with this function can receive and display multimedia messages.   Inbox Your phone saves the text messages and multimedia messages (MMS) that have been received in the Inbox folder.
10  To read messages When you have received a message, icons will indicate this message is from SIM card or Phone in inbox. If your inbox is full since the messages you have received are saved in SIM as default setting, your message will be saved in the phone instead of SIM card, If the phone’s inbox is full also, there will be a pop-up window to remind you that your inbox is full and cannot accept new messages.     1. From the main menu, select Messages.  2. Then select Inbox. All received messages are listed in this folder.  Drafts Your phone saves the saved messages in the Draft folder.    Outbox  Your phone saves the messages Unsent in the Outbox folder.  Sent messages   Your phone saves the messages sent successfully in the Sent messages folder.  Delete messages You are able to delete all messages in a folder or even all messages at once. Email To create an account 1.  First, you must create the data account. In idle mode, press the Left Soft key to access the main menu, and then select WAP > Data account > GPRS. This is where you can input the APN. 2.  Go back to idle mode by pressing the Power Key. Select Menu > Messages > Email > Email accounts.  3.   Select Options > New account to add a new email account, follow the steps which prompt you to go ahead. 4.      After you have finished, your phone will save the new account automatically. 5.      Choose one of your favorite accounts, Select Options > Activate to activate the selected account. To write an email 1.  In idle mode, press the Left Soft key to access the main menu, and then select Messages > Email >Write Email. 2.  Add the Email address in the fields of To, Cc, and Bcc of where you would like the message sent. 3.  Scroll to the subject field, enter the subject by selecting Edit, attach the files, set priority, and edit the email content. 4.  When you have finished, select Done. A popup screen will indicate the mail size. 5. Select Yes to send, send and save, save to drafts, or quit without saving.          Gmail 1.  In the main menu, select Messages>Email. 2.    Select E-mail Accounts, then select options > New account to create new account. 3.    Select “Yes” to the message of creating new account. 4.    Enter the email address (your full email address is like sunnombre@gmail.com) and select options > Next. 5.    In the protocol window, Select POP3 /IMAP4, then select Options > Next 6.  Press Options >Select, select an appropriate Data account, then select Options > Next 7.    Enter your incoming server, click next to enter Outgoing server. 8.  Enter user name 9.    Enter password, then Enter the name you give to your email account and select Options >Done. Once the configuration email account folder is listed in the Email accounts. Select the Gmail account and press options.  10. Select Edit, then select Advance settings, select Outgoing Server and add the following settings
11 Example: a. Authentication: On   b. Security: SSL/TLS 11. Select Incoming Mail and add the settings payable are:   Example: a. Security: SSL/TLS Troubleshooting:  When you send a new email at the first time, there is a certificate error, The error occurs because the security certificate of the mail server electronic Gmail, not installed or Expired.   1. Press the option key, select the option 1: Install   2. Enter the security certificate name   3. Select Done.      Note: If you sent email trough Gmail, you have to install the certificate, please contact your Gmail operator for more information.  Broadcast Message Your phone allows you to receive commercial messages. You can either enable or disable the receiving mode and set some other settings based on your personal preference.   Templates There are several default Text message and MMS templates in your phone.   Message Settings Your phone allows you to set up default setting on the Text message and MMS features. 1. Go to Messages and choose Message settings. 2. Then select Text message or Multimedia message to change settings. 3.  Choose the field you would like to change. Text message provide following options to customize: • Profile Settings: If more than one message profiles are allowed by your SIM, you may edit the profiles separately. • Voicemail server: Your phone allows you to access your voice mailbox quickly if your operator supports this function. Your voice mail number will be provided by your service provider and displayed in the phone. In the standby mode, press and hold the 1 Key to call your voice mail directly. • Common Settings: If Delivery Report is on, the network will sends delivery reports on your messages. If Reply Path is on, you will transmit the number of your Text message center together with message, the recipients can then reply using your Text message centre and not theirs, this speed up the rate of transmission. This feature is subscription dependent. If Save sent message is on, the sent successfully messages will be saved in Sent box. • Memory status: Allows you check memory status in the Phone or SIM card. • Preferred Storage: Allows you to change your preferred storage as SIM or phone. • Preferred connection: Allows you to set your preferred connection.  MMS message provide the following options to customize:
12 Profiles: You may receive and send multimedia messages through a certain network or service provider. To activate a profile setting, select it and then choose Activate Account. Common settings: see following settings. • Compose: You can set compose format based on the option listed below. • Slide Time: Define the time for the delay between each slide. • Creation Mode: If you select Restricted, the device prevents you from sending messages that may not be supported. To include content in your message without notifications, select Free. • Picture Resizing: Define the size of the image in an MMS. • Auto Signature: Define whether you want to add a signature at the end of an MMS automatically. • Signature: Define the signature that you want to be added. • Sending: This setting contains the options, such as priority, delivery report, and so on.   • Retrieval: This setting contains the options, such as roaming, read report, and so on. • Memory status: Allows you check the used and free memory.  Note: You may contact with your network service operator to consult MMS settings.   Games This phone is built with creative games. You can get the game instructions from the "Help" submenu. In this menu, you can also access the JAVA applications here.    STK   Note: The submenus of this feature depends on the operator and different operators may provide different services (some SIM cards do not support STK), which cannot be modified Please contact your operator. Call center   Your phone can save the call records of missed calls, received calls, Dialled calls, durations and cost of calls in the Call History menu.        Notes:        1.   Once the call list exceeds the memory limitation, the oldest one is deleted.             2.    For the call logs, you can press the Dial Key in standby mode to have a quick review.     Call history Missed Calls To view Missed Calls In Call center menu, choose Call history > Missed calls, and press the Navigation Key up and down to view the records.
13 Dialled Calls To view Dialled Calls In Call center menu, choose Call history > Dialled calls, and press the Navigation Key up and down to view the records. Received Calls   To view Received Calls In Call center menu, choose Call history > Received calls, and press the Navigation Key up and down to view the records. Delete call logs Your phone allows you to delete Records from the Missed Calls list, Dialled Calls list, Received Calls list, or All Call lists. Call timers Your phone allows you to view the duration of your incoming and outgoing calls.   Call Cost This function allows you to check the cost of your last phone call or total cost. To reset the cost, you need to enter PIN2 code. The password can be obtained from your service provider. Text message counter This function allows you to check the numbers of message.   In Call center menu, choose Call history > Text msg. counter to view the records. You may press Reset to reset the counter.  The following items are available for Text message counter: • Sent: The number of Text messages you have sent. • Received: The number of Text messages you have received. GPRS Counter This function allows you to check the data size (both message and WAP) of GPRS packet you used.   In Call center menu, choose Call history > GPRS counter to view the content.   The following options are available for GPRS counter: • Last Sent: The GPRS volume you sent last time. • Last Received: The GPRS volume you received last time. • All Sent: The total GPRS volume you have sent. • All Received: The total GPRS volume you have received. • Reset Counter: Press to reset the counters. Call settings • Caller ID: Allows you to either send or hide your ID during calling or sending out the message. Your phone is defaulted in Set by network, which means your ID is determined by your service provider.
14 • Call Waiting: Allows you to enable call waiting function. • Call Divert: Allows you to set the call condition by which calls are diverted to another number. • Call Barring: Allows you to restrict incoming calls and outgoing calls from your phone. • Closed user group: This is a network service. Advance settings • Auto redial: If it is on, your phone will make a maximum attempts to connect the call after an unsuccessful call attempt.   • Call time display: Allows you to enable or disable the call time display on the phone screen. • Call time reminder: Allows you to set a time reminder during a call.  WAP Services described in the following are supported by your service provider. If you cannot connect either one of those services, you might contact with your service provider for further information.  Internet service Your phones support WAP Browser. You can obtain various services such as up-to date news, weather, sport, and other information as well as other Internet services. These services are designed and maintained by WAP service providers.   Notes:         1. To activate WAP service, you may need to contact your service provider.         2. Do not switch the phone on when the wireless phone use is prohibited or when it may cause interference or danger.  Homepage To access the browser from the standby mode, go to Internet service in WAP and select Homepage. Once connected, the homepage is displayed. The content depends on the service provider. To exit the browser, press the End Key. You can set the homepage address in WAP > Internet service > Settings > Profiles. Bookmarks You can use this menu to save URL addresses to quick access WAP pages.   Recent Pages You can view the recent pages you have visited.   Input Address You can key in the URL address. When you are done, select Options > Done. Your phone will connect the URL you just keyed in. After the address is entered, you may select the URL and select Options > Go to to connect next time. Service Inbox WAP push messages are saved here.
15 Settings GPRS (General Packet Radio Service) is a technology that use for sending and receiving data over the mobile network.   WAP Setting If the settings have made by the service provider, you may begin immediately. If the accessed profiles have been assigned by your service provider, select a profile and activate it. Otherwise, you may key in setting manually. For appropriate settings, contact your network operator or service provider. Key in the service settings manually 1.  From the main menu, select WAP > Internet service > Settings >Profiles. 2.  Select a profile from the list. Select Activate profile to activate the selected profile. You may edit the profile in Profile name, Homepage, Data account, Connection Type, User name, and Password. To get more information, you may need to contact your operator.    Note:  In most cases, you only need to use one of the default profiles to access the Internet. The settings are different from operator to operator. Please consult your operator or service provider for the correct settings and proceed with care. Wrong settings will cause the connection to fail.  Browser Options You can set the timeout value for the browser. The purpose is to stop the browser from connecting the website if the website does not respond within the timeout. Also, you can choose to either turn On or Off the image while browsing.  Service Message Settings You can choose either receive or reject the service messages which are saved in the service inbox sent by your service provider.  Clear Cache The information or date you have accessed is all stored in the cache of the phone. A cache is a file buffer used to store date only temporarily. You can clear the cache by selecting this option.  Clear Cookies Under the consideration of privacy and security issue, we would suggest you to clear cookies which may contain sensitive information just in case your phone is misplaced, lost or stolen.  Trusted Certificates This function is to indicate your trusted certificate while browsing and allows you to manage your trust list.  Data Account You can access WAP via GSM Data or GPRS. To get the analogue number, ISDN number information or the access point of GPRS, you may need to contact your operator for the service.    Phonebook Your phonebook list is saved either on the SIM card’s memory or Phone’s memory. You can also choose to list both. Search In standby mode, press the Left Soft key to enter the main menu, and then select Phonebook.
16 Now you can search names and numbers saved in the Phonebook Key in full name or first character of contact person’s name, the phonebook list will automatically jump to the character you have entered or the matched contact will be displayed.  Add New Contact Allows you create a new entry into the phonebook list. It will be saved either in phone memory or SIM card.  To add a new contact 1. In Phonebook menu, choose Add new contact, press Left Soft Key to select Options > Select, and then enter the contact information. 2. Press Done or OK to save the new contact. Note, If you want to change the storage location, please select Add new contact > Phonebook settings > Preferred storage,  Notes:        1.    Your phone allows you to save 500 entries of phone numbers.     2.    Image and video can be selected from both default and file manager.   Caller Groups In standby mode, press the Left Soft key to enter the main menu, and then select Phonebook, press Left Soft Key to select Options > Caller groups. There are five default caller groups on the phone. You can edit each group’s name. With the caller group function, you can send a message to all members of a group at the same time.    Phonebook Settings To access the Phonebook settings, in standby mode, press the Left Soft key to enter the main menu, and then select Phonebook, press Left Soft Key to select Options > Phonebook settings Your phone provides you various setting options to personalize your phone, including,     • Preferred Storage: You can choose your preferred storage in phone, SIM or both. • Speed dial: If you assign the number to one of the speed dialing Keys (from the key 2 to key 9) saved in the phonebook list, you can dial the phone number by pressing and holding the key in the standby mode. First, you should turn this feature on, and then set the number by associating with a contact. • My Number: Allows you to define number or name. • Extra numbers: Allows you to view owner number, service dialing number and SOS number, some SIM card cannot support it. • Memory Status: You can check how many entries are stored in SIM card’s and Phone’s memory. • Copy contacts: Allows you to copy the contacts among two storages. • Move contacts: Allows you to move the contacts among two storages. • Delete all contacts: Allows you to delete the contacts from Phone or SIM.
17 Organizer  Calendar This feature allows you to keep track of your schedule and tasks saved in the calendar. You can also switch on the alarm with the task for reminding.  To make a note and reminder in Calendar for the first time: 1. In Organizer menu, choose Calendar. 2.  Select a day in the calendar. 3. Select Options > View to view the event. You can also select Options > Add event to add a new event. 4.  Choose a type of the event. Input the start and end time of your event, and describe the event contents in Subject and Details, after you finish editing the contents of your event, select Options > Done to save your description. 5. Choose Alarm clock to turn on or off.   6. Choose Once/ Everyday/Custom/ Weekly/ Monthly in Repeat. 7.    Then you can edit other information. 8. Press Done to save the event.  Tasks You can also view, edit or delete the tasks from the options under this feature. For the first-time user, you will need to follow the steps below: 1. Select Add in the Task List. Then choose the task type. 2. Edit your Task by entering date, time, Subject, reminder, repeat and other information. 3.  You can choose to turn the alarm on as the reminder. 4. Select Done and Yes to save your task.  Alarm This function allows you to set the alarm to ring at the time specified. The alarm clock works even when the phone is switched off. 1. In the Organizer menu, choose Alarm. 2. Select Edit to set alarm time. First, you should turn it on. 3.  To set the alarm, directly input the hours and minutes via the Numeric Keys. 4. Choose Once/Everyday/Custom in Repeat option for your ring mode. 5.  After you finish all the settings above, select Done to save the alarm setting. World Clock You can view the local date and time via selecting the GMT and city. When the cross points out a certain city, it will show the local date and time.     Note:   If you want to change the home city, please go to Settings > Phone settings > Time and date > Set home city.
18 Multimedia  Audio Player Your phone provides you a friendly music player device for entertainment purpose.   Music tracks must be saved in My Music folder in File Manager in order to be automatically detected and added into the default play list. You may listen to the music through the headset or loudspeaker. The user-friendly interface is specially designed to enable users to control, play, pause, and stop the music player as you wish.     Key Description The OK Key    Displays a list of the audio files from the storage you set. Navigation Key Down  Press to stop the music. Navigation Key  Left or Right  Short press to select the previous song/next song. Press and hold to rewind or fast forward the track during playback. *,# Adjust volume.  Left Soft Key [List]  Displays a list of the audio file from the storage you set. Right Soft Key [Back]  Return to previous menu. Navigation Key Up  Press to Start/Pause/resume the current music.   Note: You can make or answer a call while using the music player. During a phone call, the music playback will be paused and resumed after you end the call.  Play the music If you are a first-time user, select List > Options > Settings > Player settings > Pre. playlist to set the storage for adding music tracks. Your music player will automatically detect and add all the music tracks into the default play list. While playing the music, you can press the *# Key to adjust the volume.  Note:  MPEG Layer-3 audio coding technology licensed from Fraunhofer IIS and Thomson. Supply of this product does not convey a license nor imply any right to distribute MPEG Layer-3 compliant content created with this product in revenue-generating broadcast systems(terrestrial, satellite, cable and/or other distribution channels), streaming applications(via internet, intranets and/or other networks), other content distribution systems(pay-audio or audio-on-demand applications and the like) or on physical media(compact discs, digital versatile discs, semiconductor chips, hard drives, memory cards and the like). An independent license for such use is required. For details, please visit http://mp3licensing.com.  Image viewer All images from photos folder can be reviewed from here and storage is located in either the phone or memory card. You may choose to view your images in List Style or Matrix Style. To change the storage, please select Options and select Storage. Sound recorder   The Sound recorder is a simple sound-recording tool, providing all the required functionalities for you to manage voice files. To start recording 1. In Multimedia menu, choose Sound Recorder. 2. Select Options >New record to start recording.  Notes:      1.   During recording, you can pause or stop the voice recording anytime by pressing OK Key.       2.    After the recording is completed, the voice file is saved as AMR or WAV format.
19 FM Radio This feature allows you to listen to your favorite FM radio station anytime with frequency ranging from 87.5MHz to 108.0MHz.  To start using 1.    First, please plug in the earphone. 2.  From main menu, choose Multimedia >FM Radio.  3.    If FM is off, press the Navigation Down Key to turn on the FM radio. 4.  You can choose to either turn on or off the auto search by pressing the Navigation Up Key. 5.  Press the Navigation Left or Right Key to start searching.  Your phone provides the following selections for your option: • Channel list: Allows you to bookmark up to 9 radio stations by entering the channel name and frequency. You can have quick access to 9 radio stations by Numeric Key. You are allowed to play, delete or edit a selected radio station frequency. • Manually input: Allows you to key in the radio station frequency manually.   • Auto Search: Allows you to auto scan the radio station and the station searched will be memorized in the channel list. • Settings: Allows you to change the settings of background play and loud speaker.    File Manager In this menu, you can manage images, audio, music, photos, videos and other contents you have downloaded. Two storages Phone and Memory Card will be displayed:  To check files saved in the File Manager 1.  From the main menu, select File Manager. You may see one more drive named Memory Card if you insert the T-Flash card in. 2.  Scroll to the menu to Phone and press Options to open options list.  3.  When you choose Open, you will see a list of the folders. Note, some folder, such as My Music may be hidden until you enter the menu of Music Player. Note, the Java games folder lists the JAVA games you have installed.    Settings   Phone Setting Time and date   This function allows you to set your home city, view and change the time and date settings in your phone. You can also choose to auto update the date and time.
20 Schedule power on/off You are allowed to schedule the power on and off time for 4 different time settings. Language This phone allows you to set a language for the display in this phone.   In Settings menu, choose Phone settings > Language.  Note: The option of Automatic depends on your service provider and languages supported by your phone. If you select Automatic, your phone will auto detect the language supported by your SIM and phone. Pref. input methods: Allows you to predefine your input method. Display This feature allows you to personalize your display setting through following options: • Wallpaper: Allows you to change wallpaper displayed on the idle screen. 1.  In Settings menu, choose Phone settings > Display > Wallpaper. 2. Choose User defined, select one image from File manager. 3.  Or choose System and press OK.  • Screen Saver: Allows you to play different screen savers. The waiting time after which the screen saver is activated is from 5 sec. to 1 min.   After the above setting is completed, go back to the Screen Saver submenu, and choose Select to enter either System or User defined to choose an image as your screen saver. • Power on display: Allows you to set the power-on animation from the system or the file manager. • Power off display: Allows you to set the power-off animation from the system or the file manager. • Show date and time: If it is on, the time and date will be shown in standby mode. • Show owner number: If it is on, the owner number will be shown in standby mode. Dedicated Key This function allows you change the features on Navigation Keys. Auto update of date and time You can set on or off.   Flight mode Select from Normal mode, Flight mode and Query when power on . Misc. settings This menu allows you to set the LCD backlight. Network Settings Here you can search the network, set your preferred network, change the GPRS connection. Security settings This function allows you to activate password to protect your phone against unauthorized use. Your phone provides the following selections for your option:
21 • PIN Lock: To prevent your SIM card from illegal use, your SIM card is protected by a PIN code. If you set the SIM lock to On, you can only use your cellular phone by entering the correct PIN code every time you turn it on. If you enter the wrong PIN code three times, your SIM card will be locked and a PUK code will be required. Contact your service provider for more information.   • Phone lock: You can switch on or off to activate the phone lock function to protect your phone .If you switch phone lock on, you need to enter the password to set the request on. The default password is 1122 • Auto keypad lock: This allows you to lock the phone’s keypad to prevent accidental key pressed. In Auto keypad lock submenu, select the time ,and press OK  • Fixed Dial: Allows you to dial only the numbers in the fixed dial list. To save and edit numbers on the list, you need the PIN2 code. • Barred Dial: Allows you to switch on or off restricted call function. However, you need to check if your SIM supports this function. • Change password: Allows you to change PIN, PIN2 and phone lock password. Restore factory settings This function allows you to reset the most of the phone setting to the original setting when it is produced. The phone lock password is needed to access this function.   Extra Calculator The calculator applies simple calculator function such as addition, subtraction, multiplications and division. Currency converter First, you should enter the rate, and then enter the local data. Press the OK key, and the foreign data conversion will be shown automatically. Stopwatch This function is designed to store the timepiece, which is to start or stop for exact timing. To use stopwatch 1.  From the main menu select Organizer > Stopwatch. 2. Select Typical stopwatch. You can choose different record methods and view records.   • Split Timing: When you select this, the timepiece will be saved and continue to count when you press Split. The 2nd timepiece is recorded based on the continuous timing. You can stop and resume anytime. • Lap Timing: When you select this, the timepiece will be saved and start the new timing when you press Lap. The 2nd timepiece is recorded in new timing. You can stop and resume anytime. • View records: You can view those timepieces you have recorded or delete the records. 3. Select nWay stopwatch. You can make four records by pressing the Navigation Key.   .
22 Camera You can use this phone to take photos with the phone’s built-in camera and adjust its settings. The camera lens is on the back of the phone, and the display of the phone works as a viewfinder. If there’s not enough memory for camera, you need to delete old photos to free some spaces for new photos or you can choose to save photos in memory card. The status of your camera setting will be displayed on the top of preview mode.  Note: Do not use this feature when it violates local laws.   To start using Camera 1.  In the main menu, select Multimedia > Camera.  2.  To take the picture, press the Ok Key.  Note: The photo will be saved in the Photos folder in File Manager menu. You can also view the picture by selecting Photos from option list or open Photos folder from File Manager menu.    To setup the Camera 1.  Press the Left Soft Key in the preview mode. All options will be displayed, and then you can adjust the setting through the preview mode directly. 2.  Now you can set the image size, quality, scene mode, and so on.  User profiles Your phone provides 5 different profiles, including General, Meeting, Outdoor, Indoor, Silent and Headset profiles. Note: If you customize the alert type, the indication icon may be changed. The Headset profile can only be activated when the headset is plugged in. To activate a Profile 1. In Profile menu, select a profile.  2. Select Options > Activate.  To edit the Profile You can customize Profile settings to meet your preference. 1.  In Profile menu, select a profile. 2.  Select Options > Customize.
23 GENERAL Information Accessories There are various accessories for your mobile phone. Your pack will include standard battery x 1, headset x 1, and travel adapter x 1. Please note:   •  Use only accessories and charging devices approved by the phone manufacturer otherwise you would risk serious damage to health and property. •  Failure to do this may invalidate your warranty. •  Accessories may be different in different regions.   GPRS/EDGE Note, Only RX supports EDGE, only TX supports GPRS.  PRECAUTIONS  Please carefully read and observe the terms below:  Safe power on Do not use your cellular phone where it is restricted to use or you might cause a disturbance or               danger.  Safe transportation first Please observe all related local laws and regulations. Please drive with both hands.   Safe transportation should be considered when driving.  Disturbance All cellular phone services may be disrupted.  Turn off when in the hospital   Please follow related restrictions. Please switch your cellular phone off when near a medical instrument.  Turn off on an airplane Please follow related restrictions. Do not use your cellular phone on an airplane.  Turn off when at a gasoline station Do not use your cellular phone at a filling station or around fuels or chemicals.  Turn off near exposure Area Please observe related limitations and do not use your cellular phone near an area where explosions can occur.  Proper use As described in this manual, your cellular phone can be used only in proper locations. If possible, please do not touch the antenna area of your phone.
24  Use qualified after sales service Only a qualified technician can repair your cellular phone.   Accessories and batteries Only use the authorized accessories and batteries and do not connect to incompatible products.  Waterproof Your cellular phone is not waterproof. Please keep it away from water.  Backup Remember to make a backup or keep a written record of all important information saved in your cellular phone.  Connect to other devices Please read the user manual of the device to get more detailed security instructions before connecting to other devices and do not connect to an incompatible product.  SOS emergency calls Make sure your cellular phone is switched on and in a service area. In idle mode, input the SOS number, then press the Dial Key. Advise where you are and do not hang up without permission.  TROUBLESHOOTING Common issue  Reason  Troubleshooting Bad connection  Using the cellular phone in an area where the network connection is poor, such as around a tower or basement where a radio wave cannot be sent effectively.   Try to avoid. Using the cellular phone when the network is busy, such as an on-off duty time or the line is busy. Try to avoid. Related to the distance of the send basis of the network.  Ask your operator to provide a map of your service area. Aftersound or cacophony  It is caused by the network connection and it is a regional problem.  Hang up and redial the number. Network connection is not good in some areas. Idle time becomes short  Idle time is related to network settings.  If the cellular phone is in an area where the network connection is not good, please temporarily shut off your phone. Need to change battery.  Insert a new battery. When you cannot receive signals, your cellular phone will continue to send to find a basis. A lot of battery power is used, so as to limit idle time. Please move to an area where the signal is strong or temporarily turn off your phone. Cannot switch on  Battery is drained.  Check battery volume or charge battery. Wrong SIM card  SIM card is damaged.  Contact your operator.
25 SIM card is not inserted properly.  Make sure SIM card is inserted properly. Dirt on metal side of SIM card.  Wipe metal point of SIM card with a clean cloth. Cannot connect to network  SIM card is unusable  Contact your operator. Out of GSM service area.  Request service area to operator. Feeble signal.  Please move to an area where signal is stronger and try again. Cannot call  Call barring is activated  Cancel call barring Wrong PIN code  Entered the wrong PIN code three times.  Contact your operator. Cannot charge  Battery or charger is damaged.  Change battery or charger. Charge in area where the temperature is lower than 0℃  or higher than 40℃.  Change charging environment. Bad connection  Check the connection between the phone and the charger. Cannot add contact  Contacts memory is full.  Delete some contacts. Cannot set some functions  Operator does not support the function or you have not applied the function.  Contact your operator.  SAFETY INFORMATION AND NOTICES Using the Cellular Phone and Charger Danger: Only use the battery and charger approved by the manufacturer. Using other brands may cause battery leakage, overheating, explosion or even fire. Caution: Keep the phone away from dust, water and damp areas. Dust, water or other liquids may cause overheating, electrical leakage, and/or phone failure.   The phone, battery, charger and AC adapter are not waterproof. Keep them away from liquid. Warning: Do not bump, shake or tamper with the phone or charger. This may cause battery leakage, overheating, explosion or even fire. Do not place the battery, phone or charger near a microwave or high-voltage device.    This may cause battery leakage, overheating, explosion or even fire; also prevent the phone and AC adapter from overheating, smoking or short circuiting. Do not use the phone around volatile oil. This may cause fire, breakdown or damage. To avoid any damage or breakage, do not disassemble the phone, battery, charger or internal components by yourself. Using the Cellular Phone Warning: Do not use the phone while you are driving. Pull over and stop your automobile to dial or answer a phone call. Usage of cellular phones in aircrafts or hospitals is prohibited. Turn the phone off to prevent interference with electronic medical devices. Follow any rules or regulations in such places. Do not use the phone at a gas station, near fuel or near chemicals.
26 Do not use the phone near electronic medical devices such as hearing aids, pacemakers and auto-control devices such as fire detectors and automatic doors.   If you have to use your cellular phone near an electronic medical device such as a pacemaker, please contact your manufacturer or dealer for information about preventing interference. Caution: Electronic systems in automobiles such as anti-lock brakes, speed control, or fuel spraying systems, are usually not influenced by wireless devices. Manufacturers of these systems will tell you whether they are provided with good screening functions. If you suspect that an automobile failure is caused by a wireless wave, please contact your automobile dealer. Avoid using your phone in crowded places. Do not store your cellular phone near or together with a credit card, disk or other magnetic materials. This may affect information stored on your phone. Keep your phone away from pins. Pins can be absorbed by the phone’s receiver magnet, which may cause harm. Using the Battery Danger: Do not dispose of the battery into a fire. Doing so may cause battery explosion or even fire. If you have difficulties installing the battery, do not force the installation. This may cause battery leakage, overheating, explosion or even fire. Keep metal objects away so they do not come in contact with the battery or its connectors as it may cause the battery to short circuit, overheat or explode.   Do not weld the polarities of the battery directly together. This may cause battery leakage, overheating, explosion or even fire. Battery liquid is severely harmful for your eyes. If battery liquid gets in your eyes, do not rub them.    Instead, wash your eyes with water first and then go directly to a doctor for help. Do not use or store your phone in high temperature areas. This may cause battery leakage, overheating, explosion or even fire. Warning: Replace the battery when the normal usage time begins to decrease or if you notice the battery is overheated or has changed shape or color.   If battery liquid leaks onto your skin or clothes, immediately wash the affected parts with water.   If the battery begins to leak or emits a strange odor, properly dispose of the battery according to local regulations. Do not throw it into a fire.   Caution: Do not leave the product or its battery inside a vehicle or in places where the temperature may exceed 60°C (140°F), such as on a car dashboard, window sill, or behind a glass that is exposed to direct sunlight or strong ultraviolet light for extended periods of time. This may damage the product, overheat the battery, or pose a risk to the vehicle.   Using the Charger Danger: Only use the charger that came with the phone. Using a different charger may cause the phone to breakdown or explode.  If the charger short circuits, a fire may occur.   Do not use a damaged, worn or broken charger. This may cause a fire.   Clean dust away from the power socket to avoid the possibility of a fire. Do not store the charger near any liquids. If liquids spill onto the charger it may cause it to overheat or breakdown. If liquid does spill onto the charger, immediately unplug the power cable to prevent overheating, fire or another type of breakdown.
27 Do not use the charger in places with high humidity like a bathroom. This may cause a fire or other breakdown. Do not touch the charger, power cable or socket with wet hands. This may cause an electric shock. Caution: Keep the environment temperatures within the range of 0ºC ~40ºC while charging. Temperature below 0ºC or higher than 40ºC will cause insufficient charging, terminate charging or even cause the battery to explode. Unplug the charger from its power source before cleaning it.   Do not place heavy objects on the power cord. This may cause electric shock or fire. Hold the plug while unplugging the power cord. This will avoid any potential damage or even fire. Requirements for Cellular Phone Avoid using your cellular phone in extremely high or low temperatures. Use the phone in a temperature range between -10~55℃and humidity of 35%~85%. It is recommended that you do not use your cellular phone near a telephone, TV set, radio or other radio frequency sensitive devices. Requirements for the Battery When not in use, store the battery in a cool, well-ventilated place with sunlight. If you will not be using the cellular phone for an extended period of time, charge the battery on a regular basis to avoid battery breakdown. The phone battery wears out fast. If after charging the battery does not improve its performance, it is time to replace the battery. Properly dispose of the battery according to local regulations. Do not throw it into a fire. Requirements for the Charger and AC Adapter Do not charge your phone under the following circumstances: sunlight, temperatures equal to or lower than 0ºC, temperatures equal to or higher than 40ºC, high humidity, dust, high vibration areas, or near a TV, a radio, etc. Specific Absorption Rate (SAR) information The SAR limit of USA (FCC) is 1.6 W/kg averaged over one gram of tissue. This model (FCC ID: T38PCD1012B) has also been tested against this SAR limit. The highest SAR value reported under this standard during product certification for use at the ear is 0.759 W/kg and when properly worn on the body is 1.507 W/kg. This device was tested for typical body-worn operations with the back of the handset kept 1.5cm from the body. To maintain compliance with FCC RF exposure requirements, use accessories that maintain a 1.5cm separation distance between the user's body and the back of the handset. The use of belt clips, holsters and similar accessories should not contain metallic components in its assembly. The use of accessories that do not satisfy these requirements may not comply with FCC RF exposure requirements, and should be avoided.  This device complies with part 15 of the FCC rules. Operation is subject to the following two conditions: (1) this device may not cause harmful interference, and (2) this device must accept any interference received, including interference that may cause undesired operation.  NOTE: The manufacturer is not responsible for any radio or TV interference caused by unauthorized modifications to this equipment. Such modifications could void the user’s authority to operate the equipment.  Cleaning and Maintenance The cellular phone, the battery and the charger are not waterproof. Do not use them in places with high humidity like a bathroom and also avoid spilling any liquids on them. Use a soft cloth to clean the cellular phone, the battery and the charger. Do not use alcohol, diluted liquid or benzene to clean the cellular phone. If dust gets in the sockets the phone can be damaged, short-circuit or even lose the ability to be re-charged. Be sure to clean the socket regularly.
28   12 MONTH LIMITED WARRANTY PERSONAL COMMUNICATIONS DEVICES (the Company) warrants to the original retail purchaser of this PCD handheld portable cellular telephone, that should this product or any part thereof during normal consumer usage and conditions, be proven defective in material or workmanship that results in product failure within the first twelve (12) month period from the date of purchase, such defect(s) will be repaired or replaced (with new or rebuilt parts) at the Company’s option, without charge for parts or labor directly related to the defect(s). The antenna, keypad, display, rechargeable battery and battery charger, if included, are similarly warranted for twelve (12) months from date of purchase.     This Warranty extends only to consumers who purchase the product in the United States or Canada and it is not transferable or assignable. This Warranty does not apply to: Product subjected to abnormal use or conditions, accident, mishandling, neglect, unauthorized alteration, misuse, improper installation or repair or improper storage; Product whose mechanical serial number or electronic serial number has been removed, altered or defaced. Damage from exposure to moisture, humidity, excessive temperatures or extreme environmental conditions; Damage resulting from connection to, or use of any accessory or other product not approved or authorized by the Company; Defects in appearance, cosmetic, decorative or structural items such as framing and non-operative parts; Product damaged from external causes such as fire, flooding, dirt, sand, weather conditions, battery leakage, blown fuse, theft or improper usage of any electrical source. The Company disclaims liability for removal or reinstallation of the product, for geographic coverage, for inadequate signal reception by the antenna or for communications range or operation of the cellular system as a whole.  When sending your wireless device to PERSONAL COMMUNICATIONS DEVICES for repair or service, please note that any personal data or software stored on the device may be inadvertently erased or altered.    Therefore, we strongly recommend you make a back up copy of all data and software contained on your device before submitting it for repair or service.    This includes all contact lists, downloads (i.e. third-party software applications, ringtones, games and graphics) and any other data added to your device.    In addition, if your wireless device utilizes a SIM or Multimedia card, please remove the card before submitting the device and store for later use when your device is returned, PERSONAL COMMUNICATIONS DEVICES is not responsible for and does not guarantee restoration of any third-party software, personal information or memory data contained in, stored on, or integrated with any wireless device, whether under warranty or not, returned to PERSONAL COMMUNICATIONS DEVICES for repair or service.     To obtain repairs or replacement within the terms of this Warranty, the product should be delivered with proof of Warranty coverage (e.g. dated bill of sale), the consumer’s return address, daytime phone number and/or fax number and complete description of the problem, transportation prepaid, to the Company at the address shown below or to the place of purchase for repair or replacement processing.    In addition, for reference to an authorized Warranty station in your area, you may telephone in the United States (800) 229-1235, and in Canada (800) 465-9672 (in Ontario call 416-695-3060). THE EXTENT OF THE COMPANY’S LIABILITY UNDER THIS WARRANTY IS LIMITED TO THE REPAIR OR REPLACEMENT PROVIDED ABOVE AND, IN NO EVENT, SHALL THE COMPANY’S LAIBILITY EXCEED THE PURCHASE PRICE PAID BY PURCHASER FOR THE PRODUCT.  ANY IMPLIED WARRANTIES, INCLUDING ANY IMPLIED WARRANTY OF MERCHANTABILITY OR FITNESS FOR A PARTICULAR PURPOSE, SHALL BE LIMITED TO THE DURATION OF THIS WRITTEN WARRANTY. ANY ACTION FOR BREACH OF ANY WARRANTY MUST BE BROUGHT WITHIN A PERIOD OF 18 MONTHS FROM DATE OF ORIGINAL PURCHASE.    IN NO CASE SHALL THE COMPANY BE LIABLE FOR AN SPECIAL CONSEQUENTIAL OR INCIDENTAL DAMAGES FOR BREACH OF THIS OR ANY OTHER WARRANTY, EXPRESS OR IMPLIED, WHATSOEVER.    THE COMPANY SHALL NOT BE LIABLE FOR THE DELAY IN RENDERING SERVICE UNDER THIS WARRANTY OR LOSS OF USE DURING THE TIME THE PRODUCT IS BEING REPAIRED OR REPLACED.  No person or representative is authorized to assume for the Company any liability other than expressed herein in connection with the sale of this product.
29 Some states or provinces do not allow limitations on how long an implied warranty lasts or the exclusion or limitation of incidental or consequential damage so the above limitation or exclusions may not apply to you. This Warranty gives you specific legal rights, and you may also have other rights, which vary from state to state or province to province.  IN USA: PERSONAL COMMUNICATIONS DEVICES   555 Wireless Blvd.   Hauppauge, NY  11788  (800) 229-1235  IN CANADA: PCD COMMUNICATIONS CANADA LTD.   5535 Eglinton Avenue West Suite# 234 Toronto, ON M9C 5K5 (800) 465-9672

Navigation menu