Cellon Communications Technology PCD2095P Mobile Phone User Manual C2095
Cellon Communications Technology (Shenzhen) Co.,Ltd. Mobile Phone C2095
UserManual.wiki
>
Cellon Communications Technology
>
PCD2095P User Manual
manual
Navigation menu
Upload a User Manual
Namespaces
Wiki Guide
HTML
PDF
Info
Views
User Manual
Discussion / Help
Navigation


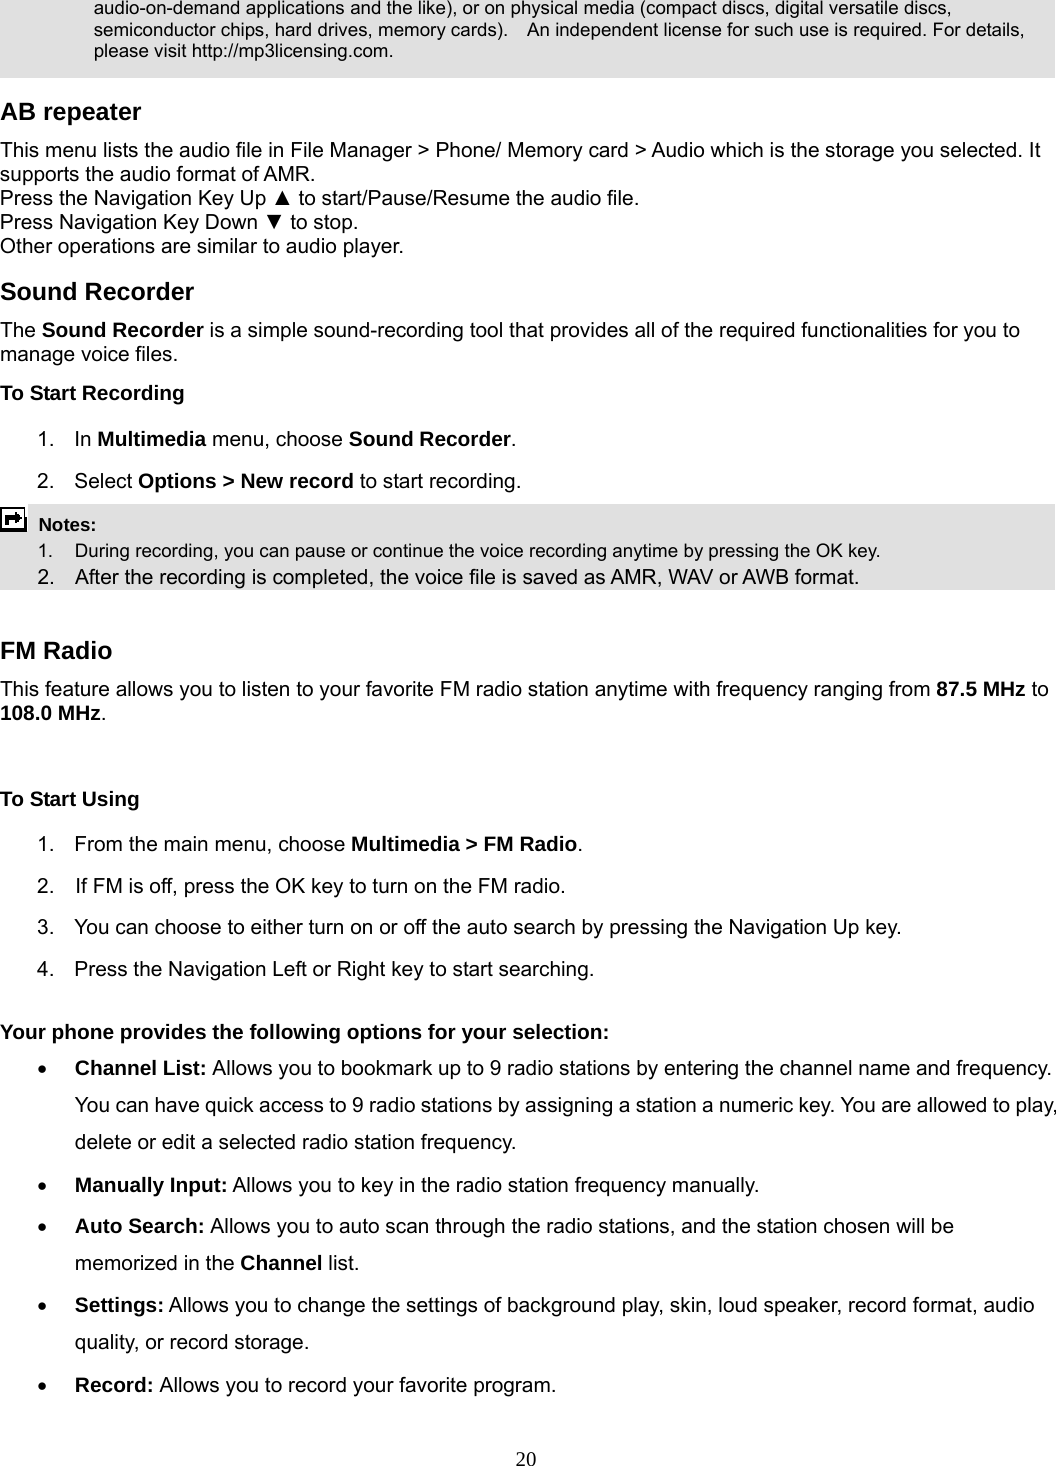
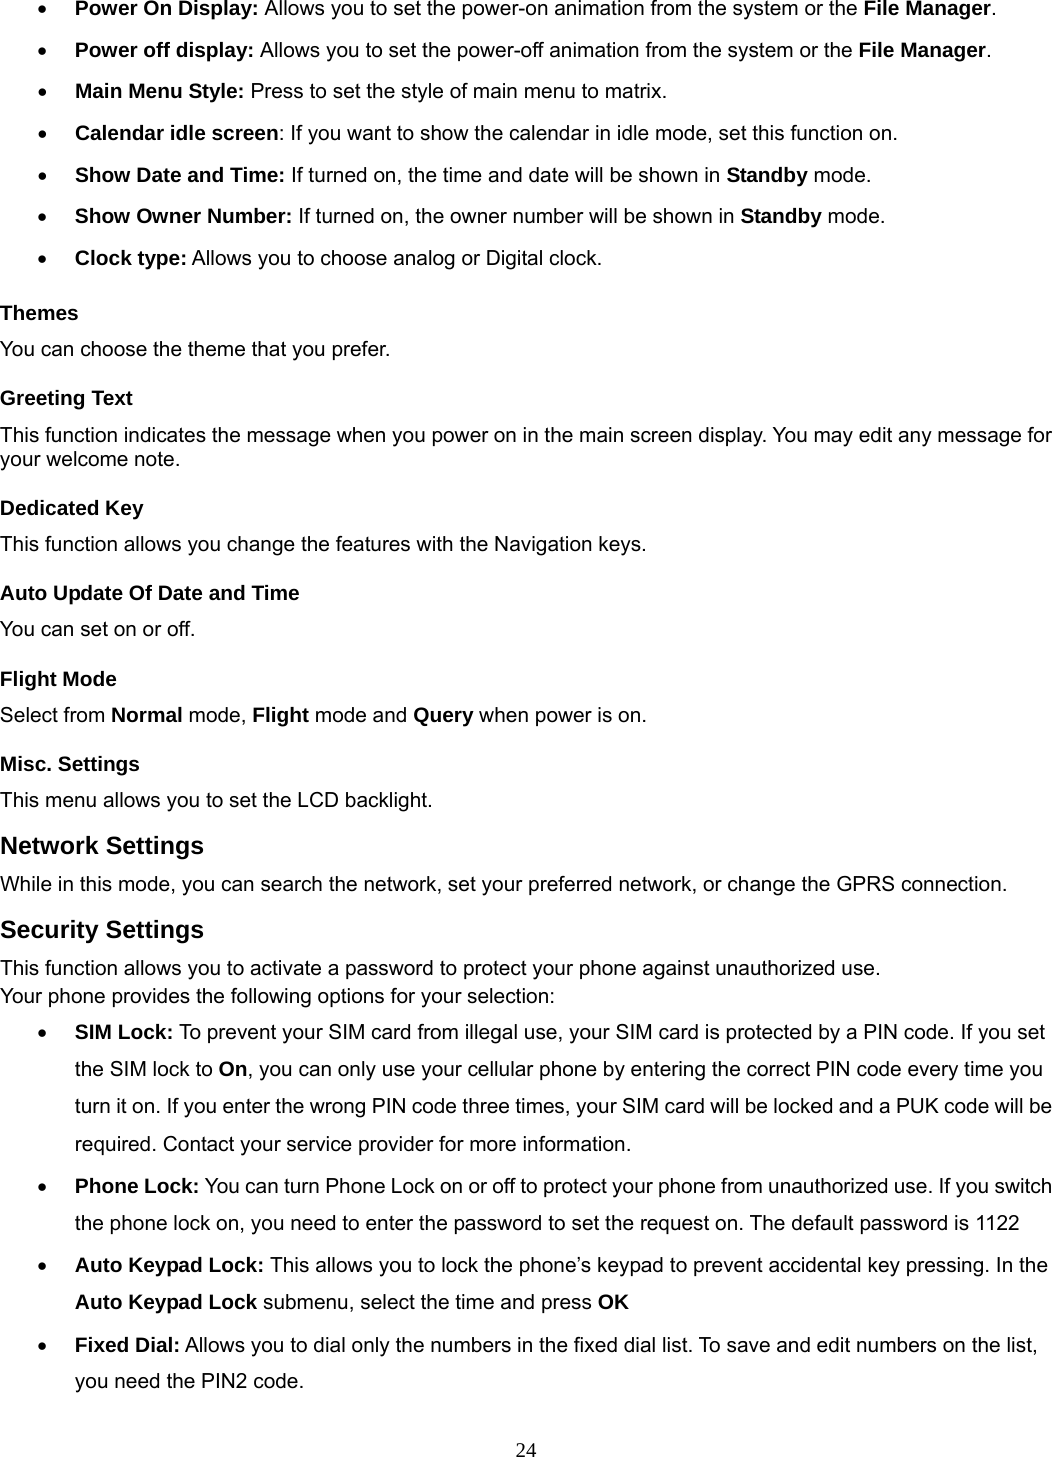
![19 4. Select Memory Card or Phone, and press LSK to open the folders. 5. Select an image file you like to edit, and press LSK to start photo editing. Options includes: • Auto Resize: Allows you to adjust the selected image. In the submenu of Auto Resize, you can add icon, add text, and rotate the picture, and so on. • Main LCD clip: Allows you to select a certain part of the selected image for the full screen display. Use the Navigation Keys to adjust your selection, use the * or # Key to zoom out or in, after finish, press OK. • Manual clip: Allows you to select a certain part of the selected image for the full screen display. Press the * Key to choose the clip state, and then press the Navigation Keys to adjust your selection. After finish, press OK. • Clip help: Allows you to review the instructions on how to clip the image described above. To start using Slide Show 1. In Multimedia menu, select Photo Editor and press OK. 2. Select Slide Show. 3. Select Memory Card or Phone, and press LSK to open. 4. Use the Navigation down Key to select a folder you like to play. Audio Player Key Operation The keypad operations during music playback are as follows: Key Description The OK Key Show the play list in File Manager > Phone/Memory card > My Music. Navigation Key ◀ or ▶ Short press to select the previous song/next song. Press and hold to rewind/fast forward the track during playback. Navigation Key Up ▲ Press to Start/Pause/Resume music playback. Navigation Key Down ▼ Press to stop the music playback. Volume Side Keys Adjust volume. Left Soft Key [List] Show the play list in File Manager > Phone/Memory card > My Music. Right Soft Key [Back] Return to previous menu. Audio Player Setting Menu Press Left Soft key [List] to list the audio files, and then press the Left Soft key [Option] to choose Settings. You can set your preferred play list, list auto gen, repeat, shuffle, background play and so on. Note: This menu lists the music file in File Manager > Phone/Memory Card > My Music. It supports the audio format of MP3, AMR and WAV. Playing Music If you are a first-time user, select List > Options > Settings > Player Settings > Pre. Playlist to set the storage for adding music tracks. Your music player will automatically detect and add all the music tracks into the default play list. Note: MPEG Layer-3 audio coding technology licensed from Fraunhofer IIS and Thomson. Supply of this product does not convey a license, nor imply any right to distribute MPEG Layer-3 compliant content created with this product in revenue-generating broadcast systems (terrestrial, satellite, cable and/or other distribution channels), streaming applications (via internet, intranets and/or other networks), other content distribution systems (pay-audio or](https://usermanual.wiki/Cellon-Communications-Technology/PCD2095P/User-Guide-1369069-Page-19.png)