Cellon Communications Technology UT1200 GSM handest User Manual
Cellon Communications Technology (Shenzhen) Co.,Ltd. GSM handest
UserManual.wiki
>
Cellon Communications Technology
>
UT1200 User Manual
User Manual
Navigation menu
Upload a User Manual
Namespaces
Wiki Guide
HTML
PDF
Info
Views
User Manual
Discussion / Help
Navigation
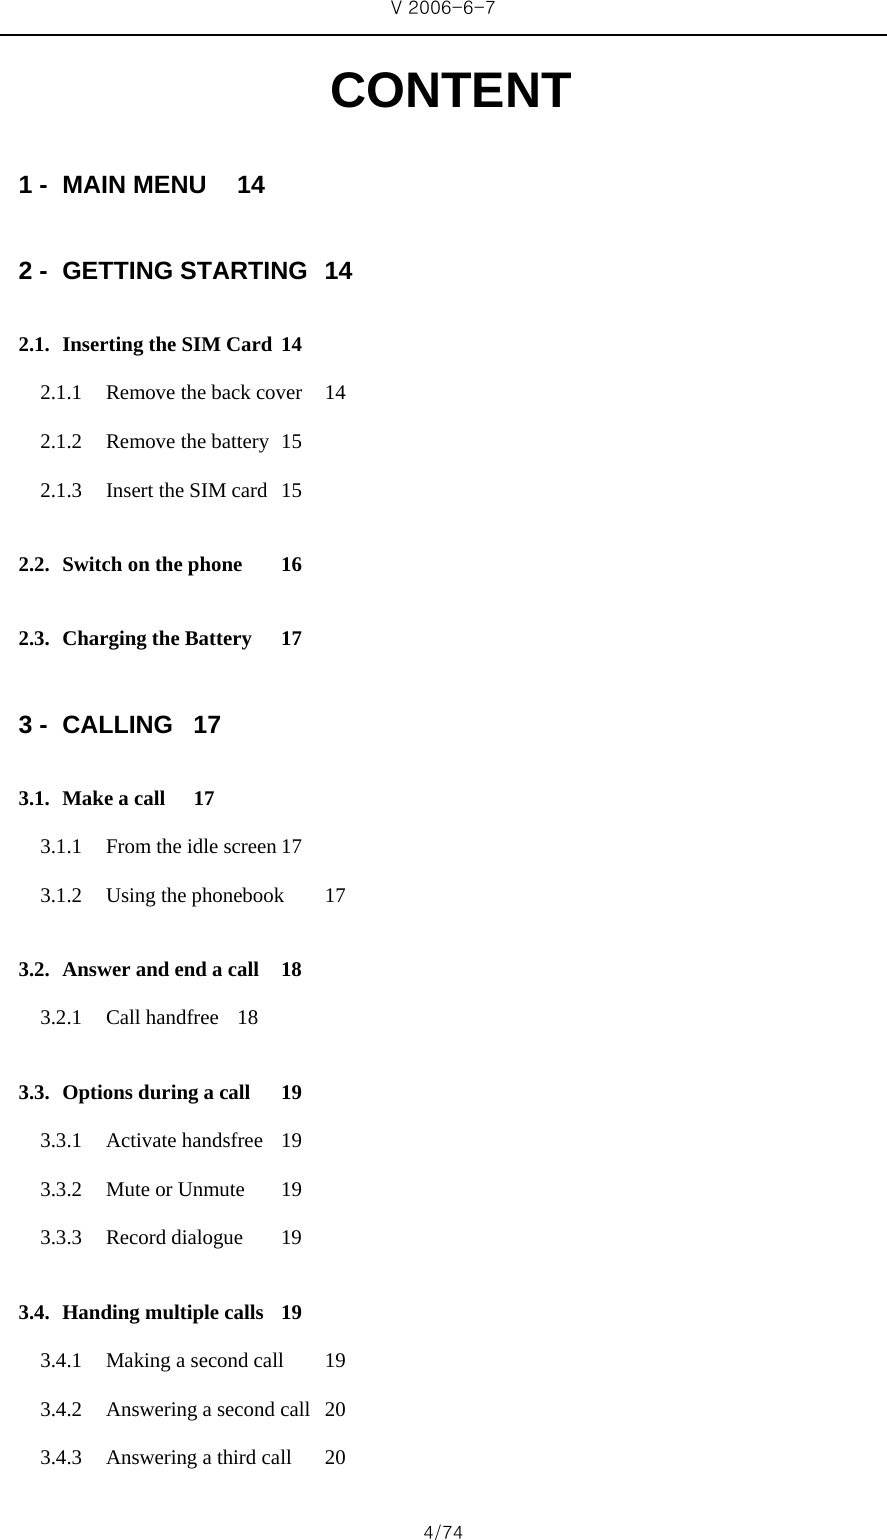


![V 2006-6-7 12/74 General Information [Caution] Changes or modifications made in the radio phone, not expressly approved by UTstarcom, will void the user's authority to operate the equipment. [RF Energy Interference/Compatibility] This device complies with Part 15 of the FCC Rules. Operation is subject to the following two conditions: (1) this device may not cause harmful interference, and (2) this device must accept any interference received, including interference that may cause undesired operation. [What's in the Box?] Your wireless mobile phone comes with a battery, charger, USB data cable, headset, companion CD, user manual, product and service user data. You can purchase other accessories to customize your phone for maximum performance and portability. [Body-worn operation] To maintain compliance with FCC RF exposure guidelines, if you wear a radio product on your body when transmitting, always place the radio product in a UTstarcom approved clip, holder, holster, case or body harness for this product. Use of non-UTstarcom-approved accessories may exceed FCC RF exposure guidelines.](https://usermanual.wiki/Cellon-Communications-Technology/UT1200/User-Guide-680029-Page-12.png)
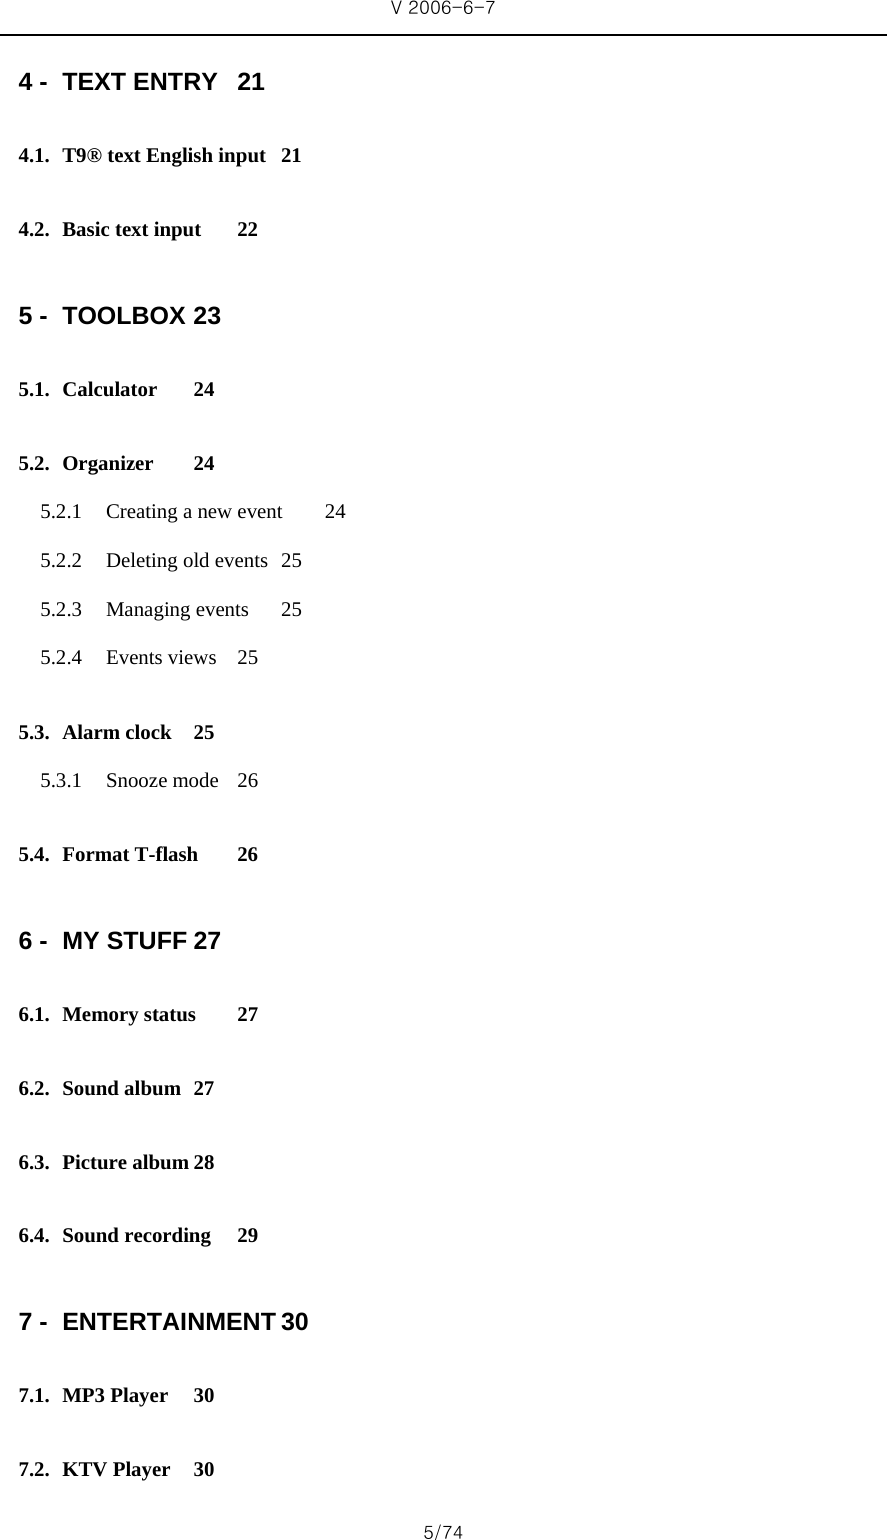
![V 2006-6-7 13/74 How to Operate Switch the phone Long press Hang up key Enter your PIN code Enter your PIN code using the keypad and press [OK] or or Left softkey to confirm. Make a call Enter the phone number on the keypad and press Pick up key to dial. Answer a call Press Pick up key when your phone rings. End a call Press Red key Reject a call Press Red key when your phone rings. Adjust the earpiece volume Press the Up or Down volume keys. Access to [Names List] Press in idle mode. Access to [Call List] Press Pick up key in idle mode. The Call List displays the Calls missed, the Calls received and the Calls dialed. Access to [Main Menu] Press [OK]or Left softkey Menu in the idle mode. Go to the previous Menu Press Right softkey Softkeys The left and right soft keys- located at the top of the keypad allow you to select the corresponding options that appear on the screen immediately above them, including during calls. The functions associated with these keys will vary according to the current context.](https://usermanual.wiki/Cellon-Communications-Technology/UT1200/User-Guide-680029-Page-13.png)
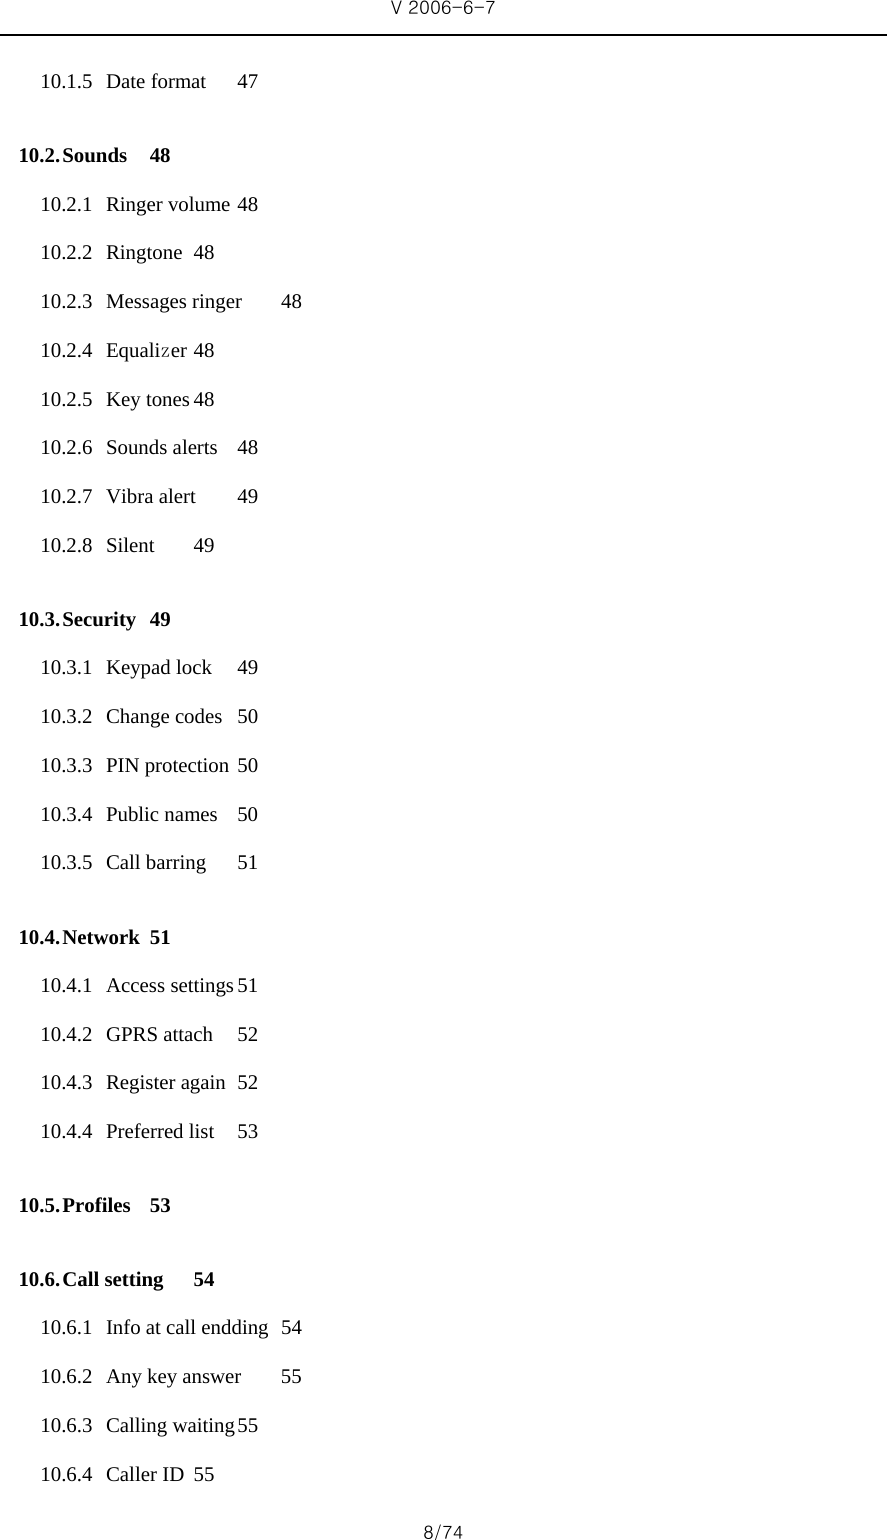
![V 2006-6-7 14/74 1 - MAIN MENU The Main Menu gives you access to all the different features of your mobile phone presented in the form of 9 grids. The table above summaries the arrangement of the Main Menu, the meanings of the various icons found them, and the page in this manual where more detailed information concerning the subject can be found. Press [OK] to access the Main Menu when in idle mode, then use the central navigation key – which directions are represented in the present guide with the ▲, ▼, ◀, ▶, signs - to browse the icons and lists. When navigating in a list, a scroll bar located on the right hand side of the screen shows your current position in the list. Within lists, press, to access the options related to the selected item, press select Right softkey go back one level. 2 - GETTING STARTING Please read the safety instructions in the "Precautions" section before use. To use your phone, you must insert a valid SIM card supplied by a GSM operator or retailer. The SIM card contains your subscription information, your mobile telephone number, and a memory card in which you can store phone numbers and messages. Follow the steps below to insert your new SIM card. Remember to switch off your mobile phone before removing the back cover. 2.1.1 Remove the back cover To insert the SIM card, you must first remove the back cover. Press on the back cover and then slide the cover downwards as shown below. 2.1. Inserting the SIM Card](https://usermanual.wiki/Cellon-Communications-Technology/UT1200/User-Guide-680029-Page-14.png)
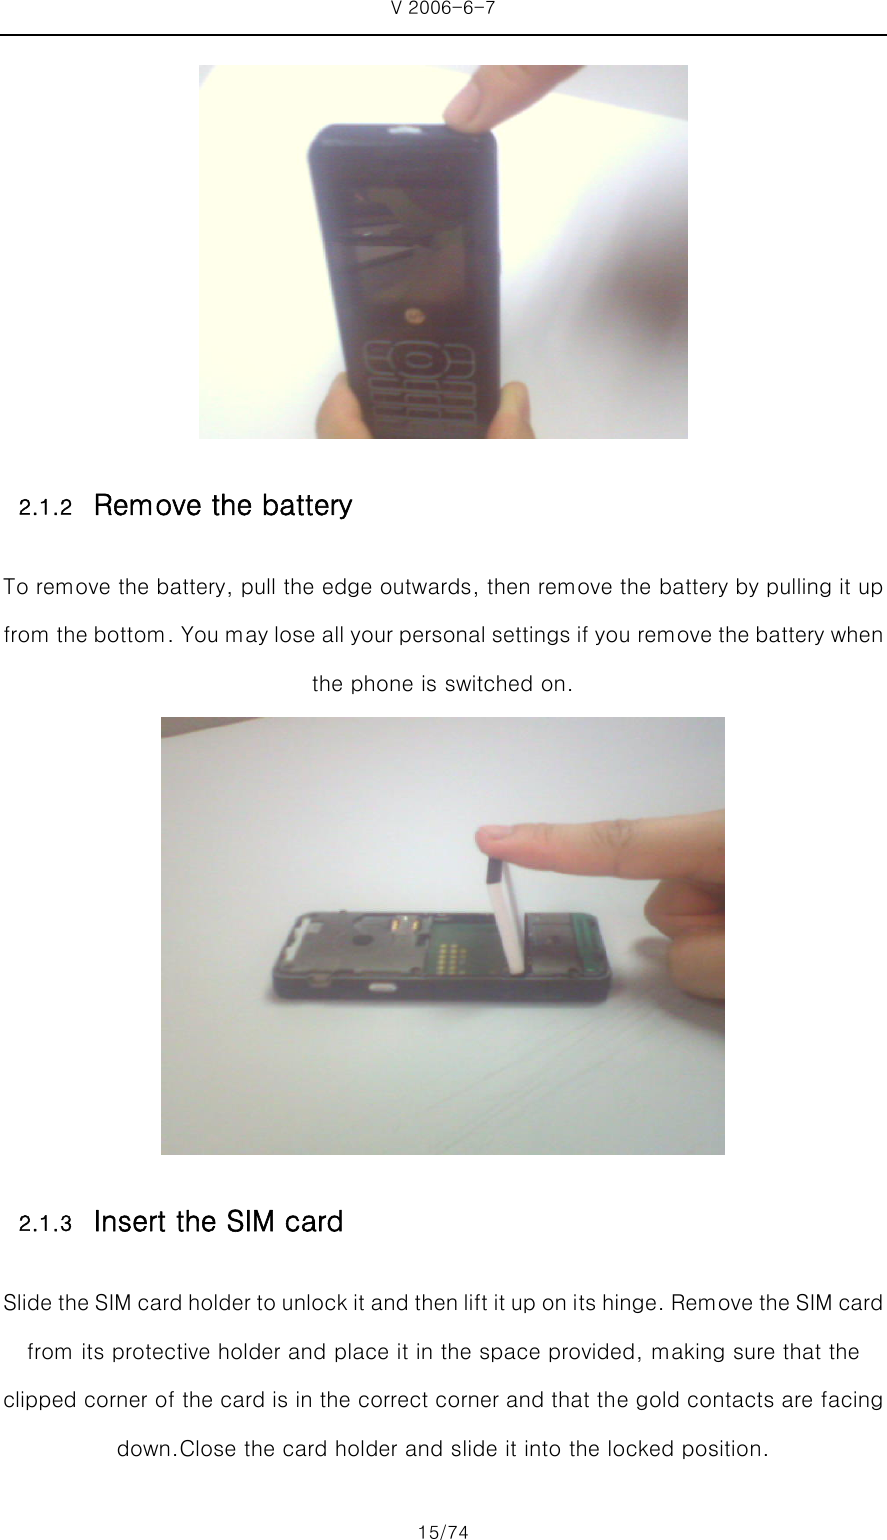
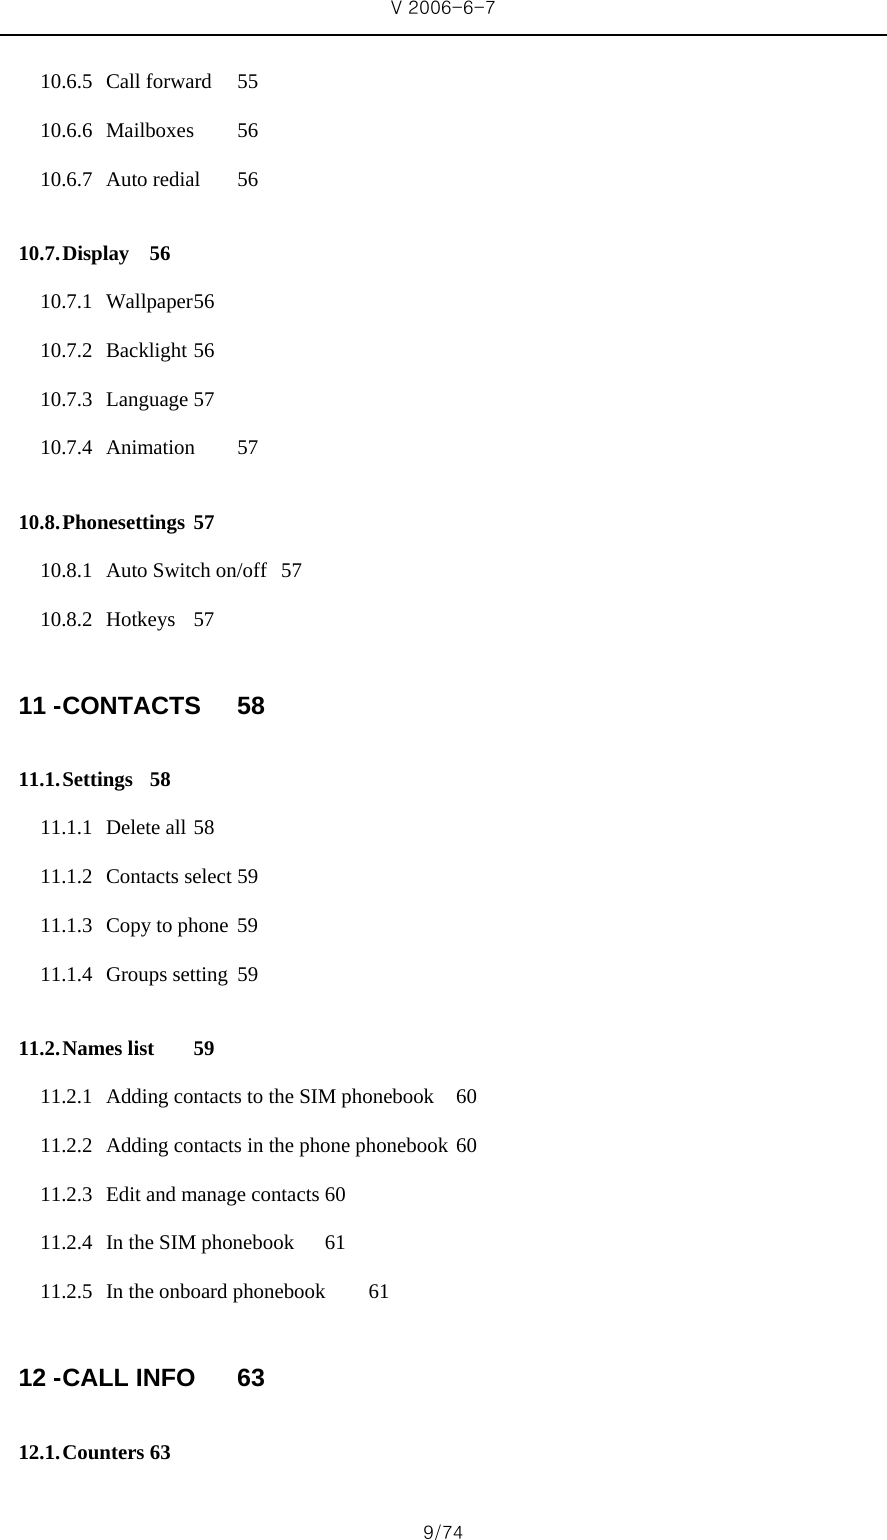
![V 2006-6-7 16/74 Slide the battery back into its slot, gold contacts downwards, then lock it by pushing it downwards until it stops. Replace the back cover by sliding it into its slots until it stops. Remove the protective film covering the screen and the camera lens before using the phone. Long press Red key to switch on the phone. Enter the PIN code if required. A PIN code is a 4- to 8-digit secret code for your SIM card. It is preconfigured and communicated to you by your operator or retailer. If you enter an incorrect PIN code three times, your SIM card will be blocked. To unblock it, you must request the PUK code from your operator. When you switch on your mobile phone with your new SIM for the first time, you will be asked for the following: [Set date] To set the current date [Set time] To set the current time [Time zone] To select your time zone [Copy SIM names into the phone] If your phone detects any names and telephone numbers in the SIM card phonebook, you will be asked if you want to copy them into the on board phone book. If you wish to copy the numbers, press OK, otherwise press Cancel. 2.2. Switch on the phone](https://usermanual.wiki/Cellon-Communications-Technology/UT1200/User-Guide-680029-Page-16.png)
![V 2006-6-7 18/74 are using the onboard phonebook and the selected contact feature more than one number, the number identified as the default will automatically be selected. Select a different number. When receiving a call, the number of the caller may be displayed, depending on whether or not the person calling has chosen to display his or her ID. If the number is stored in the selected phonebook, then the corresponding name is displayed instead of the number. •Answer the call: press Rick up key to open the phone if the Active flip option is On. •Reject the call: press Red key. •Hang up: press Hang up key or close the phone. If you have selected Any Key Answer, you can accept a call by pressing any key (except Red key). 3.2.1 Call handfree For your own comfort and safety, ensure you move the phone away from your ear when calling hands free, especially when increasing the volume. In idle mode, enter the phone number using the keypad or select a contact in the phonebook. Press [OK], or Left softkey Options then select Call Handsfree or press[OK]. If you are already on the phone, long press Pick up key to swit ch to Handsfree mode and back. 3.2. Answer and end a call](https://usermanual.wiki/Cellon-Communications-Technology/UT1200/User-Guide-680029-Page-18.png)
![V 2006-6-7 19/74 During a call, press [OK]or Left softkey Options to access the following options. 3.3.1 Activate handsfree This option allows you to use hands-free option. 3.3.2 Mute or Unmute Allow you to mute or unmute the microphone so that your caller cannot hear you. 3.3.3 Record dialogue In most countries, recording telephone conversations is subject to legislation. We advise you to notify the caller if you intend to record your conversation and only do so if they agree. To record a conversation during a call, select Record dialogue and press [OK]. Press [OK] again or Left softkey Save to end the recording: an edit window allows you to assign a name to the recording, which is then available in My s tuff> Sound album. If you select Mute and then Record dialogue, only the caller’s voice is recorded. The ability to handle two or more calls at one time and to make conference calls is dependent on your operator and/or subscription. 3.4.1 Making a second call You can make a second call during an active call or with a call on hold. While on the 3.3. Options during a call 3.4. Handing multiple calls](https://usermanual.wiki/Cellon-Communications-Technology/UT1200/User-Guide-680029-Page-19.png)
![V 2006-6-7 20/74 phone, dial a number (or select a contact in the phonebook) and press Pick up key. The first call is put on hold (the number is displayed on the bottom of the screen) and the second number is dialed. You can then press [OK] to access the options among which are: •Switch calls to toggle between calls (you can also press ◀or ▶ to switch calls). •Transfer to connect the two calls. You are disconnected when the transfer is completed. •Conference to introduce the caller into a conference call. 3.4.2 Answering a second call When you receive a second call while being already in communication, the phone emits a beep alert and the screen displays Call waiting. You can then: Press Pick up key To answer the call (the first one is put on hold). Press Red key To reject the call. Press [OK] or Left softkey Options To open the options list. You can select End Call to end the current call, then answer the incoming call. To receive a second call, you must have deactivated the Call forward for voice calls and activated the Call waiting. 3.4.3 Answering a third call If you are in a call and have one call on hold, you can also receive a third call. To do so, you must either end one of the calls or introduce the new caller to a conference. Press Red key To reject the call. Press [OK] or Left softkey Options To open the options list. You can select Accept to answer the incoming call, or End call to end the current call, then answer the incoming call. This service is limited to two current communications (one active and one on hold).](https://usermanual.wiki/Cellon-Communications-Technology/UT1200/User-Guide-680029-Page-20.png)
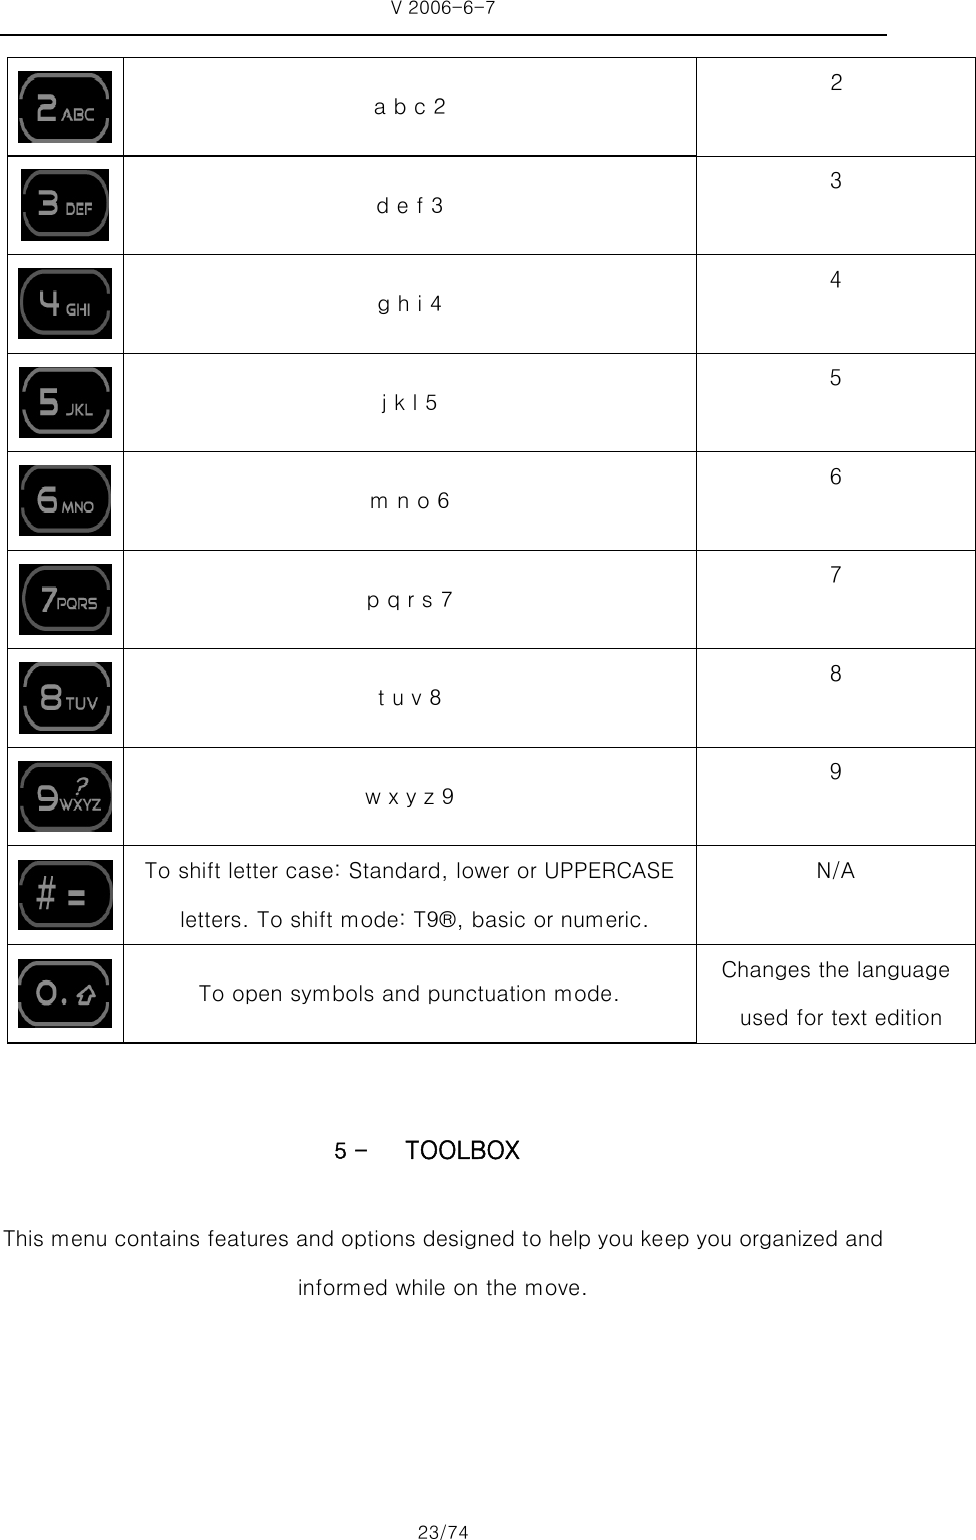
![V 2006-6-7 21/74 4 - TEXT ENTRY Text can be entered in editing screens in two different ways: by using T9® Predictive Text Input or basic text input. The techniques for using these two methods are discussed below. T9® Predictive Text Input is an intelligent editing mode for entering text on a mobile phone. It allows you to enter text more quickly by anticipating the word you want to enter based on the keys you have pushed. You press once on the key corresponding to each letter needed to spell a word and T9® suggests a word based on your keystrokes. If several words are available, the first word in the list is displayed and highlighted. Press ▲/ ▼ or Left softkey to browse the list and press [OK] to insert the word. How to use it? Letters and symbols represented by each key are as follows: to To key in letters. Left softkey or ▲ / ▼ To browse the list of candidate words. [OK] Press any of the three keys to insert the selected word followed by a space. Right softkey Short press to back space, long press to clear all text. To shift letter case: Standard, lower or UPPERCASE letters. To view the table of symbols and punctuation. 4.1. T9® text English input](https://usermanual.wiki/Cellon-Communications-Technology/UT1200/User-Guide-680029-Page-21.png)
![V 2006-6-7 22/74 To shift mode from T9® to basic text input to numeric. Example: how to enter the word "home": 1. Press , , and .The screen displays the first word of a list: Good. 2. Press ▲ or Left softkey to scroll and select Home. 3. Press[OK] or ▶ to confirm selection of the word Home. Press to switch from T9® to basic text input. This method requires multiple key presses to reach the desired character: the letter "h" is the second letter on the 4 key, so you must press it twice to enter "h". Short press Right softkey Cancel to clear one entry, long press to clear all text. Example: how to enter the word "home": Press , (GHI) , ,(MNO), (MNO), , (DEF). Press[OK], when the message is completed. Letters, numbers and symbols are located on each key as follows: Short press Long press Blank space / 1 1 4.2. Basic text input](https://usermanual.wiki/Cellon-Communications-Technology/UT1200/User-Guide-680029-Page-22.png)
![V 2006-6-7 24/74 Your phone has a built-in calculator that you can use to perform basic calculations. Numbers are entered with the keypad and operators with the navigation keys as indicated in the table below: Addition Press ▶ Subtraction Press ◀ Multiplication Press ▲ Division Press ▼ Equals Press [OK] An icon at the top of the screen indicates which navigation keys to use for entering operators. Press and hold 0 to get the decimal point. Calculator accuracy is to 2 decimal places and is rounded up to the higher decimal figure. This menu allows user to create, store and manage events in your organizer. When the organizer alert is On, a beep or a sound recorded via the Secretary on the go feature alerts you when an event is due. The organizer shares the mobile memory capacity with other features (phonebook, picture album, sound, etc.). 5.2.1 Creating a new event ·In Events, select <New>, then the type of event to create (Holiday, Meeting, To Do). ·Enter the starting and ending date and time of the event and name it (e.g. "Meeting with Smith"). ·Set a reminder and a frequency: alerts will be triggered at the chosen time. 5.1. Calculator 5.2. Organizer](https://usermanual.wiki/Cellon-Communications-Technology/UT1200/User-Guide-680029-Page-24.png)
![V 2006-6-7 25/74 The reminder only applies to Meeting and To Do events. It will be updated when changing time zones. 5.2.2 Deleting old events This menu allows you to delete past events. Enter the starting date (past or future) from which all previous events will be deleted and press [OK] twice to delete all events preceding this date. To delete all events set in your organizer, enter a starting date several years ahead (e.g. 31st of December 2010) to make sure all events preceding this date are deleted at once. 5.2.3 Managing events Select an event in the list and press [OK] or Left softkey Options to access the following options: Delete To delete the selected event. Change To change the selected event. Change sound To change the sound associated with the alarm type of the selected event. Changing a repeating event modifies all instances of this event. 5.2.4 Events views Events stored in your organizer can be displayed in Day View, Week View and Month View. Select a view format and press [OK], then use ◀ or ▶to display the previous or next day, week or month. 5.3. Alarm clock](https://usermanual.wiki/Cellon-Communications-Technology/UT1200/User-Guide-680029-Page-25.png)
![V 2006-6-7 26/74 Your mobile phone has a built-in alarm clock with a snooze feature. You can set up to three separate alarms and choose whether or not the alarm should repeat. To set an alarm, follow the steps below: ·Select an alarm and set it On. ·Then enter the time and press [OK]. ·Then select the frequency: Once, Every day, On weekdays. ·Finally, select the type of alarm: Melody, Sound recording, or Buzzer and press OK. Repeat above steps to set other alarms. The alarm clock will ring even if your mobile phone is switched off and/or the ringer volume is set to Silent. When the alarm rings, press any key to stop it or close the phone (except if the snooze mode is on, see below). 5.3.1 Snooze mode This menu allows you to set the snooze mode On or Off. When the alarm rings and the snooze mode is On: •Press any key (except Right softkey Stop) to stop the ringing temporarily or close the phone. The alarm will ring again around 7 minutes later. •Press Right softkey Stop to stop the ringing and the alarm repetition. The snooze mode is automatically deactivated after 9 alarm repetitions. The snooze mode setting applies to all the alarms you have set. T-flash is a memory card designed specifically for mobile phones. Select Format T-flash, the operation system will erases all data in T-flash. So you need to confirm the operation system alert: Do you really want to format? 5.4. Format T-flash](https://usermanual.wiki/Cellon-Communications-Technology/UT1200/User-Guide-680029-Page-26.png)
![V 2006-6-7 27/74 6 - MY STUFF This menu and its sub-menus contain options related to the multimedia features of your mobile phone. This menu allows you to display the percentage of memory available in your phone. Various features share the memory capacity: pictures, sounds, recorded memos and voice tags for voice commands, stored messages, phonebook and organizer entries, games, etc. Press [OK] to check the memory status. The display shows you the percentage of memory free and the phone’s total memory in Kilobytes (Kb). Press [OK] again to check the detailed list of memory used by each feature. Your mobile phone is supplied with many sounds and pictures. You can only delete sounds or pictures in the My melodies or My images folders, e.g. to free memory space for your own sounds and pictures. If the List Full message appears when saving a new item you must delete an item to be able to create or add anew one. This menu allows you to manage the sound files stored in your mobile phone. The options are: Get more Launch the WAP application and download new sound files. View all Access all your sound files in a single list. Own melodies Access your downloaded sound files. Protected melodies Access the list of copyright protected sample sounds. Recordings Access the list of sound recordings. 6.1. Memory status 6.2. Sound album](https://usermanual.wiki/Cellon-Communications-Technology/UT1200/User-Guide-680029-Page-27.png)
![V 2006-6-7 28/74 Once in a list, you can then select a sound file and press [OK] to access the menu options listed below. Send by Send the selected sound files via MMS. Note that sound files from Recordings folder cannot be sent via MMS. Set as ringer Set the selected sound as ringer. As SMS/MMS Set the selected sound as the Messages ringer. This option must be activated in the menu Settings >Sounds. Rename To Rename the selected sound files. Delete / Delete all To Delete the selected sound file or all files at once. This menu allows you to display and modify the images stored in your mobile phone. The options are: Get more To launch the WAP application and download new image files. View all To access all your image files in a single list. My photos To access the photos taken with the phone’s embedded camera. My images To access the images you have downloaded. Protected images To access the list of copyright protected sample images. Icons To access the list of icons you have downloaded. Inside the folders, images are displayed as a text list. Select an image and press ▶ to view the image. Pressing [OK] gives you access to the menu options listed below. Send by To send the selected image file via MMS. Note that you cannot send pictures that are protected by copyright. 6.3. Picture album](https://usermanual.wiki/Cellon-Communications-Technology/UT1200/User-Guide-680029-Page-28.png)
![V 2006-6-7 29/74 Set as wallpaper To set the selected picture as wallpaper. Modify picture Use this menu to access the following options: •Add text To add text to the selected picture. Enter your text in the editing screen and press [OK]. Use the navigation keys to move the text on the screen: short press to move the text 1pixel at a time, long press for 5 pixels. Press Right softkey Back to go back to the text editor, or Left softkey [OK] to validate and go to the next option. •Add frame or icon To add a frame or an icon to the selected picture. •Eraser To Undo the last modification made on the picture, or to Reset, i.e. cancel all changes at once. Press Right softkey Back to cancel or Left softkey [OK] to validate. •Send To send the selected picture via MMS. •Save To save the picture with all the changes you have applied. Rotate Use this option to rotate the selected image of -90 degrees, +90 degrees or +180 degrees. View To display the selected file. Properties Display its properties (size, format, resolution, etc.). Rename To rename the selected image. Select <New> to begin the recording. The message Speak now appears along with a progress bar. When you are finished, press Left softkey Save to stop recording. You can then either enter a name for the new sound file or accept the default name proposed by pressing [OK]. You then return to the list of Sound recordings and the new recording is displayed in the list. When you select a sound file, it is played automatically in a loop. Press[OK] to access the options. You can Play recording, Rename or Delete it, Set as ringer or As SMS/MMS ringer. 6.4. Sound recording](https://usermanual.wiki/Cellon-Communications-Technology/UT1200/User-Guide-680029-Page-29.png)
![V 2006-6-7 31/74 This function is to play KTV. You can set the function after entering it. ▪ KTV list: list all saved KTV, you can select one of them to play, check, and delete. ▪ Delete: Delete the KTV selected song. ▪ KTV Info: provide the relevant information about the playing KTV, such as file size, title. ▪ Play setting: Select the way to enter to play. Whether to play last song or not? / Whether to start playing once entering KTV? ▪ Repeat setting: Select the way of playing, Only/ Repeat/ Shuffle. ▪ Side volume key can adjust the volume. Your mobile phone features a built-in digital camera. You can take pictures, store them in your phone or transfer them to your PC, use them as wallpaper or send them to your friends via MMS. This chapter describes in detail how to use the camera. 7.3.1 Activate the camera To activate the camera mode, simply access to Entertainment>Camera: the camera application is automatically launched. When the camera is active, the preview screen is displayed and the lens is automatically focused. The table below details the operations of the various keys in camera mode. ▲ ▼ Zoom in / out ◀ ▶ Increase/decrease exposure compensation [OK]or camera key Take a picture Red key Exit Camera mode and return to home screen Left softkey Access the Options menu Right softkey Return to previous screen 7.3. Camera](https://usermanual.wiki/Cellon-Communications-Technology/UT1200/User-Guide-680029-Page-31.png)
![V 2006-6-7 32/74 7.3.2 Take a picture Frame your picture and press [OK] to take the picture. Once the picture is taken, a view screen is displayed. Save To save the picture in your personal photos folder using the default numbering (you can then rename it from the folder itself). MMS Send the picture by MMS. Picture List List all pictures saved. Pictures are named with the date of the shot, e.g."0410_154157.jpg" for a picture taken on October 4, at 15: 41:57.The number of pictures you can save varies according to the settings: the higher the resolution, the bigger the file size. A message will warn you if there isn’t enough memory left. In this case, you must delete data before storing a new picture. 7.3.3 Picture List When you take a picture and save it, the file is stored in your Picture List. When you open the menu, your photos are displayed as thumbnails. Use the up and down navigation keys to move through the list. To view the image full-screen, press [OK]. Use the up and down navigation keys to move through the list of images. Pr ess Left softkey Options to access the following: Send by Use this menu to transfer an image to another device. The options are: MMS. Set as wallpaper To set the selected photo as the image to be displayed in the background of your screen. Properties Choose this option displays the following properties of the selected image: Name, Size (in Kb), Resolution and Format. View To display the picture in full screen. Rename Use this option to rename an image file. Delete all Use this option to delete all the files in your My photos folder.](https://usermanual.wiki/Cellon-Communications-Technology/UT1200/User-Guide-680029-Page-32.png)
![V 2006-6-7 34/74 frame your picture, and then press [OK]. 7.3.8 Resolution Use this menu option to choose the size of the photos you take. The options are: •128 x 96 •128 x128 •Medium (320 x 240) •VGA (640 x 480) Please note that the higher the resolution, the larger the file size. 7.3.9 Picture quality This menu allows you to adjust the quality of the pictures taken with your camera: Low, Medium, High. The lower the quality, the smaller will be the resulting image files, thereby allowing you to store more photos on your mobile phone. 7.3.10 Shutter Sound •Ring.adp •Gunshoot.adp •Beep.adp 7.3.11 Reset settings Reset all camera settings to their default values. A warning message appears: Do you really want to reset all parameters? Choose Yes or No. 7.3.12 Rotate This option allows you to rotate an image; The options are: 0 degree +90 degree](https://usermanual.wiki/Cellon-Communications-Technology/UT1200/User-Guide-680029-Page-34.png)
![V 2006-6-7 36/74 and stored in the My photos folder. With this function, you can make video with your phone at any moment. In the menu, select Entertainment>Video, and press [OK]to access the status for finding views. In the viewfinder mode, you can press [OK] to make video. The option is as following, ▪ Video list: the saved video list and you can process about the video by playing, delete, and delete all. ▪ Environment: select to take video in day or night. ▪ Video quality: Low, Medium or high. ▪ Resolution: 128*96, 128*128, Medium (320*240) ▪ Color mode: Normal, Warm, Antique, Moon light, Cool, Reserve, Gray ▪ Reset settings: Do you really want to reset all parameters 8 - WAP This menu allows you to access services supplied with your network, such as news, sports, weather, etc. If your phone was pre-configured, it isn’t necessary for you to change the settings described in this section. With some operators, settings can be set remotely. Select Operator > WAP >Homepage to launch a WAP session, Use or To browse the on-line pages Press [OK] or Left sofkey select To select a highlighted item 7.5. Video](https://usermanual.wiki/Cellon-Communications-Technology/UT1200/User-Guide-680029-Page-36.png)
![V 2006-6-7 37/74 Press Right softkey back To return to the previous page Press Red key or select option>Exit To end the WAP session Your mobile phone connects to the network according to the Access settings you have defined in the menu Settings > Network. In case of a connection error, the screen displays "Go to menu": press Pick up key or Left softkey Options to access the WAP options. This is the link to the first WAP site you access when launching a WAP session. In most cases, this menu item is preconfigured and will connect to your operator’s WAP homepage. This menu allows you to store your favorite WAP site addresses, rename them and access them quickly from the list. Press Left softkey Options while browsing, and then select Bookmarks: the name and URL fields will be automatically filled in with the information of the page you are browsing. Select Add bookmark and start entering the new name for the edit screen to appear. Press[OK] then proceed the same way to enter the URL address. The [Manage bookmarks] menu allows you to Delete or Edit the selected bookmark. 8.1. Homepage 8.2. Bookmarks](https://usermanual.wiki/Cellon-Communications-Technology/UT1200/User-Guide-680029-Page-37.png)
![V 2006-6-7 38/74 This menu allows you to enter a WAP site address and to connect directly when selecting it (a quick way to access WAP addresses without saving them as bookmarks). All the addresses you enter in this menu and connect to at least once, will appear in a list. Select one of the items and press[OK], to reconnect to the corresponding page, without having to re-enter its complete address. 8.4.1 Select profile In order to access WAP sites, you must first configure a WAP connection profile. To select one of the available profiles, then define the connection settings for each of them. All connection settings described below apply to the selected profile. 8.4.2 Browser options To activate or deactivate the downloading of images attached to WAP pages. Selecting Off will speed up the global down loading time of the pages browsed. 8.4.3 Rename profile Rename the currently selected profile (start entering the new name for the edit screen to appear). 8.3. Go to URL 8.4. Settings](https://usermanual.wiki/Cellon-Communications-Technology/UT1200/User-Guide-680029-Page-38.png)
![V 2006-6-7 41/74 This menu allows you to send text messages using the Short Messaging Service (SMS) and to manage the messages you send and receive. 9.2.1 New SMS To compose and send an SMS, follow the steps detailed below: Select Send SMS, then Enter phone no. or From contact list and press [OK]. Enter a number or select a contact and press[OK] then one of the following options:. <New>To write a new message. Last message:To edit, modify and re-send the last message sent. This menu also lets you recall the message you were entering and might have lost if you pressed the Pick up key by accident and returned to idle screen. Template: To select a pre-configured message such as Can you ring me back on this number? Save: To store the current message and its attachments in the Archive menu. Send now: To send the current message. Add sound: To attach a melody. Add graphic: To attach an image or an animation. You can send up to two attachments of two different types together with your SMS. Images and animations and pictures are exclusive: if you first select an animation and then an image, only the image will be taken into account and vice-versa. Copyright protected pictures and sounds cannot be sent by SMS. 9.2.2 Settings This menu allows you to configure the SMS settings. The options are: SMS centre To select your default SMS centre. If not available on your SIM card, you must enter your SMS centre number. 9.2. SMS](https://usermanual.wiki/Cellon-Communications-Technology/UT1200/User-Guide-680029-Page-41.png)
![V 2006-6-7 42/74 Signature When On, allows you to add a signature at the end of your message. You can Edit, Change or Save the signature. Validity period To select the length of time your messages are to be stored in the SMS centre. This is useful when the recipient is not connected to the network (and thus cannot receive your message immediately). This feature is subscription dependent. Auto save SMS When On, this option will automatically save messages sent in the Archive menu. Reply path When On, this option allows you to transmit the number of your SMS message centre together with the message. The recipient can then reply using your own SMS centre and not theirs. This speeds up the rate of transmission. This feature is subscription dependent. Delivery report When On, this option will inform you via SMS whether your own SMS was received or not. This feature is subscription dependent. 9.2.3 Archive This menu allows you to consult all the messages stored in the phone’s memory using the Auto save SMS or Move to archive options. The <Delete all SMS> item allows you to delete all SMS at once. When a message is displayed, press, or L Options to access the following options: Delete, Edit SMS, Forward to, Call back, Call handsfree. 9.2.4 SMS Inbox This menu allows you to read SMS messages you have sent and received. The messages are displayed in a list. At the end of the list, the <Delete All> item allows you to delete all the messages at once. Deleting old messages is useful to free memory space in order to receive new messages. When a message is displayed, press [OK] or Options to access the menu options listed below. Delete To delete the selected message.](https://usermanual.wiki/Cellon-Communications-Technology/UT1200/User-Guide-680029-Page-42.png)
![V 2006-6-7 44/74 in order to be able to view your message. 9.3.1 Receiving MMS If someone sends you an MMS, an icon and a sound alert will inform. If the sender of the message has asked for a Read report, a prompt will ask you to send it or not. Once the MMS is downloaded, it is available in MMS > Inbox (see below). If the size of the MMS to download is bigger than the memory available in your phone, you must free memory by deleting data (picture, sounds, etc.). 9.3.2 Create New MMS When you select Create MMS, you are first asked to enter the contact to whom you wish to send the MMS. You can select one or more existing contacts or enter a new mobile phone number. Next you will be asked to Add media. In the MMS creation screen, five icons allow you to add a Picture, add Text, add Sound, Send the message or access the MMS options. Use ▲ or ▼to move from one option to the next and press[OK] or Left softkey to access the menu. 1. Design your message: add a Picture, a Text and/or a Sound. Press ▶ to create more slides. 2. The last icon on the left-hand side lets you access the MMS options (see below). 3. Select Send: to send the MMS to the selected recipient(s). Pictures are chosen from the Picture album. Copyright protected pictures cannot be sent via MMS. Sounds can be chosen from the Sound Album melodies. If you wish to send a sound memo, you need to record it when creating the MMS. In this case, in Sound... menu, select <Records>, then <New> and follow the procedure that appears on the screen. Recordings previously saved cannot be sent via MMS. The following options are available when creating new MMS messages: Edit subject: To edit and change or enter the subject of your message. Save as draft: To save your message as a draft that you can edit, complete and send later on.](https://usermanual.wiki/Cellon-Communications-Technology/UT1200/User-Guide-680029-Page-44.png)
![V 2006-6-7 45/74 Save as template: To save your message as a template, that you can use as a basis for other MMS (e.g. "Happy birthday" type of message). Slide duration: To change the value of slide duration set in Settings > Application settings, and to set a delay between each slide. Once your message is completed, select Send now and press[OK]. A progress bar allows you to follow the sending of your message, press Right softkey Cancel if you wish to cancel the sending. If you saved the MMS as a draft, it will be available in the Drafts menu. If you have sent the MMS, it is available in the Outbox. 9.3.3 Inbox You MMS inbox lists all the Read and Unread MMS, Notifications, Delivery and Read reports. To read a message, select it and press ▶. Press [OK], or Left softkey Options to access the following options: Play: To switch back to automatic mode: the MMS is then played as a continuous slide show. Next / previous slide: To move to the next or previous slide. Y ou can also press ◀ or ▶ when viewing the MMS in manual mode. Note that this option only appears if the MMS contains more than one slide. Save picture: To detach the picture of the current slide and save it in the Picture album. Save sound: To detach the sound of the current slide and save it in the Sound album. Close: To close the MMS and go back to the list of options. Do NOT delete notifications before you have retrieved the MMS, or you will not be able to retrieve the MMS .Notifications are automatically deleted once you have received the full MMS. 9.3.4 Drafts Lists all messages saved as drafts, or automatically saved if you quit the MMS menu before saving or sending your MMS. You can Play, Edit, Send, view Details and Delete drafts.](https://usermanual.wiki/Cellon-Communications-Technology/UT1200/User-Guide-680029-Page-45.png)
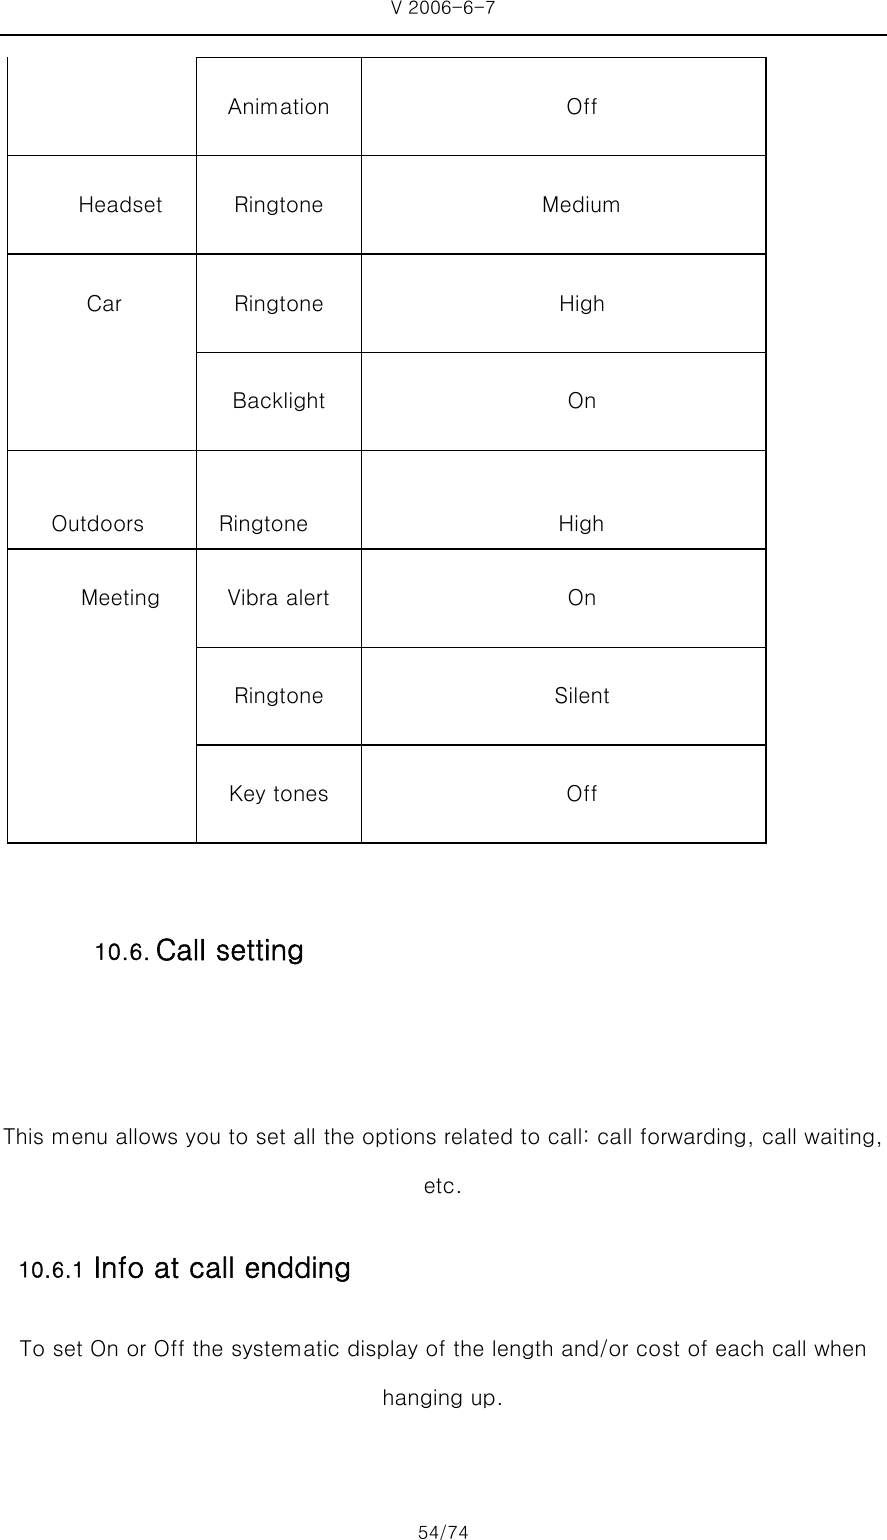
![V 2006-6-7 48/74 10.2.1 Ringer volume This option allows you to adjust the volume of your ringer. Press the side key [+] or [-] to adjust the volume of your ringer. [+] is to increase, and [-] is to decrease. 10.2.2 Ringtone Allow you to select a ringer tone. The list also includes recorded sounds and melodies you saved. Scroll through the list and wait to hear the selected melody being played. The phone provided ringtone will ring automatically if the ringtone user selected is deleted. 10.2.3 Messages ringer Allows you to set On or Off an alert for each time you receive a new message. When On, you can select the alert of your choice from the ringers list. 10.2.4 Equalizer This option allows you to choose from different audio settings. It is only available while a call is in progress. Scroll through the list and wait a few seconds to hear the difference. 10.2.5 Key tones Allows you to switch the key tones On or Off. 10.2.6 Sounds alerts Allows you to set alert sounds for the following items: •Organizer: when an event programmed in your organizer is due, 10.2. Sounds](https://usermanual.wiki/Cellon-Communications-Technology/UT1200/User-Guide-680029-Page-48.png)
![V 2006-6-7 52/74 during connections are mainly due to incorrect parameters: contact your operator before first use, in order to have the appropriate settings, which you may receive by SMS in some cases. Some pre-configured profiles might be locked, preventing re-programming and renaming. Select an item in the list and press[OK] to access the following options: Change name: To rename the selected profile. Show: To display all parameters of the selected profile GSM Settings: To change the GSM settings: •Login & Password, •Phone number needed to establish the connection and provided by your operator (ISDN or Analogue), •Inactivity time, a value of over 30seconds after which the phone disconnects automatically (if a connection was in progress). GPRS settings: To change the GPRS settings: •Login, •Password, •Inactivity time •the APN menu allows you to enter the address of the external data network you want to connect to, a text string used to establish the connection. 10.4.2 GPRS attach This menu allows you to define how your mobile phone connects to the GPRS service. Always on: Your phone automatically connects to the GPRS service (if available).This option allows quicker access to GPRS features, but increases energy consumption. For data calls: Your phone will connect to the GPRS service only when required. This option reduces energy consumption, but increases the connection delay. 10.4.3 Register again Provide you with a list of the networks available in the area when the Manual mode is](https://usermanual.wiki/Cellon-Communications-Technology/UT1200/User-Guide-680029-Page-52.png)
![V 2006-6-7 53/74 selected. Select the network you want to register with and press [OK] to confirm. 10.4.4 Preferred list Allow you to build a network list in order of preference. Once defined, the phone will try to register on the network, according to your preferences. A profile is a group of predefined settings that allow you to quickly adapt your phone to your environment. Selecting Meeting, for example, will set your ringer volume to silent, activate the vibrating alert and deactivate the key tones (the other items are set according to your Personal settings). When your meeting is over, selecting Personal will reactivate all your usual settings. The details of each profile are displayed when selecting a profile. You can also associate a hotkey with a profile (e.g., long press key to activate Outdoors). Long pressing the same key deactivates it and returns you to your Personal settings. Personal The information that appears here will depend on how your mobile phone has been configured. Autonomy Vibra alert On Ringtone Medium Backlight 10 sec 10.5. Profiles](https://usermanual.wiki/Cellon-Communications-Technology/UT1200/User-Guide-680029-Page-53.png)
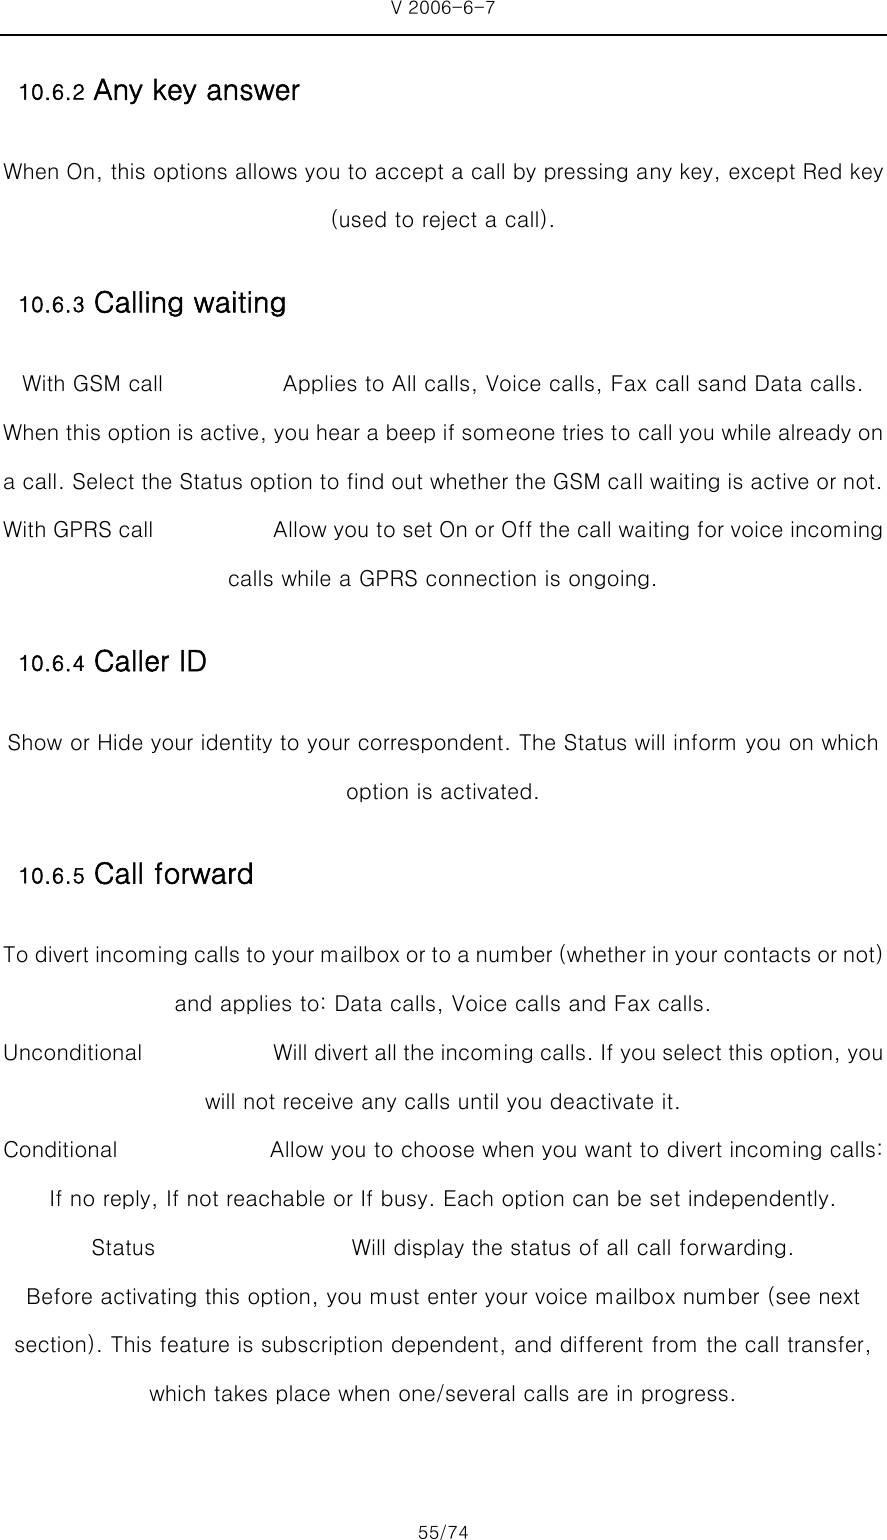
![V 2006-6-7 56/74 10.6.6 Mailboxes To enter your voice mailbox numbers (if not available on your SIM card).In some cases, you might have to enter two numbers: one to listen to your mailbox, the other one to forward calls. Contact your operator for more information. 10.6.7 Auto redial When On, if the person you are calling is busy, your phone will automatically redial the number until a successful connection is made or until the maximum number of attempts is reached (10). The phone beep sat the beginning of each attempt and emits a special beep if the connection is successful. The time between redials increases with each attempt. This menu allows you to configure how the menus are displayed on screen. Deactivating most of the functions in this menu increases battery life. 10.7.1 Wallpaper Allows you to set the wallpaper of the main screen On or Off. 10.7.2 Backlight Backlight is activated when receiving incoming calls or messages, browsing list and menus, etc. Press ▲or ▼ to set the backlight Duration by selecting one of the available values and press [OK] to confirm. The Duration is as following, ▪ 10 seconds 10.7. Display](https://usermanual.wiki/Cellon-Communications-Technology/UT1200/User-Guide-680029-Page-56.png)
![V 2006-6-7 57/74 ▪ 30 seconds ▪ 1 minute 10.7.3 Language This menu allows you to select a language for all menu texts. Use ▲or ▼to browse the list and select a language by pressing[OK] or Left softkey. 10.7.4 Animation Allows you to set the animation of the carousel menus On or Off. When On, this option will also scroll texts, such a message selected in the Read SMS menu. 10.8.1 Auto Switch on/off These two separate menus allow you to set your mobile phone to switch itself on or off at pre-set times. To set Auto switch on, select the option and press [OK]. Select On and press [OK]. Enter the time at which you want your mobile phone to switch itself on and press [OK]. Select the desired frequency from Once, Everyday, or On weekdays and press [OK]. A message appears to confirm activation. Proceed the same way for the Auto switch off option. 10.8.2 Hotkeys Allow you to set up direct access to a specific function or a contact by linking it to a Hotkey. A long press on the key in idle mode will then automati cally activate the function or call the associated number (Flash dial). 10.8. Phonesettings](https://usermanual.wiki/Cellon-Communications-Technology/UT1200/User-Guide-680029-Page-57.png)
![V 2006-6-7 58/74 Depending on your service provider, other hotkeys may be predefined and locked. 1. In the list, select a key from to and press [OK]. If the key was already programmed, select Change. 2. Browse the list to select the function you wish to associate with this key and press [OK] to confirm your choice. If you select Flash dial, you will be asked to select a contact in the contacts list. 3. To use a hotkey, simply press and hold the key corresponding to the function you want to launch or to the number you want to dial when in idle mode. 4. Hotkeys list: Flash dial, Send SMS, Read SMS, MMS, Activate silence, Activate headset, Meeting, Activate outdoors, Activate personal, Activate Autonomy, Calculator, Reply last No., SOS Call, Show Balance, Total cost, Add new event, Show events, Alarm clock, Record, Sound recording, WAP, To voice mail, Brick game, MP3 Player, KTV Player, Contacts Select, Picture album. 11 - CONTACTS Contacts are stored in one of the two available phonebooks: in your SIM card (number of entries depending on capacity) or in your phone (up to 999names). When entering new names, they will only be added to the phonebook you have selected. This menu contains the settings for configuring the phonebooks for your mobile phone. 11.1.1 Delete all Delete all contacts at once. This option only applies to the onboard phonebook, not to 11.1. Settings](https://usermanual.wiki/Cellon-Communications-Technology/UT1200/User-Guide-680029-Page-58.png)
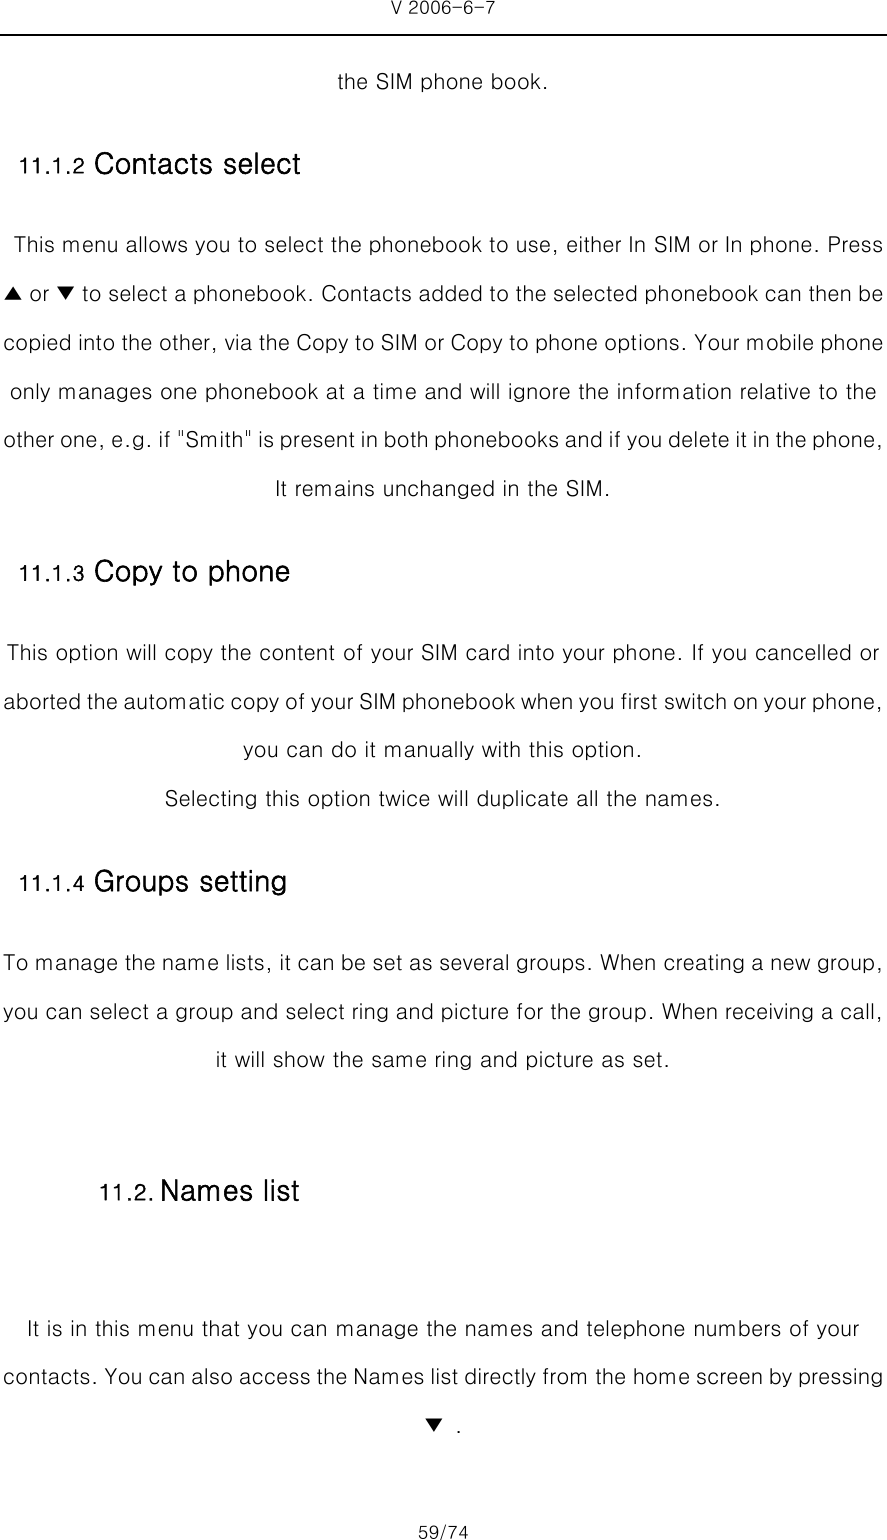
![V 2006-6-7 60/74 11.2.1 Adding contacts to the SIM phonebook ·Select <New> in the list. ·Enter the name and the number of your choice, then the type of number allocated to the name (Phone, Fax or Data) and press [OK] to store this name in your phonebook. Entering international prefix, country and area codes allows you to dial a number from any location. 11.2.2 Adding contacts in the phone phonebook 1. Select <New> in the list. 2. Enter the first, then last name (up to 20 Latin characters); one of the two fields can be empty, but not both. 3. Then select the Number type. Numeric fields can hold up to 40 digits and one "+" sign and alphanumeric fields feature up to 50 Latin characters. Each contact can feature a maximum of 5 numeric fields (e.g. 2 mobile numbers, 3 work numbers, a text note). If you wish to personalize this contact with a picture and/or a sound, see below. 11.2.3 Edit and manage contacts Press ▼ when in idle mode to access the phonebook. To search for a given name: Press the key for the letter that you want to go to in the list (e.g. Press twice to access the letter "U").The first record starting with this letter is selected in the list.](https://usermanual.wiki/Cellon-Communications-Technology/UT1200/User-Guide-680029-Page-60.png)
![V 2006-6-7 61/74 Press this key then enter the first letters of the name you are Searching and press [OK] to go directly to that name. You can also use the <Search> item appearing in the phonebook. 11.2.4 In the SIM phonebook Choose a contact in your SIM phonebook and press [OK] or Options to access the following options: Call Call handsfree Send SMS Send MMS Flash dial Delete Change Add to blacklist Copy to phone Details 11.2.5 In the onboard phonebook Choose a contact of your phone phonebook and press [OK] or Options to access the following options: Call handsfree, Send SMS, Send MMS, Call, Show, Delete, Add to blacklist, Change name, Select picture, Select sound.](https://usermanual.wiki/Cellon-Communications-Technology/UT1200/User-Guide-680029-Page-61.png)
![V 2006-6-7 62/74 Select Show to access the list of numbers or fields saved for this contact. Select <New> to create a new field or select one of the number and press[OK], to access a second set of additional options, among which are: Make default: The first number you enter becomes the default number which is automatically dialed when pressing Pick up key. This option allows you to set another default number. Copy to SIM card To copy a contact of your phone phonebook into the SIM phonebook (it is then always updated when switching phonebooks or when using another phone). Show Display the details of the selected field. Change type To change or to define the field type of the selected number. Change To change the number of the selected field. Flash dial To set a direct access to this contact by linking to a key. Alphanumeric fields can only be changed or deleted.](https://usermanual.wiki/Cellon-Communications-Technology/UT1200/User-Guide-680029-Page-62.png)
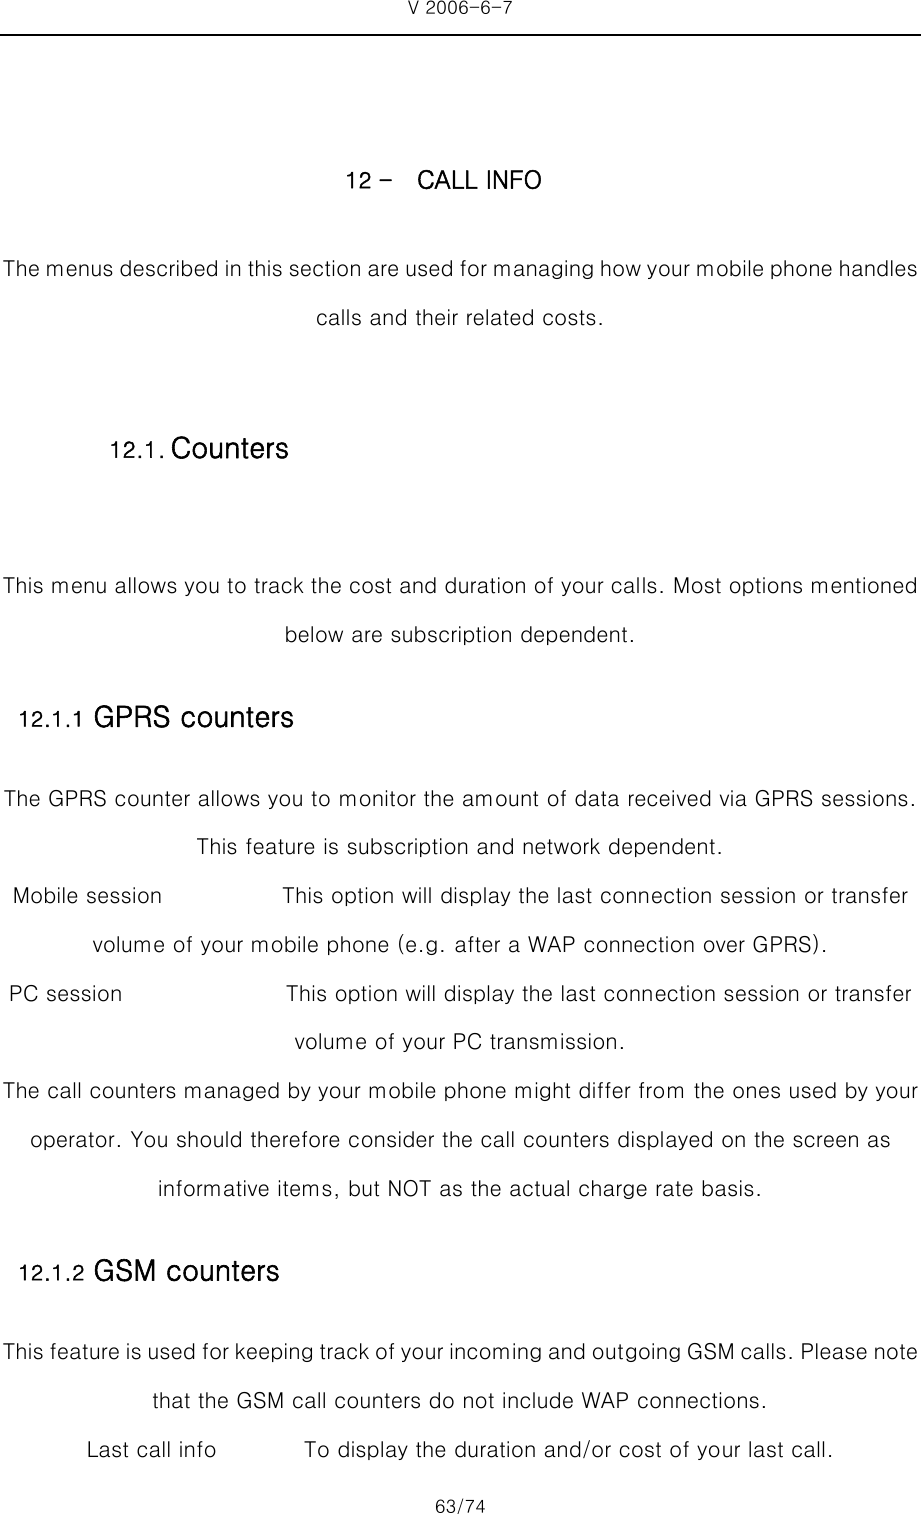
![V 2006-6-7 64/74 Total duration Show or Reset the time duration of Outgoing or Incoming calls. Total cost To display the accumulated cost and to set the counter to zero (maybe protected by PIN/PIN2 codes) .•Show how much has been spent based on the Charge rate. •Reset the current total cost. •Show balance to check the remaining credit (based on the Cost limit). •Cancel cost limit •Cost limit to enter the cost limit used in the Show balance menu. •Charge rate to set the rate per unit. First enter the currency used (3characters maximum), then enter the cost per unit. This menu provides you with the list of outgoing and incoming calls, attempts at auto redialing and call details. The different types of calls - calls made, calls missed and calls received - are represented by different icons. They are displayed in chronological order with the most recent on top. If the correspondent is listed stored in your contacts, the corresponding name is displayed. 12.2.1 Reset Reset the whole list at once and delete all listed calls. 12.2.2 Call list Select a number in the list, and press Pick up key( to redial t he number or press [OK] or Left softkey Options to access the options: Details, Call or Call handsfree this correspondent, Send SMS, Send MMS, Delete the selected call or Store the associated number (if not 12.2. Call list](https://usermanual.wiki/Cellon-Communications-Technology/UT1200/User-Guide-680029-Page-64.png)