Chaney Instrument 00597TX Rain Gauge User Manual RNE00597TX UserMan 0428
Chaney Instrument Co. Rain Gauge RNE00597TX UserMan 0428
Users Manual
1. Product Introduction:
1.1 Mounting the Rain Gauge
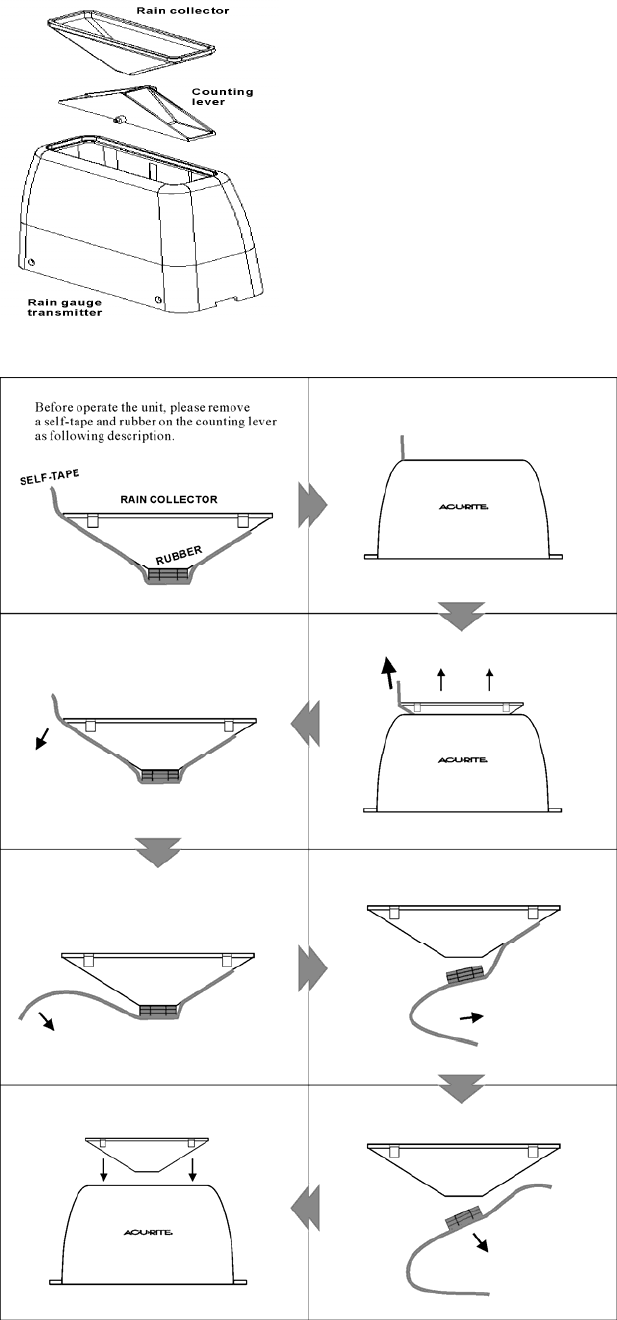
First remove the self-stick tape and rubber inset on the counting lever as shown as the
following figure.
Secondly pace the counting lever into the base and make sure the counting lever is
placed in an upright position and is free to swing smoothly. Then place the rain
collection into the unit.
Finally place the rain gauge on a flat surface above ground level to avoid being
immersed in water while it is raining.
Note: do not store or locate the outdoor rain gauge close to any source of magnetic
interference or electrical equipment.
2. Specifications :
a. Rain 1 Hour Range: 0 to 5.10 inch
Rain 24 Hour Range: 0 to 81.8 inch
Rain Days Range: 0 to 199.98 inch
Rain Total Range: 0 to 199.98 inch
Resolution: 0.02 inch
b. Transmission time interval:
Rain gauge: 57 OR 59 OR 61 OR 67 seconds.
3.Important Information:
1) For the initial set-up put the batteries in the indoor rain monitor base unit first and then
into the outdoor rain gauge transmitter.
2) For the outdoor rain gauge transmitter, please make sure the counting lever inside the
unit is placed in an upright position and is free to swing smoothly.
3) For the best reception and to avoid the outdoor rain gauge being immersed in water
while it is raining, please place the outdoor rain gauge on a flat surface above ground level.
4) Do not store or locate the outdoor rain gauge and a counting lever close to any source of
magnetic interference or electrical equipment.
3. Before Getting Started:
4.Getting Started (Power reset procedure)
1. Please make sure batteries are inserted into the indoor rain monitor first and the
display appears. The unit will go into “sync mode” for 30 minutes.
2. Insert batteries in the outdoor rain gauge transmitter.
3. In the “sync mode” the indoor rain monitor will receive the outdoor transmission
signal within 1 minutes.
4. At the synchronization period, the antenna wave icon will keep blinking on the
rain monitor display.
5. When the antenna wave icon stops blinking and remains on the display, this means
synchronization has occurred and the main unit has gotten the signal from the
transmitter unit.
6. Once the synchronization has occurred, the indoor rain monitor will detect updated
rainfall information from the transmitter every minute automatically.
5. Outdoor Rain Gauge Transmitter:
- Measures the rainfall using the internal counting lever and transmits rainfall & rain
mode information to the indoor rain monitor base unit.
- Lever resolution: each lever swing = 0.02 inch (0.508 millimeter).
- Low battery condition will be detected and displayed on the indoor rain monitor.
- Operation temperature range: -30°C to 50°C
- The antenna used for this transmitter must be installed to provide a separation
distance of at least 20 cm from all persons and must not be co-located or operating
in conjunction with any other antenna or transmitter.
6. Indoor Rain Monitor:
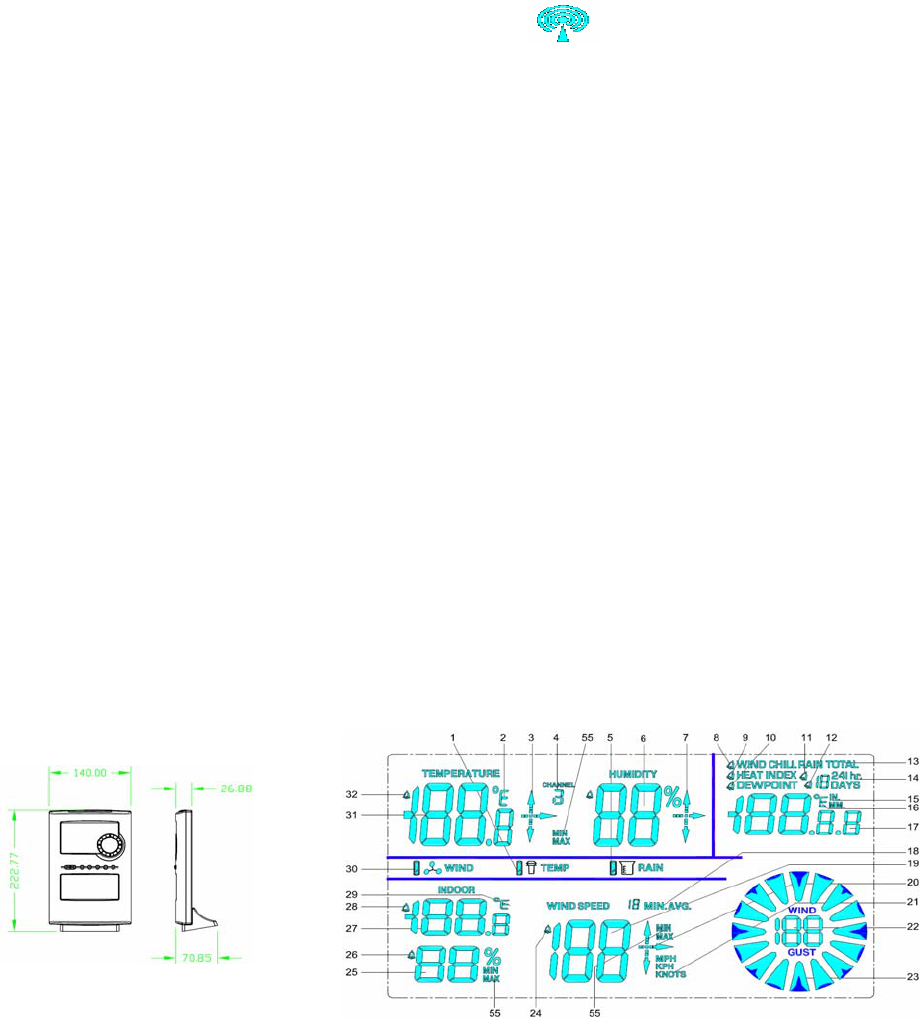
5. Low battery indicator for rain sender 13. Rainfall total display (optional)
14. 24h or user defined period display (optional) 15. Rainfall units (inch or MM)
6.1 Display
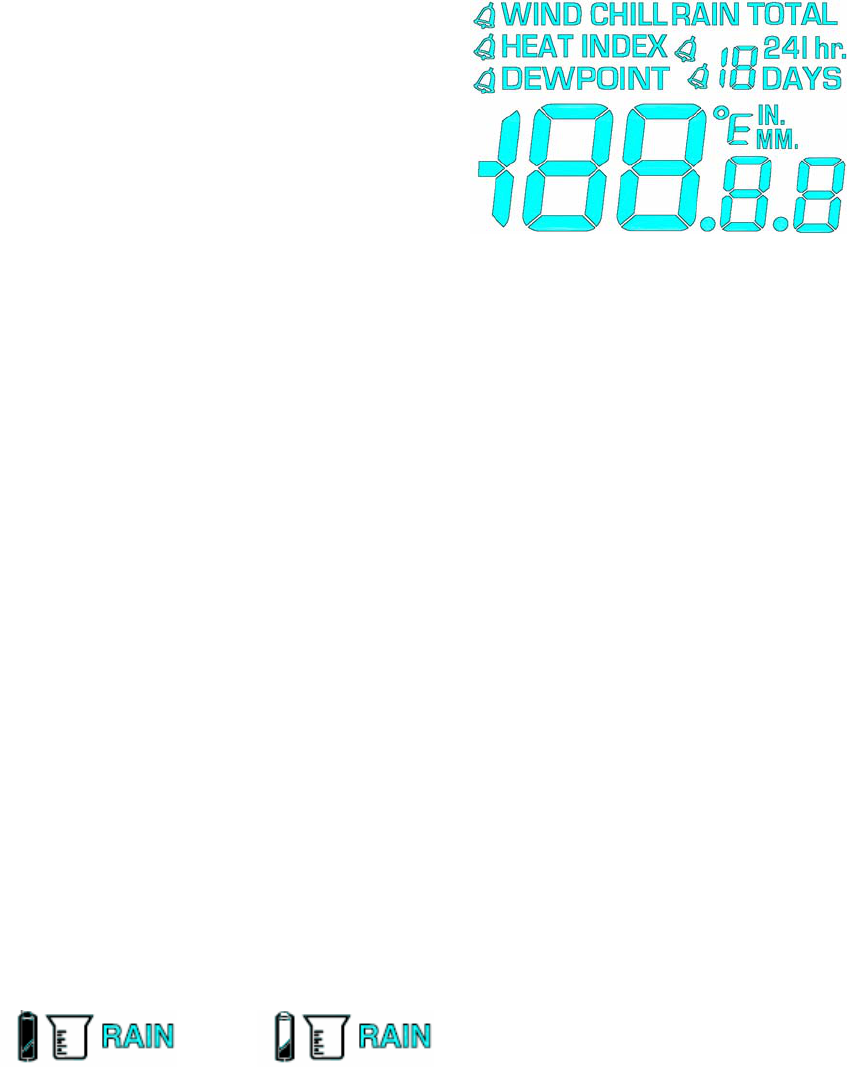
6.1.1 Press “Display” button is to view the following display area in upper right hand
screen.
- Wind chill
- Heat index
- Dew point
- Rain in last hour
- Rain in last 24 hours
- Rain in user defined days
- Rain total
6.1.2 In the rain total mode, press and hold “Clear” button for 3 seconds is to clear the total
rain record. (If it has the capability of rain gage)
6.1.3 The following record can be viewed in the MAX/MIN mode
1. Wind chill / Heat index / Dew point/Rain 1 hr. / Rain 24 hr.
View the max/min of anyone of them, press “Display” button is to set the one in
normal mode.
6.2 In MAX / MIN mode, press “Daily Record” button to view rain 1 hr., the last 24 hour
record can be viewed. When first press “MAX or MIN” button and later press “Daily
Record” button to view rain 24 hr., the last 19 day record can be viewed.
6.3 In MAX / MIN mode, press “Record” button to view long time record, the rainfall can
not be viewed.
7. Low battery indicator and battery changing
Battery full Low Battery
If you see that the low battery indicator(s) has changed to half-full status, please
install fresh batteries.
Remove 4 screws from the bottom of the unit and remove the cover, install 2 AA
alkaline batteries according to the polarity indicted. Then close the cover and screw 4
screws.
8. Indoor rain monitor:
Remove the old batteries from the battery compartment and insert 2 fresh “AA” alkaline
batteries. Unit will sync with the outdoor transmitter unit automatically.
NOTE: After battery replacement, if you find any data showing on the indoor rain monitor
display, it must be accumulated data. Please press the “RESET” button for 1 second to
clear the display and start counting from 00.00IN or 000.0MM.
9.Outdoor rain gauge
To change the outdoor rain gauge batteries, you must press and hold the “RESET” button
for 1 seconds on the indoor rain monitor and let it re-sync again.
NOTE: After battery replacement, if you find any data show on the indoor rain monitor
display, it may an incorrect counting the occurred during the battery change. Please press
the “RESET” button for 1 second to clear the display and start counting from 00.00IN or
000.0MM.
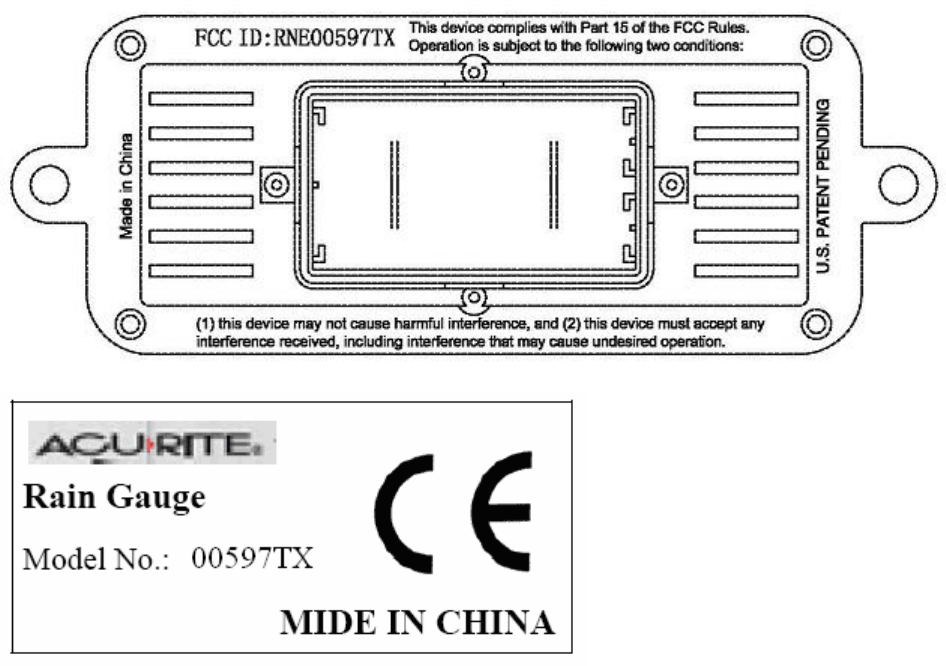
FCCID: RNE00597TX Notes: RAIN GAUGE Transmitter
This device complies with part 15 of the FCC rules. Operation is subject to the following two
conditions: (1) This device may not cause harmful interference, and (2) this device must
accept any interference received, including interference that may cause undesired
operation.