Checkpoint Systems FISOIUS RFID SYSTEM User Manual ILS 3 0
Checkpoint Systems Inc RFID SYSTEM ILS 3 0
UserManual.wiki
>
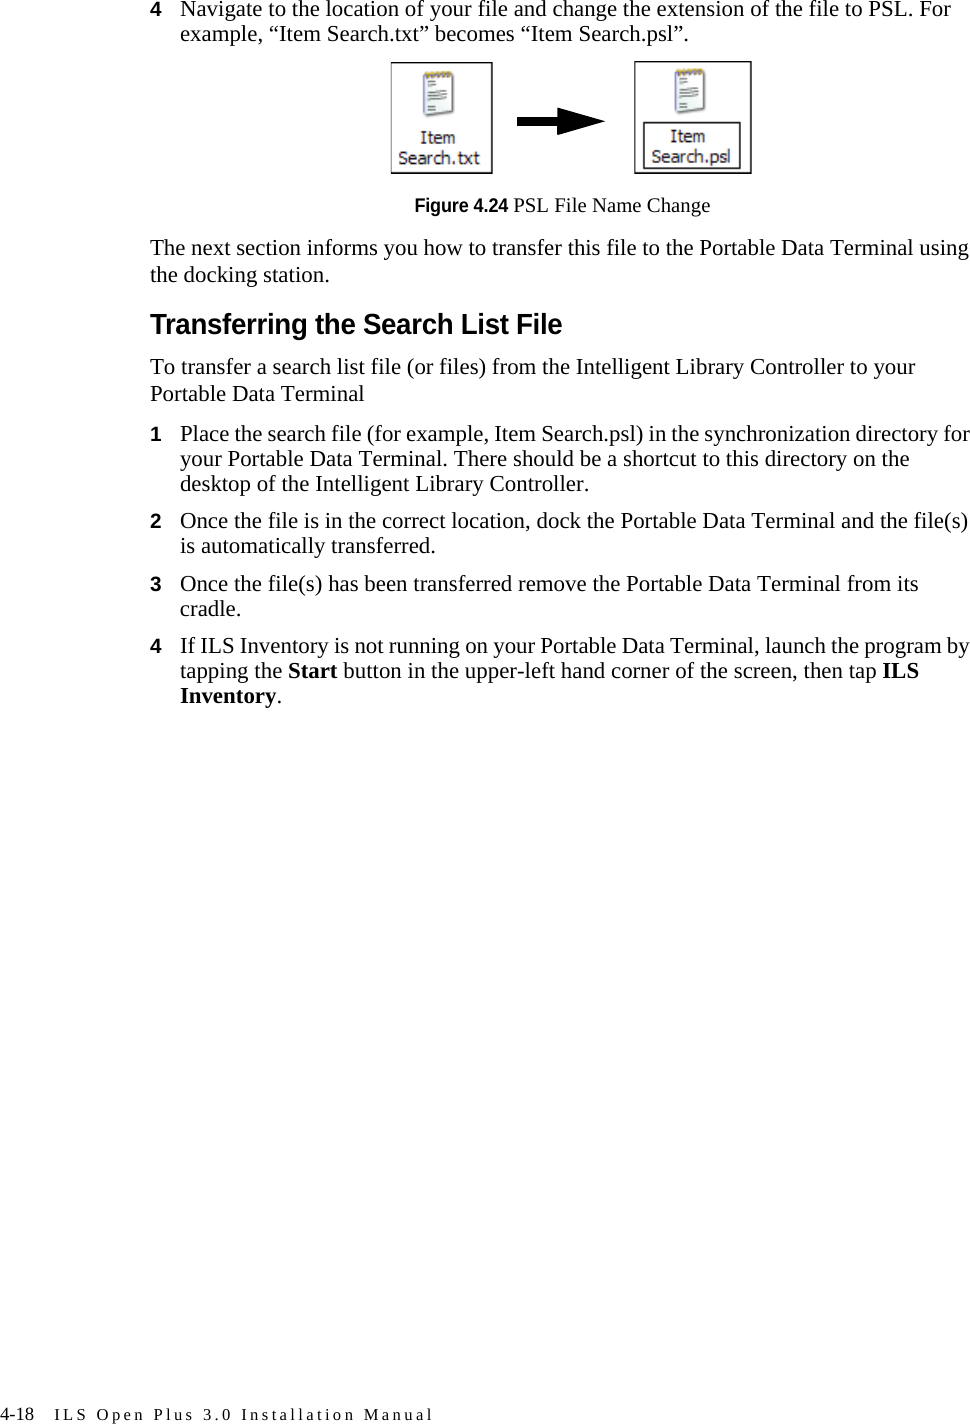
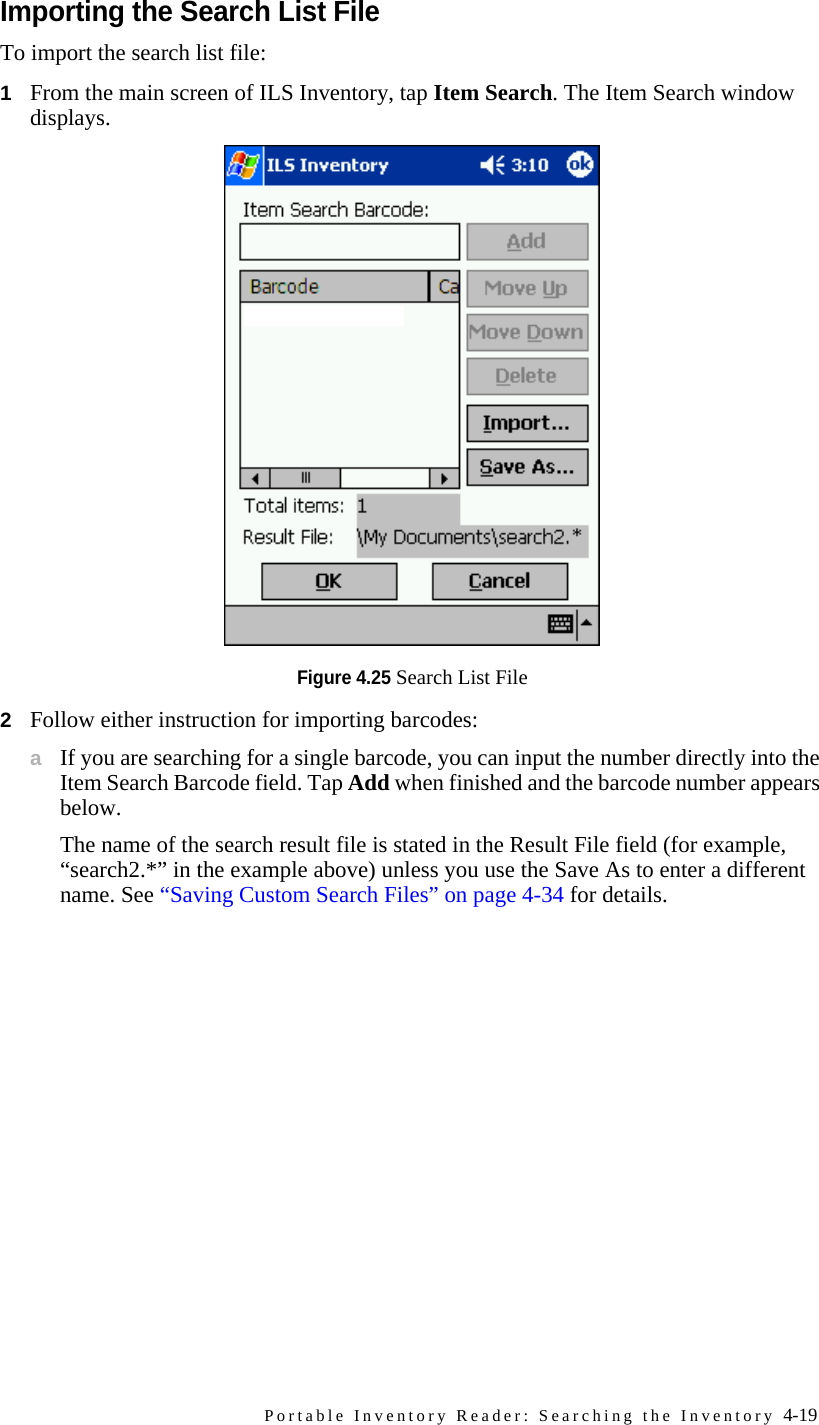
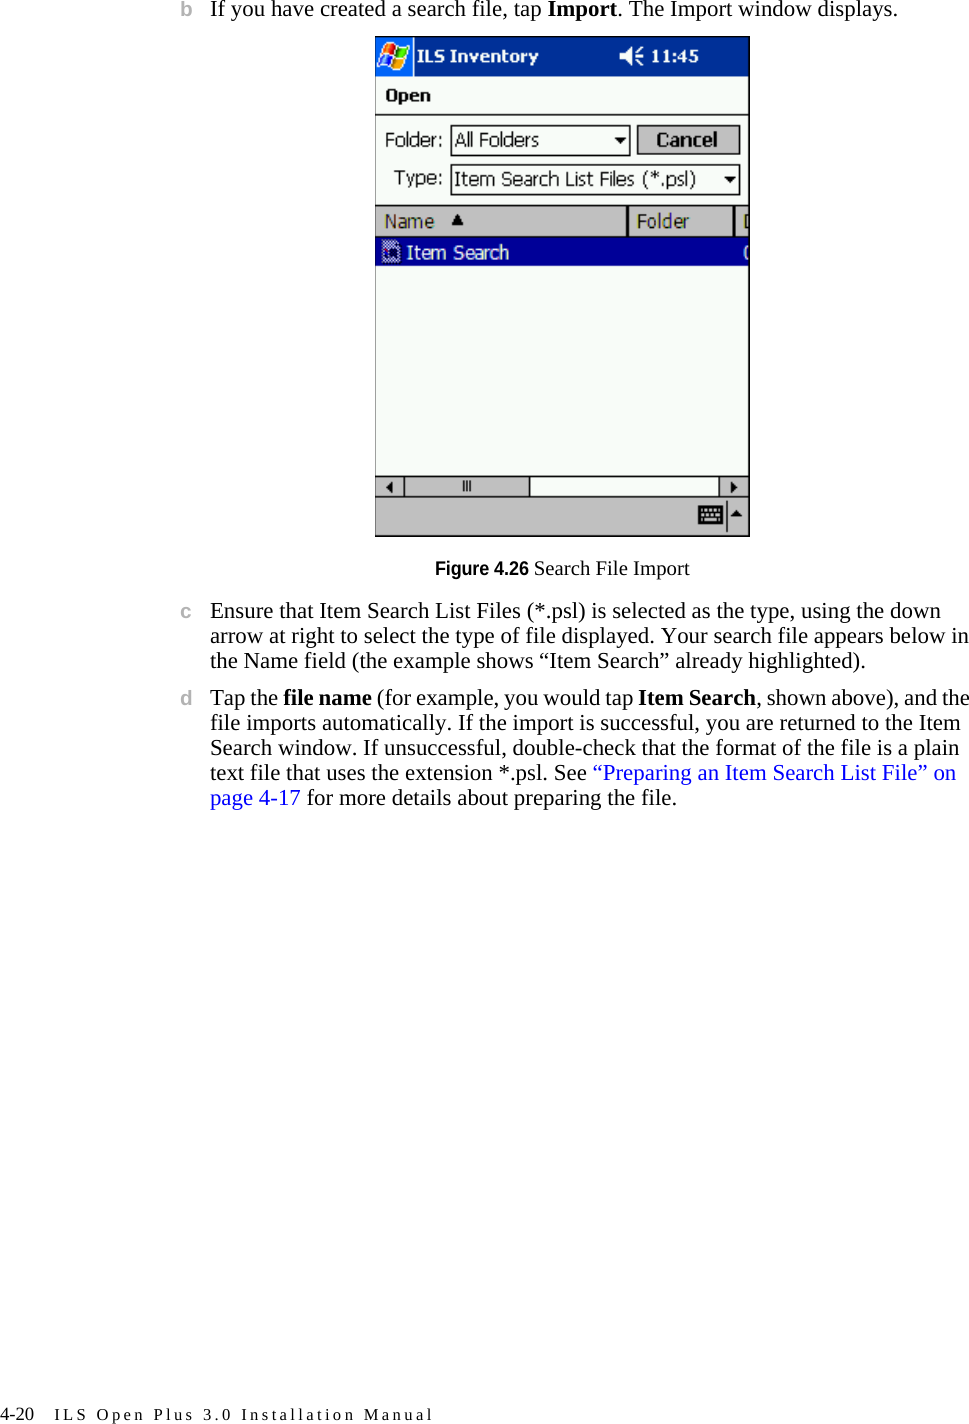
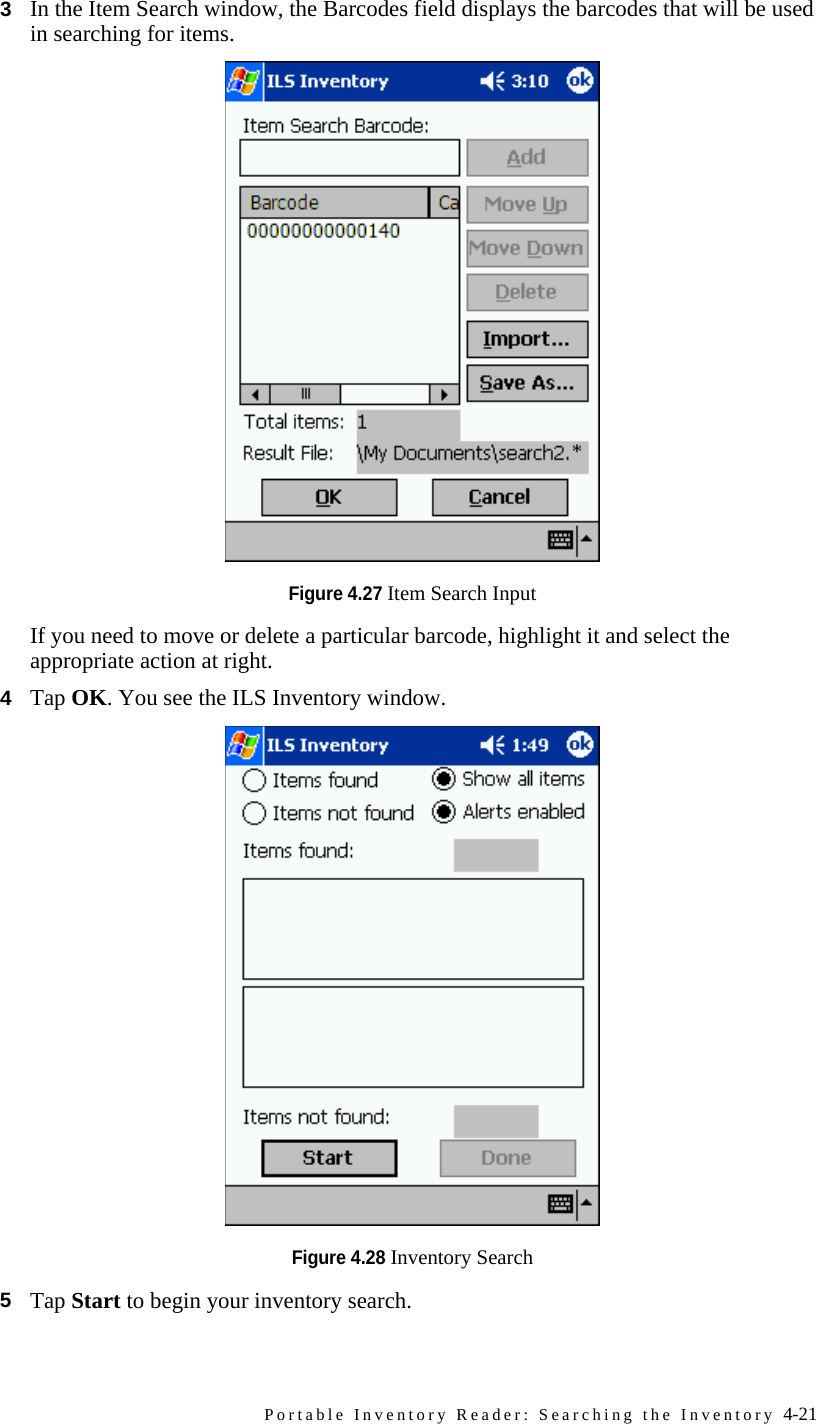
Checkpoint Systems
>
FISOIUS User Manual
USERS MANUAL
Navigation menu
Upload a User Manual
Namespaces
Wiki Guide
HTML
PDF
Info
Views
User Manual
Discussion / Help
Navigation
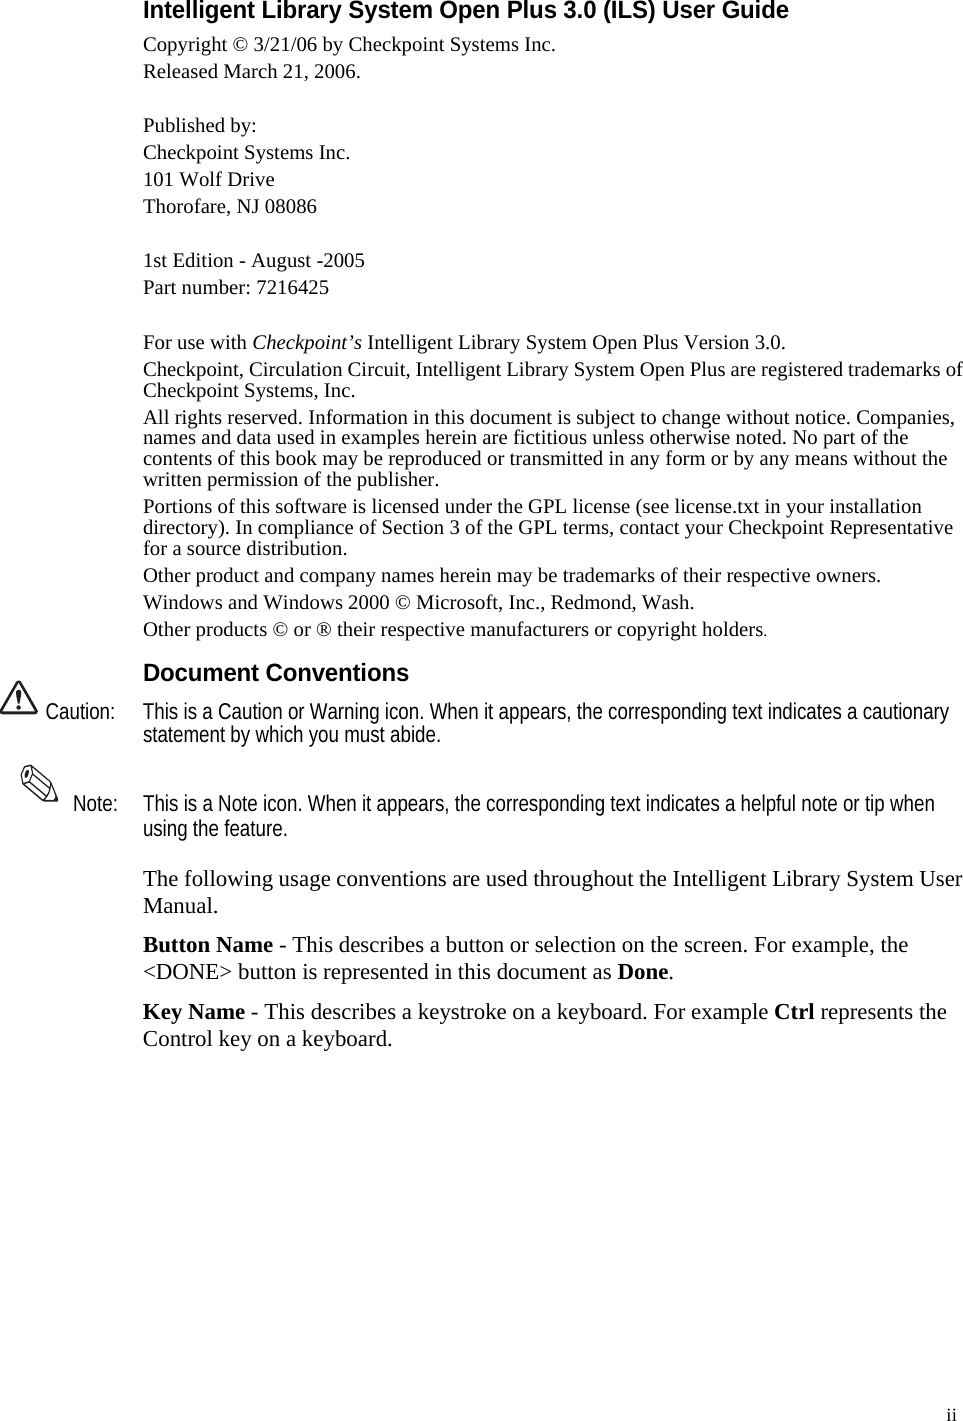
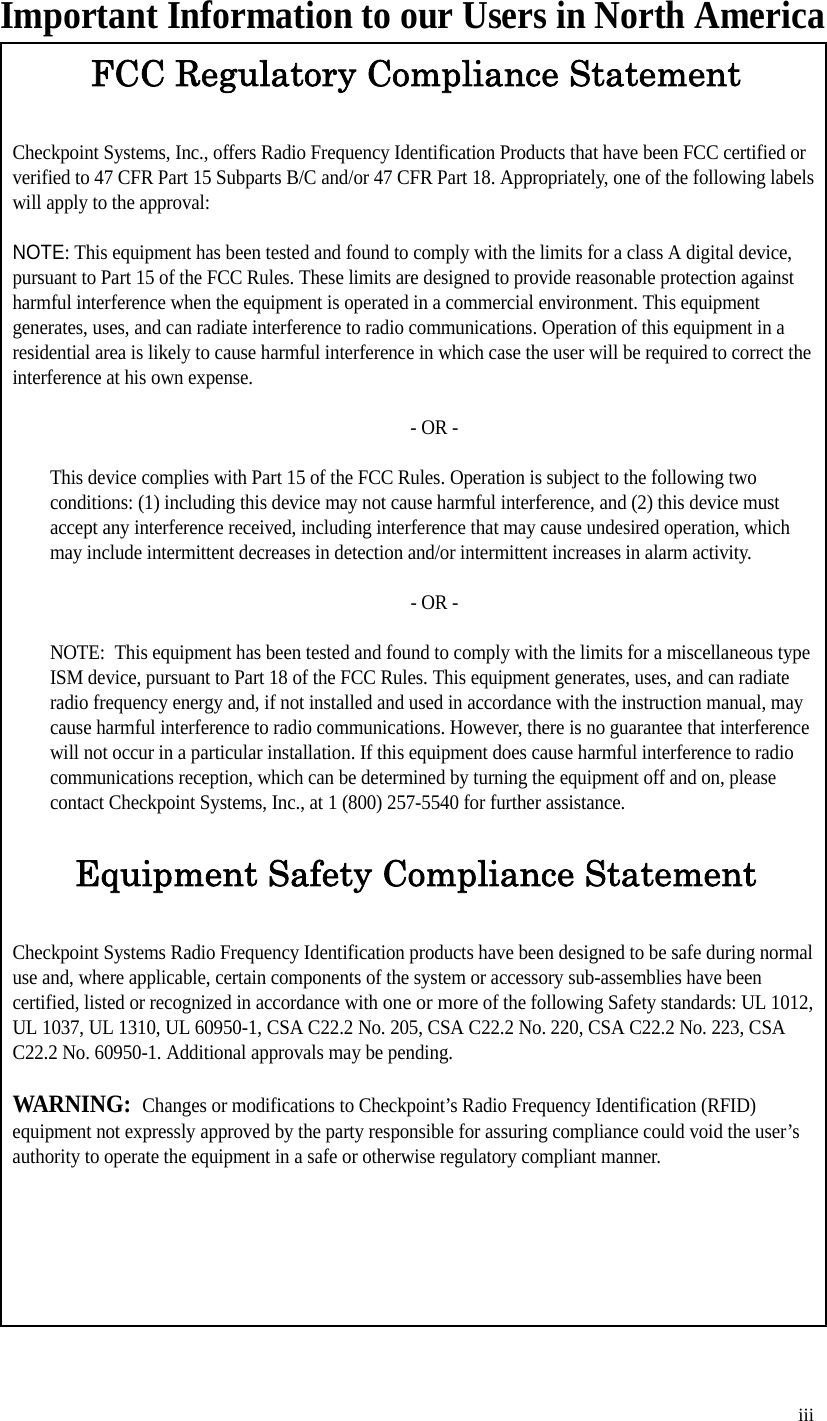

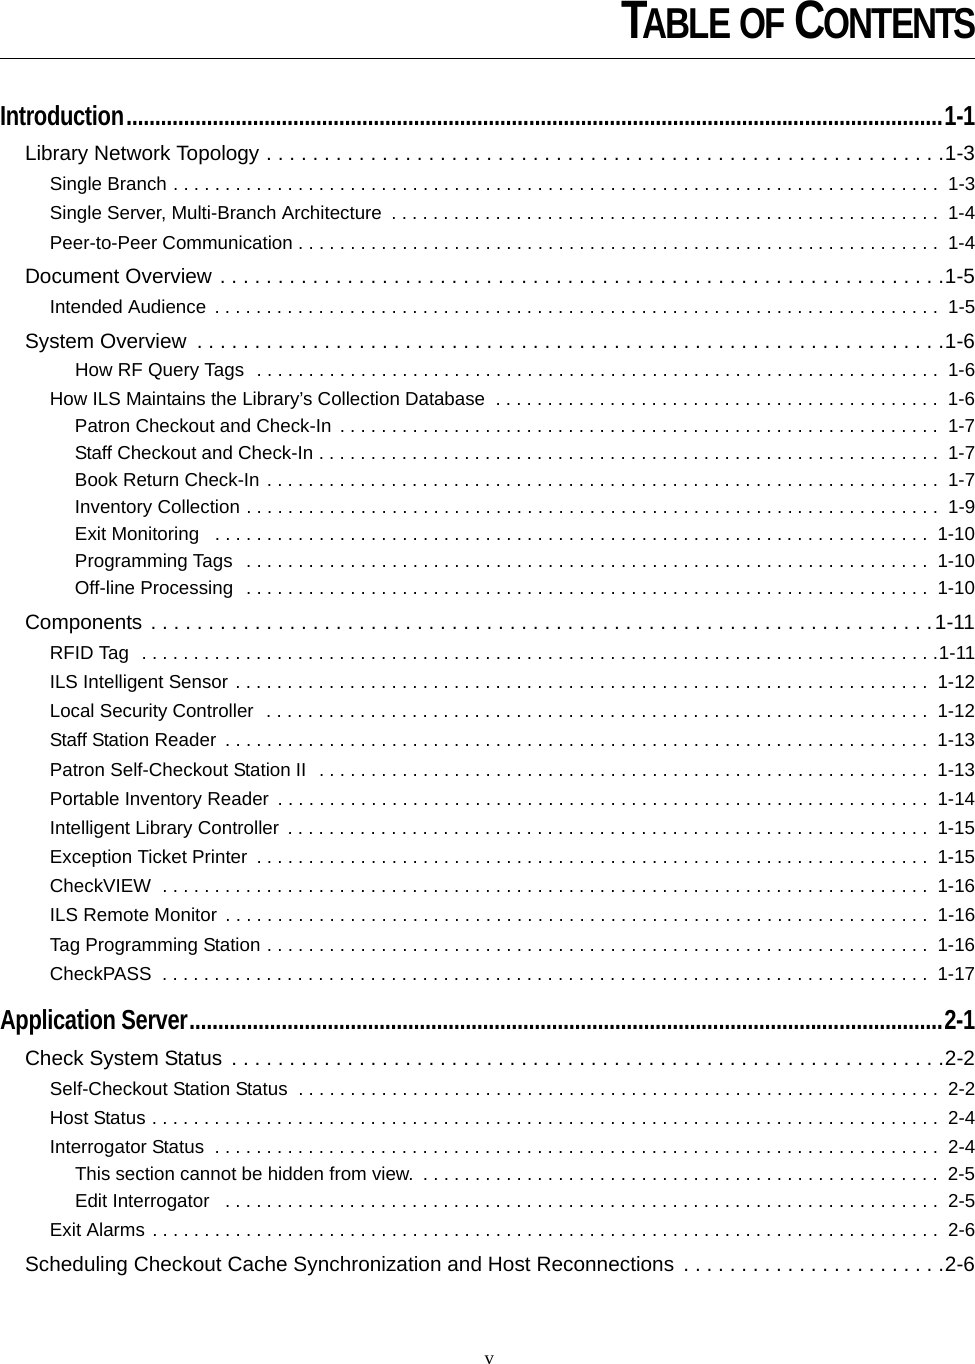
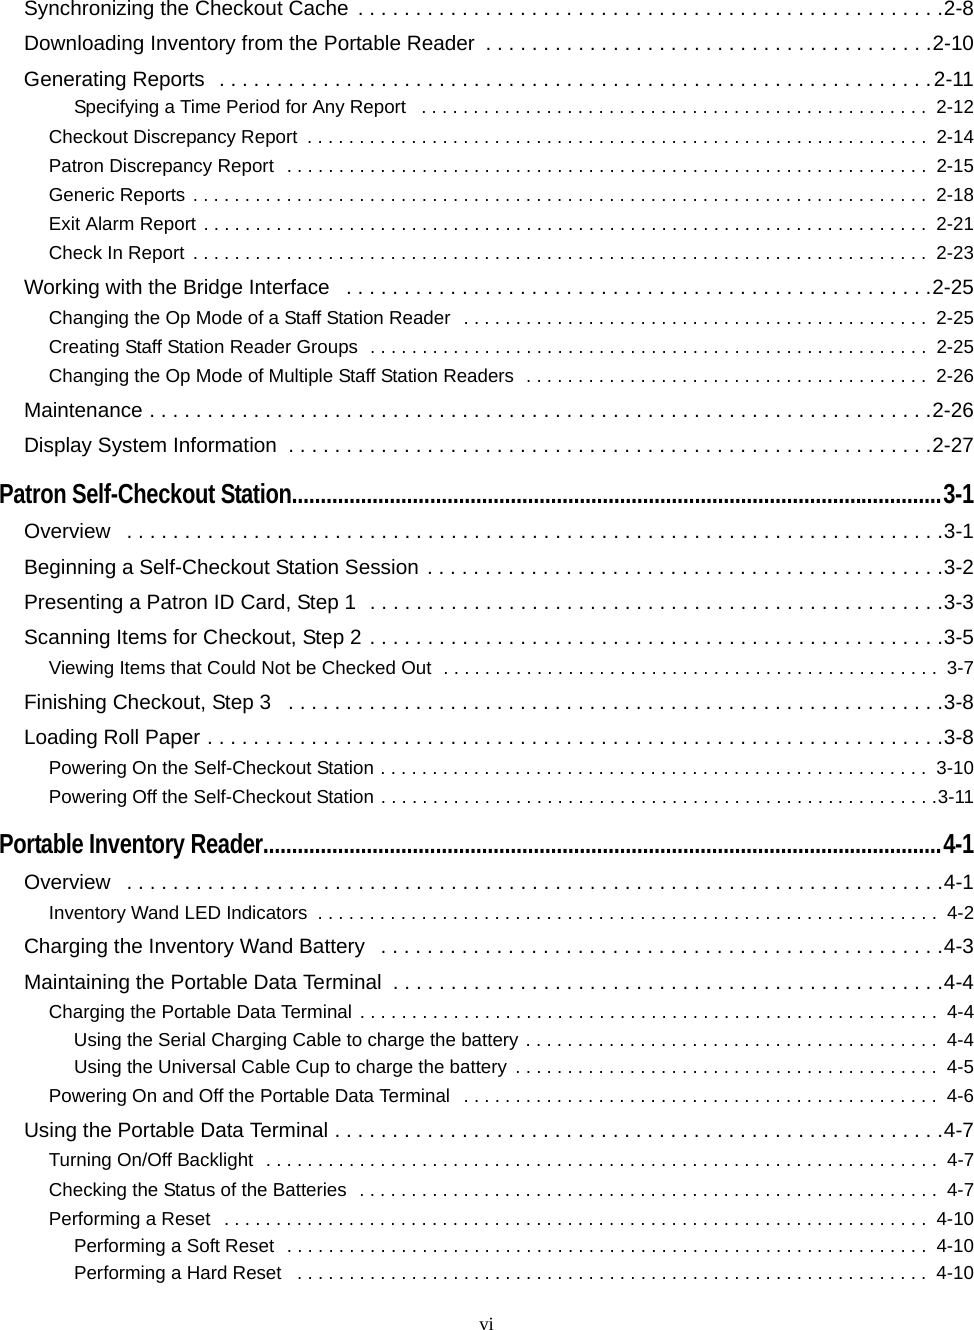
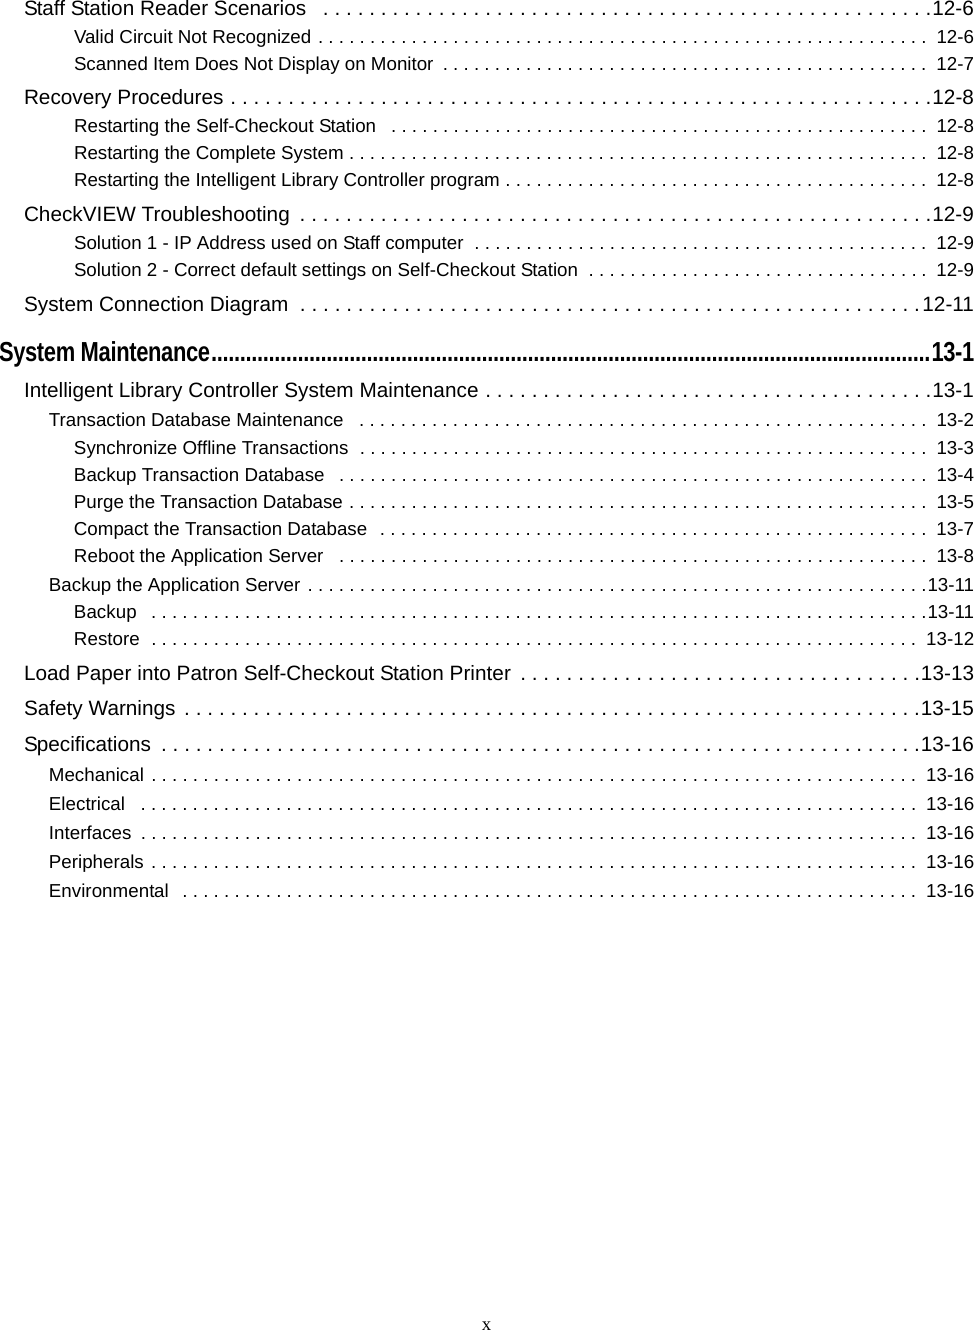
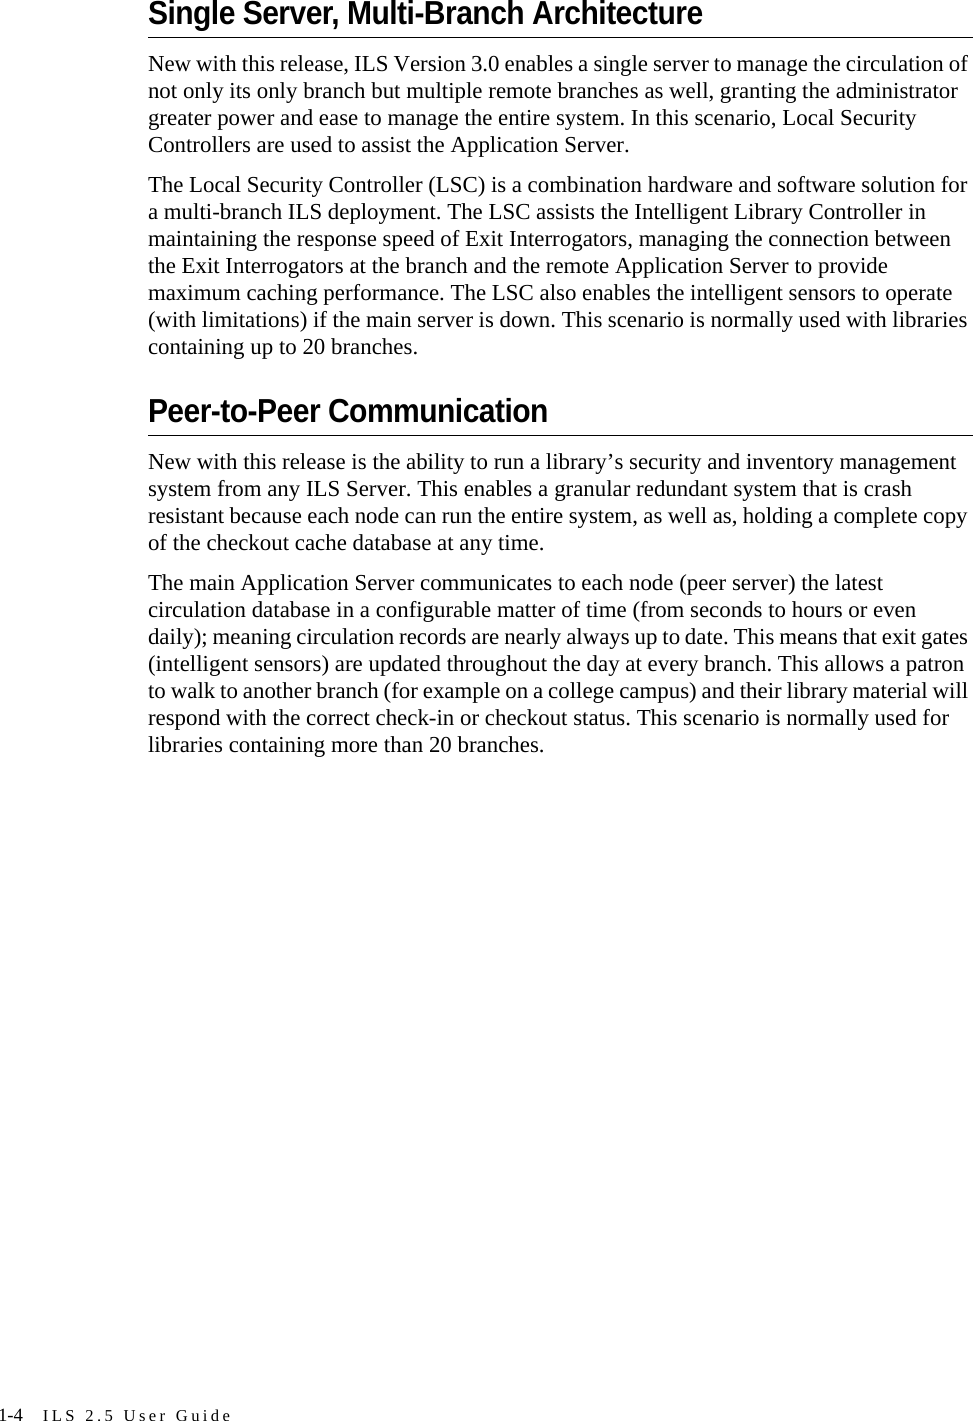


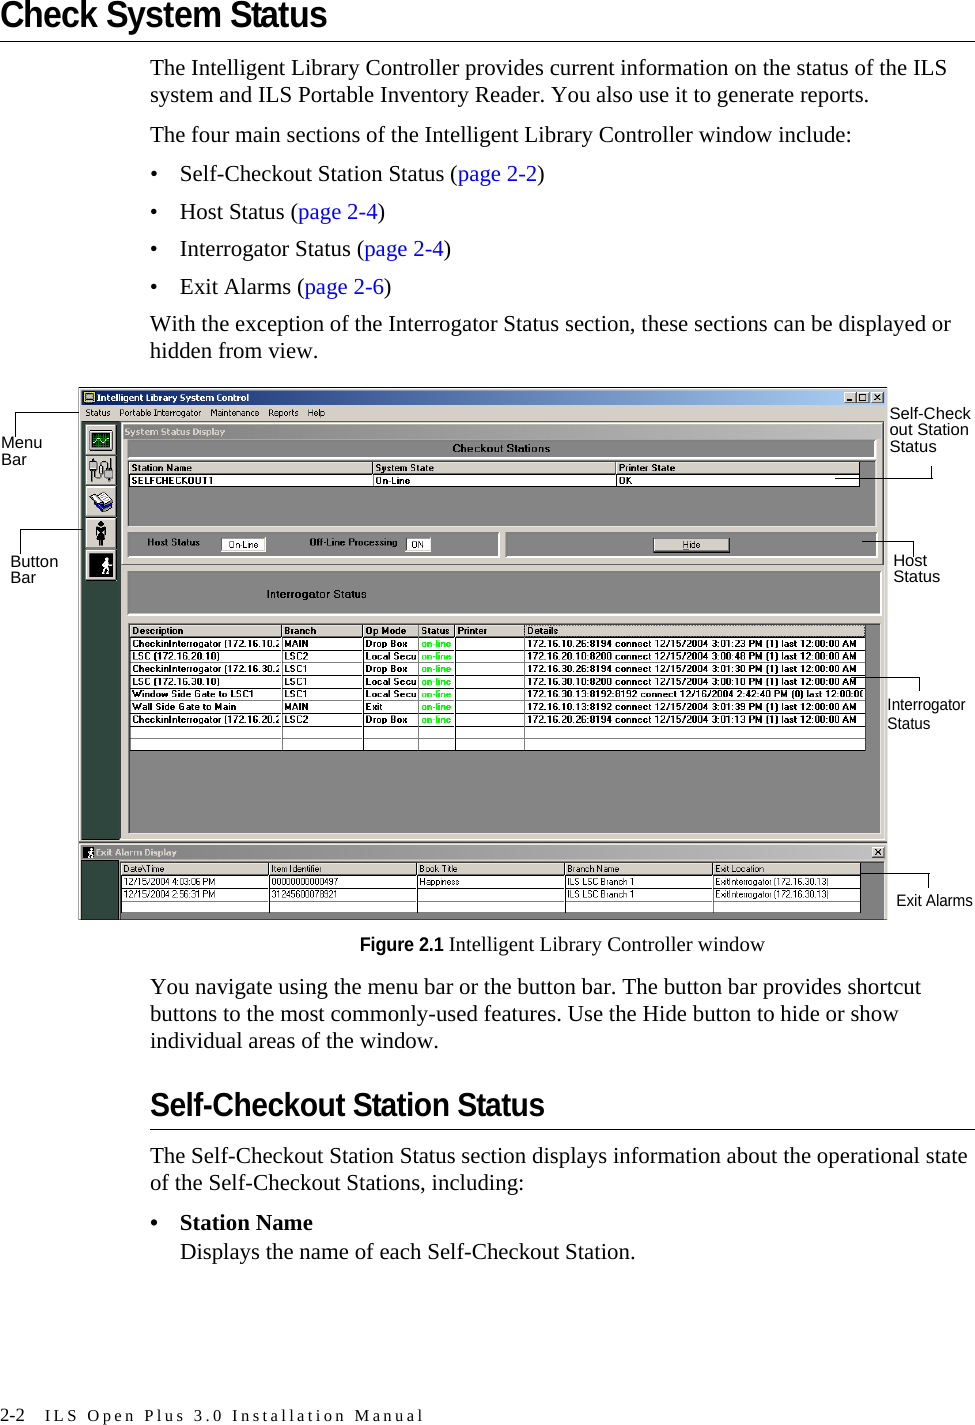

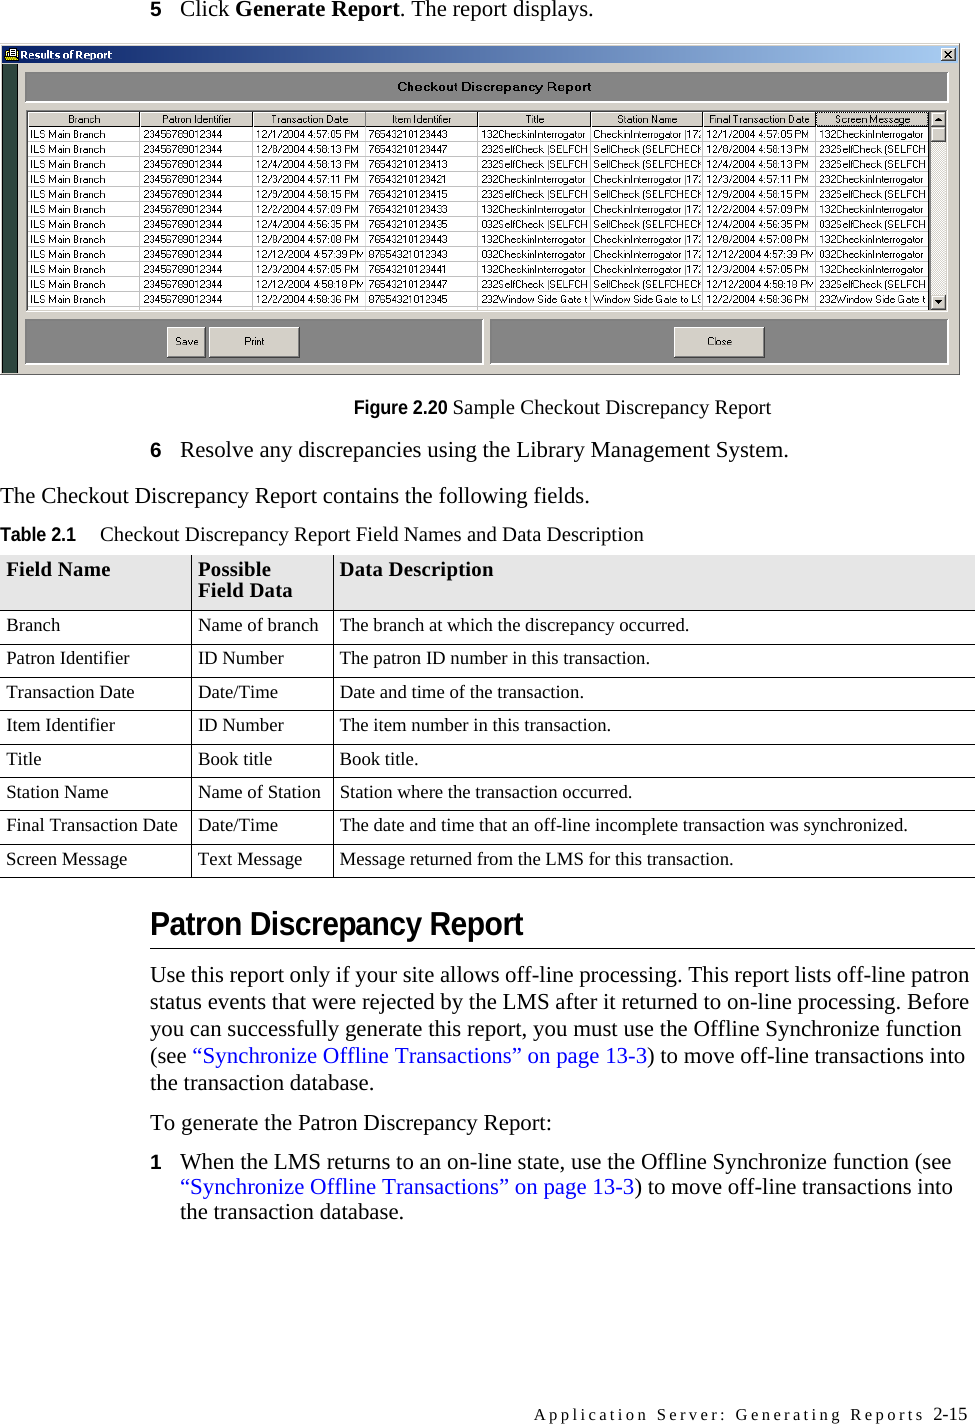
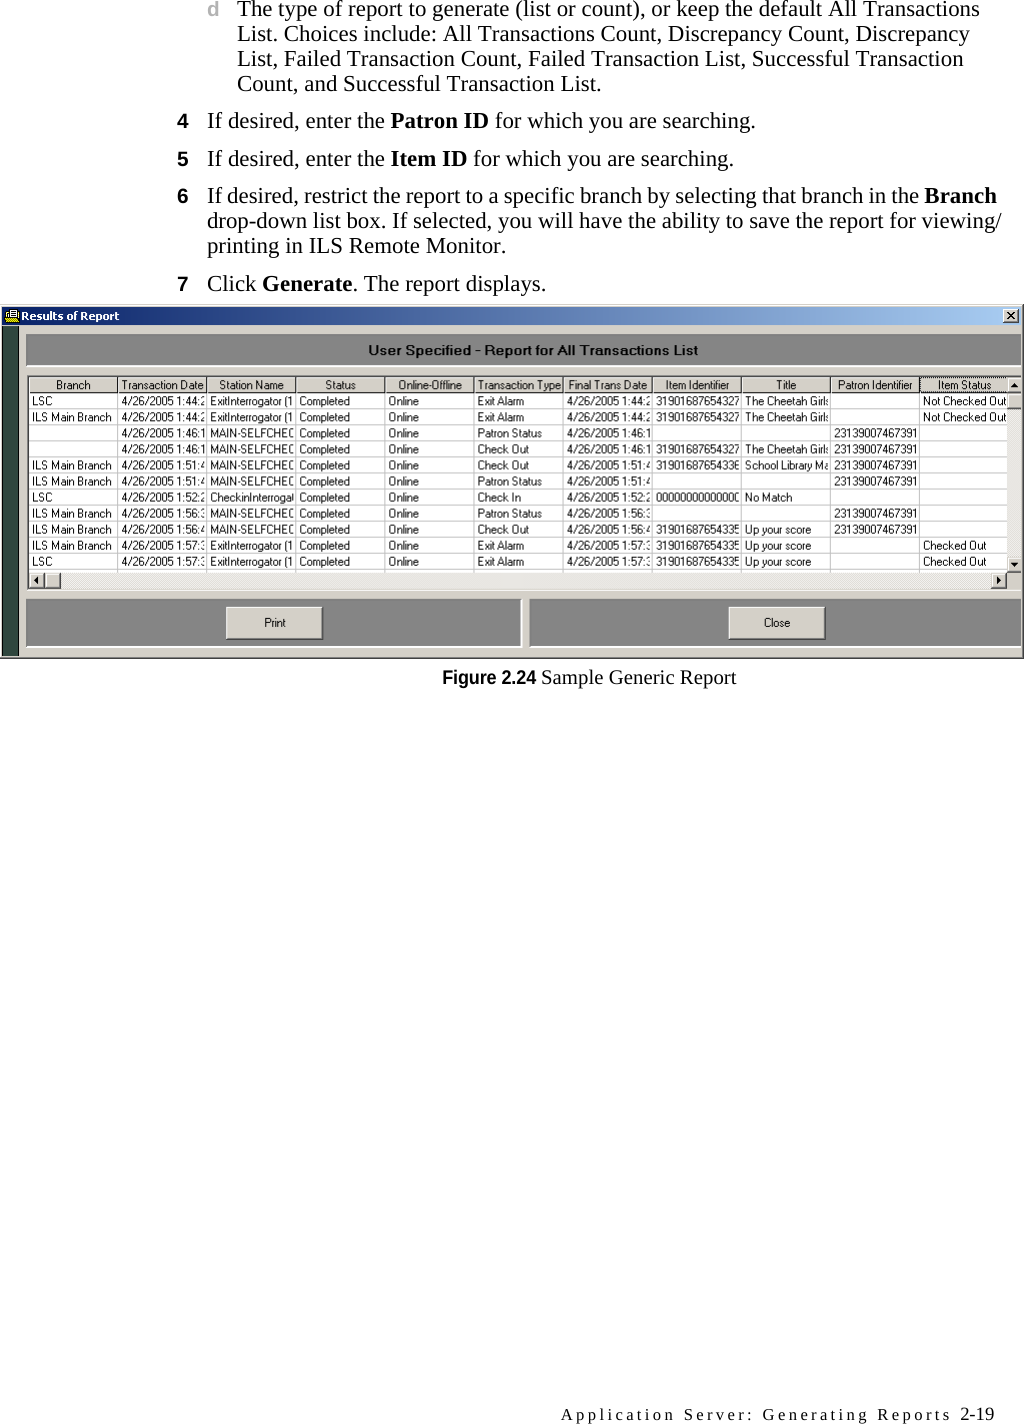
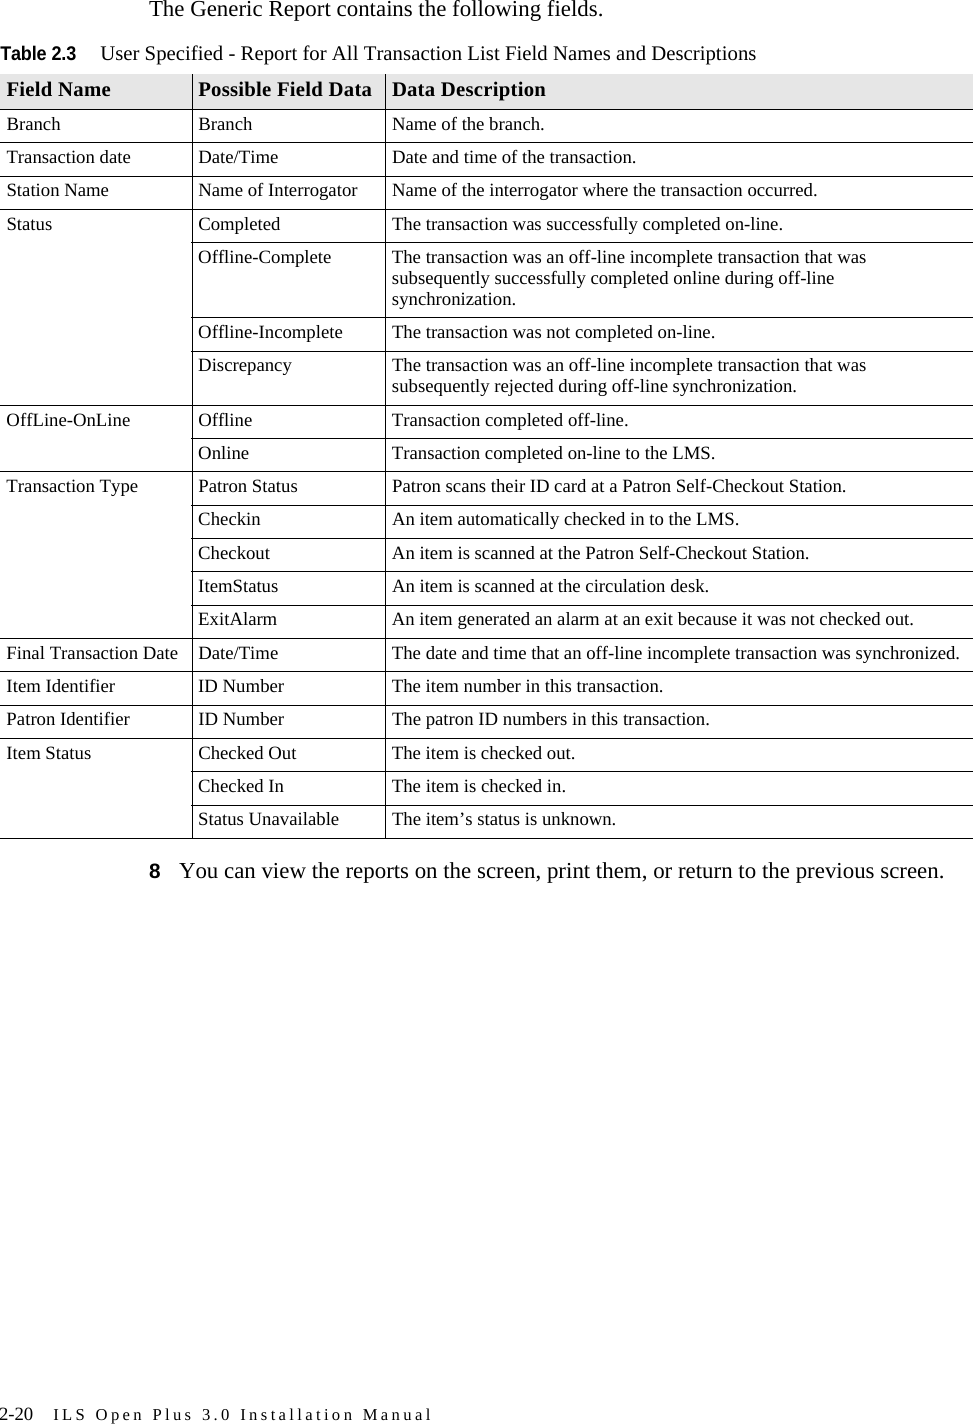
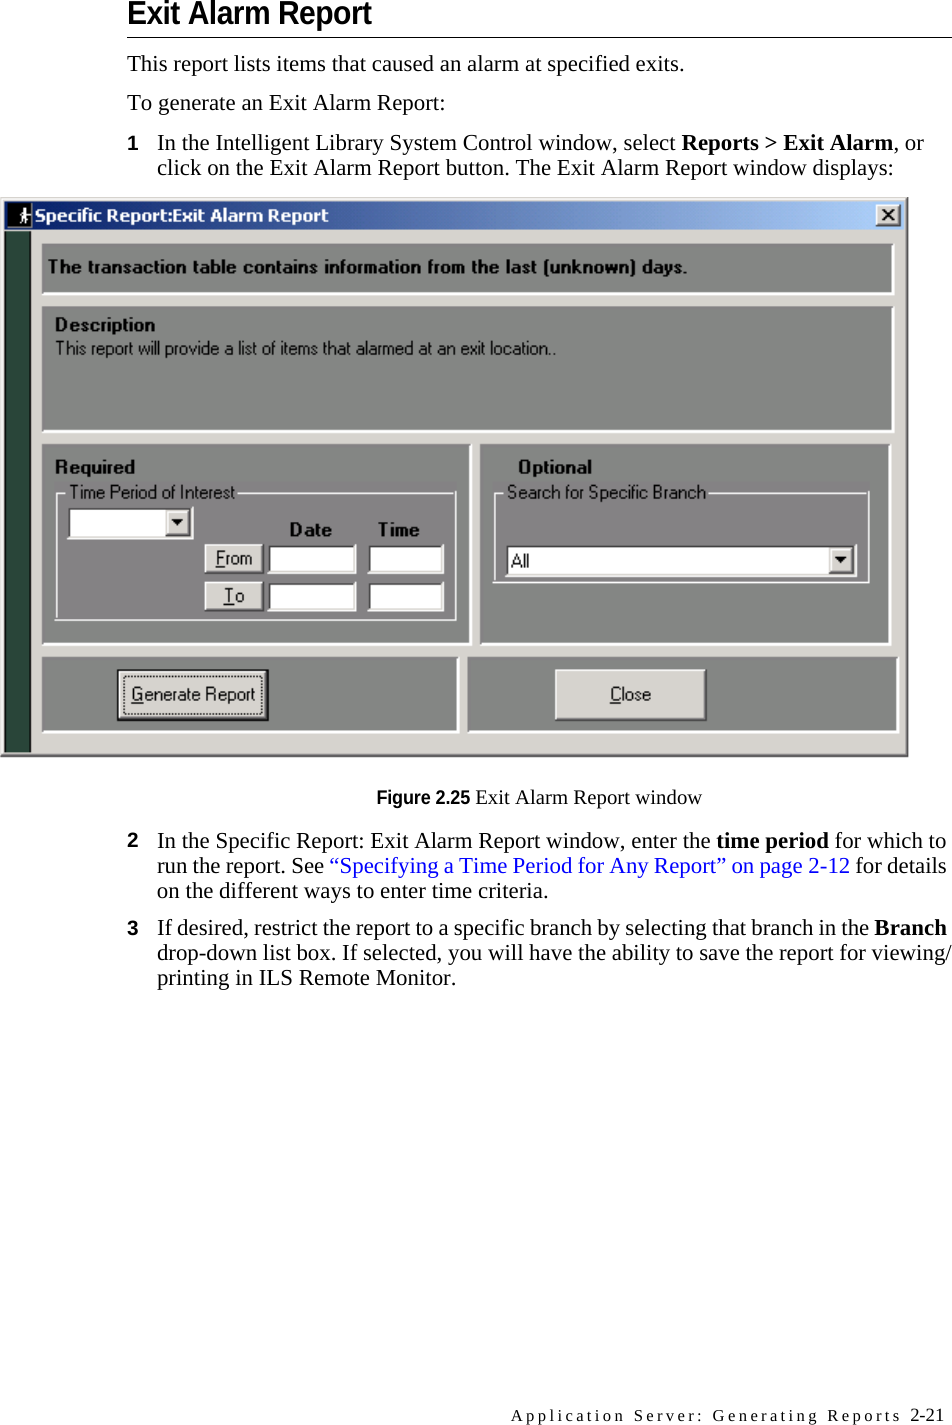
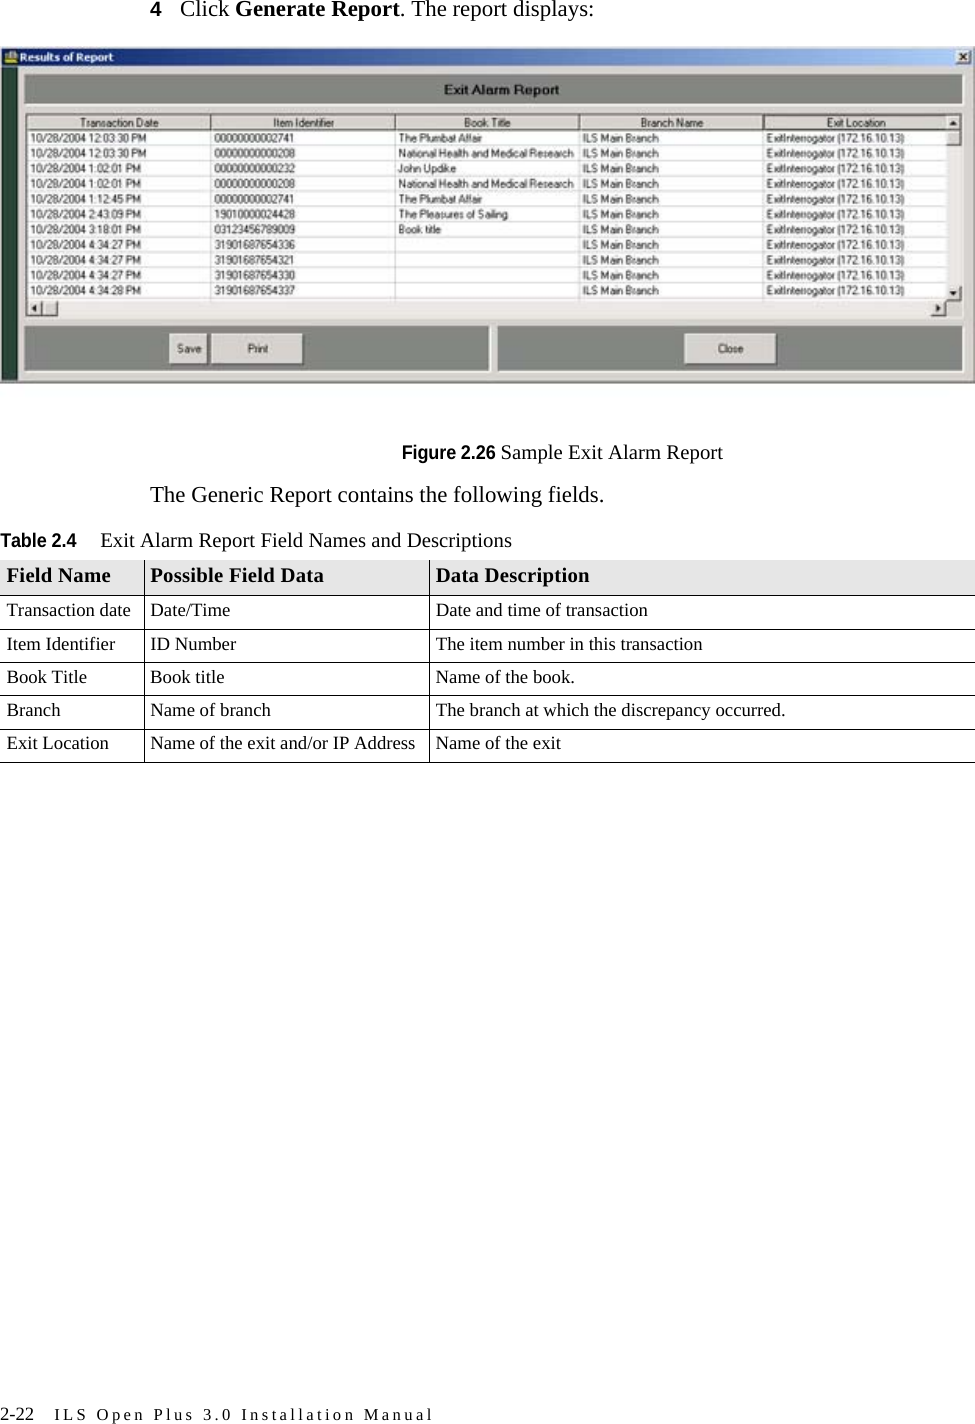


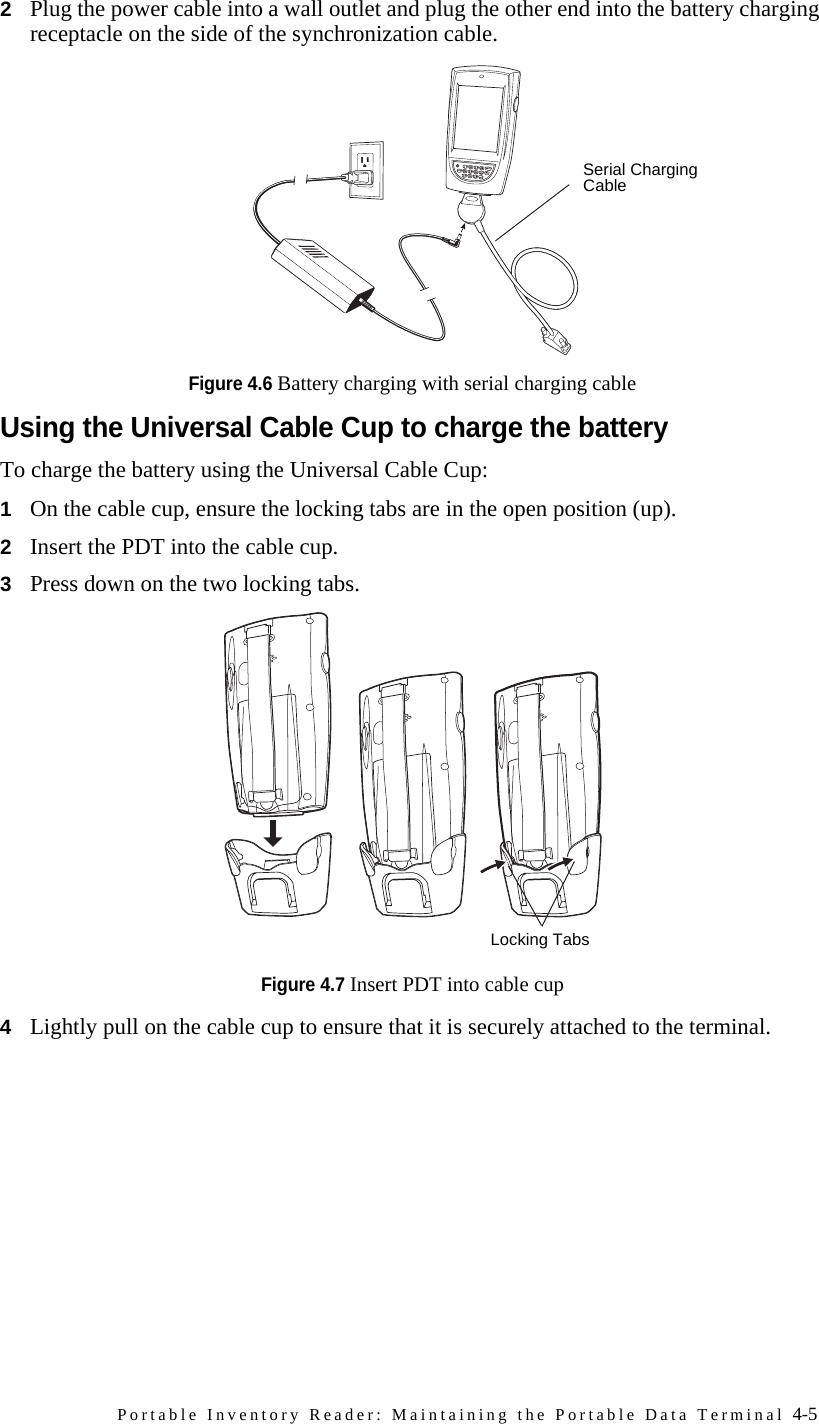
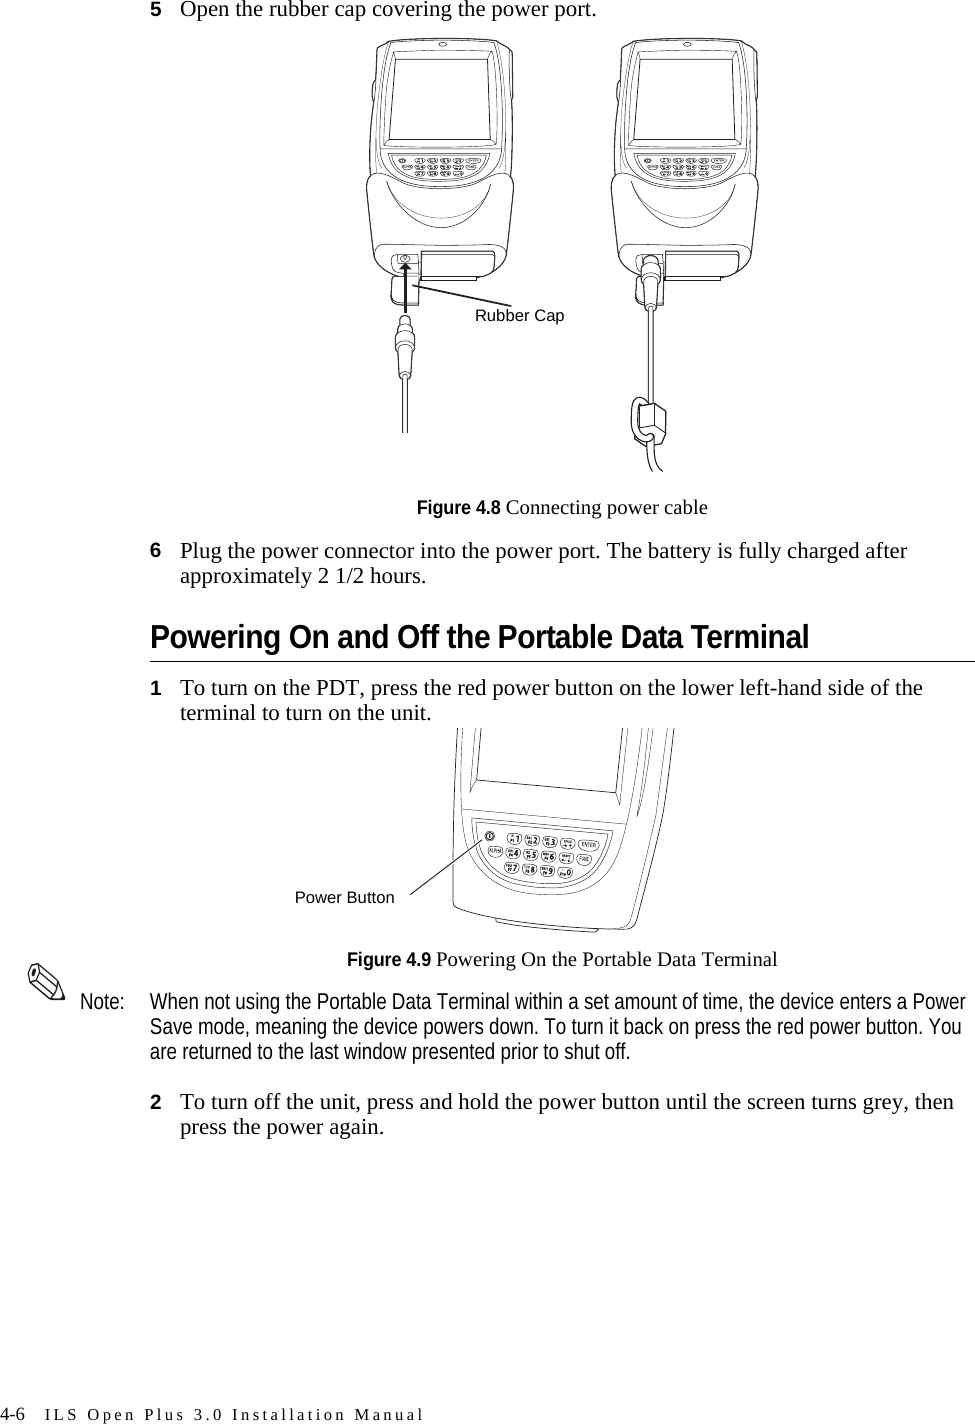
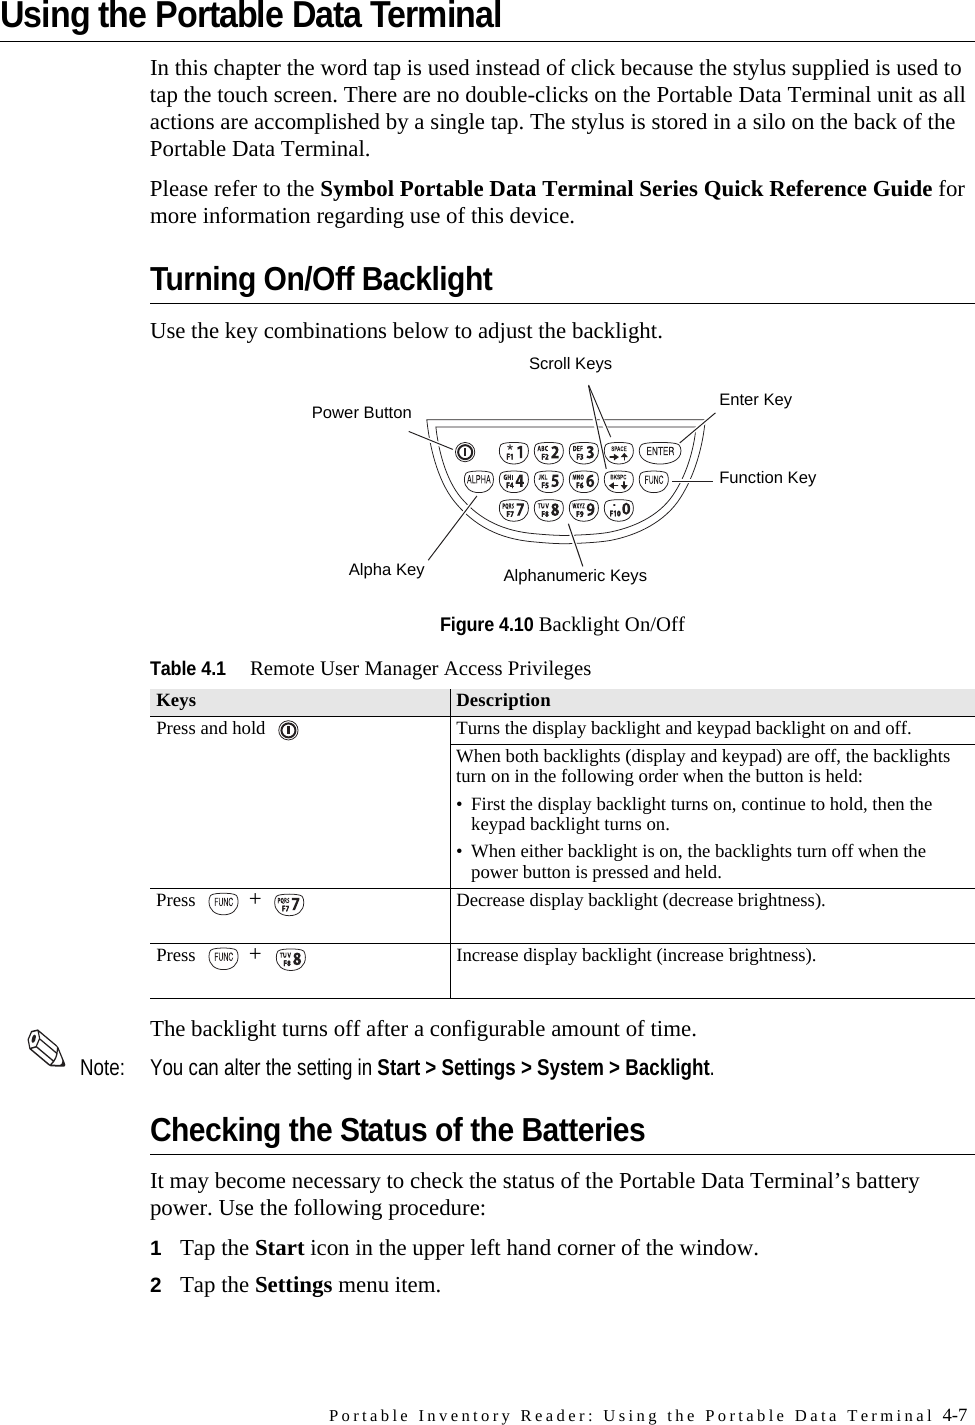

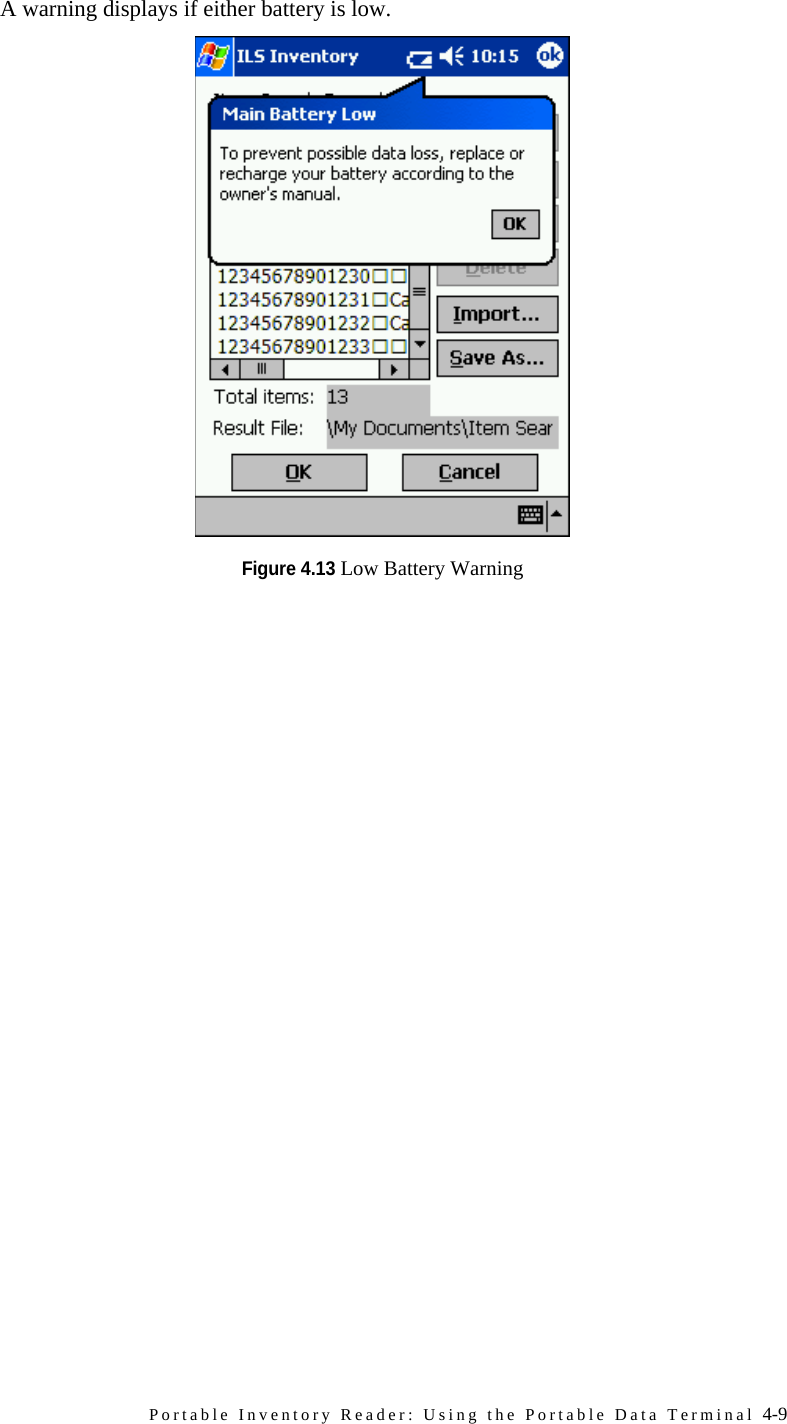
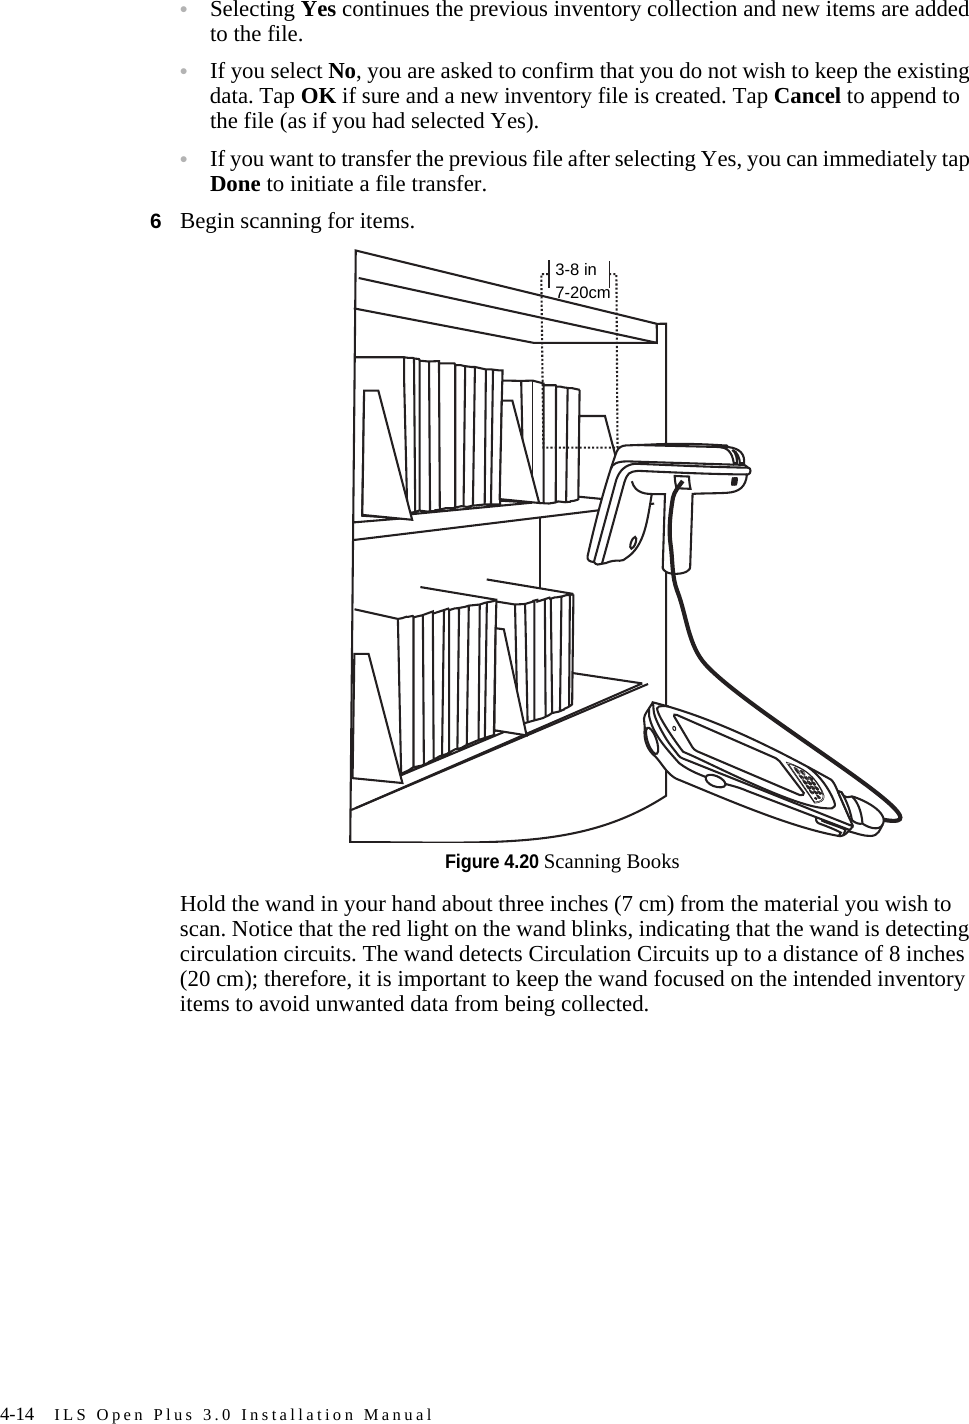
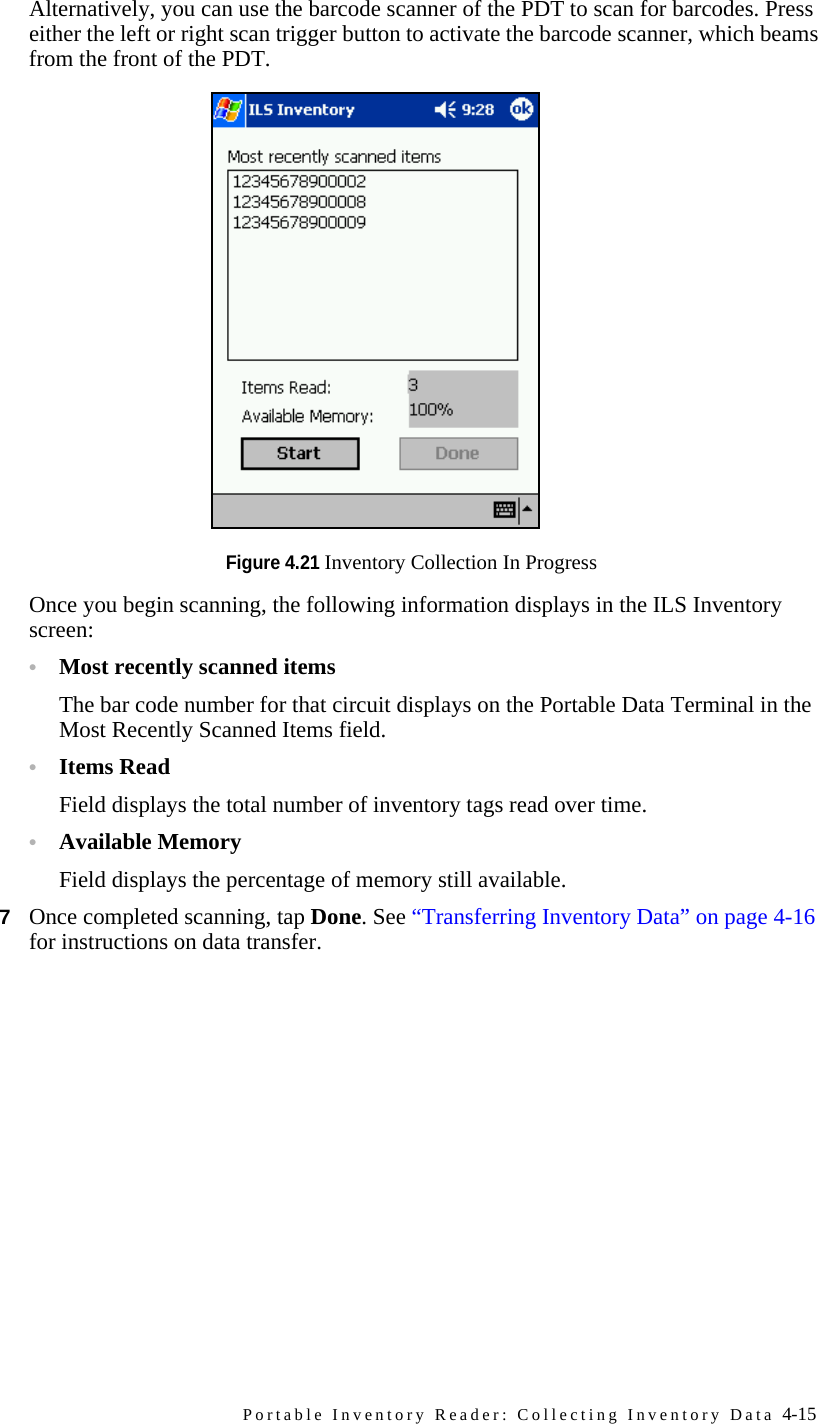
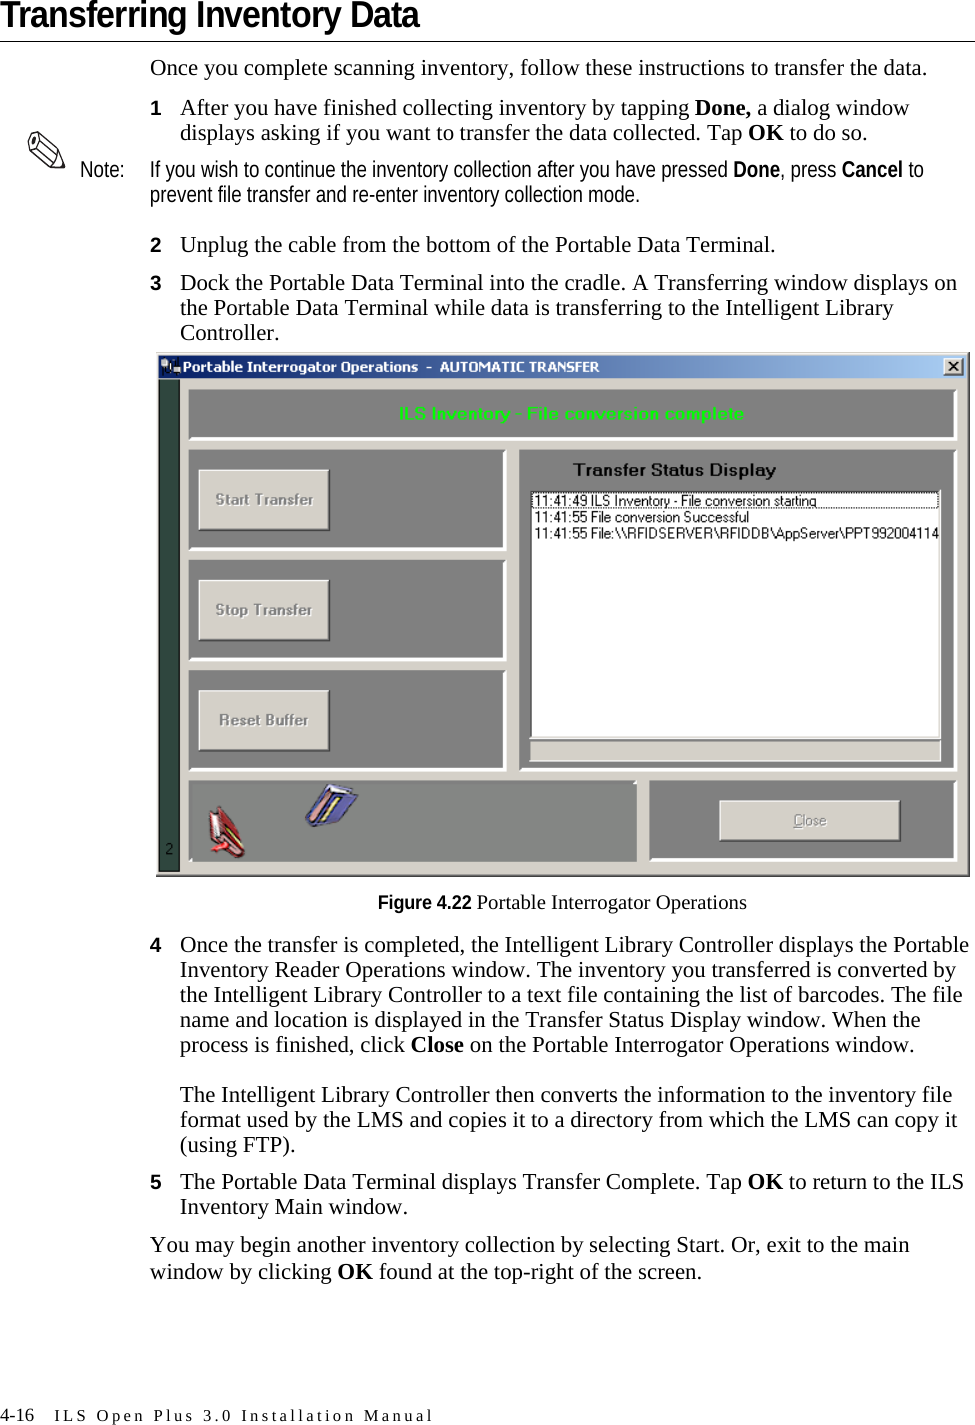
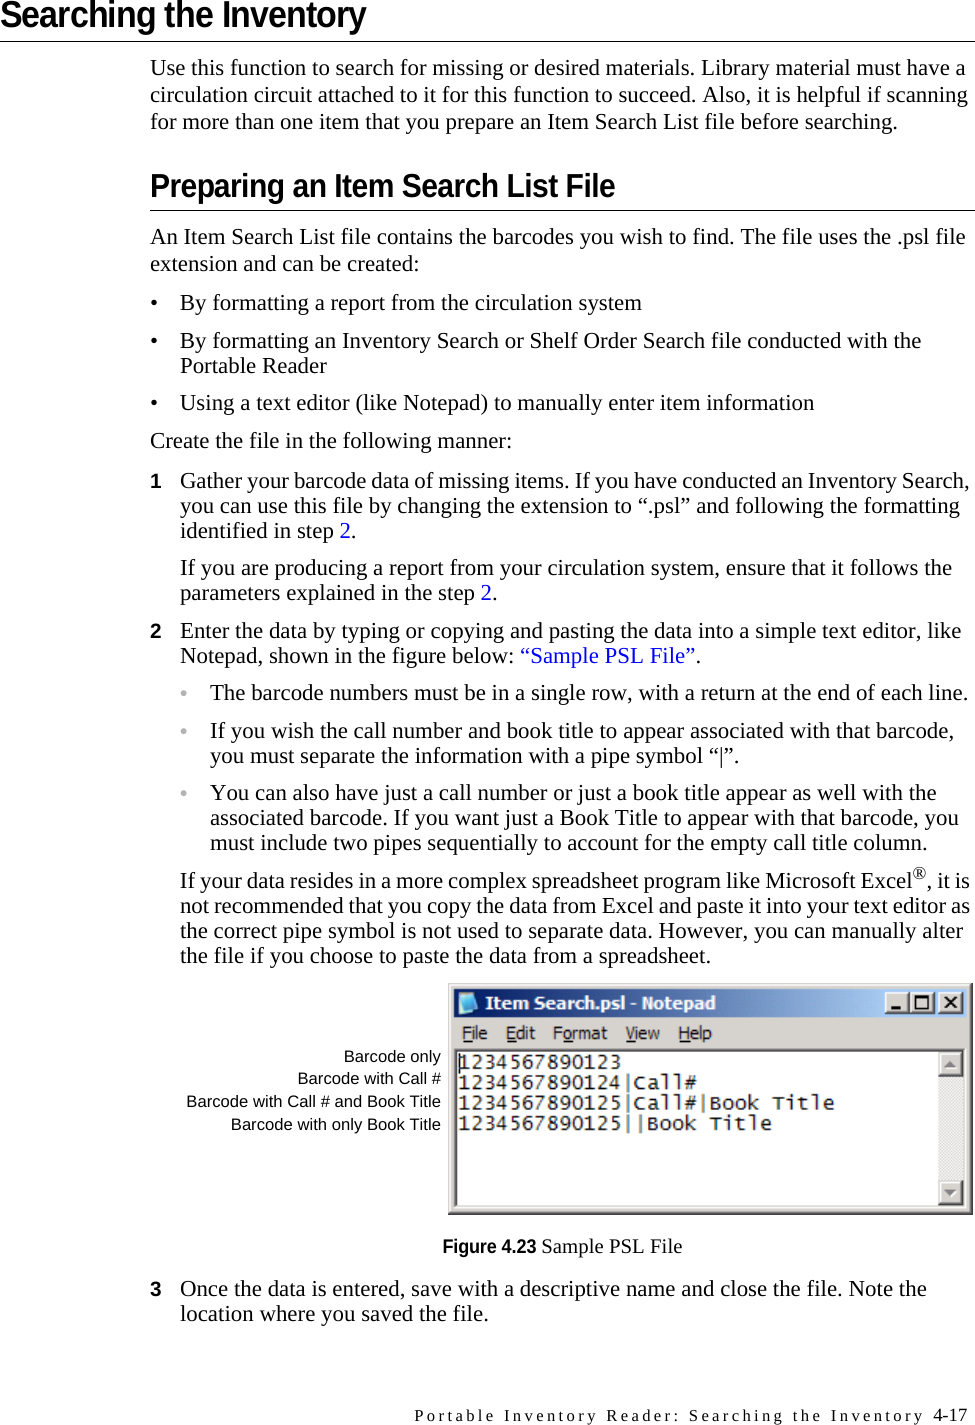
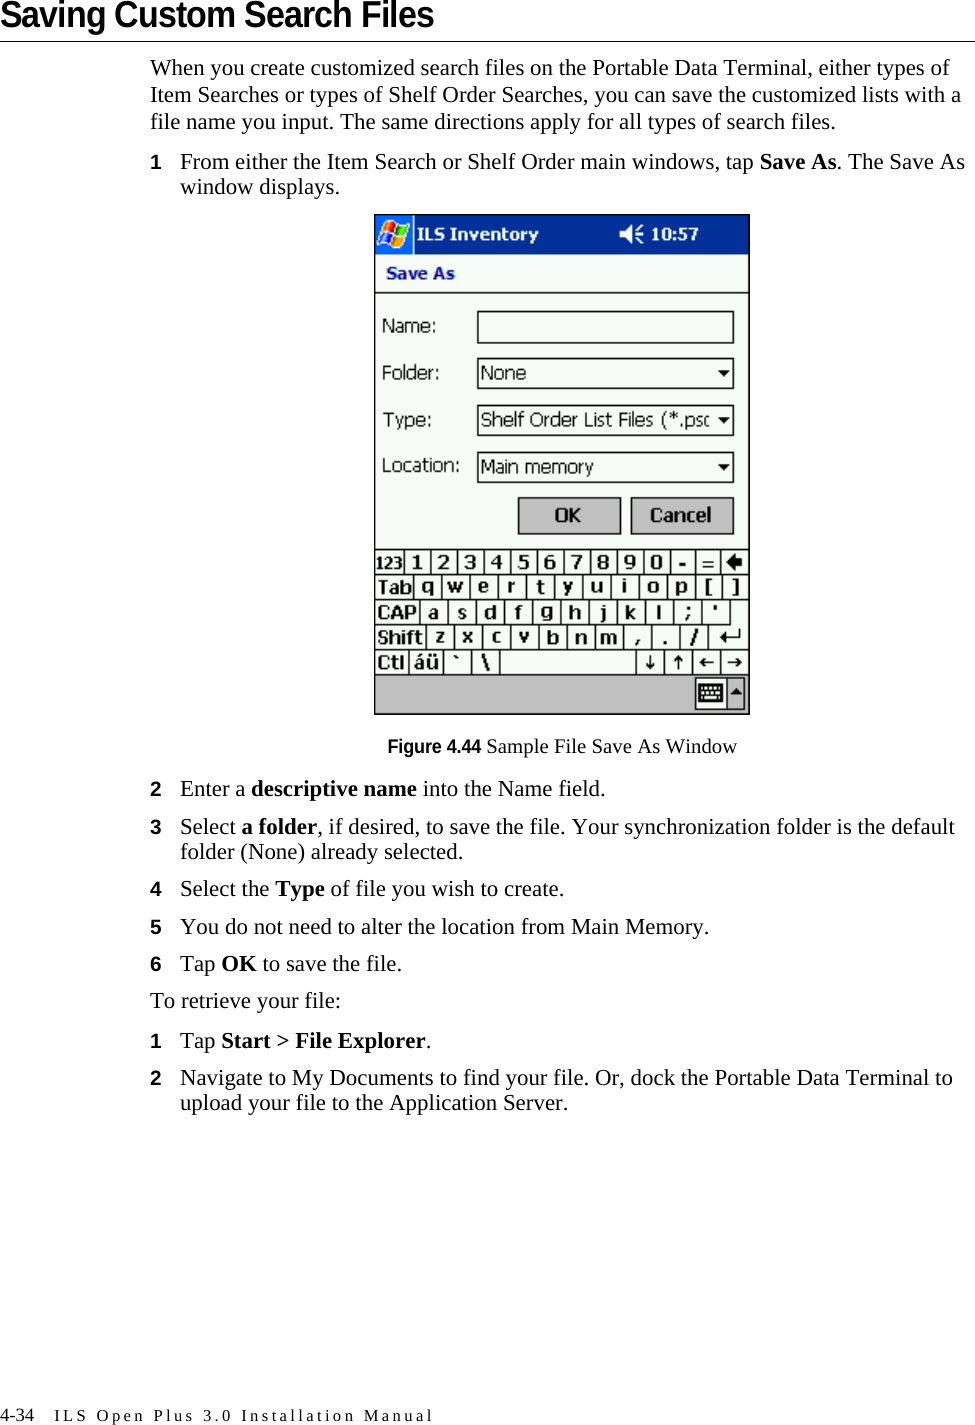
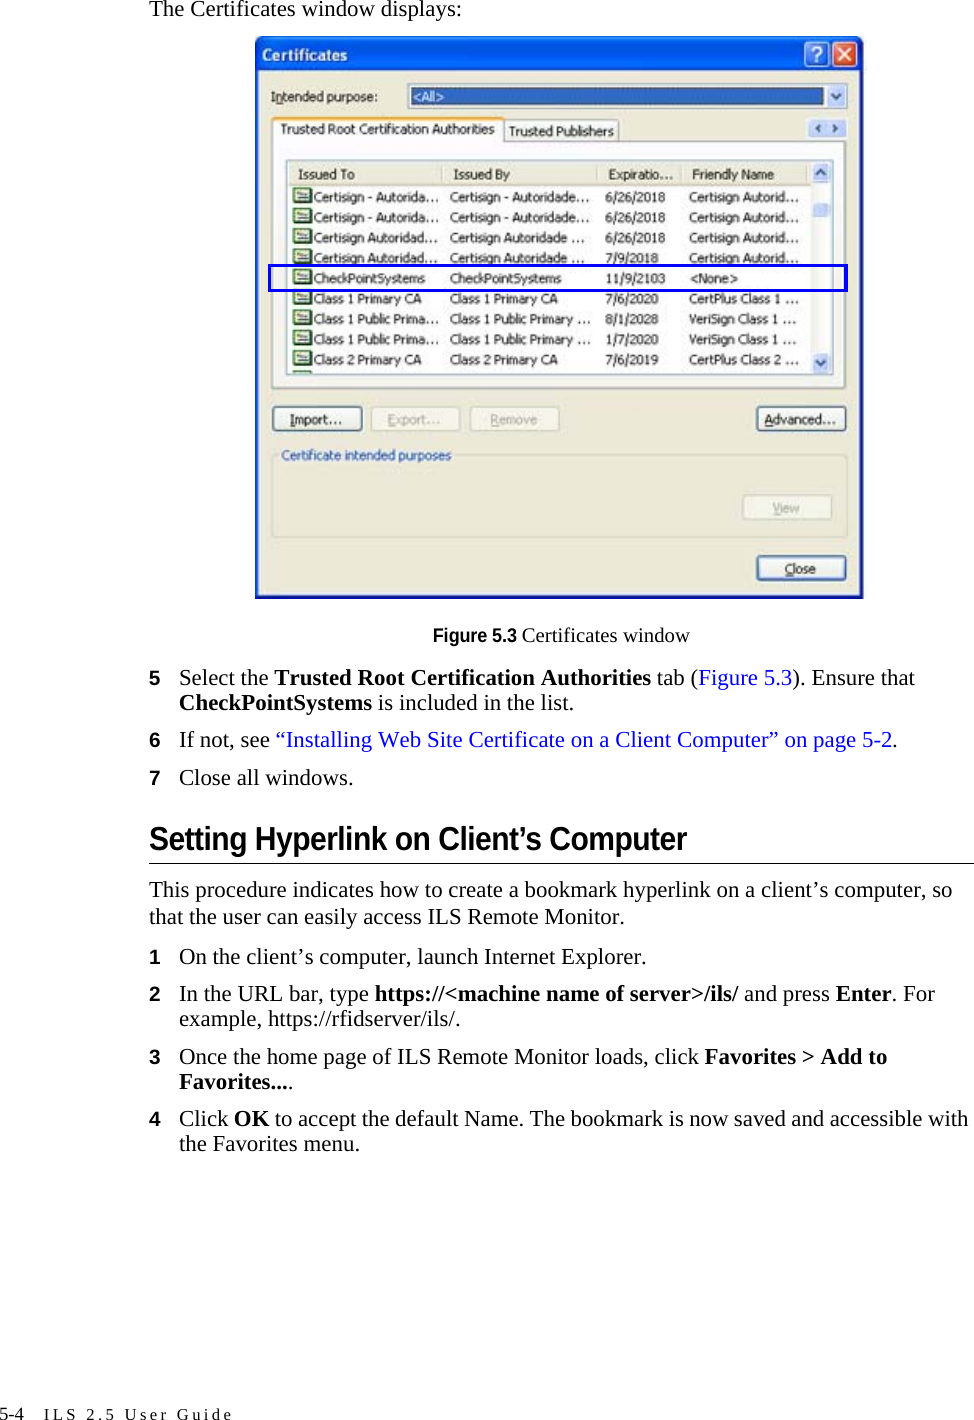

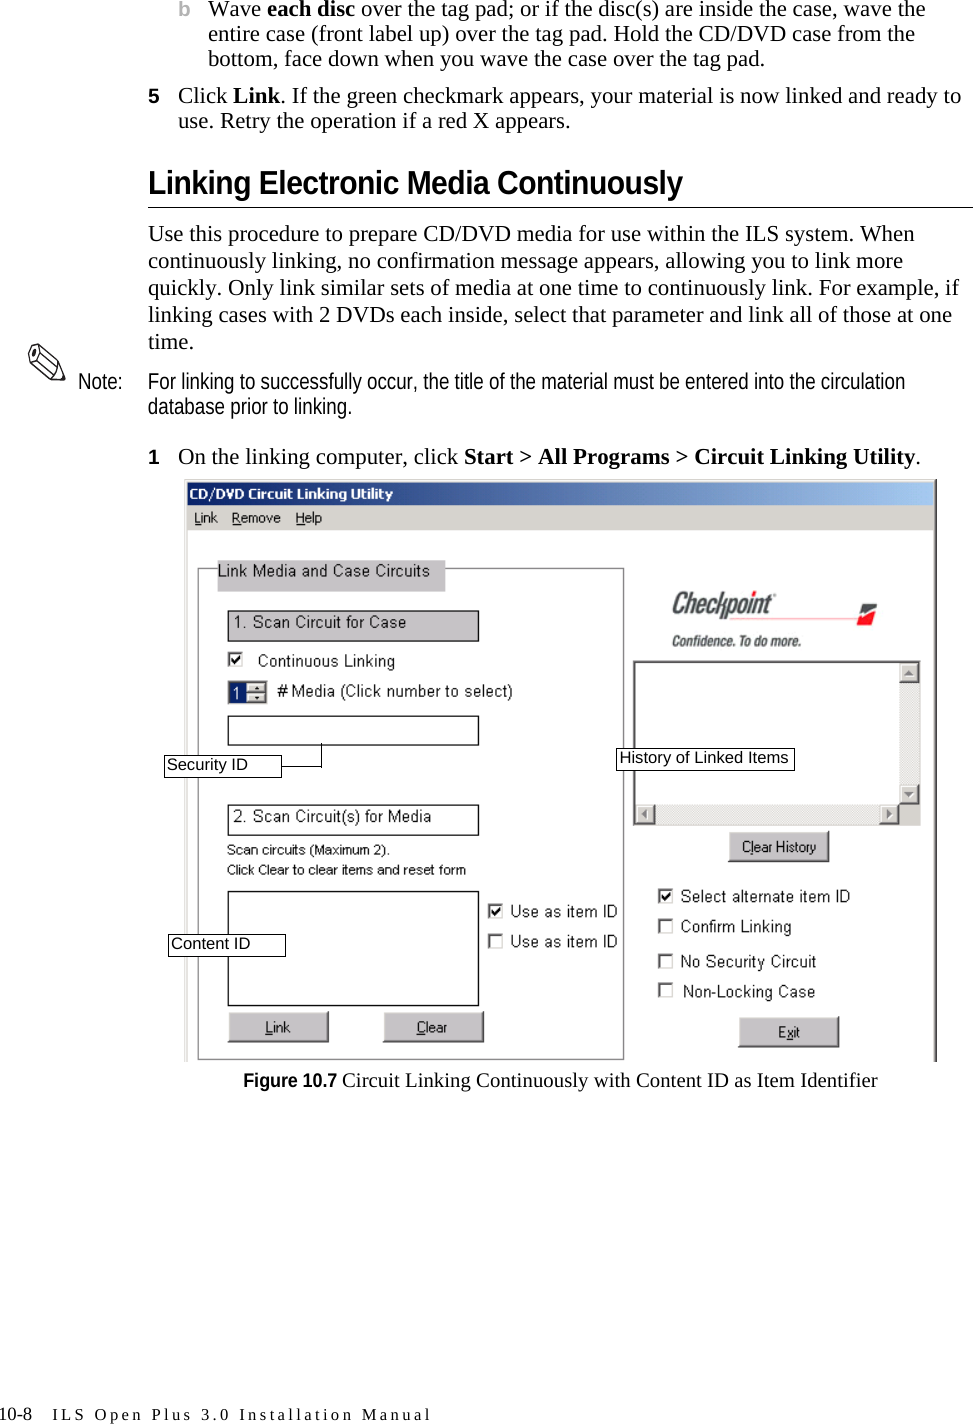
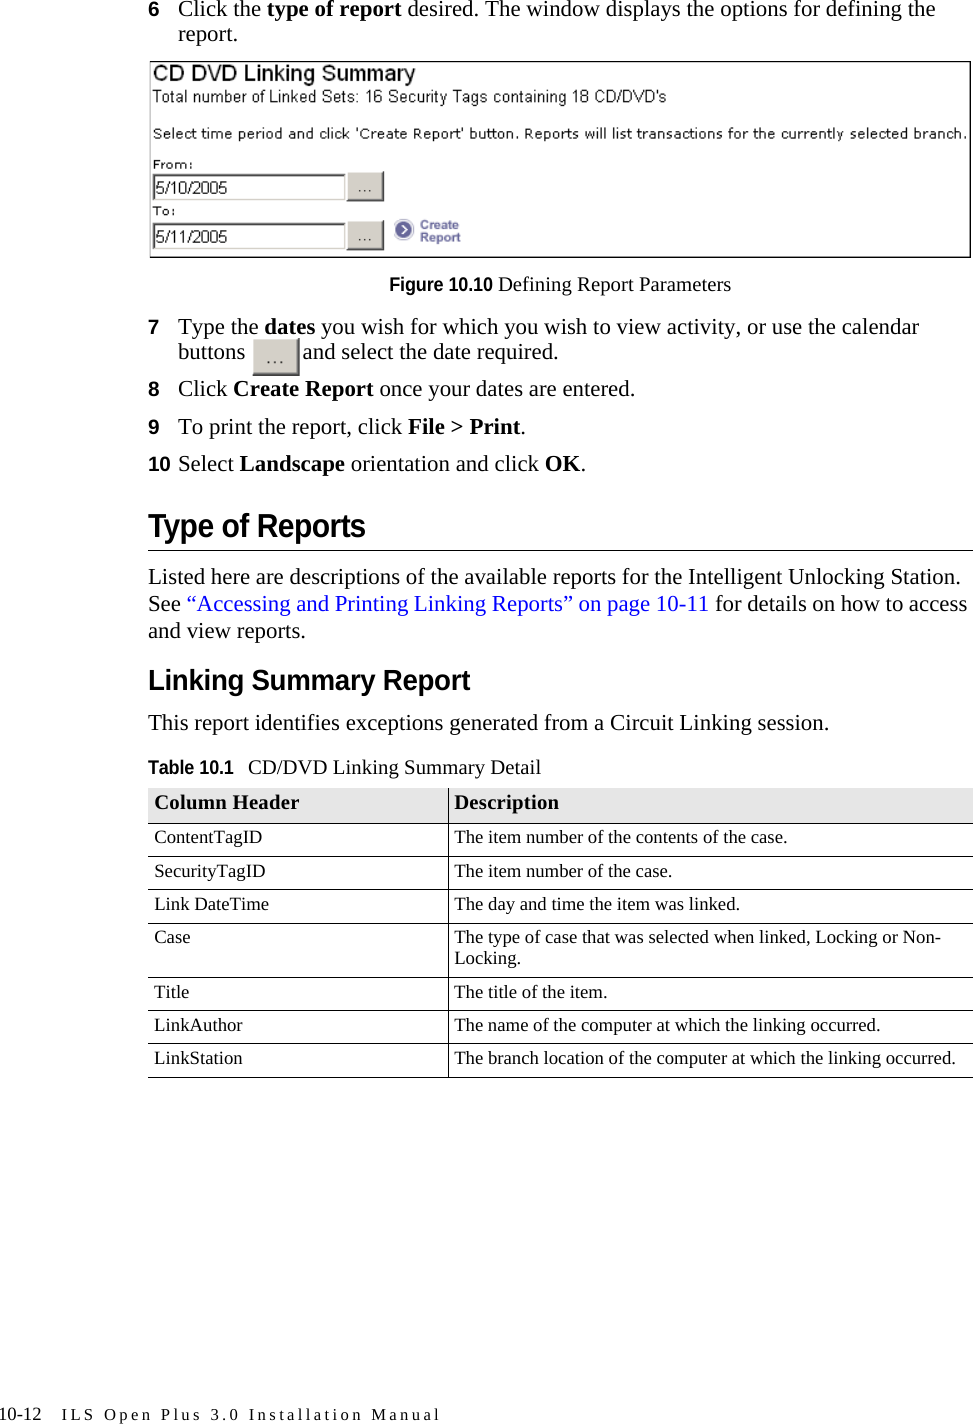
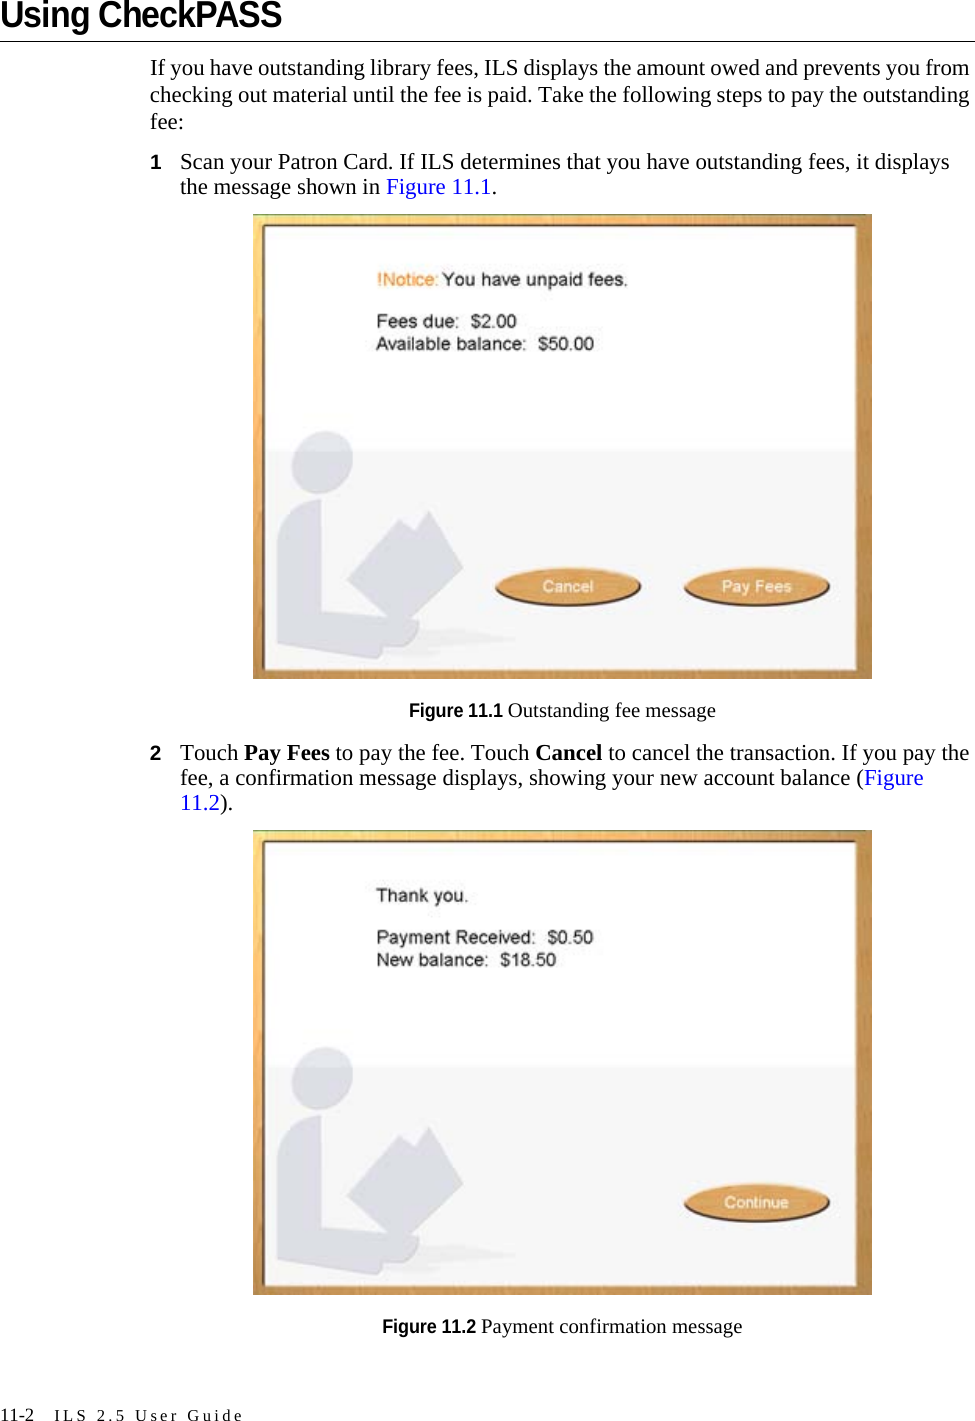
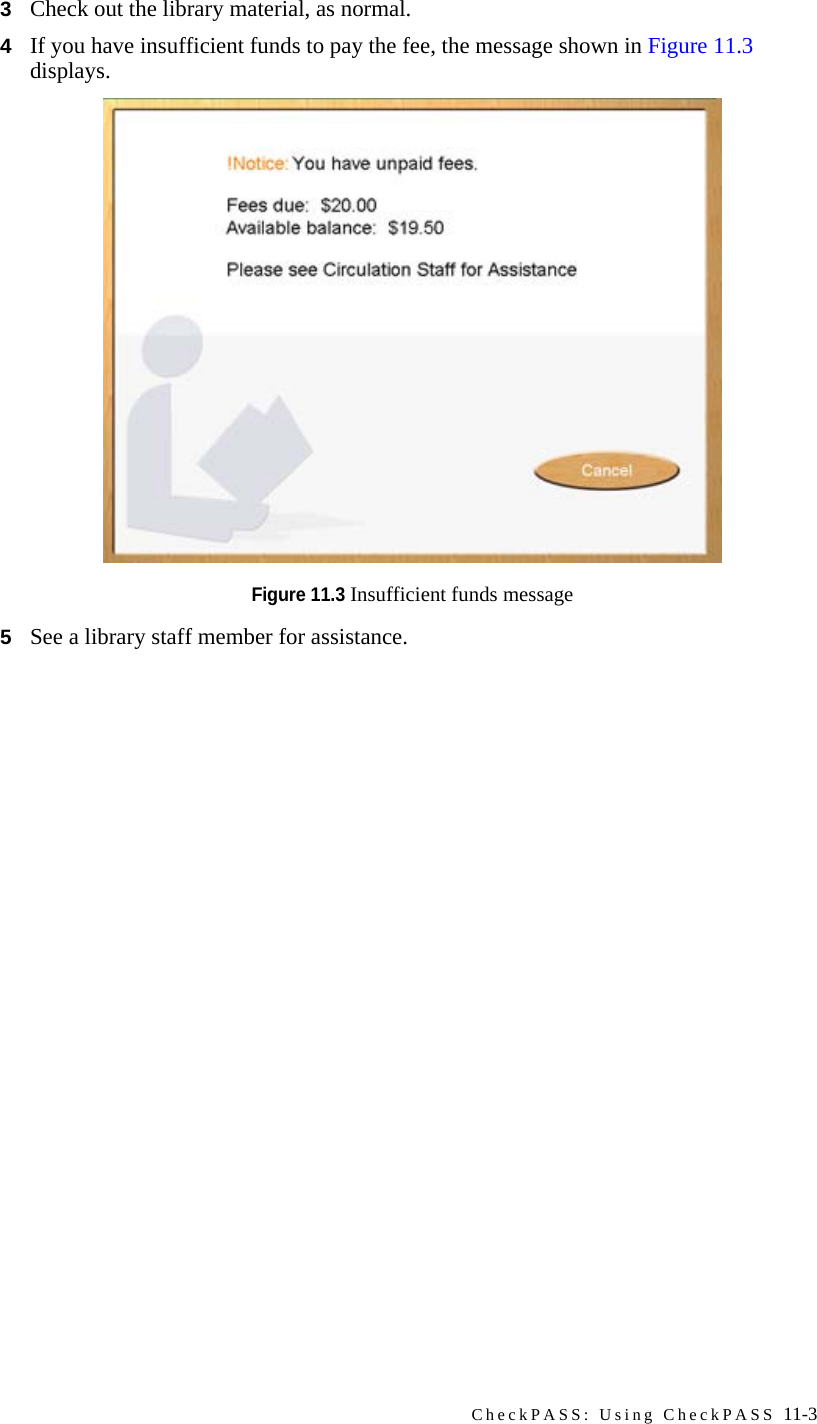
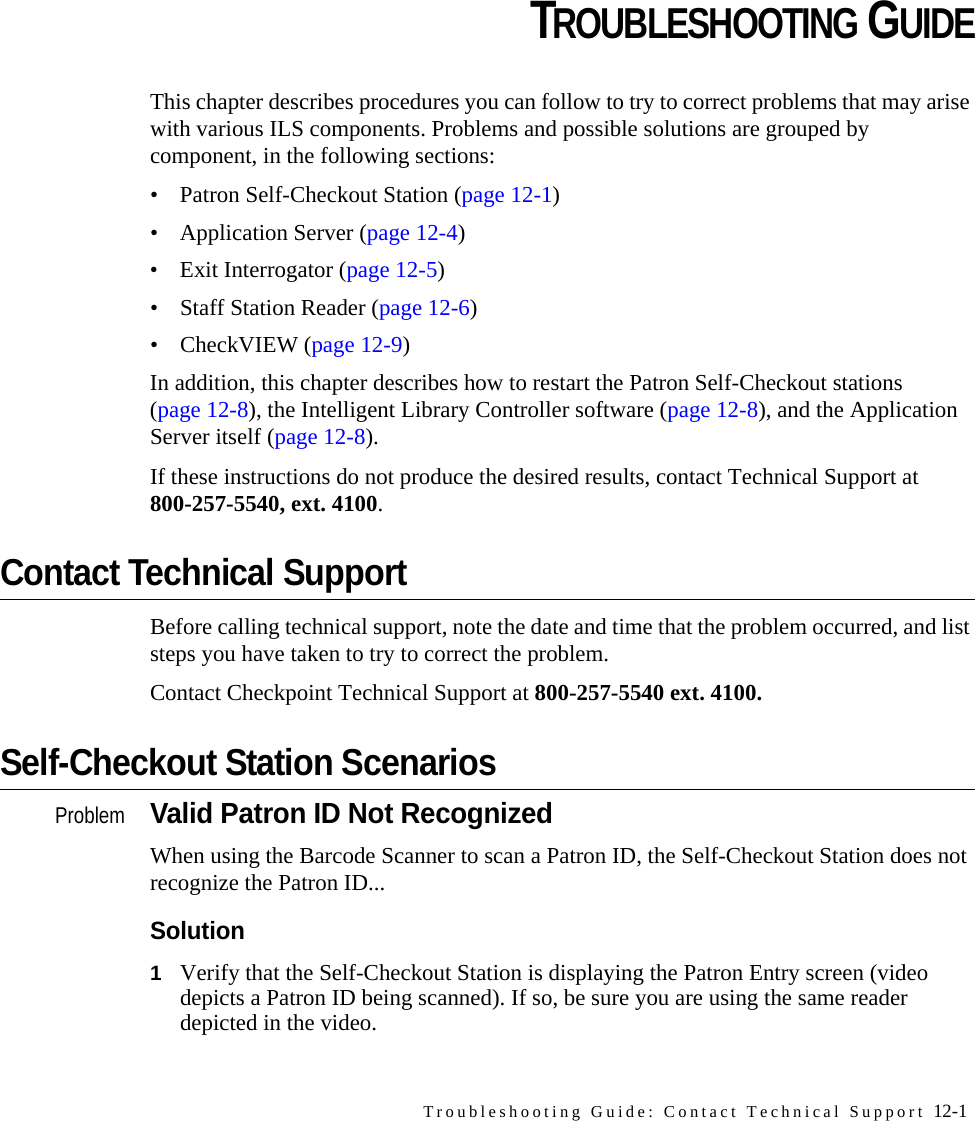
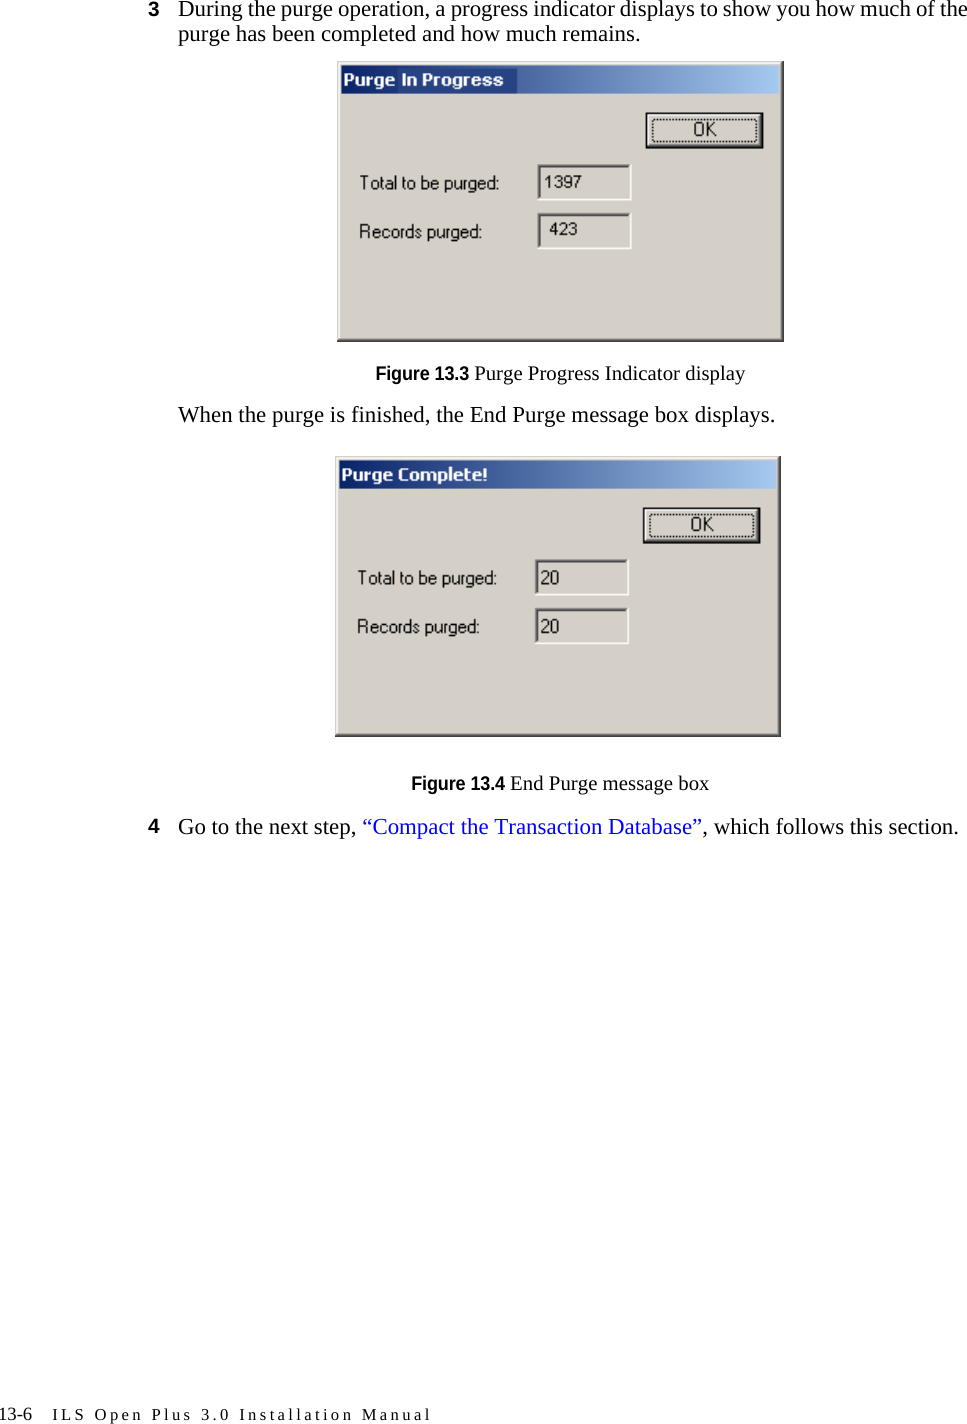
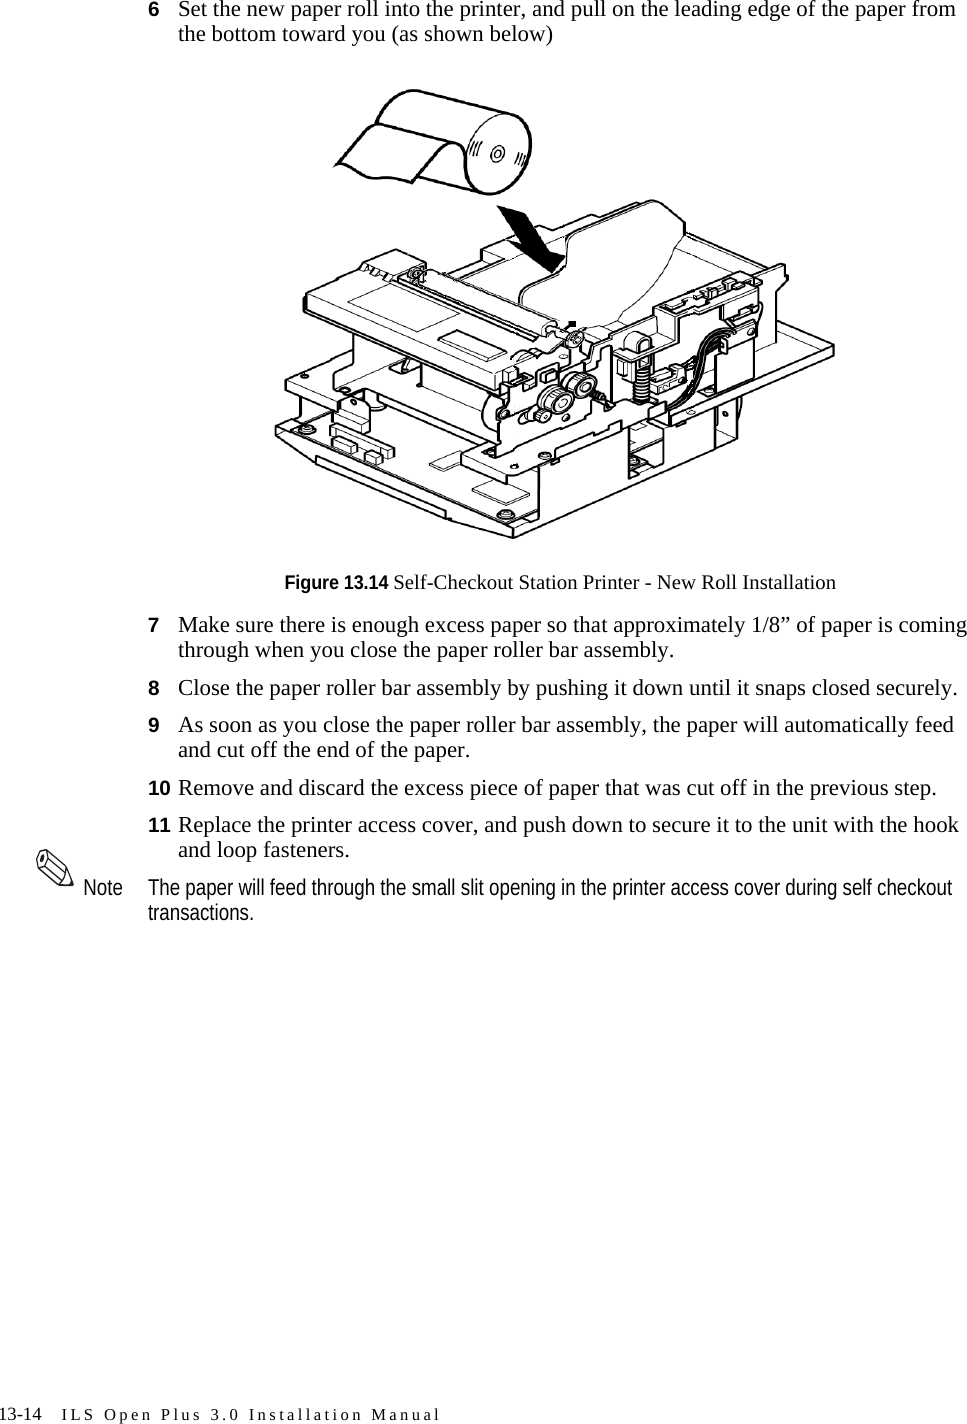
![6-4 ILS Open Plus 3.0 Installation ManualSetting the Printer’s Cut TypeCheckpoint Systems recommends that you set up the printer to do a partial cut of the paper. This produces a string of receipts, which can be easily separated, rather than individual receipts, which might fall and be lost.1On the computer you used to set up the printer, click Start > Settings > Printers and right-mouse click the Epson printer.2Select Printing Preferences.3Select the Paper/Quality tab.Figure 6.3 Partial Cut Select4From the Paper Source drop-down menu, select Form[Partial cut]. This sets the printer to only partially cut the receipt.5Click OK to save your selection and close the window.](https://usermanual.wiki/Checkpoint-Systems/FISOIUS/User-Guide-666041-Page-118.png)