Chic Technology 2100UP Wireless Optical Mouse User Manual PMU MRF00012
Chic Technology Corporation Wireless Optical Mouse PMU MRF00012
Contents
- 1. brochure
- 2. users manual
users manual
TM
OfficeMouse
Office Wireless Optical Mouse
User's Quick Guide
1. Charge from PC
Connect the mouse to the USB port of the computer with the USB to DC cable.
2. Charge from Adapter
Connect the mouse with the AC to DC adapter.
3. Charge from Cradle
The cradle must be connected with the required AC to DC adapter in advance
and then place the mouse on the cradle precisely.
Charging Notice
& At the first time of usage, please charge the AAA batteries at least 6 to 8 hours
or 10 to 12 hours for the AA batteries.
& The LED indicator or the scroll wheel on the mouse will light while the mouse is
low battery. Please recharge or change the batteries immediately.
& Press any button to wake up the mouse while the mouse is in the sleeping mode.
ALL OTHER PRODUCT NAMES AND TRADEMARKS ARE THE PROPERTY OF THEIR RESPECTIVE OWNERS.
PMU-MRF00012 / MADE IN CHINA
Office Wireless Optical Mouse
User's Quick Guide
Notice:
Federal Communications Commission (FCC) requirements, Part 15
This equipment has been tested and found to comply with the limits for a class B digital device, pursuant to part 15
of the FCC Rules. These limits are designed to provide reasonable protection against harmful interference in a
residential installation.
This equipment generates, uses and can radiate radio frequency energy and, if not installed and used in accordance
with the instructions, may cause harmful interference to radio communications. However, there is no guarantee that
interference will not occur in a particular installation. If this equipment does cause harmful interference to radio or
television reception, which can be determined by turning the equipment off and on, the user is encouraged to try to
correct the interference by one or more of the following measures:
--Reorient or relocate the receiving antenna.
--Increase the separation between the equipment and receiver.
--Connect the equipment into an outlet on a circuit different from that to which the receiver is connected.
--Consult the dealer or an experienced radio/TV technician for help.
CAUTION: Any changes of modifications not expressly approved by the grantee of this device could void the user's
authority to operate the equipment.
This device complies with Part 15 of the FCC Rules. Operation is subject to the following two conditions: (1) this
device may not cause harmful interference, and (2) this device must accept any interference received, including
interference that may cause undesired operation.
Congratulations on your purchase of this Office Wireless Optical Mouse. Please
carefully read the User's Quick Guide to learn about the installation and the powerful
functions of your new Office Wireless Optical Mouse.
Contents of the Package
T Office Wireless Optical Mouse (Ergonomic or Symmetric)
T Chargeable Mouse Cradle (PS/2, USB or UP Combo)
T Two AA or AAA Batteries
T Office Mouse Driver CD-ROM
T User's Quick Guide
T Optional Parts for Wireless Optical Mouse
(The optional parts may be different due to various wireless optical mice.)
- AC to DC Adapter
- USB to DC Cable
Install Hardware
% Connect the Receiver to Your Computer
1.Please turn off your computer.
2.Plug the connector of the receiver into the PS/2 or USB port of the computer.
% Select the Channel
Notice:
- Please skip this section if the mouse has only one channel.
- The location of the mouse channel switch may be different due to various mouse
shapes.
1. The two-channel switch is located at the back of the mouse or inside the battery
case. Select Channel "1" or "2".
2. Put the batteries into the battery box.
% Link the Mouse with the Receiver
1. Turn on the computer. The LED indicator on the receiver will light.
2. Press the ID Link Button on the receiver and the LED indicator will blink. The
receiver is ready to automatically link with the mouse.
3. Press the ID Link Button on the back of the mouse. The indicator will stay in light
while successfully finish the linkage.
4. The LED indicator will blink while you move the mouse.
5. If you need to re-link the mouse or after changing the mouse batteries, please
repeat the above linkage step 2~3.
6. If the selected channel is interfered by other wireless-mouse users nearby, please
change the Link ID by re-linkage or select the other channel immediately.
7. There are 256 Link IDs per channel.
Install Driver
Notice:
- The driver supports Windows 98, Windows NT, Windows 2000, Windows ME and
Windows XP.
1. Insert the driver CD-ROM to your computer. The PC system may automatically
install the driver through selecting the PC auto-install function.
2. If the PC system does not set the auto-install function, please double click the
file "Setup.exe" and follow the setup instructions to complete the driver
installation.
3. A Mouse Setting icon will appear on the task bar of Windows after you
successfully finish the installation.
4. Restart the computer.
5. Double click the Mouse Setting icon and then follow the instructions of the
selection items to set the mouse properties.
6. Introduction of the Office Application Software: You can simply apply the Office
application functions through the one-touch hot key on the top of the Office
mouse.
Optional Charging Modes
Notice:
- There are three charge modes. Some mice may have only one or two charge modes.
- Please use rechargeable batteries for the chargeable mouse.
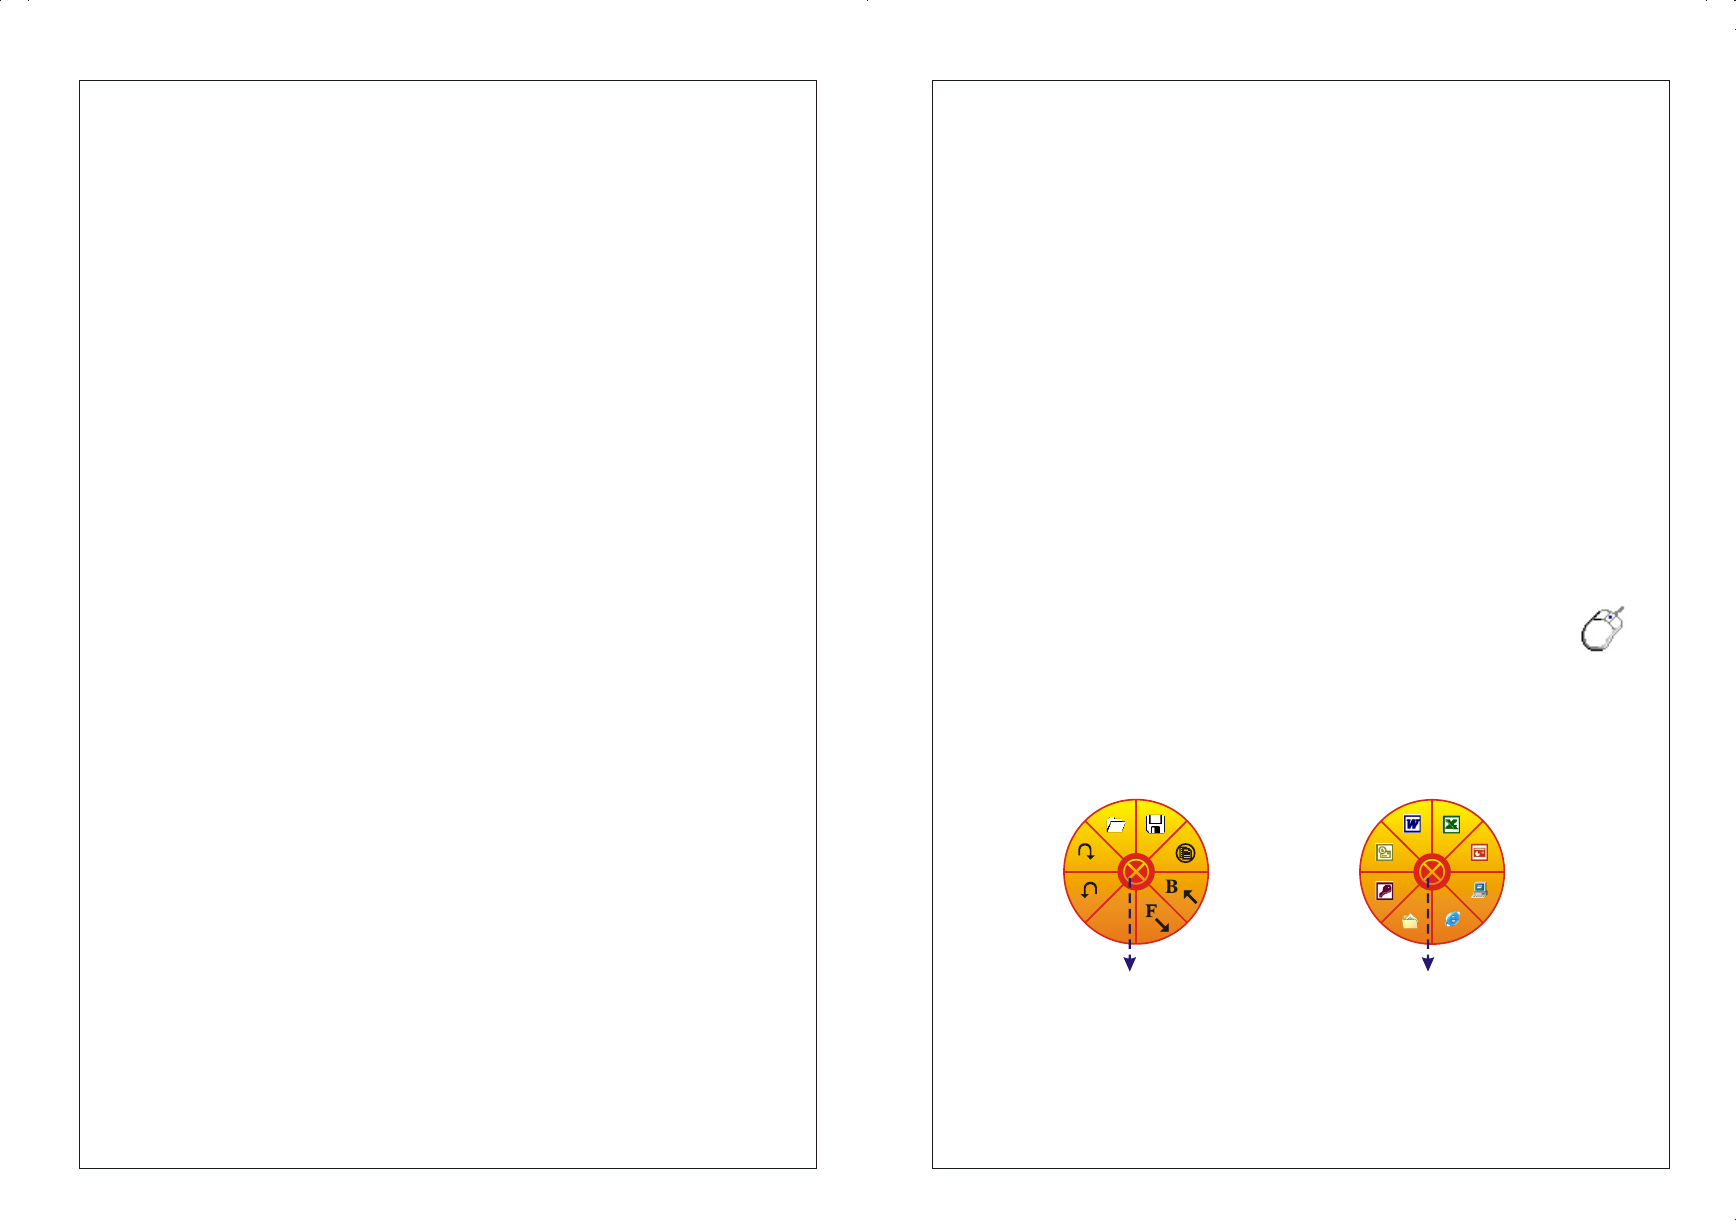
P
Open
Re-do
Un-do
Save
New
Backward
Print Forward
Close Application
Access
My Document
My Computer
IE
Outlook
Word Excel
PowerPoint
Close Application