Chic Technology RMO259UP WIRELESS OPTICAL MOUSE User Manual PMU MRF00049
Chic Technology Corporation WIRELESS OPTICAL MOUSE PMU MRF00049
USERS MANUAL

Office Mini
Wireless Optical Mouse
User's Quick Guide

1
Office Mini Wireless Optical Mouse
a 2003 All Rights Reserved. The copyright is the property of its respective owners.
Notice:
Federal Communications Commission (FCC) requirements, Part 15
This equipment has been tested and found to comply with the limits for a class B digital device, pursuant to part 15 of
the FCC Rules. These limits are designed to provide reasonable protection against harmful interference in a residential
installation.
This equipment generates, uses and can radiate radio frequency energy and, if not installed and used in accordance with
the instructions, may cause harmful interference to radio communications. However, there is no guarantee that
interference will not occur in a particular installation. If this equipment does cause harmful interference to radio or
television reception, which can be determined by turning the equipment off and on, the user is encouraged to try to
correct the interference by one or more of the following measures:
--Reorient or relocate the receiving antenna.
--Increase the separation between the equipment and receiver.
--Connect the equipment into an outlet on a circuit different from that to which the receiver is connected.
--Consult the dealer or an experienced radio/TV technician for help.
CAUTION: Any changes of modifications not expressly approved by the grantee of this device could void the user's
authority to operate the equipment.
This device complies with Part 15 of the FCC Rules. Operation is subject to the following two conditions: (1) this device
may not cause harmful interference, and (2) this device must accept any interference received, including interference that
may cause undesired operation.
-----------------------------------------------------------------------------------------------------------------------------------------------
CE Declaration Of Conformity
Hereby, the manufacturer, declares that this is in compliance with the essential
requirements and other relevant provisions of Directive 1999/5/EC.
Essential requirements - Article 3
Protection requirements for health and safety - Article 3.1a
--Testing for electric safety according to EN 60950 has been conducted. These are considered relevant and sufficient.
Protection requirements for electromagnetic compatibility -Article 3.1b
--Testing for electromagnetic compatibility according to EN 301 489-1 and EN 301 489-03 has been conducted. These
are considered relevant and sufficient.
Effective use of the radio spectrum -Article 3.2
--Testing for radio test suites according to EN 300 220-3 has been conducted. These are considered relevant and
sufficient.
Caution: May explode or leak if recharged, inserted improperly, disposed of in fire or mixed with used or different battery
types.
Congratulations on your purchase of this Office Mini Wireless Optical
Mouse. Please carefully read the User's Quick Guide to learn about the
installation and the powerful functions of your new Office Mini Wireless
Optical Mouse.
Contents of the Package
3 Office Mini Wireless Optical Mouse
3 Mini Receiver (USB or UP Combo)
3 Two AAA Batteries
3 Office Mouse Driver CD-ROM
3 User's Quick Guide
3 Optional Parts
(The optional parts may be different due to various wireless optical mice.)
& AC to DC Adapter
& USB to DC Cable
Office Mini Wireless Optical Mouse
2
Office Mini Wireless Optical Mouse
Install Hardware
- If you are running Windows 98 and plug the
connector into the computer, you may find a pop-up
window that requires to insert the Windows 98 CD-
ROM. Please follow the window instruction to install
the required driver or set the driver path as
"Windows\system" or the other path that the driver
located.
Put the batteries into the battery case
1. Place your thumbs on the top of the mouse.
2. Press slightly and push out the top case.
3. Insert the batteries and then close the top case.
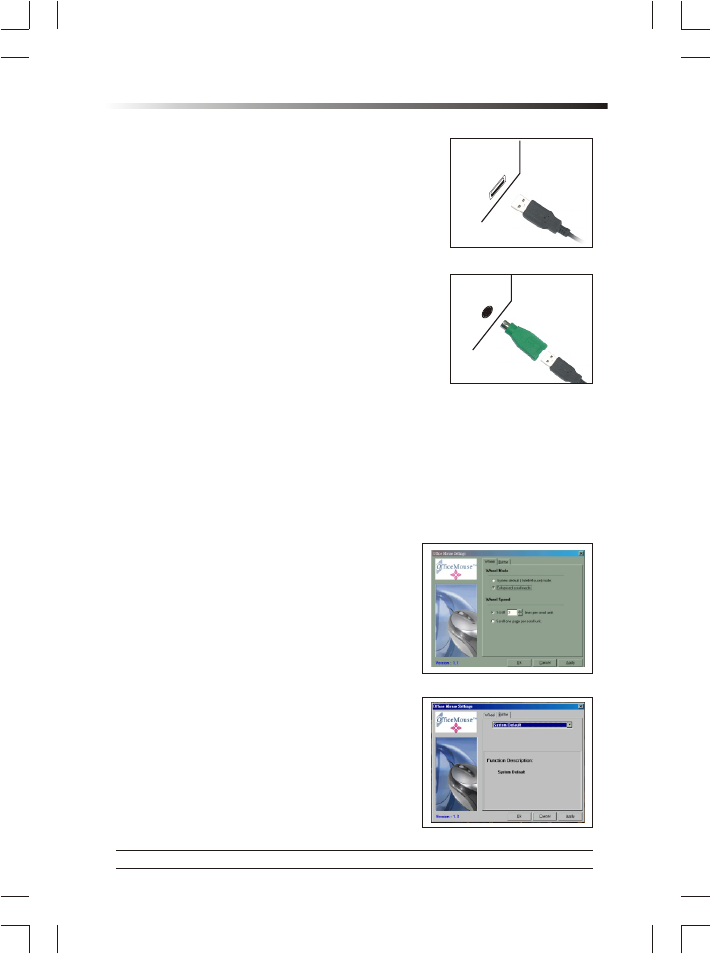
Connect the Receiver to Your Computer
1. USB Connector: Plug the connector of the mini receiver into the USB port of
the computer.
Notice:
- If you are running Windows 98 and plug the
connector into the computer, you may find a pop-up
window that requires to insert the Windows 98 CD-
ROM. Please follow the window instruction to install
the required driver or set the driver path as
"Windows\system" or the other path that the driver
located.
2. USB to PS/2 Connector: Connect the USB to PS/2 connector to the mini
receiver and then plug the connector to the PS/2 port of the computer.
Link the Mouse with the Receiver
1. Turn on the computer. The LED indicator on
the receiver will light.
2. Press the ID Link Button at the bottom of
the mini receiver and the LED indicator will
blink. The receiver is ready to automatically
link with the mouse.
3. Press the ID Link Button on the back of the
mouse. The indicator will stay in light while
successfully finish the linkage.
4. The LED indicator will blink while you move
the mouse.
5. If you need to re-link the mouse or after
changing the mouse batteries, please repeat
the above linkage step 1~3.
6. If the mouse is interfered by other wireless-
mouse users nearby, please change the Link
ID by re-linkage immediately.
7. There are 256 Link IDs.
PS/2 Port
USB Port
3
Office Mini Wireless Optical Mouse
8. The scroll wheel of the mouse will light while the mouse is low battery.
Please change the batteries immediately.
9. Press any button to wake up the mouse while the mouse is in the sleeping
mode.
Install Driver
Notice:
- The driver supports Windows 98, Windows NT, Windows 2000, Windows ME and
Windows XP.
- When you change the interface port, please reinstall the driver.
1. Insert the driver CD-ROM to your computer. The PC system may
automatically install the driver through selecting the PC auto-install
function.
2. If the PC system does not set the auto-install function, please double click
the file Setup.exe and follow the setup instructions to complete the driver
installation.
3. Restart the computer.
4. A Mouse Setting icon will appear on the task bar of Windows after you
successfully finish the installation.
5. Double click the Mouse Setting icon and then follow the instructions of the
selection items to set the mouse properties.
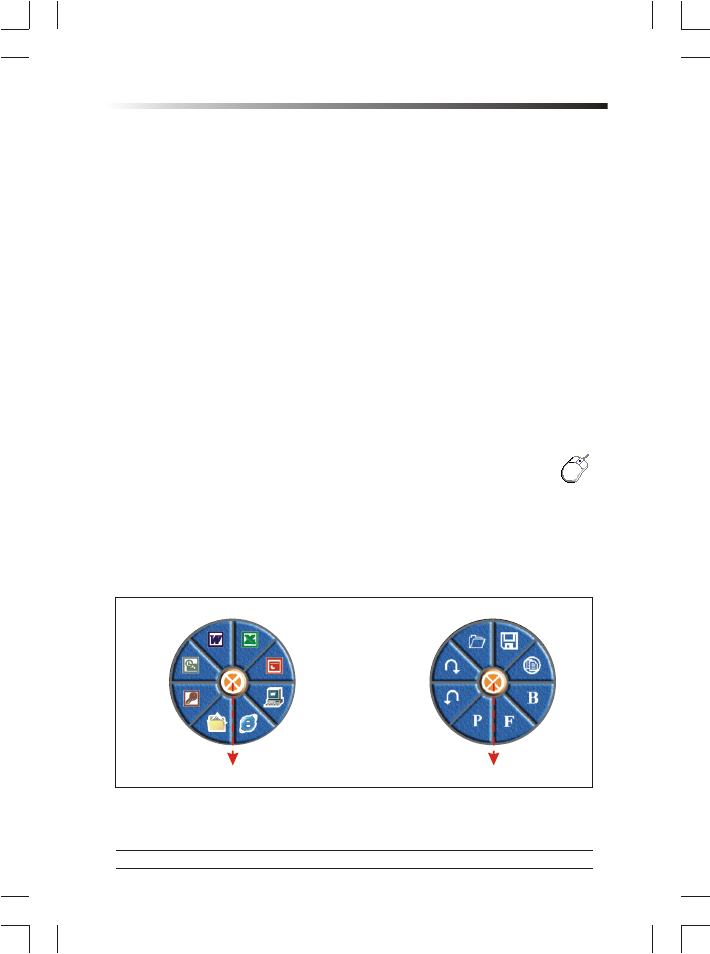
6. Introduction of the Office Application Software: You can simply apply the
Office application functions through the one-touch hot key on the top of the
Office mouse.
Open
Re-do
Un-do
Save
New
FindPrint
Bold
Close Application
Access
My Document
My Computer
IE
Outlook
Word Excel
PowerPoint
Close Application

4
Office Mini Wireless Optical Mouse
Uninstall Driver
Mouse Software can be removed from Windows by clicking the Add/Remove
Programs icon in the Control Panel or clicking the "Uninstall" icon in the folder
that Setup.exe created in "Programs" of "Start". Select Mouse Software
installed and click the "Remove" button.
Charge Mode
Notice:
- Please skip this section if your mouse is not rechargeable.
- There are two charge modes for the rechargeable version.
Some mice may have only one charge modes.
- Please use rechargeable batteries for the chargeable mouse.
- At the first time of usage, please charge the AAA batteries at least 6 to 8 hours.
1. Charge from PC: Connect the mouse to the USB port of the computer with the
USB to DC cable.
2. Charge through Adapter: Connect the mouse with the AC to DC adapter.
Notification
- This equipment is intended for use in the following countries.
18 European Countries:
Austria, Belgium, Denmark, Finland, France, Germany, Greece, Iceland, Ireland,
Italy, Luxembourg, Netherlands, Norway, Portugal, Spain, Sweden, Switzerland
and United Kingdom
- Please do not change the frequency, features and functions of wireless mice
from the original design.
- The optical technology can precisely detect the mouse motion on most surfaces.
Please avoid using the optical mouse on any reflective, transparent, metallic or
complex-pattern surface.
- Recommendation: please do not use the mouse during charge periods.
- The LED indicator or the scroll wheel on the mouse will light while the mouse is
low battery. Please recharge or change the batteries immediately.
- Press any button to wake up the mouse while the mouse is in the sleeping
mode.
- While not click the Office hot key, the Office pop-up window appears and there
is no any reaction from the right button. Please eliminate the situation by
repeatedly clicking the Office hot key.
- Please avoid using the mice under the following conditions.
% Direct sunlight
% Extreme hot, cold, dusty or magnetic environment
% Near by fax machine, television, radio, mobile phone or any wireless device
% Metal surface
- Notices for wireless mice:

5
Office Mini Wireless Optical Mouse
% Install the driver properly.
% Check the distance between the mouse and the receiver. (The max. operation
distance is 1 meter.)
% Place the positive and the negative of the battery in the right direction.
% Link the mouse with the receiver properly.
- If the product is malfunction, please change or recharge the batteries, or move
the receiver away from the computer and the monitor.
Trouble Shooting
Question 1: No mouse movement.
Solution:
1) Make sure the software that you are using supports a mouse.
2) Check that mouse is plugged into the relevant port at the back of computer.
3) Ensure that mouse driver is installed into system.
Question 2: The cursor on the screen remains at one spot or moves erratically.
Solution:
1) Check the mouse cable for any breaks or sharp twists. Examine the cable
closely where it connects to the mouse.
Question 3: The cursor movement stops at a corner and no longer responds to
the mouse movement.
Solution:
1) Run the mouse driver to check which mode the mouse is operating in.
2) If the mouse is wireless, please check the battery power or re-link the
mouse.
Question 4: Mouse movement does not produce corresponding cursor movement
or there is a brief pause during movement.
Solution:
1) Check the connecter or the cables of the mouse and the receiver if there is
any break or tangled.
2) Check the distance between the mouse and the receiver.
Question 5: Displayed error number -115 on screen when install mouse driver
software.
Solution:
1) The error usually occurs because a virus-checking program is being used on
the System to prevent files from being renamed. Please shutdown any virus
checking software running on the system and then run the setup again.
Question 6: Detection problems of the mouse
Solution: If your mouse is connected to the mouse port and is not detected by
the system, attempt the following step(s):
1) Please check the mouse port setting from the computer.

6
Office Mini Wireless Optical Mouse
2) If you have a mouse with a mouse port adapter, please connect the mouse to
the computer through the mouse port adapter. Restart the computer and
check if the mouse is detected properly.
3) If the problem persists, please check for a possible computer BIOS ROM
upgrade from your computer manufacturer.
4) Some notebook systems, such as IBM Thinkpad, have both an external
Mouse Port and an integrated Pointing Stick, which is connected to the
Mouse Port. If your mouse is having difficulty running on the Mouse Port of
this type of system, please other ports.
Question 7: Conflicts with other Devices
Solution:
1) Some softwares, provided by other manufacturers, include mouse functions,
which may conflict with the Office mouse. We recommend you to remove the
software installed previously and then install the Office mouse software.
Question 8: Too much interference to the wireless mouse
Solution:
1) Change the location of the receiver.
2) Please remain a certain distance from other high-voltage or wireless devices.
Question 9: Problems of operating the wheel
Solution:
1) Verify that the "Browser Mouse" or "Mouse Control Panel" application is
installed properly. If you do not find the "Browser Mouse" or "Mouse Control
Panel" icon in the system tray, you need to reinstall mouse software.
2) Please install the mouse driver while the OS is under Windows 98.
3) Some other applications with mouse scrolling function may conflict with this
mouse function. Remove these applications before install the Office mouse
software.

PMU-MRF00049 / MADE IN CHINA