China Great Wall Computer FC18D LED Monitor User Manual 185LD
China GreatWall Computer Shenzhen Co., Ltd. LED Monitor 185LD
UserManual.wiki
>
China Great Wall Computer
>
FC18D User Manual
Users Manual
Navigation menu
Upload a User Manual
Namespaces
Wiki Guide
HTML
PDF
Info
Views
User Manual
Discussion / Help
Navigation
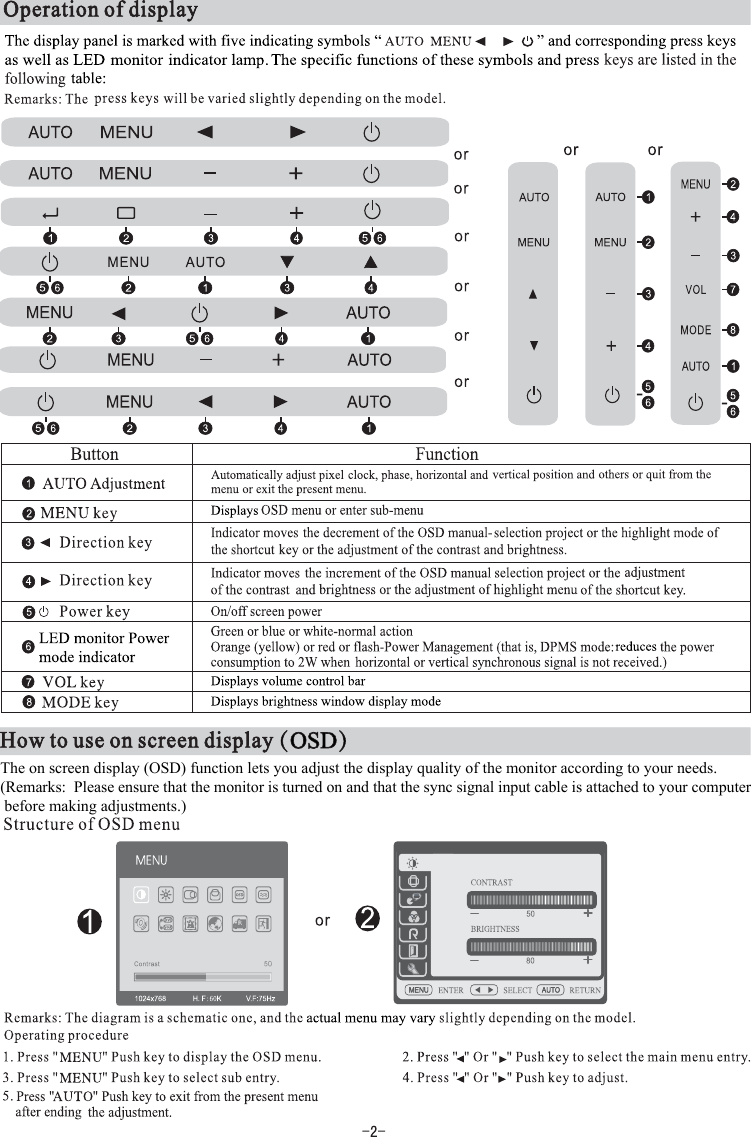
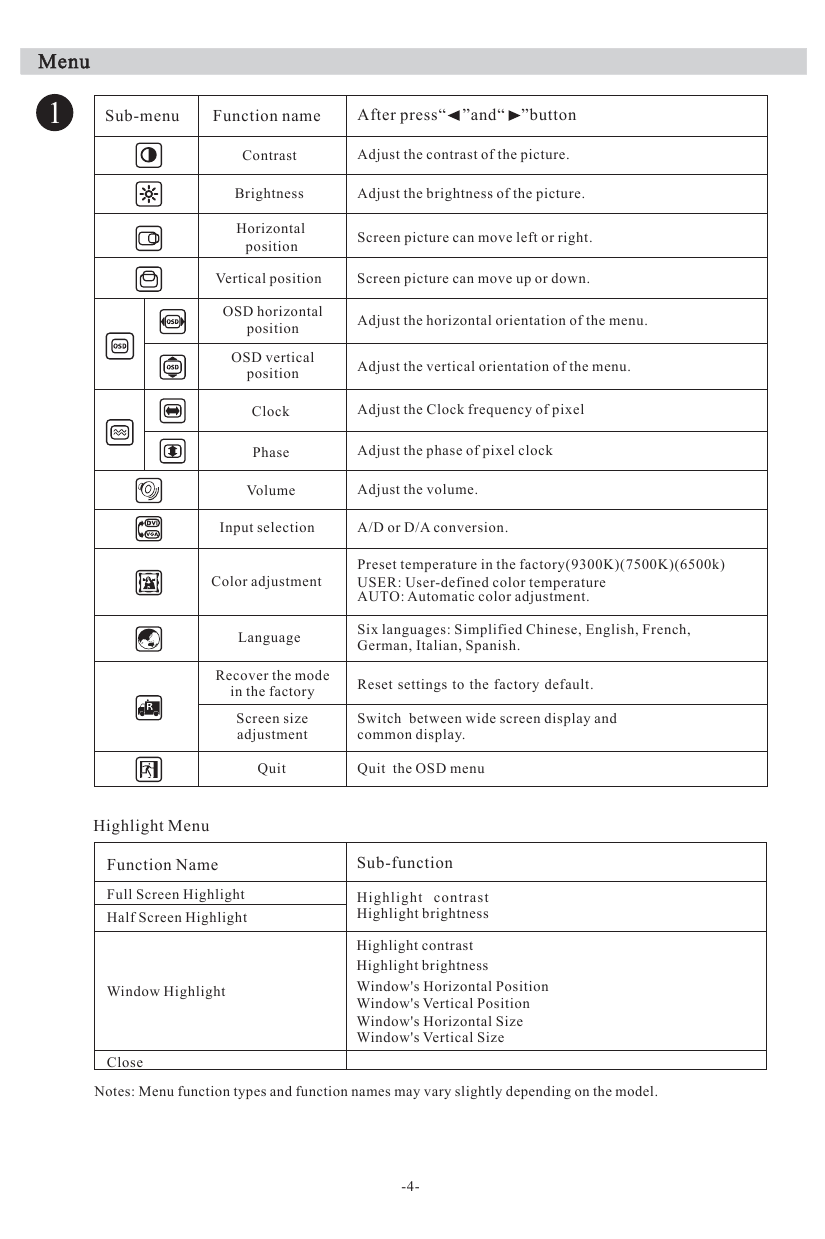
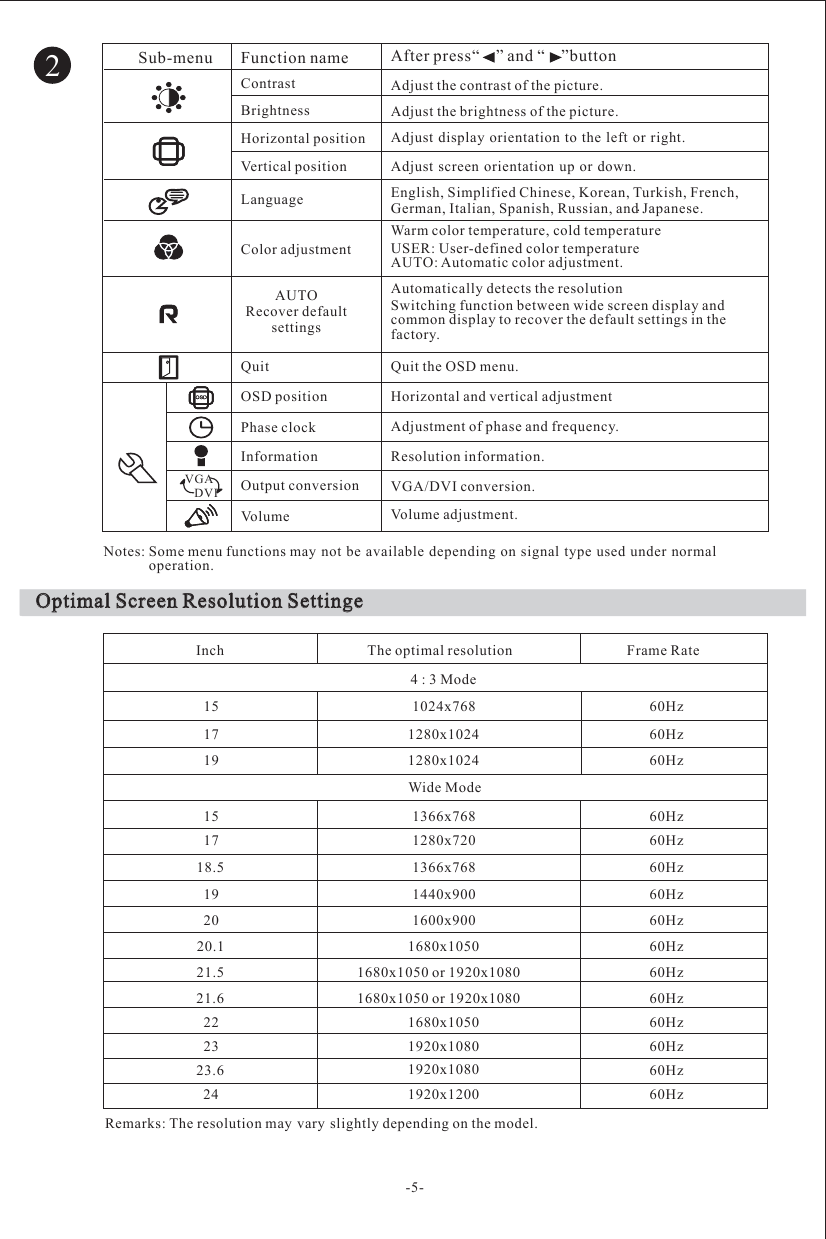
![OSD Shortcut KeyorororororAUTOAUTOAUTOAUTOAUTOAuto adjustment1. Press the key with [AUTO] on the display panel.2. Auto adjustment will begin. OSD will be displayed automatically. It willcomplete the adjustment about 10 seconds later.Remarks: No effect will be available for the function adjustment under DVImode since the digital signal is very standard.OSD Shortcut key (Remarks: The menu function may differ slightly depending on the model.)This function allows users to adjust commonly used menus such as “brightness” and “contrast”.](https://usermanual.wiki/China-Great-Wall-Computer/FC18D/User-Guide-1891668-Page-5.png)