Chris King Iso Xd Driveshell Add Web User Manual
2015-04-15
User Manual: Chris King Iso Xd Driveshell Add Web
Open the PDF directly: View PDF ![]() .
.
Page Count: 4
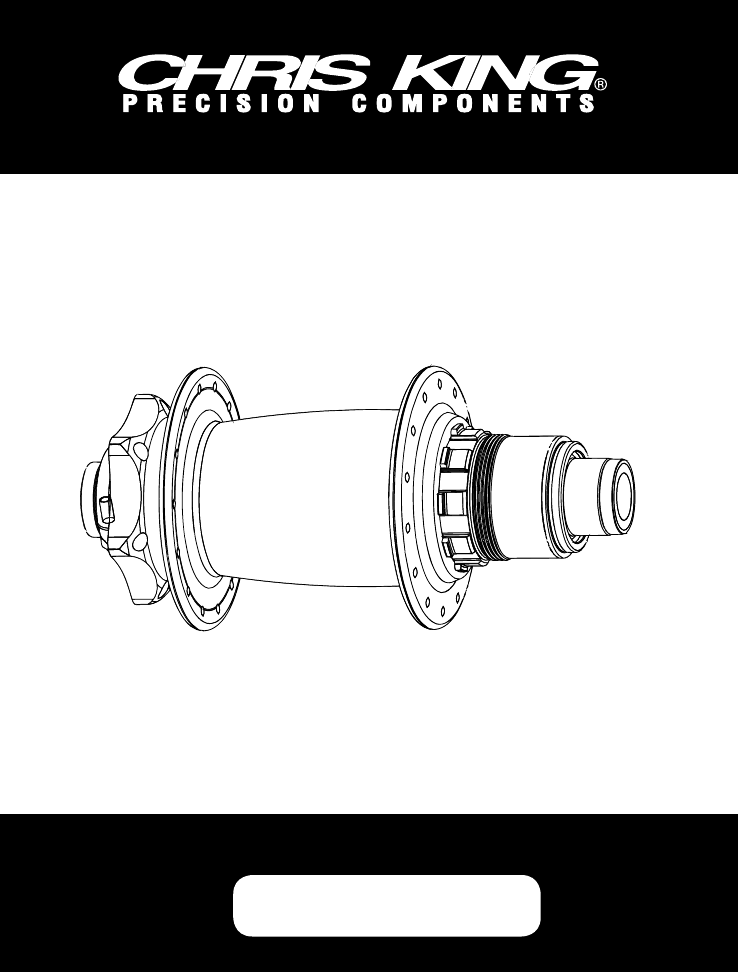
ISO XD Driveshell Addendum
register online
chrisking.com/warranty
year warranty
5
Congratulations
You have just purchased an XD Driveshell for your Chris King ISO hubs. With proper
care and maintenance you will enjoy many years of the legendary performance you
have come to expect from all Chris King Precision Components. This addendum is a
supplement to the Chris King ISO manual to give you the specific information needed
for the setup and use of your new XD Driveshell.
Preparation
Chris King XD Driveshell are compatible with
Chris King ISO Rear Hubs and Chris King ISO
DH Rear Hubs. With the correct parts converting
your existing hub is easy. Note, when converting
your hub make sure that that Axle ID matches
the XD Driveshell ID. See Figure 1 for identifica-
tion locations.
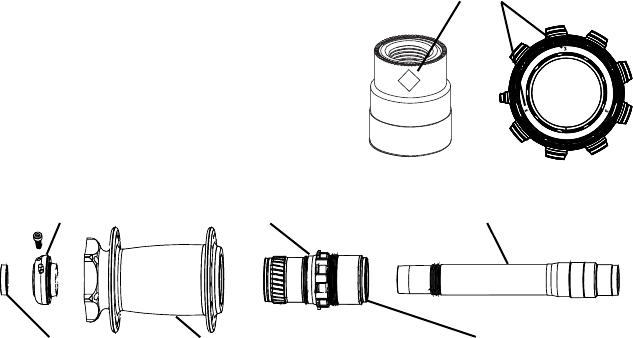
Disassembly of one piece axle on rear ISO XD Driveshell
equipped hub (see Figure 2)
1. Remove cassette using a chain whip and HG™ cassette lock ring removal tool.
*If the XD Driveshell End Cap is removed along with the cassette use a small
punch or small flat head screw driver to gently tap the Driveshell End Cap out
of the cassette.
2. With Adjusting Clamp facing towards you, hold opposite end of axle stationary,
loosen pinchbolt with a 2.5mm hex wrench and rotate clamp in a counter
clockwise direction to unscrew it from the thru-axle. If Adjusting Clamp is difficult
to remove, insert a 2.5mm hex key into the “helper hole” on the Adjusting Clamp
adjacent to 2.5mm hex bolt. Use the hex key as a lever to unscrew Adjusting
Clamp. Note: 142/157mm also axles feature a steel axle end cap that will pop
off of axle end as Adjusting Clamp is pulled from axle.
3. Remove axle from hub by pushing the axle from the non-drive side.
4. Holding hub or wheel in your left hand, pull the driveshell while also rotating it
3
3
3
3
Axle ID
Figure 1
Figure 2
Steel End Cap
(If Applicable)
Adjusting Clamp
Hub Shell Assembly
XD Driveshell Assembly ISO Axle
XD Driveshell End Cap

in a counter-clockwise direction away from the hub.
5. Hub shell bearings, RingDrive internals and driveshell bearing assemblies can
now be accessed.
For RingDrive inspection and maintenance information, see “The RingDrive”, pg.
12 of the ISO Manual.
For bearing service, information see “Service of the bearings”, pg. 14 of the ISO
Manual.
Further disassembly requires specialized tools. These come individually or in the
Chris King Hub Service Tool Kit, which are available at any authorized Chris
King dealer, or directly from Chris King Precision Components. Visit our website
at http://chrisking.com/tools/tls_hubs for further information.
Reassembly of a one-piece axle on a rear ISO XD
Driveshell equipped hub (see Figure 2)
1. Lightly grease threads on adjusting clamp. Apply two drops of l
ightweight, low
viscosity oil, with PTFE
( e.g. TriFlow ™) to the axle O-ring and sleeve. If using QR
adaptors or FunBolts, apply anti-seize to threads before threading them into
the axle.
2. Apply two drops of l
ightweight, low viscosity oil, with PTFE
( e.g. TriFlow™ ) to driveshell
O-ring. Holding hub or wheel in your left hand, insert the driveshell into the
hub shell; turn in a counter-clockwise motion so the driveshell will pull itself
into the hub shell. Finish installation by pressing the driveshell into position.
A distinctive click sound will indicate that the driveshell is firmly seated in the
hub.
3. Insert a finger or a dental pick from the non-drive side to push on the spring
retainer to ensure that the spring retainer is correctly seated on the driveshell.
4. Insert main axle, small end first into the driveshell. Continue until axle is through
the hub and the large end is firmly seated in the driveshell.
5. Thread adjusting clamp onto the protruding threads of axle.
6. Snug the adjusting clamp up to the bearing. Once the hub is properly adjusted
torque pinchbolt to 1.13Nm(10inch-pounds). Note: 142mm and 157mm axles
feature a steel axle end cap that must be hand-pressed back onto the end of
the axle.
7. Proceed to “Adjustment of one piece axle on rear ISO hub”, pg. 9 of ISO Manual.
To improve performance, the axles have been precisely matched with the needle
bearings in the driveshell. Be sure to combine only like numbered parts, (e.g., #3
axle with #3 needle bearing race, See Figure 1).
Tech Note: Weights
- XD Drivesheel Assembly Complete - 90 grams
- XD Drivehell Assembly Ceramic Complete - 88 grams
- XD Driveshell - 54 grams
- XD Driveshell End Cap - 8 grams

CHRIS KING PRECISION COMPONENTS
2801 NW Nela Street
Portland, OR 97210
phone: 800.523.6008
fax: 503.972.4051
www.chrisking.com
email: info@chrisking.com part # 18993 rev. 4/14-A
Limited Warranty
Chris King Precision Components warrants its products to be free from defects in materials or workmanship for the
following periods from the original date of purchase:
Headsets: Ten (10) years
Hubs: Five (5) years
Bottom Brackets: Five (5) years
Wheels: The hubs only are warranted for a period of five (5) years. All other wheel components that are not manufactured
by Chris King Precision Components such as, but without limitation, rims, spokes, and nipples, are not warranted
by Chris King Precision Components.
Accessories: One (1) year
Soft Goods: Ninety (90) days
Any Chris King product that is found by Chris King Precision Components to be defective in materials or workmanship
will be repaired or replaced at the discretion of Chris King Precision Components. This warranty does not cover
damage or failure resulting from misuse, abuse, alteration, neglect, normal and reasonable wear and tear, crash or
impact, failure to perform routine maintenance as instructed, improper installation, or use other than that for which
the product was intended.
In order to make a warranty claim, the Chris King product alone (i.e., not including any other equipment such as
cassettes, skewers, steering tubes, etc.), together with a copy of the original receipt showing the date of purchase
of the product, must be returned to Chris King Precision Components at the address set forth on its website (www.
chrisking.com) postage prepaid. If a defect is found, our entire liability and your sole remedy shall be, at our option,
free repair or replacement of the Chris King product. Chris King Precision Components shall not be held liable for
any indirect, special, punitive, or consequential damages. The warranty does not cover any Chris King Precision
Components product where the serial number has been altered or removed.
To the fullest extent permitted by applicable law, this written express limited warranty is in lieu of all other warranties,
implied or expressed, and does not cover any representation or warranty made by dealers beyond the provisions
of this warranty. If any implied warranties exist by applicable law, such implied warranties shall be limited to the
duration of the express limited warranty for the product. Some U.S. states and foreign countries provide rights in
addition to those above or do not allow the exclusion or limitation of certain warranties or limitation of liability for
certain types of damages. Therefore, the above limitations may not apply to you or there may be laws of a state or
foreign country which supersede the above. Any clause of this limited warranty or any disclaimer or limitation of
liability contained herein that is declared invalid shall be deemed severable and not affect the validity or enforceability
of the remaining clauses.
You are strongly encouraged to register your Chris King product on the website within thirty (30) days of the original
date of purchase. Registration will assist us in processing your warranty claim and in expediting our response.
All trademarks, registered trademarks, and logos are of their respective holders.
©King Cycle Group, 2014. All rights reserved.
Printed with soy ink. Contains 100% post consumer recycled paper fiber.
