Chuango Security Technology IP6 HD WiFi Camera User Manual Manual 1
Chuango Security Technology Corporation HD WiFi Camera Manual 1
UserManual.wiki
>
Chuango Security Technology
>
IP6 User Manual
>
Manual 1
Contents
1.
Manual 1
2.
Manual 2
Manual 1
Navigation menu
Upload a User Manual
Namespaces
Wiki Guide
HTML
PDF
Info
Views
User Manual
Discussion / Help
Navigation
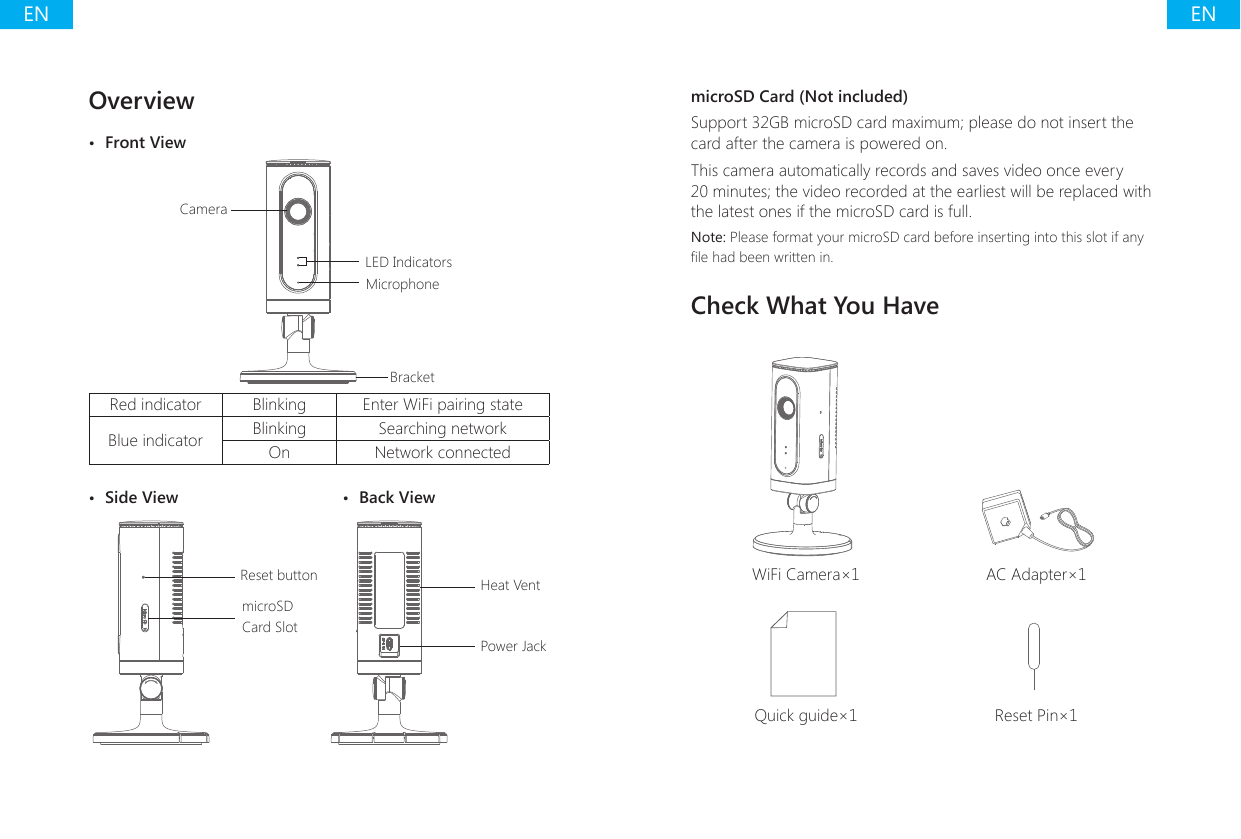
![ENENDownload the AppDownload the App by searching “IP6 camera” from Apple Store or Google Play. If you also bought a smanos alarm system, you don't need to download the separate app for the camera, just setup through the app for the alarm system.IP6 CameraWiFi Pairing1. Preparation• Hold the reset button by using the supplied reset pin until the camera beeps once, and then the red indicator starts to blink• Find and choose the WiFi named “smanos IP6” from your phone’s WiFi list2. Pairing Camera with WiFi through App***• Launch the App, and then tap [+] to add a new camera* Make sure the UID No. is displayed before tapping [OK]• Name your camera, enter the password (default: 888888) and input your home WiFi name & password• When the blue indicator is on, it means the camera has connected with WiFiThe paired camera will be displayed in the video list.Note: For safety, it is recommended to change the password of your camera on the setting menu after pairing.](https://usermanual.wiki/Chuango-Security-Technology/IP6.Manual-1/User-Guide-2599161-Page-3.png)
![ENENSettings Setting ButtonCamera Sharing QR CodeDevice IDShare or Stop Sharing Camera with Your FriendsTap and save the QR code icon on your camera’s [Settings] interface, send to your friends so they can watch your camera from his/her App by scanning the given QR code.If you want to stop sharing the camera, please change the password of camera.PasswordAll the successfully paired phones have the same authority as administrator who can view and set the camera (including changing the password), so it is recommended to pair the phones of users with caution. For non-administrator users, you can share the camera by sending the QR code for them to scan.Sync the Date and TimeCheck if the camera’s date and time are set correctly. Sync them with your phone’s time if necessary.Enjoy the AppSnapshotRecordHold To TalkSpeaker](https://usermanual.wiki/Chuango-Security-Technology/IP6.Manual-1/User-Guide-2599161-Page-4.png)
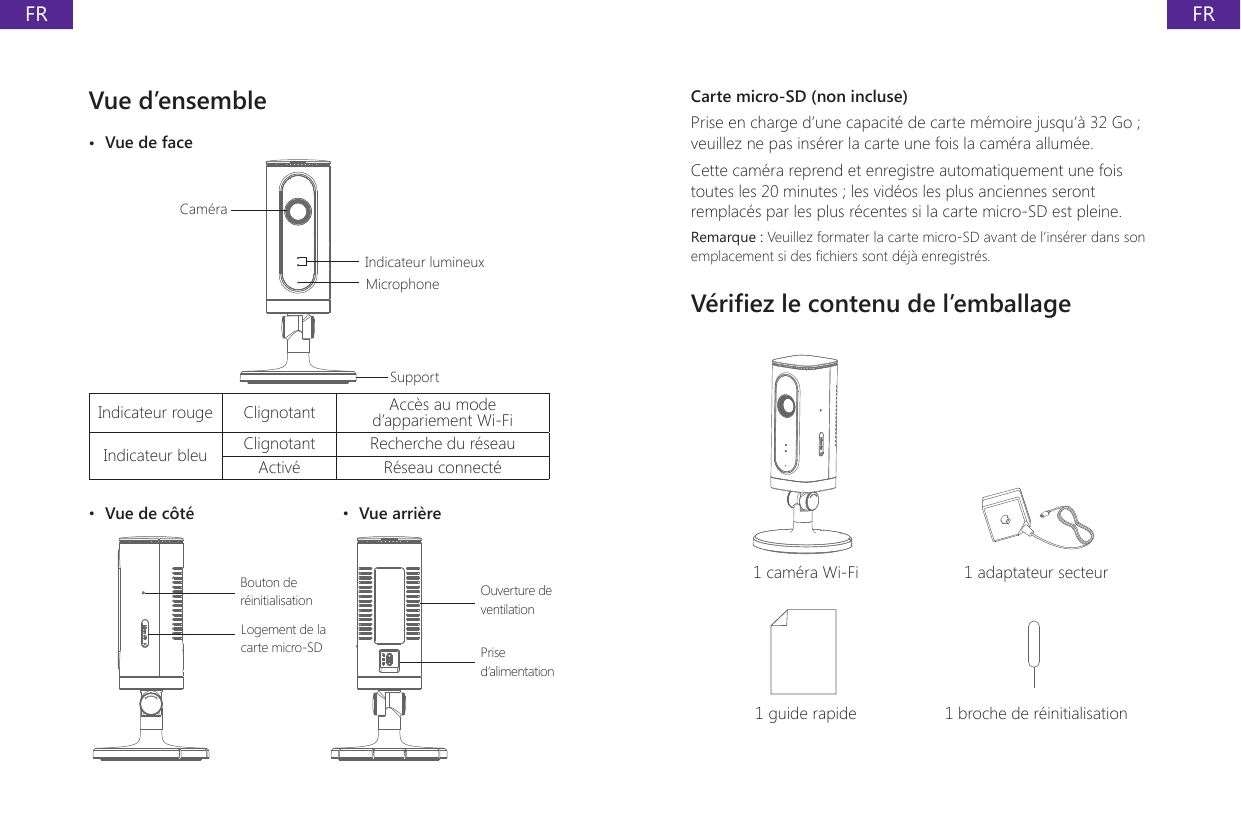
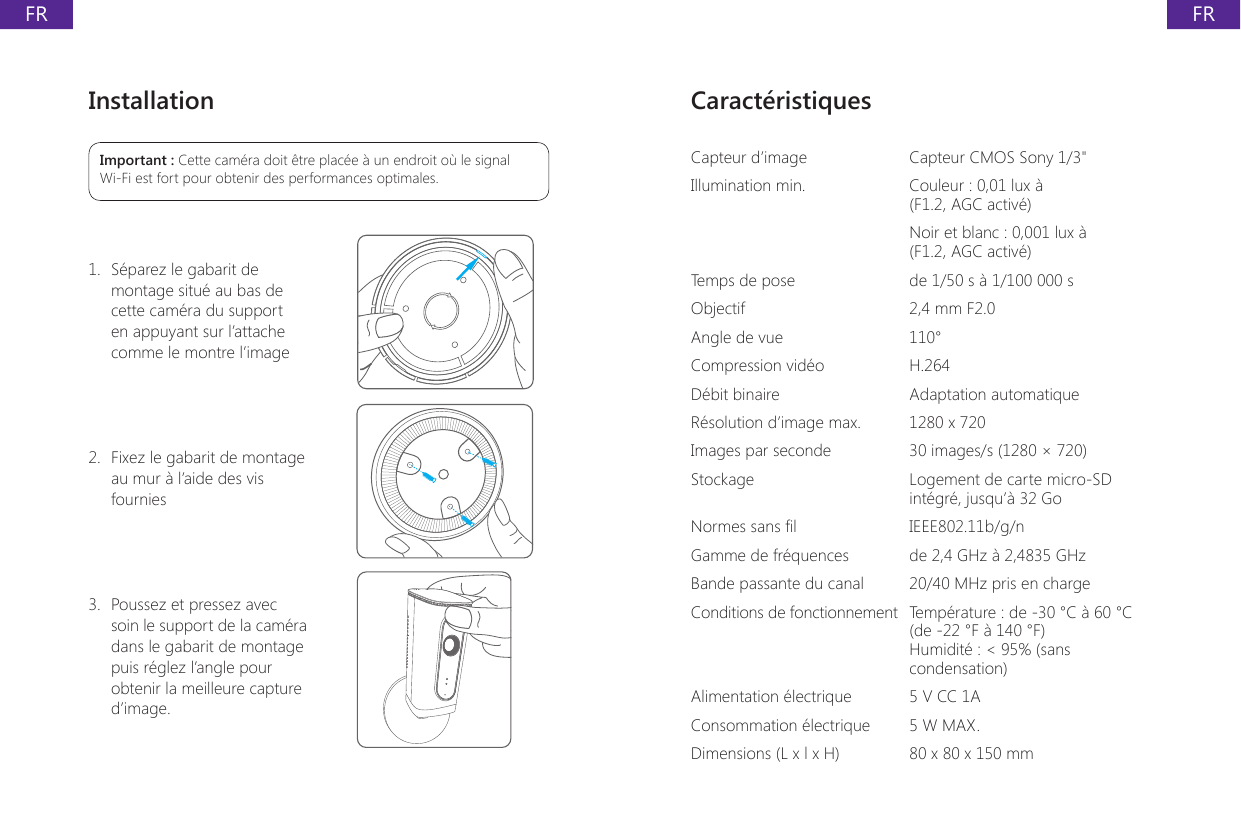
![FRFRTélécharger l’applicationTéléchargez l’application en recherchant le mot clé « IP6 camera » dans les magasins d’application « Apple Store » ou « Google Play ».Si vous utilisez l'IP6 avec un smanos système d'alarme, il faut seulement télécharger l'application du système d'alarme.IP6 CameraAppariement Wi-Fi1. Préparation• Maintenez enfoncé le bouton de réinitialisation à l’aide de la broche de réinitialisation fournie jusqu’à ce que la caméra émette un bip. L’indicateur lumineux rouge se mettra ensuite à clignoter• Recherchez et sélectionnez l’entrée portant le nom « smanos IP6 » dans la liste des réseaux Wi-Fi de votre téléphone2. Appariement de la caméra avec le réseau Wi-Fi au moyen de l’application***• Lancez l’application puis appuyez sur [+] pour ajouter une nouvelle caméra* Vérier que le numéro de l’identiant unique (UID) s’afche avant d’appuyer sur [OK]• Donnez un nom à votre caméra, saisissez le mot de passe (par défaut : 888888), le nom de votre réseau Wi-Fi domestique et son mot de passe• Une fois l’indicateur bleu allumé, la caméra aura établi la connexion Wi-Fi.La caméra appariée sera afchée dans la liste vidéo.Remarque : Pour votre sécurité, il est préférable de modier le mot de passe de votre caméra dans le menu de réglage après l’appariement.](https://usermanual.wiki/Chuango-Security-Technology/IP6.Manual-1/User-Guide-2599161-Page-9.png)
![FRFRRéglages Bouton de réglageCode QR de partage de la caméraIdentiant de l’appareilPartager ou annuler le partage de la caméra avec vos amisAppuyez sur l’entrée correspondante et enregistrez l’icône du code QR de l’interface [Paramètres] de votre caméra, envoyez-le à vos amis de façon à qu’ils puissent visualiser votre caméra depuis leur application en scannant le code QR donné.Si vous souhaitez ne plus partager la caméra, veuillez changer le mot de passe de la caméra.Mot de passeTous les téléphones appariés ont le même niveau d’autorité qu’un administrateur qui peut voir et effectuer des réglages de la caméra (y compris changer le mot de passe) et donc il est recommandé d’apparier les téléphones personnels avec précaution. Pour des utilisateurs qui ne sont pas administrateurs, il est possible de partager la caméra en leur envoyant le code QR à scanner.Synchroniser la date et l’heureVériez que la date et l’heure de la caméra sont dénies correctement. Synchronisez-les avec l’heure et la date de votre téléphone si nécessaire.Proter de l’applicationInstantanéEnregistrerMaintenir pour parlerHaut-parleur](https://usermanual.wiki/Chuango-Security-Technology/IP6.Manual-1/User-Guide-2599161-Page-10.png)