Chuango Security Technology W020 WiFi Alarm System User Manual RJY W020 User maunal
Chuango Security Technology Corporation WiFi Alarm System RJY W020 User maunal
UserManual.wiki
>
Chuango Security Technology
>
W020 User Manual
RJY-W020_User maunal
Navigation menu
Upload a User Manual
Namespaces
Wiki Guide
HTML
PDF
Info
Views
User Manual
Discussion / Help
Navigation
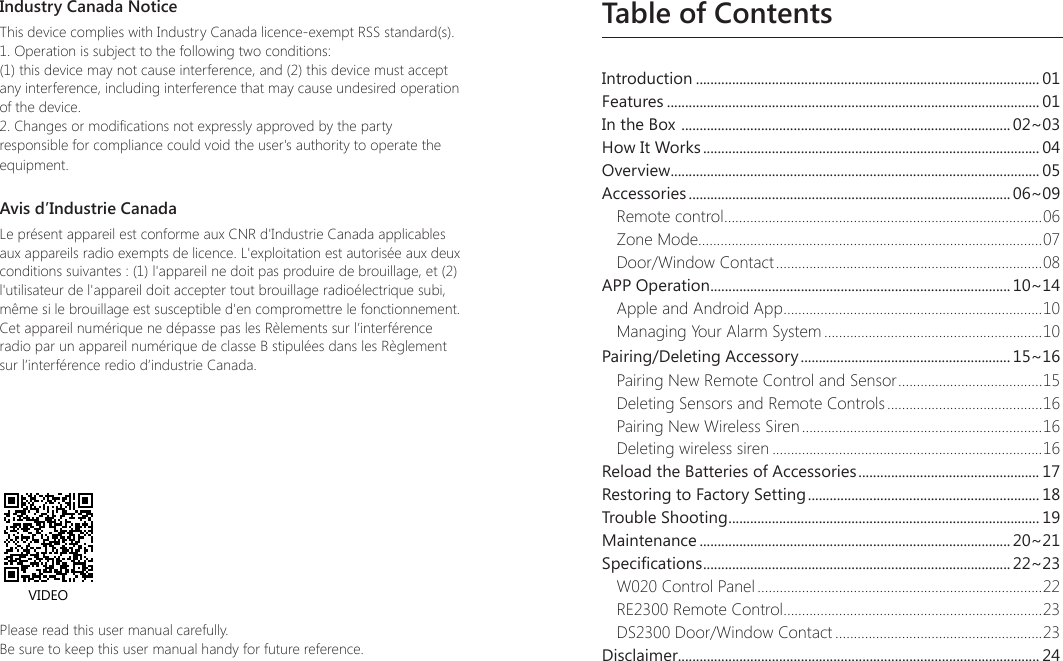
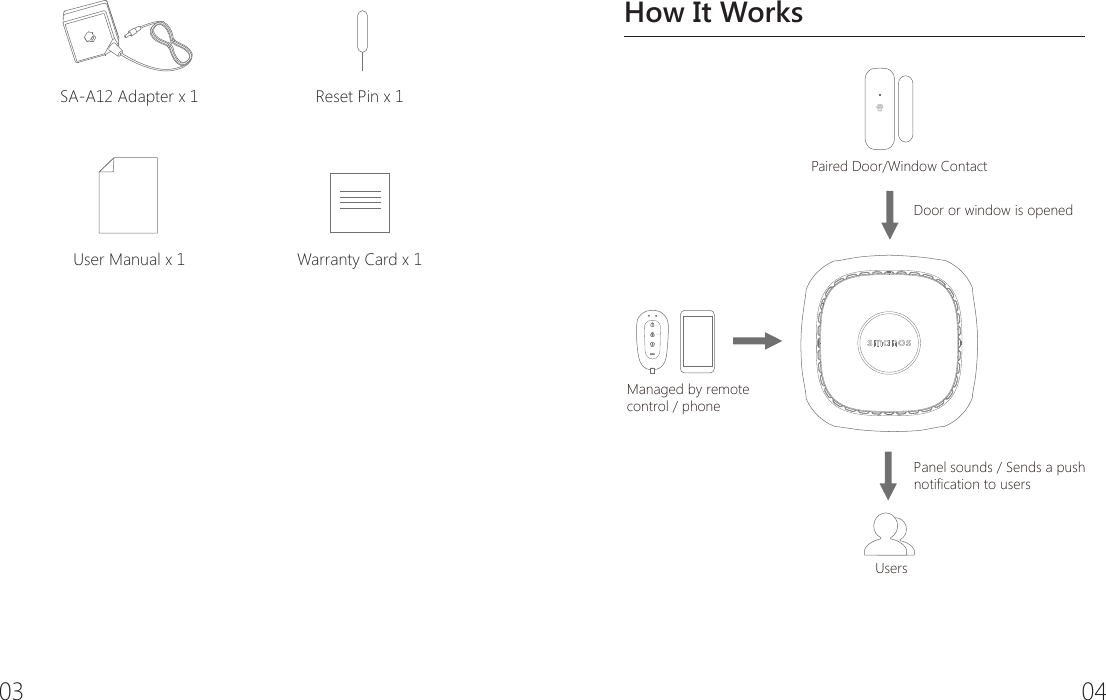
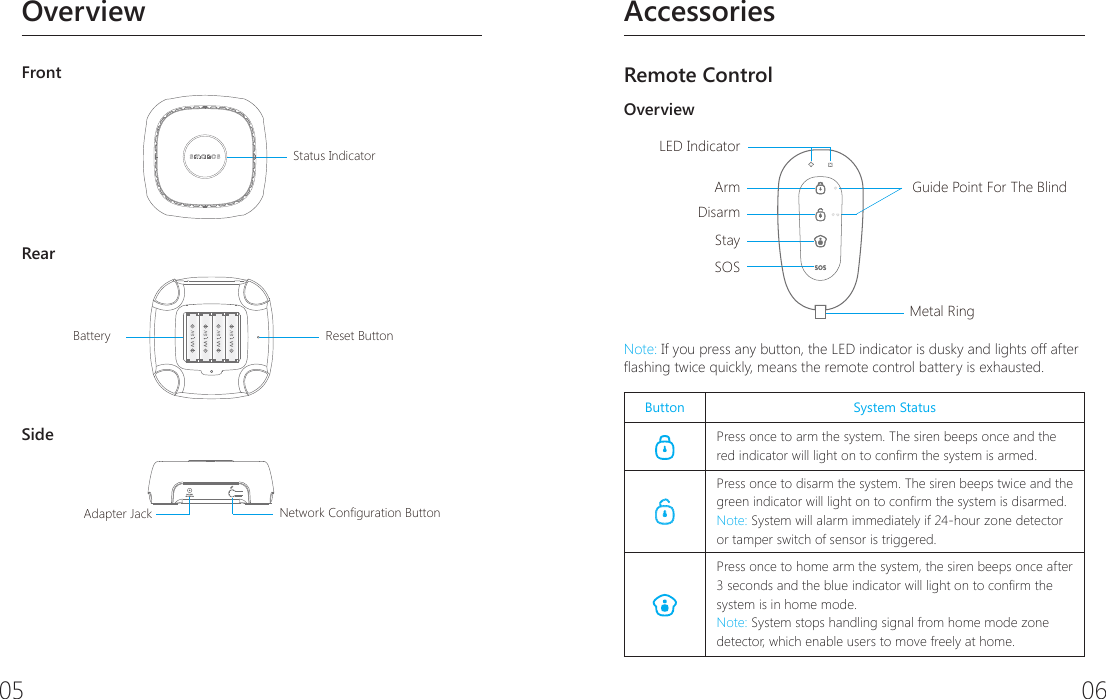
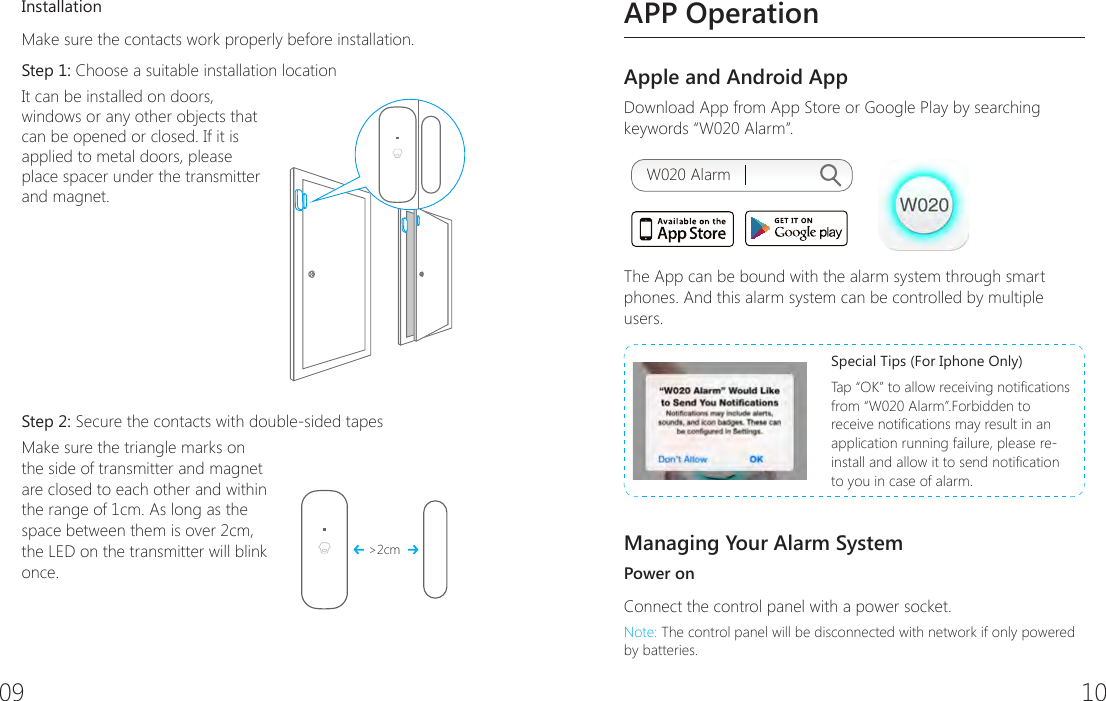
![07 08 The control panel will hoot on-site with indicator ashing, users will receive an emergency message from App.Press the [stay ] button, the indicator on the remote control blinks once, and then press [Arm ] button within 3 seconds to mutely arm the system.Press the [stay ] button, the indicator on the remote control blinks once, and then press [Disarm ] button within 3 seconds to mutely disarm the system.Zone modesThere are three zone modes available for the sensors.Normal zone: In arm or home arm state, the detectors set to normal zone work normally. Once intrusion is detected, the detectors trigger an alarm.Home mode zone: When system is in home arm state, the detectors set to home mode zone are disarmed. The detectors set to other zones are armed. That is, partial arm.24-H zone: The detector set to 24-H zone trigger an alarm immediately when detecting intrusion, no matter the system is armed or disarmed.Sensors in This Kit Zone Mode (Default Setting)DS2300 Door/Window Contact Normal Zone (can be changed through App)Note: The zone mode of 24-hour zone sensor can not be changed.Door/Window Contact The contact contains a transmitter and a magnet, which can be mounted on a door, window or any objects that can be opened or closed. When the transmitter and magnet are separated over 2 cm, the contact will send a signal to the control panel to trigger an alarm.OverviewFront SideLED IndicatorTransmitter MagnetBack SideTamper SwitchLED IndicationBlinks once: Door/window open detected.Blinks once per 3 seconds after triggered: Low battery. Push notication will be sent to App. Please change battery as soon as possible.Note: When tamper switch is pressed, system will alarm immediately.](https://usermanual.wiki/Chuango-Security-Technology/W020/User-Guide-2570794-Page-6.png)
![11 12Registration and Network setupAfter registration, it enters into the network setup interface. There are two ways to connect the control panel with Wi-Fi:Option 1. One-click setup 1. Click the network conguration button (refer to page 5) on the control panel once, you’ll hear a beep from the control panel. then the red and blue status indicators blink alternately.2. Input the Wi-Fi’s password on the App, then tap [Start], when the indicator stops blinking but keeps on instead, the conguration is successful.Option 2. Manual conguration1. Hold the network conguration button on the control panel until the control panel beeps once, then the red and blue status indicators blink alternately, means the control panel has entered into a manual conguration state. 2. Find and choose the Wi-Fi named W020 in your phone’s Wi-Fi list.3. Choose manual conguration in the one-click setup interface of W020 App.4. Input the local Wi-Fi name and its password, click [Start]. When the status LED indicator stops blinking but keeps on instead, it means the conguration is successful.Note: One control panel can be controlled by multi users.Remote control your alarm systemPull-down to RefreshNetwork ReconnectionHome ArmDisarmArm](https://usermanual.wiki/Chuango-Security-Technology/W020/User-Guide-2570794-Page-8.png)
![13 14System settings① Edit Accessory10 remote controls and 30 sensors could be extended and the names of sensors are editable.This function aims at guiding user to identify the invasion location quickly by changing the sensor name. Their sequence in naming follows pairing order, for example, the rst paired sensor is by default assigned to zone 1, the second paired sensor is by default assigned to zone 2, etc. In case of emergency, this control panel will push notication with zone number (or new name) to user.Meanwhile, you can change the working mode of accessory (Except the 24-hour zone sensor) by tapping the [ ] or [ ], please refer to the detail of “zone mode” on page 7.② Wireless SirenIf wireless siren is purchased, you can setup on the app to turn on/off the alarm function and arm/disarm tone, etc.③ Exit Delay Time & Entry Delay TimeIf you don’t want to carry along remote controls, you can set the exit or entry delay.Suppose entry delay is set at 30 seconds, the system will allow you 30 seconds to disarm the system before alarming. Suppose exit delay is set at 35 seconds, the system will allow you 35 seconds to leave before the system is armed. The “beep” is heard in every 2 seconds to remind you to leave. The pace of reminding sound will speed up in the last 15 seconds. Thus leaves you enough time to leave home without triggering the system.④User DeletionInput the ID No. (on the back side of the control panel) to delete all the users.](https://usermanual.wiki/Chuango-Security-Technology/W020/User-Guide-2570794-Page-9.png)
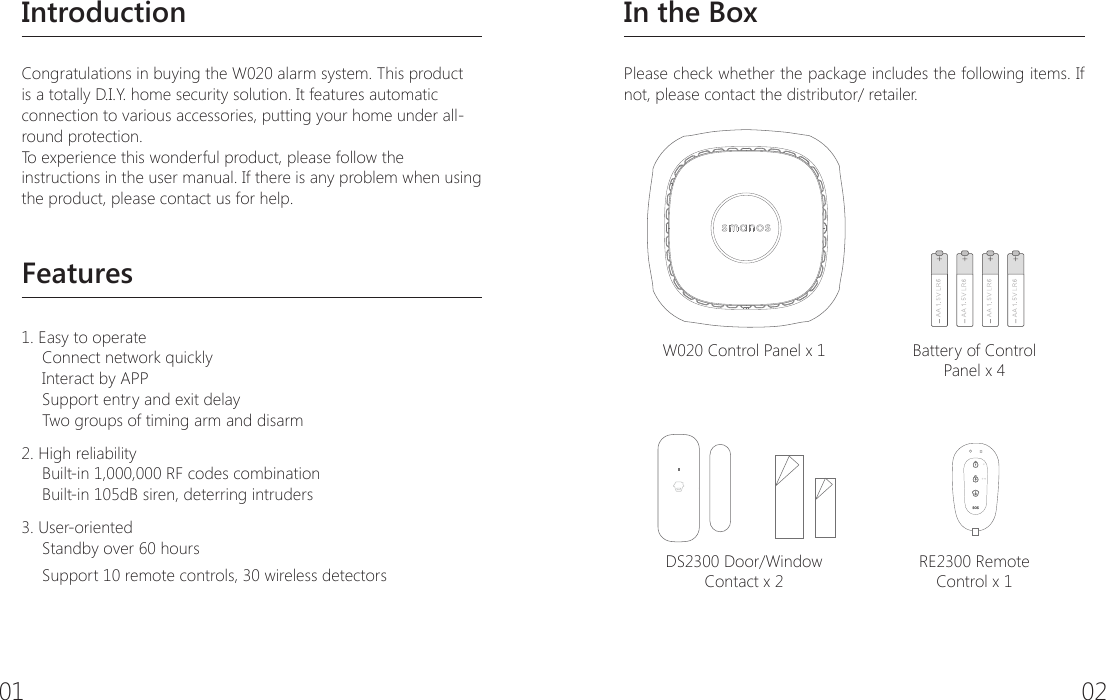
![15 16Pairing/Deleting AccessoryThe included accessories have been paired with the control panel by default, if you want to pair new accessories, please follow these instructions:Pairing New Remote Control and SensorTa p [+] on the accessory interface to send out pairing signal, and then trigger the accessory by following the illustration. Important: Please don't trigger the tamper switch of sensor when pairing, otherwise the system will recognize the sensor as a 24-hour zone sensor.Press any button on the remote controlPress the test button more than twice(Purchase separately)Separate the transmitter and the magnetWhen a beep is heard from the control panel means the sensor is paired successfully. If two beeps are heard, it means the sensor has already been paired.Note: To pair other sensors, please refer to the related user manuals.Deleting Sensors and Remote ControlsUse the supplied reset pin to press the reset button for about 3 seconds, the control panel will beep once to indicate all the sensors and remote controls have been deleted.Pairing New Wireless SirenWireless siren is sold separately.1. Siren enters pairing state (please refer to its user manual).2. Arm or disarm the control panel on App to send out pairing signal to the siren.When a beep is heard from the siren means the siren is paired successfully. If two beeps are heard means the siren has already been paired.Deleting Wireless SirenPress and hold the pair button of the wireless siren, the deletion is succeeded when one beep is heard from the wireless siren.](https://usermanual.wiki/Chuango-Security-Technology/W020/User-Guide-2570794-Page-10.png)