Chungear Co CE10309 Ceiling Fan Remote Controller (Transmitter) User Manual Manual
Chungear Industrial Co Ltd Ceiling Fan Remote Controller (Transmitter) Manual
Manual
1. User Manual
INSTALLATION INSTRUCTIONS
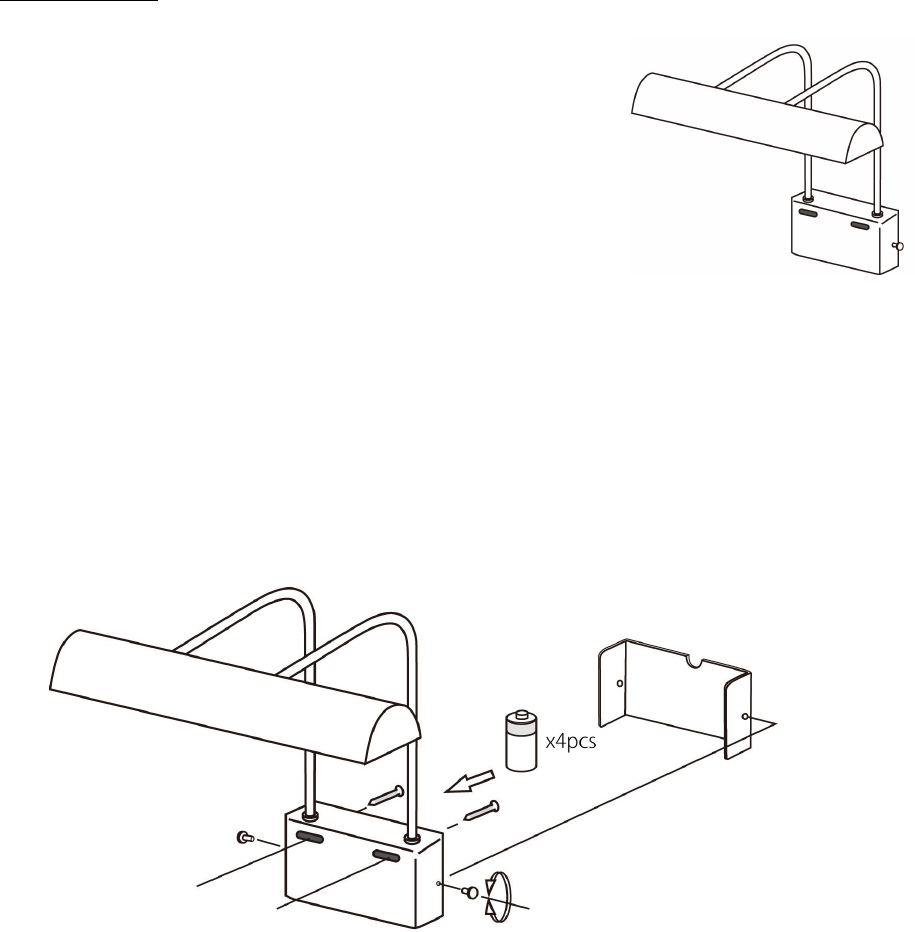
14” LED Classic Picture Light (BAL14) Battery Operated w/Remote Control
ASSEMBLY STEP
STEP1:
1. First, release 2 screws on the both sides from wall mount
and remove the wall mount cover.
2. Drill 2 pilot holes in an appropriate location on the back
of picture frame. Fasten the wall mount with 2 screws
(included) in the pre-drilled holes on the back of picture frame.
Tighten slightly until scure, but do not tighten all the way.
NOTE: Please make sure to be light cover parallel with picture
frame, which will have a perfect performance.
3. Place 4 units of C-cell into the wall mount, and follow the instruction shown on the wall
mount cover.
CAUTION: Be cautious of what the anode and cathode are placed, as it may cause the damage.
4. Finally, place the wall mount cover into the wall mount, then tighten 2 screws onto the two
sides.
CAUTION: Do not press the wire and remote control receiver. Otherwise, it may cause to be
worse performance.
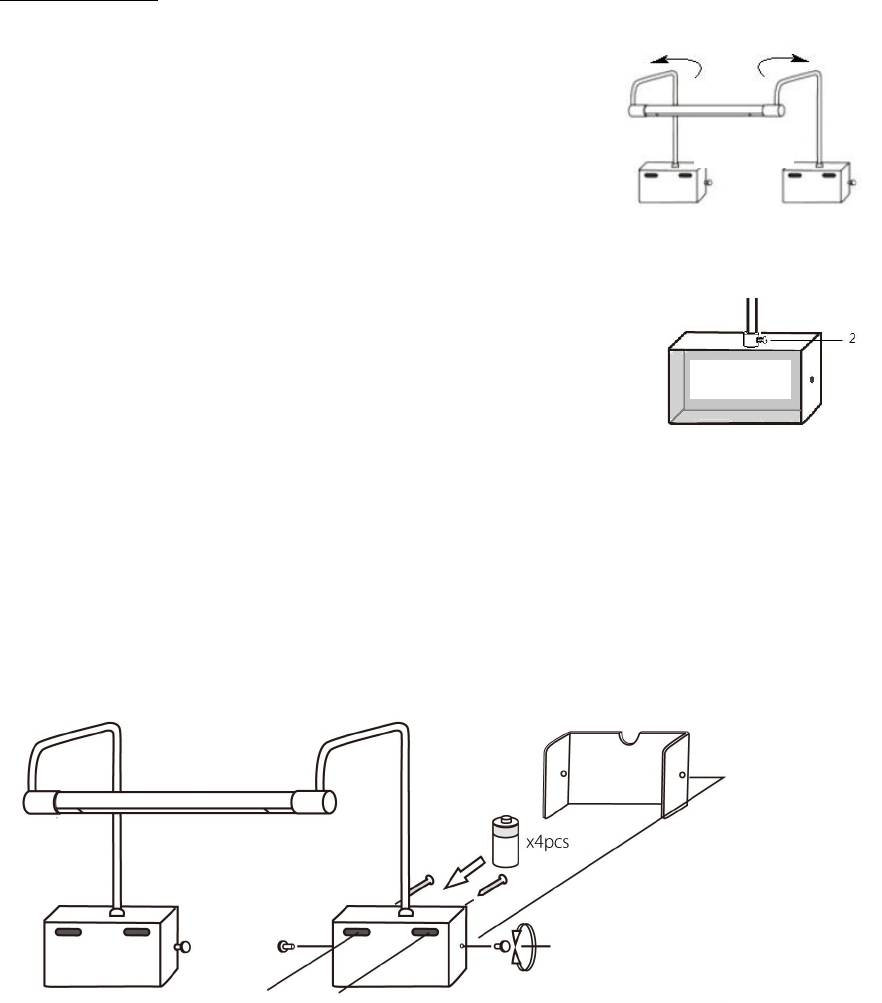
Tru-Slim LED Picture Light (BSL series) Battery Operated w/Remote Control
ASSEMBLY STEP
STEP1:
1. Rotate both bending necks to outside, and the necks
and the light cover have to be 90 degree.
STEP2:
1. Release 2 screws on the both sides from wall mount
and remove the wall mount cover.
2. Drill 4 pilot holes in an appropriate location where you
want to mount it on the wall or back of picture frame.
Both wall mounts have to be aligned, then tighten each
screw under each bending neck to fasten both wall mounts.
3. Place 4 units of C-cell into both wall mount separately,
and follow the instruction shown on the wall mount cover.
CAUTION: Be cautious of what the anode and cathode
are placed, as it may cause the damage.
4. Finally, place the wall mount cover into the wall mount, then tighten 2 screws onto the two
sides.
CAUTION: Do not press the wire and remote control receiver. Otherwise, it may cause to be
worse performance.
STEP1
STEP2
STEP 2
REVERSE SIDE
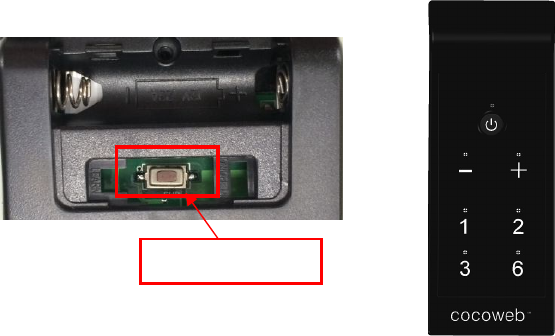
Learning Button
LEARNING PROCESS
1.Your remote control is ready for use after battery installation.
LEARNING PROCESS:
The Hand Held Remote Control System is equipped with a ID code which has code combination
to prevent potential interference from other remote units.
1. Within 30 seconds of installing the battery of the picture light, press and hold the leaning button
for over 5 seconds. Once the picture light has learned the ID code, the light will be ON-> OFF->
ON-> OFF-> ON. This will indicate the picture light has learned the ID code that was previously
selected on the transmitter.
FUNCTIONS OF TRANSMITTER
ON/OFF: Turn on/off the picture light. (POWER)
Reduce luminance: pressed and hold to dim luminance from 100% to 10% to desired level and
release. (-)
Increase luminance: pressed and hold to brighten luminance from 10% to 100% to desired level
and release. (+)
One hour timer: Turn off the picture light after one hour automatically. (1)
Two hour timer: Turn off the picture light after two hour automatically. (2)
Three hour timer: Turn off the picture light after three hour automatically. (3)
Six hour timer: Turn off the picture light after six hour automatically. (6)
Learning button: The picture lihgt need to be learned the ID code before operating for preventing
potential interference from other remote units.
CAUTION:
To assure continued FCC compliance:
FCC ID:KUJCE10309
This device complies with Part 15 of the FCC Rules. Operation is subject to the
following two conditions: (1) This device may not cause harmful interference, and (2)
this device must accept any interference received, including interference that may cause
undesired operation.
Any changes or modifications not expressly approved by the grantee of this device
could void the user's authority to operate the equipment.