Chungear Co CE10717 Ceiling Fan Remote Controller User Manual Rev02 0914
Chungear Industrial Co Ltd Ceiling Fan Remote Controller Rev02 0914
User Manual Rev02-0914
Model # TR205D + JY1126B(with Bluetooth Low Energy)
DC POWER CEILING FAN REMOTE CONTROL MANUAL
□INSTALLATION INSTRUCTIONS
NOTE: This unit is to be used for the control of DC power ceiling fan and in an
AC120V 60Hz power supply only. Output Power: 40W (Max.) for motor and
40W (Max.) for light.
Important: Using a full range dimmer switch (not included) to control fan
speed will damage the fan. To reduce the risk of fire or electrical shock, do not
use a full range dimmer switch to control fan speed.
1. Switch power off at fuse box or circuit breaker before you begin installing the fan.
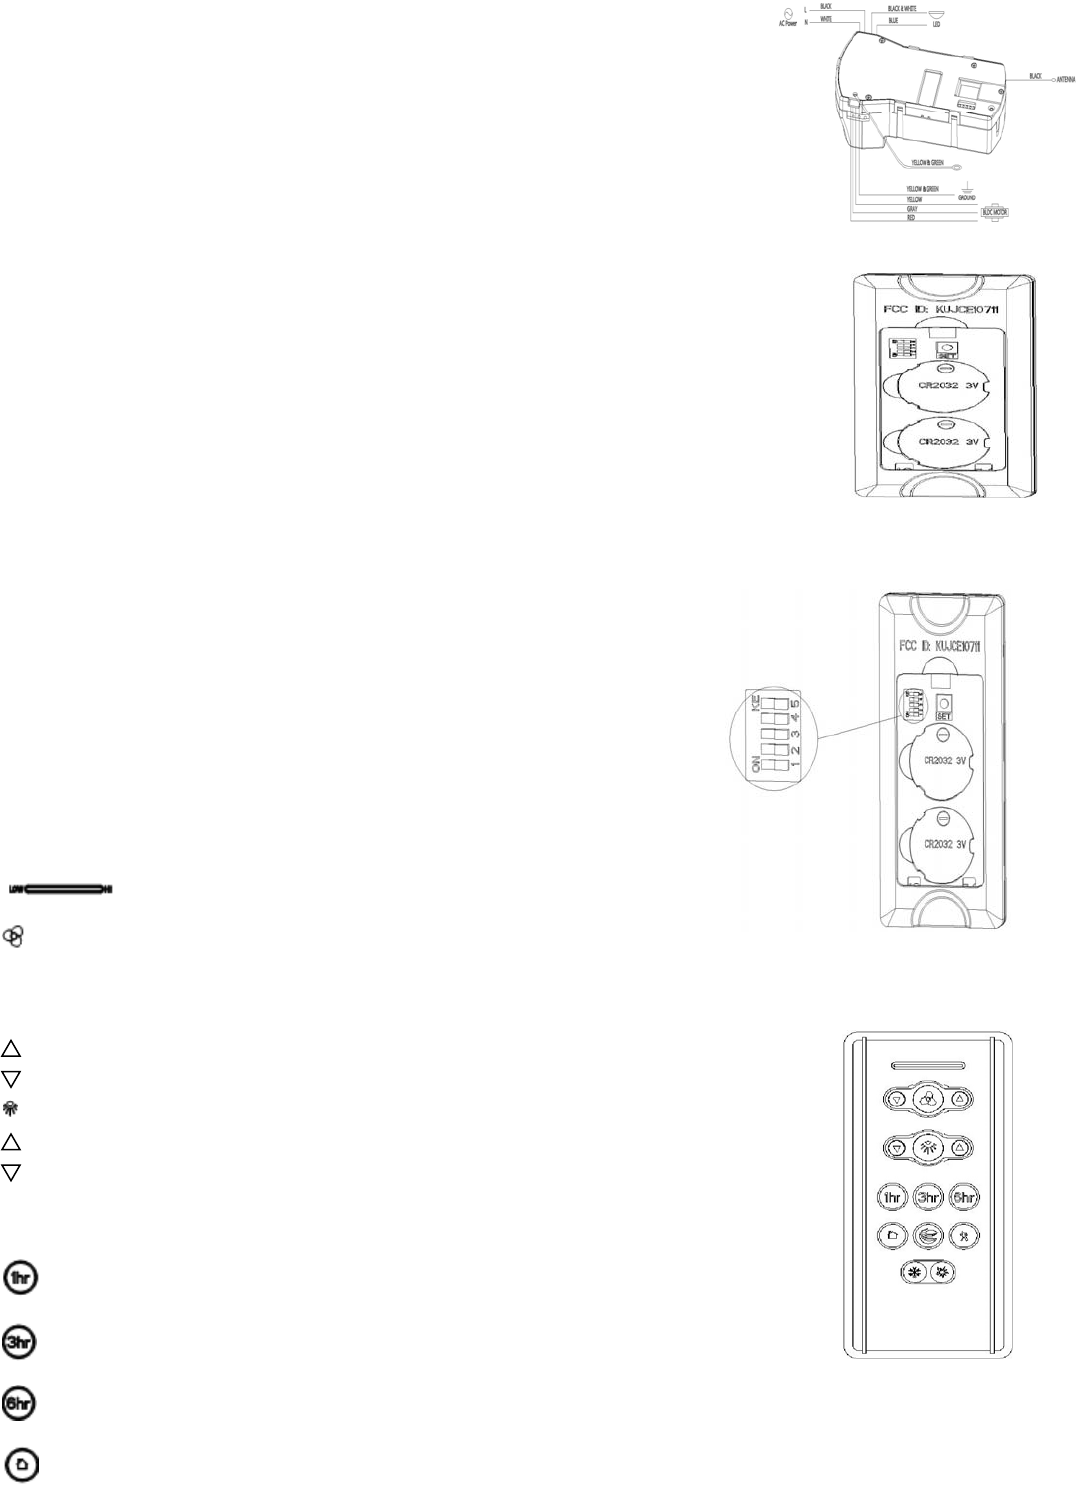
2. Make wiring connections as indicated Fig. 1.
3. Please do not remove the ferrite core on the motor wires.
4. Launch distance for remote control: about 10m.
5. The remote code setting process:
Step: 1 Open the remote battery cover and install 3V,CR2032, 2pcs Lithium batteries, with the
fan power off. (Fig. 2)
Step: 2. Within 30 seconds of restring power to the fan, you must use a ball pen or tool to press
“SET” button about 5 seconds, (Fig. 3). Once the receiver has detected the frequency, the
receiver will make sound, Bi Bi, twice and light flicker twice and turn off. This will indicate the receiver has
learned the frequency that was previously selected on the transmitter.
Note: After the AC power is on, do not press any other button on the transmitter
before setting learning. Doing so will cause the procedure to fail.
After completing the steps above, you should be able to operate the ceiling fan
and light. If the fan is not responding to the transmitter, please turn the power off
to the receiver. And repeat step 2.
□Before installation SELECT SWITCH (Fig. 3)
The same settings as the 5-digit receiver and emitter DIP switch. (Fig. 3)
□FUCNCTIONS OF REMOTE CONTROL: (Fig. 4)
Indicator LED light: fan speed or light dimmer indicator
button: Tape once turn off the fan. Press and hold this button for 5
seconds to turn on or turn off the buzzer.
Fan speed:
Turn on the fan and turn speed up.
Turn on the fan and turn speed down.
Light button: Turn on or off the light.
Increase light output level.
Decrease light output level.
(Tungsten only and light function select switch on dimmer position.)
Sleep Timer:
:The fan and light will turn off after 1 hour automatically.
:The fan and light will turn off after 3 hours automatically.
:The fan and light will turn off after 6 hours automatically.
Home Shield: Tap this button, the light will blink twice that mean the function setting completed, the fan
will turn off and the light will randomly turn on and off while you are away, press any buttons cancel the
Fig. 1
Fig. 2
Fig. 3
Fig. 4
function.
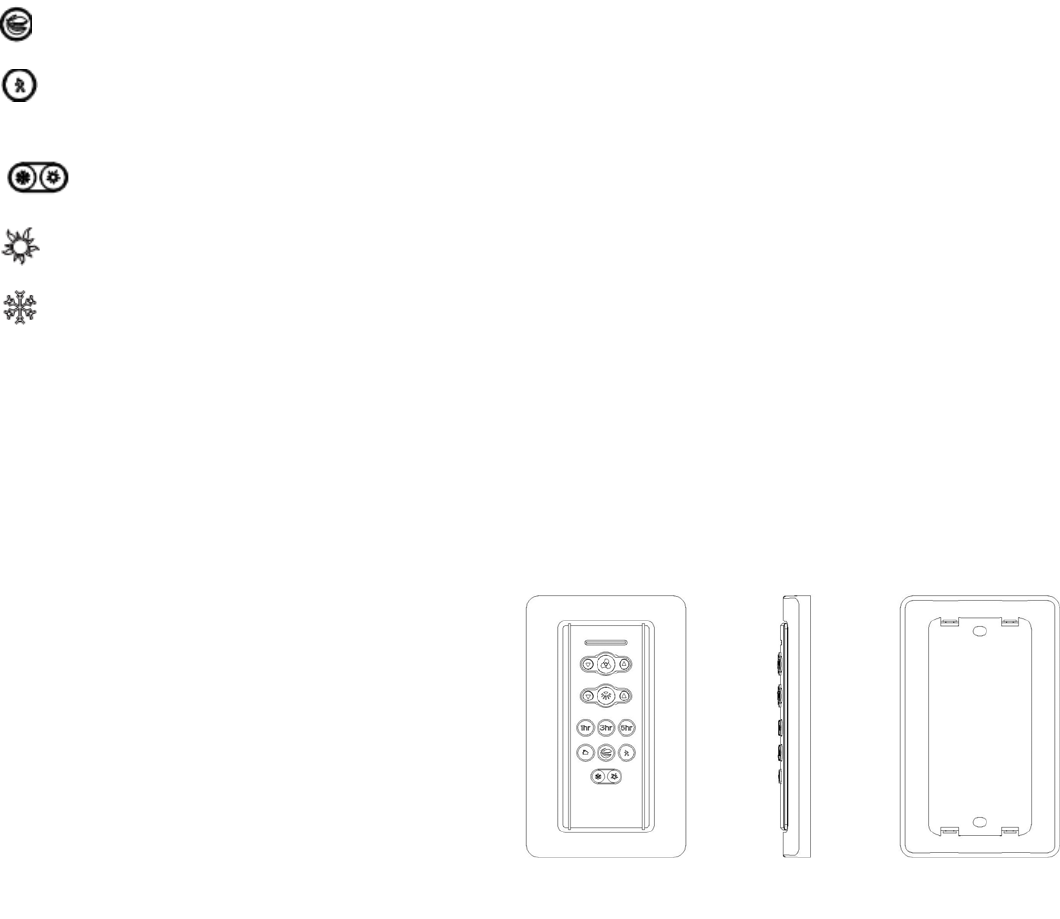
Natural breeze: Fan speed will modulate to simulate a natural breeze.
Walk Away Light Delay: Tap once, the light will blink once that mean the function setting completed
and fan and light will turn off after 1 minute automatically. Press any buttons cancel the function.
Reverse button:
Summer: The fan runs counterclockwise. Airflow will provide a downward cooling breeze.
Winter: The fan runs clockwise. Airflow will force warm air downward without a noticeable breeze.
□MOBILE DEVICE APP:
1. Follow the instructions on the website to download the app from the App Store or Google Play.
2. Open the app, it will show all the devices around you. (Please make sure the device near from you)
3. Select one of your device to connect.
4. Operating your remote control, same as your handheld remote.
□INSTALLING WALL PLATE
Attach wall plate using the two provided screws. (Fig. 5)
□To assure continued FCC compliance:
FEDERAL COMMUNICATIONS COMMISSION INTERFERENCE STATEMENT
This equipment has been tested and found to comply with the limits for a Class B digital device, pursuant to Part
15 of the FCC Rules. These limits are designed to provide reasonable protection against harmful interference in
a residential installation. This equipment generates uses and can radiate radio frequency energy and, if not
installed and used in accordance with the instructions, may cause harmful interference to radio communications.
However, there is no guarantee that interference will not occur in a particular installation. If this equipment does
cause harmful interference to radio or television reception, which can be determined by turning the equipment off
and on, the user is encouraged to try to correct the interference by one or more of the following measures:
--Reorient or relocate the receiving antenna. --Increase the separation between the equipment and receiver.
--Connect the equipment into an outlet on a circuit different from that to which the receiver is connected.
--Consult the dealer or an experienced radio/TV technician for help.
CAUTION:
Any changes or modifications not expressly approved by the grantee of this device could void the user's authority
to operate the equipment.
FCC ID:KUJCE10717
This device complies with Part 15 of the FCC Rules. Operation is subject to the following two conditions: (1) This
device may not cause harmful interference, and (2) this device must accept any interference received, including
interference that may cause undesired operation.
Fig. 5