Cidco Communications CL915 900MHz Digital Cordless Telephone User Manual
Cidco Communications Corporation 900MHz Digital Cordless Telephone
User Manual

&/
2ZQHU·V0DQXDO
&RUGOHVV7HOHSKRQH
&DOOHU,'&DOO:DLWLQJ,'
CL915.book Page 1 Friday, May 4, 2001 11:35 AM

Copyright © 2001 by CIDCO Communications, LLC. All rights
reserved.
CL915 105292-01 Rev. A
No part of this publication may be reproduced, copied, transcribed, stored in a retrieval
system, or translated into any language in any form, by any means, without the prior
written permission of CIDCO Communications,LLC.
CL915.book Page 2 Friday, May 4, 2001 11:35 AM

iii
❏ IMPORTANT SAFETY INSTRUCTIONS 1
Telephone Wiring and Jack Installation........................................................................ 2
Batteries.................................................................................................................................... 3
FCC Requirements................................................................................................................ 4
Warranty................................................................................................................................... 5
❏ INSTALLATION 6
Selecting a Location............................................................................................................. 6
Wall Mounting ....................................................................................................................... 7
Battery Installation ............................................................................................................... 8
Ringer Setting......................................................................................................................... 8
Headset..................................................................................................................................... 9
Belt Clip..................................................................................................................................... 9
❏ FEATURES AND CONTROLS 10
Base......................................................................................................................................... 10
Handset ................................................................................................................................. 10
Location of Controls and Features............................................................................... 11
Programmable Phone Features.................................................................................... 13
Programming the Phone’s Features ........................................................................... 14
Programming the Speed Dial Directory .................................................................... 16
Caller ID and Call Waiting ID .......................................................................................... 17
Programming Voice Mail................................................................................................. 18
Using Network Services................................................................................................... 18
New Call Light ..................................................................................................................... 19
Using a Headset.................................................................................................................. 19
Locating a Lost Handset.................................................................................................. 19
Out-of-Range Warning..................................................................................................... 20
Channel Changing............................................................................................................. 20
❏ BASIC OPERATION 21
Making a Call ....................................................................................................................... 21
Using Redial ......................................................................................................................... 21
Using 3-Way/Flash............................................................................................................. 21
Using Tone Services on a Pulse Line ........................................................................... 22
Speed Dial Directory ......................................................................................................... 22
❏ CALLER ID OPERATION 23
Viewing the Caller ID List ................................................................................................ 23
Returning a call from the Caller ID records............................................................... 24
Storing Caller ID Records in the Speed Dial Directory.......................................... 24
Deleting Caller ID Records.............................................................................................. 25
Caller ID with Call Waiting Service............................................................................... 25
Caller ID Displays................................................................................................................ 26
❏ TROUBLESHOOTING 28
❏ CARE AND MAINTENANCE 30
Replacing the Battery Pack............................................................................................. 31
Lightning............................................................................................................................... 31
TABLE OF CONTENTS
CL915.book Page iii Friday, May 4, 2001 11:35 AM

IMPORTANT SAFETY INSTRUCTIONS
1
IMPORTANT SAFETY INSTRUCTIONS
❑Read and understand all instructions.
❑Follow all warnings and instructions marked on the phone.
❑Use only the battery type recommended in this manual.
❑Unplug this telephone from the wall outlet before cleaning. Do not
use liquid or aerosol cleaners, just use a damp cloth for cleaning.
❑Do not use this telephone near water. For example, do not use near
a bathtub, washbowl, kitchen sink, laundry tub, in a wet basement,
or near a swimming pool.
❑Do not place this telephone on an unstable cart, stand, or table. It
could fall, causing serious damage or impeding operation.
❑Never place this telephone near or over a radiator or heat register.
❑Only operate this telephone using the type of power source listed on
the marking label. If you are not sure of the power supply of your
home, consult your dealer or local power company.
❑Do not overload wall outlets and extension cords as this can result
in the risk of fire or electrical shock.
❑Never push objects of any kind into this telephone as they can touch
dangerous voltage points or short out parts that could result in a
risk of fire or electrical shock.
❑Take the phone to a qualified technician when it requires repair work
or service. To reduce the risk of electrical shock, do not
disassemble the telephone. Opening or removing covers can expose
you to dangerous voltages or other risks. Incorrect re-assembly can
cause electrical shock during subsequent use.
❑Unplug this telephone from the wall outlet and refer servicing to
qualified service personnel under the following conditions:
■If the power supply cord or plug is damaged or frayed.
■If liquid is spilled into the unit.
■If the unit is exposed to water.
■If the unit does not operate normally by following the operating
instructions.
■If the unit is dropped or the casing is damaged.
■If the unit exhibits a distinct change in performance.
❑Avoid using the telephone during an electrical storm. There can be
a slight risk of electrical shock from lightning.
❑Do not use the telephone to report a gas leak if the leak is in the
SAVE THESE INSTRUCTIONS
vicinity of the phone.
IMPORTANT SAFETY INSTRUCTIONS
CL915.book Page 1 Friday, May 4, 2001 11:35 AM
2
WARNING
Warning: To prevent fire or shock hazard, do not
expose this product to rain or moisture.
!CAUTION
CAUTION: TO REDUCE THE RISK OF ELECTRIC SHOCK, DO NOT
REMOVE COVER OR BACK. NO USER-SERVICEABLE PARTS INSIDE.
REFER SERVICING TO QUALIFIED PERSONNEL.
This symbol is intended to alert you to the presence of uninsu-
lated dangerous voltage within the product’s enclosure that
might be of sufficient magnitude to constitute a risk of electric
shock. Do not open the product’s case.
This symbol is intended to inform you that important operating
and maintenance instructions are included in the literature ac-
companying this product.
Important: Cordless phones generally require AC power to operate. You
should also have a corded phone that does not require AC power to operate
so you can still make and receive calls if there is an AC power failure.
!CAUTION
Changes or modification to this device not expressly approved by
CIDCO Communications could void the user’s authority to operate this
equipment.
TELEPHONE WIRING AND JACK INSTALLATION
❑Use caution when installing or modifying telephone lines.
❑Never install telephone wiring during an electrical storm.
❑Never install telephone jacks in wet locations unless the jack is
specifically designed for wet locations.
!
CL915.book Page 2 Friday, May 4, 2001 11:35 AM
IMPORTANT SAFETY INSTRUCTIONS
3
BATTERIES
❑Disconnect the telephone when replacing the battery pack.
❑Use only 3.6V 600mAh Nickel Cadmium (Ni-Cd) cordless telephone
replacement battery pack (one included with phone).
❑Do not dispose of the battery pack in a fire as it will explode. Check
with local codes for proper battery disposal regulations.
❑Do not open or mutilate the battery pack. Released electrolyte is
corrosive and can cause damage to the eyes or skin. It can be toxic,
if swallowed.
❑Avoid contact with rings, bracelets, keys or other metal objects,
when handling batteries. These objects could short out the battery
or cause the conductor to overheat resulting in burns.
❑Do not attempt to recharge the battery pack by heating it. Sudden
release of battery electrolyte can cause burns or irritation to the
eyes or skin.
❑Remove the battery pack if you do not plan to use the phone for
several months at a time. The batteries could leak over that time.
❑Discard “dead” battery packs as soon as possible because they are
likely to leak into the phone.
❑Do not store this phone or battery pack in a high temperature area.
Batteries stored in a freezer or refrigerator should be protected
from condensation during storage and defrosting. Battery packs
should be stabilized at room temperature before using.
❑Your battery pack is rechargeable and can be
recycled once it outlives its usefulness. Depending upon
your local and state law, it might be illegal to dispose of
this battery into a municipal waste system. Check with
your local solid waste company or call 1-800-8-BATTERY
for information on Ni-Cd battery recycling and
disposal/restrictions in your area.
CL915.book Page 3 Friday, May 4, 2001 11:35 AM

4
FCC REQUIREMENTS
This product complies with Part 68 of FCC rules. The Federal Communi-
cations Commission (FCC) has established these rules that permit this
device to be directly connected to the telephone network. Standardized
jacks are used for these connections. This equipment should not be used
on party lines or coin phones.
If this device is malfunctioning, it might also be harmful to the telephone
network; disconnect the unit until the source of the problem is deter-
mined and the device is repaired.
If the telephone company requests information on what equipment is con-
nected to their lines, inform them of:
1. The telephone number to which this device is connected.
2. The FCC registration number and ringer equivalence number (REN)
found on the bottom of the unit.
The FCC requires that you connect your device to the telephone network
through a modular telephone outlet or jack. The appropriate outlet or jack
is a USOC RJ-11C, RJ-14C, RJ-11W, or RJ-14W.
A label on the base of this equipment contains information about the FCC
registration number and the Ringer Equivalence Number (REN). The REN
determines the number of communication devices that can be connected
to your telephone line. In most areas, the sum of RENs should not exceed
5 devices.
3. If too many devices are attached, they might not ring properly.
If you are using a cordless telephone product, some frequencies might
cause interference to nearby TVs and VCRs. To minimize this type of
interference, do not place the cordless base on or near a TV or VCR. If
you continue to experience interference, move the base further away
from the TV or VCR.
This equipment cannot be used on public coin telephone lines. Connection
to party line service is subject to state tariffs.
This product is hearing aid compatible.
CL915.book Page 4 Friday, May 4, 2001 11:35 AM

IMPORTANT SAFETY INSTRUCTIONS
5
WARRANTY
If your telephone is defective in material or workmanship and you return
it within one year from the date of purchase, we will repair it, or, at our
option, we will replace it. If we repair it, we might use reconditioned
replacement parts or materials. If we choose to replace it, we might
substitute an identical reconditioned unit. The repaired/replaced unit is
warranted for either (a) ninety days, or (b) the remainder of your phone’s
original one year warranty, whichever is longer.
A. WHAT YOU NEED TO DO
To receive warranty service, you must provide proof of purchase (your
sales receipt) and date of purchase.
B. WHAT THIS WARRANTY DOES NOT COVER
This warranty does not cover defects resulting from accidents,
alterations, failure to follow this manual’s instructions, battery leakage,
misuse, fire, flood, and Acts of God.
We do not warrant this product to be compatible with party lines, with
all types of telephone equipment, or with your specific customer
premises equipment. Shipping costs to and from authorized service
centers are not covered.
We are not responsible for implied warranties, including those of fitness
for a particular purpose and merchantability after the initial one year
period. We do not pay for loss of time, inconvenience, loss of use of the
product, or property damage caused by this product or its failure to
work, telephone company service calls, or any other incidental or
consequential damages.
C. STATE LAW RIGHTS
Some states do not allow limitations on how long an implied warranty
lasts, or the exclusion of limitation of incidental or consequential
damages, so the above exclusions might not apply to you. This warranty
gives you specific rights; you may also have other rights, which can vary
from state to state.
CL915.book Page 5 Friday, May 4, 2001 11:35 AM
6
INSTALLATION
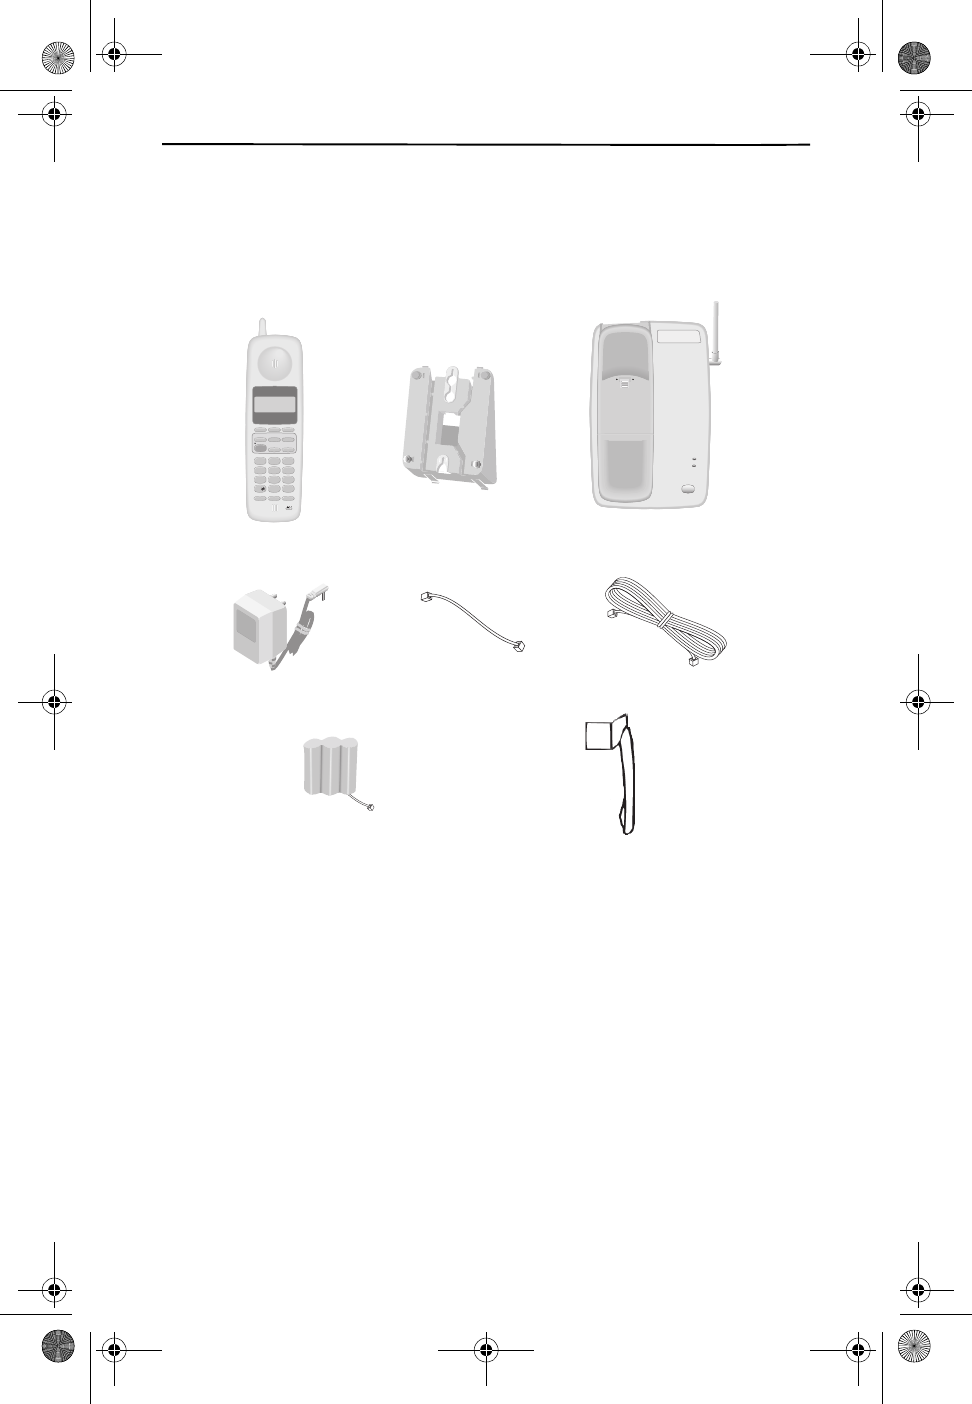
In addition to your User’s Manual and Quick Start Card you should find
the following items for installation:
SELECTING A LOCATION
You can place the phone on a desktop or table, or mount it on a standard
wall plate.
Select a location that is:
■Near an AC outlet
■Near a telephone line jack
■Out-of-the-way of normal activities
■Away from TVs, VCRs, LANs (used for DSL networking within the
home), other electronic equipment, electrical machinery, electrical
appliances, metal walls or filing cabinets, wireless intercoms,
alarms, and room monitors
The base's location affects the phone's range. If you have a choice of sev-
eral locations, try each to see which provides the best performance.
12
ABC
3
DEF
4
GHI
5
JKL
6
MNO
7
PQRS
8
0
TUV
9
WXYZ
OPER
#
3-WAY/FLASH DIRECTORY REDIAL/PAUSE
DELETE REVIEW/VOLUME
VOICE MAIL CALLER ID
SET UP/HOLD
NETWORK
SERVICES
CHANNEL
TALK
9:18 10/16 18
AM
IN USE 1 2
PM
LASTNAME FIRST
408 - 555-1212
DIR
RING • OFF ON
̈
̈
IN USE
CHARGE
PAGE
Handset
Base
Short Line Cord
Desk
Mount
Long Line Cord
AC Power Adapter
Belt Clip
Ni-Cd Battery Pack
CL915.book Page 6 Friday, May 4, 2001 11:35 AM

INSTALLATION
7
Caution: You must use a Class 2 power adapter that supplies
9 Volts DC and delivers at least 300 mA. Its center tip must
be set to positive and its plug must fit the phone’s DC 9V jack.
The supplied adapter meets these specifications. Using an
adapter that does not meet these specifications could damage
the phone or the adapter.
NOTE
For the longest battery life it is important that you follow
the instructions below:
■Before connecting the telephone line cord, plug the AC adapter
into the wall socket and the phone.
■Charge the battery pack for at least 12 hours.
■After charging the phone, connect the telephone line cord and
use the phone as described in this manual.
WALL MOUNTING
Your new CL915 telephone may be installed on the studs of a standard
wall phone plate or on to two screws (not included) fastened into the wall.
When installing screws into plasterboard walls, use wall anchors (not in-
cluded) to insure that the screws remain secure. Insert the screws into
the wall leaving 3/16” of each screw extending out from the wall.
Mounting the Base on a Wall Plate
1. Remove the handset from the base.
2. Turn the base over so the underside of the base faces you.
3. Place the pedestal in the wall mount position and slide into place.
■If mounting over a telephone wall jack, plug the supplied short
telephone cord into the jack labeled TEL LINE on the telephone.
Thread the line cord through the slot on the back of the phone
and plug the other end of the cord into the wall jack.
■If wall mounting with screws, plug the supplied long telephone
line cord into the jack labeled TEL LINE on the telephone and
plug the other end of the cord into the wall jack.
4. Insert the AC adapter into the 9V DC jack on the bottom of the base.
5. Slip the telephone base onto the wall, lining up the wall mounting
holes over the wall plate posts or screws. Slide the telephone base
down so it is firmly in place.
6. Return the handset to the telephone base.
7. Plug the other end of the AC adapter into the AC outlet.
!
CL915.book Page 7 Friday, May 4, 2001 11:35 AM

8
BATTERY INSTALLATION
1. Slide open the battery compartment door on the back of the
handset.
2. Securely plug in the wire and then lay the battery pack into the
battery compartment.
3. Close the battery compartment door.
4. Place the handset on the base unit cradle.
NOTE
Once you have installed the battery pack and placed the
handset on the base, you will hear a tone indicating the
handset has connected with the base and will charge
successfully. In addition, the charge LED on the base
illuminates when the handset is properly making contact
with the charge terminals.
WHEN THE BATTERY NEEDS CHARGING
■The phone will beep.
■The display will show BATTERY LOW.
WHEN TO PURCHASE A NEW BATTERY PACK
■If the battery lasts only a few minutes even after a full charge,
the usable life of the battery has expired and it needs to be
replaced.
RINGER SETTING
1. To set the ringer level to high or low on the handset, press
̄REVIEW/VOLUME ̆ when the handset is idle.
2. To turn the handset ringer ON or OFF, set the RINGER switch located
on the handset to the desired position.
Ringer tones can be programmed on the handset when you are program-
ming setup functions.
CL915.book Page 8 Friday, May 4, 2001 11:35 AM

INSTALLATION
9
HEADSET
The headset jack is located on the side of the handset and is a standard
2.5mm plug. Simply plug the headset into the jack and the headset will
be active.
NOTE
When the headset is plugged into the telephone, the
microphone and earpiece on the handset are not active.
BELT CLIP
You can use the belt clip to hang the handset from your belt.
1. Place the belt clip on the back of the handset.
2. Align the tabs on the belt clip with the slots on the handset.
3. Press the belt clip to the handset to snap the tabs into the slots.
4. Make sure both tabs are securely snapped into the handset slots.
CL915.book Page 9 Friday, May 4, 2001 11:35 AM
10
FEATURES AND CONTROLS
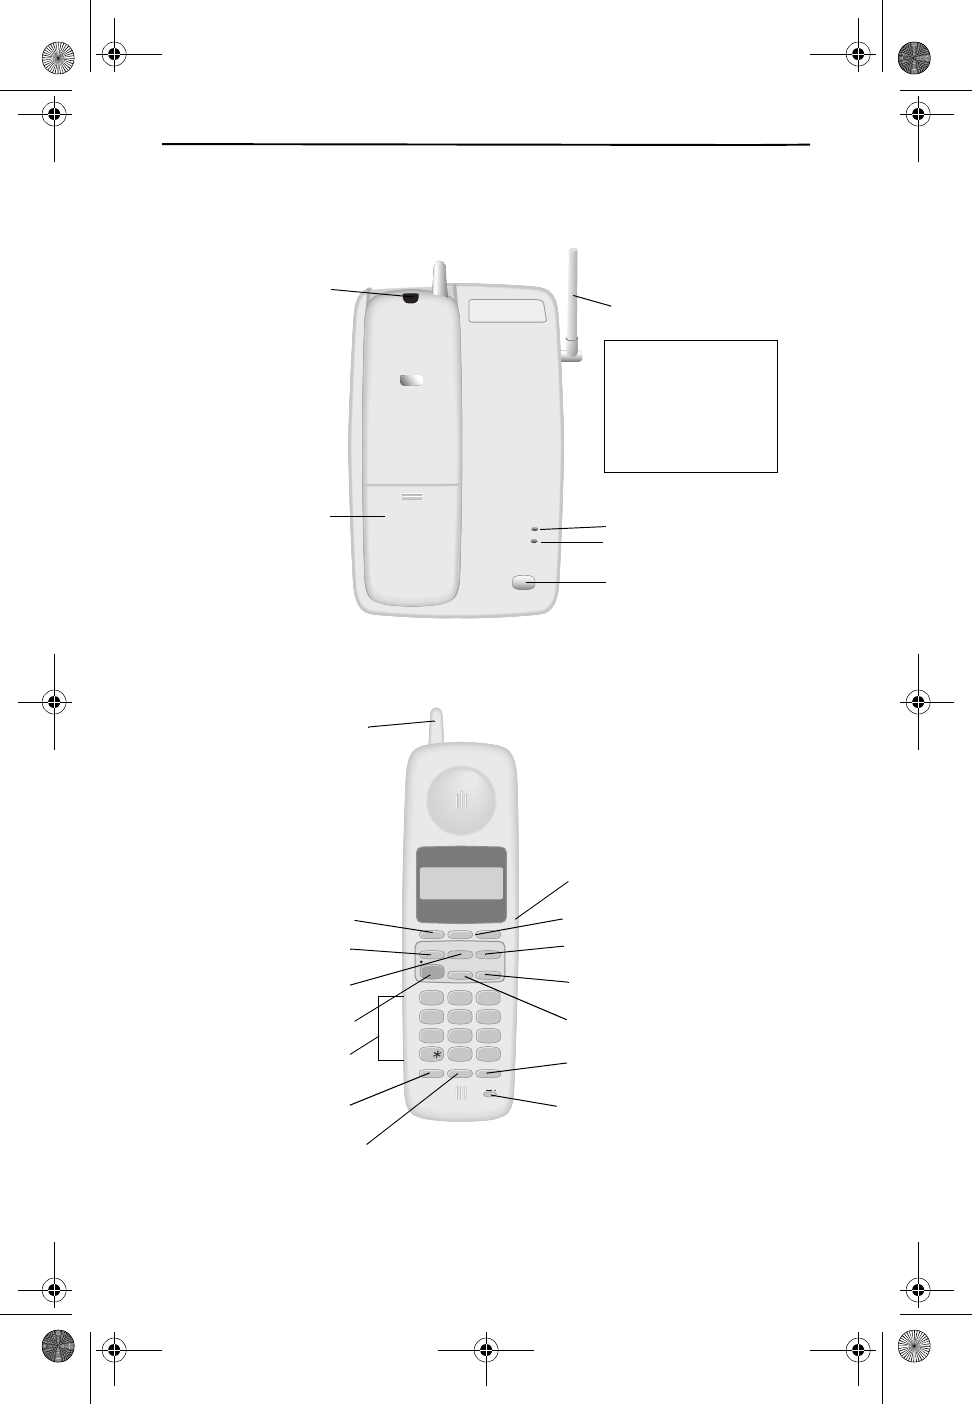
BASE
HANDSET
IN USE
CHARGE
PAG E
New Call/
Indicator Light
Phone In Use Light
Charge Light
Page
Note:
Handset may
be placed face
up or face down
Antenna
Battery Cover
Voice Mail
on the base.
12ABC 3DEF
4GHI 5JKL 6MNO
7PQRS 8
0
TUV 9WXYZ
OPER #
3-WAY/FLASH DIRECTORY REDIAL/PAUSE
DELETE REVIEW/VOLUME
VOICE MAIL CALLER ID
SET UP/HOLD
NETWORK
SERVICES
CHANNEL
TAL K
9:18 10/16 18
AM IN USE 1 2
PM
LASTNAME FIRST
408 - 555-1212
DIR
RING • OFF ON
̈
̈
Talk
Voice Mail
̄ Review/Volume ̆
Network Services
Caller ID
Setup/Hold
Channel
Dial Pad
3-Way/Flash
Directory
Headset Jack
Delete/Mute
Redial/Pause
Ringer
Antenna
CL915.book Page 10 Friday, May 4, 2001 11:35 AM

FEATURES AND CONTROLS
11
LOCATION OF CONTROLS AND FEATURES
❑Talk - The TALK key is used to access the telephone line.
❑Delete/Mute - The DELETE key is used to erase digits on the display.
It can also delete single or multiple entries from the Speed Dial and
Caller ID Directories. The DELETE key also works as a MUTE key
when pressed during a call.
❑Caller ID - The CALLER ID key is used to access Caller ID information
stored in memory.
❑Setup/Hold - The SETUP/HOLD key is used to place a call on hold.
This key is also used to access the programmable functions of your
phone.
❑Review/Volume - The ̄ REVIEW/VOLUME ̆ keys let you scroll
through menu options and adjust the ringer and handset volume.
❑Network Services - This key gives you access to services offered by
your local telephone company.
❑Voice Mail - The VOICE MAIL key provides one-button access to the
telephone company’s voice mail service. You must subscribe
through your local telephone company to have this service.
❑Dial Pad - Numeric keys are used in the conventional manner for
dialing.
❑3-Way/Flash - The 3-WAY/FLASH key is used to access telephone
company services, like call waiting.
❑Directory - Use the DIRECTORY key to program and retrieve the
numbers in the Speed Dial Directory.
❑Redial/Pause - By pressing the REDIAL/PAUSE key, your telephone
will automatically redial the last number dialed. REDIAL/PAUSE is
also used to program a measured pause into a dialing sequence
stored in a memory location.
❑Channel - The CHANNEL key, when pressed, will scan up to 15
channels and select the clearest one to provide the best possible
reception. You can use this key after dialing if you do not get a clear
line.
NOTE
If the handset is too far from the base, the channel might
not change. Move closer to the base and try again.
CL915.book Page 11 Friday, May 4, 2001 11:35 AM

12
❑Ringer Switch - The RINGER switch is used to turn the handset
ringer ON and OFF.
❑Headset Jack - The headset jack allows for the hands-free use of
your phone. You can use any standard headset with an 2.5mm
connector.
❑Page - Located on the base, this key is used to initiate a handset
page.
❑In Use LED - This light is located on the base. It will be on when the
handset is in use.
❑Charge LED - The handset can be placed in the cradle on the base
with the display up or down. The Charge LED on the base will be red
(ON) when the handset is in the cradle being charged and the
handset is making correct contact. If the light does not go on, move
the handset in the cradle until contact is made and the red Charge
light comes on.
CL915.book Page 12 Friday, May 4, 2001 11:35 AM

FEATURES AND CONTROLS
13
PROGRAMMABLE PHONE FEATURES
You can change the settings on the handset in the Setup mode. To pro-
gram the settings see Handset Settings on page 14. The settings that
can be changed are:
❑Language - Choose English or Spanish.
❑Voice Mail On/Off - Activates one-touch Voice Mail access.
❑Ringer Tone - Change the way the ringer sounds on the handset.
❑Dial Method - Choose Tone or Pulse depending on what service is
available in your area.
❑Time and Date Setting - Change the time and date.
❑Home Area Code - Set the home area code for Caller ID dial back.
TIP
If within your local area you are required to dial 10 digits (e.g. 555-
987-1234), to dial a local number you must first program the LOCAL
CALLING AREA code. In this case do not program anything into the
HOME AREA CODE setting when setting up Caller ID call back.
❑Local Area Codes - Set local area codes if you have 10-digit dialing
for Caller ID call back. You can set as many as 8 local area codes.
❑Call History - This setting allows you to select how you want your
call records saved. Your choices are: save all calls (ALL CALLS),
save unanswered calls (UNANS CALLS), or save no calls (NO CALLS).
❑Repeat Calls - When you receive more than one call from the same
phone number, you can select how those calls are shown in your
Call Records. Choose SEPARATE to store each call as a separate
entry. Choose COMBINED to store the repeat calls as one entry with
the notation RPT.
CL915.book Page 13 Friday, May 4, 2001 11:35 AM
14
PROGRAMMING THE PHONE’S FEATURES
Press and hold the SETUP/HOLD key until the phone displays ENGLISH. At
any time during programming you can quit and the settings that you have
already selected will be saved. Quit programming by pressing and holding
the SETUP/HOLD key or let the programming time out by not pressing any
key for 20 seconds.
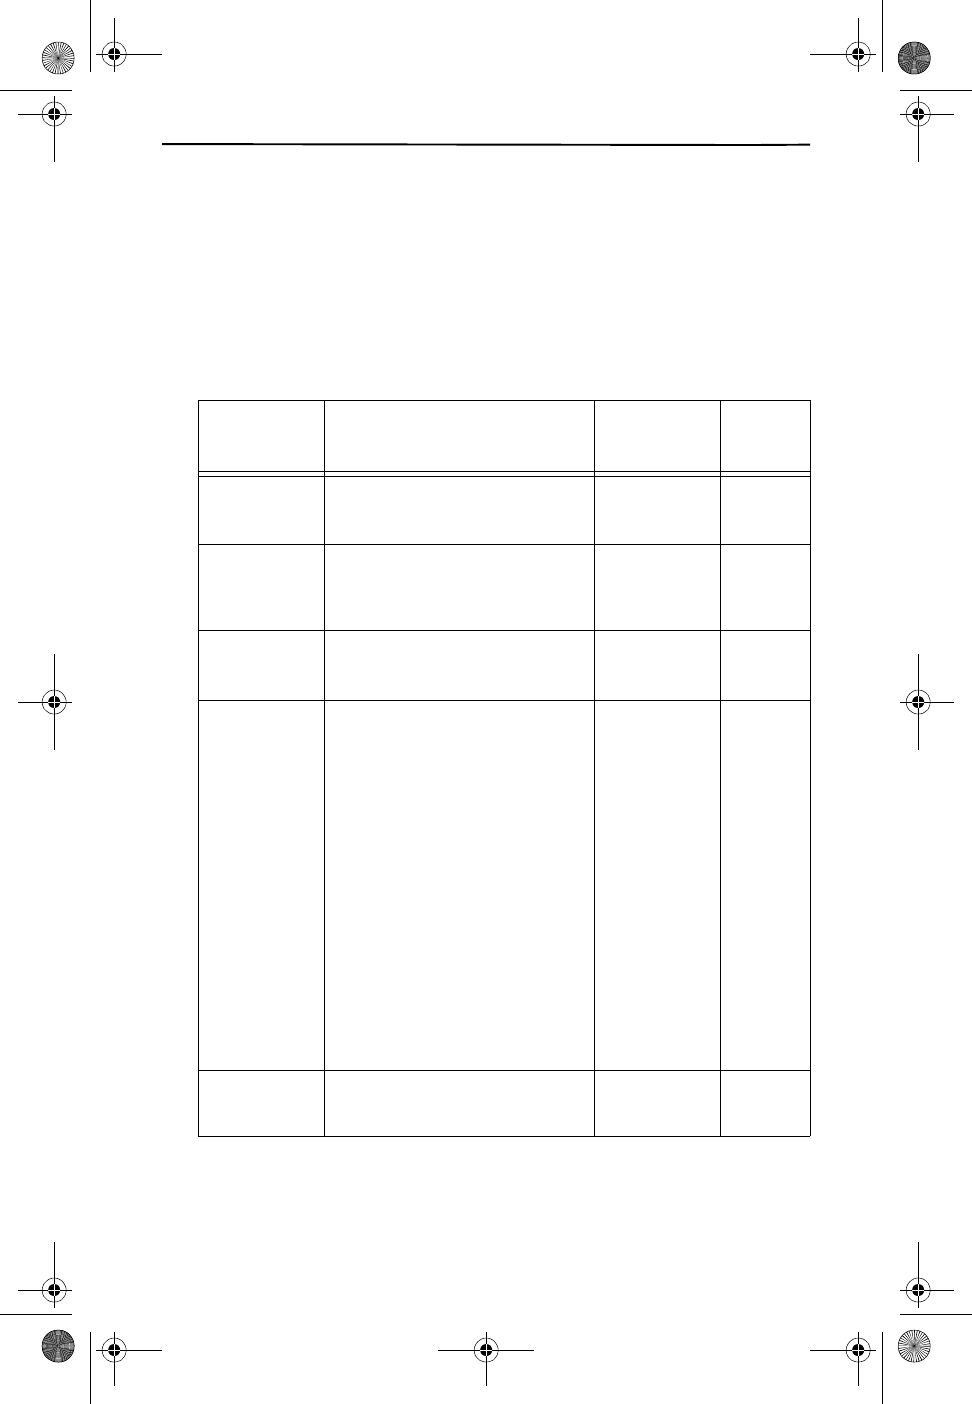
TABLE 1: HANDSET SETTINGS
DISPLAY
SHOWS
ENGLISH
TO CHANGE SETTING SETTINGS TO
SELECT
VOICE MAIL
ON/OFF
Push ̄̆ to change the setting. ON
OFF
Push
SETUP/
HOLD
RING TONE:A Push ̄̆ to change the setting.
Note: The ringer will ring each tone to
allow yo to choose the tone you prefer.
A, B, C, D, & E Push
SETUP/
HOLD
TONE DIAL Push ̄̆ to change the setting. TONE DIAL
PULSE DIAL
Push
SETUP/
HOLD
SET TIME? Use the number pad to change the date
and time.
1. Enter the date as month/day
(mm/dd). As you enter each
digit, the next digit space will
flash. Enter the month as two
digits and then enter the date
as two digits.
Example: Feb. 5 = 0 2 0 5
2. Next enter the time. Use mili-
tary time.
Example: 1:31 pm = 1 3 3 1
NOTE: If you have Caller ID, the
time will update automatically
and you do not need to change
the time setting.
Date and Time Push
SETUP/
HOLD
HOME AREA
CODE
Use the number pad to add or change
the home area code.
Home Area
Code
Push
SETUP/
HOLD
CL915.book Page 14 Friday, May 4, 2001 11:35 AM
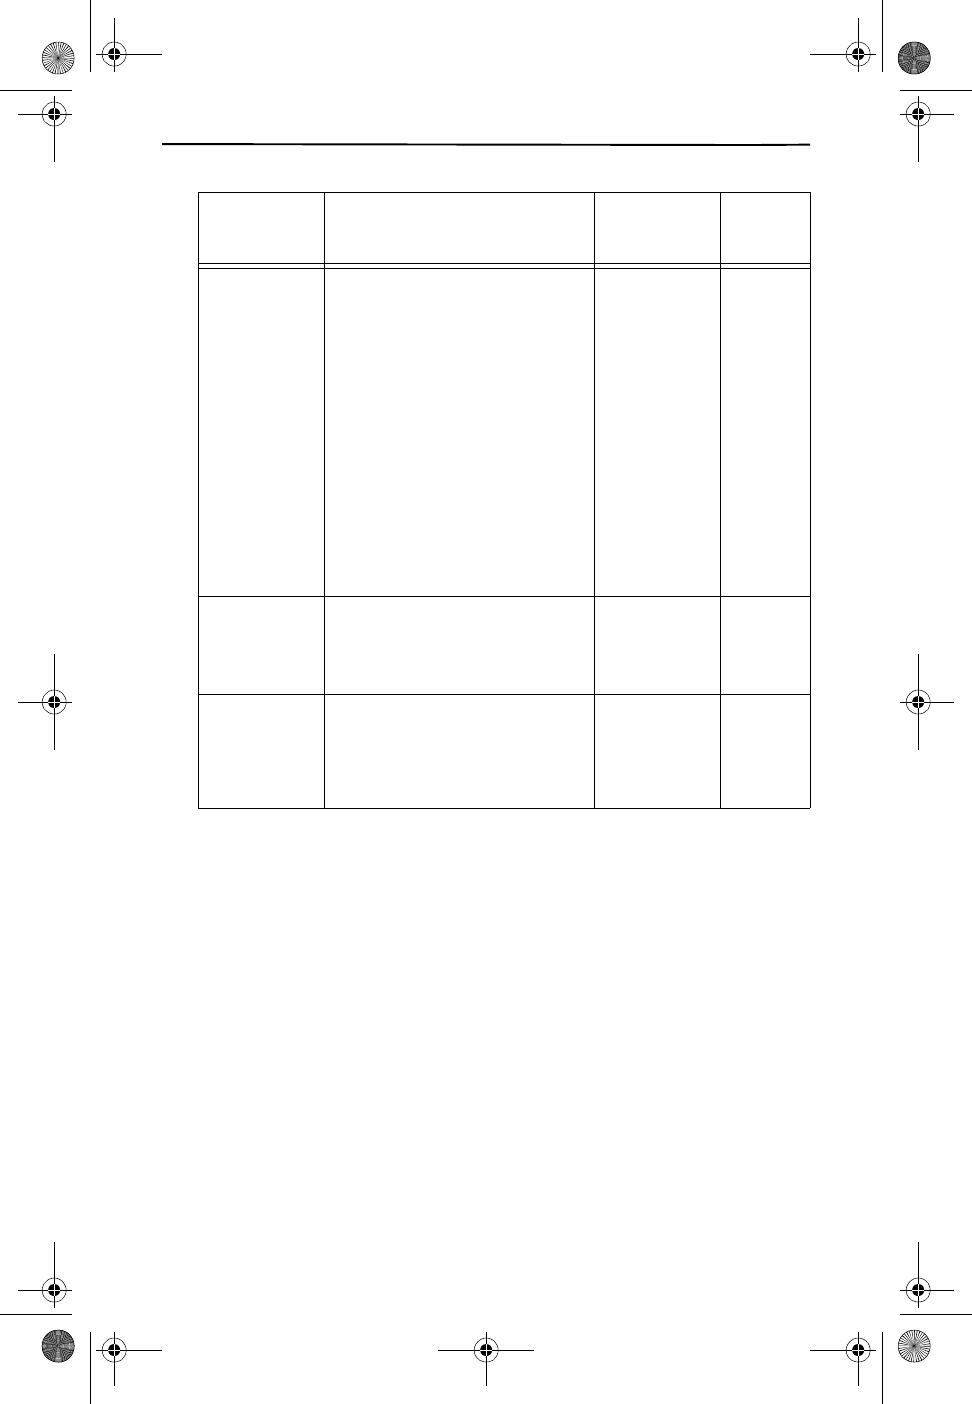
FEATURES AND CONTROLS
15
LOCL AREA
CODE
1ST LOCL
CODE
2ND LOCL
CODE
YOU CAN ADD
UP TO 8 TOTAL
LOCAL CODES
Use the ̄̆ key to go to the first local
area code and each subsequent local
area code (if applicable).
1. Use the number pad to add or
change the home area code.
2. Go to the next local area code
by pressing ̄̆.
3. Enter the local area code the
same as previously and con-
tinue entering up to 8 local
area codes.
NOTE: If you do not have 10-
digit dialing in your local area DO
NOT use this feature.
Local Area
Code
Push
SETUP/
HOLD
CALL HISTORY This setting allows you to choose which
call records you want displayed.
1. Press ̄̆ to change the set-
ting.
ALL CALLS
NO CALLS
UNANS CALLS
Push
SETUP/
HOLD
REPEAT
CALLS
This setting allows you to choose how
repeat calls will be displayed when you
review them.
1. Push ̄̆ to change the set-
ting.
SEPARATE
COMBINED
Push
SETUP/
HOLD
TABLE 1: HANDSET SETTINGS
DISPLAY
SHOWS
ENGLISH
TO CHANGE SETTING SETTINGS TO
SELECT
CL915.book Page 15 Friday, May 4, 2001 11:35 AM
16
PROGRAMMING THE SPEED DIAL DIRECTORY
Your new phone will store up to 20 Speed Dial numbers. Up to 10 can
be programmed for 1-touch dialing. To program your Speed Dial selec-
tions:
1. With the handset in the idle state, press DIRECTORY. DIRECTORY will
show on screen.
2. Dial the number you wish to store (up to 15 digits) and press the
DIRECTORY key.
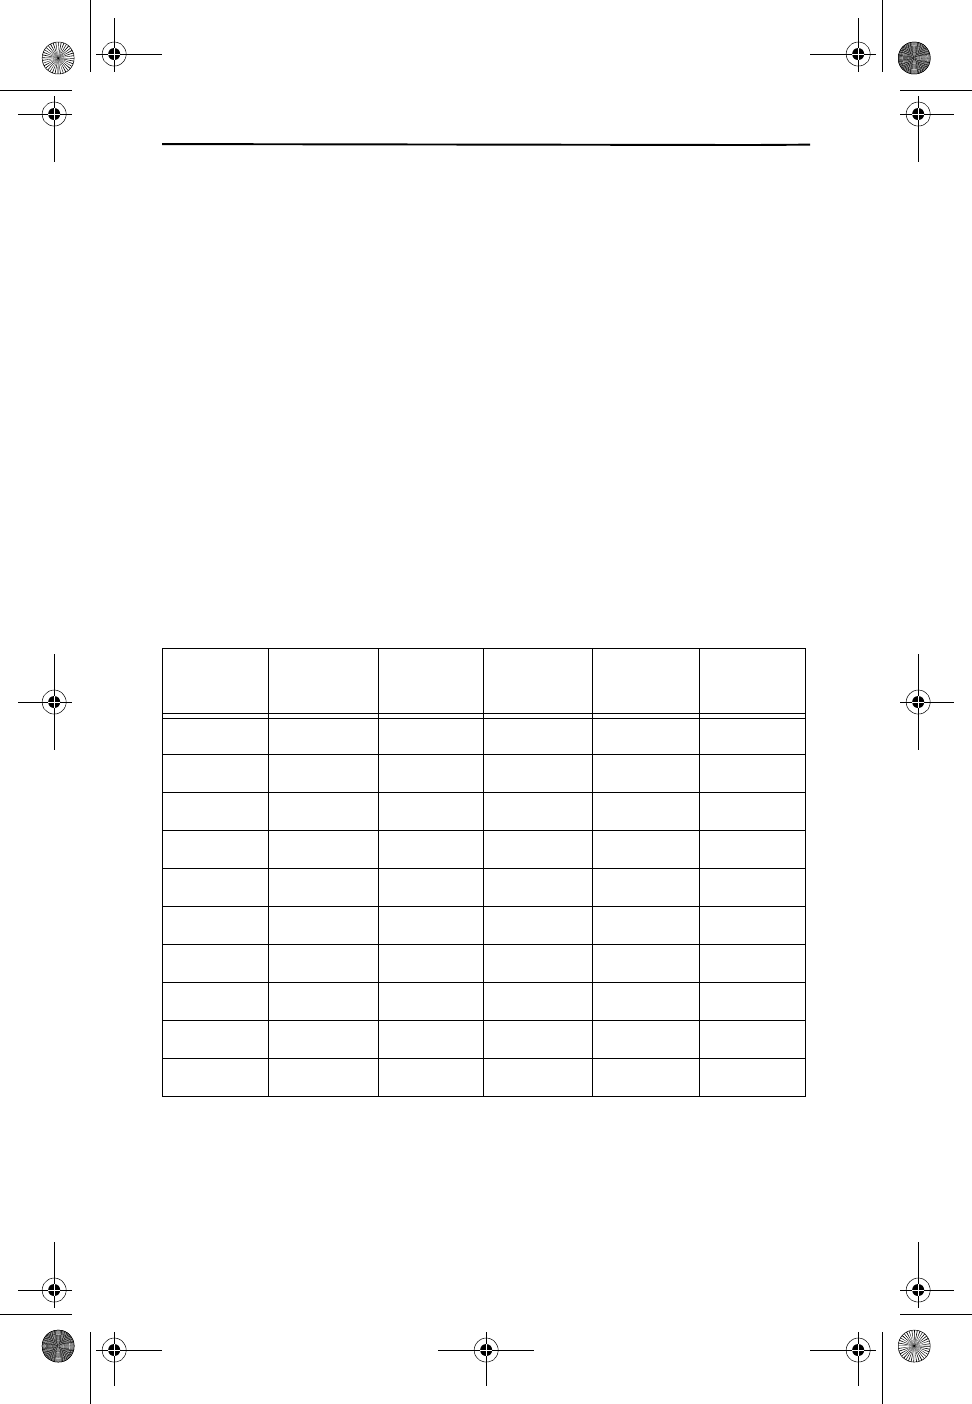
3. Enter the name you wish to store with this number by using the dial
pad. See Table 2, “Letter Table,” below for help using the dial pad to
enter names.
If you pause for more than a second or two while you enter the letters,
the phone will assume you want to leave a space and move to the next
letter area. If this should happen and you don’t want a space, just press
DELETE once and you will return to the previous space. If you want to add
a space, you can press the 1 key.
TABLE 2: LETTER TABLE
NUMBER FIRST
PRESS
SECOND
PRESS
THIRD
PRESS
FOURTH
PRESS
FIFTH
PRESS
1 Space 1 Space 1 Space
2ABC2A
3DEF 3D
4GHI 4G
5J KL 5J
6MNO6M
7PQRS7
8TUV8T
9WXYZ9
00 00 00
CL915.book Page 16 Friday, May 4, 2001 11:35 AM
FEATURES AND CONTROLS
17
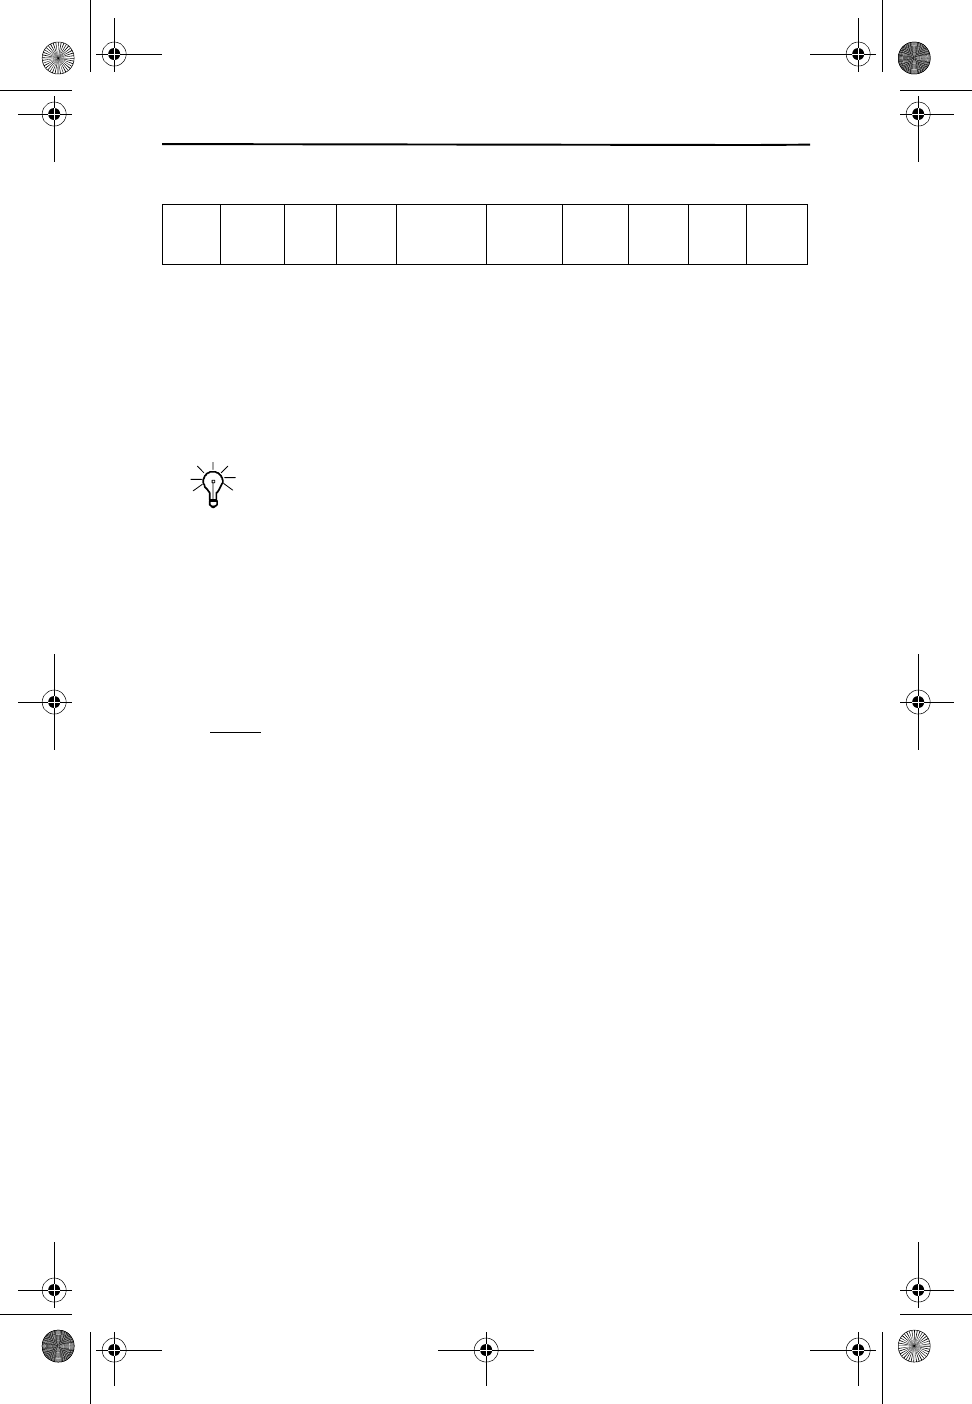
TABLE 3: ENTERING “JOHN SMITH” INTO YOUR SPEED DIAL DIRECTORY
4. As indicated in Table 3 above, press each key the number of times
shown in Table 2 to get the desired letter. After entering the correct
sequence for the letter, wait 2 seconds and the cursor will move
forward one space. It is not necessary to wait to select a letter on a
different key.
5. Press DIRECTORY when you are finished with the name.
TIP
If you make a mistake, press DELETE. Each time you press DELETE,
the last letter or number will be deleted.
6. The next available memory location will automatically be displayed.
To accept the next location given press DIRECTORY, or enter a two
digit number for a different location. If there is a name/number
already stored in the location selected, the CL915 will ask you if you
would like to erase the original memory location. Press the
DIRECTORY key to accept or any other key to reject.
NOTE
If there are no memory locations left in the speed dial
directory (will hold 20), the CL915 will display MEMORY FULL.
At this point, you will need to replace an existing entry if you
want to put a new entry in. You can continue with memory
programming of the new entry by selecting the entry you
wish to replace and programming the new number there.
CALLER ID AND CALL WAITING ID
Caller ID will allow you to view the caller’s name and phone number on
the handset display before you answer the call. In order to use this ser-
vice, you must first subscribe to Caller ID service with your local tele-
phone company.
When a new call comes in while you are talking, Call Waiting ID (CWID)
will alert you with a notification beep and the handset volume is momen-
tarily muted. The new caller’s name and phone number, if available, ap-
pears in the display. (For more information see CALLER ID OPERATION
on page 23.)
5
J
O
O
44
H
66
N
1
SPACE
777
S
6
M
444
I
8
T
44
H
CL915.book Page 17 Friday, May 4, 2001 11:35 AM

18
PROGRAMMING VOICE MAIL
If you subscribe to Voice Mail from your local telephone company, this
feature will access your Voice Mail messages by pressing one key.
1. With the handset not in use, dial your voice mail access number.
2. Press the REDIAL/PAUSE key to insert 3 second pauses (2 pauses
should be enough).
3. Enter your password.
4. Press and hold the VOICE MAIL key.
5. You will see STORED appear on the screen.
USING NETWORK SERVICES
Your phone is programmed so that you can easily use the convenient
Network Services that you subscribe to through your local telephone
company. The available services are:
- *69 Call Return
- *70 Cancel Call Waiting
- *87 Anonymous Call Rejection Off
- *77 Anonymous Call Rejection On
- *60 Call Blocker
- 73# Call Forward Off
- *73 Call Forward Off
- 72# Call Forward On
- *72 Call Forward On
- 1411 Local/National Information
- 411 Local/National Information
- *66 Repeat Dialing
- *60 Call Blocker
To use Network Service features:
1. Press the NETWORK SERVICES key.
2. Use the ̄REVIEW/VOLUME ̆ key to scroll to the service you want.
3. Activate the displayed feature by pressing the TALK key.
CL915.book Page 18 Friday, May 4, 2001 11:35 AM

FEATURES AND CONTROLS
19
NEW CALL LIGHT
The NEW CALL light will flash for the following reasons.
1. When the phone is ringing the light will flash rapidly.
2. When you receive a Caller ID call the light will flash. The phone will
store a record of this call.
3. When you have a new Voice Mail message the light will flash to alert
you and the screen will display the message MESSAGE WAITING.
USING A HEADSET
You can make or answer calls with hands-free convenience using an op-
tional headset that has a standard (2.5 mm) plug.
Follow these steps to use a headset.
1. Insert the headset’s plug into the headset jack on the side of the
handset.
2. Place the headset on your head with the earpiece over either ear
and adjust the microphone boom until it is about even with your
chin.
3. The headset volume can be adjusted by pressing the volume key
(see Location of Controls and Features on page 11).
NOTE
Connecting a headset disconnects the handset’s earpiece and micro-
phone.
TIP
If you place the handset on the base to recharge it while the headset
is connected, be sure the handset seats properly or it will not
charge. A good way to be sure the connection has been made is to
check that the red CHARGE light is on.
LOCATING A LOST HANDSET
Your CL915 has a PAGE button to help you locate the handset when it is
not on its cradle.
1. Press the PAGE key on the base. If the handset is within range, it
will beep for 20 seconds.
2. Press any key on the handset to stop the PAGE beeping or wait for
20 seconds and it will automatically stop.
CL915.book Page 19 Friday, May 4, 2001 11:35 AM

20
OUT-OF-RANGE WARNING
If you are too far from the base, the handset will beep and the display will
read OUT OF RANGE. Walk back in the direction of the base to re-establish
connection. When the base detects that the handset has been out of
range for 15 continuous seconds, it will release the call.
CHANNEL CHANGING
If you are experiencing interference during a telephone call, press the
CHANNEL key. The CL915 will scan up to 15 channels and select the
clearest one to provide the best possible reception.
CL915.book Page 20 Friday, May 4, 2001 11:35 AM

BASIC OPERATION
21
BASIC OPERATION
MAKING A CALL
1. Pick up the handset from the base.
2. Press the TALK key. The display will show CONNECTING. Once the
phone has acquired a line, the display will show the channel that it is
using (e.g. CHANNEL 15). Wait until you hear a dial tone.
3. Dial the number you wish to call.
NOTE
You can predial the number before you press the TALK key.
The number displayed will be dialed once the TALK key is
pressed.
4. After 3 seconds of the line being active, the display will show the call
timer.
5. When you are finished talking, press the TALK key or place the unit
back into the base to end the call. The call timer will display for a
short time after the call has finished.
NOTE
The IN USE light on the base will illuminate when the line is active.
USING REDIAL
You can quickly redial the last number dialed.
1. Press the REDIAL/PAUSE key. The display will show CONNECTING.
Once the CL915 has acquired a line, the display will show the
channel that it is using (e.g. CHANNEL 15).
The redial memory holds up to 32 digits, so you can redial long distance
as well as local numbers.
The redial memory does not store a flash entry or any digits entered after
you press 3-WAY/FLASH.
USING 3-WAY/FLASH
3-WAY/FLASH is used for special services, such as Call Waiting. For ex-
ample, if you have Call Waiting, press 3-WAY/FLASH to answer an incom-
ing call without disconnecting the current call. Press 3-WAY/FLASH again
to return to the first call.
If you do not have any special phone services, pressing 3-WAY/FLASH
might disconnect the current call.
CL915.book Page 21 Friday, May 4, 2001 11:35 AM

22
USING TONE SERVICES ON A PULSE LINE
Some special services, such as bank-by-phone, require tone signals. If
you have pulse service, you can still use these special tone services by
following these steps.
1. Dial the service’s main number.
When the service answers, press the * key. (A is displayed
for the asterisk.) Any additional numbers you dial are sent
as tone signals.
2. After you complete the call, return the handset to the base or press
TALK. The phone automatically resets to pulse dialing.
SPEED DIAL DIRECTORY
You can store up to 20 phone numbers and names in memory. The first
ten numbers can be dialed with one-touch.
Each stored number can be up to 15 digits long, and each name can
contain up to 15 characters.
Making a Call with Speed Dial Directory
To One-Touch Dial a Memory Number:
1. Press the DIRECTORY key. The phone displays DIRECTORY.
2. Press and hold the key for the desired memory location. The CL915
automatically dials the stored number.
To recall and dial a Memory Number:
1. Press the DIRECTORY key. The phone displays DIRECTORY.
2. Press ̄ or ̆ to scroll through all of the memory locations until the
desired number appears.
3. Press TALK. The TALK indicator lights and the CL915 automatically
dials the displayed phone number.
To Delete a Speed Dial Number
1. Press DIRECTORY.
2. Use the ̄ and ̆ keys to scroll to the number you wish to delete.
3. Press DELETE.
4. The display will show DELETE?
5. To delete the record, press DELETE again.
CL915.book Page 22 Friday, May 4, 2001 11:35 AM

CALLER ID OPERATION
23
CALLER ID OPERATION
If you subscribe to Caller ID service from your phone company, the
CL915 automatically displays the information the phone company sends
between the first and second rings of every call you receive. It stores up
to 30 call records in its Caller ID memory.
The display also shows the date and time the call was received if caller
information is not available, or if the caller chose not to send the infor-
mation (see Caller ID Displays on page 26).
1. When the Caller ID information is received, it is stored in memory
so that the information can be recalled for later use.
2. When new Caller ID records are received, the NEW CALLS indicator
light will flash.
3. The new Caller ID record includes the name and number of the
caller and the time and date the record is received. The New Call
light will flash to indicate that you have a new Caller ID stored in
memory.
4. Your CL915 will keep track of all calls received, even if they were
not answered, depending on how you set up the handset (see
Programming the Phone’s Features on page 14).
VIEWING THE CALLER ID LIST
1. With the handset idle, press CALLER ID.
2. The most recent call will be displayed. The information on the call
will be displayed with the name, number, date and time that the call
was received.
3. To scroll to the next call, press ̄REVIEW/VOLUMĔ. The ̄ key will
go through the calls from the last call received to the first. The ̆
will allow you to view the calls from the first call received to the last.
At the end of scrolling either way, the display will show END OF
LIST.
4. Press CALLER ID to finish.
TIP
If you do not press a button for 20 seconds while you are reviewing Caller
ID records, the CL915 display automatically times out.
CL915.book Page 23 Friday, May 4, 2001 11:35 AM

24
RETURNING A CALL FROM THE CALLER ID RECORDS
You can return calls by using the Caller ID recall feature.
1. Press CALLER ID.
2. Use the ̄ and ̆ keys to scroll to the call record you wish to call
back.
3. Press TALK.
4. The display will show DIAL NUMBER?
5. Press TALK to dial the displayed number.
6. To end the call, press TALK.
7. If the number displayed is not the way the number should be dialed
from your phone, press the ̄ and ̆ keys to toggle among 7, 10, or
11 digits to choose the correct format.
8. Press TALK to dial the number displayed.
9. Press DELETE to cancel dialing.
10. To end the call, press TALK, or place the handset back in the base.
TIP
If you set up your home area code and local area codes in the handset
setup mode, you will not have to adjust the number between 7,10 or 11
digit dialing (see Handset Settings on page 14).
STORING CALLER ID RECORDS IN THE SPEED DIAL DIRECTORY
1. Press CALLER ID.
2. Repeatedly press REVIEW ̄ or ̆ until you see the desired Caller ID
record.
3. Press DIRECTORY. ENTER LOCATION appears.
4. The caller’s name is automatically stored if it is part of the Caller ID
record.
5. Enter the memory location number, then press the DIRECTORY key.
The CL915 beeps once and STORED appears.
CL915.book Page 24 Friday, May 4, 2001 11:35 AM

CALLER ID OPERATION
25
DELETING CALLER ID RECORDS
Deleting Individual Records
1. Press CALLER ID, then repeatedly press REVIEW/VOLUME ̄ or ̆
until the Caller ID record you want to delete appears.
2. Press DELETE. DELETE? appears.
3. Press DELETE again.
Deleting All Records
1. Press CALLER ID then press and hold DELETE. DELETE ALL?
appears.
2. Press DELETE. NO CALLS appears.
CALLER ID WITH CALL WAITING SERVICE
In order to use the Caller ID with Call Waiting Service service you must
subscribe to a Caller ID service and Call Waiting service from your local
telephone company.
When a new call comes in while you are talking, you will hear a notification
beep from the handset and the volume is momentarily muted. The new
caller’s name and phone number, if available, appears on the display.
1. When you receive a Call Waiting call and you want to connect the
call, press 3-WAY/FLASH. The active call will be placed on hold and
the new call will be active.
2. Press 3-WAY/FLASH to alternate between calls.
3. Press TALK to end the call or place the handset back on the base.
CL915.book Page 25 Friday, May 4, 2001 11:35 AM
26
CALLER ID DISPLAYS
TABLE 4: CALLER ID DISPLAYS
DISPLAY DESCRIPTION
SMITH JOHN
888-555-1212
12/08 11:46AM RPT 20
Display shows name, telephone number,
time, date and the number of the call in
your call records. It will also indicate if it’s
a new number or a repeat call.
888-555-1212
12/08 11:46AM RPT 20
Display shows number-only service. The
originating service does not provide
names.
UNAVAILABLE
12/08 11:46AM RPT 20
Display shows this when Caller ID
information is not available. This call was
made from a telephone company that
does not offer Caller ID services (including
International calls).
PRIVATE
12/08 11:46AM RPT 20
Display shows this when a call is received
from a blocked number. For privacy rea-
sons, some states allow callers to prevent
their telephone data from being displayed
on the other party’s Caller ID display.
INCOMPLETE DATA Display shows this when the Caller ID
information was received incorrectly or
only part of the data was received.
NOTE: When an error is received, none of
the data from the call is saved in memory.
MESSAGE WAITING Display shows this when a Voice Mail
message has been received and is stored
in your Voice Mail subscription service
which is provided by your local telephone
company .
END OF LIST This is shown between the first and last
call of the Caller ID records list.
NO CALLS This is displayed when the CALLER ID key
is pressed and there is no Caller ID data
stored.
xx New Call(s) This line indicates the number of new
calls.
CL915.book Page 26 Friday, May 4, 2001 11:35 AM

CALLER ID OPERATION
27
RPT Appears when you review a Caller ID
record from someone who has called
more than one time from the same
number. This only appears when REPEAT
CALLS is set to COMBINED.
TABLE 4: CALLER ID DISPLAYS
DISPLAY DESCRIPTION
CL915.book Page 27 Friday, May 4, 2001 11:35 AM
28
TROUBLESHOOTING
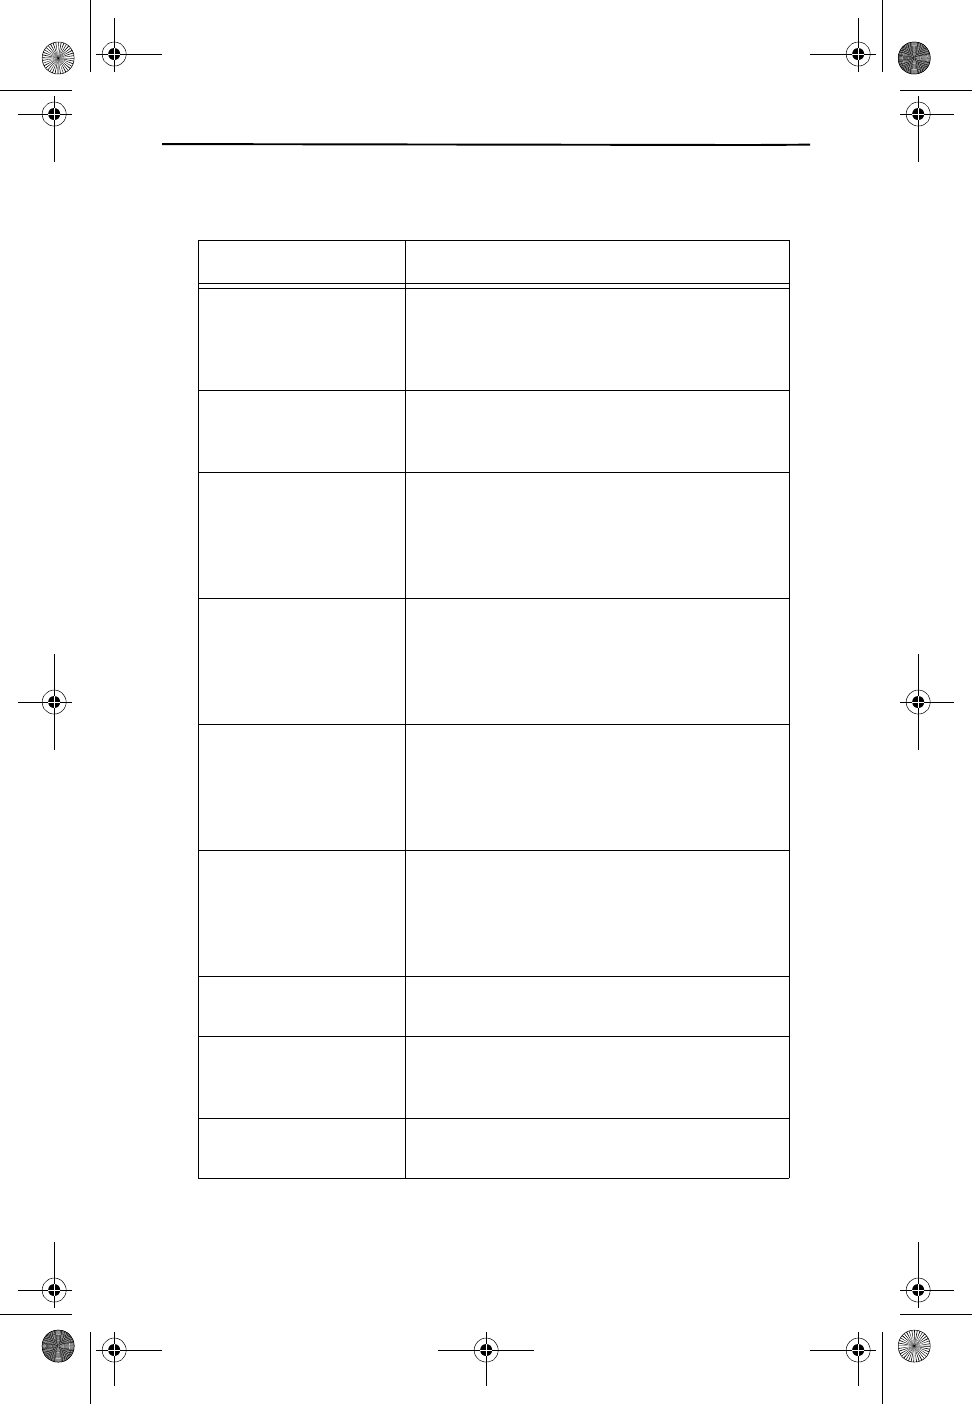
PROBLEM SUGGESTION
No dial tone or
phone will not dial
out
Check that you have plugged the AC power adapter
into a working outlet. Check all telephone cord
connections or try another jack.
Check to be sure that the phone is set to the
correct type of service (Tone or Pulse).
Cannot hear the
telephone ringing
Check the ringer volume controls (at the lowest
level the ring may not be heard). Make sure Ringer
is turned on (see Ringer Setting on page 8).
Blank Screen Make certain that the battery is plugged in and fully
charged.
Be sure the phone line cord and AC adapter are
correctly and securely connected
Contact your telephone service provider to verify
that your Caller ID service is activated and working
properly.
Caller ID service may not work if you have your
phone connected to a Private Branch Exchange
(PBX).
You answered the call before the Caller ID data
was displayed, which usually occurs after the
second ring.
Screen reads
UNAVAILABLE
The call is coming from an area not supplying caller
ID data.
Screen reads
PRIVATE
The caller has requested that their phone number
be suppressed from Caller ID service.
The handset
does not work
Move the handset closer to the base.
Be sure the phone line cord and AC adapter are
correctly and securely connected.
Be sure the battery pack is connected and
charged.
Raise the base antenna to a vertical position.
Volume drops or
you hear unusual
sounds
Someone has picked up another phone on the
same line. Hang up the other phone.
When on a call,
you hear another
call or a radio
signal
Switch channels to a clear channel. If that does not
correct the problem, check the wiring for bad
connections.
CL915.book Page 28 Friday, May 4, 2001 11:35 AM
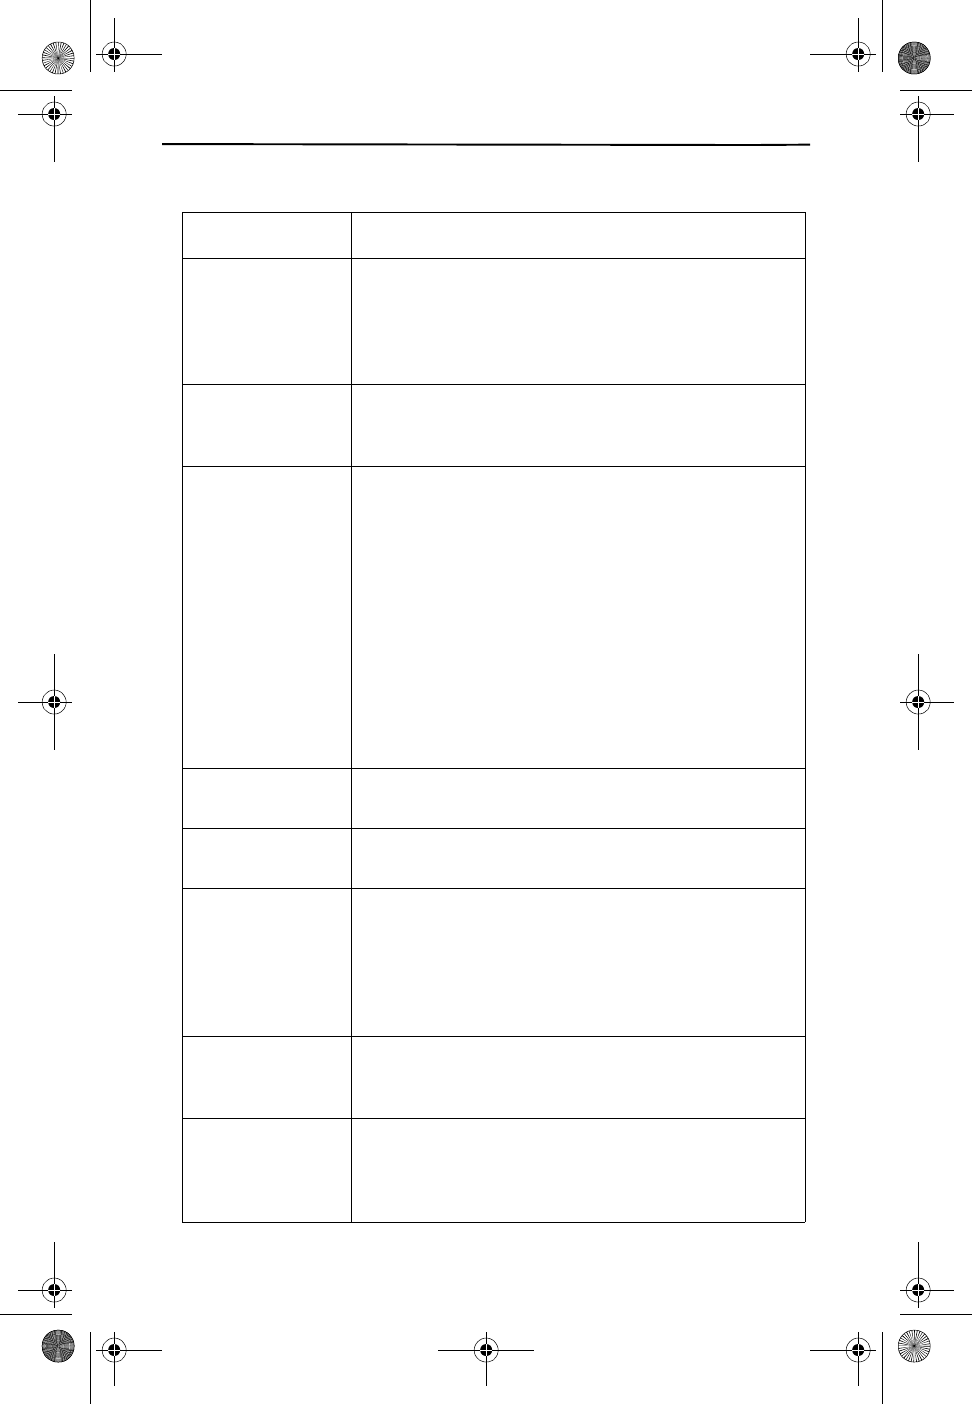
TROUBLESHOOTING
29
Static Interfer-
ence
(crackling sound
during call)
Do not place the base near appliances or large
metal objects.
Keep the handset away from interference sources
such as computers, remote control toys, wireless
alarm systems, wireless intercoms, room
monitors, fluorescent lights, and electrical
appliances.
Press CHANNEL to switch to another channel.
If the interference is severe, turn off the interfering
device.
Phone dials more
than 7 digits
when dialing a
local phone num-
ber from a Caller
ID record
Store the home area code (see Handset Settings
on page 14).
The handset’s
range decreases
Raise the base’s antenna to a vertical position.
Return the handset to the base to recharge the
battery pack.
Be sure the base’s antenna is not touching a metal
surface.
Receiver sound
flutters or fades
Be sure the battery pack is charged.
Move the handset closer to the base.
Can receive calls,
but cannot make
calls
Set Tone Dial/Pulse Dial correctly for the type of
service you have (see Handset Settings on page
14).
No Data Sent Check your service provider to ensure that you
have Caller ID or Call Waiting ID service.
Be sure that your answering machine is set to
answer after two rings.
Be sure you answer the call after two rings.
Check to see that Call Forwarding is turned off.
Check with your service provider to see if they are
experiencing problems.
PROBLEM SUGGESTION
CL915.book Page 29 Friday, May 4, 2001 11:35 AM
30
CARE AND MAINTENANCE
You new CL915 telephone is an example of superior design and
craftsmanship. The following suggestions will help you care for your
phone so you can enjoy it for years.
Modifying or tampering with the internal components of CL915 can
cause a malfunction and may invalidate its warranty and void your FCC
authorization to operate this telephone.
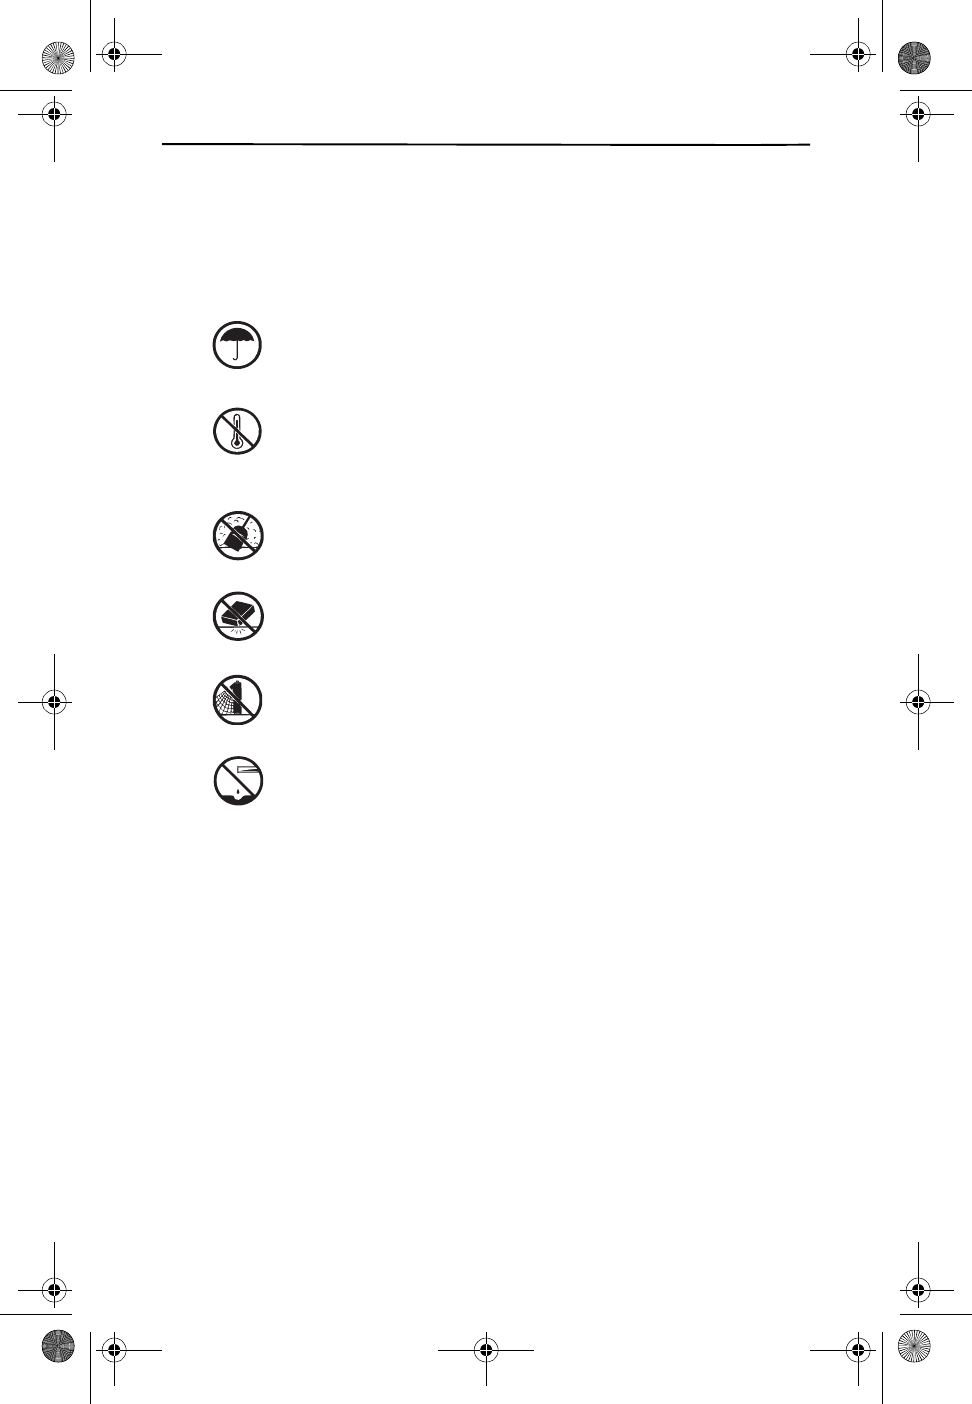
Keep the phone dry. If it gets wet, wipe it dry
immediately. Liquids may contain minerals that can
corrode the electronic circuits.
Use and store the phone only in normal temperature
environments. Temperature extremes can shorten the
life of electronic devices, damage batteries, and
destroy or melt plastic parts.
Keep the phone away from dust and dirt which can
cause premature wear of parts.
Handle the phone gently and carefully. Dropping it can
damage circuit boards and cases and can cause the
phone to work improperly.
Use only fresh batteries of the required size and
recommended type. Batteries can leak chemicals that
damage your phone’s electronic parts.
Wipe the phone with a damp cloth occasionally to
keep it looking new. Do not use harsh chemicals,
cleaning solvents, or strong detergents to clean the
phone.
CL915.book Page 30 Friday, May 4, 2001 11:35 AM

CARE AND MAINTENANCE
31
REPLACING THE BATTERY PACK
If you follow the instructions in “Connecting and Charging the Battery
Pack”, the battery pack should last approximately one year. If the battery
does not hold a charge for more than 2 hours after an overnight charge,
replace the battery with a new 3.6 volt, 600 milliampere battery with a
connector that fits the socket in the battery compartment.
Install the new battery pack, then charge the battery pack for about 15
hours.
Note: To avoid losing information stored in memory, try to install and be-
gin charging the new battery pack within 2-3 minutes.
Cautions:
■You must use a replacement battery pack of the same size and
type, with the proper connector.
■Be careful not to short the battery pack by touching it with
conducting materials such as rings, bracelets, and keys. The
battery pack or conductor might overheat and burn.
■Do not dispose of the battery pack in a fire because it might
explode.
Important: This product contains a rechargeable nickel cadmium battery
pack. At the end of the battery pack's useful life, it must be recycled or
disposed of properly. Contact your local, county, or state hazardous
waste management authorities for information on recycling or disposal
program in your area.
LIGHTNING
Your telephone has built-in lightning protection to reduce the risk of dam-
age from surges in telephone line and power line current. This lightning
protection meets or exceeds FCC requirements. However, lightning strik-
ing the telephone or power lines can damage your telephone.
Lightning damage is not common. Nevertheless, if you live in an area that
has severe electrical storms, we suggest that you unplug your phone dur-
ing storms to reduce the possibility of damage.
CL915.book Page 31 Friday, May 4, 2001 11:35 AM

CL915.book Page 32 Friday, May 4, 2001 11:35 AM

CL915.book Page 33 Friday, May 4, 2001 11:35 AM