CipherLab RS51 Mobile Computer User Manual RS30 Mobile Computer
CipherLab Co., Ltd. Mobile Computer RS30 Mobile Computer
UserManual.wiki
>
CipherLab
>
RS51 User Manual
>
Users Manual_rev3
Contents
1.
Users Manual_rev3
2.
Users Manual_rev5
Users Manual_rev3
Navigation menu
Upload a User Manual
Namespaces
Wiki Guide
HTML
PDF
Info
Views
User Manual
Discussion / Help
Navigation


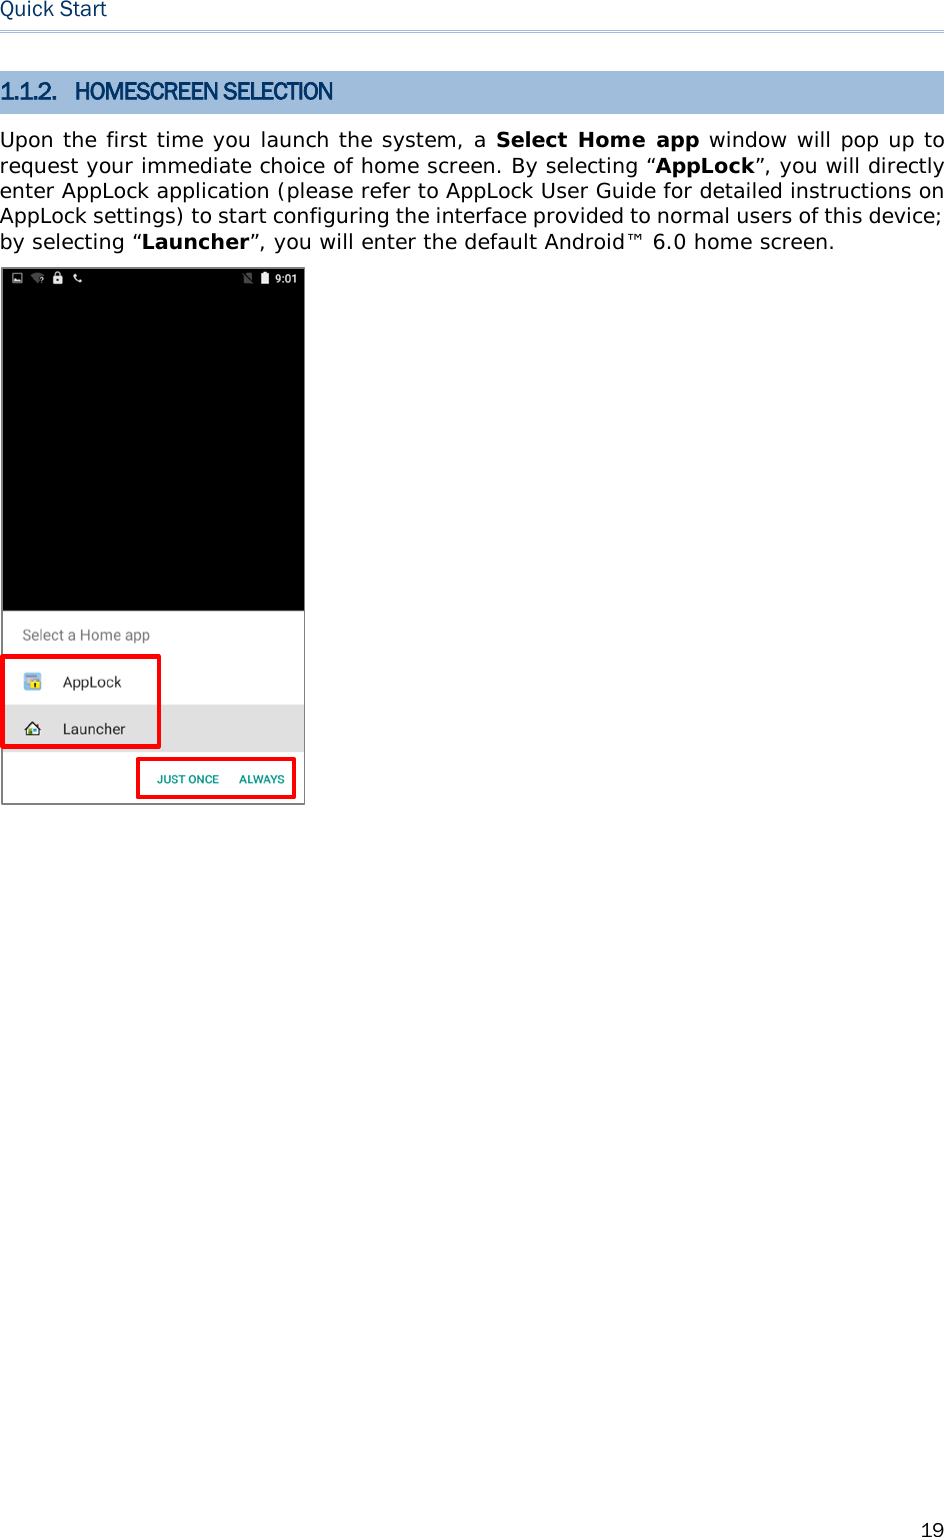
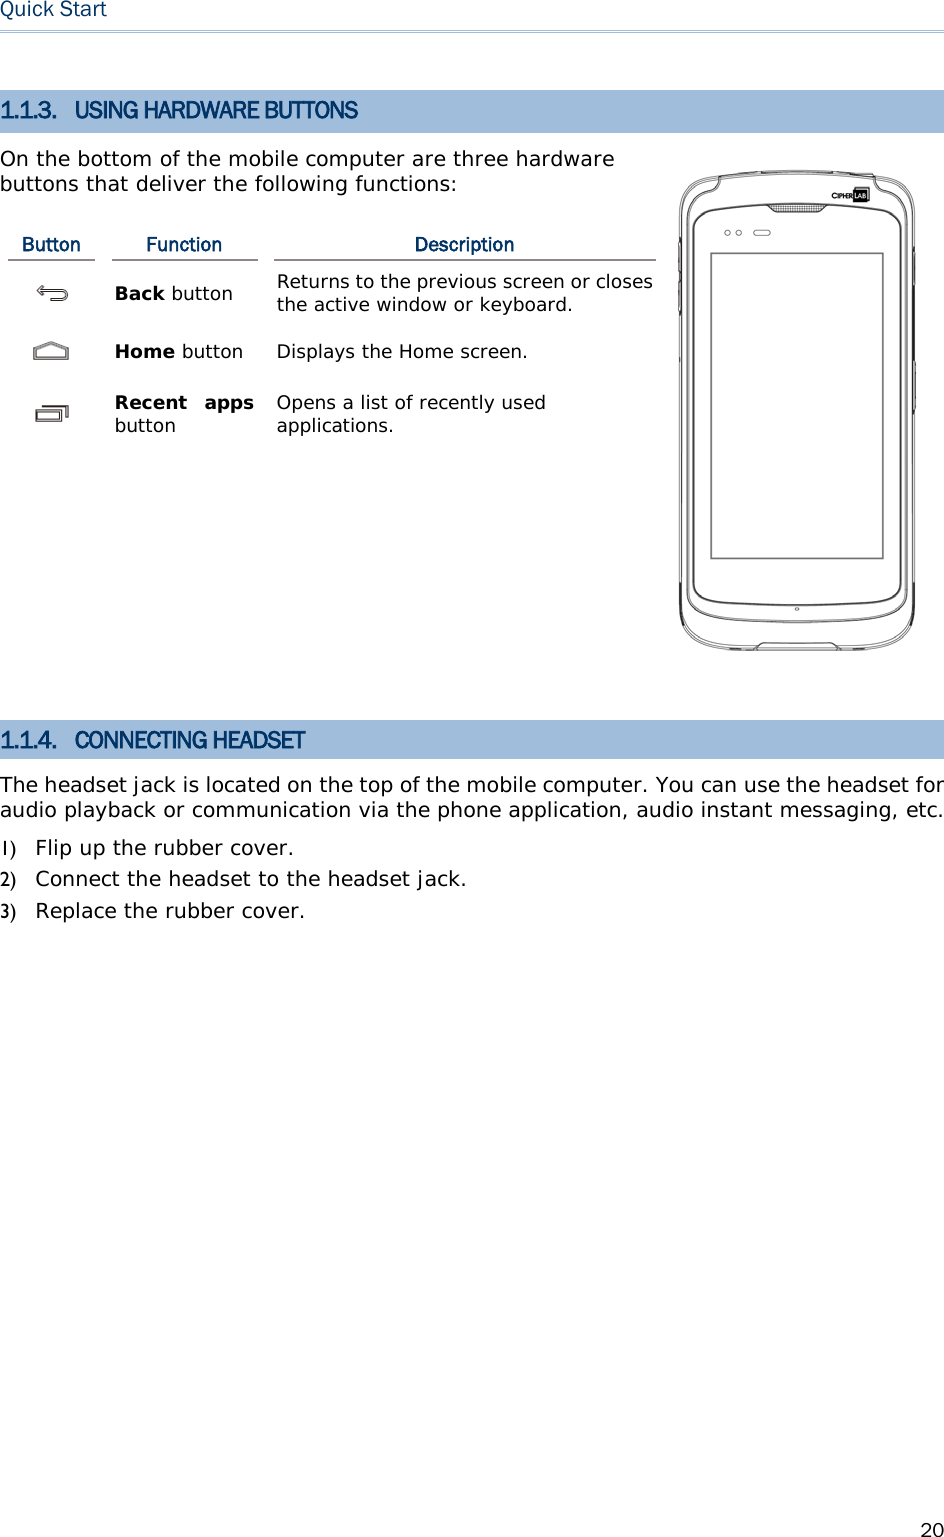
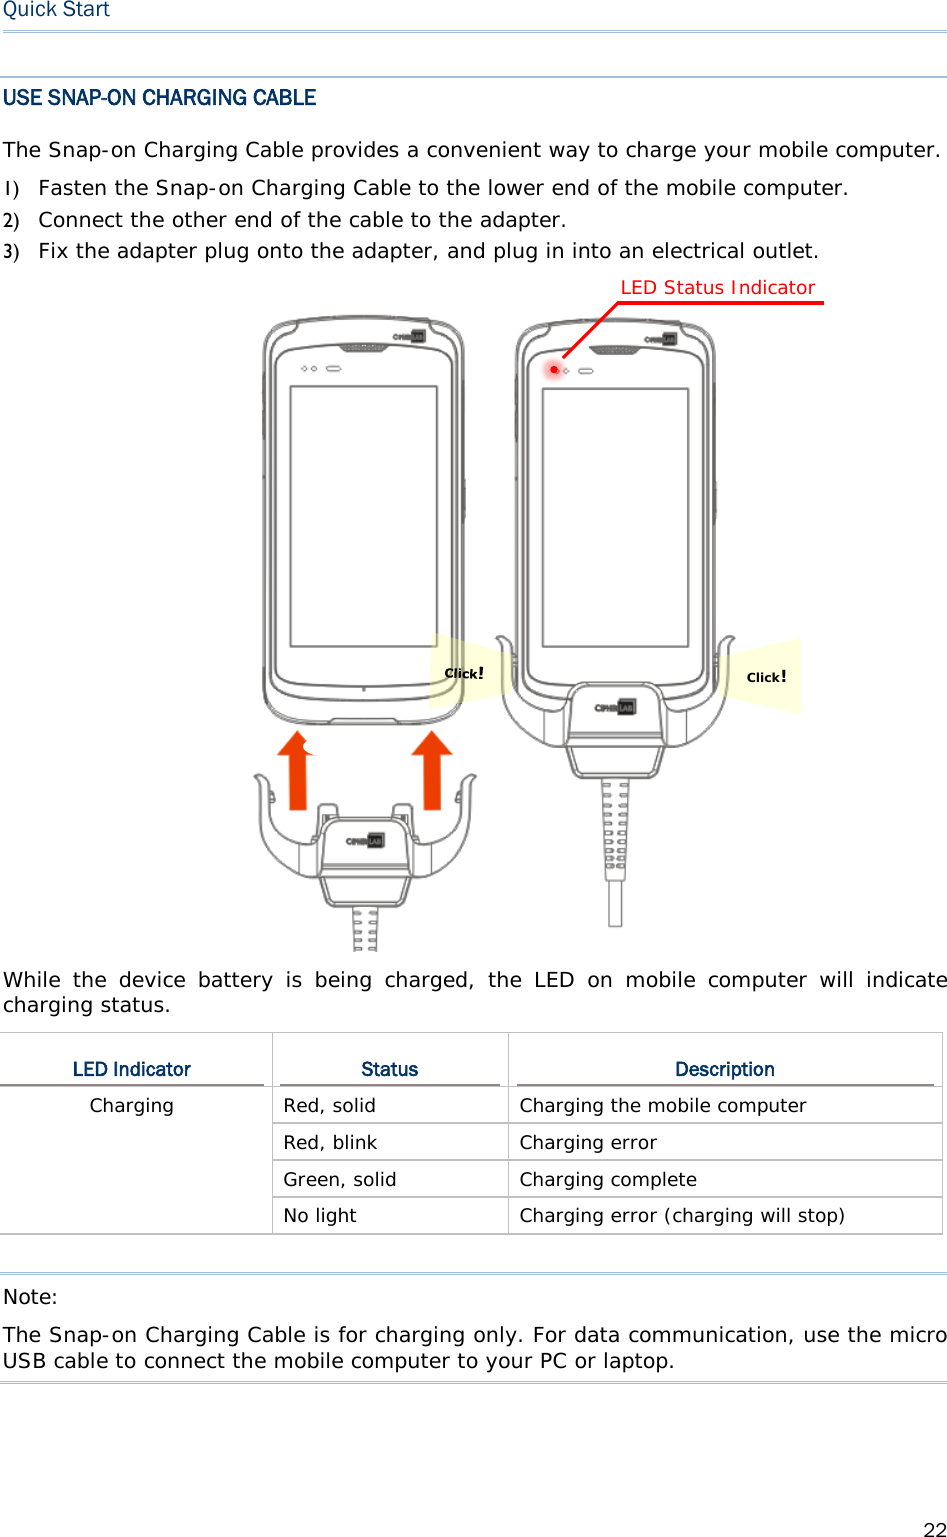
![18 Quick Start 1.1.1. POWER ON/OFF MOBILE COMPUTER POWER ON To power on the mobile computer, press and hold the power button located on the upper right side of the device. The mobile computer will turn on and show the 錯誤! 找不到參照來源。 after splash screen. Note: For the mobile computer to power on, the battery cover must be secured in place. Warning: When powering on this mobile computer, if you accidentally enter a hidden advanced boot menu, please use Volume Up key to select and Volume Down key to confirm [Normal Boot] to return to the normal booting process. Any system failure, data loss or unexpected consequences arising from your entering the other two options - [Recovery Mode] and [Factory Mode] is out of CIPHERLAB ’s warranty coverage. POWER OFF To power off the mobile computer, press and hold the power button for more than three seconds. A menu will appear on-screen which allows you to power off the device. Make sure all user data and tasks have been stored before tapping on Power off.](https://usermanual.wiki/CipherLab/RS51.Users-Manual-rev3/User-Guide-4116559-Page-18.png)