Cisco Linksys WRT51AB Dual Band Wireless A+B Broadband Router User Manual WRT51AB user guide 12
Cisco-Linksys, LLC Dual Band Wireless A+B Broadband Router WRT51AB user guide 12
UserManual.wiki
>
Cisco Linksys
>
WRT51AB User Manual
>
Manual Part 1
Contents
1.
Manual Part 1
2.
Manual Part 2
Manual Part 1
Navigation menu
Upload a User Manual
Namespaces
Wiki Guide
HTML
PDF
Info
Views
User Manual
Discussion / Help
Navigation


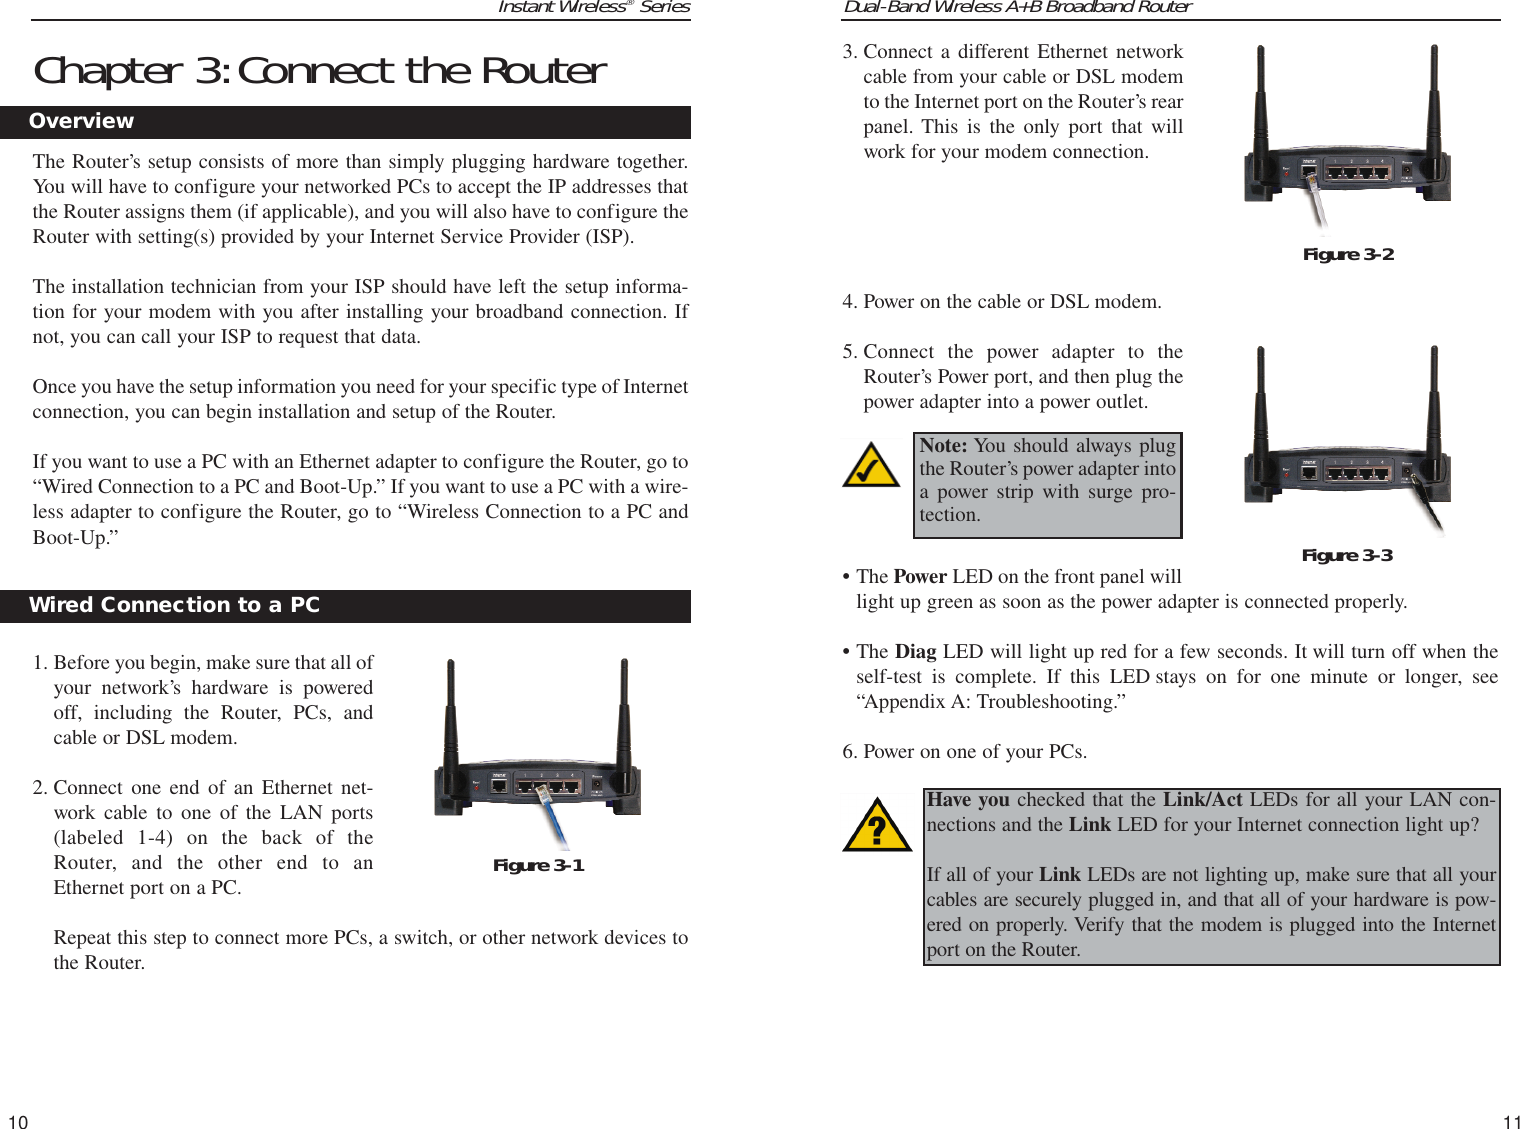

![Dual-Band Wireless A+B Broadband Router 37Instant Wireless®Series36Default Transmit Key Select which WEP key (1-4) will be used when theRouter sends data. Make sure the receiver is using the same key.Passphrase Instead of manually entering WEP keys, you can enter aPassphrase. This Passphrase is used to generate one or more WEP keys. Itis case-sensitive and should not be longer than 16 alphanumeric characters.This Passphrase function is compatible with Linksys wireless products only.[If you want to communicate with non-Linksys wireless products, enter theWEP key(s) manually on the non-Linksys wireless products.] After youenter the Passphrase, click the Generate button to create WEP keys. Keys 1-4 WEP keys enable you to create an encryption scheme for wirelessLAN transmissions. Manually enter a set of values. (Do not leave a keyfield blank, and do not enter all zeroes. These are not valid key values.)Keys 1-4 offer 64-bit or 128-bit encryption.If you are using 64-bit WEP encryption, then the key must be exactly 10hexadecimal characters in length. If you are using 128-bit WEP encryption,then the key must be exactly 26 hexadecimal characters in length. Validhexadecimal characters are “0”-“9” and “A”-“F”.Check all the values, and click the Apply button to save your 2.4GHz,802.11b WEP settings.To apply any of the settings you change on this page, click the Apply button. Tocancel any changes you’ve entered on this page, click the Cancel button. To getmore information about the features, click the Help button.WEP (Encryption) An acronym for Wired Equivalent Privacy, WEP is anencryption method used to protect your wireless data communications.WEP uses a combination of 64-bit or 128-bit keys to provide access controlto your network and encryption security for every data transmission. Todecode a data transmission, each device in a network must use an identical64-bit or 128-bit key. Higher encryption levels offer higher levels of securi-ty, but due to the complexity of the encryption, they may decrease networkperformance. Click the 2.4GHz WEP Settings button to configure theWEP keys for your 2.4GHz, 802.11b network (see Figure 6-12).Check all the values, and click the Apply button to save your 2.4GHz,802.11b settings. To cancel any changes you’ve entered on this page, clickthe Cancel button. To get more information about the features, click theHelp button.2.4GHz, 802.11b (WEP)The 2.4GHz, 802.11b (WEP) screen allows you to configure your 2.4GHz,802.11b WEP settings. WEP encryption is recommended to increase thesecurity of your wireless network.WEP Encryption Keys 1-4 offer 64-bit or 128-bit encryption; select thetype of encryption you want from the drop-down box. To disable WEPEncryption, select Disable.Figure 6-12](https://usermanual.wiki/Cisco-Linksys/WRT51AB.Manual-Part-1/User-Guide-282475-Page-22.png)