Cisco Systems 88211296 Wireless IP Phone User Manual
Cisco Systems Inc Wireless IP Phone
UserManual.wiki
>
Cisco Systems
>
88211296 User Manual
Users Manual Rev 092016
Navigation menu
Upload a User Manual
Namespaces
Wiki Guide
HTML
PDF
Info
Views
User Manual
Discussion / Help
Navigation
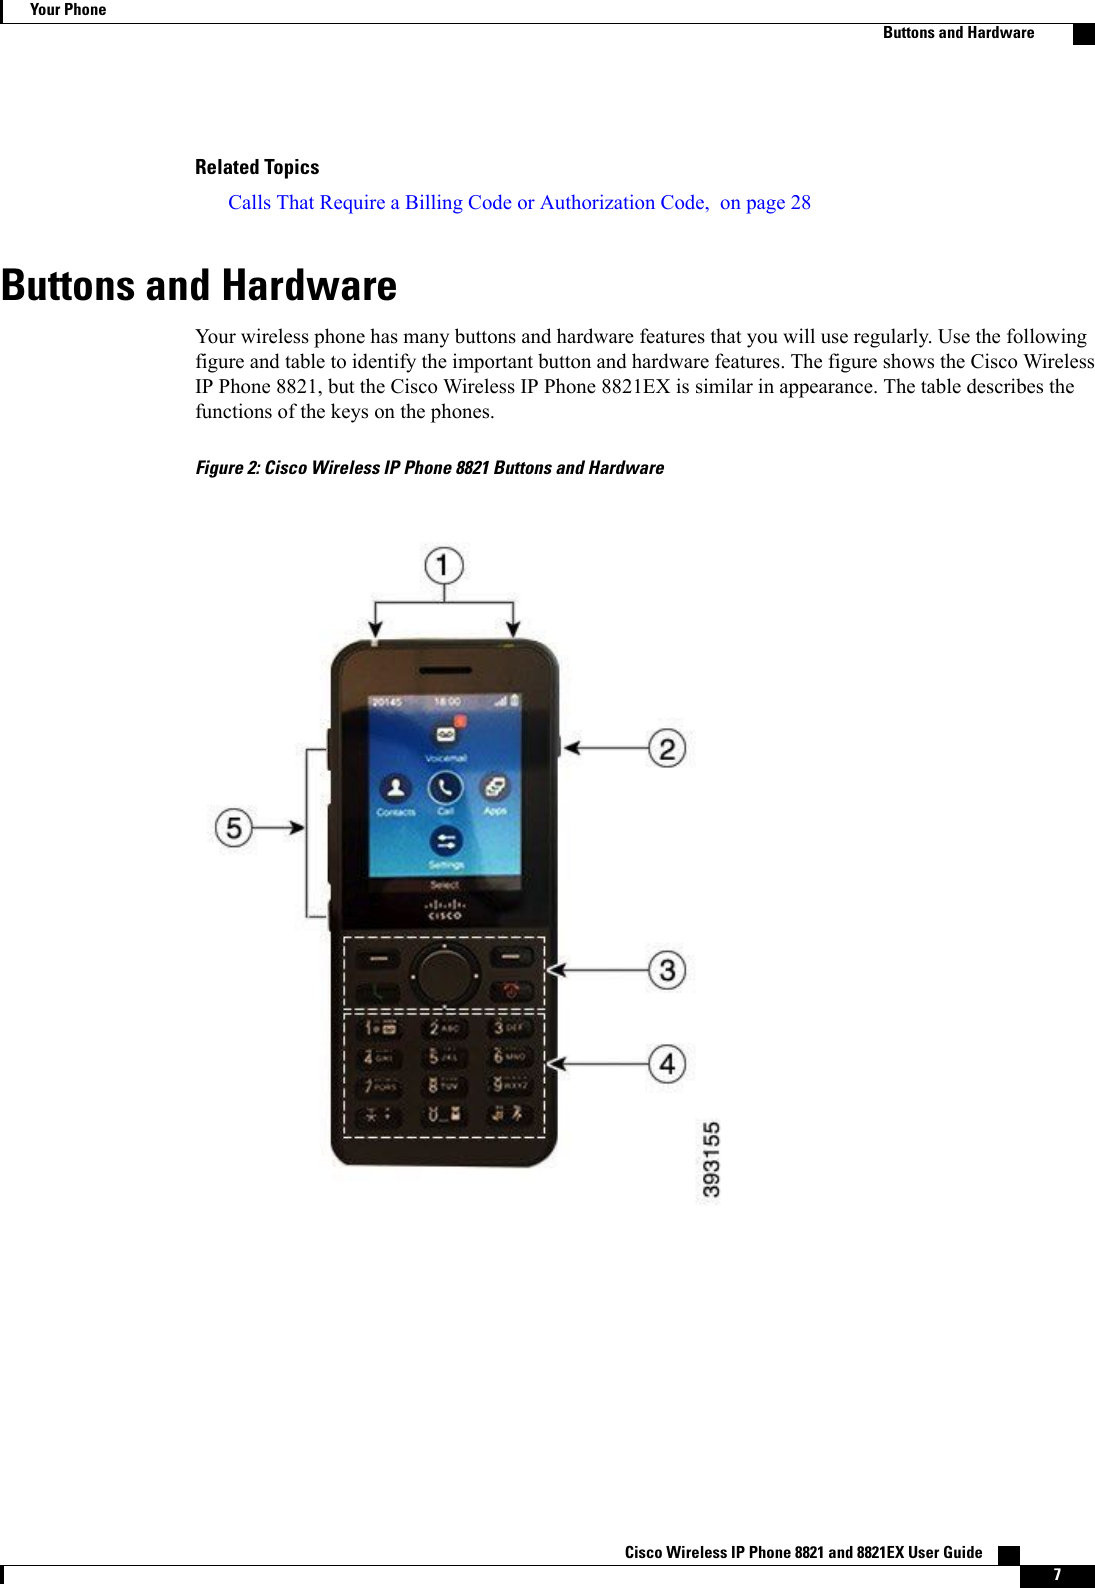
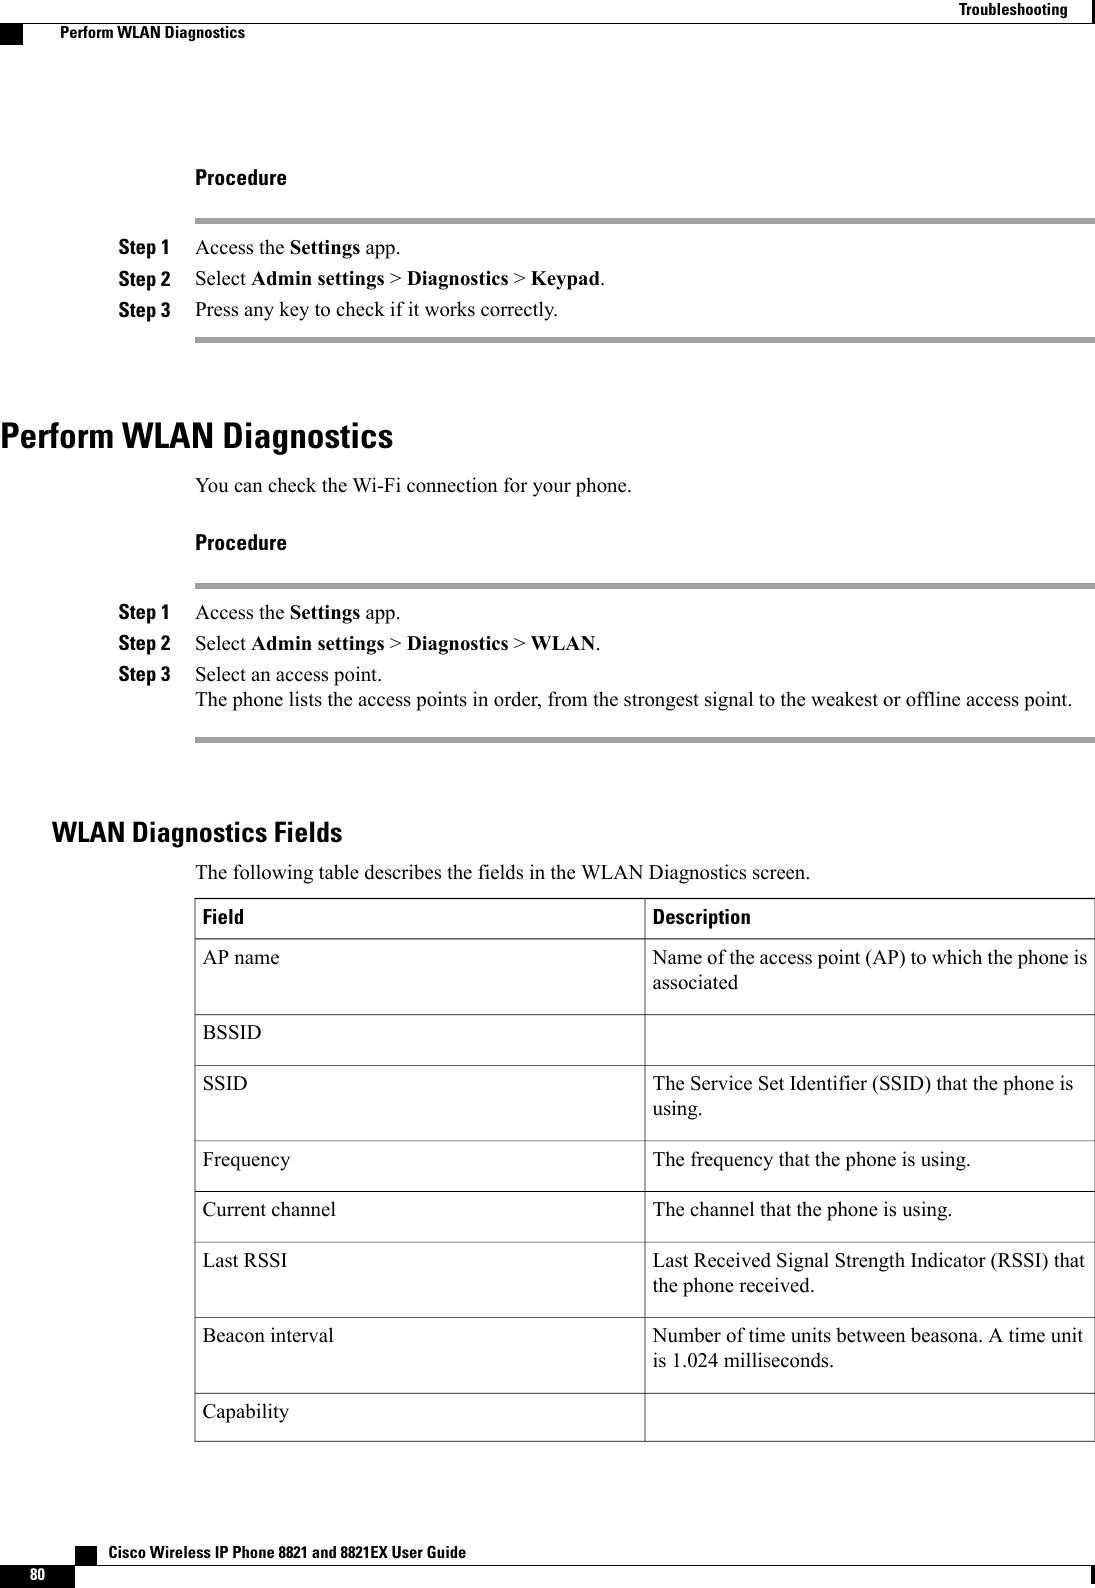
![CHAPTER 1Your Phone•The Cisco Wireless IP Phone 8821 and 8821EX, page 1•Getting Started, page 3•Self Care Portal, page 5•Buttons and Hardware, page 7•Additional Help and Information, page 13The Cisco Wireless IP Phone 8821 and 8821EXThe Cisco Wireless IP Phone 8821 and 8821EX are 802.11 dual-band wireless devices that providecomprehensive voice communications in conjunction with Cisco Unified Communications Manager and withCisco Aironet 802.11b/g and Cisco Aironet 802.11a access points (APs) in a private business communicationsnetwork.The Cisco Wireless IP Phone 8821EX is not currently supported.NoteThe phones are qualified Bluetooth wireless devices (Qualified Device ID [QDID] B014396). The phonesprovide voice communication over the same wireless LAN that your computer uses, allowing you to placeand receive phone calls, put calls on hold, transfer calls, make conference calls, and so on. Both phones haveIngress Protection 67 (IP 67) level protection, which indicates dust-tight equipment that is protected againstsplashing water.The Cisco Wireless IP Phone 8821EX is certified for Potentially Explosive Atmosphere ATEX Class I Zone2, North America Class IDivision 2/Zone 2. The phone is certified for use in potentially explosive environmentswhere flammable gasses, vapors or liquids may be present. The phone has an industry-standard yellow stylingthat offers fast recognition in emergency situations.The following figure shows the Cisco Wireless IP Phone 8821 on the left and the Cisco Wireless IP Phone8821EX on the right.Cisco Wireless IP Phone 8821 and 8821EX User Guide 1](https://usermanual.wiki/Cisco-Systems/88211296/User-Guide-3141057-Page-11.png)


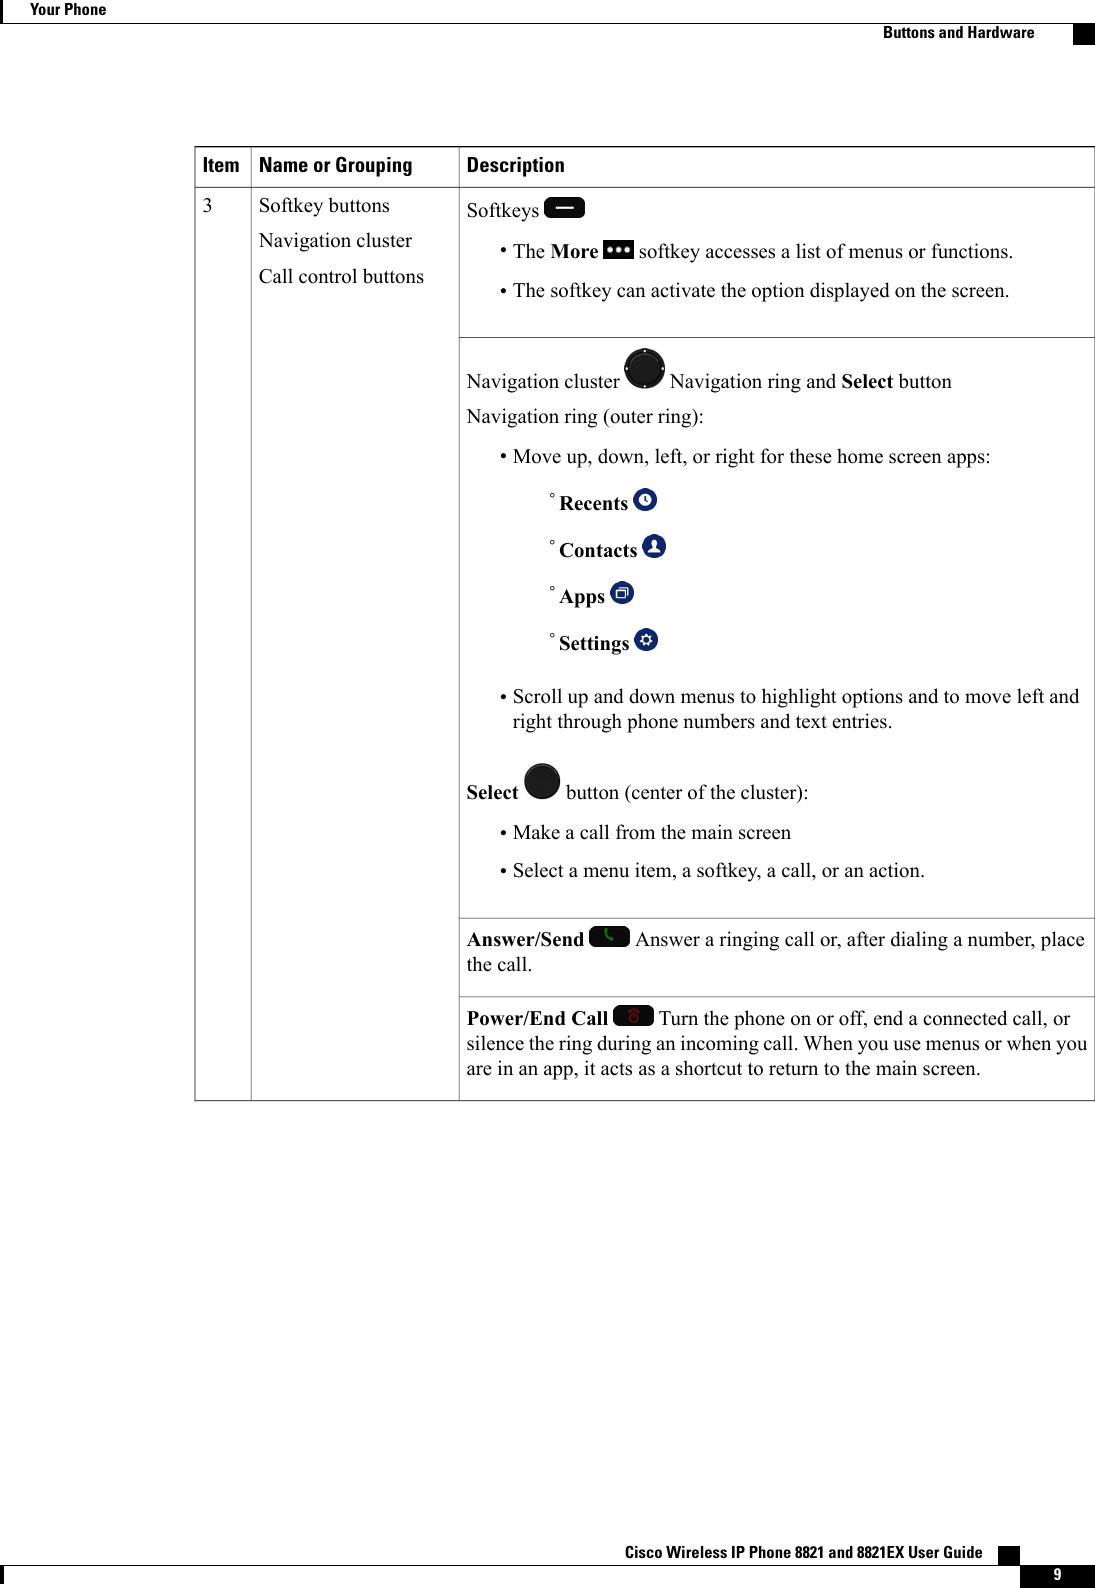
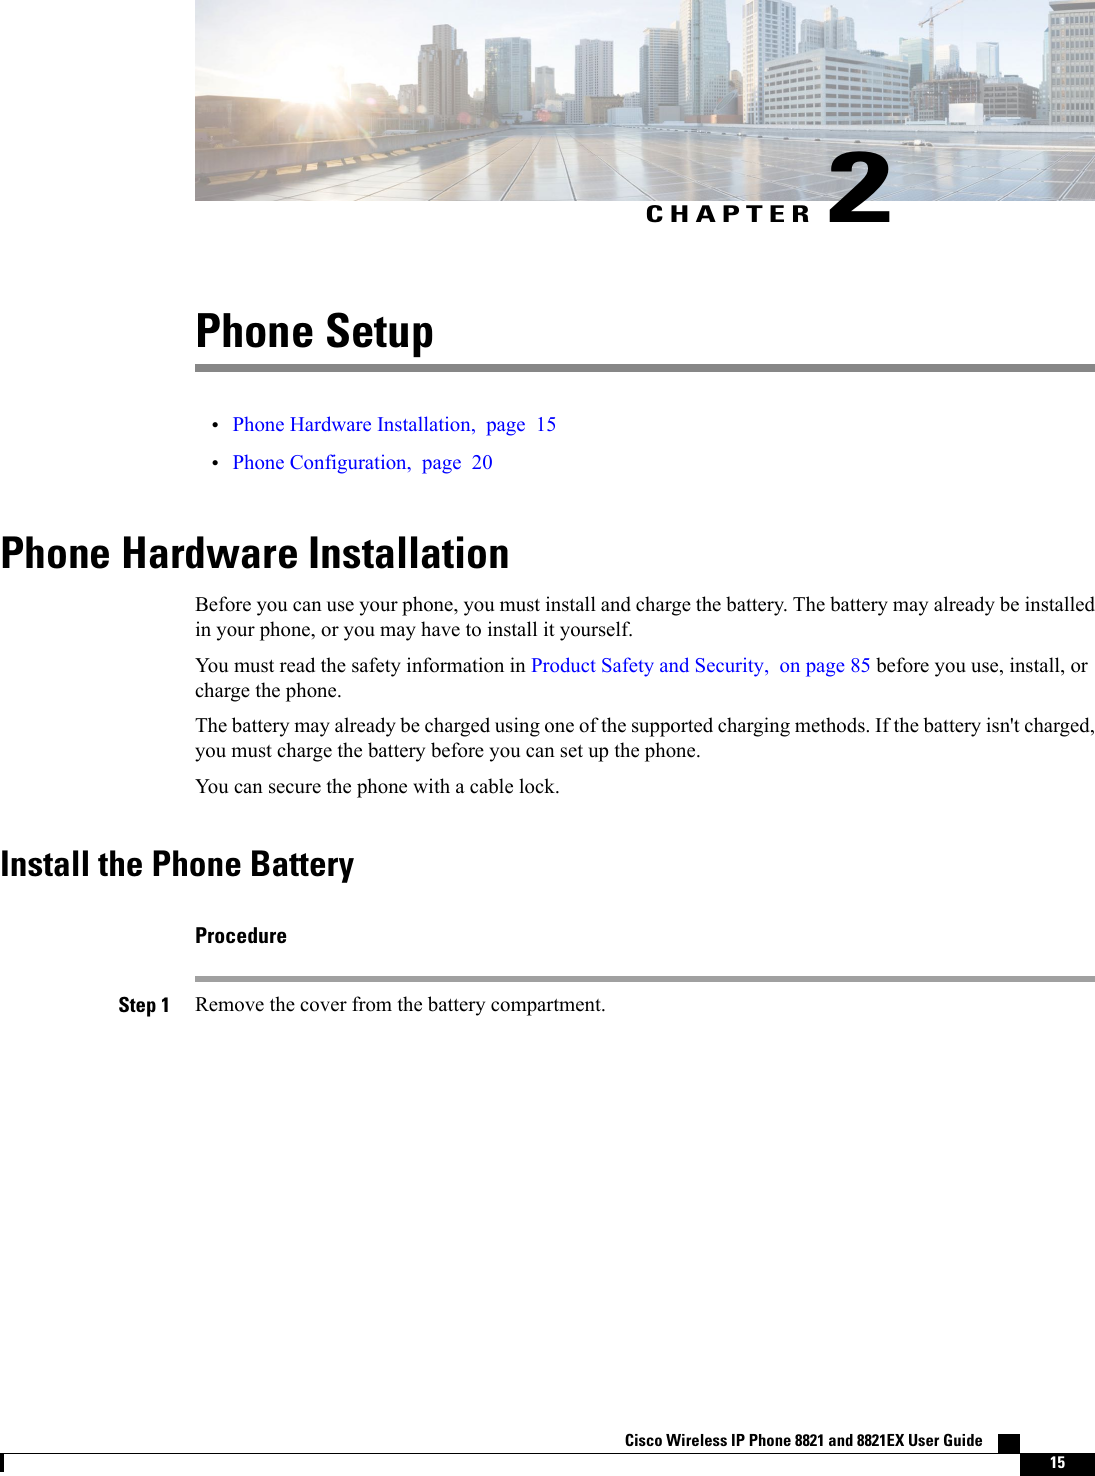
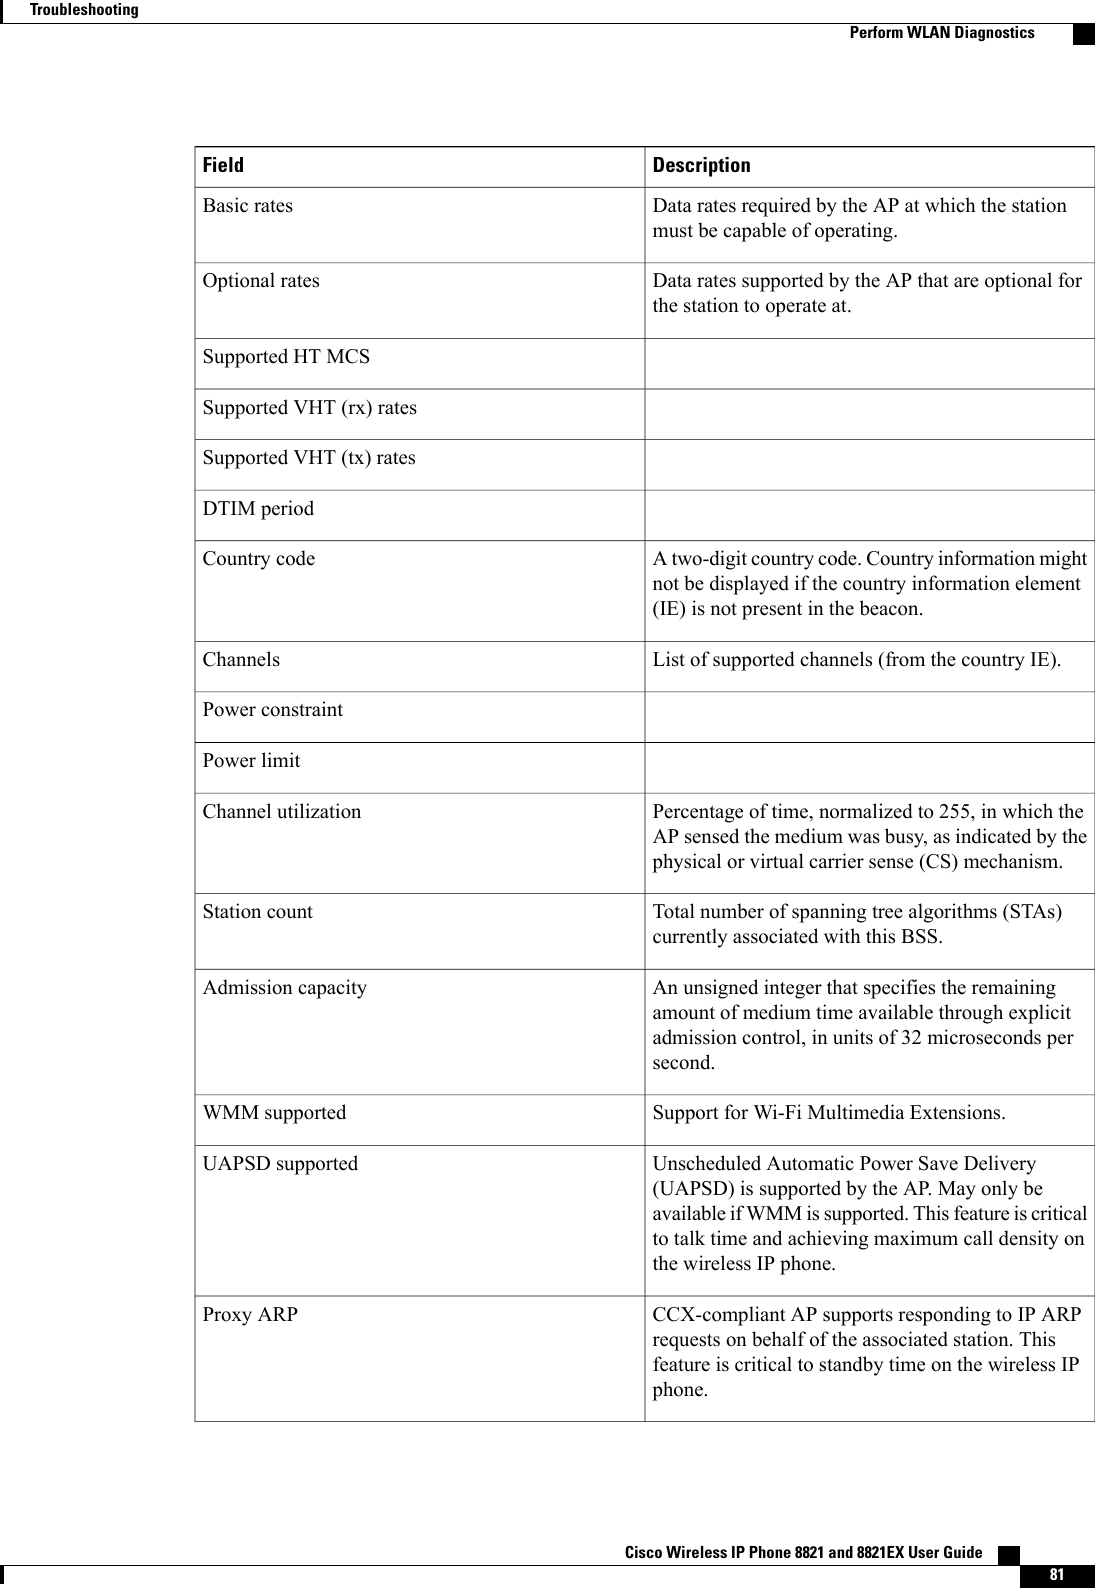
![DescriptionName or GroupingItemDial numbers, enter letters, and choose menu items by number.One (1)•Enter “1”when you dial a number.•Access voice mail.•Enter these special text characters: !@<>$%^&Asterisk (*)•Before you enter an international phone number, press and hold for afew seconds to add the plus (+) symbol to the phone number.•Enter these special text characters: * + - / = \ : ;Zero (0)•Enter “0”when you dial a number.•Lock the kepad•Enter a space or these special text characters: ,.‘“|_~’Pound (#)•Press to silence the phone ringer. If configured, the phone will vibrateinstead.•Enter these special text characters: #?()[]{}Keypad4Application Use with XML applications, such as Push to Talk.Left Side Buttons5Volume•When the phone is idle, change the ring volume, turn on the vibrateoption, or turn off the ringer.•When you have an incoming (ringing) call, press the button once tosilence the ringer.•During a call, control the speaker volume for the active handset,headset, or speaker.•When the phone is docked in the desktop charger, control the volumeof the charger speaker.Mute Toggle the mute feature on or off. Cisco Wireless IP Phone 8821 and 8821EX User Guide10Your PhoneButtons and Hardware](https://usermanual.wiki/Cisco-Systems/88211296/User-Guide-3141057-Page-20.png)


![Depending on the quality of these devices and their proximity to other devices such as mobile phones ortwo-way radios, some audio noise may still occur. In these cases, Cisco recommends that you take one ormore of the following actions:•Move the external device away from the source of the RF or AF signals.•Route the external device cables away from the source of the RF or AF signals.•Use shielded cables for the external device, or use cables with a better shield and connector.•Shorten the length of the external device cable.•Apply ferrites or other such devices on the cables for the external device.Cisco cannot guarantee the performance of the system because Cisco has no control over the quality of externaldevices, cables, and connectors. The system will perform adequately when suitable devices are attached usinggood quality cables and connectors.In European Union countries, use only external headsets that are fully compliant with the EMC Directive[89/336/EC].CautionPhone Behavior During Times of Network CongestionAnything that degrades network performance can affect Cisco IP Phone voice and video quality, and in somecases, can cause acall to drop. Sources of network degradation can include, but are not limited to, the followingactivities:•Administrative tasks, such as an internal port scan or security scan•Attacks that occur on your network, such as a Denial of Service attackSARThis product's SAR value meets applicable national SAR limitsof 1.6W/kg. The specific values can be found in the productdatasheet.When carrying the product or using it while worn on your body,either use an approved accessory such as a holster or otherwisemaintain a distance of 5 cm from the body to ensure compliancewith RF exposure requirements. Note that the product may betransmitting even if you are not making a phone call.Cisco Wireless IP Phone 8821 and 8821EX User Guide 89Product Safety and SecurityPhone Behavior During Times of Network Congestion](https://usermanual.wiki/Cisco-Systems/88211296/User-Guide-3141057-Page-99.png)