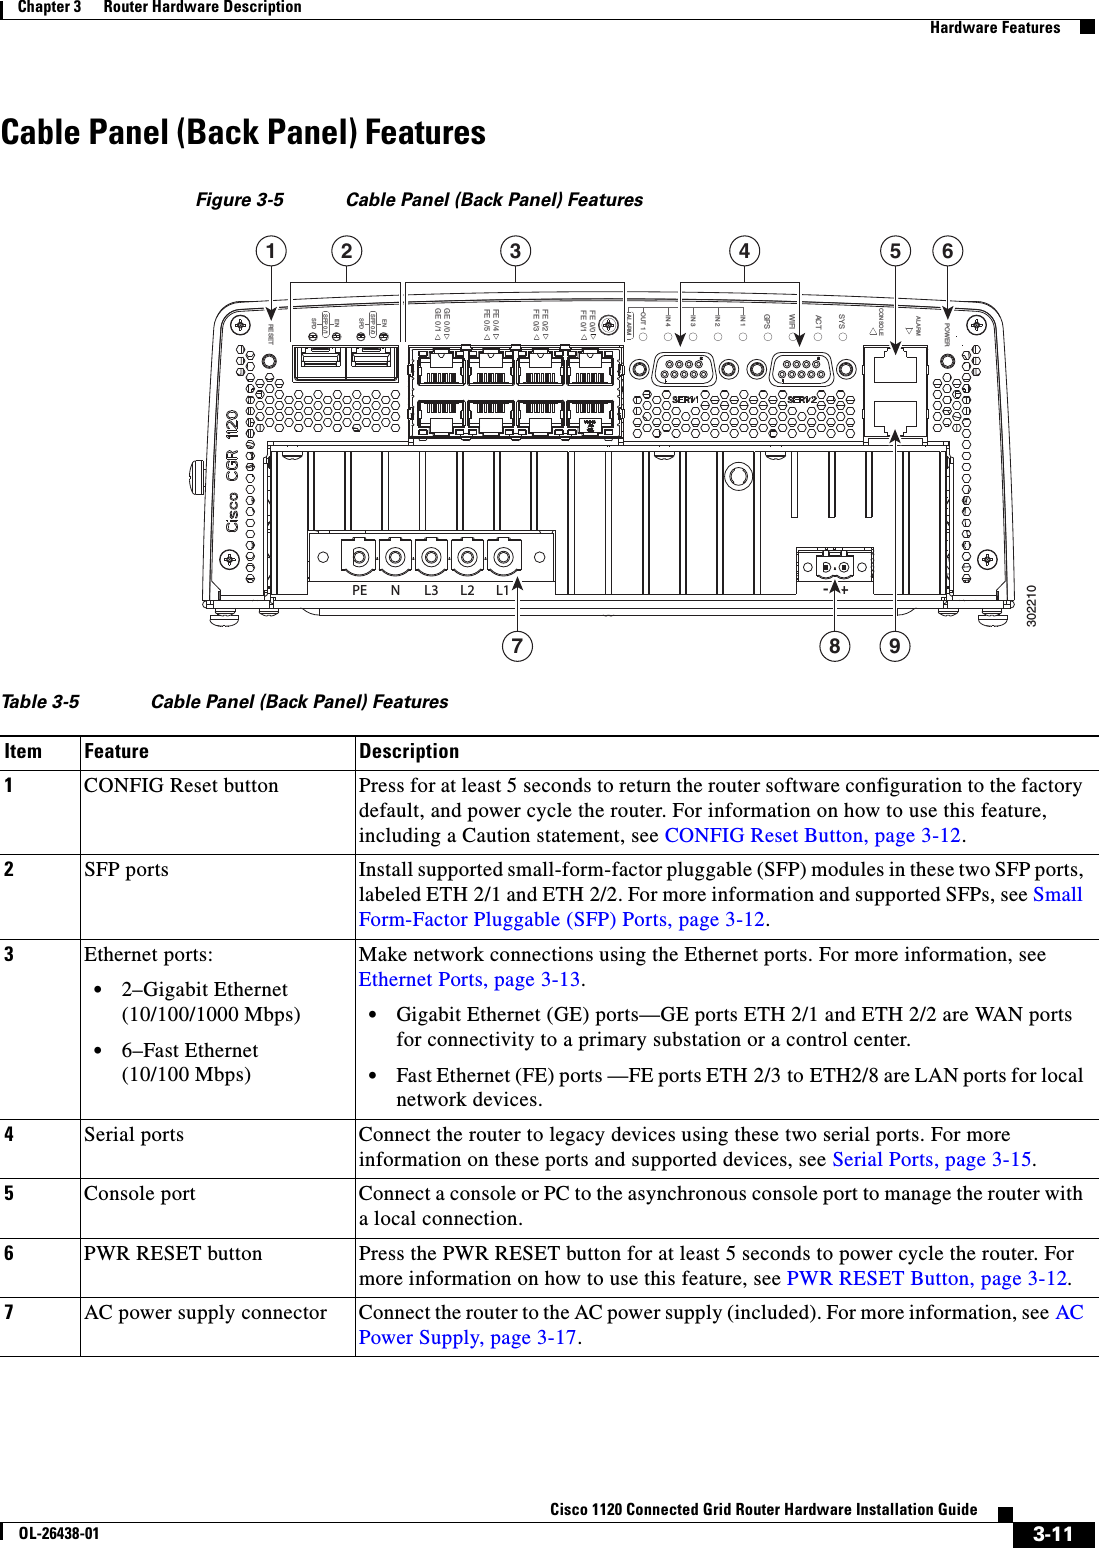
Cisco Systems CALAB0676 Cisco 1120 Connected Grid Router (CGR 1120) User Manual cgr1120hig
Cisco Systems Inc Cisco 1120 Connected Grid Router (CGR 1120) cgr1120hig
UserManual.wiki
>
Cisco Systems
>
CALAB0676 User Manual
Users Manual
Navigation menu
Upload a User Manual
Namespaces
Wiki Guide
HTML
PDF
Info
Views
User Manual
Discussion / Help
Navigation


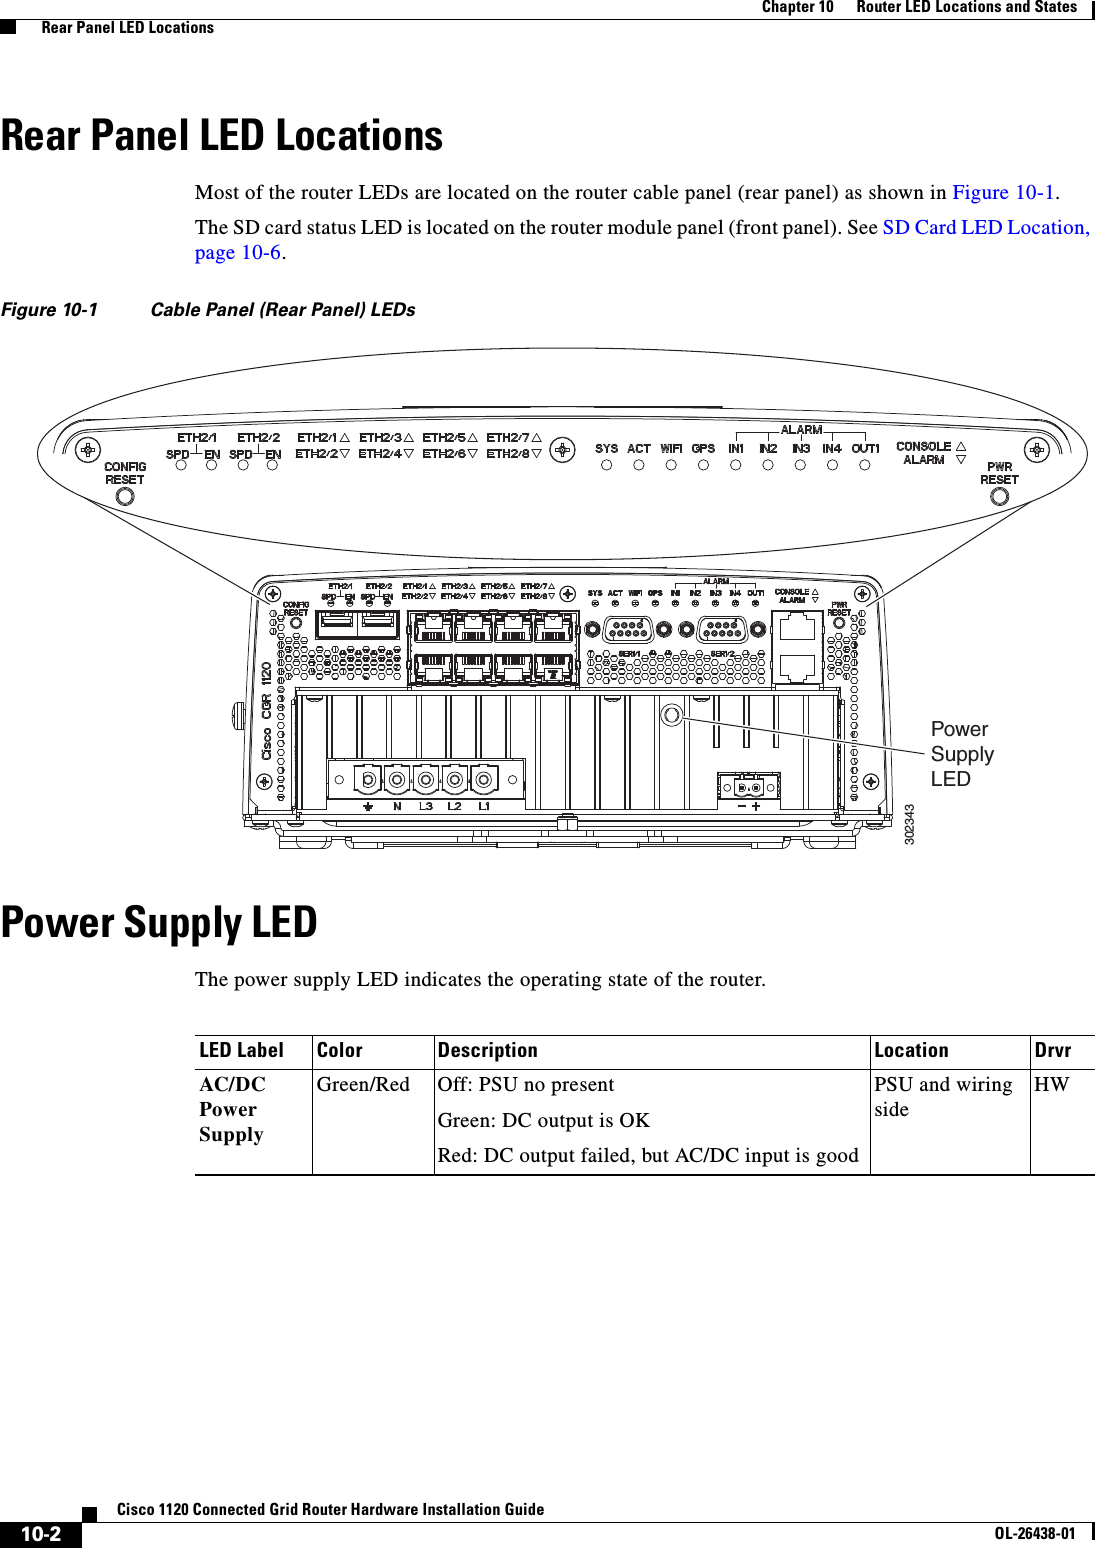
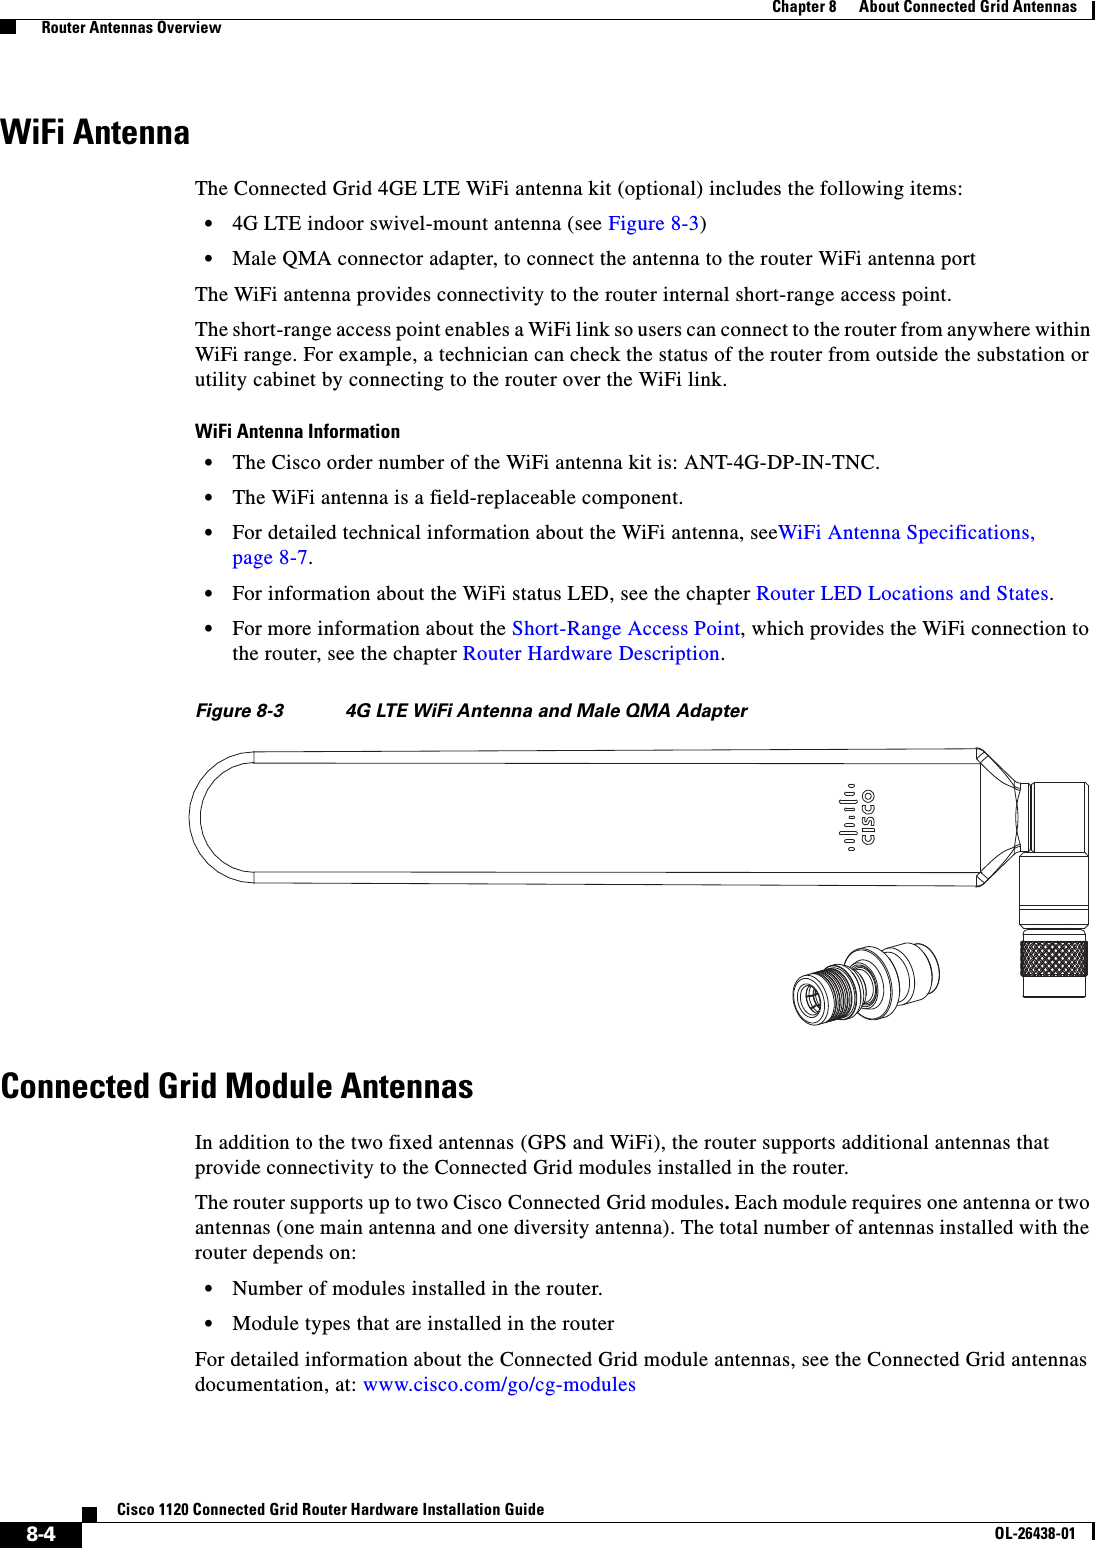
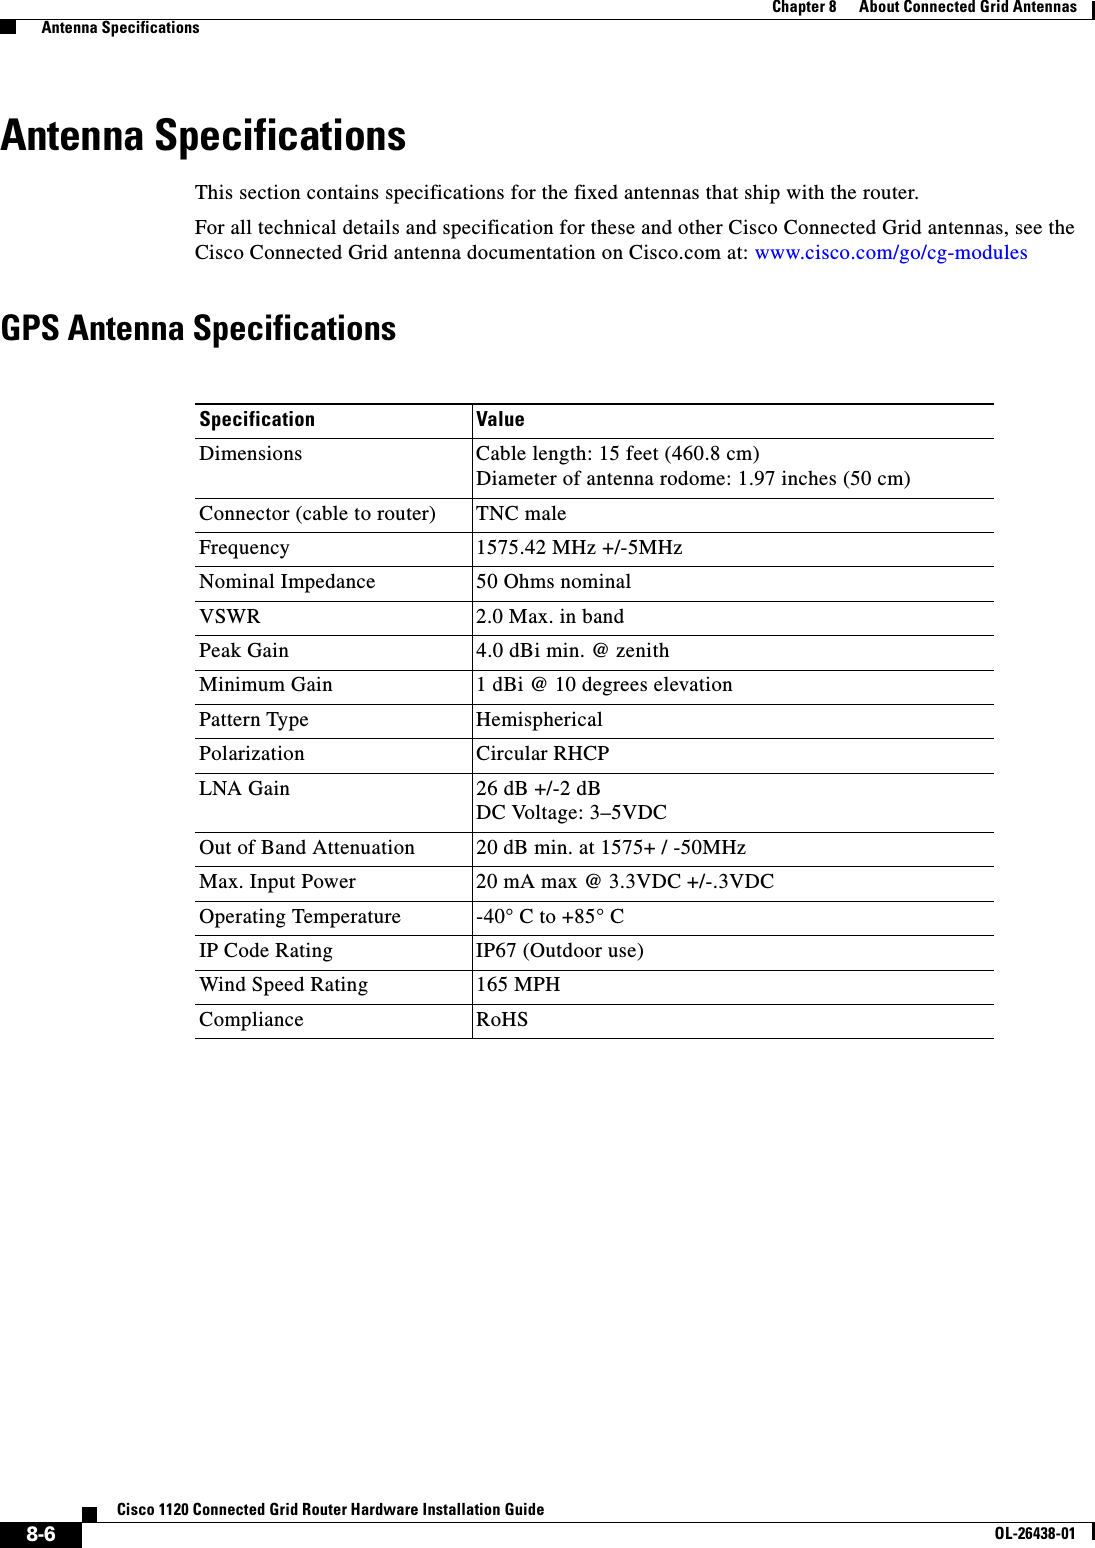
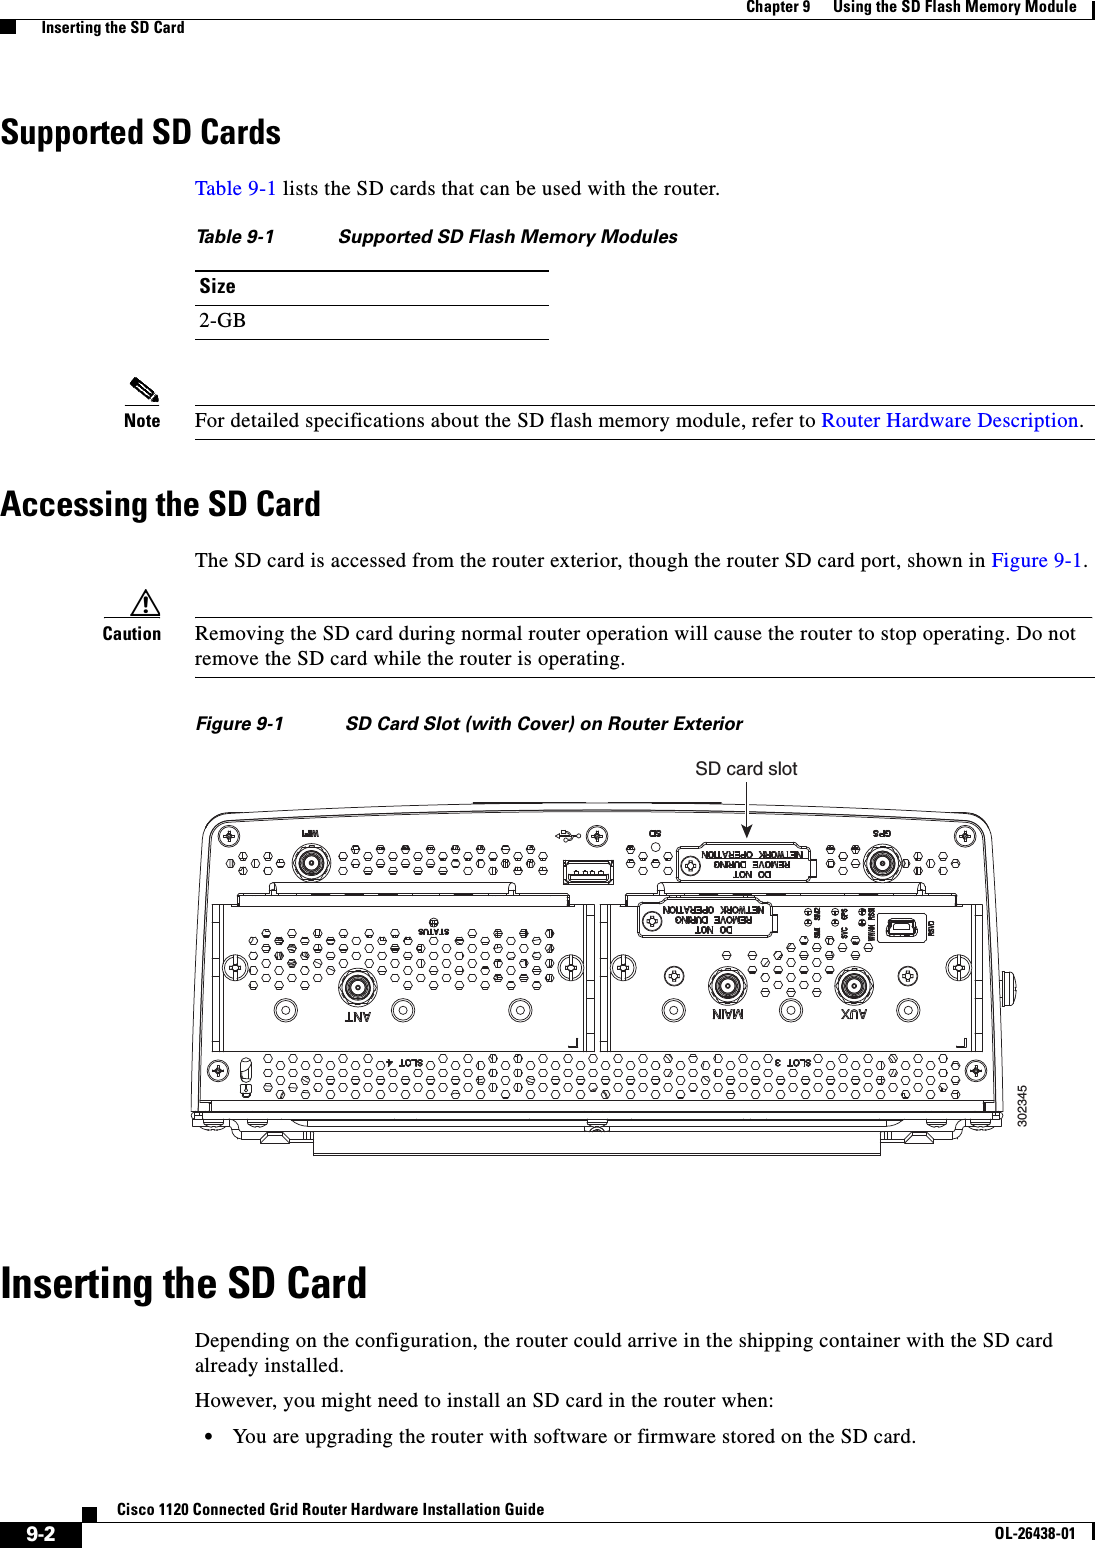
![3-20Cisco 1120 Connected Grid Router Hardware Installation GuideOL-26438-01Chapter 3 Router Hardware Description Hardware FeaturesSpecificationsRelated CommandsUse the commands in this section to see the GPS current time and location.Use the show gps time command to display the current GPS time:cgr-1000# show gps time8:46:9.923 UTC Fri Sep 11 2011Use the show gps location command to display the GPS latitude and longitude:cgr-1000# show gps locationLatitude: 37.4090637Longitude -121.9523598Short-Range Access PointThe router features an integrated, short-range WiFi access point to support a wireless connection to the router, over which you can administer the router. The router can be installed in a utility box or substation; the wireless connection enables you to manage the router from outside these enclosures.The WiFi connection is available only when the system software is operating. If the system software is not operating, you cannot use the WiFi connection to connect to or administer the router.Related CommandsTo display WiFi configuration information, enter any or all of the following commands:•show interface wifi slot/port [associations | brief | description | statistics]–Summarizes the status of the interface as up or down, the five second input and output rate and the number of input and output packets. Additionally, the Cisco CG-OS router displays hardware details such as radio type (802.11N, 2.4 GHz radio), MAC address and MTU setting.•show controller wifi slot/port–Displays serial number, software version, and configured frequency and power settingsFor detailed information about these commands, see the chapter “Configuring the WiFi Interface” in the Cisco 1000 Series Connected Grid Routers WiFi Software Configuration Guide, at www.cisco.com/go/cgr1000-docs.Specification DescriptionChannels 12Tracking sensitivity -160 dBmAcquisition sensitivity -148 dBmFast TTFF (Cold start) 38 sectionsError correction Space Based Augmentation Systems (SBAS)](https://usermanual.wiki/Cisco-Systems/CALAB0676/User-Guide-1850190-Page-38.png)


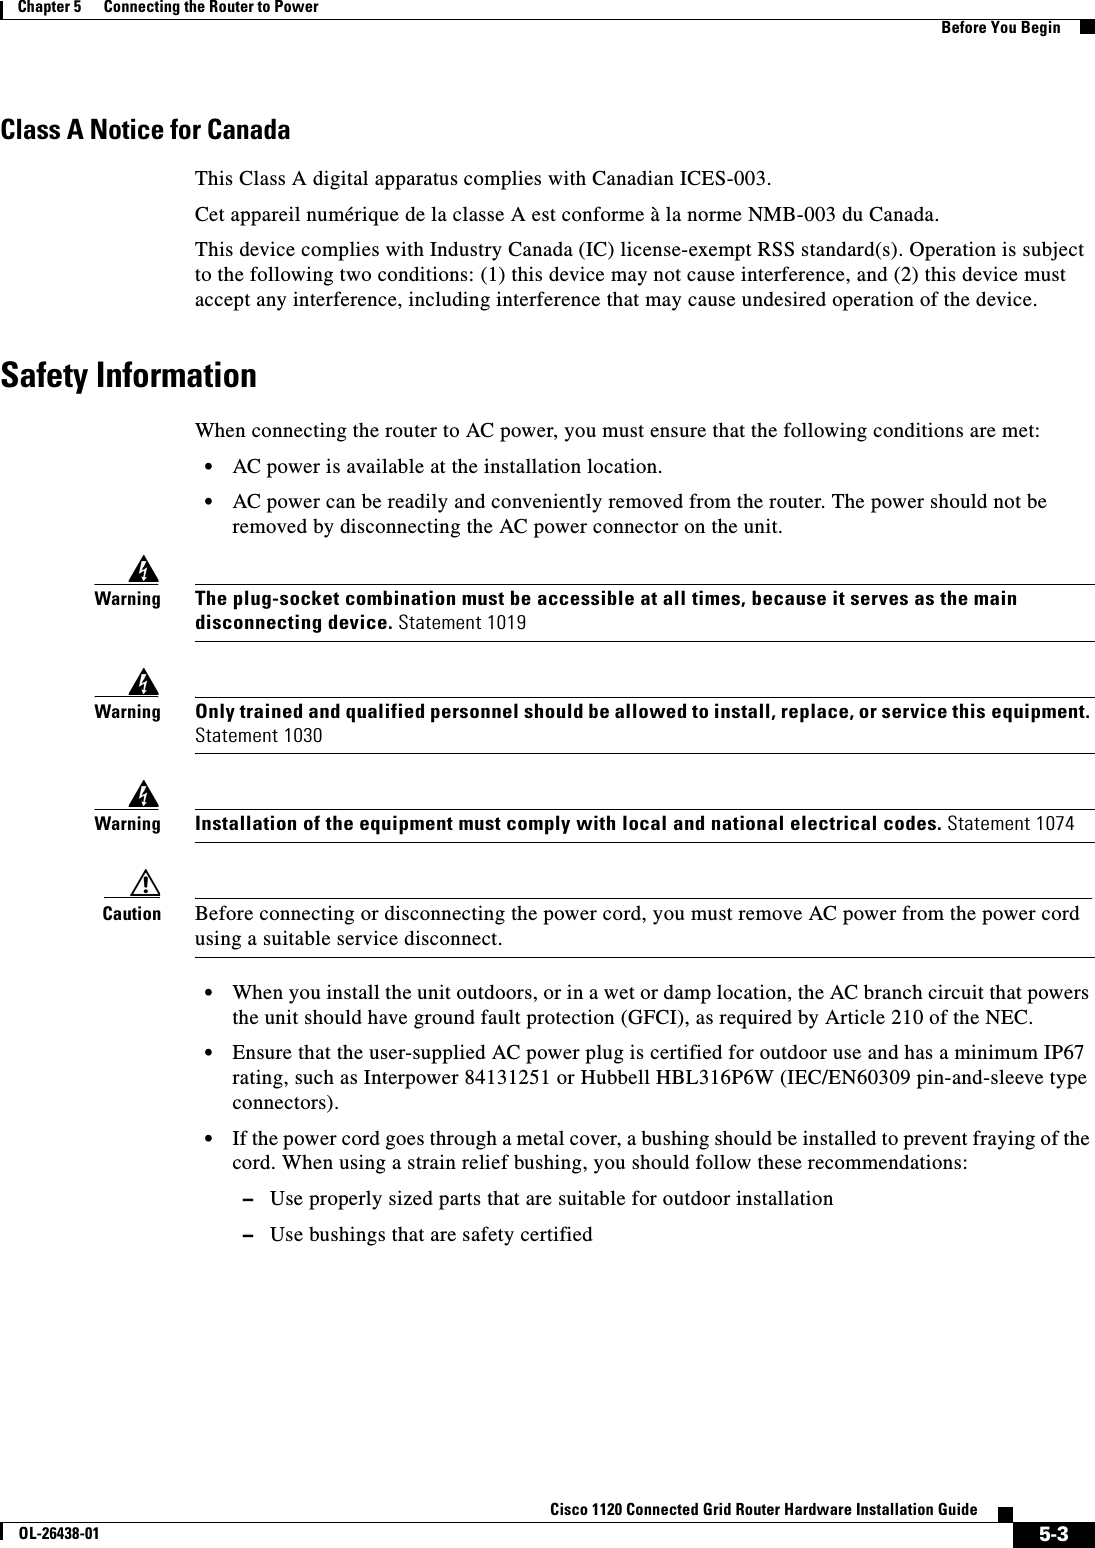


![9-6Cisco 1120 Connected Grid Router Hardware Installation GuideOL-26438-01Chapter 9 Using the SD Flash Memory Module Related CommandsRelated CommandsUse the copy running-config startup-config command to save the router current software configuration to the SD card:cgr1120# copy running-config startup-config [########################################] 100% Copy complete, now saving to disk (please wait)...](https://usermanual.wiki/Cisco-Systems/CALAB0676/User-Guide-1850190-Page-94.png)