Cisco Systems IW3702 Cisco Industrial Wireless 802.11ac Dual Band Access Point User Manual iw3702 gsg
Cisco Systems Inc Cisco Industrial Wireless 802.11ac Dual Band Access Point iw3702 gsg
UserManual.wiki
>
Cisco Systems
>
IW3702 User Manual
>
Installation Guide
Contents
1.
Users Manual
2.
Draft Installation Guide
3.
Draft Installation Guide addendum
4.
Installation Guide
5.
Installation Guide amendment
Installation Guide
Navigation menu
Upload a User Manual
Namespaces
Wiki Guide
HTML
PDF
Info
Views
User Manual
Discussion / Help
Navigation
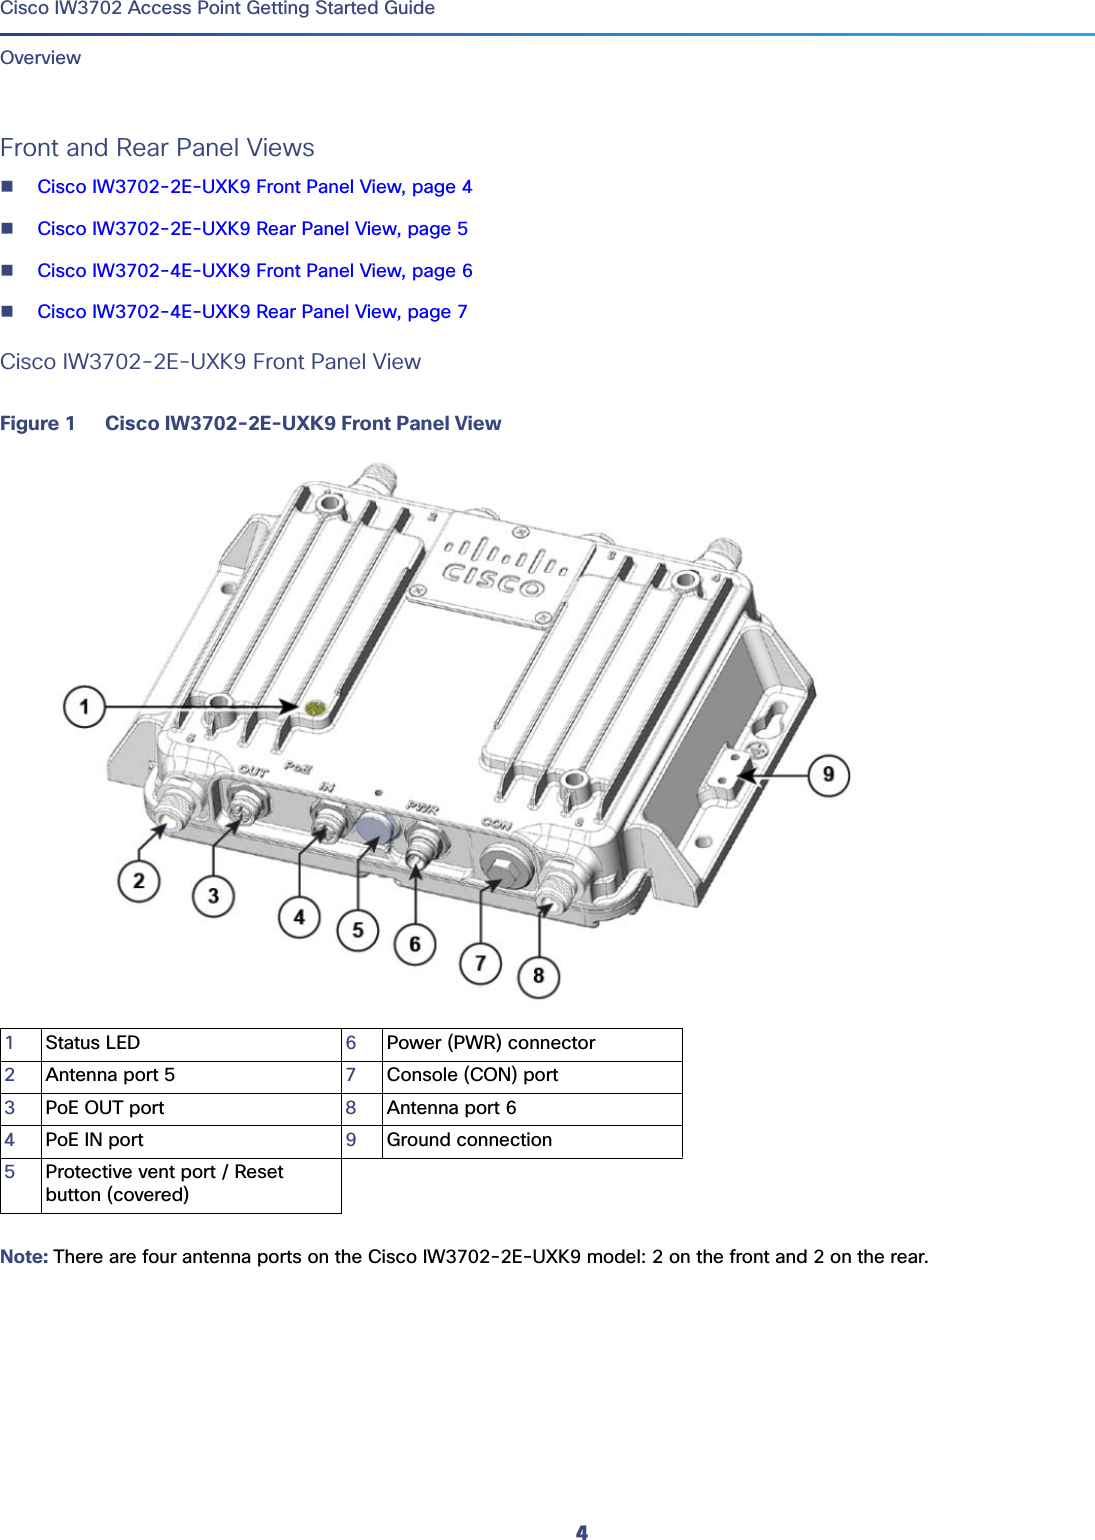
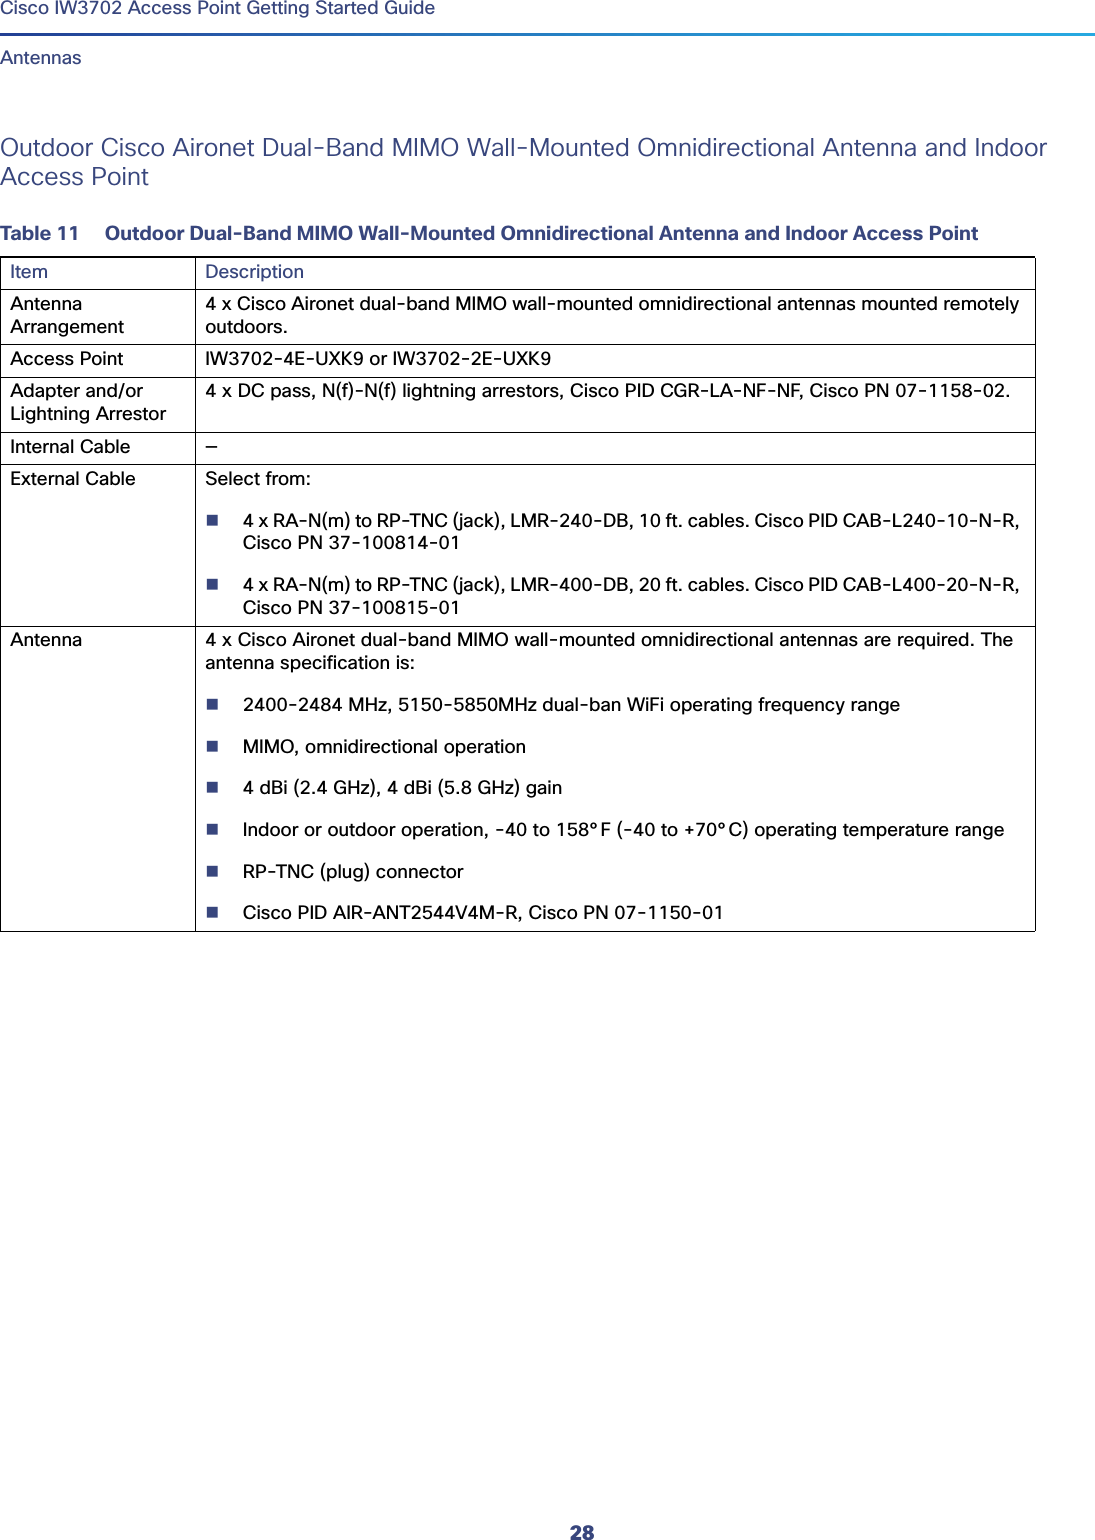
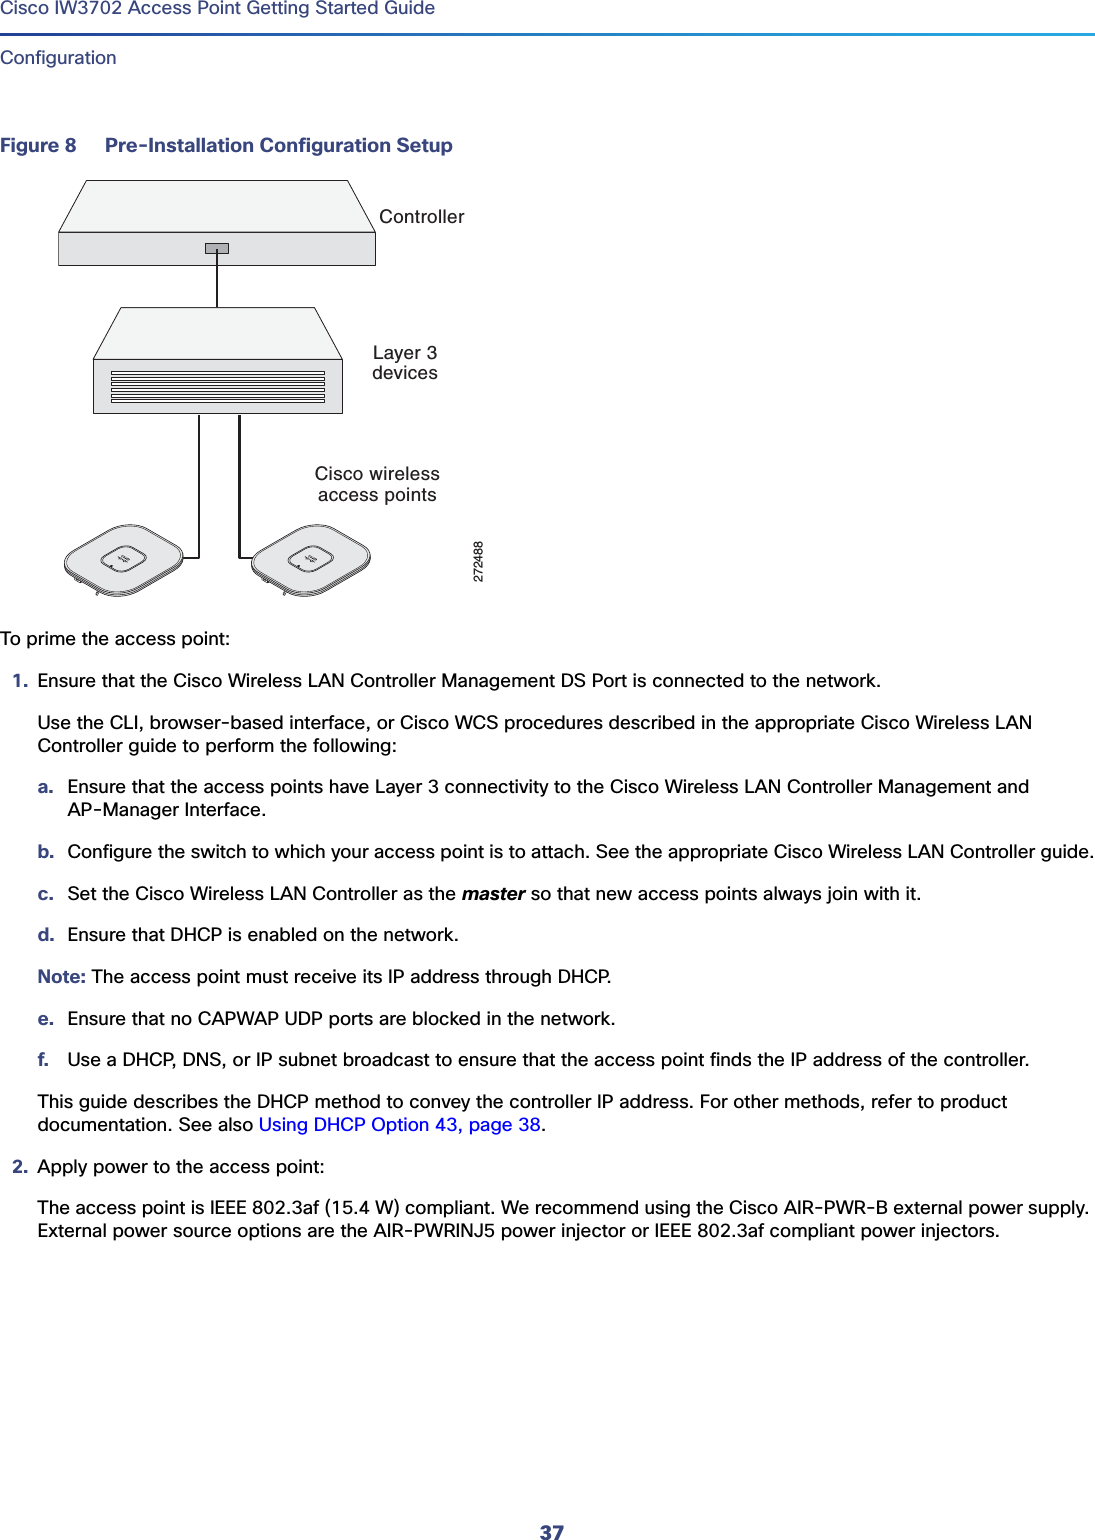
![1Cisco Systems, Inc. www.cisco.comCisco IW3702 Access Point Getting Started GuideFirst Published: July 2015This guide documents the hardware features of the Cisco IW3702 access point. It describes the physical and performance characteristics of each access point, and explains how to install and configure an access point.This publication is for the network technicians who install and configure access points. You must be familiar with network structures, terms, and concepts.The Cisco IW3702 access point is referred to as access point in this document.OrganizationThis guide includes the following sections:ConventionsThis document uses the following conventions. Section DescriptionConventions, page 1 Describes text conventions used in this document.Overview, page 3 Describes the major components and features of the access point.Installation, page 11 Provides warnings, safety information, and installation information you need to install your access point.Antennas, page 19 Provides information about the antennas used by the access point and the antenna configurations deployed.Configuration, page 31 Describes the steps to configure the access point.Technical Specifications, page 41 Lists technical specifications for the access point.Ports and Connectors, page 50 Describes the port and connector pinouts for the access point.Convention Indicationbold font Commands and keywords and user-entered text appear in bold font.italic font Document titles, new or emphasized terms, and arguments for which you supply values are in italic font.[ ] Elements in square brackets are optional.{x | y | z } Required alternative keywords are grouped in braces and separated by vertical bars.[ x | y | z ] Optional alternative keywords are grouped in brackets and separated by vertical bars.string A nonquoted set of characters. Do not use quotation marks around the string or the string will include the quotation marks.courier font Terminal sessions and information the system displays appear in courier font.](https://usermanual.wiki/Cisco-Systems/IW3702.Installation-Guide/User-Guide-2685290-Page-1.png)
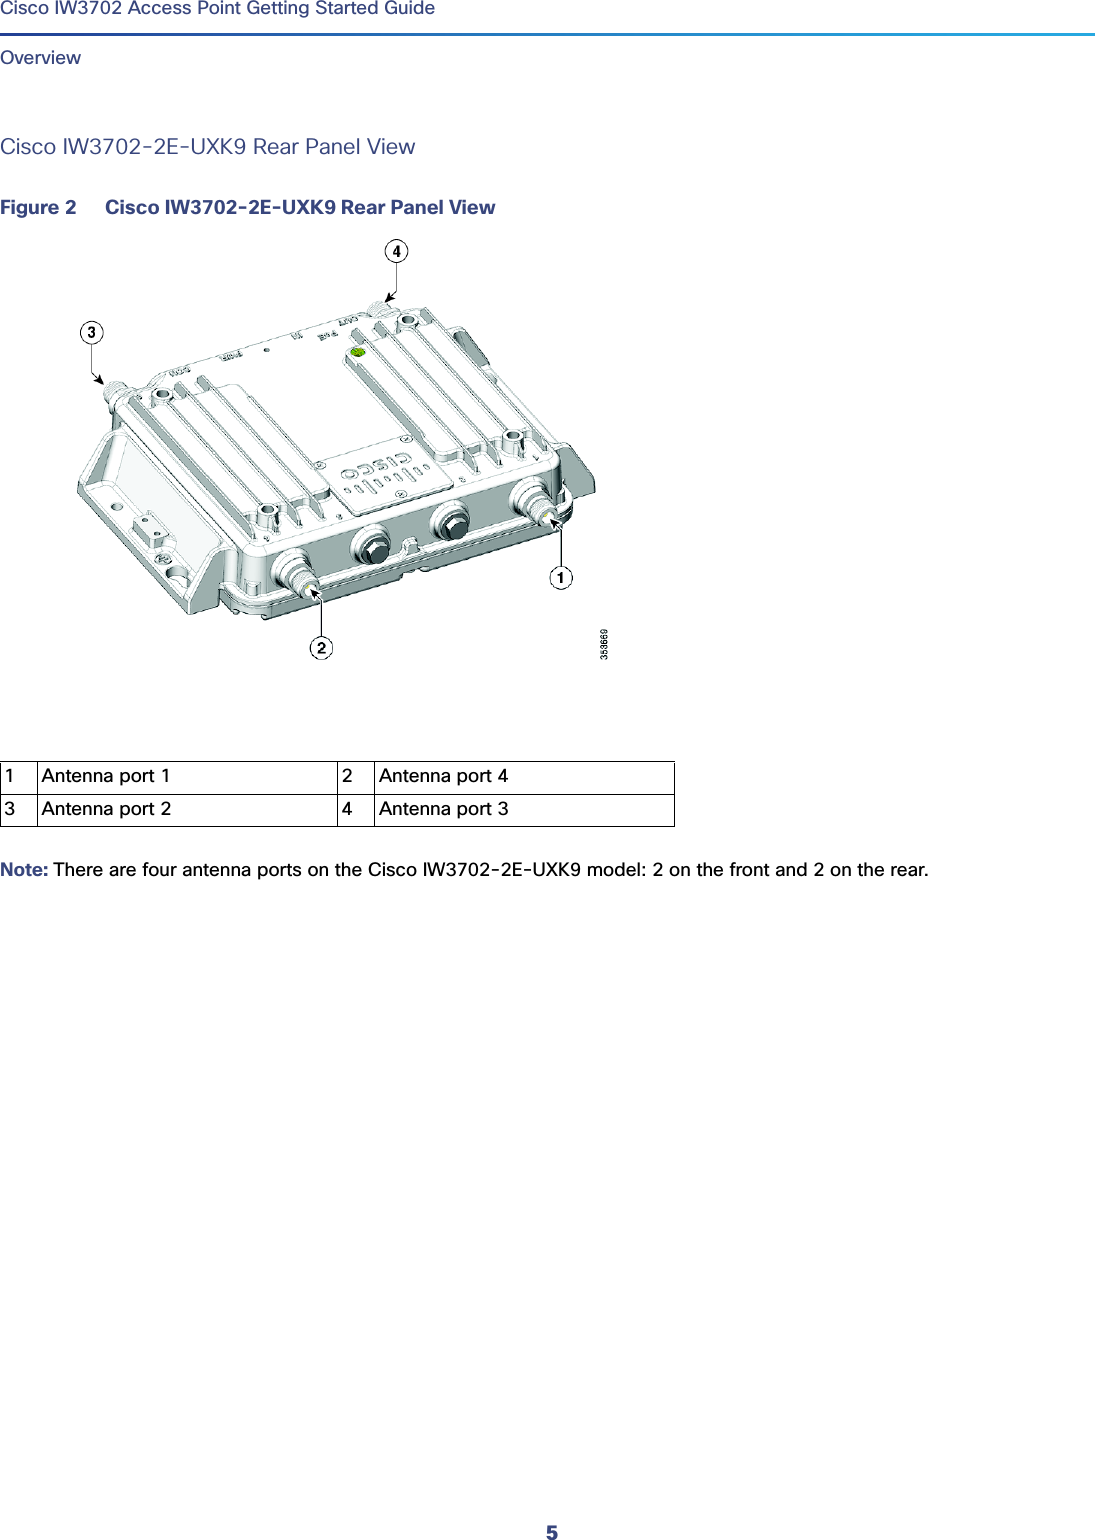
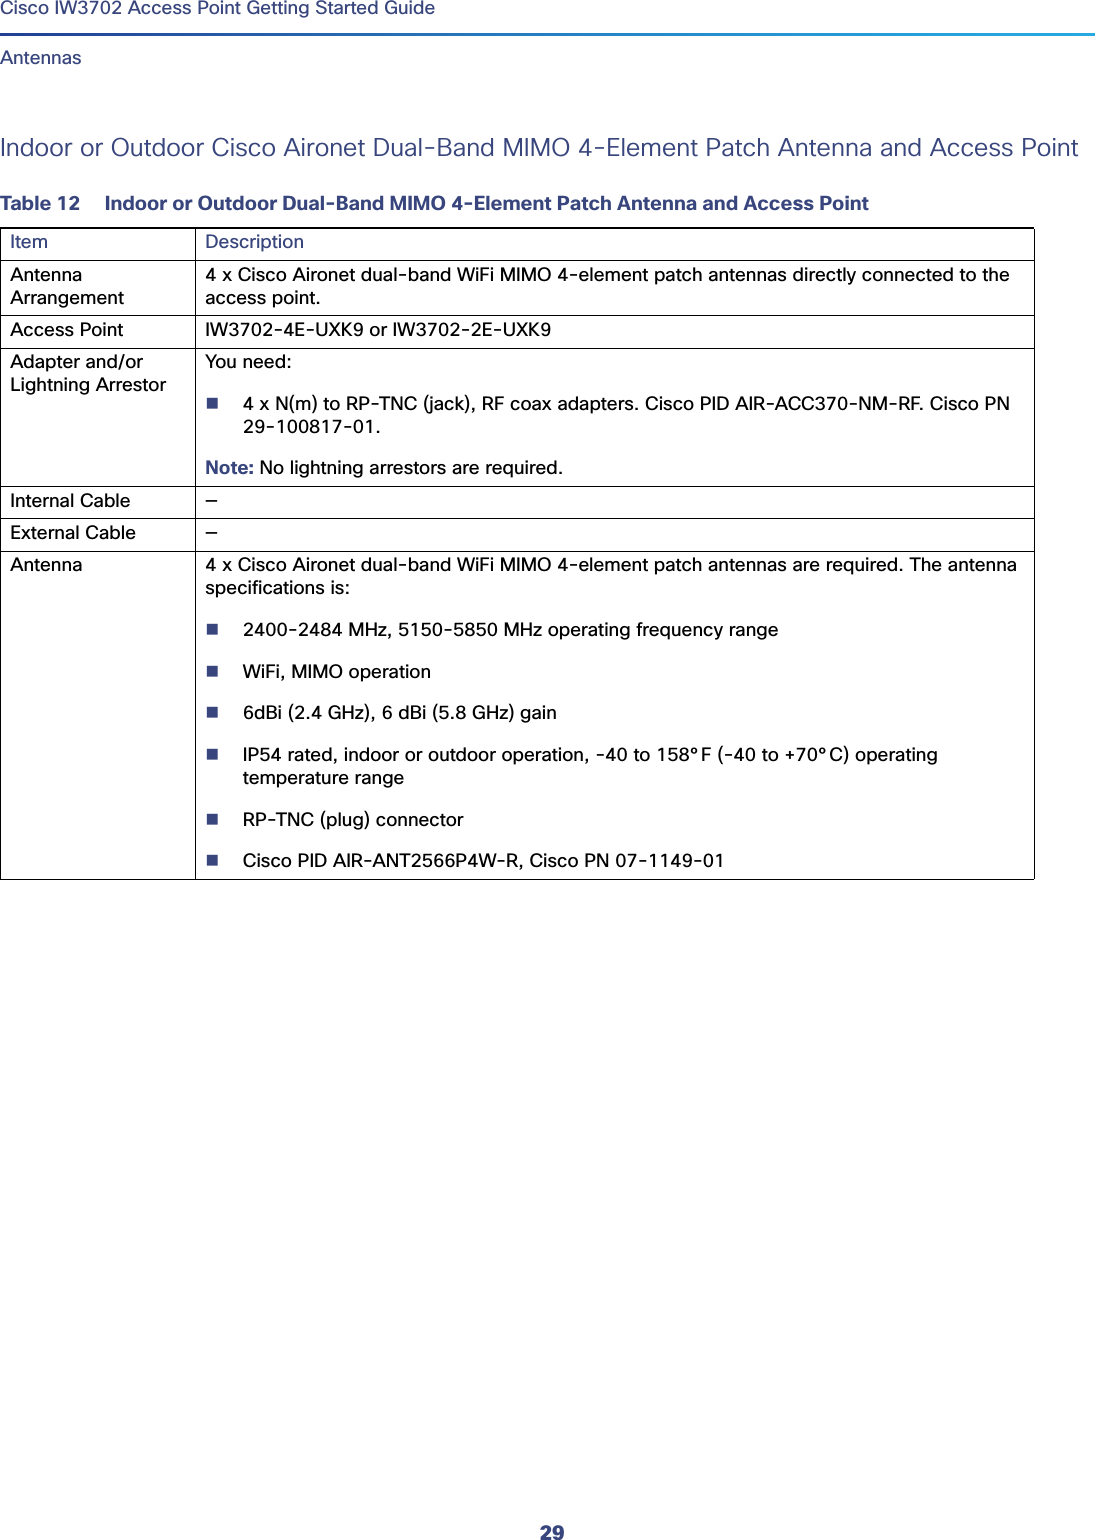
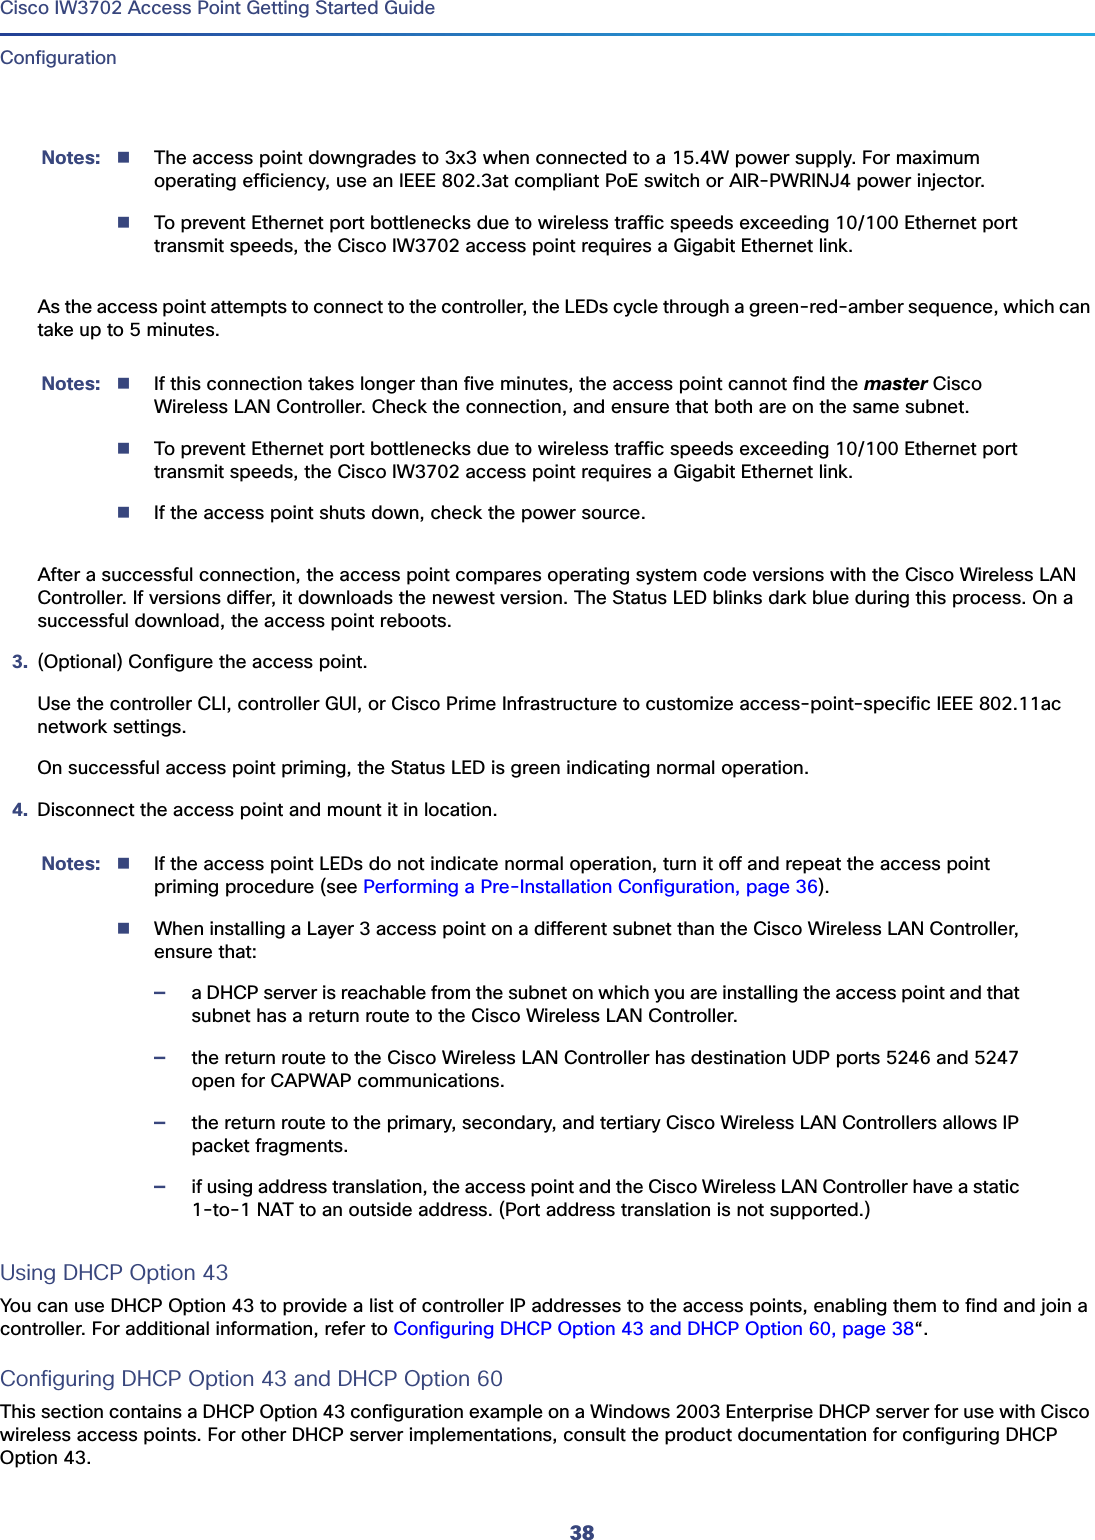
![2Cisco IW3702 Access Point Getting Started GuideConventionsNote: Means reader take note. Notes contain helpful suggestions or references to material not covered in the manual.Caution: Means reader be careful. In this situation, you might perform an action that could result in equipment damage or loss of data.Warning: IMPORTANT SAFETY INSTRUCTIONSMeans danger. You are in a situation that could cause bodily injury. Before you work on any equipment, be aware of the hazards involved with electrical circuitry and be familiar with standard practices for preventing accidents. Use the statement number provided at the end of each warning to locate its translation in the translated safety warnings that accompanied this device.SAVE THESE INSTRUCTIONSRegulatory: Provided for additional information and to comply with regulatory and customer requirements.< > Nonprinting characters such as passwords are in angle brackets.[ ] Default responses to system prompts are in square brackets.!, # An exclamation point (!) or a pound sign (#) at the beginning of a line of code indicates a comment line.Convention Indication](https://usermanual.wiki/Cisco-Systems/IW3702.Installation-Guide/User-Guide-2685290-Page-2.png)