Clarion Sirius Plug And Play Receiver User’s Guide CALYPSO Manual
User Manual: Clarion CALYPSO Clarion U.S.A | Search Result
Open the PDF directly: View PDF ![]() .
.
Page Count: 44
- Getting Started
- Basic Operations
- Setting Options
- Using the Remote Control
- Troubleshooting
- Specifications
Calypso
1234567890
POWER JUMP MEMO BAND MENU
DISP
CAT
Plug and Play Receiver
User’s Guide
Clarion_SIRIUS_PnP_Shuttle_Users_Guide.book Page 1 Thursday, February 3, 2005 7:42 PM
Clarion_SIRIUS_PnP_Shuttle_Users_Guide.book Page 2 Thursday, February 3, 2005 7:42 PM

Calypso 1
Dear Customer
Congratulations on your purchase of the world’s
finest brand in the electronic industry. At Clarion we
are committed to high-quality sound reproduction,
and are confident that you will be pleased with your
purchase.
Clarion’s Sirius Satellite Plug and Play Receiver
provides entertainment with the flexibility of both
home and car use.
100 channels of original programming received in
high-quality digital sound provide:
• 60 channels of commercial-free music
• 40 channels of news, sports and entertainment
Your Plug and Play receiver requires one or both of
the following adapter kits for operation:
• Home/Office Kit part number: CLHK
• Automobile Kit part number: CLCK
Clarion and Sirius Satellite Radio welcome you to an
experience like no other.
To learn more about Clarion’s complete line of audio
products, please visit us at our Website:
www.clarion.com
Clarion_SIRIUS_PnP_Shuttle_Users_Guide.book Page 1 Thursday, February 3, 2005 7:42 PM
User’s Guide
2
Vehicle Precautions
Follow these precautions to avoid a serious auto
accident or personal injury:
• Do not mount the Plug and Play receiver where
it will block your view through the windshield or
your view of dashboard indicators and displays.
• Do not mount the Plug and Play receiver where
it might obstruct the operation of a safety
device, such as air bags.
• Do not let the receiver distract you as you drive.
You are responsible for the vehicle. Always
drive safely and follow traffic rules.
FCC Notice
This device complies with Part 15 of the FCC Rules.
Operation is subject to the condition that this device
does not cause harmful interference.
Copyright and Trademarks
This document is copyrighted by Clarion. You may
not copy any portion of it without permission.
SIRIUS is a registered trademark of SIRIUS
Satellite Radio.
Clarion_SIRIUS_PnP_Shuttle_Users_Guide.book Page 2 Thursday, February 3, 2005 7:42 PM
Calypso 3
Contents
Getting Started.................................................. 5
What comes in the box ............................... 5
Additional components ............................... 5
How satellite radio works ............................ 6
Preparing to use the receiver ..................... 7
Locating the receiver at home ................. 7
Locating the receiver in a vehicle ............ 7
Install the antenna ................................... 7
Turn the power on.................................... 7
Noting your identification number ............ 8
Activate the radio service......................... 8
Receiver controls (front panel) .................... 9
Basic Operations ................................... 10
How to read the default display ................ 10
Changing the size of the text .................... 10
Direct tuning by channel ........................... 11
Tuning by category ................................... 11
Tuning by previewing what’s playing ........ 12
Previewing by category.......................... 12
Previewing all channels ......................... 13
Jumping to your favorite channel ..............13
Jump settings ......................................... 13
Configuring Jump for traffic reports ........ 14
Configuring JUMP for your
favorite channel.................................. 15
Tuning to a sports game ...........................15
Configuring a team-playing alert ............ 15
Tuning by favorites ....................................17
Storing favorites ..................................... 17
Direct tuning by band
and preset number............................. 18
Tuning by preset number ....................... 18
Tuning by channel, artist,
game or title ....................................... 18
Saving favorite information ........................19
Activating automatic searching
for favorites ........................................ 19
Storing favorite information .................... 19
Replacing information............................. 21
Finding favorites..................................... 21
Clarion_SIRIUS_PnP_Shuttle_Users_Guide.book Page 3 Thursday, February 3, 2005 7:42 PM
User’s Guide
4
Viewing stored favorite information........ 22
Deleting stored favorite information ....... 22
Exiting viewing stored
favorite information ............................ 23
Parent control features ............................. 23
Turning the unit off .................................... 23
Setting Options .......................................23
Accessing Options .................................... 24
Quick reference to options ........................ 24
Sirius ID .................................................... 25
FM Transmitter .......................................... 25
Game settings ........................................... 26
Jump settings ............................................ 26
Display settings ......................................... 27
Confirm tone settings ................................ 27
Add or skip ................................................ 27
Skipping a channel................................. 27
Accessing skipped channels.................. 28
Restoring a skipped channel.................. 28
Lock Options ............................................. 28
Locking a channel .................................. 28
Accessing locked channels.................... 29
Restoring a locked channel.................... 29
Changing the lock code ......................... 29
Audio Level Options .................................. 30
Antenna Aiming (Home Installation) ......... 30
Memory Options ....................................... 31
Time Based Features ............................... 31
Clock...................................................... 32
Alarm Clock............................................ 32
Program Alert......................................... 32
Auto Shutdown....................................... 33
Sleep mode............................................ 33
Using the Remote Control .....................34
Remote control features ........................... 35
Troubleshooting .....................................36
Specifications .........................................38
Limited Warranty Information ...............40
Clarion_SIRIUS_PnP_Shuttle_Users_Guide.book Page 4 Thursday, February 3, 2005 7:42 PM
Calypso 5
What comes in the box
1. Getting Started
Plug and Play receiver
Remote control uni
t
Includes AAA batteries for the remote control
1234567890
POWER JUMP MEMO BAND MENU
DISP
CAT
Additional components
In addition to the Plug and Play receiver, you will
need a kit for your home or your vehicle (or both):
• Home kit part number: CLHK
• Vehicle kit part number: CLCK
Clarion_SIRIUS_PnP_Shuttle_Users_Guide.book Page 5 Thursday, February 3, 2005 7:42 PM

User’s Guide
6
How satellite radio works
1234567890
POWER JUMP MEMO BAND MENU
DISP
CAT
SIRIUS Satellite
Radio company in
New York City
Hundreds of channels of
radio content bounce off the
network of satellites that
encircle the earth.
Satellite
Plug and Play
Radio
The antenna receives SIRIUS signals
anywhere in the continental United
States provided no obvious satellite
signal obstructions are in the way.
Obstructions include: nearby buildings,
high terrain, parking garages and
tunnels.
The Plug and Play
receiver decodes the
information and sends it
to your radio or other
audio system.
Antennareceiver
Clarion_SIRIUS_PnP_Shuttle_Users_Guide.book Page 6 Thursday, February 3, 2005 7:42 PM
Calypso 7
Preparing to use the receiver
See the separate installation guide for how to install
the home or vehicle kit.
Locating the receiver at home
Install the antenna and Plug and Play receiver near
your stereo receiving equipment.
Locating the receiver in a vehicle
Mount the Plug and Play receiver in an accessible
location, usually the dashboard. Make sure:
• No component blocks the driver’s view of the
road and rear-view mirrors.
• The driver can easily reach the receiver.
• The receiver is directly in the line-of-sight of the
remote control.
Install the antenna
Mount the antenna per the instruction guide that
comes with the vehicle or home kit.
Turn the power on
1. Plug in the power adapter.
The power icon glows blue.
2. Press the power button.
3. The SIRIUS logo appears for three seconds
followed by the SIRIUS preview channel.
If you’re using the Plug and Play receiver for the
first time, the unit displays “Updating Channels.”
Then the default display appears. For a
description of this screen, see “How to read the
default display” on page 10.
Clarion_SIRIUS_PnP_Shuttle_Users_Guide.book Page 7 Thursday, February 3, 2005 7:42 PM

User’s Guide
8
Noting your identification number
You may need this number in the future.
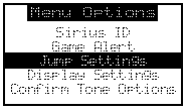
1. Press MENU.
The unit displays the Menu Options page with
the SIRIUS ID option highlighted.
2. Press the encoder knob.
The 12-digit SIRIUS ID number appears.
3. Write this number here.
Activate the radio service
• Visit Sirius.com and click JOIN, then follow the
on-screen instructions.
OR
• Call SIRIUS at 1-888-539-SIRIUS (7474).
A friendly Customer Care representative will
activate your service. A subscription fee is
involved.
Make sure to have your identification
number accessible when calling
Sirius.
Note
Clarion_SIRIUS_PnP_Shuttle_Users_Guide.book Page 8 Thursday, February 3, 2005 7:42 PM
Calypso 9
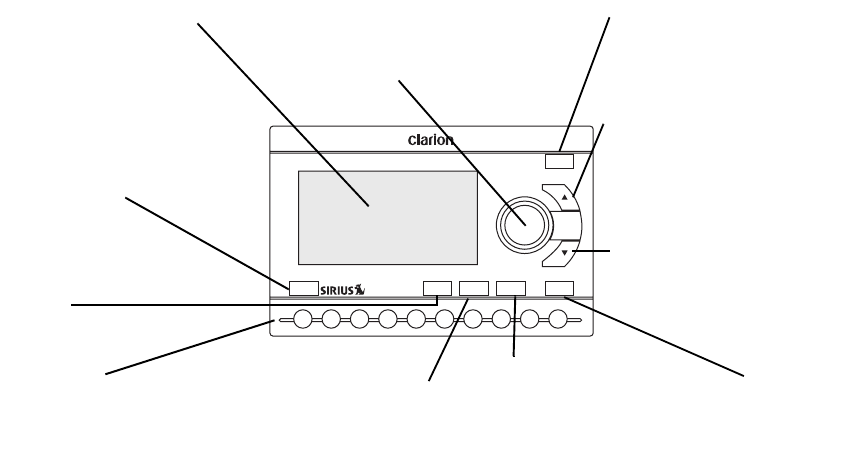
Receiver controls (front panel)
1234567890
POWER JUMP MEMO BAND MENU
DISP
CAT
MEMO (memory) stores up to
20 artist, song title or sports
team combinations.
Category down arrow moves back
through channel groups based on
content category.
The power button turns the
power on and off. The blue
LED indicates power is applied
to the receiver.
DISP (display) chooses one of
several ways to present stream
name, artist and song title.
Channel and option names
appear in the liquid crystal
display (LCD).
Use the keypad buttons to
directly enter a channel or
preset number.
Turn the Encoder knob clockwise to
highlight the next item. Turn it
counterclockwise to highlight the
previous item.
MENU accesses
Plug and Play
receiver options.
BAND momentarily switches
among bands A, B and C.
Each band contains 10
preset stream settings.
Category up arrow moves forward
through channel groups based on
content category.
JUMP activates a favorite
channel, such as your traffic
report.
Clarion_SIRIUS_PnP_Shuttle_Users_Guide.book Page 9 Thursday, February 3, 2005 7:42 PM

User’s Guide
10
After activating your SIRIUS subscription and
pressing the POWER button, the default display
appears.
1. Turn the Encoder knob clockwise to move to the
next channel.
Turn the Encoder knob counterclockwise to
move to the previous channel.
2. Press the Encoder knob to make a selection.
The channel starts playing. The name scrolls if
the length of the artist’s name or song title
cannot be viewed in its entirety.
ION
A channel is a source of satellite
radio content.
2. Basic Operations
Definition
How to read the default display
Default display
Changing the size of the text
Press DISP to alternate among two display options:
• Large artist’s name and song title in a single
line of scrolling text
Category
name (genre)
Song title
3-digit channel
number
Signal
strength
indicator
Channel name
Artist’s
name
Clock
Band or preset
bank number
Clarion_SIRIUS_PnP_Shuttle_Users_Guide.book Page 10 Thursday, February 3, 2005 7:42 PM

Calypso 11
Large is useful when viewing the display at a
distance, but may cause the screen to scroll if
the name or title is too long to fit the screen.
• Small artist’s name and song title that occupies
two lines of text.
Direct tuning by channel
If you know the channel number you wish to play:
1. Press and release the Encoder knob.
Enter the channel number using the keypad
buttons.
Entering channel number
The receiver changes immediately as soon as
you enter three numbers. If you enter only one
or two digits, the unit waits for three seconds
before changing the channel.
Tuning by category
Category groups channels by music genre or other
content. For example, your favorite rock channels
are in the category “ROCK.”
1. Press (category up) or (category down).
2. Turn the Encoder knob to scroll through the
channels.
3. Press the Encoder knob to select the channel.
The channel begins playing and the LCD
returns to the default display.
Clarion_SIRIUS_PnP_Shuttle_Users_Guide.book Page 11 Thursday, February 3, 2005 7:42 PM

User’s Guide
12
Tuning by previewing what’s playing
There are two ways to preview what’s playing before
selecting a channel.
Previewing by category
This procedure lets you view by category what’s
currently playing on other channels without
changing the current channel.
1. Press (category up) or (category down) to
select a category.
The unit displays a list of channels.
2. Press DISP.
If you chose a music category, pressing DISP
again and again alternates the list among
channel, artist name and song title..
List by channel, artist name, and song title
If you chose a sports category, pressing DISP
switches between team names and current
score for all live play-by-play games.
3. Rotate the Encoder knob to move through the
list.
4. Press the Encoder knob to play the channel.
The channel begins playing and the LCD
returns to the default display.
To go back to your previous channel without making
a selection, press DISP for one second.
Clarion_SIRIUS_PnP_Shuttle_Users_Guide.book Page 12 Thursday, February 3, 2005 7:42 PM
Calypso 13
Previewing all channels
This procedure lets you view regardless of category
what’s currently playing on other channels without
changing the current channel.
1. Press DISP (display) for 2 seconds.
The unit displays a list of all channels
regardless of category.
2. Press DISP again and again to alternate the list
among channel, artist name and song title.
3. Rotate the Encoder knob to move through the
list.
4. Press the Encoder knob to play the channel.
The channel begins playing and the LCD
returns to the default display.
To go back to your previous channel without making
a selection, press DISP for one second.
Jumping to your favorite channel
Press JUMP to tune to the channel you listen to
most often, such as your local traffic, weather, news
or sports channel.
Press JUMP again to return to the original channel.
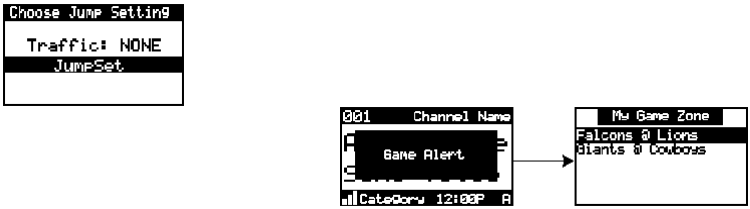
Jump settings
To define your favorite channel, press and hold the
JUMP button for two seconds or press MENU and
select Jump Settings using the Encoder knob.
Jump Settings menu option
Clarion_SIRIUS_PnP_Shuttle_Users_Guide.book Page 13 Thursday, February 3, 2005 7:42 PM

User’s Guide
14
Configuring Jump for traffic reports
1. Turn the Encoder knob to highlight “Traffic,” then
press the knob to make your selection.
Traffic option
2. Turn the Encoder knob to highlight your city,
then press the knob to make your selection.
City option
To cancel your selection, press MENU.
If the channel list has not been
downloaded from the satellite data
channel, the message, “Updating
City List” appears. Please wait 10
minutes and select your city again.
When you press JUMP, the unit immediately
searches for your city’s traffic report when you press
JUMP.
The band indicator changes to the Jump icon to
indicate that search is active. Pressing JUMP while
the receiver is searching, cancels the search and
returns you to your previous channel.
After tuning to the local traffic channel, you may
have to wait up to four minutes to hear your specific
report. The receiver displays an alert when the
report for your selected city is broadcast.
Note
Clarion_SIRIUS_PnP_Shuttle_Users_Guide.book Page 14 Thursday, February 3, 2005 7:42 PM
Calypso 15
Configuring JUMP for your favorite channel
1. Turn the Encoder knob to highlight “JumpSet,”
then press the knob to make your selection.
JumpSet option
The default screen appears.
2. Press MENU to exit the default screen.
3. Turn the Encoder knob to your favorite channel.
4. Press and hold JUMP for two seconds.
Your favorite channel is now programmed to play
when you press JUMP.
Tuning to a sports game
The receiver can constantly scan the SIRIUS
channels and alert you when your favorite team is
playing or when there is a score update for your
team.
The message “Game Alert” is followed by tuning
information.
Game Alert
Turn the Encoder knob to start playing the game.
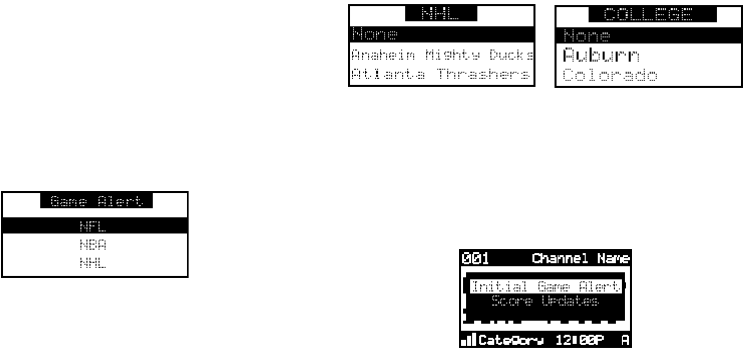
Configuring a team-playing alert
Teams that you have selected and that are currently
playing display in a content category called “My
Clarion_SIRIUS_PnP_Shuttle_Users_Guide.book Page 15 Thursday, February 3, 2005 7:42 PM
User’s Guide
16
Game Zone.” You may select one team from each
sports league and college category.
This procedure explains how to select one team
from each sports league and college category.
1. Turn the Encoder knob to highlight “Game
Alert” and press the knob to select.
2. Turn the Encoder knob to highlight the sports
league or college category and press the knob
to select.
Sports league
3. Turn the Encoder knob to highlight the team
and press the knob to select the team..
Sports team
For college teams, the receiver alerts you for all
teams playing for that college.
The receiver asks you to choose the type of
alert you want to receive.
Choosing the type of alert
Clarion_SIRIUS_PnP_Shuttle_Users_Guide.book Page 16 Thursday, February 3, 2005 7:42 PM
Calypso 17
Initial Game Alert sounds an alert when your
favorite team is playing a game.
All Score Updates sounds an alert when your
team is playing and scores have been updated
for the team.
4. Turn the Encoder knob to highlight your choice
and press the knob to select the alert type.
To exit the Game Alert menu, press MENU.
For instructions on how to use MEMORY and Song
Seek to configure additional teams, see “Saving
favorite information” on page 19.
Tuning by favorites
The receiver can locate up to 30 favorite channels—
10 per band. With hundreds of channels available,
this feature is especially useful.
Storing favorites
To store a favorite from the default display:
1. Press BAND momentarily to select A, B, or C.
The display in the lower right hand side
changes to the corresponding preset band.
2. Locate the channel you want to assign to a
preset by direct tuning. See “Direct tuning by
channel” on page 11.
3. With the channel playing, press and hold any of
the numbered keypad buttons (0-9) for one
second.
The channel number flashes and remains lit to
indicate that the unit stored the channel
number. The current channel number replaces
any previously stored channel.
Clarion_SIRIUS_PnP_Shuttle_Users_Guide.book Page 17 Thursday, February 3, 2005 7:42 PM
User’s Guide
18
Direct tuning by band and preset number
1. Press BAND momentarily and again
momentarily to switch among the three bands:
A, B, and C.
The band letter displays in the lower right
corner of the default display.
2. Press one of the 0 - 9 keys.
The associated preset channel begins playing
and the LCD returns to the default display.
Tuning by preset number
1. Press and hold BAND.
The bottom right portion of the display changes
to highlight the current preset number.
2. Turn the Encoder knob in either direction to
move forward or backward through all presets.
The associated preset channel begins playing
and the LCD returns to the default display.
This procedure displays only stored presets in band
and preset number order (A-1, A-2... B-1, B-2... C-1,
C-2...).
To return to the currently-playing channel without
selecting a preset, press and hold BAND.
Tuning by channel, artist, game or title
1. Press and hold BAND.
2. Press and hold DISP for two seconds.
The unit displays up to six preset channels.
3. Press DISP again and again to alternate among
channel name (right top), artist name (right
middle) and song title (right bottom).
The name scrolls if the length of the artist’s
name or song title cannot be viewed in its
entirety.
4. Turn the Encoder knob to scroll through the
preset list.
Clarion_SIRIUS_PnP_Shuttle_Users_Guide.book Page 18 Thursday, February 3, 2005 7:42 PM
Calypso 19
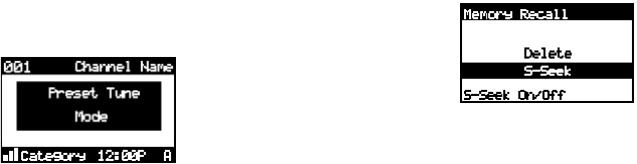
5. Press the knob to tune to the selected channel.
The channel changes and the display indicates
you are in Preset Tune Mode.
Preset Tune Mode
Saving favorite information
You may store a list of up to 20 favorite artists, song
titles or sports games. The receiver can then search
the incoming SIRIUS signal and alert you when a
favorite song or sports team is playing.
Activating automatic searching for favorites
1. Press and hold MEMO for three seconds.
2. Press and release the Enabler knob.
The receiver displays:
Activating song seek
3. Turn the Encoder knob to highlight S-Seek
(Song Seek) and press the knob.
The unit displays the S-Seek settings: On
(default) and Off.
4. Turn the Encoder knob to highlight On and
press the Encoder knob.
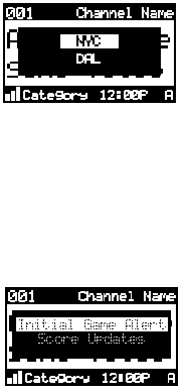
Storing favorite information
1. From the default display momentarily press
MEMO (memory).
If the current channel is an NFL®, NBA®,
NHL® or college play-by-play sports broadcast,
Clarion_SIRIUS_PnP_Shuttle_Users_Guide.book Page 19 Thursday, February 3, 2005 7:42 PM
User’s Guide
20
the program asks you to select one of the
teams playing to store.
Choosing a team to store
2. If storing team information, rotate the Encoder
knob to highlight the team and press the knob
to select the team.
The receiver asks you to choose the type of
alert you want to receive.
Choosing the type of alert
Initial Game Alert sounds an alert when your
favorite team is playing a game.
All Score Updates sounds an alert when your
team is playing and scores have been updated
for the team.
3. If storing team information, rotate the Encoder
knob to highlight your choice and press the
knob to select the alert type.
The receiver makes sure you have not already
stored this channel an another preset.
Assuming it does not find a duplicate, the
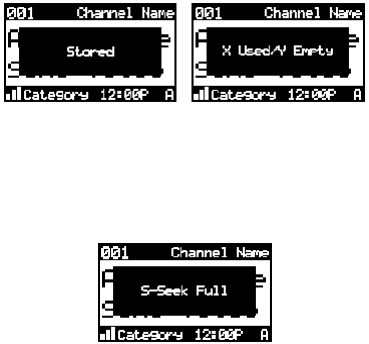
receiver stores the current program information
in its memory and displays a pop-up screen that
Clarion_SIRIUS_PnP_Shuttle_Users_Guide.book Page 20 Thursday, February 3, 2005 7:42 PM
Calypso 21
shows how many of the 20 memory slots are
used and how many are empty.
Stored message followed by usage information
Replacing information
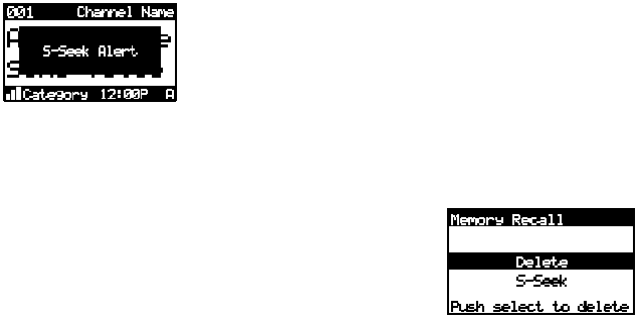
If the unit’s memory is full, it displays the following
message for one second:
Memory full alert
Then it gives you the option to replace a song in the
list with the current one you’re listening to.
1. Use the Encoder knob to choose Replace or
Cancel.
2. If you chose to replace, use the Encoder knob
to highlight the information you wish to replace.
3. Press the Encoder knob to remove the stored
information and replace it with the information
for the current channel.
A pop-up message indicates the new
information is stored. This message is followed
by the pop-up that indicates how many memory
slots are used and how many are empty.
Finding favorites
When you turn the Plug and Play receiver on, it
automatically searches the incoming SIRIUS signal
to see if any of your favorite songs or sports teams
are playing.
Clarion_SIRIUS_PnP_Shuttle_Users_Guide.book Page 21 Thursday, February 3, 2005 7:42 PM
User’s Guide
22
If it finds one or more songs or teams playing on
channels other than the current channel, the
receiver beeps and the following message appears
for two seconds.
Favorite songs and teams alert
Then the list of favorites that are currently playing
appears.
Use the Encoder knob to highlight a song or game
and press the knob to select it.
The stored channel begins to play and the display
reverts to its condition before the alert occurred.
If you make no selection within 10 seconds, the
display returns to its previous status.
Viewing stored favorite information
1. Press and hold MEMO for three seconds.
The unit displays the stored information, one
item at a time on the LCD.
2. Rotate the Encoder knob to page through all 20
items.
Deleting stored favorite information
1. With the stored favorite displaying in the LCD,
momentarily press the Encoder knob.
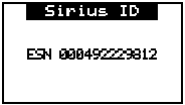
The unit displays two settings: Delete and S-Seek.
Delete options
Clarion_SIRIUS_PnP_Shuttle_Users_Guide.book Page 22 Thursday, February 3, 2005 7:42 PM

Calypso 23
2. Turn the Encoder knob to highlight Delete and
press the Encoder knob.
The receiver asks you to confirm the deletion.
The default selection is NO.
3. Turn the Encoder knob to highlight YES and
press the Encoder knob to complete the
deletion.
Exiting viewing stored favorite information
To exit viewing favorite information, press and hold
MEMO for three seconds.
Parent control features
You may restrict young people from accessing
specific channels in two ways:
• Skip specific channels when tuning.
Use this feature to completely omit specific
channels. For instructions, see “Add or skip” on
page 27.
• Require the listener to enter a four-digit lock
code to play specific channels.
Use this feature to allow only those who know
the four-digit activation code to listen to the
channel. For instructions, see “Lock Options” on
page 28.
Turning the unit off
Press the power button momentarily.
The Clarion logo appears for two seconds and the
unit turns off.
There are a variety of ways to customize how your
Clarion Plug and Play receiver works.
3. Setting Options
Clarion_SIRIUS_PnP_Shuttle_Users_Guide.book Page 23 Thursday, February 3, 2005 7:42 PM
User’s Guide
24
Accessing Options
1. Press MENU.
The Menu Options list appears.
2. Using the Encoder knob, highlight the option
you wish to change.
3. Press the Encoder knob to select the
highlighted option.
4. Using the Encoder knob, highlight an option
setting.
5. Press the Encoder knob to select the
highlighted setting.
If, while on the Menu Options, you don’t actually set
any option for 10 seconds, the menu closes.
To exit Menu Options, press MENU.
Quick reference to options
Sirius ID displays your SIRIUS ID
FM Transmitter controls the use of
frequency transmission.
Game Alert identifies your favorite
sports team so the receiver
can alert you when the team
is playing.
Jump Settings configures the JUMP button.
Display Settings controls how text appears
on the LCD.
Confirm Tone
Options
Turns the audio beep on
and off.
Add or Skip configures the unit to omit
specific channels.
Lock Options requires the entry of a 4-digit
code to play the selected
channel.
Audio Level Options sets the audio gain output.
Clarion_SIRIUS_PnP_Shuttle_Users_Guide.book Page 24 Thursday, February 3, 2005 7:42 PM
Calypso 25
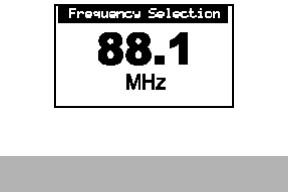
Sirius ID
Displays your unique 12-digit SIRIUS ID
number. You can’t change this number.
Sample SIRIUS ID
Antenna Aiming helps you position the
antenna at home for best
reception.
Memory Options stores favorites and turns
automatic seeking on and
off.
Time Based Features sets the clock and alarms.
Factory Default restores factory default
settings.
FM Transmitter
To use the built-in FM Transmitter you must turn on
the function and select an FM frequency.
1. Turn the Encoder knob to highlight FM
Transmitter Options and press the knob to
select the option.
2. Turn the Encoder knob to select On/Off and
press the knob to set the option.
3. Press MENU to return to the previous menu.
4. Turn the Encoder knob to highlight the
Frequency Selection option and press the knob
to select the option.
5. Use the Encoder knob and Category arrows to
adjust the FM frequency.
Clarion_SIRIUS_PnP_Shuttle_Users_Guide.book Page 25 Thursday, February 3, 2005 7:42 PM
User’s Guide
26
The Encoder knob adjusts in 0.1 MHz
increments. The Category arrows adjust in 1
MHz increments.
FM Frequency
Turn this option off if you are using
the low level audio outputs in your
particular application.
Press MENU to leave the setting unchanged.
Note
Game settings
Initial Game Alert: sounds an alert when your
favorite team is playing a game.
All Score Updates: sounds an alert when your
team is playing and scores have been
updated for the team.
Jump settings
To access this menu, press and hold JUMP for two
seconds.
Traffic: defines the city for which you want to listen
to the traffic report. A list of city codes
accompanies this option.
If the channel list has not been
downloaded from the satellite yet, the
receiver displays “Updating City List.”
Please wait 10 minutes and try again.
JumpSet: configures the JUMP button for any other
channel than the traffic channel.
Clarion_SIRIUS_PnP_Shuttle_Users_Guide.book Page 26 Thursday, February 3, 2005 7:42 PM

Calypso 27
Display settings
Contrast control: adjusts the LCD display.
Dimming control: selecting automatic dimming
enables the function. Selecting Manual
disables automatic dimming.
Contrast control
Confirm tone settings
The receiver sounds an audio tone alert when you
turn it on and off as well as when an alert occurs.
The default is on. To turn the tone off follow these
steps:
1. Turn the Encoder knob to highlight “Confirm
Tone Options” and press the knob to select this
option.
2. Turn the Encoder knob to select Off and press
the knob to confirm the setting.
To exit, press MENU.
Add or skip
With hundreds of channels available, you may wish
to limit the accessible list to only those you like.
Skipping a channel
When you select this option, the unit displays a
channel list with the current channel highlighted.
1. Rotate the Encoder knob to highlight the
channel to skip.
2. Press the Encoder knob to omit the channel.
Clarion_SIRIUS_PnP_Shuttle_Users_Guide.book Page 27 Thursday, February 3, 2005 7:42 PM
User’s Guide
28
The unit displays “SKIP” next to the channel
number. The unit will not access this channel
during regular tuning.
Accessing skipped channels
There are only two ways to access skipped
channels:
• Enter the channel number directly. See “Direct
tuning by channel” on page 11.
• Use the Add option to restore the channel.
Restoring a skipped channel
When you select this option:
1. Rotate the Encoder knob to highlight the
skipped channel.
2. Press the Encoder knob to restore the channel.
“SKIP” disappears next to the channel number.
Lock Options
Locking a channel requires the entry of the four-digit
lock code to play the channel. You can use this
feature to prevent unauthorized people from
accessing specific channels.
Locking a channel
When you select this option, the unit prompts you to
define a four-digit lock code.
1. If this is the first time you’ve used this feature,
enter the default code “0000.”
If you’ve used this feature before, enter your
unique four-digit code. To change this code, see
“Changing the lock code” on page 29.
The unit displays a channel list with the current
channel highlighted.
2. Rotate the Encoder knob to highlight the
channel to lock.
Clarion_SIRIUS_PnP_Shuttle_Users_Guide.book Page 28 Thursday, February 3, 2005 7:42 PM
Calypso 29
3. Press the Encoder knob to lock the channel.
The unit displays “LOCK” next to the channel
number. The unit will not access this channel
during regular tuning.
Accessing locked channels
A listener may access this channel by entering the
direct channel number followed by the four-digit lock
code. The audio begins to play.
The channel returns to the locked status if the
listener changes channels or turns the unit off (for
example, turns the vehicle off).
Restoring a locked channel
When you select this option:
1. Enter the four-digit code.
The unit displays a channel list with the current
channel highlighted.
2. Rotate the Encoder knob to highlight the locked
channel.
3. Press the Encoder knob to restore the channel.
“LOCK” disappears next to the channel number.
Changing the lock code
1. Press MENU.
2. Rotate the Encoder knob to highlight Lock
Options.
3. Press the Encoder knob to select Lock Options.
4. Rotate the knob to highlight Edit Code.
5. Press the knob again.
6. Enter the default code “0000” (or the lock code
you previously defined).
The New Code prompt appears.
Clarion_SIRIUS_PnP_Shuttle_Users_Guide.book Page 29 Thursday, February 3, 2005 7:42 PM
User’s Guide
30
7. Enter the new four-digit code using the keypad
buttons.
The unit prompts you to confirm the code.
8. Enter the new four-digit code again.
You have changed the lock code.
Audio Level Options
This option adjusts the audio level indication and
audio gain (the increased level of a sound that
results from amplifying the input signal).
When you select this option, a 10-segment
horizontal bar graph with a minus (-) at the left end
and a plus (+) at the right end indicates the current
setting.
Rotate the Encoder knob to adjust the bar graph
and press the Encoder knob when finished.
Antenna Aiming (Home Installation)
To receive a good signal requires a direct line of
sight between you and the satellite. If your reception
is poor, moving the antenna may help. This option
confirms that the antenna is in the best position to
receive the satellite signal.
1. Press MENU.
2. Rotate the Encoder knob to highlight Antenna
Aiming.
The unit displays two 10-segment horizontal bar
graphs with a minus (-) to the left and a plus (+)
to the right.
The SAT graph displays the satellite signal
strength. The TER graph shows the terrestrial
signal strength.
Clarion_SIRIUS_PnP_Shuttle_Users_Guide.book Page 30 Thursday, February 3, 2005 7:42 PM

Calypso 31
In urban areas where structures may
affect the line of sight satellite signal,
terrestrial repeaters (TER)
strengthen the signal. They may not
be available in your geographical
location.
Memory Options
This option lets you control the automatic memory
search function and clear all memory slots.
Automatic Memory Search: turns automatic
searching on and off. Use the Encoder
knob to highlight ON or OFF and press the
knob to make the selection.
Clear all Memory: clears all favorite artist and song
title combinations you previously stored.
Definition
Press the Encoder knob. The unit prompts
“Clear All Memory?” Highlight YES or NO
and press the Encoder knob.
For more information about storing favorites in
memory, see “Saving favorite information” on
page 19.
Time Based Features
The SIRIUS signal maintains the current time and
can trigger pre-programmed alarms.
Once you turn the power on and the unit receives
the satellite signal, the unit automatically maintains
the time unless you remove it from its docking base.
If the receiver loses the signal, it loses the time and
will not trigger any pre-programmed alarms. To
restore the time and alarms, turn the receiver on. It
will update the time automatically from the satellite
signal.
Clarion_SIRIUS_PnP_Shuttle_Users_Guide.book Page 31 Thursday, February 3, 2005 7:42 PM
User’s Guide
32
Clock
This option sets the time on the clock that appears
on the default display based on your chosen format,
the time zone, and daylight savings time.
Format: determines the style of display: 12 Hour
(default) or 24 Hour.
Time Zone: selects the time zone based on
Greenwich Mean Time (GMT).
DST (Daylight Savings Time): indicates whether
daylight savings time is observed in your
current location or not. Your settings are:
DST Observed or DST Not Observed.
Alarm Clock
This option turns the Plug and Play receiver on at a
specific time. Press any button on the front panel.
When the unit turns on it plays the channel you
selected last.
Set Alarm: provides the settings: Alarm On or Alarm
Off (default).
When the alarm is on, the time appears on
the default display in reverse image.
Alarm time: sets the alarm time. Press the
Category buttons to increase or decrease
the hours. AM and PM switch
automatically.
Turn the Encoder knob to set the minutes.
Clockwise increases the minutes and
counterclockwise decreases them.
Press the Encoder knob to accept the
selected time (or press MENU to cancel).
Program Alert
This feature allows you to program the unit to switch
to a specific channel at a specific time. The top line
of the display shows: Set Program Alert.
Clarion_SIRIUS_PnP_Shuttle_Users_Guide.book Page 32 Thursday, February 3, 2005 7:42 PM
Calypso 33
Program Time/Day: selects the time and the day.
The default is 12:00 PM Monday.
With Time highlighted, press the Category
buttons to increase or decrease the hours.
AM and PM switch automatically.
Turn the Encoder knob to set the minutes.
Clockwise increases the minutes and
counterclockwise decreases them.
Press the Encoder knob to accept the
selected time.
With Day highlighted, the unit displays the
days of the week (default: Monday). Use
the Encoder knob to select the day.
Channel: displays the list of channels. Use the
Encoder knob to select the channel to
associate with the selected time.
Program Alert On/Off: turns the Program Alert
function on and off. Your settings are:
Program Alert On or Program Alert Off.
Auto Shutdown
You can configure the Plug and Play receiver to
automatically shut off after one hour. This is
especially useful if the Plug and Play receiver is
running on battery power, such as in your car.
After running for 59 minutes of inactivity, the unit
displays: Cancel Auto Shutdown. If you’re near the
unit and wish it to continue, press the Encoder knob
to cancel shutdown.
Your settings are: Enabled, Disabled (default).
Rotate the Encoder knob to highlight the setting and
press the knob to select the highlighted setting.
Sleep mode
This option lets you configure the Plug and Play
receiver to shut down after a number of minutes.
Sleep Off: is the factory default.
15, 30, 45 and 60 minute: intervals are your
settings.
Clarion_SIRIUS_PnP_Shuttle_Users_Guide.book Page 33 Thursday, February 3, 2005 7:42 PM

User’s Guide
34
Rotate the Encoder knob to highlight a setting and
press the knob to select it.
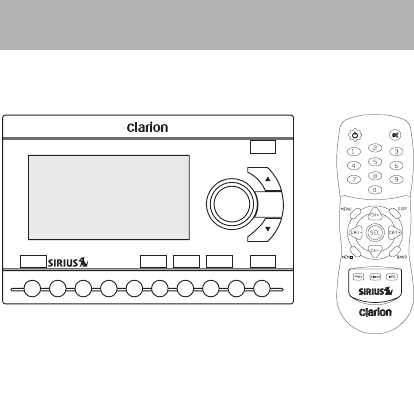
The wireless remote control supplied with the Plug
and Play receiver operates most Plug and Play
receiver features from a remote location. The
buttons on the remote control function the same way
their equivalents do on the Plug and Play receiver.
4. Using the Remote
For optimal operation, always aim the remote
control toward the remote sensor on the Plug and
Play receiver’s front panel. To locate this sensor,
see “Receiver controls (front panel)” on page 9.
Clarion_SIRIUS_PnP_Shuttle_Users_Guide.book Page 34 Thursday, February 3, 2005 7:42 PM
Calypso 35
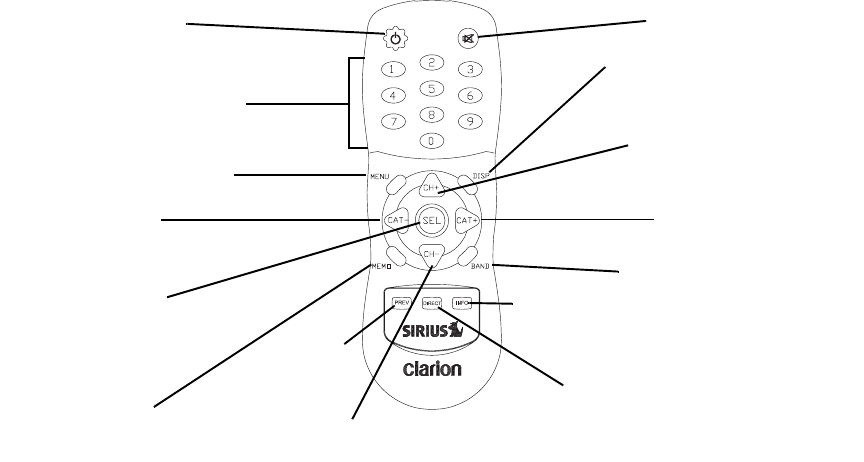
Remote control features
MEMO captures and
stores current
program information.
Power turns the Plug and
Play receiver on and off.
Press BAND momentarily to
switch among bands A, B and C.
Each band contains 10 preset
channels. Press and hold BAND
to activate preset tuning.
MENU accesses menu options.
Press DISP to choose one of
several ways of presenting the
channel name, artist and song title.
Use the keypad buttons to directly
enter a channel number, and recall
channel numbers.
CH- accesses channels in descending order.
Also used for adjustments in various menus.
Use CAT- (Category) to
access categories (genres) in
descending order.
CAT+ accesses categories
in ascending order.
CH+ accesses channels in
ascending order. Also used for
adjustments in various menus.
MUTE silences audio beeps.
Information
Previous
Select/Direct confirms
selection in various lists and
menus. It also allows direct
channel entry.
Press DIRECT followed by a 3-digit
channel number within 4 seconds to select
a channel. If channel number is less than
3 digits, press 1 or 2 digits, then SEL.
Clarion_SIRIUS_PnP_Shuttle_Users_Guide.book Page 35 Thursday, February 3, 2005 7:42 PM

User’s Guide
36
Description Probable Cause Remedy
The Plug and Play receiver does
not turn on.
The power cable may not be
properly connected.
The fuse may be blown.
Check power cable and fuse.
The LCD displays, “Check
antenna”.
The satellite antenna is not
connected.
Check the antenna connection to
the Plug and Play receiver.
The antenna or its cable is faulty. Contact the system installer or
vendor.
Reception is marred by audio static
or loss of clarity.
The FM frequency contains static. Switch to another FM frequency.
The vehicle’s antenna is not
connected to the radio.
Check the vehicle antenna cable.
There’s no signal on the Plug and
Play receiver’s display.
Check for obstacles over or around
the antenna.
Change your location to eliminate
nearby obstacles, such as bridges
and tall buildings.
5. Troubleshooting
Clarion_SIRIUS_PnP_Shuttle_Users_Guide.book Page 36 Thursday, February 3, 2005 7:42 PM

Calypso 37
You hear no sound. The audio cables are not
connected.
Check the cables at the Plug and
Play receiver and the radio.
You’ve selected an incorrect FM
frequency.
Select another FM modulator
frequency.
Description Probable Cause Remedy
Clarion_SIRIUS_PnP_Shuttle_Users_Guide.book Page 37 Thursday, February 3, 2005 7:42 PM

User’s Guide
38
Audio Output: (100-250 ohms): 650mV RMS Maximum
Fuse: 3A Slow Blow
Power Supply: 10-16V, Negative Ground, DC
Dimensions (W x H x D): 110mm x 73mm x 28mm (with knob)
6. Specifications
Clarion_SIRIUS_PnP_Shuttle_Users_Guide.book Page 38 Thursday, February 3, 2005 7:42 PM
Calypso 39
NOTES
Clarion_SIRIUS_PnP_Shuttle_Users_Guide.book Page 39 Thursday, February 3, 2005 7:42 PM

User’s Guide
40
For USA and Canada only
This product is warranted against all defects in material workman-
ship for a period of one year from the date of original purchase.
Clarion ProAudio products, except for speakers, are covered by a
two year limited warranty when installed by an authorized Clarion
dealer. The conditions of this limited warranty and the extent of
responsibility of Clarion Corporation of America (“Clarion”) under
this limited warranty are as follows:
1. PROOF OF DATE OF PURCHASE WILL BE REQUIRED FOR
WARRANTY SERVICE OF THIS PRODUCT. IN THE CASE OF
THE TWO (2) YEAR LIMITED WARRANTY FOR CLARION
PROAUDIO PRODUCT, PROOF OF INSTALLATION BY AN
AUTHORIZED DEALER IS REQUIRED. INFORMATION
ABOUT CLARION AUTHORIZED WARRANTY SERVICE CEN-
TERS MAY BE OBTAINED BY CONTACTING CLARION AT
THE ADDRESS BELOW.
2. This limited warranty will become void if service performed by
anyone other than an approved Clarion Warranty Service Cen-
ter results in damage to the product.
3. This limited warranty does not apply to any product which has
been subject to misuse, neglect or accident, or which has had
the serial number altered, defaced or removed, or which has
been connected, installed, adjusted or repaired, other than in
accordance with the instructions furnished by Clarion.
4. This limited warranty does not cover car static or other electrical
interferences, tape head or laser pick-up cleaning or adjust-
ments, or labor costs for the removal or reinstallation of the unit
for repair.
5. The sole responsibility of Clarion under this limited warranty
shall be limited to the repair of the product or replacement of the
product, at the sole discretion of Clarion.
1. Limited Warranty Information 6. Product must be shipped in its original carton or equivalent car-
ton, fully insured, with shipping charges prepaid. Clarion will not
assume any responsibility for any loss or damage incurred in
shipping.
7. ALL IMPLIED WARRANTIES EXCEPT TO THE EXTENT PRO-
HIBITED BY APPLICABLE LAW SHALL HAVE NO GREATER
DURATION THAN THE WARRANTY PERIOD SET FORTH
ABOVE. UNDER NO CIRCUMSTANCES SHALL CLARION BE
LIABLE FOR ANY LOSS OR DAMAGE, DIRECT OR CONSE-
QUENTIAL, ARISING OUT OF THE USE OR INABILITY TO
USE THE PRODUCT. BECAUSE SOME STATES DO NOT
ALLOW LIMITATIONS ON HOW LONG AN IMPLIED WAR-
RANTY LASTS OR EXCLUSIONS OR LIMITATIONS OF INCI-
DENTAL OR CONSEQUENTIAL DAMAGES, THE ABOVE
LIMITATIONS OR EXCLUSIONS MAY NOT APPLY TO YOU.
8. THIS LIMITED WARRANTY GIVES YOU SPECIFIC LEGAL
RIGHTS, AND YOU MAY ALSO HAVE OTHER RIGHTS
WHICH VARY FROM STATE TO STATE.
9. Should you have any difficulties with the performance of this
product during the warranty period, please call or visit our web
site (www.clarion.com) for a listing of Authorized Warranty Ser-
vice Centers in your area. You may also contact Clarion at the
address listed below.
In USA:
Clarion Corporation of America
Attn: Customer Service Manager
661 W. Redondo Beach Blvd.
Gardena, CA. 90247-4201
1-800-GO-CLARION
(310)327-9100
In Canada:
Clarion Canada, Inc.
Warranty Service Center
2239 Winston Park Drive
Oakville, Ontario L6H 5R1
(905)829-4600
Clarion_SIRIUS_PnP_Shuttle_Users_Guide.book Page 40 Thursday, February 3, 2005 7:42 PM
Clarion_SIRIUS_PnP_Shuttle_Users_Guide.book Page 1 Thursday, February 3, 2005 7:42 PM
200502-CALYPSO-10 Rev. 1
Clarion Corporation of America
661 West Redondo Beach Blvd.
www.clarion.com
Clarion_SIRIUS_PnP_Shuttle_Users_Guide.book Page 2 Thursday, February 3, 2005 7:42 PM
