Clarion NX700_NA NX700 Manual
User Manual: Clarion Clarion U.S.A | Search Result
Open the PDF directly: View PDF ![]() .
.
Page Count: 177 [warning: Documents this large are best viewed by clicking the View PDF Link!]

2-DIN MEMORY NAVIGATION & DVD MULTIMEDIA STATION
WITH 7-inch TOUCH PANEL CONTROL
Owner’s manual & Installation manual
NX700
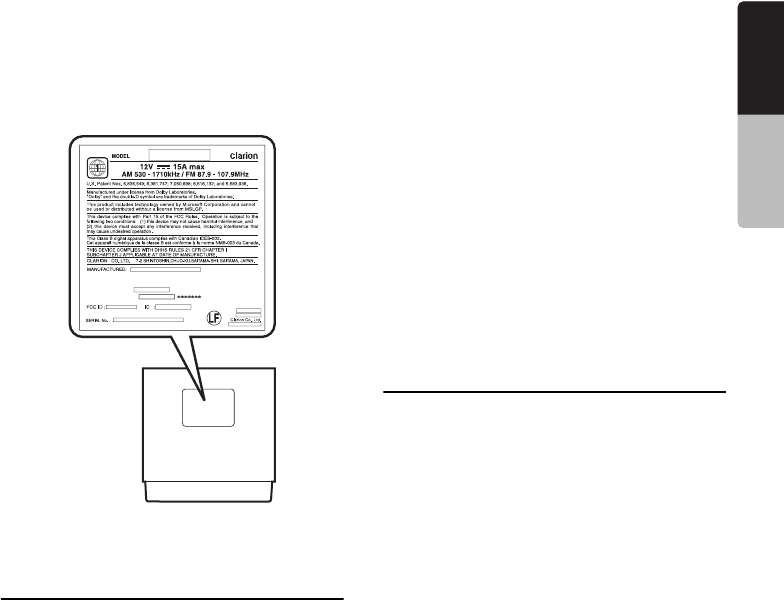
CLARION PRODUCT REGISTRATION INFORMATION
For USA and Canada only
www.clarion.com
Dear Customer:
Congratulations on your purchase of a Clarion mobile electronic product. We are
confident that you’ll enjoy your Clarion experience.
There are many benefits to registering your product. We invite you to visit our website at
www.clarion.com to register your Clarion product.
We have made product registration simple with our easy to use website. The registration
form is short and easy to complete. Once you’re registered, we can keep you informed of
important product information.
Register at www.clarion.com - it’s easy to keep your Clarion product up to date.
INFORMATIONS DE L’ENREGISTREMENT DE PRODUITS CLARION
Pour les Étas Unis et le Canada seulement
www.clarion.com
Cher client:
Nous vous remercions d’avoir acheté ce produit électronique mobile Clarion. Nous sommes
confiants que vous apprécierez votre expérience Clarion.
Il y a beaucoup d’avantage à enregistrer votre produits. Nous vous invitons à visiter notre site
Web www.clarion.com pour enregistrer votre produit Clarion.
Nous avons facilité la tache d’enregistrement de produit simple et facile grâce à notre site Web.
Le formulaire d’enregistrement est court et facile à compléter. Lorsque vous êtes enregistrer,
nous pouvons vous tenir informé des informations important de produits.
Enregistrer à www.clarion.com - c’est facile de mettre à jour votre produit Clarion.
INFORMACIÓN DEL REGISTRO DE PRODUCTO DE CLARION
Para USA y Canada nomas
www.clarion.com
Querido Cliente:
Felicitaciones por su compra de producto electrónico móvil de Clarion. Estamos seguros que
usted gozará de su experiencia con el producto de Clarion.
Hay muchas ventajas al registrar su producto. Le invitamos a que visite nuestro sitio en internet
www.clarion.com para registrar su producto de Clarion.
Hemos hecho el registro de producto fácil en nuestro sitio. La forma de registro es corta y fácil
de completar. Una vez que lo registre, podremos proporcionarle la información de su producto.
Registrese en www.clarion.com - es fácil mantener su producto de Clarion actualizado.

1
NX700
English Owner’s manual
Thank you for purchasing the Clarion NX700.
• Please read this owner’s manual thoroughly before operating this equipment.
• After reading this manual, be sure to keep it handy for future reference.
• Check the contents of the enclosed warranty card and keep it carefully with this manual.
• The provided disc (CD-ROM manual) cannot be played back on this unit.
Contents
1. FEATURES .................................................................................................................... 2
Expanding Systems........................................................................................................ 2
Playable Discs................................................................................................................ 3
DVD Video Features ...................................................................................................... 3
2. PRECAUTIONS ............................................................................................................. 4
Operation Panel/Generalities ......................................................................................... 5
Cleaning ......................................................................................................................... 5
About the Registered Marks, etc. ................................................................................... 6
3. CONTROLS ................................................................................................................... 6
Functions of Buttons....................................................................................................... 6
Outline of Button and Touchkey Operation .................................................................... 8
Remote Control Unit..................................................................................................... 13
4. BASIC OPERATIONS.................................................................................................. 14
Turning On and Off the Power ..................................................................................... 14
Adjusting the Volume ................................................................................................... 15
Opening the Operation Panel and Adjusting the Angle................................................ 15
Turning the Audio OFF................................................................................................. 16
Turning the Monitor OFF .............................................................................................. 17
Displaying the Clock Screen......................................................................................... 17
Setting/Ejecting a Disc ................................................................................................. 17
Connecting/Disconnecting an USB Media Device........................................................ 18
Selecting a Media Source ............................................................................................ 20
2-Zone Function ........................................................................................................... 20
5. SOURCE OPERATIONS ............................................................................................. 21
Radio Operations ......................................................................................................... 21
DVD Video Operations ................................................................................................. 23
Audio CD Operations ................................................................................................... 29
MP3/WMA/AAC Operations ......................................................................................... 30
DivX Operations ........................................................................................................... 33
6. SOURCE OPERATIONS (ACCESSORIES)................................................................ 36
Satellite Radio Operations............................................................................................ 36
iPod Operations............................................................................................................ 39
USB Memory Operations.............................................................................................. 42
Navigation System Operations..................................................................................... 43
Bluetooth Telephone Operations (Tel mode) ............................................................... 44
AUX Operations ........................................................................................................... 44
7. SYSTEM SETTINGS.................................................................................................... 45
Audio Settings .............................................................................................................. 45
General Settings........................................................................................................... 48
Adjusting the Monitor.................................................................................................... 51
8. TROUBLESHOOTING................................................................................................. 52
9. ERROR DISPLAYS...................................................................................................... 54
10. SPECIFICATIONS ....................................................................................................... 56
INSTALLATION AND WIRE CONNECTION MANUAL.................................................... 57
2NX700
English Owner’s manual
■Built in Bluetooth® hands-free calling
■Compatible with iPod® and iPhone™ via USB
■Sirf III GPS module with 20-channel receiver
Expanding Systems
1. FEATURES
NX700
Expanding audio features
4-Channel Amplifier
Rear Vision
Camera
(CC2011/
CAA185)
Rear Monitor
iPod/iPhone
USB Memory
VTR etc.
Note:
The items listed outside of the frames are the
commercial products generally sold.
Expanding visual features
Sirius Tuner
XM Mini-Tuner
(via Translator Adapter
sold separately)
Bluetooth
Telephone
3
NX700
English Owner’s manual
Playable Discs
This DVD player can play the following discs:
In addition, the DVD player can play CD-R/RW,
DVD-R/RW, and DVD+R/RW discs on which the
following media files have been recorded:
For detailed information, see the sections entitled
“MP3/WMA/AAC Operations” (page 30) and
“DivX Operations” (page 33).
About CD Extra discs
A CD Extra disc is a disc in which a total of two
sessions have been recorded. The first session is
Audio session and the second session is Data
session.
Your personally-created CDs with more than
second data sessions recorded cannot be played
on this DVD player.
Note:
•When you play a CD Extra disc, only the first
session will be recognized.
About playing a CD-R/RW disc
This player can play CD-R/RW discs previously
recorded in Audio CD format or format with MP3/
WMA/AAC/DivX files.
About playing a DVD-R/RW or
DVD+R/RW disc
This player can play DVD-R/RW and DVD+R/RW
discs previously recorded in DVD video format or
format with MP3/WMA/AAC/DivX files.
Discs that cannot be played back
This player cannot play DVD Audio, DVD-RAM,
Video CDs, Photo CDs, etc.
Note:
•It may not be possible to play back discs recorded
on some CD/DVD drive units. (Cause: disc
characteristics, cracks, dust/dirt, dust/dirt on
player’s lens, etc.)
•If a CD-R/RW, DVD-R/RW, or DVD+R/RW disc
that has not been finalized is played, it will take a
long time to start playing. Also, it may not be
possible to play depending on its recording
conditions.
•You cannot play Super Audio CDs. Playback of the
CD player is not supported even if it is a hybrid
disc.
Note on region numbers of DVD
video discs
The DVD video system assigns a region number
to DVD players and DVD discs by sales area.
The DVD video region number playable in this
system is marked on the disc jacket as shown
below.
DVD Video Features
This unit provides the following functions in
addition to the high image quality and sound
quality of DVD video.
Note:
•The functions described in this section differ
depending on the DVD video disc. Refer to the
instructions provided with the DVD video.
•Some disc functions may operate differently from
described in this manual.
Playable discs
DVD video discs Audio CDs CD TEXT
MP3/WMA/AAC
DivX
Playable media files
ALL
1
4NX700
English Owner’s manual
Multi-sound function
DVD video can store up to 8 languages for one
film; select the language of your preference.
• The languages stored on the disc are indicated
by the icon shown below.
Multi-angle function
A DVD video that is filmed from multiple angles
allows you to select the angle of choice.
• The number of recorded angles is indicated by
the icon shown below.
Subpicture (subtitles) function
A DVD video can record subtitles for up to 32
languages and you can select the language of
the subtitles you wish to see.
• The number of recorded subtitle languages is
indicated by the icon shown below.
Multi-story function
When a DVD video contains more than one story
for a film, you can select the story you wish to
enjoy. The operation procedures vary with the
disc; observe the instructions for selecting a story
provided during playback.
DVD menu
DVD Menus can be called up during DVD video
playback to perform menu setting.
• Example showing DVD menu
1. When the inside of the car is very cold and the
player is used soon after switching on the
heater, moisture may form on the disc (DVD/
CD) or the optical parts of the player and
proper playback may not be possible. If
moisture forms on the disc (DVD/CD), wipe it
off with a soft cloth. If moisture forms on the
optical parts of the player, do not use the
player for about one hour. The condensation
will disappear naturally allowing normal
operation.
2. Driving on extremely bumpy roads which
cause severe vibration may cause the sound
to skip.
3. This unit uses a precision mechanism. Even
in the event that trouble arises, never open
the case, disassemble the unit, or lubricate
the rotating parts.
4. This equipment has been tested and found to
comply with the limits for a Class B digital
device, pursuant to Part 15 of the FCC Rules.
These limits are designed to provide
reasonable protection against harmful
interference in a residential installation. This
equipment generates, uses, and can radiate
radio frequency energy and, if not installed
and used in accordance with the instructions,
may cause harmful interference to radio
communications. However, there is no
guarantee that interference will not occur in a
particular installation. If this equipment does
cause harmful interference to radio or
television reception, which can be determined
by turning the equipment off and on, the user
is encouraged to consult the dealer or an
experienced radio/TV technician for help.
2. PRECAUTIONS
WARNING
For your safety, the driver should not watch
the DVD video/movie data or operate the
controls while driving. Please note that
watching and operating the DVD video/
movie data while driving are prohibited by
law in some countries. Also, while driving,
keep the volume to a level at which external
sounds can be heard.
5
NX700
English Owner’s manual
INFORMATION FOR USERS:
CHANGES OR MODIFICATIONS TO THIS
PRODUCT NOT APPROVED BY THE
MANUFACTURER WILL VOID THE
WARRANTY AND WILL VIOLATE FCC
APPROVAL.
Operation Panel/
Generalities
For a longer service life, be sure to read the
following cautions.
• The operation panel will operate properly in a
temperature range of 0 to 60°C.
• Do not allow any liquids on the set from drinks,
umbrellas, etc. Doing so may damage the
internal circuitry.
• Do not disassemble or modify the set in any
way. Doing so may result in damage.
• Do not draw the operation panel out and use it
as a tray. Also, subjecting the operation panel
to shocks may result in breakage, deformation,
or other damage.
• Do not let cigarettes burn the display. Doing so
may damage or deform the cabinet.
• If a problem should occur, have the set
inspected at your store of purchase.
• Do not insert objects or poke in the space
between the operation panel and the main unit
when the panel is tilted.
• Do not place anything on the display when the
panel is tilted.
• The remote control unit may not work if the
remote control sensor is exposed to direct
sunlight.
• In extremely cold weather, the display
movement may slow down and the display may
darken, but this is not a malfunction. The
display will work normally when the
temperature increases.
• Small black and shiny spots inside the
operation panel are normal for LCD products.
• The operation panel may stop temporarily
when it opens or closes, when the engine stops
or when it is cold.
• The touchkeys on the display operate when
slightly touched. Do not press the touchkey
screen with much force.
• Do not push the case surrounding the touchkey
panel with much force. This may cause
malfunctioning of the touchkeys.
Cleaning
•Cleaning the cabinet
Use a soft and dry cloth and gently wipe off the
dirt. For tough dirt, apply some neutral
detergent diluted in water to a soft cloth, wipe
off the dirt gently, then wipe again with a dry
cloth.
Do not use benzene, thinner, car cleaner, etc.,
as these substances may damage the cabinet
or cause the paint to peel. Also, leaving rubber
or plastic products in contact with the cabinet
for long periods of time may cause stains.
•Cleaning the operation panel
The operation panel tends to collect dust, so
wipe it off occasionally with a soft cloth. The
surface is easily scratched, so do not rub it with
hard objects.
6NX700
English Owner’s manual
About the Registered
Marks, etc.
• This product incorporates copyright protection
technology that is protected by U.S. patents
and other intellectual property rights. Use of
this copyright protection technology must be
authorized by Macrovision, and is intended for
home and other limited viewing uses only
unless otherwise authorized by Macrovision.
Reverse engineering or disassembly is
prohibited.
• Manufactured under license from Dolby
Laboratories.
“Dolby” and the double-D symbol are
trademarks of Dolby Laboratories.
• “DivX”, “DivX Certified”, and associated logos
are trademarks of DivX, Inc., and are used
under license.
• ©2009 SIRIUS XM Radio Inc., SIRIUS, XM and
all related marks and logos are trademarks of
SIRIUS XM Radio Inc. and its subsidiaries.
All other marks, channel names and logos are
the property of their respective owners.
• The Bluetooth word mark and logos are owned
by the Bluetooth SIG, Inc. and any use of such
marks by Clarion Co., Ltd. is under license.
Other trademarks and trade names are those
of their respective owners.
• “Made for iPod” means that an electronic
accessory has been designed to connect
specifically to iPod and has been certified by
the developer to meet Apple performance
standards.
“Works with iPhone” means that an electronic
accessory has been designed to connect
specifically to iPhone and has been certified by
the developer to meet Apple performance
standards.
Apple is not responsible for the operation of
this device or its compliance with safety and
regulatory standards.
iPod is a trademark of Apple Inc., registered in
the U.S. and other countries.
iPhone is a trademark of Apple Inc.
• BBE MP (Minimized Polynomial Non-Linear
Saturation) Process improves digitally
compressed sound, such as MP3, by restoring
and enhancing the harmonics lost through
compression. BBE MP works by regenerating
harmonics from the source material, effectively
recovering warmth, details and nuance.
• Manufactured under license from BBE Sound,
Inc.
• Licensed by BBE Sound, Inc. under one or
more of the following US patents: 5510752,
5736897. BBE and BBE symbol are registered
trademarks of BBE Sound, Inc.
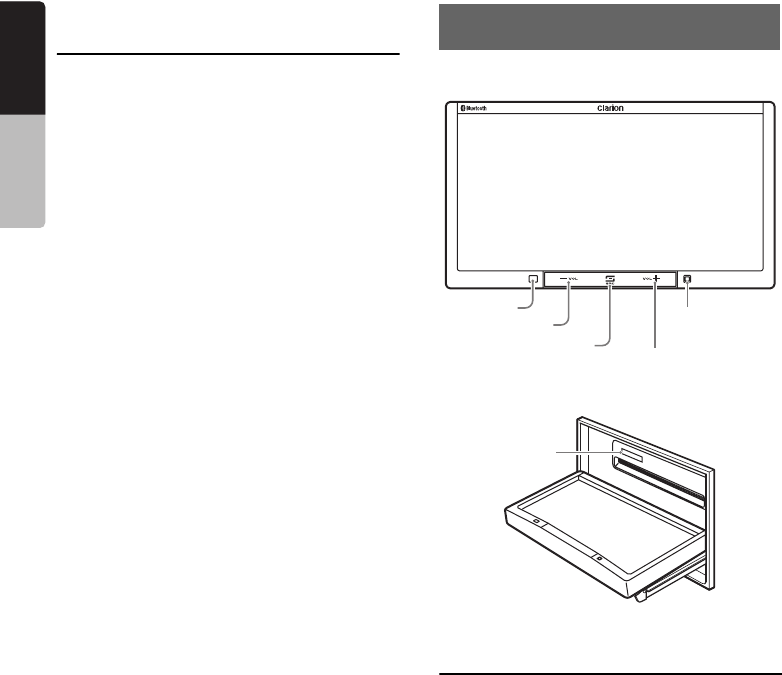
●Operation Panel
●With the operation panel open
Functions of Buttons
Note:
•Be sure to read this section while referring to the
front diagram.
Sensor
• Receiver for the remote control unit (operating
range: 30° in all directions).
[VOL –], [VOL +] buttons
• Use these buttons to increase/decrease the
volume.
3. CONTROLS
NX700
[VOL –]
[VOL +]
[SRC]
Sensor Blink LED/
Reset button
SD memory
card slot

7
NX700
English Owner’s manual
[SRC] button
• Press this button to display/hide the Source
screen to switch the source mode.
Blink LED
• When the Blink LED function is set to “On” from
the System tab menu on the General screen,
blinks when the ACC power is turned off.
SD memory card slot
• SD memory card function is available in the
Navi mode. For more information about the SD
memory card function, see your User Manual
(for the Navi mode).
Note:
•When you insert the SD memory card stored music
files, they cannot be read in this unit.
8NX700
English Owner’s manual
Outline of Button and Touchkey Operation
Turning the power on
NX700
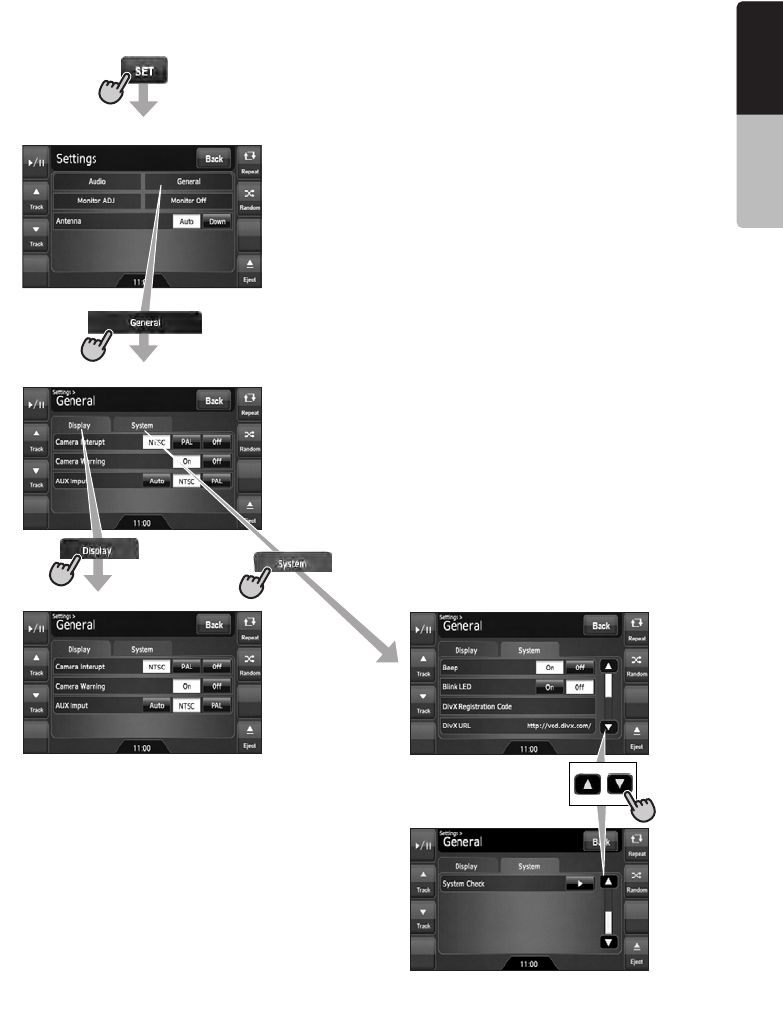
System check
The CeNET format utilized on this unit is provided
with a system check function. When the system
check function is performed under the following
conditions, the power is automatically turned off.
Once turn off the engine switch, then restart the
engine again.
• When power is first turned on after initial
installation.
• When an external device is connected or
disconnected.
• When Reset button is pressed.
*In addition to the above conditions, the system
check function can be performed from the System
tab menu on the General screen.
Note:
*1These images indicate the buttons to press or
keys to touch.
You can change the media sources.
Engine ON
position
*1
9
NX700
English Owner’s manual
Tuner mode operation
(Source screen)
Switches the radio band.
Preset ch.
Manual tuning
Selects Home/Travel modes.
• Select desired station after
selecting radio band.
Seek tuning
10 NX700
English Owner’s manual
DVD Video mode operation
(Source screen)
(DVD Video mode screen) *2
(Options screen)
(Setup screen)
*Screen during DVD Video mode
when automobile moving.
Note:
*2If you do not touch the screen for about 7 seconds, all the keys on the screen
will disappear. Touch the screen surface to redisplay them.
(DVD top menu) *2
11
NX700
English Owner’s manual
Adjusting the General settings
(Settings screen)
(General screen)
(System tab screen)(Display tab screen)
(Source or Mode screen)
12 NX700
English Owner’s manual
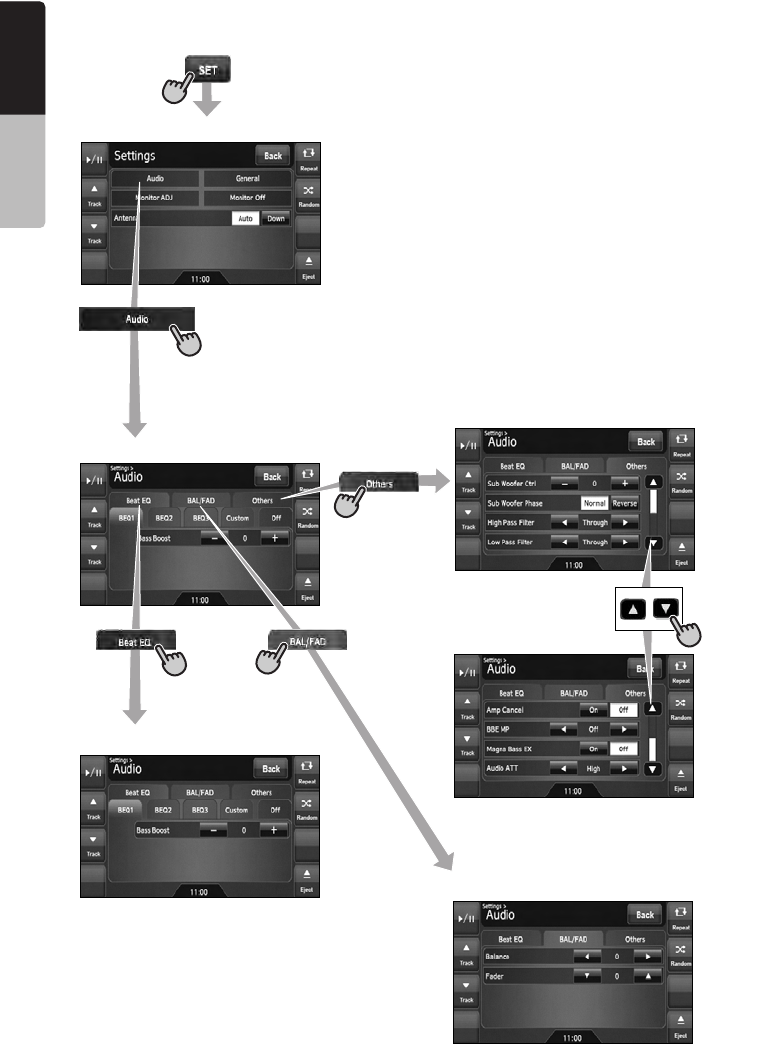
Adjusting the Audio settings
(Settings screen)
(Audio screen)
(Others tab screen)
(Beat EQ tab screen)
(BAL/FAD tab screen)
(Source or Mode screen)
13
NX700
English Owner’s manual
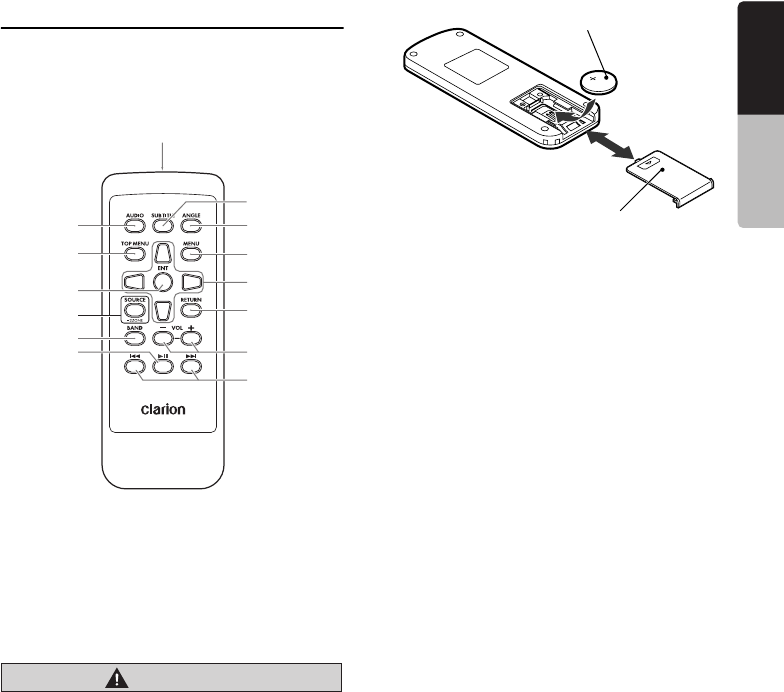
Remote Control Unit
❏Names of buttons
❏Inserting the Battery
1. Slide the rear cover in the direction of the
arrow, and remove it.
2. Insert the CR2025 battery bundled with the
remote control unit in the directions shown in
the figure, then close the rear cover.
CAUTION
CAUTION
Danger of explosion if battery is incorrectly
replaced.
Replace only with the same or equivalent
type.
Note:
Using battery improperly can cause it to explode.
Take note of the following points:
•Do not short-circuit, disassemble or heat battery.
•Do not dispose of battery into fire or flames.
•Dispose of spent battery properly.
❏Functions of Remote Control
Unit Buttons
You can use the remote control unit to control the
NX700. When the 2-Zone function is ON, the
controls work upon the Sub zone only.
Note:
•The steering wheel remote control operations work
upon the Main zone even when the 2-Zone
function is ON.
[AUDIO] button
• Press to set the Audio language. (in DVD Video
and DivX modes)
[SUBTITLE] button
• Press to display subtitles. (in DVD Video and
DivX modes)
[ANGLE] button
• Press to switch among the angles when DVD
video discs recorded in multiple angles are
played back.
[TOP MENU] button
• Press to display the DVD top menu stored on
the DVD video disc. Some discs are not
displayed the DVD top menu. (in DVD Video
mode)
[MENU] button
• Press to display the DVD menu stored on the
DVD video disc. (in DVD Video mode)
[ENT] button
• Press to fix the selected menu item on the DVD
menu. (in DVD Video mode)
[E], [e], [T], [t] buttons
• Press to select desired menu item displayed on
the DVD menu. (in DVD Video mode)
Signal transmitter
Operating range: 30° in all directions
[AUDIO]
[TOP MENU]
[ENT]
[SOURCE]
[BAND]
[6]
[SUBTITLE]
[ANGLE]
[MENU]
[E], [e], [T], [t]
[–], [+]
[RETURN]
[R], [F]
CR2025 battery
Rear side
Rear cover

14 NX700
English Owner’s manual
[SOURCE] button
• Press to switch the source modes such as
Tuner mode, DVD mode, etc. (in any mode)
*Only DVD, USB, and AUX modes are selectable
when 2-Zone ON.
• Keep pressing more than 1 second to turn the
2-Zone function ON/OFF. (in any mode)
[RETURN] button
• Press to return to the previous screen while the
DVD menu is being displayed. However, it may
occur that this button operation dose not work
on some discs. (in DVD Video mode)
[BAND] button
• Switches reception bands. (in Tuner, Sirius,
and XM modes; disabled when 2-Zone ON)
• Keep pressing more than 1 second to switch
the Home/Travel modes. (in Tuner mode;
disabled when 2-Zone ON)
• Press to select the next higher folder. (in MP3/
WMA/AAC/DivX and USB memory modes)
[VOL –], [VOL +] buttons
• Decreases or increases the volume. (in any
mode; disabled when 2-Zone ON)
[6] button
• Press to play or pause video and audio media.
(in DVD and USB modes; disabled in USB
mode when 2-Zone ON)
• Keep pressing more than 1 second to stop
video playback. (in DVD Video mode)
[R], [F] buttons
• Press to select the next lower or higher preset
station. (in Tuner, Sirius, and XM modes;
disabled when 2-Zone ON)
• Press to select the next lower or higher chapter
number. (in DVD Video mode)
• Press to select the next lower or higher track.
(in CDDA, MP3/WMA/AAC/DivX, and USB
modes)
• Keep pressing to perform fast backward or fast
forward playback. (in DVD and USB modes)
Note:
•Be sure to read this chapter referring to the chapter
“3. CONTROLS” (page 6).
Turning On and Off the
Power
CAUTION
CAUTION
When the unit is turned on, starting and
stopping the engine with its volume raised to
the maximum level may harm your hearings.
Be careful about adjusting the volume.
Note:
•Start the engine before using this unit.
•Be careful about using this unit for a long time
without running the engine. If you drain the car’s
battery too far, you may not be able to start the
engine and this can reduce the service life of the
battery.
1. Start the engine. The power is supplied to this
unit.
The unit automatically memorizes its last
operation mode and will automatically switch
to display that mode.
2. To turn off the power, turn off the engine
switch.
●About the CT (Clock Time) display
• The displayed clock data is based on the CT
(clock time) data in the Navigation system.
• When the CT data cannot be received, “--:--”
appears in the display.
4. BASIC
OPERATIONS
Engine ON
position
15
NX700
English Owner’s manual
Adjusting the Volume
1. Press the [VOL –]/[VOL +] buttons to adjust
the volume.
[VOL –]: Decreases the volume.
[VOL +]: Increases the volume.
• The volume level indicated in the display is
in a range from 0 (min.) to 33 (max.).
CAUTION
CAUTION
While driving, keep the volume level at which
external sounds can be heard.
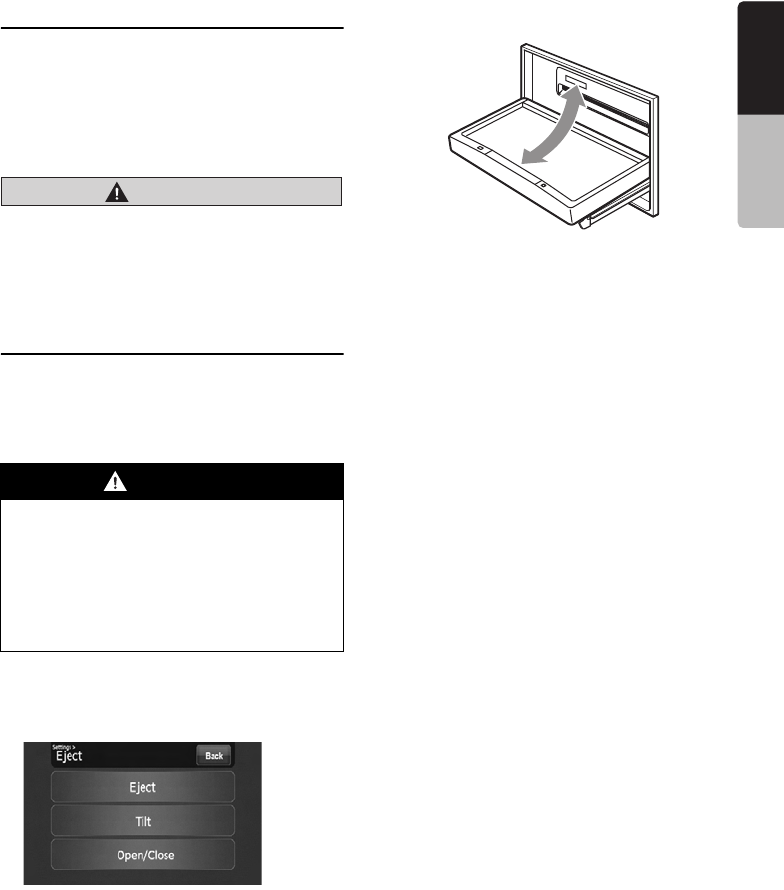
Opening the Operation
Panel and Adjusting the
Angle
The operation panel can be opened/closed to
insert/eject a disc. The angle of the operation
panel can be adjusted depending on the
mounting angle of the unit or light coming into the
car.
Opening/closing the operation panel
1. Touch the [o (Eject)] key to display the
following Eject screen:
2. Touch the [Open/Close] key.
The operation panel will be opened.
3. Touch the [Open/Close] key when the
operation panel is open.
The operation panel will be closed.
• The operation panel will close automatically
when leaving it open for a while.
4. Touch the [Back] key to return to the previous
screen.
WARNING
•To prevent the battery from going dead,
operate this unit with the engine running
if possible.
•When the operation panel is operating, be
careful not to get your hand or finger
caught between the panel and main unit
or the instrument panel of the car.
•Do not move the operation panel by hand.

16 NX700
English Owner’s manual
Adjusting the angle of the operation
panel
The angle of the operation panel can be adjusted
in the range of 0° to 30°
1. Touch the [o (Eject)] key to display the Eject
screen.
2. Repeat touching the [Tilt] key to adjust the
angle of the operation panel. Every touching
the [Tilt] key tilts the operation panel forward
or backward.
The adjusted angle is stored in memory.
Once you adjust the angle of the operation
panel, the operation panel will return to the
adjusted angle even after it is opened/closed.
3. When the adjustment is finished, touch the
[Back] key to return to the previous screen.
Returning the operation panel to the
original angle
1. Touch and hold the [Tilt] key.
The operation panel will move and stop at 30°.
2. Touch and hold the [Tilt] key again.
The operation panel will move and stop at 0°.
Turning the Audio OFF
You can turn off all of the AV features.
1. Press the [SRC] button to display the Source
screen.
2. Touch the [Audio Off] key.
The AV features are turned off.
Note:
•The Audio OFF function does not work in the Tel
mode.
Turning the AV features on
1. Press the [SRC] button to display the Source
screen.
2. Touch the desired Source key.
The AV features are turned on, and the
system enters into the specified mode.

17
NX700
English Owner’s manual
Turning the Monitor OFF
You can turn off the monitor screen, and change
it to a black screen.
1. Touch the [SET] key to display the Settings
screen.
2. Touch the [Monitor Off] key.
The monitor screen is turned off.
Turning the monitor on
1. Touch the monitor screen.
The monitor screen is turned on, and resumes
the last screen.
• You can also turn on the monitor by
pressing the [SRC] button.
Displaying the Clock
Screen
You can change the screen to display only the
digital clock on a black screen.
1. Touch the clock display on most screens.
The Clock screen is displayed.
2. To return to the current mode screen, touch
the monitor screen.
• Pressing the [SRC] button displays the
Source screen.
Note:
•The Clock screen cannot be displayed while in the
Tel mode.
Setting/Ejecting a Disc
❏Notes on handling discs
Handling
• New discs may have some roughness around
the edges. If such discs are used, the player
may not work or the sound may skip. Use a
ball-point pen or the like to remove any
roughness from the edge of the disc.
• Never stick labels on the surface of the disc or
mark the surface with a pencil or pen.
• Never play a disc with any cellophane tape or
other glue on it or with peeling off marks. If you
try to play such a disc, you may not be able to
get it back out of the DVD player or it may
damage the DVD player.
• Do not use discs that have large scratches, are
misshapen, cracked, etc. Use of such discs
may cause misoperation or damage.
• To remove a disc from its storage case, press
down on the center of the case and lift the disc
out, holding it carefully by the edges.
• Do not use commercially available disc
protection sheets or discs equipped with
stabilizers, etc. These may damage the disc or
cause breakdown of the internal mechanism.
Storage
• Do not expose discs to direct sunlight or any
heat source.
• Do not expose discs to excess humidity or
dust.
• Do not expose discs to direct heat from
heaters.
Cleaning
• To remove fingermarks and dust, use a soft
cloth and wipe in a straight line from the center
of the disc to the circumference.
• Do not use any solvents, such as commercially
available cleaners, anti-static spray, or thinner
to clean discs.
• After using special disc cleaner, let the disc dry
off well before playing it.
On Discs
• Exercise a good precaution when loading a
disc with the panel open.
• Never turn off the power and remove the unit
from the car with a disc loaded.
• Do not use lens cleaning discs. These may
damage the lens of this unit.
• When there seems to be something wrong with
reading discs, please consult your dealer or an
authorized Clarion service center.
Ball-point pen
Roughness

18 NX700
English Owner’s manual
❏Setting a disc
1. Touch the [o (Eject)] key to display the Eject
screen.
2. Touch the [Open/Close] key.
The operation panel will be opened.
3. Insert a disc into the center of the insertion
slot with the label side facing up.
The disc will automatically be drawn into the
DVD player.
After setting a disc
The system will automatically be switched to the
relevant source media mode according to the
disc, and start playing back the disc.
When a DVD video disc is set:
The system is switched to the DVD Video mode.
See “DVD Video Operations” (page 23).
When an Audio CD is set:
The system is switched to the CDDA mode. See
“Audio CD Operations” (page 29).
When a CD/DVD with MP3/WMA/AAC/DivX
files is set:
The system is switched to the MP3/WMA/AAC
mode or DivX mode according to the Playform
setting. See “MP3/WMA/AAC Operations”
(page 30) or “DivX Operations” (page 33).
Note:
•Never insert foreign objects into the disc insertion
slot.
•If the disc is not inserted easily, there may be
another disc in the mechanism or the unit may
require service.
•8 cm (single play) discs cannot be used.
CAUTION
For your safety, the driver should not insert
or eject a disc while driving.
❏Ejecting a disc
1. Touch the [o (Eject)] key to display the Eject
screen.
2. Touch the [Eject] key to eject the disc.
The operation panel will be opened and the
disc will be ejected.
• If a disc is left in the ejected position for 15
seconds, the disc is automatically reloaded
(Auto reload).
3. Remove the disc carefully.
4. Touch the [Open/Close] key to close the
operation panel.
• The operation panel will close automatically
when leaving it open for a while.
5. Touch the [Back] key.
Note:
•If you force a disc into the insertion slot before auto
reloading, this can damage the disc.
Connecting/Disconnecting
an USB Media Device
This unit has one USB (Universal Serial Bus)
connector which is compatible with USB 1.1 and
USB 2.0.
❏Playable USB media devices
This system can control the following USB media
devices connected to the USB connector.
• Apple iPod
• USB memory
About the Apple iPod
iPods can be connected by using the connection
cable supplied with the iPod you use, but in this
case, you can enjoy its audio sound only. To
enjoy video movies stored in the iPod with video
displaying them on this unit, it is required to use
the special connection cable separately sold.
Note:
•iPhones can also be connected to this system and
“iPod” appearing in this manual should be referred
to as “iPod/iPhone”.
•This system will not operate or may operate
improperly with unsupported versions.
•For detailed information on the playable iPod
models, see our home page: www.clarion.com
•For the other limitations, see “iPod Operations”
(page 39).
About the USB memory
This system can play audio files (MP3/WMA/
AAC) stored in an USB memory which is
recognized as “USB Mass Storage Class
device”. You can use your USB memory as an
audio device by simply copying desired audio
files into it.
Note:
•This system will not operate or may operate
improperly with some USB memory.
•Files protected with any DRM can not be played.
•For the other limitations, see “USB Memory
Operations” (page 42).
19
NX700
English Owner’s manual
❏Connecting an USB media
device
CAUTION
•For your safety, the driver should not
connect or disconnect an USB media
device.
•Do not start the vehicle’s engine while the
USB media device is connected, since it
may result in loss or damage to data on the
USB media device. Connect the USB media
device to this unit after starting the engine.
1. Turn on the power of your USB media device,
if required.
2. Confirming the orientation of the connectors,
connect the USB media device to the USB
connector of this unit.
• It may take a long time to recognize the
connected device.
After connecting an USB device
The system will automatically be switched to the
relevant source media mode according to the
USB device connected, and start playback.
When an iPod is connected:
The system is switched to the iPod mode. See
“iPod Operations” (page 39).
When an USB memory is connected:
The system is switched to the USB Memory
mode. See “USB Memory Operations” (page 42).
Note:
•Never insert foreign objects into the USB
connector.
•Always insert the USB media device fully into the
connector. Incomplete connections may cause the
device not to be recognized.
❏Disconnecting an USB media
device
1. Confirm that data transfer is not performed on
the USB media device.
For the method to confirm it, see the operation
manual of your USB media device.
2. Remove the USB media device from the USB
connector.
CAUTION
Be sure to disconnect the USB media device
while the vehicle’s engine is running.
Otherwise, it may result in loss or damage to
data on the USB media device. Do not stop
the engine when the USB media device is
connected.
Note:
•When turning on the ACC power with no USB
media device connected, “No Media” may be
displayed on the screen if the USB mode is
selected.
20 NX700
English Owner’s manual
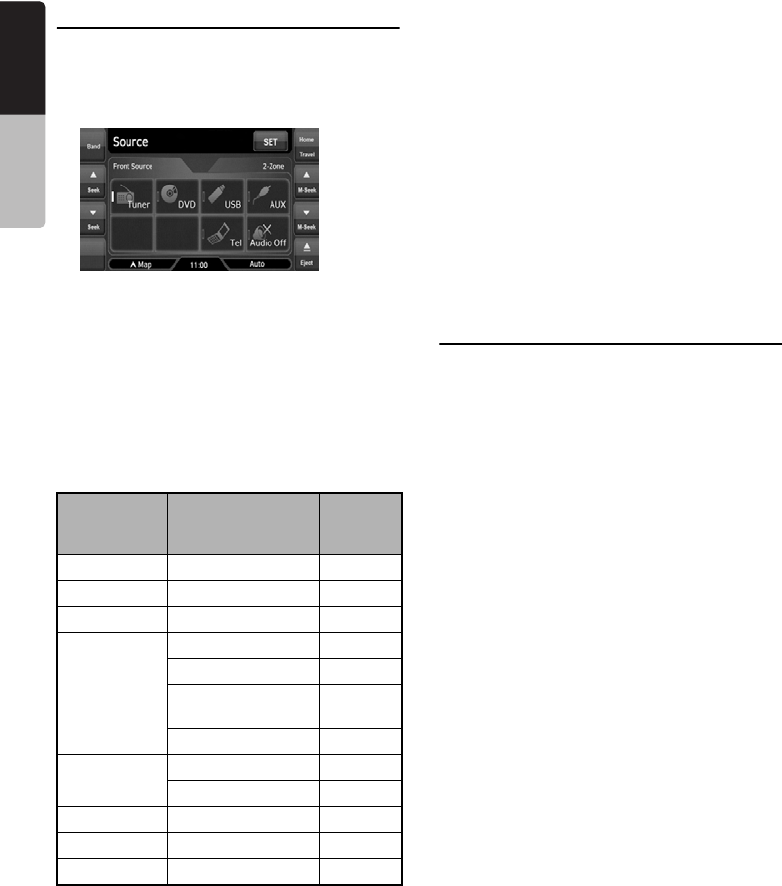
Selecting a Media Source
Changing the source mode
1. Press the [SRC] button to display the Source
screen.
2. Touch the desired Source key you wish to
change to.
The system is switched to the corresponding
source media mode.
Note:
•The Source keys have no effect in the Tel mode.
Touch the [[] key at top left of the Phone Menu
screen to cancel the Tel mode; this will resume the
last operation mode.
Available media sources
*1:These keys are displayed only when the
Sirius tuner and/or XM tuner are connected to
this unit.
*2:The source media mode to be selected differs
depending on the data format of the disc set
in the DVD player. When no disc is set, “No
Disc” will be displayed.
*3:The source media mode to be selected differs
depending on the type of the USB media
device connected. When no USB media
device is connected, “No Media” will be
displayed.
Note:
•When the USB mode is selected, video images
input from the iPod video input terminal will be
output to the rear monitor. This is normal.
2-Zone Function
About the 2-Zone function
The 2-Zone function is a function that assigns
separate source output to the Main zone (this
unit) and Sub zone (the optional rear monitor) by
simultaneously playing two sources in this
system. Therefore, the rear passengers are
allowed to enjoy a different video source from the
source played on the operation panel of this unit.
• The source sounds of the Main zone are output
from the speakers of the vehicle side, and
those of the Sub zone are from the optional
headphone systems.
• Controlling a source assigned to the Sub zone
can be made by using the optional remote
control unit. To control it from this unit, once
assign the same source to the Main zone, then
control it.
• When a media without video images is played
on the Sub zone, a black screen is output to the
rear monitor.
Note:
•When an interrupt of the navigation system arises
during the 2-Zone function is turned on, the sound
of the Main zone is muted, but the sound of the
Sub zone is output normally.
•When it arises during the 2-Zone function is turned
off, the audio signals to the 4ch speakers are
attenuated, and the voice from the navigation
system is output from the front two speakers.
•You cannot operate the 2-Zone function during the
interrupt of the navigation system.
•When the same source is assigned for Main and
Sub zones, operations in a zone are also applied
for another zone.
Source
mode Corresponding
source media
mode
Refer to
Tuner mode Tuner mode page 21
Sirius mode*1Sirius mode page 36
XM mode*1XM mode page 36
DVD mode*2DVD Video mode page 23
CDDA mode page 29
MP3/WMA/AAC
mode page 30
DivX mode page 33
USB mode*3iPod mode page 39
USB Memory mode page 42
AUX mode AUX mode page 44
Tel mode Tel mode page 44
Navi mode Navi mode page 43
21
NX700
English Owner’s manual
Assignable source mode for Main/
Sub zones
●For Main zone
All the source modes can be assigned for the
Front zone.
●For Sub zone
The following source modes can be assigned:
• DVD mode
•USB mode
•AUX mode
Setting the 2-Zone function
• The factory default setting is OFF.
1. Press the [SRC] button to display the Source
screen.
2. Touch the [2-Zone] tab to display the 2-Zone
tab screen.
The source keys for the Sub zone are
displayed.
3. Touch the desired source key you wish to
assign to the Sub zone.
The 2-Zone function is turned on with the
selected source mode assigned to the Sub
zone.
4. Touch the [Back] key to return to the previous
screen.
Note:
•Use the remote control unit to control the source
assigned to the Sub zone. To control it from this
unit, once select the same source mode as
assigned to the Sub zone for the Main zone, and
then control it.
Turning off the 2-Zone function
1. Press the [SRC] button to display the Source
screen.
2. Touch the [2-Zone] tab to display the 2-Zone
tab screen.
3. Touch and hold the [2-Zone Off] key for more
than 1 second.
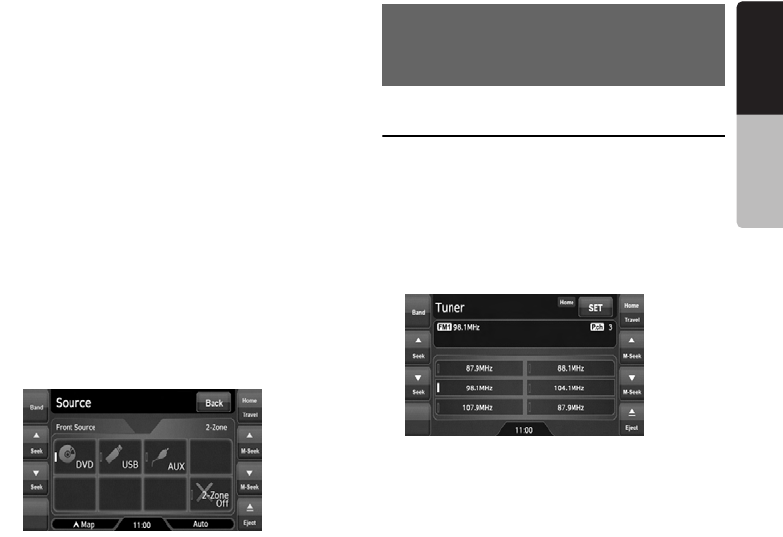
Radio Operations
Listening to the radio
1. Press the [SRC] button, and touch the [Tuner]
key.
The Tuner mode screen is displayed, and the
system resumes the last status of the Tuner
mode.
2. Touch the [Home Travel] key to select the
Home or Travel mode.
The Home/Travel modes are provided to
manage the preset stations separately in your
home location and in a location during a trip.
3. Touch the [Band] key to select the radio band.
Each time the key is touched, the radio
reception band changes in the following
order:
• In Home mode: FM Home 1 ➜ FM Home 2
➜ AM Home ➜ FM Home 1...
• In Travel mode: FM Travel ➜ AM Travel ➜
FM Travel...
4. Touch the desired Preset key to tune in the
corresponding preset station.
5. SOURCE
OPERATIONS

22 NX700
English Owner’s manual
Seek tuning
1. Touch the [Band] key to select the desired
band (FM or AM).
2. Touch the [{ (Seek)] or [} (Seek)] key to
automatically seek a station.
• When touching the [{ (Seek)] key, the
station is sought in the direction of higher
frequencies.
• When touching the [} (Seek)] key, the
station is sought in the direction of lower
frequencies.
Manual tuning
There are 2 ways available: Quick tuning and
step tuning.
When it is in the step tuning mode, the frequency
changes one step at a time. In quick tuning mode,
you can quickly tune the desired frequency.
1. Touch the [Band] key to select the desired
band (FM or AM).
2. Tune into a station.
Quick tuning:
Touch and hold the [{ (M-Seek)] or [} (M-
Seek)] key to tune in a station.
Step tuning:
Touch the [{ (M-Seek)] or [} (M-Seek)] key
to manually tune in a station.
Recalling a preset station
There are total of 30 preset positions (6-FM
Home 1, 6-FM Home 2, 6-AM Home, 6-FM
Travel, and 6-AM Travel) to store individual radio
stations in memory.
1. Touch the [Home Travel] key to select the
Home or Travel mode.
2. Touch the [Band] key to select the band.
3. Touch the corresponding Preset key to recall
the stored station.
• Touching and holding the desired Preset
key for more than 2 seconds will store the
current station to the preset memory.
Manual memory
1. Touch the [Home Travel] key to select the
Home or Travel mode.
2. Touch the [Band] key to select the band you
wish to store.
3. Tune in the station you wish to store using the
seek tuning, manual tuning, or preset tuning.
4. Touch and hold the desired Preset key you
wish to store the current station for more than
2 seconds.
Auto Store
The Auto Store is a function for storing up to 6
stations that are automatically tuned in
sequentially. If 6 receivable stations cannot be
received, a previously stored station remains
unoverwritten at the memory position.
• The Auto Store function works only in the
Travel mode.
1. Touch the [Home Travel] key to select the
Travel mode.
2. Touch the [Band] key to select the band.
3. Touch the [Auto Store] key to start scanning
stations.
A beep sounds and the stations with good
reception are stored automatically to the
preset channels.
•“AS” appears during scanning stations. To
stop the scanning, touch the [Auto Store]
key again.
23
NX700
English Owner’s manual
DVD Video Operations
❏Selecting the DVD Video mode
1. Set a DVD video disc to the DVD player.
The system will automatically read the disc
data, change to the DVD mode (DVD Video
mode), and start playback after a while.
See also “Setting/Ejecting a Disc” (page 17).
Note:
•For your safety, this system has a safety function
which turns off the picture when the car is moving,
so only the audio can be heard. The picture can
only be watched when the car is stopped and the
parking brake is applied.
•If “Audio Only” appears on the screen just after
turning on the ACC power of the car, release the
parking brake while confirming safety, and then
engage the parking brake again.
●When a DVD video disc is already set
1. Press the [SRC] button to display the Source
screen.
2. Touch the [DVD] key to select the DVD Video
mode.
The system changes to the DVD mode (DVD
Video mode), and starts playback from the
previous position.
❏Changing the DVD System
Settings
Note:
•If the Setup operation is performed in the middle of
DVD video play, the disc will restart from
beginning.
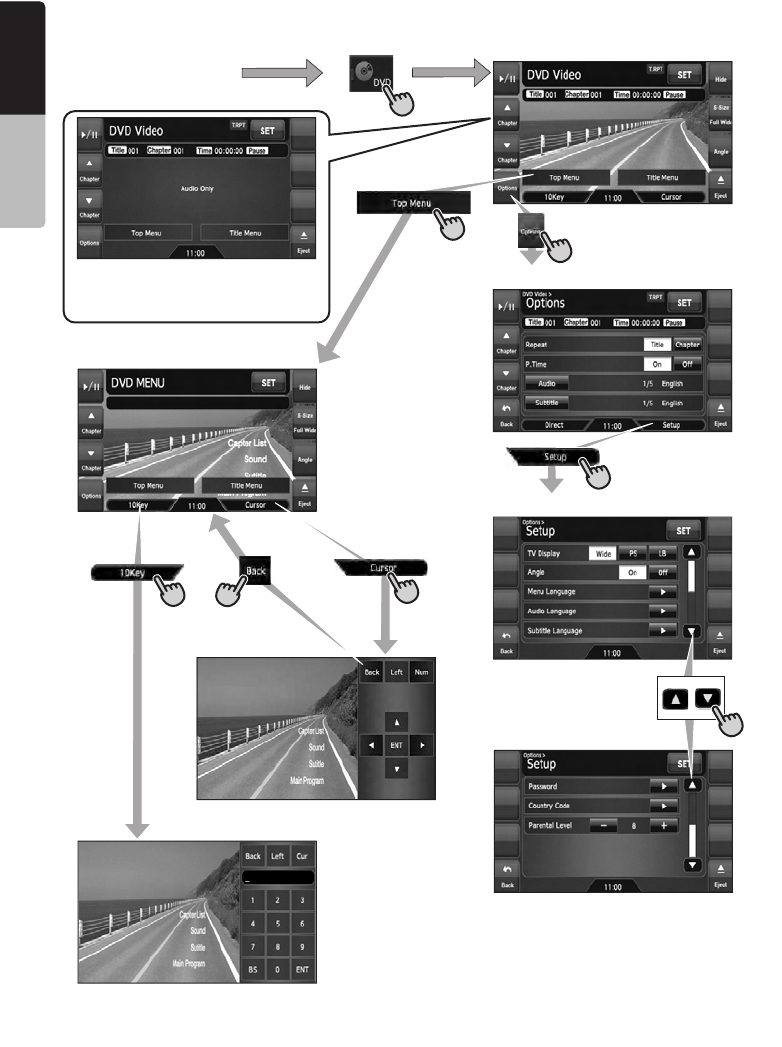
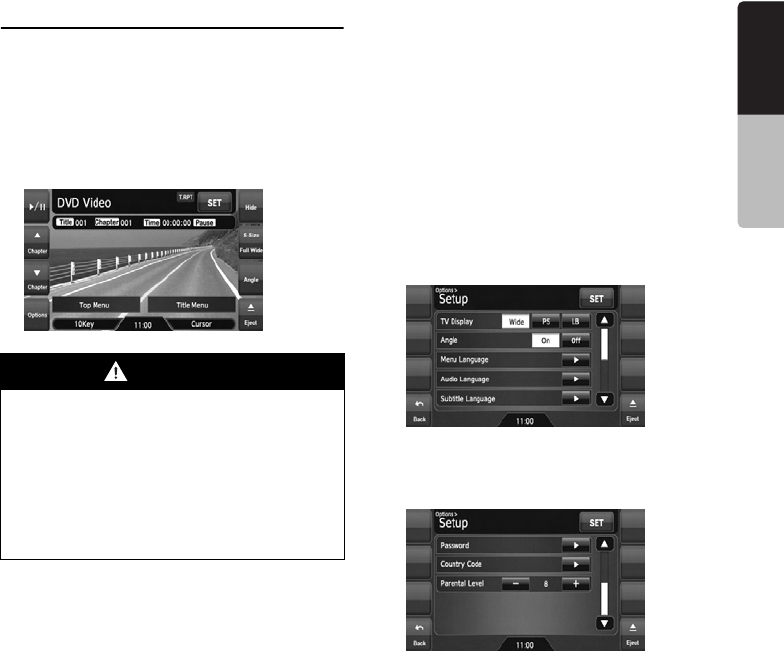
Displaying the DVD Setup screen
1. Touch the screen to display the DVD Video
mode screen.
2. Touch the [Options] key to display the
Options menu.
3. Touch the [Setup] key to display the Setup
screen.
• Touch the [}] key to display the next page.
• Touch the [{] key to return to the previous
page.
4. Perform setting for the desired setting items.
See the following sections for detail.
• In the following sections, only the details of
settings are described, the procedures to
select items are skipped.
5. Touch the [Back] key.
Setting up the screen size
Set up the screen size according to the optional
rear monitor which is connected to this unit.
• The factory default setting is “Wide”.
WARNING
•Some videos may be recorded at a higher
volume level than desired. Increase the
volume gradually from the minimal
setting after the video has started.
•For your safety, the driver should not
watch the video or operate the controls
while driving. Please note that watching
and operating the video while driving are
prohibited by law in some countries.
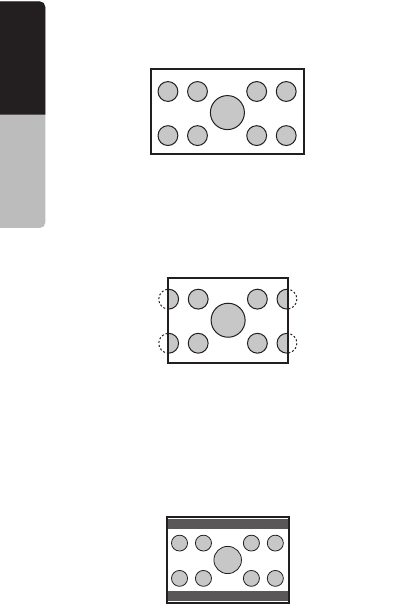
4-1. Touch the [Wide], [PS], or [LB] key of the TV
Display item to change the screen size to
“Wide”, “Pan Scan” or “Letter Box”.
24 NX700
English Owner’s manual
●When watching through a wide type of the
rear monitor (16:9)
Wide:
●When watching through a conventional
type of the rear monitor (4:3)
Pan Scan:
The leftmost and rightmost areas of the screen
are cut off.
This function allows displaying the important
part of image fully on the screen. In some
cases, image is displayed while being panned
(scrolled).
Letter Box:
A black zone is created in the top and bottom
areas of the screen.
This method displays Cinema Scope and Vista
Vision images without cutting them off by
creating a black zone on the top and bottom
gaps.
Setting up the angle mark display
You can set up so that the angle mark appears on
scenes where the angles can be switched.
• The factory default setting is “Off”.
Setting up the disc menu language
• The factory default setting is “English”.
Setting up the audio language
• The factory default setting is “English”.
Setting up the subtitle language
• The factory default setting is “English”.
Setting up the password for setting
up of the parental level
• The factory default setting is “0000”.
Note:
•When a disc with view restrictions is inserted, you
will be prompted to input a password. The disc will
not be viewable until the correct password is
entered.
4-1. Touch the [On] or [Off] key of the Angle item
to turn the Angle function ON or OFF.
4-1. Touch the []] key of the Menu Language
item.
4-2. Touch the desired Language key you wish
to set.
4-3. Touch the [Back] key.
4-1. Touch the []] key of the Audio Language
item.
4-2. Touch the desired Language key you wish
to set.
4-3. Touch the [Back] key.
4-1. Touch the []] key of the Subtitle Language
item.
4-2. Touch the desired Language key you wish
to set.
• To turn off the subtitle, select the [Off] key.
4-3. Touch the [Back] key.
4-1. Touch the []] key of the Password item.
4-2. Touch the ten-key (0 to 9) to input a 4-digit
password.
• Input the old password, and touch the
[ENT] key.
Input “4356” to reset password.
• Input a new password, and touch the
[ENT] key.
• Input the same new password again, and
touch the [ENT] key.

25
NX700
English Owner’s manual
Setting up the country code
Set up the country number for setting up of the
parental level.
• The factory default setting is “8583” (U.S.A.).
Country code list:
Setting up the parental level
You can change the level of parental lock
(audiovisual restriction).
This function allows cutting scenes that are
unfavorable for children or replacing them
automatically with other scenes prepared in
advance. For example, by replacing scenes of
radical violence or portrayals of sex with safe
scenes, you can make a trouble-free story as if it
were so from the beginning.
• The factory default setting is “8”.
• The contents that the parental level restricts
vary with the country code.
❏Operating a DVD video
Watching a DVD Video
After disc loading, the play mode is automatically
engaged.
• When playback is not started, touch the [p]
key.
• Operations may differ depending on the story
of the disc.
●About the volume adjustment when playing
DVD Video discs
This system has the independent volume data for
playing DVD Video discs. The volume setting
during DVD playback does not affect the volume
of the other modes, and the volume setting in the
other modes does not affect the DVD playback.
●When the DVD menu is displayed
For general DVD Video discs, the DVD menu
may appear.
After the DVD menu is displayed, select an item
in the operations described as follows.
4-1. Touch the []] key of the Country Code item.
4-2. Touch the ten-key (0 to 9) to input a 4-digit
country code (see the following table).
4-3. Touch the [ENT] key.
Country Input code
Canada 6765
United States 8583
American Samoa 6583
Bermuda 6677
Puerto Rico 8082
St. Pierre and Miquelon 8077
Virgin Islands (U.S.) 8673
4-1. Touch the [–] or [+] key of the Parental Level
item.
The Password input screen is displayed.
4-2. Touch the ten-key (0 to 9) to input a 4-digit
password, and touch the [ENT] key.
• The factory default setting of the
password is “0000”.
4-3. Touch the [–] or [+] key to select level “1” to
“8”, or “Off”.
The relationship between DVD video
category codes and parental level are
shown in the following table. Use this table
when setting the parental level.
LEVEL7 NC-17
(NO ONE 17 AND UNDER
ADMITTED)
LEVEL6 R
(RESTRICTED)
LEVEL4 PG-13
(PARENTS STRONGLY
CAUTIONED)
LEVEL3 PG
(PARENTAL GUIDANCE
SUGGESTED)
LEVEL1 G
(GENERAL AUDIENCES)

26 NX700
English Owner’s manual
Showing the DVD Video mode
screen
The DVD Video mode screen is used to control
the playback mode from the screen.
1. Touch the screen.
The DVD Video mode screen is displayed.
If you do not touch the screen for 7 seconds,
the display will return to the playback screen.
Selecting the screen size
You can change the screen size to suit to the
playback film.
• The factory default setting is “Full Wide”.
1. Touch the screen to display the DVD Video
mode screen.
2. Repeat touching the [S-Size] key until your
desired screen size is selected.
•
This key shows the current screen size setting.
[Full Wide]:
The image is expanded so that the rectangle
of the image fits to the screen (16:9). The
aspect ratio of the image may be changed.
[Cinema]:
The image is expanded so that the top and
bottom edges of the image fit to the screen.
Suitable for letterbox-format images. Subtitles
of non-letterboxed images may be cut off in
this mode.
[Normal]:
The image is expanded so that the top and
bottom edges of the image fit to the screen,
and that the aspect ratio of the image
becomes 4:3. The aspect ratio of the image
may be changed.
[Wide]:
The image is expanded so that the left and
right edges of the image fit to the screen. The
top and bottom areas of the image may be cut
off.
3. Touch the [Hide] key to return to the playback
screen.
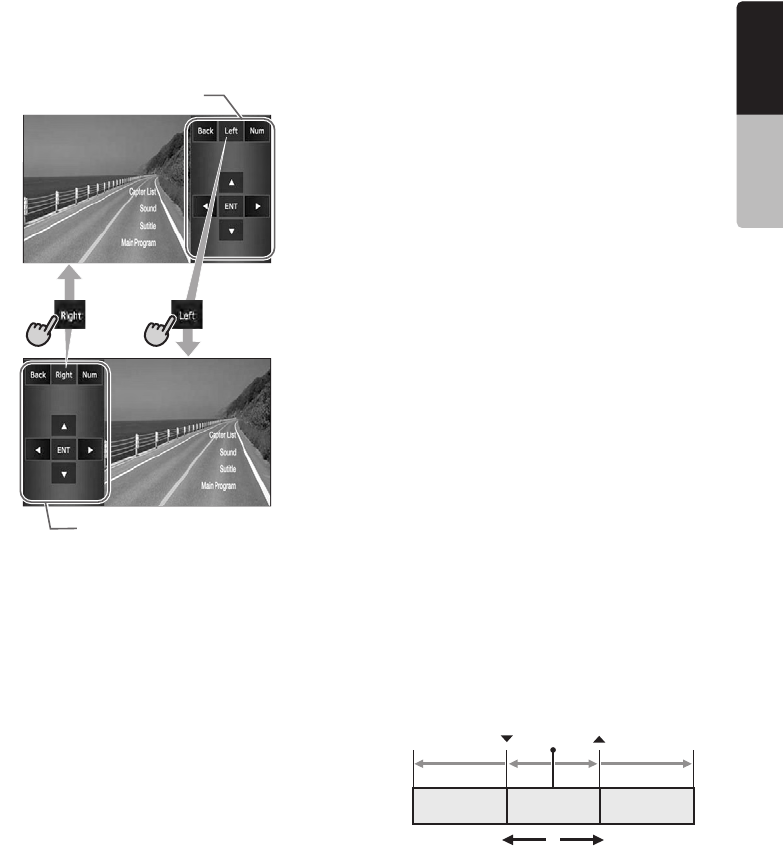
DVD menu operations
●Showing the DVD menu
1. Showing the DVD Video mode screen, touch
the [Top Menu] or [Title Menu] key during
playback.
The DVD menu appears.
• The displayed contents for each key differ
depending on the DVD software.
• An example shown below is the DVD menu
display:
●Operating the DVD menu
You can operate the menu items by displaying
the Key Pad panel.
1. Showing the DVD Video mode screen, touch
the [Cursor] or [10key] key.
The Cursor-Key Pad panel or the Numeric-
Key Pad panel is displayed on the screen.
• Touching the [Num] key or [Cur] key
changes to the each other panel.
2. Select the desired menu item using either the
Cursor-Key or the Nummeric-Key according
to the menu contents.
3. Touch the [ENT] key to specify the selected
menu item.
4. Touch the [Back] key to hide the Key Pad
panel.
27
NX700
English Owner’s manual
●Switching Key Pad position
When the menu items become difficult to view by
the Key Pad buttons, you can move the Key Pad
panel to the other side of the screen.
Stopping playback
1. Showing the DVD Video mode screen, touch
and hold the [p] key for more than 1
second during playback.
Playback is stopped.
2. To resume playback, touch the [p] key.
Playback resumes from the scene where
playback is stopped.
Pausing playback
1. Showing the DVD Video mode screen, touch
the [p] key during playback.
Playback pauses.
2. To resume playback, touch the [p] key
again.
Playback resumes.
Slow playback
1. Showing the DVD Video mode screen, touch
the [p] key during playback to pause
playback.
2. Touch and hold the [{ (Chapter)] key.
While touching the key, slow playback
continues at 1/3 speed.
Releasing the key resumes the normal
playback.
• Slow playback cannot be performed in the
backward direction. In addition, audio
cannot be reproduced during slow
playback.
Fast forward and fast backward
1. Showing the DVD Video mode screen, touch
and hold the [{ (Chapter)] or [} (Chapter)]
key during playback.
[{ (Chapter)] key: Fast forward
[} (Chapter)] key: Fast backward
The playback speed becomes 4-time faster at
first and then 16-time faster 3 seconds later.
Releasing the key resumes the normal speed
playback.
• No audio is reproduced during fast forward
and fast backward operation.
• The fast forward and fast backward speed
may differ depending on the disc.
Skipping chapters (searching)
“Chapter” means a small segment to divide the
“Title” (film) which is recorded on the disc.
1. Showing the DVD Video mode screen, touch
the [{ (Chapter)] or [} (Chapter)] key during
playback.
Chapters are skipped as many as the times
touching the key, and playback starts.
• Touching the [{ (Chapter)] key starts
playback from the beginning of the next
chapter.
• Touching the [} (Chapter)] key starts
playback from the beginning of the current
chapter.
When touching this key again within about 4
seconds, playback starts from the
beginning of the previous chapter.
Key Pad
Key Pad
Current
location
down
Chapter ChapterChapter
up

28 NX700
English Owner’s manual
Searching with a chapter/title
number
You can locate the beginning of a scene using
the chapter numbers or title numbers recorded
on the DVD video disc.
• “Chapter” means a small segment to divide the
“Title” (film) which is recorded on the disc.
1. Showing the DVD Video mode screen, touch
the [Options] key.
2. Touch the [Direct] key.
The Key Pad screen appears.
• You can specify the title number by touching
the [Title] key.
3. Input the chapter number that you want to
play back using the [0] to [9] key.
4. Touch the [ENT] key.
Playback starts from the scene of the input
chapter number of the selected title.
• If the input chapter number does not exist or
searching with a chapter number is not
allowed, the screen image will not change.
Repeat playback
This operation plays back the current title or
chapter repeatedly.
1. Showing the DVD Video mode screen, touch
the [Options] key.
2. Touch the [Title] or [Chapter] key of the
Repeat item, then touch the [Back] key.
The “T.RPT” or “C.RPT” will be displayed.
3. Touch the [Back] key to return to the previous
screen.
4. Perform the same operation to turn off the
repeat playback.
Switching among languages
On discs in which two or more audios or audio
languages have been recorded, you can switch
among the audio languages during playback.
1. Showing the DVD Video mode screen, touch
the [Options] key.
2. Touch the [Audio] key during playback.
Each time you touch the key, you can switch
among audio languages.
• Depending on the disc, up to 8 audios may
be recorded. For details, see the mark of the
disc ( : Indicates that 8 audios have
been recorded).
• Depending on the disc, switching may be
completely impossible or impossible on
some scenes.
• It may take time to switch among audios.
• When the power is turned on and the disc is
changed to a new one, the language set as
the factory default is selected. If that
language has not been recorded, the
language is specified on the disc.
3. Touch the [Back] key to return to the previous
screen.
Switching subtitles
On DVD discs in which two or more subtitle
languages have been recorded, you can switch
among the subtitle languages during playback.
1. Showing the DVD Video mode screen, touch
the [Options] key.
2. Touch the [Subtitle] key during playback.
The Subtitle Language screen appears.
3. Touch the Language key you wish to display.
• Depending on the disc, up to 32 kinds of
subtitles may be recorded. For details, see
the mark of the disc ( : Indicates that 8
kinds of subtitles have been recorded).
• To turn off subtitles, select “OFF”.
• Depending on the disc, switching may be
completely impossible or impossible on
some scenes.
• It may take time to switch among subtitles.
4. Touch the [Back] key to return to the previous
screen.
8
8
29
NX700
English Owner’s manual
Switching angles
On DVD discs in which video images have been
recorded in two or more angles, you can switch
among the angles during playback.
• When the Angle function is set to “On”, the
angle mark will appear on scenes where the
angles can be switched (see page 24).
1. Showing the DVD Video mode screen, touch
the [Angle] key during playback.
Each time you touch the key, you can switch
among angles.
• Depending on the disc, up to 9 angles may
be recorded. For details, see the mark of the
disc ( : Indicates multi-angle).
• Depending on the disc, angles may switch
smoothly or switch with a momentary still
image.
• Depending on the disc, switching may be
completely impossible or impossible on
some scenes.
• It may take time to switch among angles.
• Depending on the disc, scenes recorded in
two or more angles may be played back.
• When the power is turned on and the disc is
changed to a new one, the language set at
the time of factory shipment is selected. If
that language has not been recorded, the
language is specified on the disc.
Displaying/hiding the playback
status
1. Showing the DVD Video mode screen, touch
the [Options] key.
2. Touch the [On] or [Off] key of the P.Time item
during playback.
3. Touch the [Back] key to return to the previous
screen.
Playback status is displayed on the screen.
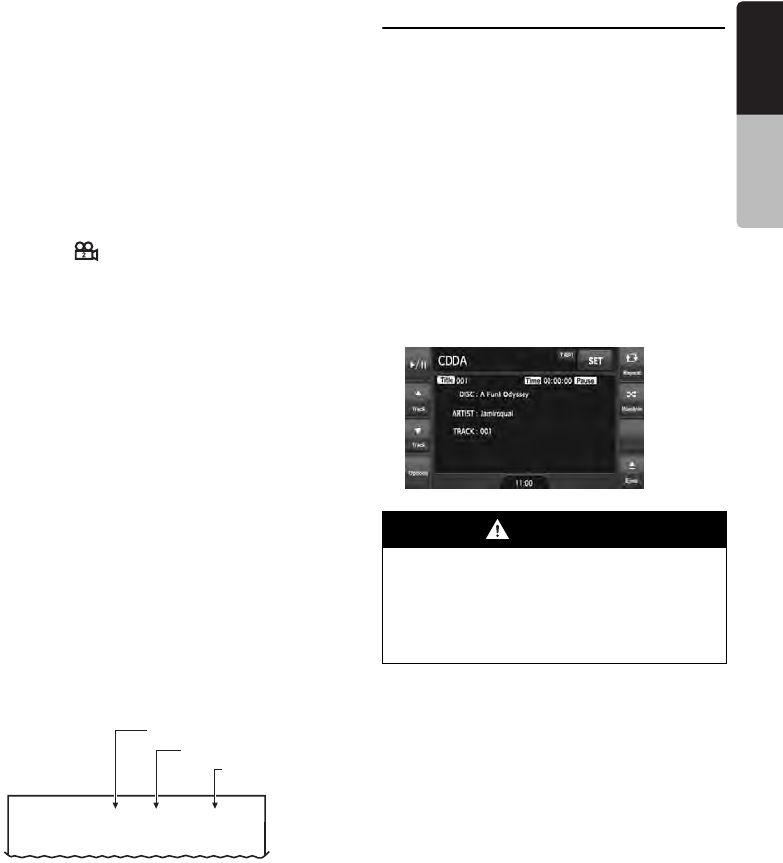
Audio CD Operations
This system is a CD TEXT compatible model,
and supports the display of the DISC TITLE,
TRACK TITLE, and TRACK ARTIST (or DISK
ARTIST) of the CD TEXT.
Note:
•This unit supports only CD TEXT in English. Also,
some character data may not be reproduced
properly on the display.
❏Selecting the CDDA mode
1. Set an audio CD to the DVD player.
The system will automatically read the disc
data, change to the DVD mode (CDDA
mode), and start playback after a while.
See also “Setting/Ejecting a Disc” (page 17).
●When an audio CD is already set
1. Press the [SRC] button to display the Source
screen.
2. Touch the [DVD] key to select the CDDA
mode.
The system changes to the DVD mode
(CDDA mode), and starts playback from the
previous position.
❏Operating an audio CD
Listening to an audio CD
After disc loading, the play mode is automatically
engaged.
• When playback is not started, touch the [p]
key.
91:00:00 100C 10T
Title number
Chapter number
Playback time
WARNING
•Some CDs may be recorded at a higher
volume level than desired. Increase the
volume gradually from the minimal
setting after playback has started.
•For your safety, the driver should not
operate the controls while driving.

30 NX700
English Owner’s manual
Pausing playback
1. Touch the [p] key during playback.
Playback pauses.
2. To resume playback, touch the [p] key.
Playback resumes.
Skipping a track (searching)
1. Touch the [{ (Track)] or [} (Track)] key
during playback.
Tracks are skipped, as many as the times the
key is touched, and playback starts.
• Touching the [{ (Track)] key starts
playback from the beginning of the next
track.
• Touching the [} (Track)] key starts
playback from the beginning of the current
track.
When this key is touched again within about
2 seconds, playback starts from the
beginning of the previous track.
Fast forward and fast backward
1. Touch and hold the [{ (Track)] or [} (Track)]
key during playback.
The playback speed becomes 4-time faster
first and then 16-time faster 3 seconds later.
Releasing the key resumes the normal speed
playback.
Other various play functions
1. Touch the [Options] key.
2. Touch the [Track] key of the function you
want to play.
Track repeat playback:
Touch the [Track] key of the Repeat item.
• This operation plays back the current track
repeatedly.
•“T.RPT” is displayed on the screen.
• You can also specify this function by
touching the [Repeat] key on the CDDA
mode screen.
Track random playback:
Touch the [Track] key of the Random item.
• This operation plays back all tracks on the
disc in no particular order.
•“T.RDM” is displayed on the screen.
• You can also specify this function by
touching the [Random] key on the CDDA
mode screen.
3. To cancel the play, touch the [Track] key of
the function to cancel.
4. Touch the [Back] key to return to the previous
screen.
Scrolling track titles
When a title or name displayed on the screen is
longer than the text area, you can confirm the
entire text by scrolling it.
1. Displaying the text you wish to scroll, touch
the text area.
The text will scroll once.
MP3/WMA/AAC Operations
This system can playback MP3/WMA/AAC files
recorded on a disc.
❏About the MP3/WMA/AAC files
What is MP3/WMA/AAC?
MP3, WMA, and AAC are the audio file formats
which have penetrated into PC users and
become a standard format.
MP3 is an audio compression method and
classified into audio layer 3 of MPEG standards.
WMA (Windows Media Audio) is an audio
compression method developed by Microsoft
Corporation.
AAC (Advanced Audio Coding) is a newer audio
compression method developed for used with
video compression standards MPEG-2 and
MPEG-4, and has been adopted as the standard
audio format of the iPod and iTunes by Apple Inc.
These features compress the original audio data
to about 10 percent of its initial size with a high
sound quality. This means that about 10 audio
CDs can be recorded on a CD-R/RW disc to
allow a long listening time without having to
change CDs.
31
NX700
English Owner’s manual
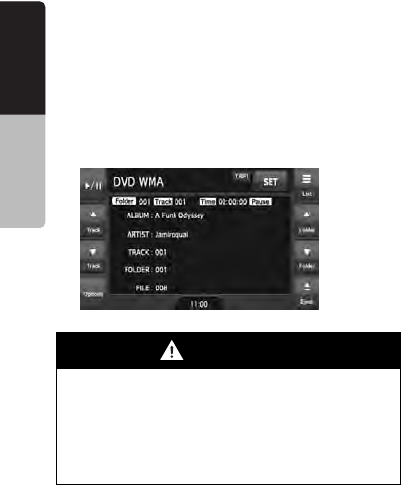
Displaying MP3/WMA/AAC Tag titles
Tag information (track title, artist name, and
album title) can be displayed for an MP3/WMA/
AAC file containing the Tag information.
This system supports the ID3 TAG version 1.x/
2.x and WMA-TAG.
Note:
•Tag information entered with 2-byte characters
may not be displayed properly on the display.
•The ID3 version 2.x tag format is not completely
supported. This system can display information up
to 60 bytes, and ignores the rest.
•Album titles of WMA-TAG may not be displayed
properly.
Precautions on the MP3/WMA/AAC
files
●General precautions
• Files other than MP3/WMA/AAC format cannot
be played. In addition, some files may not be
played because of the encoding settings.
When a file cannot be played, the next file is
played instead.
• Some noise may occur depending on the type
of encoder software used to encode the data.
• You can apply the VBR (Variable Bit Rate)
format when encoding. In this case, the
displayed play time may be slightly different
from the actual play time.
• Files that the DRM (Digital Rights
Management) function is set cannot be played.
●For MP3 files
• Set the Sampling Frequency to:
• MPEG1 Layer3: 32, 44.1, or 48 kHz
• MPEG2 Layer3: 16, 22.05, or 24 kHz
• MPEG2.5 Layer3: 8, 11.025, or 12 kHz
• Set the Bit Rate to:
• MPEG1 Layer3: 32 to 320 kbps (VBR)
• MPEG2 Layer3: 8 to 160 kbps (VBR)
• MPEG2.5 Layer3: 8 to 160 kbps (VBR)
• Add a file extension “.MP3” or “.mp3” using
single byte characters.
●For WMA files
• Set the Sampling Frequency to within ranges
from 22.05 to 44.1 kHz.
• Set the Bit Rate to 48, 64, 80, 96, 128, 160, or
192 kbps.
• Add a file extension “.WMA” or “.wma” using
single byte characters.
●For AAC files
• This system supports only the MPEG4 Audio
files encoded by the iTunes.
• Set the Sampling Frequency to 44.1 or 48 kHz.
• Set the Bit Rate to within ranges from 16 to 320
kbps (VBR).
• Add a file extension “.M4A” or “.m4a” using
single byte characters.
Precautions when preparing a disc
Note:
•For details of the DivX file mentioned below, see
“DivX Operations” (page 33).
●Logical format (File system)
The following writing formats are available when
writing MP3/WMA/AAC/DivX files on a disc:
• For CD-R/RW: ISO9660 level 1/level 2,
Romeo, Joliet, or Apple ISO (without including
expansion format)
• For DVD±R/RW: UDF (Universal Disk Format)
●Folder structure
• The folder hierarchy must be within 8
hierarchical levels. Otherwise, playback will be
impossible.
• You can store the MP3 files, WMA files, and
AAC files together in a disc or folder.
• You can also store the MP3/WMA/AAC files
and DivX files together in a disc or folder. In
such a case, you can select whether the disc is
regarded as an MP3/WMA/AAC disc or as a
DivX disc. See “Setting the Playform of discs
recorded with DivX files” (page 33).
●Number of files or folders
• The maximum allowable number of folders is
255 (including root directory).
• The maximum allowable number of files in a
folder is 255.
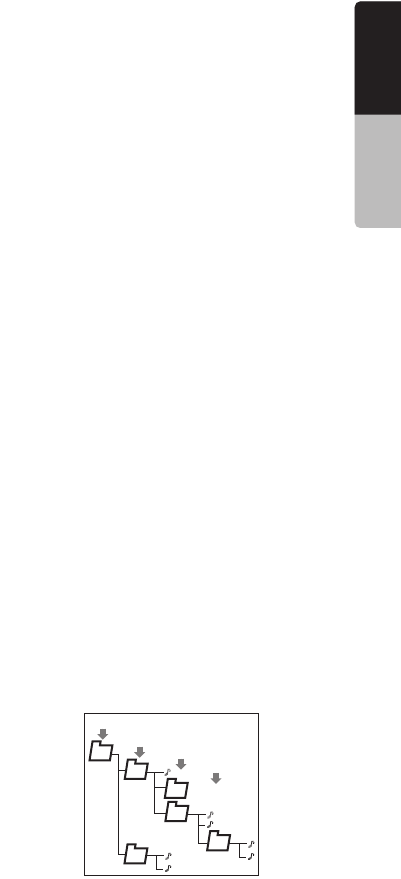
●Folder representation in the folder list
• Only folders containing MP3/WMA/AAC files or
DivX files (1 to 4 in illustration) are displayed
on the list. Folders containing no MP3/WMA/
AAC/DivX file are not displayed.
• Folder hierarchy (1 to 4 in illustration) is
ignored, and unified into one level.
• Folders are arranged in the order of the folder
creation.
1
2
1
2
3
4
3
4
32 NX700
English Owner’s manual
❏Selecting the MP3/WMA/AAC
mode
1. Set a disc which the MP3/WMA/AAC files are
recorded to the DVD player.
The system will automatically read the disc
data, change to the DVD mode (MP3/WMA/
AAC mode), and start playback after a while.
See also “Setting/Ejecting a Disc” (page 17).
Note:
•Note that the system enters to the DivX mode
when setting a disc with DivX files if the Playform
function has been set to “Video” (see page 33).
●When a disc is already set
1. Press the [SRC] button to display the Source
screen.
2. Touch the [DVD] key to select the MP3/WMA/
AAC mode.
The system changes to the DVD mode (MP3/
WMA/AAC mode), and starts playback from
the previous position.
❏Operating MP3/WMA/AAC
playback
Note:
•The same operations listed below are also used in
the USB Memory mode.
Listening to MP3/WMA/AAC files
After disc loading, the play mode is automatically
engaged.
• When playback is not started, touch the [p]
key.
Pausing playback
1. Touch the [p] key during playback.
Playback pauses.
2. To resume playback, touch the [p] key.
Playback resumes.
Skipping a track (searching)
1. Touch the [{ (Track)] or [} (Track)] key
during playback.
Tracks are skipped, as many as the times the
key is touched, and playback starts.
• Touching the [{ (Track)] key starts
playback from the beginning of the next
track.
• Touching the [} (Track)] key starts
playback from the beginning of the current
track.
When this key is touched again within about
2 seconds, playback starts from the
beginning of the previous track.
• These functions perform in the current
folder only.
Fast forward and fast backward
1. Touch and hold the [{ (Track)] or [} (Track)]
key during playback.
The playback speed becomes 4-time faster
first and then 16-time faster 3 seconds later.
Releasing the key resumes the normal speed
playback.
Skipping the current folder
1. Touch the [{ (Folder)] or [} (Folder)] key
during playback.
The tracks of the current folder are skipped
and playback starts from the first track of the
next or previous folder.
Selecting a folder/track from the list
screen
1. Touch the [List] key.
The Folder List screen is displayed.
2. When the desired folder is not displayed,
touch the [{] or [}] key to scroll the list.
3. Touch the desired Folder key.
The Track List screen appears.
4. Touch the [{] or [}] key to scroll the list, and
touch the desired Track key.
The corresponding track is started playback.
5. Touch the [Back] key.
WARNING
•Audio files may be recorded at a higher
volume level than desired. Increase the
volume gradually from the minimal
setting after playback has started.
•For your safety, the driver should not
operate the controls while driving.

33
NX700
English Owner’s manual
Other various play functions
1. Touch the [Options] key.
2. Touch a touch key of the function you want to
play.
Folder repeat playback:
Touch the [Folder] key of the Repeat item.
• This operation plays back tracks in the
current folder repeatedly.
•“F.RPT” is displayed on the screen.
Track repeat playback:
Touch the [Track] key of the Repeat item.
• This operation plays back the current track
repeatedly.
•“T.RPT” is displayed on the screen.
Folder random playback:
Touch the [Folder] key of the Random item.
• This operation plays the tracks in the
current folder in a random order.
•“F.RDM” is displayed on the screen.
Track random playback:
Touch the [Track] key of the Random item.
• This operation plays back tracks recorded
in the disc in no particular order.
•“T.RDM” is displayed on the screen.
3. To cancel the play, touch the same touch key
of the function to cancel.
4. Touch the [Back] key to return to the previous
screen.
Scrolling track titles
When a title or name displayed on the screen is
longer than the text area, you can confirm the
entire text by scrolling it.
1.
Displaying the text you wish to scroll, touch the
text area.
The text will scroll once.
Setting the Playform of discs
recorded with DivX files
MP3/WMA/AAC files can be stored together with
DivX files in a disc or folder. You can select
whether such discs are regarded as MP3/WMA/
AAC discs or as DivX discs.
1. Touch the [Options] key.
2. Touch the [Audio] or [Video] key of the
Playform item to specify the setting.
[Audio]:
Discs are regarded as MP3/WMA/AAC discs.
[Video]:
Discs are regarded as DivX discs.
3. Touch the [Back] key if required.
Note:
• This setting is disabled when a Mixed Mode
CD, which contains both data track and audio
tracks, is set in the DVD player.
DivX Operations
This system can playback DivX movie files
recorded on a disc.
• Official DivX® Certified product
• Plays all versions of DivX® video (including
DivX® 6) with standard playback of DivX®
media files.
❏About the DivX file
What is DivX?
DivX is a popular media technology created by
DivX, Inc. DivX media files contain highly
compressed video with high visual quality that
maintains a relatively small file size. DivX files
can also include advanced media features like
menus, subtitles, and alternate audio tracks.
Many DivX media files are available for download
online, and you can create your own using your
personal content and easy-to-use tools from
DivX.com.
Precautions on the DivX file
• This system can play DivX version 4.x, 5.x, and
6.x files. DivX Ultra is not supported.
• Files other than DivX format (such as the Xvid
files) cannot be played. In addition, some files
may not be played because of the encoding
format. When a file cannot be played, the next
file is played instead.
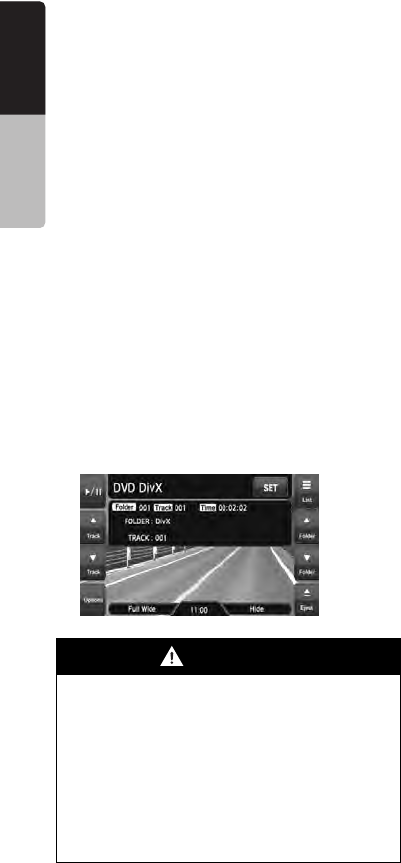
34 NX700
English Owner’s manual
• DivX VOD (Video-on Demand files) that have
authorization data can also be played. These
files must be authorized on your PC
beforehand using the DivX Registration Code
displayed on the System tab screen under the
General screen (see page 49).
• Set the Frame Size to 640 × 480 or 320 × 240
pixels.
• Set the Frame Rate to 30 or 15 fps.
• Add a file extension “.AVI”, “.avi”, “.DIVX”, or
“.divx” using single byte characters.
Precautions when preparing a disc
Note:
•The limitations on preparing a disc are same as
those in the MP3/WMA/AAC modes. See
“Precautions when preparing a disc” (page 31).
❏Selecting the DivX mode
1. Set a disc which the DivX files are recorded to
the DVD player.
The system will automatically read the disc
data, change to the DVD mode (DivX mode),
and start playback after a while.
See also “Setting/Ejecting a Disc” (page 17).
Note:
•For your safety, this system has a safety function
which turns off the picture when the car is moving,
so only the audio can be heard. The picture can
only be watched when the car is stopped and the
parking brake is applied.
•If “Audio Only” appears on the screen just after
turning on the ACC power of the car, release the
parking brake while confirming safety, and then
engage the parking brake again.
•
You can store DivX files and the MP3/WMA/AAC files
together in a disc or folder. In such a case, you can
select whether the disc is regarded as a DivX disc or
as an MP3/WMA/AAC disc. See “Setting the Playform
of discs recorded with audio files” (page 36).
●When a disc is already set
1. Press the [SRC] button to display the Source
screen.
2. Touch the [DVD] key to select the DivX mode.
The system changes to the DVD mode (DivX
mode), and starts playback from the previous
position.
❏Operating DivX playback
Note:
•The most operations in the DivX mode are same
as those in the MP3/WMA/AAC modes. See also
“Operating MP3/WMA/AAC playback” (page 32).
•The random plays cannot be specified in the DivX
mode.
Watching DivX movies
After disc loading, the play mode is automatically
engaged.
• When playback is not started, touch the [p]
key.
●To play a file with Authorization data
When a file with Authorization data is played, a
message is displayed on the screen. Confirm the
message displayed, and touch the [Done] or
[Yes] key to play the movie.
WARNING
•Some movie files may be recorded at a
higher volume level than desired.
Increase the volume gradually from the
minimal setting after the movie has
started.
•For your safety, the driver should not
watch the movie or operate the controls
while driving. Please note that watching
and operating the movie while driving are
prohibited by law in some countries.

35
NX700
English Owner’s manual
Showing the DivX mode screen
The DivX mode screen is used to control the
playback mode from the screen.
1. Touch the screen.
The DivX mode screen is displayed.
If you do not touch the screen for 7 seconds,
the display will return to the playback screen.
• You can hide the DivX mode screen by
touching the [Hide] key.
Selecting the screen size
You can change the screen size to suit to the
playback film.
• The factory default setting is “Full Wide”.
1. Touch the screen to display the DivX mode
screen.
2. Repeat touching the [Full Wide/Cinema/
Normal/Wide] key until your desired screen
size is selected.
•
This key shows the current screen size setting.
[Full Wide]:
The image is expanded so that the rectangle
of the image fits to the screen (16:9). The
aspect ratio of the image may be changed.
[Cinema]:
The image is expanded so that the top and
bottom edges of the image fit to the screen.
Suitable for letterbox-format images. Subtitles
of non-letterboxed images may be cut off in
this mode.
[Normal]:
The image is expanded so that the top and
bottom edges of the image fit to the screen,
and that the aspect ratio of the image
becomes 4:3. The aspect ratio of the image
may be changed.
[Wide]:
The image is expanded so that the left and
right edges of the image fit to the screen. The
top and bottom areas of the image may be cut
off.
3. Touch the [Hide] key to return to the playback
screen.
Searching with a folder/track
number
You can specify a file to play using the folder
number or track number.
1. Showing the DivX mode screen, touch the
[Options] key.
2. Touch the [Direct] key.
The Key Pad screen appears with the folder
number input mode.
3. Input the folder/track number that you want to
play back using the [0] to [9] key.
• Touching the [Track] key turns the Key Pad
to the track number input mode.
4. Touch the [ENT] key.
The system starts playback of the file
specified with the input folder/track numbers.
• If the input folder/track number does not
exist or searching with a folder/track
number is not allowed, the screen image will
not change.
Switching Audios
You can switch the audio data if the current DivX
file has two or more audio data.
1. Showing the DivX mode screen, touch the
[Options] key.
2. Touch the [Audio] key during playback or
pause.
Each time you touch the key, you can switch
among the audio data.
• The number of audios recorded and their
audio formats may differ depending on the
DivX file.
• Depending on the DivX file, switching may
be impossible.
• It may take time to switch the audio data.
3. Touch the [Back] key.
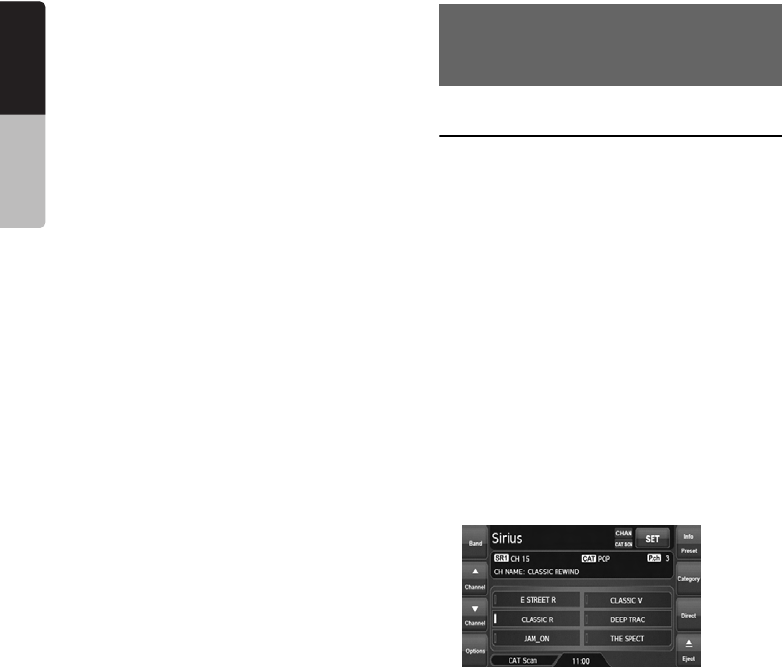
36 NX700
English Owner’s manual
Switching Subtitles
You can switch the subtitle language if the
current DivX file has one or more subtitles.
1. Showing the DivX mode screen, touch the
[Options] key.
2. Touch the [Subtitle] key during playback or
pause.
Each time you touch the key, you can switch
among the subtitle language.
• The number of subtitles recorded may differ
depending on the DivX file.
• Depending on the DivX file, switching may
be impossible.
• It may take time to switch the subtitle
language.
3. Touch the [Back] key.
Setting the Playform of discs
recorded with audio files
DivX files can be stored together with MP3/WMA/
AAC files in a disc or folder. You can select
whether such discs are regarded as DivX discs or
as MP3/WMA/AAC discs.
1. Showing the DivX mode screen, touch the
[Options] key.
2. Touch the [Audio] or [Video] key of the
Playform item to specify the setting.
[Audio]:
Discs are regarded as MP3/WMA/AAC discs.
[Video]:
Discs are regarded as DivX discs.
3. Touch the [Back] key if required.
Note:
•This setting is disabled when a Mixed Mode CD,
which contains both data track and audio tracks, is
set in the DVD player.
Satellite Radio Operations
This function is available when a Satellite Radio
tuner and Translator adapter are connected.
This unit can control the following satellite radio
tuners via Translator adapter:
• Sirius Tuner
• XM Mini-Tuner
Note:
•When a function differs depending on the
connected tuner, the following notations are used
to distinguish between Sirius and XM:
“Sirius”: for the Sirius tuner
“XM”: for the XM tuner
•Be sure to turn off the ACC power before
connecting/disconnecting the tuner.
❏Selecting the SIRIUS/XM mode
1. Press the [SRC] button, and touch the [Sirius]
or [XM] key.
The system changes to the Sirius or XM
mode.
Note:
•If the [Sirius] or [XM] key is not displayed, check
the connection with the tuner.
•The audio output is muted and other button
operations are not accepted during channel
selection.
6.
SOURCE OPERATIONS
(ACCESSORIES)

37
NX700
English Owner’s manual
Messages displayed during
reception
The following messages are displayed when the
satellite radio cannot be received normally.
●Sirius:
• When a channel is being tuned in or no signal
is received: “ACQUIRING SIGNAL”
• A channel without a broadcast has been
selected: “INVALID CHANNEL”
• A channel not covered by your contract: “CALL
888-539-SIRIUS TO SUBSCRIBE”
• When the tuner is turned on the first time or
after a reset: “UPDATING CHANNELS”
• When your contract is expired:
“SUBSCRIPTION UPDATED”
• When the Sirius antenna is not connected
correctly : “ANTENNA ERROR”
●XM:
• When a channel is being tuned in (no signal is
yet received): “LOADING”
• A channel without a broadcast has been
selected: “CHANNEL NOT AVAILABLE”
• A channel not covered by your contract:
“CHANNEL NOT AUTHORIZED”
• When a channel is out of air time: “CHANNEL
OFF AIR”
• When no signal is received: “NO SIGNAL”
• When the XM antenna is not connected
correctly : “CHECK ANTENNA”
Note:
•The messages may vary depending on the XM
tuners connected to this unit.
❏Selecting a band
1. Touch the [Band] key to select a band.
This changes the reception band as follows:
• Sirius: SR1 ➜ SR2 ➜ SR3 ➜ SR1 ...
•XM: XM1 ➜ XM2 ➜ XM3 ➜ XM1 ...
❏Confirming your Radio ID
●Sirius
1. Touch the [Options] key to display the
Options screen.
Your Sirius ID (12-digit number) will be
displayed.
2. To return to the previous screen, touch the
[Back] key.
●XM
1. Touch the [Direct] key to display the Key Pad
screen.
2. Touch the [0] key, then touch the [ENT] key.
Receiving the Channel “0” will display your
Radio ID (8-digit number).
❏Tuning in a station
Only channels that can be received are selected.
Channels without broadcasts and channels not
covered by the contract will be skipped.
1. Touch the [{ (Channel)] or [} (Channel)]
key.
The system will tune to the previous or next
available channel.
• Holding the key continues to seek channels.
❏Selecting a station with the
channel number
1. Touch the [Direct] key to display the Key Pad
screen.
2. Enter the channel number of your desired
station by touching the [0] to [9] keys.
• If you enter a wrong number, you can
cancel it by touching the [BS] key.
• To return to the previous screen, touch the
[Back] key.
3. Touch the [ENT] key.
The radio channel you entered will be tuned.
❏Displaying the channel name
and other information
1. Touch the [Preset Info] key when the Preset
keys are displayed.
The channel name, category name, and other
information are displayed.
• When the information displayed is longer
than 16 characters, touching the text scrolls
the entire text.
2. To return to the Preset Key screen, touch the
[Preset Info] key again.

38 NX700
English Owner’s manual
❏Recalling a preset station
A total of 18 Sirius stations and 18 XM stations
can be stored (Sirius: 6-SR1, 6-SR2, and 6-SR3;
XM: 6-XM1, 6-XM2, and 6-XM3). This allows you
to store your favorite stations in memory for later
recall.
1. Display the Preset Key screen by touching the
[Preset Info] key.
2. Select the desired band by touching the
[Band] key.
3. Touch the corresponding Preset key to recall
the stored station.
The system will tune to the specified station.
• Touching and holding the desired Preset
key for more than 2 seconds stores the
current station into the preset memory.
❏Manual memory
1. Display the Preset Key screen by touching the
[Preset Info] key.
2. Select the desired band by touching the
[Band] key.
3. Tune to the station you wish to store.
4. Touch and hold the desired Preset key you
wish to store to for more than 2 seconds.
A beep sounds and the current station is
stored into the preset memory.
❏Receiving stations selected by
category
Satellite Radio allows you to select broadcast
channel category (contents).
1. Touch the [Category] key to display the
Category List screen.
2. Touch the desired Category item key to select
the category.
The system will tune in to the lowest available
channel of the specified category.
• Touch the [{] or [}] key to scroll the
category list.
3. Touch the [{ (C-Seek)] or [} (C-Seek)] key
to select a station.
The system will tune to the previous or next
available channel that meets the specified
category.
4. To return to the previous screen, touch the
[Back] key.
Note:
•Touching the [Back] key within 1 second after
selecting the category cancels the category
selection and returns to the channel previously
received.
•If you do not touch the screen for 7 seconds, the
display will return to the previous screen.
❏Category Scan function
In a category scan, broadcast channels in the
same category as the current channel are
selected about every 10 seconds. During
scanning channels are performed, the display
mode cannot be switched.
1. Touch the [Category] key to display the
Category List screen.
2. Touch the desired Category item key to select
the category.
• Touch the [{] or [}] key to scroll the
category list.
3. Touch the [CAT Scan] key.
The system will start the category scan from
the lowest available channel.
4. Touch the [CAT Scan] key again to tune to
the channel currently received.
The category scan will be terminated.
Note:
•When you touch the [Back] key during the
category scan to return to the previous screen, the
category scan will continue.
•The category scan can be also performed by
touching the [CAT Scan] key on the Sirius/XM
mode screen.
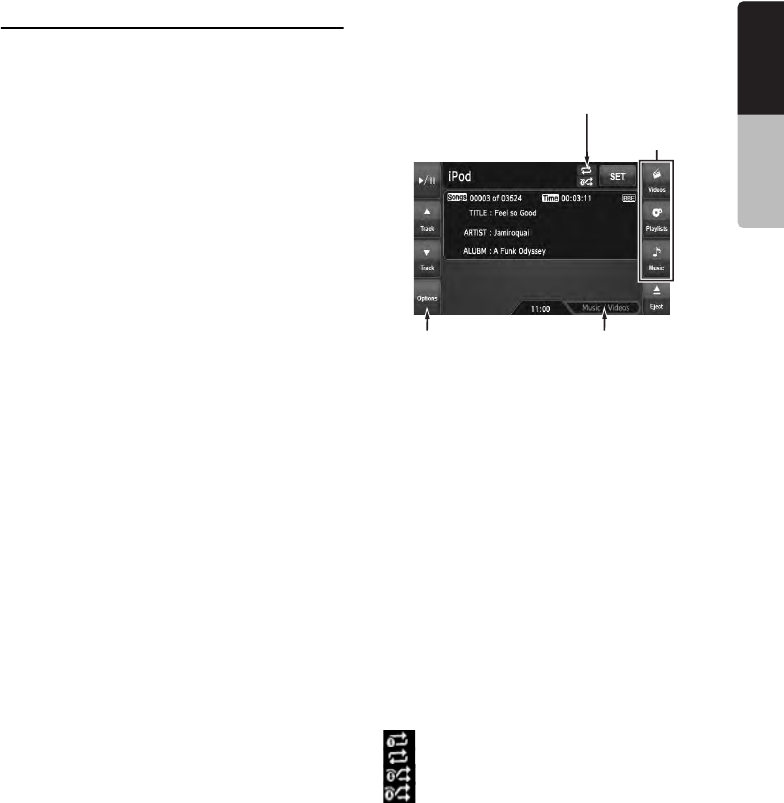
39
NX700
English Owner’s manual
iPod Operations
iPods can be connected by using the connection
cable supplied with the iPod, but in this case, you
can enjoy its audio sound only. To enjoy video
movies stored in the iPod with video displaying
them on this unit, it is required to use the special
connection cable (CCA-723/CCA-748)
separately sold.
Note:
•iPhones can also be connected to this system and
“iPod” appearing in this manual should be referred
to as “iPod/iPhone”.
•This system will not operate or may operate
improperly with unsupported versions.
•For detailed information on the playable iPod
models, see our home page: www.clarion.com
❏Notes on using Apple iPod
• Do not connect an iPod to this unit with a
headphone connected to the iPod.
• When no data is present, the title display will
remain blank.
• Set the iPod’s language setting to English
before connecting your iPod. Some characters
of the other languages may not be displayed
correctly in this system.
●Precautions on battery consumption:
If the iPod is connected to this unit when the
iPod’s internal battery has run down, this function
may not operate correctly. You must connect the
iPod after charging the battery if it has run down.
❏Selecting the iPod mode
1. Connect your iPod to the USB connector.
The system will automatically detect the
connected device, and change to the USB
mode (iPod mode), and start playback after a
while.
See also “Connecting/Disconnecting an USB
Media Device” (page 18).
●When an iPod is already connected
1. Press the [SRC] button to display the Source
screen.
2. Touch the [USB] key to select the iPod mode.
The system changes to the USB mode (iPod
mode), and starts playback from the previous
position.
❏Controlling the iPod
Operation keys
●iPod mode screen
[Music/Videos] key:
Switches the operation mode to the Video mode
or Music mode.
• Enabled in the Simple Control mode.
List keys:
Displays the corresponding list screen to select
track to be played.
[Videos], [Playlists], and [Music] are available.
[Hide] key:
Hides the iPod mode screen to display the
playback picture.
• Displayed only in the Video mode.
[Options] key:
Displays the Options screen. You can specify
play modes and other settings from this screen.
Play mode icons:
Displays status of Repeat, Shuffle play.
: 1-track Repeat
: All Repeat
: Song Shuffle
: Album Shuffle
Pausing playback
1. Touch the [p] key during playback.
Playback pauses.
2. To resume playback, touch the [p] key
again.
Playback resumes.
[Music/Videos] key
Play mode icons
List keys
[Options] key

40 NX700
English Owner’s manual
Skipping a track (searching)
1. Touch the [{ (Track)] or [} (Track)] key
during playback.
Tracks are skipped, as many as the times the
key is touched, and playback starts.
• Touching the [{ (Track)] key starts
playback from the beginning of the next
track.
• Touching the [} (Track)] key starts
playback from the beginning of the current
track. When this key is kept touching,
playback starts from the beginning of the
previous track.
Fast forward and fast backward
1. Touch and hold the [{ (Track)] or [} (Track)]
key during playback.
The playback speed becomes faster.
Releasing the key resumes the normal speed
playback.
Scrolling track titles
When a title or name displayed on the screen is
longer than the text area, you can confirm the
entire text by scrolling it.
1. Displaying the text you wish to scroll, touch
the text area.
The text will scroll once.
Controlling from the iPod
Setting this function to “On” enables to use the
iPod buttons to control the iPod.
1. Touch the [Options] key.
2. Touch the [On] or [Off] key of the Simple
Control item to specify the setting.
[On]:
Enables the iPod buttons. Only the above
operations can be performed from this
system.
[Off]:
Disables the iPod buttons. All controls are
performed from this system.
3. Touch the [Back] key to return to the previous
screen.
Other various play functions
1. Touch the [Options] key.
2. Touch a touch key of the function you want to
play.
1-track repeat:
Touch the [One] key of the Repeat item.
• This operation plays back the current or
selected track repeatedly.
All repeat:
Touch the [All] key of the Repeat item.
• This operation plays back all the tracks
currently selected repeatedly.
Song shuffle:
Touch the [Song] key of the Shuffle item.
• This operation plays back all the tracks
currently selected in a random order.
Album shuffle:
Touch the [Album] key of the Shuffle item.
• When more than one album is selected, this
operation plays back the albums in no
particular order. Tracks in an album are
played back in the recorded order.
3. To cancel the shuffle play, touch the [Off] key
of the function to cancel.
• The repeat play cannot be canceled.
Normally, it should be set to the All repeat
play.
4. Touch the [Back] key to return to the previous
screen.
Note:
•“All repeat” will be selected automatically when
you connect the iPod which is turned off the repeat
function.
❏Selecting tracks to be played
You can specify the tracks to be played by
touching the following list keys:
●[Videos] key
The following category keys are displayed. You
can narrow the listed items by selecting these
categories.
• The category keys displayed may differ
depending on the connected iPod.
[Playlists]:
The list of all the Video Playlists stored in the iPod
is displayed.
[Movies]:
The list of all the Movies stored in the iPod is
displayed.

41
NX700
English Owner’s manual
[Music Videos]:
You can narrow the Albums to be listed by
specifying the Artist name.
[Rental]:
The list of all the Rental Movies stored in the
iPod, which are downloaded with iTunes Movie
Rentals, is displayed.
[TV Shows]:
You can narrow the Seasons to be listed by
specifying the Program title.
[Video Podcasts]:
You can narrow the Tracks to be listed by
specifying the Video Podcast name.
●[Playlists] key
The list of all the Playlists and Video Playlists
stored in the iPod is displayed.
●[Music] key
The following category keys are displayed. You
can narrow the listed items by selecting these
categories.
• The category keys displayed may differ
depending on the connected iPod.
[Playlists]:
The list of all the Playlists stored in the iPod is
displayed.
[Artists]:
You can narrow the Albums to be listed by
specifying the Artist name.
[Albums]:
The list of all the Albums stored in the iPod is
displayed.
[Songs]:
The list of all the Tracks stored in the iPod is
displayed.
[Genres]:
You can narrow the Artists to be listed by
specifying the Genre name.
[Composers]:
You can narrow the Albums to be listed by
specifying the Composer name.
Selecting tracks to be played from a
list screen
1. Touch the desired Category key from the iPod
mode screen to display the corresponding list
screen.
2. Touch the desired item key on the screen to
specify it.
• Touch the [{] or [}] key to scroll the list.
You can also use the ABC Search function
to scroll the list (see below).
• When a track list of an Album, Playlist, or
Video Playlist is displayed, specifying a
track starts playback of the specified album/
playlist from the specified track.
• When the track list of the Songs is
displayed, specifying a track starts playback
of all the tracks stored in the iPod from the
specified track.
• When the other list screen is displayed,
repeat this operation until you select the
tracks to be played back.
• When video tracks are specified in the
Music mode, only the audio data will be
played back.
3. Touch the [Back] key to return to the previous
screen.
●Using the ABC Search function
1. Touch the [ABC Search] key when the list
screen you wish to scroll is displayed.
2. Repeat touching the [A ]], [[ Z], or [0-9] key
to specify the initial character of the list item
you wish to display.
3. Touch the [Search] key.
The list will scroll to display the first item
started from the specified character (or a
following character).

42 NX700
English Owner’s manual
❏Viewing video data in the iPod
(only for the iPod with video)
When you connect an iPod with video by using
the optional connection cable, you can enjoy the
video data stored in the iPod showing them on
the operation panel of this unit (and the rear
monitor if connected).
1. Play back your desired video tracks.
The system will automatically enter into the
Video mode and the playback starts. The
specified video image is also displayed on the
rear monitor if connected.
• When in the Simple Control mode, touch the
[Music/Videos] key to switch to the Video
mode. To return to the Music mode, touch
the [Music/Videos] key again.
2. Touch the [Hide] key to hide the iPod mode
screen.
The video image will be displayed on this unit.
3. To display the iPod mode screen, touch the
screen.
Note:
•“Audio Only” is displayed when the automobile is
moving.
•Video data may not be played back according to
the status of the iPod.
•The volume setting of video data is relatively lower
than audio data. Be sure to lower the volume
setting before switching to the other mode.
•Do not select the categories with no track
registered from a list screen. The iPod may be
frozen. If the iPod is frozen, reset the iPod by
following the procedure described in the instruction
manual of the iPod.
Selecting the Output Signal
This setting is used to select the audio signal of
video tracks.
1. Touch the [Options] key.
2. Touch the [Digital] or [Analog] key of the
Output Signal item to specify the setting.
[Digital]:
The digital audio data via the USB will be
output. Normally select this setting.
[Analog]:
The analog audio data via the AUX will be
output. Select this setting if your iPod cannot
output digital signals.
3. Touch the [Back] key to return to the previous
screen.
Note:
•Make sure to reconnect the iPod after changing
this setting. The key ([Digital] or [Analog])
indicator and output setting will be changed after
reconnecting your iPod.
USB Memory Operations
This system can play audio files (MP3/WMA/
AAC) stored in an USB memory which is
recognized as “USB Mass Storage Class
device”. You can use your USB memory as an
audio device by simply copying desired audio
files into it.
Note:
•This system will not operate or may operate
improperly with some USB memory.
•Files protected with any DRM can not be played.
❏Notes on using USB memories
●General notes
• When no data is present, the message “No
File” will be displayed.
• The USB memory is used with the equalizer
function turned OFF.
●Notes on the MP3/WMA/AAC files
• This system can play the MP3/WMA/AAC files
stored in the USB memory.
• This system cannot play DivX files stored in the
USB memory.
• For AAC files, this system supports only the
MPEG4 Audio files encoded by the iTunes.
• Set the Sampling Frequency to:
For MP3 files:
• MPEG1 Layer3: 32, 44.1, or 48 kHz
• MPEG2 Layer3: 16, 22.05, or 24 kHz
• MPEG2.5 Layer3: 8, 11.025, or 12 kHz
For WMA files: 8 to 48 kHz
For AAC files: 8 to 48 kHz
WARNING
•Some videos may be recorded at a higher
volume level than desired. Increase the
volume gradually from the minimal
setting after the video has started.
•For your safety, the driver should not
watch the video or operate the controls
while driving. Please note that watching
and operating the video while driving are
prohibited by law in some countries.

43
NX700
English Owner’s manual
• Set the Bit Rate to:
For MP3 files:
• MPEG1 Layer3: 32 to 320 kbps (VBR)
• MPEG2 Layer3: 8 to 160 kbps (VBR)
• MPEG2.5 Layer3: 8 to 160 kbps (VBR)
For WMA files: 32 to 192 kbps (VBR)
For AAC files: 8 to 320 kbps (VBR)
• Add the following file extension using single
byte characters:
For MP3 files: “.MP3” or “.mp3”
For WMA files: “.WMA” or “.wma”
For AAC files: “.M4A” or “.m4a”
Note:
•Some files may not be played on this system even
though they meet all the above mentioned
conditions.
●Notes on the folder structure
• The folder hierarchy must be within 8
hierarchical levels. Otherwise, playback will be
impossible.
• The maximum allowable number of folders is
512 (including root directory and folders with no
MP3/WMA/AAC file).
• The maximum allowable number of files in a
folder is 255.
• You can store the MP3 files, WMA files, and
AAC files together in a folder.
●Notes on the Tag titles
The limitations on the Tag titles are same as
those in the MP3/WMA/AAC modes. See
“Displaying MP3/WMA/AAC Tag titles” (page 31).
●Folder representation in the folder list
The limitations on the folder representation are
same as those in the MP3/WMA/AAC modes.
See “Folder representation in the folder list”
(page 31).
❏Selecting the USB Memory
mode
1. Connect your USB memory to the USB
connector.
The system will automatically detect the
connected device, and change to the USB
mode (USB Memory mode), and start
playback after a while.
See also “Connecting/Disconnecting an USB
Media Device” (page 18).
●When an USB memory is already connected
1. Press the [SRC] button to display the Source
screen.
2. Touch the [USB] key to select the USB
Memory mode.
The system changes to the USB mode (USB
Memory mode), and starts playback from the
previous position.
❏Playing back files in the USB
memory
The operations in the USB Memory mode are
same as those in the MP3/WMA/AAC modes.
See “Operating MP3/WMA/AAC playback”
(page 32) for details.
Note:
•When performing the fast forward or fast backward
function, the playback speed will become 10-time
faster. For the VBR files, it may differ depending on
the file.
Navigation System
Operations
Notes on the Navi functions
• Hereafter in this section, the Navigation system
will be called as “Navi”.
• The following functions are available:
• Showing the Navi display
• Showing the current location screen (The
[Map] key selection available on the Source
screen).
• Navi guidance voice interruption
• When a voice interrupt of the Navi arises during
2-Zone ON, the sound of the Main zone is
muted, and the sound of the Sub zone is output
normally. When it arises during 2-Zone OFF,
the audio signals to the 4ch speakers are
attenuated, and the voice from the navigation
system is output from the front two speakers.
Navi operations
Changes between the Navi display and the
Audio/Visual (hereinafter, referred as “AV”)
display.
44 NX700
English Owner’s manual
●When in the AV mode
• Touch the [Map] key on the Source screen to
switch to the Navi mode.
• When the image interruption from the Navi
arises, the screen will be changed to the Navi
display. When the interruption is finished, the
screen will return to the previous AV display.
Note:
•Depending on the distance to the next guidance
point and the vehicle’s speed, the image
interruption may continue until the next route
guidance finishes.
●When in the Navi mode
• Touch the [ ] key on the Navigation Menu
screen to switch to the AV mode.
• Touch the key of the currently selected Source
mode on the Source screen to switch to the
relevant AV mode.
Note:
•For more information on the Navi mode, see the
User Manual.
Bluetooth Telephone
Operations (Tel mode)
When the connection with your Bluetooth cellular
phone is established, the following functions are
available on this unit:
• Listening to your telephone calls on the car
speakers.
• Answering to an incoming call.
• Making a call using the Phone Dialer screen.
• Making a call using the Phonebook data in the
selected cellular phone.
• Making a call using the Call Log data of the
dialed/received calls.
• Redialing
Note:
•You need to register your Bluetooth cellular phone
(Pairing) before use.
Telephone operations
You can select the Tel mode from either AV or
Navi mode.
●When in the AV mode
• Touch the [Tel] or [TEL] key on the Source
screen to enter the Tel mode.
●When in the Navi mode
• Touch the [ ] key on the Navigation Menu to
enter the Tel mode.
• Touch the [TEL] key on the Source screen to
enter the Tel mode.
Note:
•For the details, refer to the supplied Bluetooth
telephone operation manual.
AUX Operations
This function is available when a VTR, etc. is
connected to the AUX terminal.
Note:
•For your safety, this system has a safety function
which turns off the picture when the car is moving,
so only the audio can be heard. The picture can
only be watched when the car is stopped and the
parking brake is applied.
Selecting the AUX mode
1. Press the [SRC] button, and touch the [AUX]
key. The system will enter into the AUX mode.
Showing the AUX mode screen
The AUX mode screen is used to adjust settings
concerning the AUX mode.
1. Touch the screen.
The AUX mode screen is displayed.
If you do not touch the screen for 7 seconds,
the display will return to the video screen.
Switching to another AUX mode
1. Showing the AUX mode screen, touch the
[AUX] key.
The system will enter into another AUX mode.
Changing the audio input level
The input audio level of the AUX terminals can be
changed.
• The factory default setting is “High”.
1. Touch the screen to display the AUX mode
screen, then repeat touching the [Sense] key
to select the level.
High: 10 dB
Mid: 4 dB
Low: 0 dB
WARNING
•For your safety, the driver should not
watch the video or operate the controls
while driving. Please note that watching
and operating the video while driving are
prohibited by law in some countries.
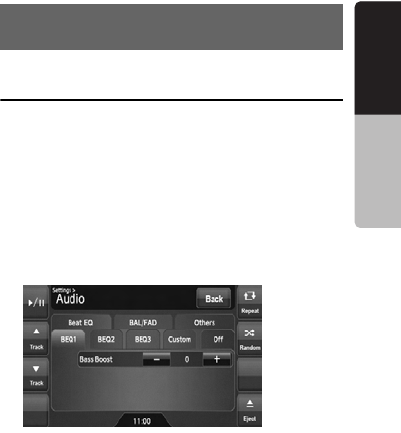
45
NX700
English Owner’s manual
Selecting the screen size
You can change the screen size to suit to the
video image.
• The factory default setting is “Full Wide”.
1. Touch the screen to display the AUX mode
screen.
2. Repeat touching the [S-Size] key until your
desired screen size is selected.
• This key shows the current screen size
setting.
[Full Wide]:
The image is expanded so that the rectangle
of the image fits to the screen (16:9). The
aspect ratio of the image may be changed.
[Cinema]:
The image is expanded so that the top and
bottom edges of the image fit to the screen.
[Normal]:
The image is expanded so that the top and
bottom edges of the image fit to the screen,
and that the aspect ratio of the image
becomes 4:3. The aspect ratio of the image
may be changed.
[Wide]:
The image is expanded so that the left and
right edges of the image fit to the screen. The
top and bottom areas of the image may be cut
off.
3. Touch the [Hide] key to return to the video
screen.
Audio Settings
❏Displaying the Audio screen
You can customize the various audio settings of
this unit from the Audio screen.
1. Touch the [SET] key.
The Settings screen appears.
2. Touch the [Audio] key.
The Audio screen appears.
3. Touch the desired Tab key, and perform the
adjustment.
See the following sections for details.
• In the following sections, only the details
regarding adjustments are described,
procedures to select items are skipped.
4. When the adjustment completes, touch the
[Back] key to return to the previous screen.
7.
SYSTEM SETTINGS

46 NX700
English Owner’s manual
❏Setting the Beat EQ
This system provides 4 types of sound tone
adjustment functions. You can select desired
function and adjust the effect level.
• The factory default setting is “Off”.
Notes:
•The volume will change each time the Beat EQ
function is switched.
•Sufficient effects may not be obtained with some
speaker systems. In such cases, adjust the
volume.
Adjusting the custom tone
●Adjusting the Bass
●Adjusting the Mid
●Adjusting the Treble
❏Adjusting the Balance/Fader
3-1. Touch the [Beat EQ] key to display the Beat
EQ tab screen.
3-2. Touch the [BEQ1], [BEQ2], [BEQ3],
[Custom], or [Off] key to select the function
you wish to apply.
[BEQ1]:
The bass sound area is emphasized.
[BEQ2]:
The mid sound area is reduced, and the
bass and treble sound area are
emphasized.
[BEQ3]:
The mid sound area is lowered, and the
bass and treble sound area are extremely
emphasized.
[Custom]:
You can adjust the sound tone of bass, mid,
and treble areas individually. For details,
see the following section.
[Off]:
No sound effect is applied.
3-3. When you select an item other than
“Custom” and “Off” in step 3-2, adjust the
effect level by touching the [–] or [+] key.
Setting range: –3 to +3
• The factory default setting is “0”.
3-1. Touch the [Beat EQ] key to display the Beat
EQ tab screen.
3-2. Touch the [Custom] key.
3-3. Perform the following settings to adjust the
sound tone.
3-4. Touch the [Bass] key.
3-5. Touch the [–] or [+] key of the desired item
to adjust the effect level.
Gain: –7 to +7
• The factory default setting is “0”.
Frequency: 50Hz, 100Hz, 200Hz
• The factory default setting is “100Hz”.
Q: 0.7, 1, 1.4, 2
• The factory default setting is “1”.
3-4. Touch the [Mid] key.
3-5. Touch the [–] or [+] key of the desired item
to adjust the effect level.
Gain: –7 to +7
• The factory default setting is “0”.
Frequency: 500Hz, 1kHz, 2kHz
• The factory default setting is “1kHz”.
Q: 0.7, 1, 1.4, 2
• The factory default setting is “1”.
3-4. Touch the [Treble] key.
3-5. Touch the [–] or [+] key of the desired item
to adjust the effect level.
Gain: –7 to +7
• The factory default setting is “0”.
Frequency: 5kHz, 10kHz, 15kHz
• The factory default setting is “10kHz”.
Q: 0.7, 1, 1.4, 2
• The factory default setting is “1”.
3-1. Touch the [BAL/FAD] key to display the
BAL/FAD tab screen.
3-2. Touch the [[] or []] key of the Balance item
to adjust the balance level.
[[]:
Emphasizes the sound from the left
speakers.
[]]:
Emphasizes the sound from the right
speakers.
Adjustment range: left 12 to right 12
• The factory default setting is “0”.

47
NX700
English Owner’s manual
❏Setting the Sub Woofer
Control
You can adjust the volume output to the Sub
Woofer.
• The factory default setting is “0”.
❏Setting the Sub Woofer Phase
You can reverse the phase of the Sub Woofer
output signal.
• The factory default setting is “Normal”.
❏Adjusting the High Pass Filter
You can adjust the cut-off frequency of the High
Pass Filter for the front/rear speaker output.
• The factory default setting is “Through”.
❏Adjusting the Low Pass Filter
You can adjust the cut-off frequency of the Low
Pass Filter for the subwoofer output.
• The factory default setting is “Through”.
❏Setting the Amp Cancel
When an external amplifier is used, using this
function reduces power noises of the audio lines.
• The factory default setting is “Off”.
❏Setting the BBE MP
This function works only for the sound in the USB
mode, corrects the distorted waveform of the
high-pass area when decoding the digital sound.
• The factory default setting is “Off”.
❏Turning on/off the Magna Bass
EXtend
The Magna Bass Extend does not adjust the low
sound area like the normal sound adjustment
function, but emphasizes the deep bass sound
area to provide you with a dynamic sound.
• The factory default setting is “Off”
3-3. Touch the [{] or [}] key of the Fader item
to adjust the fader level.
[{]:
Emphasizes the sound from the front
speakers.
[}]:
Emphasizes the sound from the rear
speakers.
Adjustment range: front 12 to rear 12
• The factory default setting is “0”.
3-1. Touch the [Others] key to display the Others
tab screen.
3-2. Touch the [–] or [+] key of the Sub Woofer
Ctrl item to adjust the output level.
Setting range: –6 to +6
3-1. Touch the [Others] key to display the Others
tab screen.
3-2. Touch the [Reverse] or [Normal] key of the
Sub Woofer Phase item to select the phase
setting.
3-1. Touch the [Others] key to display the Others
tab screen.
3-2. Touch the [[] or []] key of the High Pass
Filter item to adjust the setting.
Settings: Through, 60Hz, 90Hz, 120Hz
3-1. Touch the [Others] key to display the Others
tab screen.
3-2. Touch the [[] or []] key of the Low Pass
Filter item to adjust the setting.
Settings: Through, 120Hz, 90Hz, 60Hz
3-1. Touch the [Others] key to display the Others
tab screen.
3-2. Touch the [}] key to display the next
screen.
3-3. Touch the [On] or [Off] key of the Amp
Cancel item to turn the Amp Cancel function
on or off.
3-1. Touch the [Others] key to display the Others
tab screen.
3-2. Touch the [}] key to display the next
screen.
3-3. Touch the [[] or []] key of the BBE MP item
to set the correction level.
Settings: Off, Low, Mid, High
3-1. Touch the [Others] key to display the Others
tab screen.
3-2. Touch the [}] key to display the next
screen.
3-3. Touch the [On] or [Off] key of the Magna
Bass EX item to turn the Magna Bass
Extend function on or off.
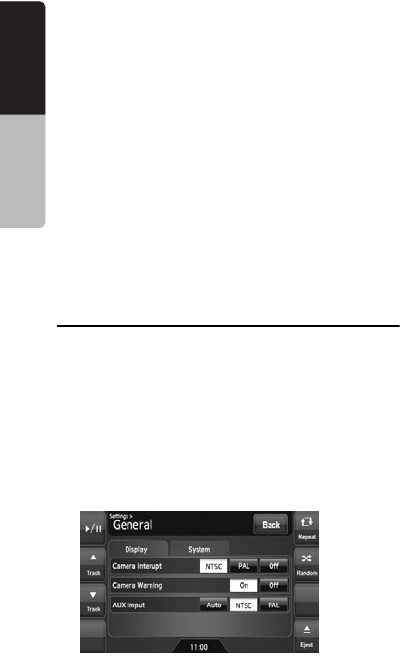
48 NX700
English Owner’s manual
❏Setting the Audio
ATTenuation
The audio output can be attenuated when a voice
interrupt of the navigation system arises.
• The factory default setting is “High”.
General Settings
❏Displaying the General screen
You can customize the various settings of this
unit from the General screen.
1. Touch the [SET] key.
The Settings screen appears.
2. Touch the [General] key.
The General screen appears.
3. Touch the desired Tab key, and perform the
adjustment.
See the following sections for details.
• In the following sections, only the details
regarding adjustments are described,
procedures to select items are skipped.
4. When the adjustment completes, touch the
[Back] key to return to the previous screen.
❏Setting Camera Interrupt
When the optional Rear Vision Camera is
connected to this unit, the rear view image is
displayed on the screen when the gear lever is
put in the reverse gear position.
• The factory default setting is “Off”.
❏Setting Camera Warning
The following warning message is displayed
during use of the Rear Vision Camera: “Make
sure of safety around your vehicle”.
• The factory default setting is “On”.
Note:
•This setting is disabled when the Camera Interrupt
feature is set to Off.
❏Setting the AUX input (NTSC/
PAL)
• The factory default setting is “NTSC”.
Note:
•This setting is applied only to the AUX video input.
•If nonstandard video signals are input, the video
image may be disturbed.
•When you set to “Auto”, the video image may be
disturbed temporarily depending on the input video
signal.
3-1. Touch the [Others] key to display the Others
tab screen.
3-2. Touch the [}] key to display the next
screen.
3-3. Touch the [[] or []] key of the Audio ATT
item to set the volume level when a voice
interrupt arises.
Settings: Mute, Low, Mid, High
3-1. Touch the [Display] key to display the
Display tab screen.
3-2. Touch the [NTSC], [PAL], or [Off] key of the
Camera Interrupt item to set to “NTSC”,
“PAL”, or “Off”.
[NTSC]:
Turn on the function with the NTSC video
system.
[PAL]:
Turn on the function with the PAL video
system.
[Off]:
Turn off the function.
3-1. Touch the [Display] key to display the
Display tab screen.
3-2. Touch the [On] or [Off] key of the Camera
Warning item to turn the Camera Warning
function on or off.
3-1. Touch the [Display] key to display the
Display tab screen.
3-2. Touch the [Auto], [NTSC], or [PAL] key of
the AUX input item to set the VTR system.

49
NX700
English Owner’s manual
❏Setting the Beep
The sound heard when you make operations is
called “beep”. The system can be set so that it
does not produce this beep sound.
• The factory default setting is “On”.
❏Setting the Blink LED
You can set the unit to blink the Blink LED
indication when the ACC power is turned off.
• The factory default setting is “Off”.
❏Confirming the DivX
Registration Code and DivX
URL
When you download a DivX VOD (Video-on-
Demand) file from a web site, entering the
registration code of your playback system may
be required to authorize the file. You can confirm
the registration code of your system and the URL
information by the following operation.
Note:
•The DivX registration code is not displayed when a
disc is set in the DVD player.
❏Performing the System Check
You can perform the system check by the
following operation.
❏Resetting the navigation
system
You can reset the navigation system.
3-1. Touch the [System] key to display the
System tab screen.
3-2. Touch the [On] or [Off] key of the Beep item
to turn the Beep function on or off.
3-1. Touch the [System] key to display the
System tab screen.
3-2. Touch the [On] or [Off] key of the Blink LED
item to turn the Blink LED function on or off.
3-1. Touch the [System] key to display the
System tab screen.
3-2. Confirm the displayed information of the
DivX Registration Code and DivX URL
items.
3-1. Touch the [System] key to display the
System tab screen.
3-2. Touch the [}] key to display the next
screen.
3-3. Touch the []] key of the System Check item.
The System Check screen is displayed.
3-4. Touch the [Start system check] key to
perform the system check manually.
The system will be restarted after
performing the system check.
3-1. Touch the [System] key to display the
System tab screen.
3-2. Touch the [}] key to display the next
screen.
3-3. Touch the []] key of the System Check item.
3-4. Touch the [Reset NAVI module.] key to
reset the navigation system.

50 NX700
English Owner’s manual
❏Setting the anti-theft function
(CATS)
“CATS” is the acronym of “Clarion Anti-Theft
System”. When you set a PIN code (called as
“Personal Code”), a theft is prevented by
disabling the operation of the unit at the theft.
In addition, set the Blink LED function to improve
the effect of the CATS function (see page 49).
Setting your Personal Code
Note:
•Write down your Personal Code in case you forget
it.
Erasing the Personal Code
When the ENTER PERSONAL CODE
screen appears
The Personal Code screen will be displayed
when turning the ACC power on after performing
the following operations:
• The car battery was replaced.
• The backup power was cut off.
• The Reset button was pressed.
Note:
•If you forgot your Personal Code, please consult
your dealer or an authorized Clarion service
center.
1. Enter your Personal Code currently set.
2. When the correct Personal Code is entered,
the unit will restart from the initial startup
screen.
Note:
•When you enter a wrong Personal Code, the
message “Code Incorrect” is displayed and the
Personal Code entry is prohibited for a while. This
prohibited time is changed according to the
number of times of wrong code entry as follows:
•1 to 6 times: 15 seconds
•7 times or more: 15 minutes
3-1. Touch the [System] key to display the
System tab screen.
3-2. Touch the [}] key to display the next
screen.
3-3. Touch and hold the blank area just below
the []] key of the System Check item for
more than 2 seconds.
The Personal Code screen appears.
• When a Personal Code is already set, the
Erase Code screen will appear. Retry this
operation after erasing the old Personal
Code.
3-4. Enter your desired 4-digit Personal Code by
touching the [0] to [9] keys, then touch the
[ENT] key.
• Touch the [BS] key when you make a
mistake in entering.
3-5. Enter the same Personal Code again for
confirmation, then touch and hold the [ENT]
key for more than 2 seconds.
The entered Personal Code will be set, and
it will return to the previous screen.
3-1. Touch the [System] key to display the
System tab screen.
3-2. Touch the [}] key to display the next
screen.
3-3. Touch and hold the blank area below the []]
key of the System Check item for more than
2 seconds.
The Erase Code screen appears.
3-4. Enter the Personal Code currently set by
touching the [0] to [9] keys, then touch and
hold the [ENT] key for more than 2 seconds.
The message “Personal Code has been
erased” appears, and it will return to the
previous screen.
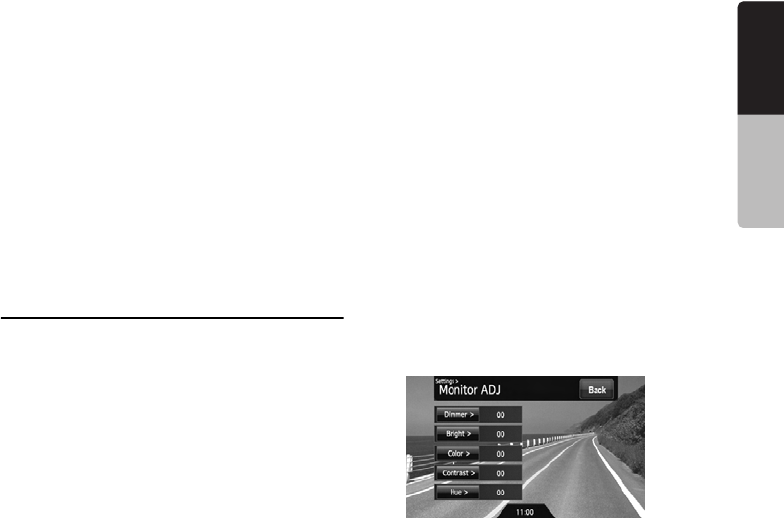
51
NX700
English Owner’s manual
❏Setting the Auto Antenna
When an auto antenna which is extended
automatically is used, you can set so that it is
automatically extended/collapsed according to
the power setting of this unit.
1. Touch the [SET] key to display the Settings
screen.
2. Touch and hold the [Auto] or [Down] key of
the Antenna item for more than 1 second to
set this function.
Auto:
The auto antenna function is turned on.
Down:
The antenna is collapsed.
Adjusting the Monitor
You can customize the various monitor settings
by the following operations.
❏Setting the Screen mode
The system has two screen modes: the Day
mode and Night mode. Each mode has the own
dimmer setting. You can select these modes
temporarily by performing the following
operation.
• The factory default setting is “Auto”.
1. Press the [SRC] button to display the Source
screen.
2. Touch the [Day], [Night], or [Auto] key to set
the Screen mode.
[Day]:
Set the dimmer level temporarily to the Day
mode (brighter).
[Night]:
Set the dimmer level temporarily to the Night
mode (dimmer).
[Auto]:
The dimmer level is changed according to the
status of the car light:
When the car light is off: Day mode
When the car light is on: Night mode
Note:
•When the Night Mode setting of the navigation
system is set to “Automatic”, this setting also
works upon the Color mode of the navigation
system.
❏Adjusting the Dimmer, Bright,
Color, Contrast, and Hue level
Note:
•The Bright, Color, Contrast, and Hue settings can
be adjusted only when a video image is displayed
on the screen, and the car is stopped with applying
the parking brake.
•The Hue setting can be adjusted only when the
NTSC mode is selected.
•The navigation screen has own dimmer setting
separately from the AV screen. The dimmer
adjustment in a mode does not affect each other
screen.
•The Rear Vision Camera image cannot be
adjusted directly. Perform the adjustments when
displaying a video image of the other source.
1. Touch the [SET] key to display the Settings
screen.
2. Touch the [Monitor ADJ] key to display the
Monitor screen.
3. Touch the [Dimmer], [Bright], [Color],
[Contrast], or [Hue] key you wish to adjust,
then touch the [–] or [+] key to adjust the level.
[Dimmer]:
Adjusts the panel brightness when the car
lights are ON or OFF.
[+]: Press to make image brighter.
[–]: Press to make image dimmer.
[Bright]:
Adjusts the brightness of the display.
[+]: Press to make image brighter.
[–]: Press to make image dimmer.
[Color]:
Adjusts the color saturation.
[+]: Press to increase color depth.
[–]: Press to decrease color depth.
[Contrast]:
Adjusts the contrast of the display.
[+]: Press to make contrast higher.
[–]: Press to make contrast lower.
[Hue]:
Adjust the tone of color (red or green is
emphasized).
[+]: Press to increase green.
[–]: Press to increase red.
4. When the adjustment completes, touch the
[Back] key to return to the previous screen.
52 NX700
English Owner’s manual
If you have a problem with this system, check the following items to resolve it. See also our homepage
(www.clarion.com) for additional information.
General
8. TROUBLESHOOTING
Problem Cause Measure
Power does not turn
on. (No sound is
produced.)
Fuse is blown. Replace with a fuse of the same amperage. If the
fuse blows again, consult your store of purchase.
Incorrect wiring. Consult your store of purchase.
Nothing happens
when buttons are
pressed.
Display is not
accurate.
The microprocessor has
malfunctioned due to
noise, etc.
Turn off the power. Press the Reset button with a
thin rod.
Note:
When the Reset button is pressed, turn off the ACC
power.
• The frequencies of radio stations, setting data,
etc. stored in memory are not cleared even
when the Reset button is pressed.
The remote control
unit does not work. Direct rays of the sun fall on
the light-receptive part of
the remote control unit.
When direct rays of the sun fall on the light-
receptive part of the remote control unit, it may not
work.
The battery of the remote
control unit is dead or there
is no battery in the remote
control unit.
Check the battery of the remote control unit.
The display is dark. The Dimmer control is too
low. Adjust the Dimmer properly.
The operating condition is
not good. The temperature inside the vehicle may be 0°C or
lower. Set to an appropriate temperature (25°C or
so) and check it again.
The headlight of the vehicle
is lit. The display is made dark at night to prevent the
glare (when the headlight is the vehicle is lit in the
daytime, the display gets dark).
There are red, green
and blue points in
the display.
This is not a failure, but a phenomenon peculiar to
a liquid crystal display (The liquid crystal display is
produced according to technology with very high
precision. Note that, though there are effective
pixels of 99.99% or more, pixel missing or
normally lit pixels account for 0.01%).
Reset button

53
NX700
English Owner’s manual
DVD Player
Problem Cause Measure
Disc cannot be
loaded. Another disc is already
loaded. Eject the disc before loading the new one.
There is a foreign matter
already in place. Eject the foreign matter forcibly.
Sound skips or is
noisy. Disc is dirty. Clean the disc with a soft cloth.
Disc is heavily scratched or
warped. Replace with a disc with no scratches.
MP3/WMA/AAC files are
not encoded properly. Use MP3/WMA/AAC files encoded properly.
Sound is bad directly
after power is turned
on.
Water droplets may form
on the internal lens when
the car is parked in a humid
place.
Let dry for about 1 hour with the power on.
The image is not
displayed. The parking brake is not
engaged. Check that the parking brake is engaged.
Disc cannot be
played with the
display “Parental
Violation” shown.
The view is limited. Release the view limitation or change the parental
level.
See the subsection “Setting up the parental level”
(page 25).
Disc cannot be
played. File system is not correct. Use ISO9660 level 1/2, Romeo, Joliet, or Apple
ISO file system for CD-R/RW, or UDF for DVD±R/
RW.
The color of the
display is light or a
shade of color is not
good.
The color is not adjusted
adequately. Check that the Bright, Color, Contrast, and Hue
are adjusted properly.
54 NX700
English Owner’s manual
USB Devices
If an error occurs, one of the following displays is displayed.
Take the measures described below to solve the problem.
DVD Player
Problem Cause Measure
USB device cannot
be inserted. The USB device has been
inserted with wrong
direction.
Reversing the connection direction of the USB
device, try it again.
The USB connector is
broken. Replace with a new USB device.
USB device is not
recognized. The USB device is
damaged. Disconnect the USB device and reconnect. If the
device is still not recognized, try replacing with a
different USB device.
Connectors are loose.
No sound heard with
the display “No File”
shown.
No MP3/WMA/AAC file is
stored in the USB device. Store these files properly in the USB device.
Sound skips or is
noisy. MP3/WMA/AAC files are
not encoded properly. Use MP3/WMA/AAC files encoded properly.
The iPod’s video
image is disturbed. The TV Signal setting of
the iPod is not set correctly. Set the TV Signal setting (NTSC/PAL) of the iPod
correctly.
9. ERROR DISPLAYS
Display Cause Measure
Error 2 A disc is caught inside the
DVD player and is not
ejected.
This is a failure of DVD player’s mechanism.
Consult your store of purchase.
Error 3 A disc cannot be played
due to scratches, etc. Replace with a non-scratched, non-warped disc.
Error 6 A disc is loaded upside-
down inside the DVD
player and does not play.
Eject the disc then reload it properly.
No MP3/WMA/AAC/DivX
file is recorded on the disc. Write these files properly onto a disc.
Parental Violation Parental level error Set the correct Parental level.
Wrong Region Region code error Eject the disc, and replace correct region code
disc.
DRM WMA files protected by
DRM are played. Perform the operation such as skipping a file.
(Repeat and random playback mode may be
canceled.)
Not Support Files not supported by this
unit are played.

55
NX700
English Owner’s manual
USB Devices
If an error display other than the ones described above appears, press the Reset button. If the problem
persists, turn off the power and consult your store of purchase.
• The frequencies of radio stations, setting data, etc. stored in memory are not cleared even when the
Reset button is pressed.
Display Cause Measure
Error 2 The connected USB device
is not supported. If the USB device is frozen, disconnect it, reset it,
and reconnect it again.
Connect a proper USB device.
Error 3
(USB memory) An error occurred when
controlling the USB device. Disconnect the USB device, and reconnect it
again.
Error 3 (iPod) The selected category has
no track data. Touch the [{ (Track)] key. If the error is not
cleared, disconnect the iPod, and reconnect it
again.
The iPod is frozen. Disconnect the iPod, reset it, and reconnect it
again.
Error 5 (iPod) The connected iPod is not
recognized. Disconnect the iPod, and reconnect it again. If the
iPod is still not recognized, try replacing with a
different iPod.
If the iPod is frozen, disconnect it, reset it, and
reconnect it again.
Bus Error Over-current or data error
is detected. Turn off the ignition switch, disconnect the device,
restart the engine and reconnect it again. If the
device is still not recognized, try replacing with a
different device.
Device Error The device is connected
via the USB Hub. Disconnect the device, and reconnect directly to
the USB connector of this unit without using the
USB Hub.
DRM WMA files protected by
DRM are played. Perform the operation such as skipping a file.
(Repeat and random playback mode may be
canceled.)
Not Support Files not supported by this
unit are played.

56 NX700
English Owner’s manual
FM Tuner
Frequency Range: 87.9 MHz to 107.9 MHz
Usable Sensitivity: 9 dBf
50dB Quieting Sensitivity: 15 dBf
Alternate Channel Selectivity: 70 dB
Stereo Separation (1 kHz): 38 dB
Frequency Response (±3 dB): 30 Hz to 15 kHz
AM Tuner
Frequency Range: 530 kHz to 1710 kHz
Usable Sensitivity: 28 dBμV
DVD Player
System:
Digital Versatile Disc System with CDDA
capable
Usable discs:
DVD video disc, Compact disc
Frequency Response:
20 Hz to 20 kHz (CD) (±1 dB)
Signal to Noise Ratio: 100 dB (1 kHz)
Dynamic Range: 100 dB (1 kHz)
Distortion: 0.01%
USB
Specification: USB 2.0 Full Speed
File system: FAT12/16/32, non-VFAT-compliant
Playable audio format:
MP3 (.mp3): MPEG 1/2 Audio Layer-3
WMA (.wma): Ver. 7/8/9.1/9.2
AAC (.m4a): AAC format encoded by iTunes
and iTunes+ only
Maximum number of folders: 512
Maximum number of files: 255 (for a folder)
Maximum folder hierarchy: 8 levels (including Root)
Maximum power supply: 500 mA
Bluetooth
Specification: Bluetooth Ver. 2.0 + EDR
Profile:
HFP (Hands-Free Profile)
DUN (Dial-up Networking Profile)
SPP (Serial Port Profile)
Send/Receive Sensitivity: Class 2
Audio Amplifier
Maximum power output:
200 W (50 W × 4)
Speaker impedance: 4 Ω (4 to 8 Ω allowable)
Input
Audio input sensitivity:
High: 0.65 V (at 2 V output)
Mid: 1.3 V (at 2 V output)
Low: 2.0 V (at 2 V output)
(input impedance 10 kΩ or greater)
Video input:
1.0 ±0.2 Vp-p (input impedance 75 Ω)
Video Output
Video output:
1.0 ±0.2 Vp-p (output impedance 75 Ω)
LCD Monitor
Screen Size: 7-inch wide type
6" Width (152 mm) × 3-5/16" Height (85 mm)
Display method:
Transmission type TN liquid crystal display
Drive method: TFT (thin-film transistor)
active matrix driving
Pixels: 336,960 (1440 × 234)
General
Power source voltage:
14.4 V DC (10.8 to 15.6 V allowable)
Ground: Negative
Current consumption: 3.5 A (1 W)
Auto Antenna Rated Current: 500 mA less
Dimensions of the Main Unit:
7" Width (178 mm) × 3-15/16" Height (100 mm)
× 6-5/16" Depth (160 mm)
Weight of the Main Unit: 2.6 kg
Dimensions of the Remote Control Unit:
1-3/4" Width (43.4 mm) × 1/2" Height (12.5 mm)
× 4-1/2" Depth (112.7 mm)
Weight of the Remote Control Unit:
60 g (including battery)
Note:
•Specifications comply with JEITA Standards.
•Specifications and design are subject to change
without notice for further improvement.
10.SPECIFICATIONS
6-3/4" (171 mm)
7" (178 mm)
2" (25mm)
6-5/16" (160mm)
3-15/16"
100 mm
Power Output:
20 W x 4 Channels RMS [4 Ω @
14.4 V ≤ 1 % THD+N]
Signal to Noise Ratio:
84 dBA (reference: 1 W into 4 Ω)
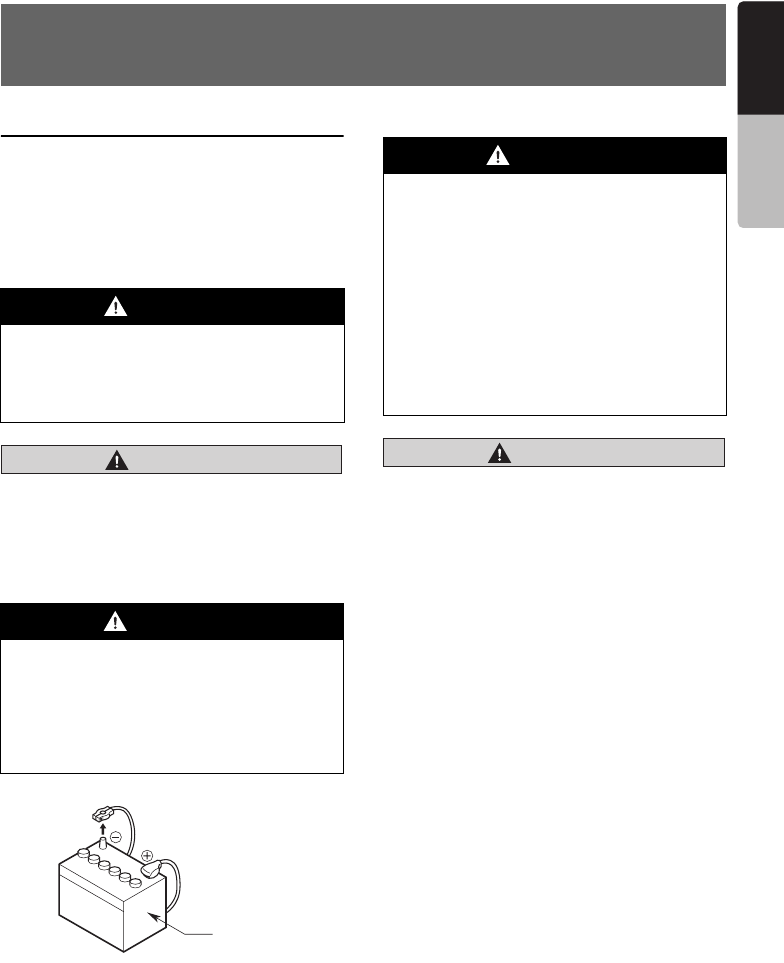
57
NX700
English INSTALLATION
MANUAL
1. SAFETY PRECAUTIONS
Symbol Identification
This manual uses symbols and icons to indicate
safety precautions and concerns during the
installation procedure. Be sure to carefully read
and understand each precaution prior to
beginning the installation.
CAUTION
CAUTION
This symbol is intended to alert the user to
the presence of important operating
instructions. Failure to heed the instructions
can result in injury or material damage.
Before Use
Installation Precautions
CAUTION
CAUTION
•Do not install the system in the locations
described below. This may cause a fire,
accident or electrical shock:
A location exposed to rain or dust.
An unstable location, or where the system
may fall.
•Do not install this unit in a place exposed to
direct sunlight, heat or a place where the
vent holes or heat radiation holes are
covered.
•When you install the antenna, mount it in a
place where the elements of the antenna do
not protrude beyond the edge of the front,
back, left and right of the vehicle.
If it comes in contact with pedestrians, it
may cause an accident.
INSTALLATION AND WIRE CONNECTION
MANUAL
WARNING
This symbol is intended to alert the user to
the presence of important operating
instructions. Failure to heed the
instructions may result in severe injury or
death.
WARNING
•Confirm the battery voltage of the vehicle
to be installed. This unit is designed only
for vehicles with DC 12V power supply.
•Disconnect the negative terminal of the
battery before connecting wires,
otherwise an electric shock, injury by
short circuit may occur.
Car battery
WARNING
•When installing the unit to a vehicle with
an airbag system, never install it in a
place where it may affect the operation of
the airbag.
•Do not install this unit in the following
locations:
A location interfering with the driver’s
visual range or operation.
A location where the gear shift or brake
pedal are hindered.
A location where passengers are at risk.
An unstable location, or where the
system may fall.
58 NX700
English INSTALLATION
MANUAL
Installation Notes
CAUTION
CAUTION
•Use only the supplied parts.
If unspecified parts are used, they may
cause damage.
•Any holes made in the body of the vehicle
should be sealed with a silicon adhesive.
If exhaust fumes or water penetrates into
the vehicle, this may cause an accident.
•Fasten the bolts securely when installing
the unit. If the bolts are loose an accident or
malfunction could occur.
Connection Notes
CAUTION
CAUTION
•Verify wires with a digital multi-meter prior
to making any connections. Many new
vehicles use multiplexed and/or low voltage
circuits that can be damaged if a test light
or logic probe is used.
•Connect cables appropriately. If a wrong
connection is made, this may cause a fire or
accident.
•When passing cables through the body of
the vehicle, use non-conductive grommets.
If the coatings of the cables are worn out by
rubbing, this may cause an accident, fire or
a short circuit.
•After wiring cables, fix them with insulation
tape.
•Be sure to switch off the vehicle when
connecting or disconnecting cords to/from
the unit, otherwise an electric shock, injury
or accident may occur.
2. PACKAGE CONTENTS
1Main unit
2Quick Start Guide
3Installation Manual
4CD-ROM
• Owner’s manual & Installation Manual
• User Manual - Clarion Mobile Map
• User Manual - Bluetooth Connectivity
5Power supply cord
6RCA pin cord
7Bag for accessories
Flat head screw (M5 × 8 mm)...................... 8
Hexagonal bolt (M5 × 8 mm) ....................... 8
Rubber cap (for RCA pin cord) .................. 14
Lead holder.................................................. 3
Double-sided tape
for fastening GPS antenna .......................... 1
8Remote control unit
9Battery
0Finisher
!Warranty card
@GPS antenna
#Microphone
Note:
•The provided disc (CD-ROM manual) cannot be
played back on this unit.
WARNING
•Please note the position of pipes, tanks
and electrical wirings before installing
the unit into the vehicle; failure in
avoiding these may cause a fire or
malfunction.
WARNING
•Loom all cables according to the
instruction manual, so as not to hinder
operation.
•Wire the connecting cords/cables away
from high temperature areas. If the
coatings of the cables melt, it could
cause an accident/fire by a short circuit.
Take care when wiring in the engine
compartment.
•When wiring the connecting cables in a
vehicle with an airbag system, never feed
the cables through a place where it may
affect the operation of the airbag.
An airbag not operating correctly in an
emergency may cause increased injury.
59
NX700
English INSTALLATION
MANUAL
3. GENERAL CAUTIONS
• Do not open the case. There are no user-
serviceable parts inside. If you drop anything
into the unit during installation, consult your
dealer or an authorized Clarion service center.
4. CAUTIONS ON
INSTALLATION
• Prepare all articles necessary for installing the
main unit before starting.
• This model features an operation panel that
slides forward.
On some types of cars, the operation panel
may make contact with the dashboard or
gearshift lever, in which cause it cannot be
installed. Before installing, check that the unit
will not hamper operation of the gearshift lever
or obstruct your view before selecting the
installation location. (Figure 2)
• Install the unit within 30° of the horizontal
plane. (Figure 3)
• If you have to do any modification on the car
body, such as drilling holes, consult your car
dealer beforehand.
• Use the included screws for installation. Using
other screws can cause damage. (Figure 4)
• This unit has a fan motor in the left side of the
main unit so as not to raise the temperature in
the main unit. When the fan motor vent is
covered with cords or mounting bracket, it may
cause a malfunction. Be sure not to cover it
when wiring cords. (Figure 5)
Dashboard
Figure 2
Gearshift lever (check
that it does not touch
the LCD.)
Max. 30°
Figure 3
Chassis
Damage
Max. 3 mm (M4 screw)/
Max. 8 mm (M5 screw)
Chassis
Figure 4
Chassis
Figure 5
Fan motor vent
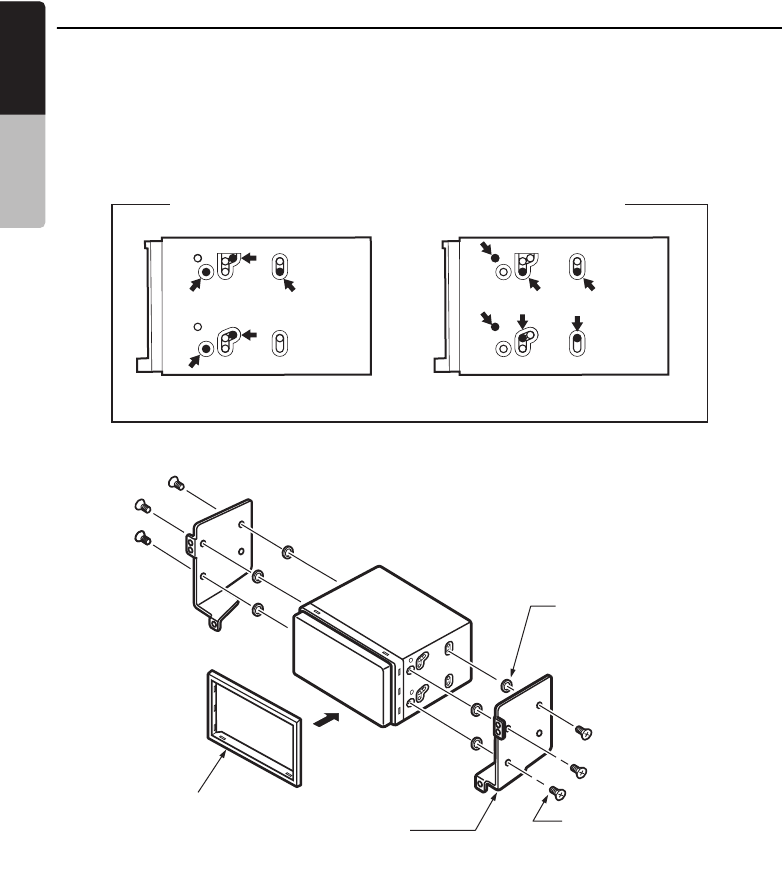
60 NX700
English INSTALLATION
MANUAL
5. INSTALLING THE MAIN UNIT
This unit is designed for fixed installation in the
dashboard.
• When installing the main unit in NISSAN
vehicles, use the parts attached to the unit and
follow the instructions in Figure 6.
When installing the main unit in TOYOTA
vehicles, use the parts attached to the vehicle
and follow the instructions in Figure 7.
• Wire as shown in Section 10 (see page 65).
• Reassemble and secure the unit in the
dashboard and set the face panel and center
panel.
Installing the Main Unit in a NISSAN Vehicle
Note:
*1Position the face panel with its wide edge at the bottom. Fit the edge into the groove of the main unit.
Mounting Screw Holes (Side View of the Main Unit)
For NISSAN vehicle For TOYOTA vehicle
Figure 6
6-Spacer (thickness: 1 mm)
6-Flat head screw
(M5 × 8)
(attached to the main unit)
Mounting bracket
(1 pair for the left and right sides)
Finisher (*1)
Main Unit
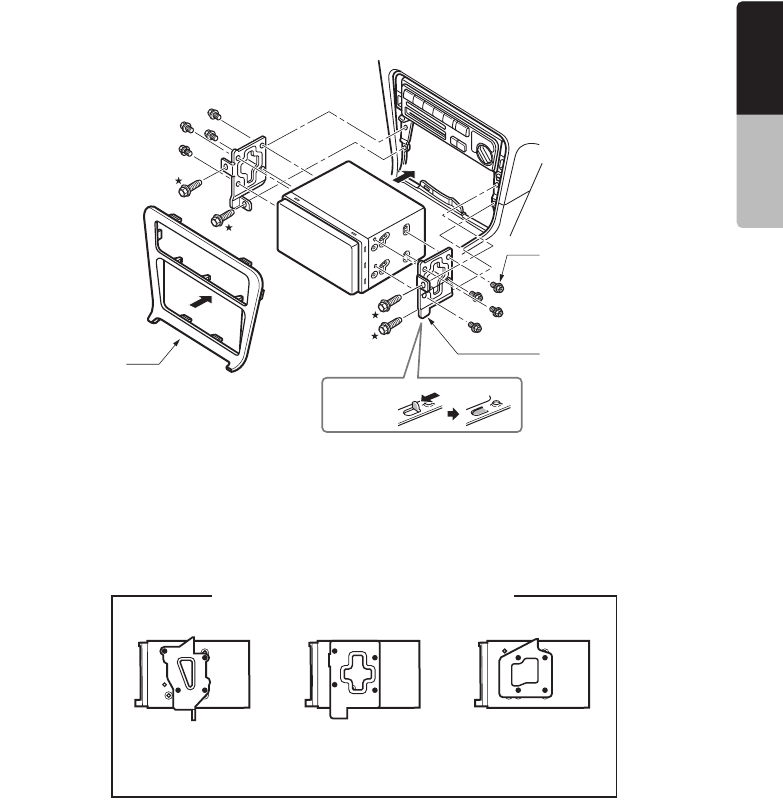
61
NX700
English INSTALLATION
MANUAL
Installing the Main Unit in a TOYOTA Vehicle
Install by using parts attached to the vehicle. (Screws marked ★ are attached to the vehicle.)
Note:
*2Some panel openings are too small for the unit
depending on the vehicle type and model. In
such a case, trim the upper and lower sides of the
panel frame by about 0.5 to 1.5 mm so the unit
can be inserted smoothly.
*3If a hook on the installation bracket interferes
with the unit, bend and flatten it with a nipper or
similar tool.
Vehicles other than NISSAN and TOYOTA
In some cases the center panel may require modification. (Trimming, filing, etc.)
Figure 7
Mounting bracket
(1 pair for the left and right
sides)
8-Hexagonal screw
(M5 × 8)
Center Panel *2
Main Unit
*3
Typical Mounting Brackets
Example 1 Example 2 Example 3
Affix the screws to the ● marks.
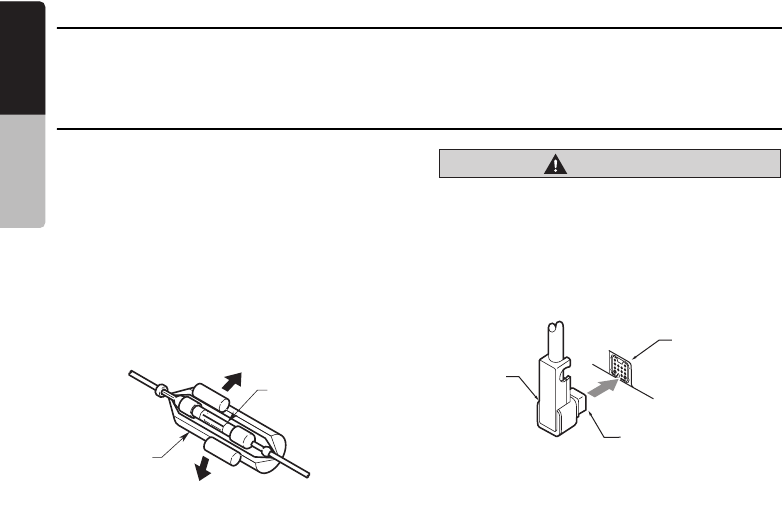
62 NX700
English INSTALLATION
MANUAL
6. REMOVING THE MAIN UNIT
When the main unit is to be removed, disassemble it in the reverse of the order in “INSTALLTING THE
MAIN UNIT” (see page 60).
7. CAUTIONS ON WIRING
• Be sure to turn the power off before wiring.
Be particularly careful where you route the
wires.
• Keep them well away from the engine, and
exhaust pipe, etc. Heat may damage the wires.
• If the fuse should blow, check to see if the
wiring is correct.
If a fuse is blown, replace it with a new one of
the same specification as the original.
• To replace the fuse, remove the old fuse of the
power supply cord and insert the new one.
(Figure 8)
Note:
•There are various types of fuse holder. Do not let
the battery side touch other metal parts.
CAUTION
caution
After the connection, fix the cord by a clamp
or insulation tape for protection.
• Connect the CeNET extension cable fully and
securely until it locks. When the CeNET
extension cable is pulled, hold the slide cap
part and pull it towards you. (Figure 9)
Fuse (15A FUSE)
Figure 8
Fuse holder Figure 9
CeNET cable
CeNET
terminal
Slide cap
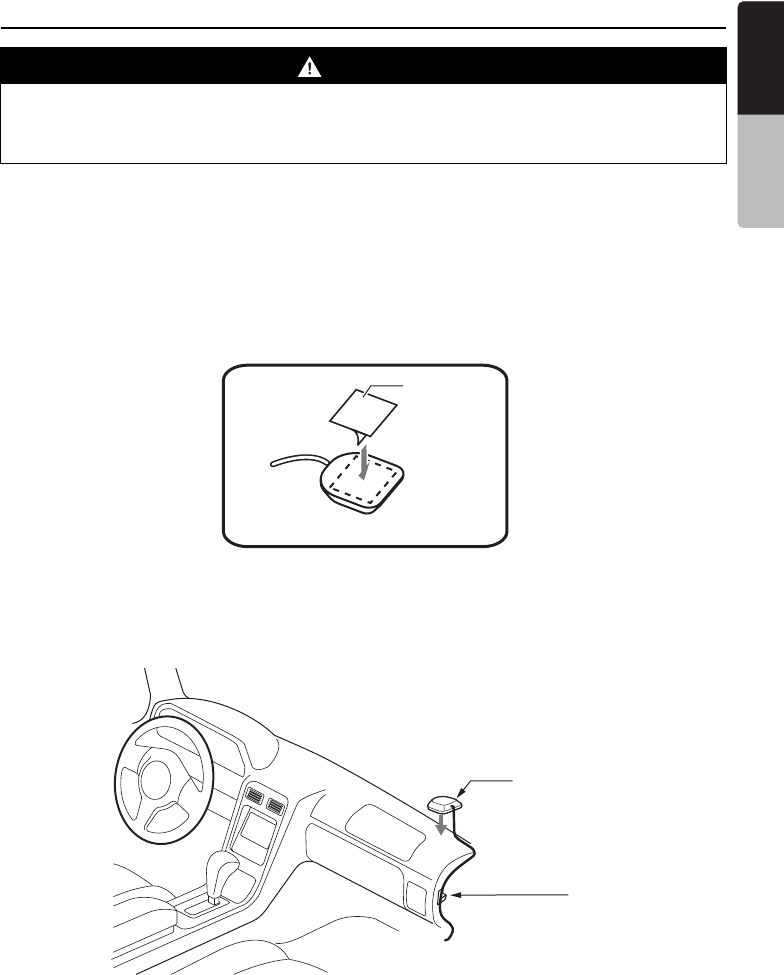
63
NX700
English INSTALLATION
MANUAL
8. INSTALLING THE GPS ANTENNA
Note:
• The supplied GPS antenna is for installing inside the vehicle. Do not install it outside the vehicle.
• Install the GPS antenna more than 50 cm away from the main unit, other audio devices such as CD player,
and a radar detector. If it is installed near these devices, GPS reception may be impaired.
• To improve the GPS signal reception, install the GPS antenna horizontally on a flat plane.
• Do not wax or paint the cover of the GPS antenna. This may reduce the performance of the GPS antenna.
• Install the GPS antenna at least 10 cm away from the windshield.
• Wipe off the dirt of the mounting surface before installing the GPS antenna.
• Stick the double-sided tape to the bottom face of the GPS antenna.
• Mount the GPS antenna.
Stick it surely on a flat plane of the passenger-side dashboard where GPS signal interruption is
minimized.
• Wire the GPS antenna cord.
Fasten the cord using the cord holders.
(Shows an example in case of the left-hand traffic.)
WARNING
• Do not install the GPS antenna in a place where it may interfere with the operation of the
airbag or hinder the driver’s visual range.
• Do not use the navigation system with the GPS antenna cord cut off. The power cables in the
cord may be short-circuited.
Double-sided
tape
Bottom face of the GPS antenna
GPS antenna
Cord holder
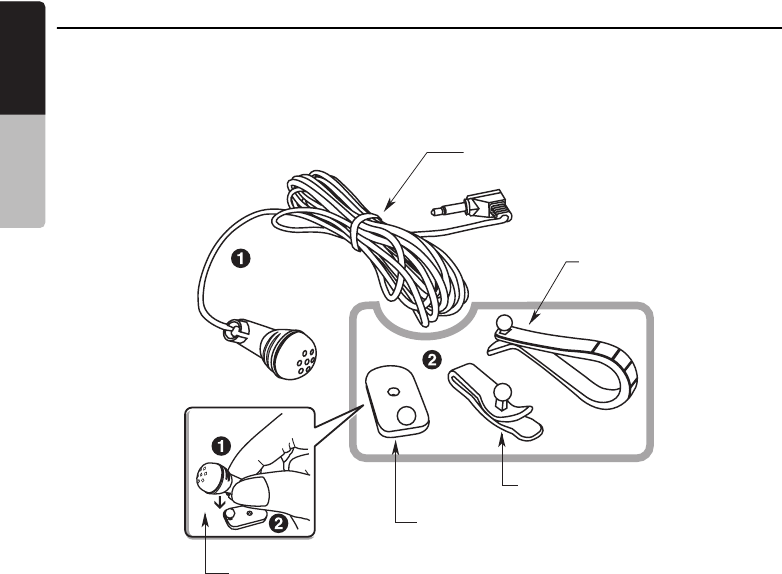
64 NX700
English INSTALLATION
MANUAL
9. MICROPHONE ACCESSORY
Note:
• Do not leave the microphone of Bluetooth handsfree in the places with wind passing such as air outlet of the
air conditioner, etc. This may cause a malfunction. In addition, if leave it in the places subjected to direct sun,
high temperature can cause distortion, discoloration which may result in a malfunction.
• External microphone has to be connected at the back of the main unit during installation if necessary.
Microphone
Visor Clip Type A
Visor Clip Type B
MIC Holder
Attach the microphone
with the MIC holder or
visor clip
65
NX700
English INSTALLATION
MANUAL
10.WIRE CONNECTION
Radio antenna jack
Connect to the AUX audio
input terminal* and the iPod
video input terminal.
*Audio connection is required only
when [Analog] is selected for the
iPod output signal (page 42).
or
iPod/iPhone
Connection cable
(included in your
iPod/iPhone)
Connection cable
(CCA-723/CCA-
748)
iPod with video/iPhone
Refer to the
following page.
Gray
Purple
Gray
Green
Black
Red
White
Red
White
Red
White
Yellow
Yellow
White
Red
Yellow
Right
Left
Right
Left
Right
Left
Right
Left
Rear audio
output terminal
Subwoofer output
terminal (MONO 2ch)
Video output terminal
(2-Zone audio
output terminal)
AUX audio input terminal
Rear Vision Camera
terminal
4-Channel Amplifier
Rear Monitor
Wireless Headphone
VTR etc.
USB terminal
Red
White
Black
GPS antenna
jack
Black
Black iPod video input terminal Connect to the AUX audio/
video input terminal.
Red
AUX video input terminal
Front audio
output terminal
Yellow
Steering wheel
remote control
terminal
CeNET
terminal
Microphone
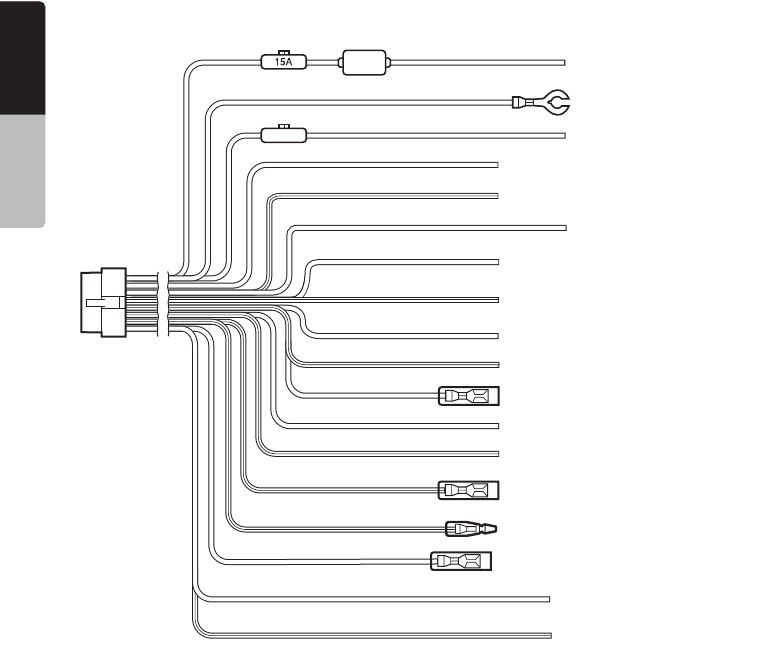
66 NX700
English INSTALLATION
MANUAL
See next page for how to connect the parking brake cord.
3A
Yellow
Black
+12V main power
Ground
Rear right +
Rear right -
+12V accessory
Front right +
Front right -
Front left +
Front left -
Rear left +
Rear left -
Amplifier turn-on cord
Illumination
Auto antenna
Parking brake cord
Reverse gear cord
Purple
Purple/Black
Red
Gray
Gray/Black
White
White/Black
Green
Green/Black
Blue/White
Orange/White
Blue
Grass-green
Purple/white
Brown No connection
Yellow CeNET bus backup
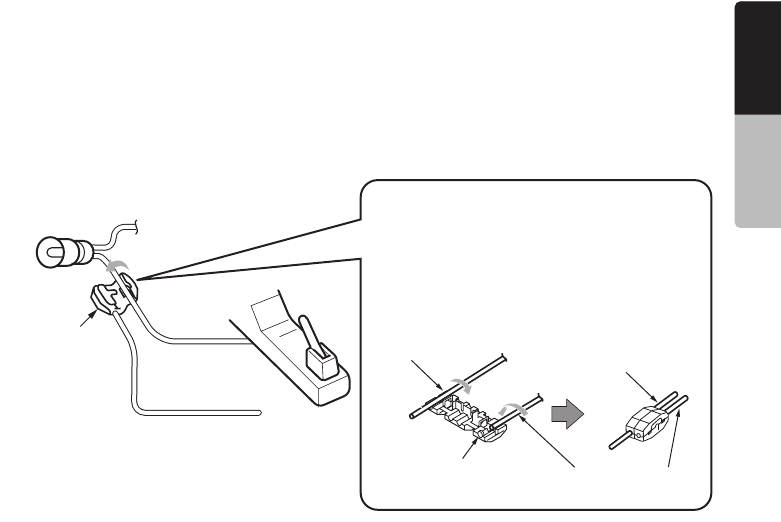
67
NX700
English INSTALLATION
MANUAL
●Connecting the parking brake cord
Connect the cord to parking brake lamp ground in the meter panel.
Note:
•Connecting the parking brake cord to lamp ground allows you to watch video images when the parking brake
is engaged.
•When the parking brake cord is not connected, the monitor will not display video images.
•If “Audio Only” appears on the screen just after turning on the ACC power of the car, release the parking
brake while confirming safety, and then engage the parking brake again.
Connecting the Accessories
●Connection to the Rear Vision Camera for vehicle
The Rear Vision Camera for vehicle can be connected to Rear Vision Camera video input terminal of
the RCA pin cord. For detailed information, refer to the instruction sheet or manual for the Rear Vision
Camera.
Note:
•Be sure to connect the reverse gear cord to the vehicle’s relevant terminal.
•Connect the Rear Vision Camera to the RCA pin cord; if not, the screen turns black while the gearshift lever
is in the reverse gear position.
•The power supply box CAA185 (sold separately) is required for connection of the main unit and the Rear
Vision Camera.
●Sirius Tuner and XM Mini-Tuner
Connect these tuners to the CeNET connector via Translator adapter sold separately. For detailed
information, refer to the instruction manual of these tuners.
Parking brake lamp
+ cord to battery
Electro-tap
(sold
separately) Parking brake
signal cord
Parking brake cord
(Grass-green)
●How to attach the electro-tap
1. Place the Parking brake cord at the stopper,
and fold it back in the direction of the arrow.
2. Pass the Parking brake signal cord through,
and fold it back in the direction of the arrow.
Parking brake
Parking brake
signal cord Parking brake
signal cord
Stopper Parking brake cord
(Grass-green)

2010/1
280-8883-00
QY-5014B
Clarion Co., Ltd.
All Rights Reserved.Copyright © 2010: Clarion Co., Ltd.

User Manual
Bluetooth Connectivity
NX700
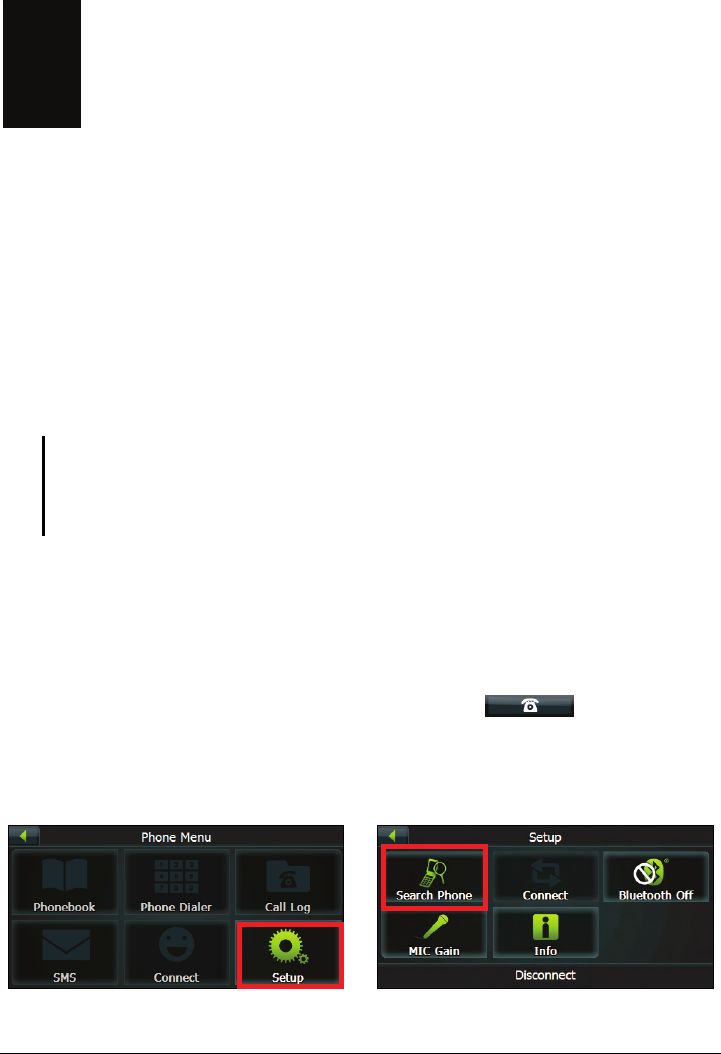
Bluetooth Connectivity
Bluetooth Profiles
This system incorporates Bluetooth wireless communications technology.
Devices with Bluetooth capabilities can exchange information over a distance of
about 10 meters (30 feet) without requiring a physical connection.
This system supports Bluetooth profiles as below:
z Hands-free Profile (HFP)
NOTE:
z Not all Bluetooth devices support all profiles. Check the document of a Bluetooth device to
know its Bluetooth capabilities.
z When necessary, you can turn off the Bluetooth radio on this system. (See Section
“Turning On/Off Bluetooth Radio” for more information.)
Connecting a Bluetooth Mobile Phone
Connecting to a Mobile Phone for the First Time
1. Tap the TEL button on the Source screen or tap the on the Navi
menu.
2. Tap Setup Æ Search Phone.
Æ
1
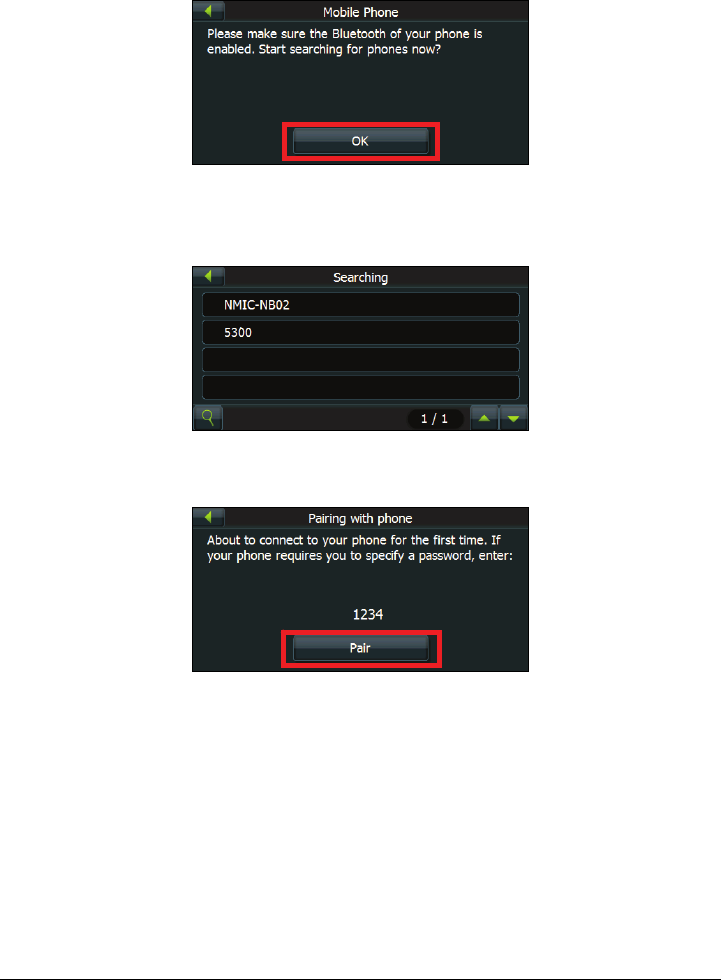
3. Make sure that your Bluetooth mobile phone is in discoverable mode. Tap OK
for the program to search for nearby Bluetooth mobile phones.
4. The screen shows the search result. Tap the mobile phone you want to
connect.
5. Tap Pair to connect this system with the mobile phone.
6. When prompted, enter the passkey 1234 on your mobile phone to establish a
connection. Depending on the mobile phone model, you may need to select
the hands-free service to complete the connection.
7. Tap OK. The Phone Menu screen appears.
2
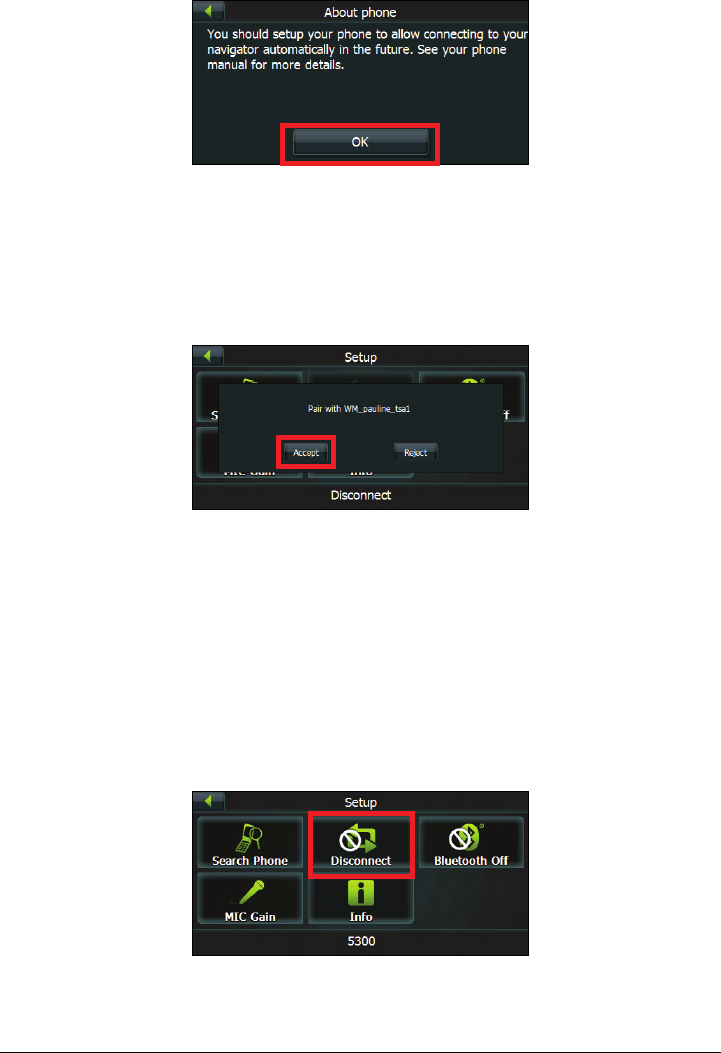
Connecting from a Mobile Phone for the First Time
You will be prompted when a mobile phone wants to connect to the system.
1. Tap Accept on the system to proceed.
2. Enter the same passkey used on the mobile phone and tap Pair on the system to
establish a connection.
Disconnecting and Reconnecting the Mobile Phone
When you pair your mobile phone with this system, a connection is established
between them. The name of the connected device appears at the bottom of the
Setup menu. You can then disconnect or reconnect your mobile phone by tapping
Disconnect or Connect on the Setup menu.
3
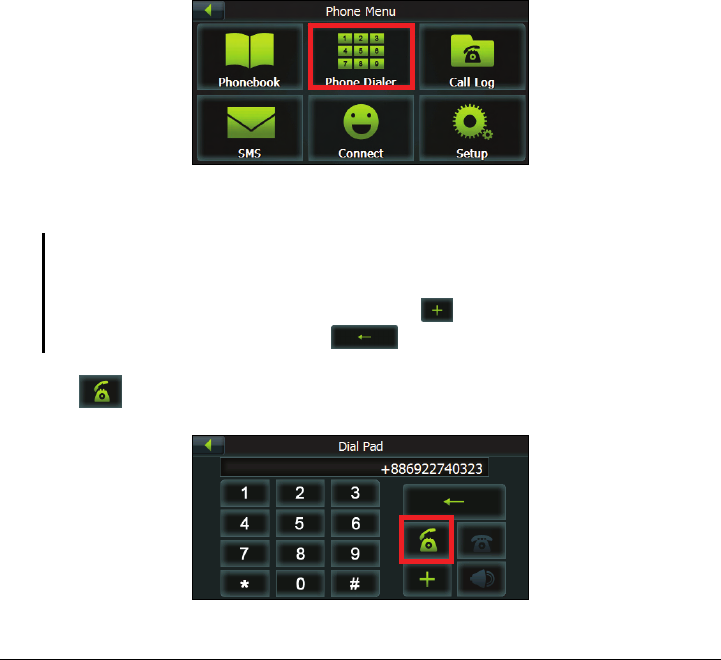
Connecting a Paired Mobile Phone
Tap the Connect button on the Phone Menu to connect a paired phone.
Phone Operations
Placing a Call
After pairing with a mobile phone, you can place a call by using the Phonebook,
Call Log and Phone Dialer button on the Phone Menu.
Phone Dialer
1. Tap Phone Dialer on the Phone Menu.
2. Enter the telephone number.
NOTE:
z International calls require a country code to be included in the phone number. On this
system, the country code is separated from the rest of the number sequence by a plus (+)
sign. If you are making an international call, tap on the Dial Pad.
z To delete the last digit entered, tap .
3. Tap .
4
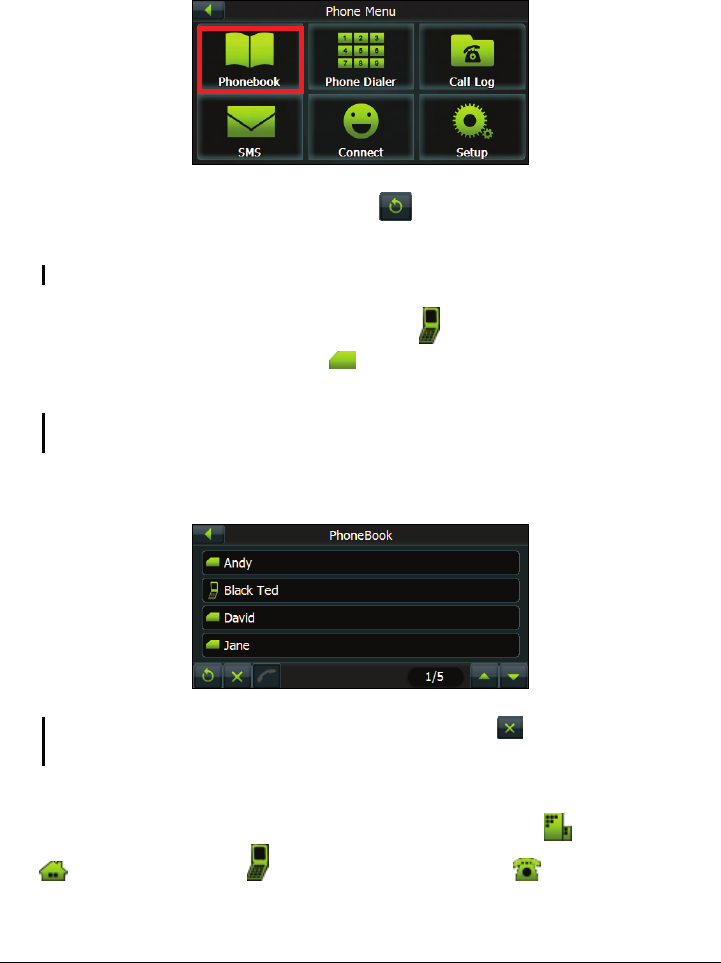
Phone Book
1. Tap Phonebook button on the Phone Menu screen
2. If the contact list does not display, tap to download the contact list from
the mobile phone.
NOTE: Not all mobile phone models support the downloading of such data.
3. The contact list appears on the screen with meaning the contacts saved in
the mobile phone’s memory and meaning the contacts saved in the SIM
card.
NOTE: Not all mobile phone models support the downloading of the data saved in the
phone’s memory or the SIM Card.
Select a contact to place a call.
NOTE: You can clear the downloaded contact list by tapping . Doing so does not delete
the data on the mobile phone.
4. When a contact has more than one phone number, tapping the contact opens the
details screen. Various numbers appear on the screen with meaning work,
meaning home, and meaning mobile phone and meaning fax.
Tap the phone number to place a call.
5
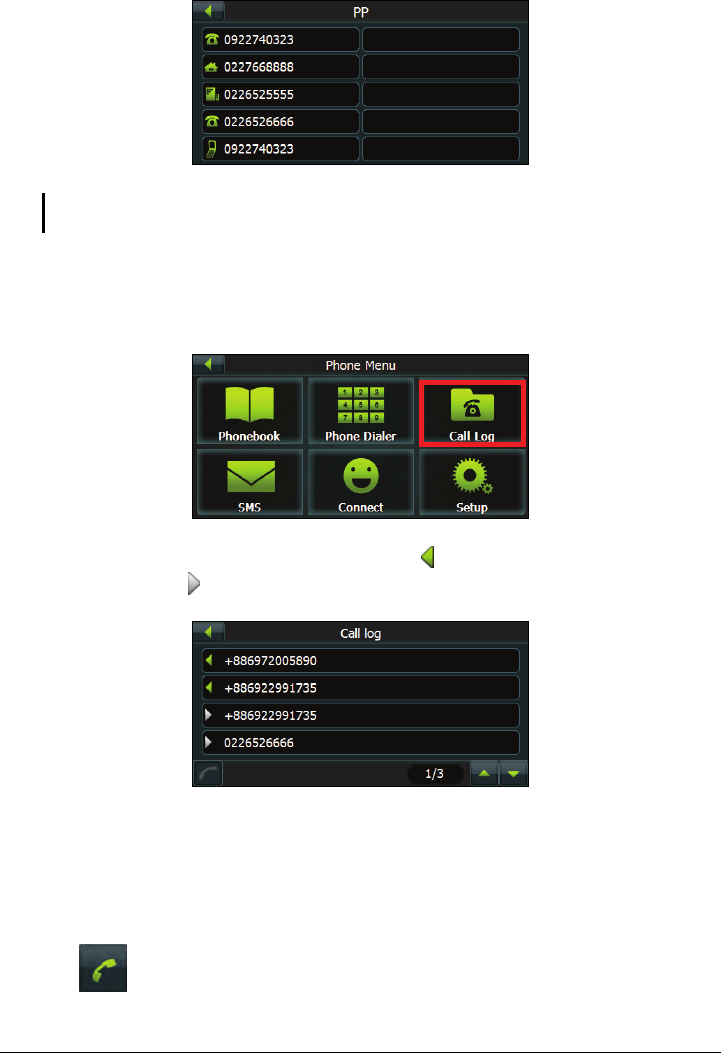
NOTE: If you need to input other numbers during a call, such as an extension number, tap
Phone Dialer on the Phone Menu to open the keypad and tap the digits.
Call Log
1. Tap Call Log on the Phone Menu.
2. The call history appears on the screen with meaning incoming calls and
missed calls and meaning outgoing calls.
3. To call a number in your call history, tap the number.
4. The details of the call display on the screen such as name, number, date, and
time. Depending on your mobile phone model, not all information will be
displayed.
5. Tap .
6
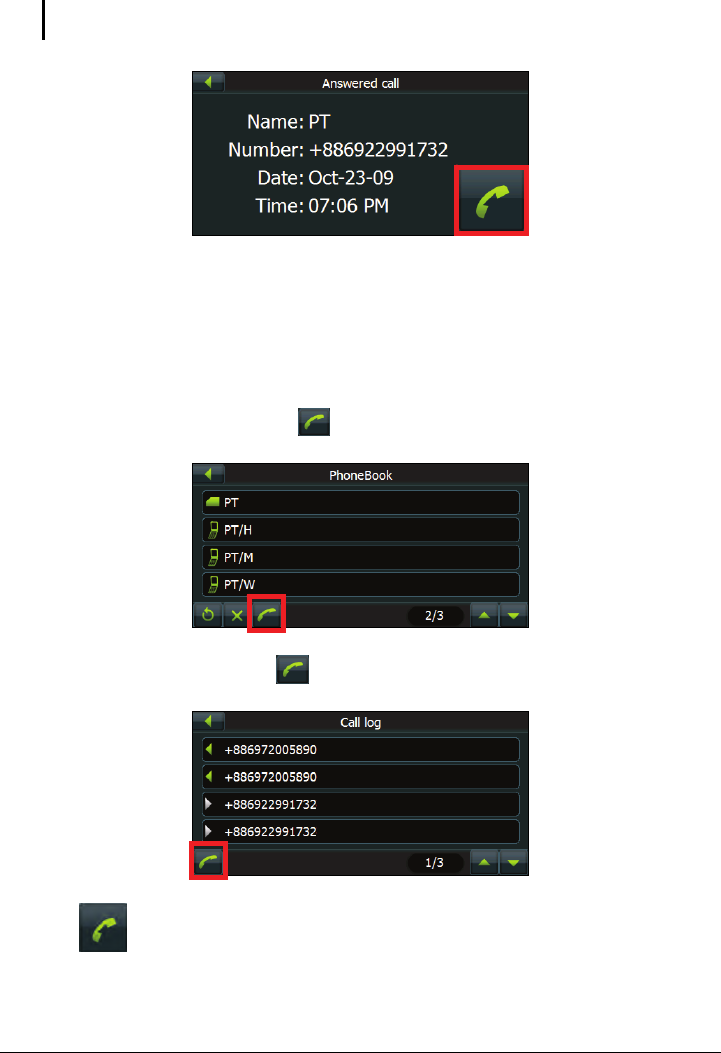
NOTE: If you need to input other numbers during a call, such as an extension number, tap
Phone Dialer on the Phone Menu to open the keypad and tap the digits.
Redialing a Recently Dialed Number
To make a call using a recently dialed number:
1. Do one of the following:
z When in Phonebook, tap .
z When in Call Log, tap .
2. Tap .
7
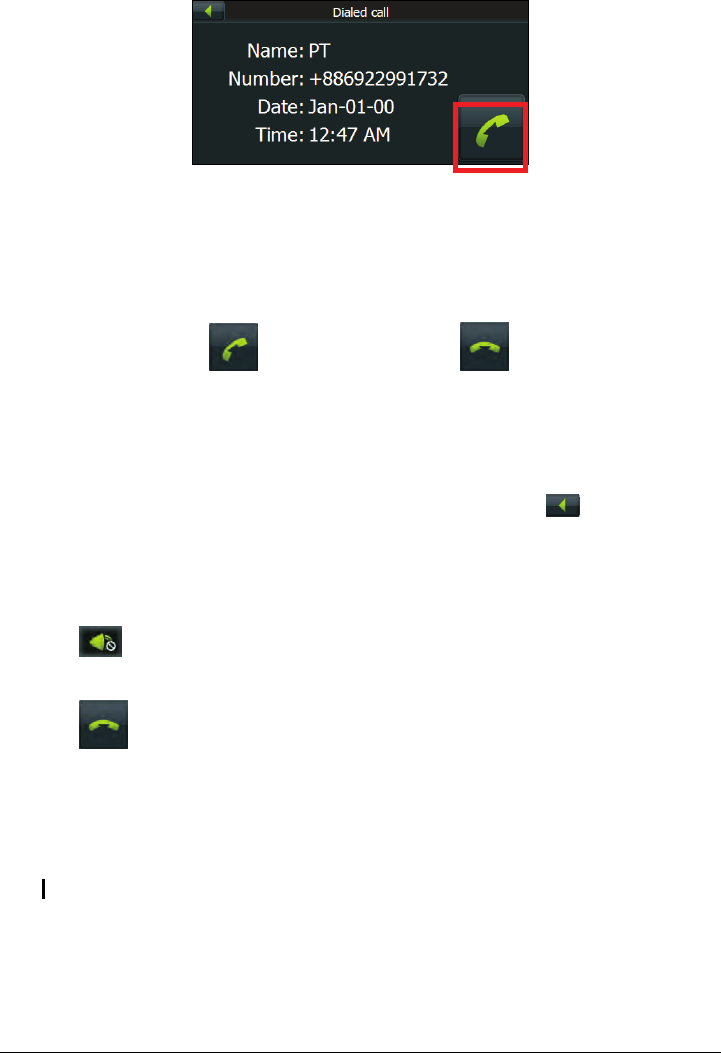
Receiving a Call
After pairing with a mobile phone, this system will ring and display the incoming
call screen when there is an incoming call.
To receive the call, tap . To reject the call, tap .
Operations during a Call
During a phone call:
z If you need to browse the phonebook or the message, tap and then tap
Phonebook or SMS. You cannot refresh the data.
z If you need to input other numbers, such as an extension number, use the dial
pad and tap the digits.
z Tap to mute your sound so that the other party cannot hear you. To end
the mute mode, tap the same button again.
z Tap to end the call.
Viewing Messages
After pairing with a mobile phone, you can browse sent and received messages.
NOTE: You cannot send messages via this system.
1. Tap SMS on the Phone Menu.
8
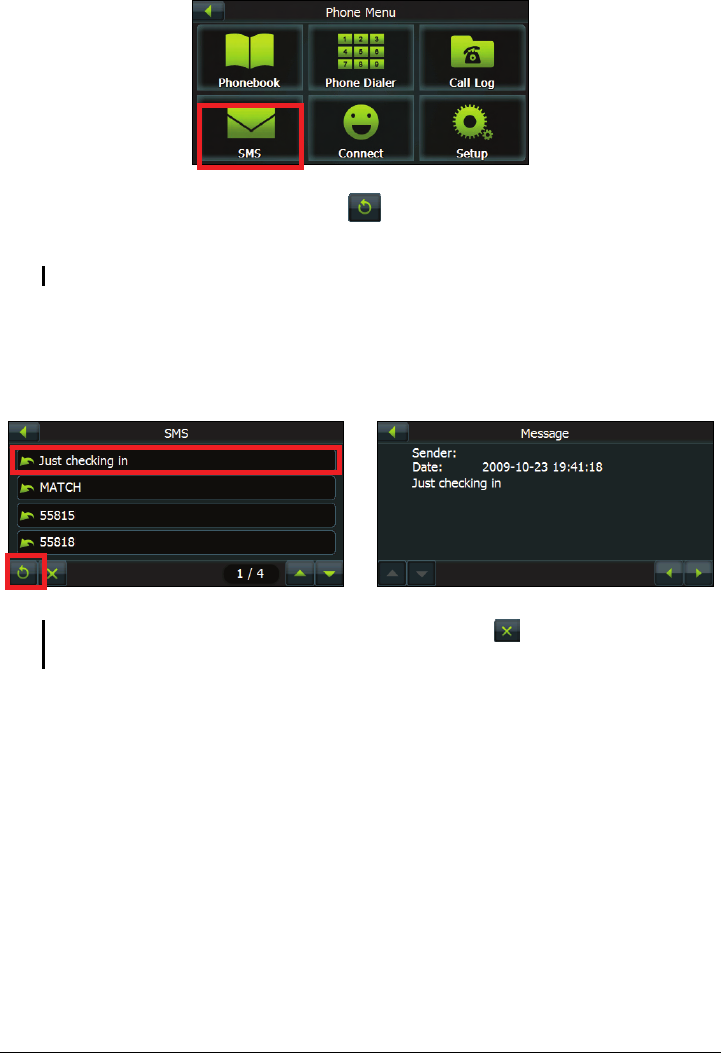
2. If the messages do not display, tap to download the messages from the
mobile phone.
NOTE: Not all mobile phone models support the downloading of such data.
3. Select a message to view the full message.
The screen displays the sender, date and the message. Depending on your
mobile phone model, not all information will be displayed.
Æ
NOTE: You can clear the downloaded messages by tapping . Doing so does not delete
the data on the mobile phone.
Using the Shortcuts
Once a Bluetooth connection has been established, a shortcut will be saved. You
can then use the shortcut to reconnect a particular device without searching and
entering the passkey again.
1. Tap the Connect button on the Phone Menu.
9
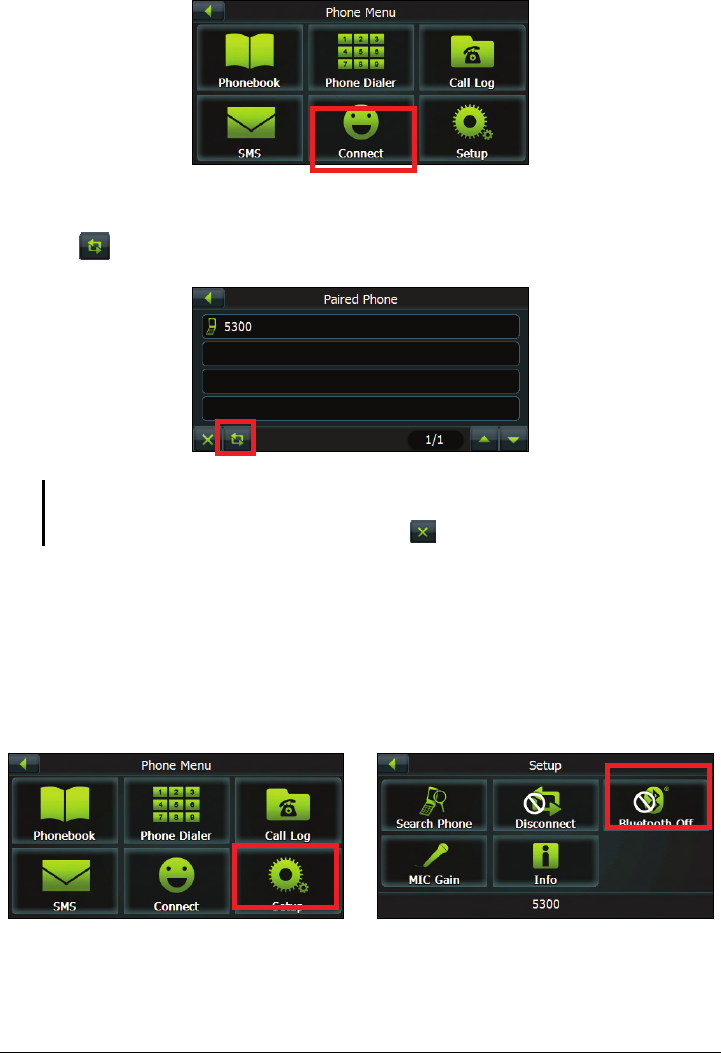
2. Select the device you want to connect.
3. Tap .
NOTE:
z The shortcuts will be cleared if you shut down the system.
z You can delete a selected shortcut by tapping .
Turning On/Off Bluetooth Radio
Whenever you start the Bluetooth, the Bluetooth radio is turned on.
To turn off Bluetooth radio, tap the Setup button on the Phone Menu and tap
Bluetooth Off. To turn on Bluetooth radio, tap Bluetooth On button.
Æ
10
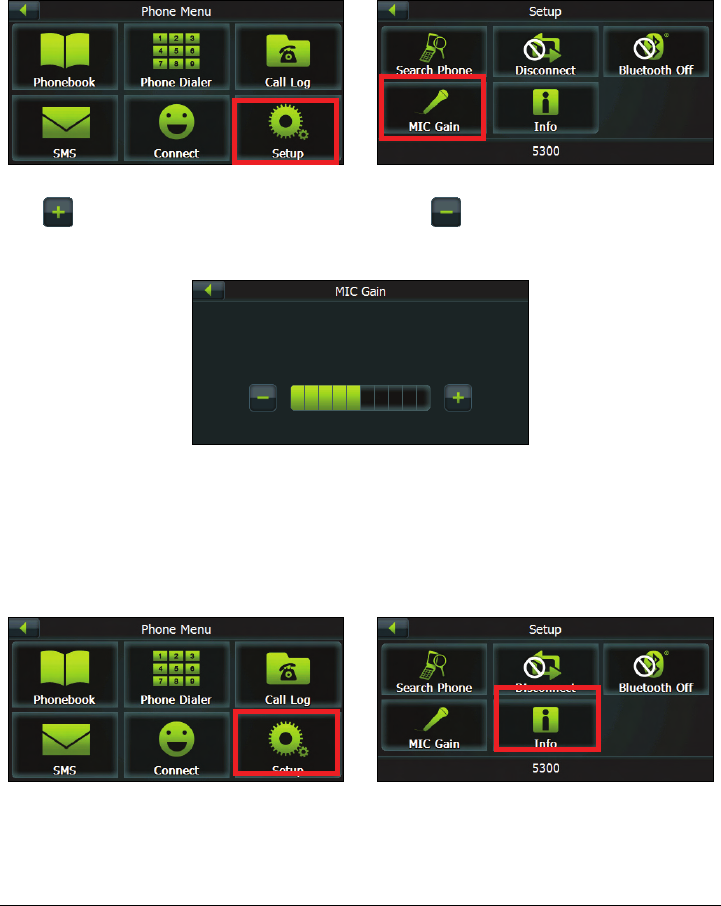
MIC Gain
You can adjust the microphone volume for hands-free calling.
Tap the Setup button on the Phone Menu and tap MIC Gain.
Æ
Tap to increase the microphone volume; tap to decrease the microphone
volume.
Info
To view the application version, address and name of the Bluetooth of the system,
tap the Setup button on the Phone Menu and tap Info.
Æ
11

Regulatory Information
Bluetooth QD ID B016101
Revision: R00
(11/2009)
Trademarks
The Bluetooth word mark and logo are owned by the Bluetooth SIG, Inc. All other
brand and product names are trademarks or registered trademarks of their
respective companies.
Note
The information in this manual is subject to change without notice.
12

User Manual
Clarion Mobile Map
NX700
2
Copyright note
The product and the information contained herein is subject to change without prior notification.
This manual may not, in whole or in part, be reproduced or transmitted in any form either electronically or
mechanically, including photocopying and recording, without the express written consent of Clarion.
© 2009 – Clarion.
Data Source © 2006 Tele Atlas N.V.
All rights reserved.
3
Thank you for choosing the Clarion NX700 as your in-car navigator. This document is the detailed
description of the software.
You can easily discover Clarion Mobile Map while you are using it; however, we still recommend that you
read this manual to understand the screens and the features of Clarion Mobile Map.
4
Table of contents
1 Warnings and Safety information .................................................................................. 7
2 Getting started with Clarion Mobile Map ..................................................................... 8
2.1 Simple and Advanced modes ..................................................................................................10
2.2 Buttons and other controls on the screen ............................................................................... 11
2.2.1 Using keyboards.............................................................................................................................12
2.3 Using the map ......................................................................................................................... 13
2.3.1 Checking the details of a map location ..........................................................................................13
2.3.2 Manipulating the map ....................................................................................................................14
2.3.3 Lane information and Signposts.....................................................................................................16
2.3.4 Status information and hidden controls on the map .......................................................................17
2.3.5 Using the Cursor (the selected map location) ................................................................................20
2.4 Clarion Mobile Map concepts ................................................................................................ 21
2.4.1 Smart Zoom ................................................................................................................................... 21
2.4.2 Position markers.............................................................................................................................22
2.4.2.1 Current GPS position and Lock-on-Road ............................................................................................... 22
2.4.2.2 Returning to normal navigation .............................................................................................................. 22
2.4.2.3 Selected location (Cursor) ...................................................................................................................... 23
2.4.2.4 Original position in the Cursor menu ..................................................................................................... 23
2.4.3 Daytime and night color profiles ...................................................................................................24
2.4.4 Color scheme in tunnels .................................................................................................................24
2.4.5 Route calculation and recalculation ...............................................................................................24
2.4.6 Itinerary ..........................................................................................................................................25
2.4.7 Track Logs ..................................................................................................................................... 26
2.4.8 Route demonstration ......................................................................................................................26
2.4.9 POI (Points of Interest) .................................................................................................................. 27
2.4.10 Road Safety Cameras ...................................................................................................................27
2.4.10.1 Camera types ........................................................................................................................................ 28
2.4.10.2 Camera directions................................................................................................................................. 29
2.4.11 Speed limit warning .....................................................................................................................30
3 Navigating with Clarion Mobile Map .......................................................................... 31
3.1 Selecting the destination of a route ........................................................................................ 31
3.1.1 Selecting the Cursor as the destination ..........................................................................................31
3.1.2 Entering an address or part of an address .......................................................................................32
3.1.2.1 Entering an address ................................................................................................................................ 32
3.1.2.2 Entering an address if house numbering is restarted .............................................................................. 34
3.1.2.3 Entering an address without knowing the district/suburb ....................................................................... 35
5
3.1.2.4 Selecting an intersection as the destination ............................................................................................ 36
3.1.2.5 Selecting a city center as the destination ................................................................................................ 37
3.1.2.6 Entering an address with a ZIP code ...................................................................................................... 38
3.1.2.7 Tips on entering addresses quickly ......................................................................................................... 39
3.1.3 Selecting the destination from your Favorites ................................................................................40
3.1.4 Selecting the destination from the POIs .........................................................................................40
3.1.5 Selecting the destination with saved POI search criteria ............................................................... 41
3.1.6 Selecting the destination from the History .....................................................................................42
3.1.7 Selecting the destination by entering its coordinates .....................................................................42
3.2 Creating a multi-point route (inserting a via point)
............................................................... 43
3.3 Creating a multi-point route (appending a new destination) ................................................. 44
3.4 Editing the route ..................................................................................................................... 44
3.5 Viewing the entire route on the map (Fit-to-Screen) .............................................................. 45
3.6 Watching the simulation of the route ...................................................................................... 45
3.7 Enabling Safety Mode ............................................................................................................. 46
3.8 Pausing the active route ......................................................................................................... 46
3.9 Deleting the next via point from the route .............................................................................. 46
3.10 Deleting the active route....................................................................................................... 47
3.11 Using Track Logs ................................................................................................................. 47
3.12 Saving the active route ......................................................................................................... 49
3.13 Loading a saved route .......................................................................................................... 49
4 Reference Guide (Advanced mode) .............................................................................. 50
4.1 Map screen ............................................................................................................................. 51
4.1.1 Icons on the map ............................................................................................................................54
4.1.1.1 GPS position quality and Vehicle type indicator .................................................................................... 54
4.1.1.2 Status indicator strip ............................................................................................................................... 55
4.1.1.3 Phone call in progress ............................................................................................................................ 55
4.1.1.4 Next two route events (Turn Preview fields) ........................................................................................... 56
4.1.2 Objects on the map .........................................................................................................................57
4.1.2.1 Streets and roads .................................................................................................................................... 57
4.1.2.2 3D object types ....................................................................................................................................... 57
4.1.2.3 Elements of the active route .................................................................................................................... 57
4.1.3 Detour menu ..................................................................................................................................59
4.1.4 Cursor menu ...................................................................................................................................59
4.1.5 Position menu ................................................................................................................................61
4.1.6 Route Information screen ...............................................................................................................62
4.1.7 Trip Information screen ................................................................................................................. 63
4.1.7.1 Trip Computer screen ............................................................................................................................. 65
4.1.8 Quick menu ....................................................................................................................................66
6
4.1.9 GPS Data screen ............................................................................................................................ 67
4.2 Find menu ............................................................................................................................... 68
4.3 Route menu ............................................................................................................................. 69
4.4 Manage menu ......................................................................................................................... 70
4.4.1 Manage Saved Routes .................................................................................................................... 70
4.4.2 Manage History .............................................................................................................................. 71
4.4.3 Manage Track Logs ....................................................................................................................... 71
4.4.4 Manage Favorites ...........................................................................................................................72
4.4.5 Manage POIs .................................................................................................................................. 73
4.4.6 Manage Saved Search Criteria .......................................................................................................74
4.4.7 User Data Management .................................................................................................................. 75
4.5 Settings menu .......................................................................................................................... 76
4.5.1 Map Screen settings .......................................................................................................................77
4.5.2 Sound settings ................................................................................................................................ 78
4.5.3 Route Planning options ..................................................................................................................79
4.5.4 Regional settings ............................................................................................................................81
4.5.5 Navigation settings .........................................................................................................................82
4.5.6 Warning settings ............................................................................................................................83
4.5.7 Menu settings .................................................................................................................................84
4.5.8 Device settings ...............................................................................................................................84
4.5.9 Track Log settings ..........................................................................................................................85
5 Glossary ........................................................................................................................... 86
6 End User License Agreement ........................................................................................ 88
7
1 Warnings and Safety information
Clarion Mobile Map is a navigation system that helps you find your way to your destination with its GPS
receiver. Clarion Mobile Map does not transmit your GPS position; others cannot track you.
It is important that you look at the display only when it is safe to do so. If you are the driver of the vehicle,
we recommend that you operate Clarion Mobile Map before you start your journey. Plan the route before
your departure and stop if you need to change something in the route.
Clarion Mobile Map has a Safety Mode: if you turn on Safety Mode, you cannot change anything in
Clarion Mobile Map while the vehicle is moving at a speed of 10 km/h (6 mph) or higher. Unless only
passengers operate Clarion Mobile Map, we strongly encourage you to turn on Safety Mode.
You must obey the traffic signs and follow the road geometry. If you deviate from the route that Clarion
Mobile Map recommended, Clarion Mobile Map changes the instructions accordingly.
Never place any part of the navigation system where it obstructs the driver's view, where it is in the
deployment zone of an airbag or where it might cause injuries in an accident.
For more information, consult the End User License Agreement (page 88).

8
2 Getting started with Clarion Mobile Map
Clarion Mobile Map is optimized for in-car use. You can use it easily by tapping the screen buttons and
the map with your fingertips.
Clarion Mobile Map can plan routes throughout the whole installed map set; you do not need to change
maps or switch to a poorly detailed general map to navigate between map segments or countries.
Tasks Instructions
Double tapping the
screen
You do not need to tap the screen twice for any action. With buttons and
controls, a single tap is enough.
Tapping and holding the
screen You do not need this to access the basic navigation functions. Tap and keep
pressing the following buttons to reach extra functions:
x Tap and hold on the Map screen: you can set the minimum and
maximum zoom level of Smart Zoom.
x Tap and hold any of the buttons on the Map screen:
you can set or reset the zoom value of the button (2D map).
x Tap and hold any of the buttons on the Map screen:
you can set or reset the tilt and zoom values of the button (3D map).
x Tap and hold on list and menu screens: the Navigation menu
appears.
x Tap and hold any of the , , , , , and
buttons on the Map screen: you can rotate, tilt or scale the map
continuously.
x Tap and hold on keyboard screens: you can delete several
characters quickly.
x Tap and hold or in long lists: you can scroll pages
continuously.
x Tap and hold the buttons in the Quick menu to open screens related with
the function of the button from the Manage menu or the Settings menu.
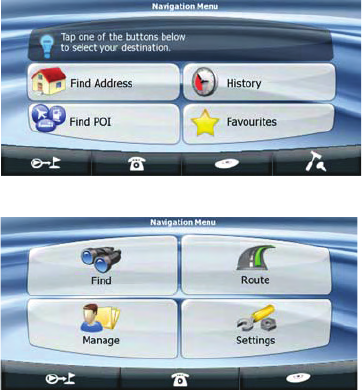
9
Start using Clarion Mobile Map
When Clarion Mobile Map is started the first time, you need to do the following:
1. Select the written language of the application interface. Later you can change it in Settings (page
81).
2. Select the language and speaker used for voice guidance messages. Later you can change it in
Settings (page 81).
3. Read and accept the End User License Agreement (page 88).
4. Select whether to start the program in Simple mode or in Advanced mode. Later you can switch
between the two operating modes in Settings.
5. Read and accept the road safety warning.
After this, the Navigation menu appears and you can start using Clarion Mobile Map.
The Navigation menu in Simple mode:
The Navigation menu in Advanced mode:
The typical way of using Clarion Mobile Map is to select a destination, and start navigating. You can
select your destination in the following ways (not all of them are available in Simple mode):
x Use the selected location on the map (the Cursor) (page 31).
x Enter a full address or a part of an address, for example a street name without a house number or
the names of two intersecting streets (page 32).
x Enter an address with ZIP code (page 38). This way you do not need to select the name of the city
and the search for street names might be faster as well.
x Use a coordinate (page 42)
x Use a saved location:
x a Favorite (page 40)
x a POI (page 40)
x the History of previously set destinations and waypoints (page 42)
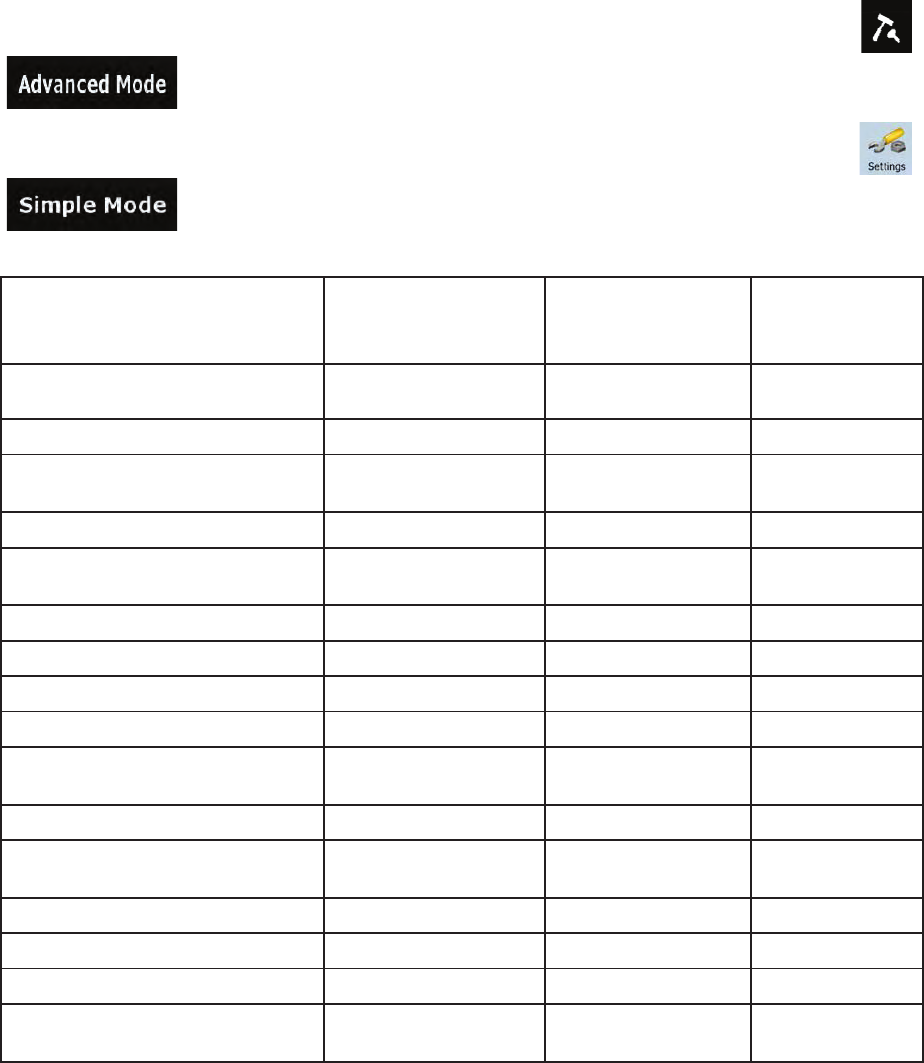
10
2.1 Simple and Advanced modes
The two operating modes of Clarion Mobile Map mainly differ in the menu structure and the number of
available features. The controls and screen layouts are the same.
x Simple mode: you have easy access to the most important navigation functions and the basic
settings only. The rest of the settings are set to values that are optimal for typical use.
x Advanced mode: you have access to the full functionality of Clarion Mobile Map.
To switch from Simple mode to Advanced mode: on the startup screen (Navigation Menu), tap ,
.
To switch from Advanced mode to Simple mode: on the startup screen (Navigation Menu), tap ,
.
The features and settings available in each mode are as follows:
Type of action Available in
Simple mode
Available in
Advanced mode
Explanation
Navigating to a selected map point Yes Yes See page 31
Navigating to a street address Yes Yes See page 32
Navigating to an incomplete
address
Yes Yes See page 32
Navigating to an intersection Yes Yes See page 36
Navigating to recent destinations
(History)
Yes Yes See page 42
Navigating to Favorites Yes Yes See page 40
Navigating to a POI Yes Yes See page 40
Navigating to coordinates No Yes See page 42
Creating a multi-point route No Yes See page 43
Saving a map point as a Favorite
destination
Yes Yes See page 59
Saving a map point as a POI No Yes See page 59
Saving a map point as a location of
a Road Safety Camera
No Yes See page 59
Mark a map point with a Pin No Yes See page 59
Saving the active route No Yes See page 49
Saving Track Logs No Yes See page 26
Map Screen settings Only color profiles (from
Quick Menu)
Yes See page 77
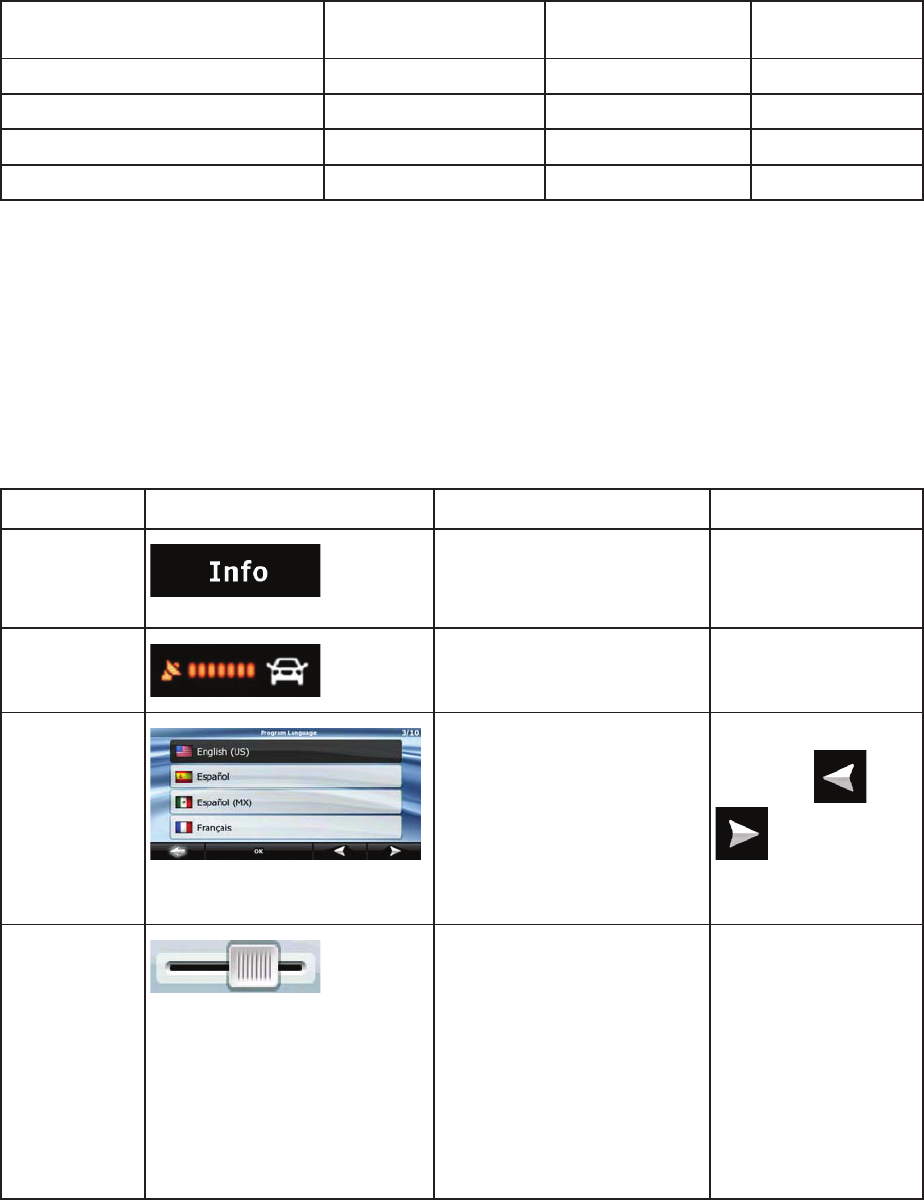
11
Menu settings Only background
picture
Yes See page 84
Sound settings Yes (from Quick Menu) Yes See page 78
Route Planning options Yes Yes See page 79
Regional settings Only language selection Yes See page 81
Warnings No Yes See page 83
2.2 Buttons and other controls on the screen
When you are using Clarion Mobile Map, you usually tap buttons on the touch screen.
You only need to confirm selections or changes in Clarion Mobile Map if the application needs to restart, it
needs to perform a major reconfiguration, or you are about to lose some of your data or settings.
Otherwise, Clarion Mobile Map saves your selections and applies the new settings without confirmation
as soon as you use the controls.
Type Example Description How to use it
Button
Tap it to initiate a function, to
open a new screen, or to set a
parameter.
Tap it once.
Icon
Shows status information. Some icons also
function as a button.
Tap them once.
List
When you need to select from
several options, they appear
in a list.
Move between pages
with the and
buttons and tap
the value that you
want.
Slider
When a feature has several
different unnamed values,
Clarion Mobile Map shows an
indicator on a gauge that
displays and sets a value from
a range.
x Drag the handle
to move the
slider to its new
position.
x Tap the slider
where you want
the handle to
appear; the
thumb jumps
there.
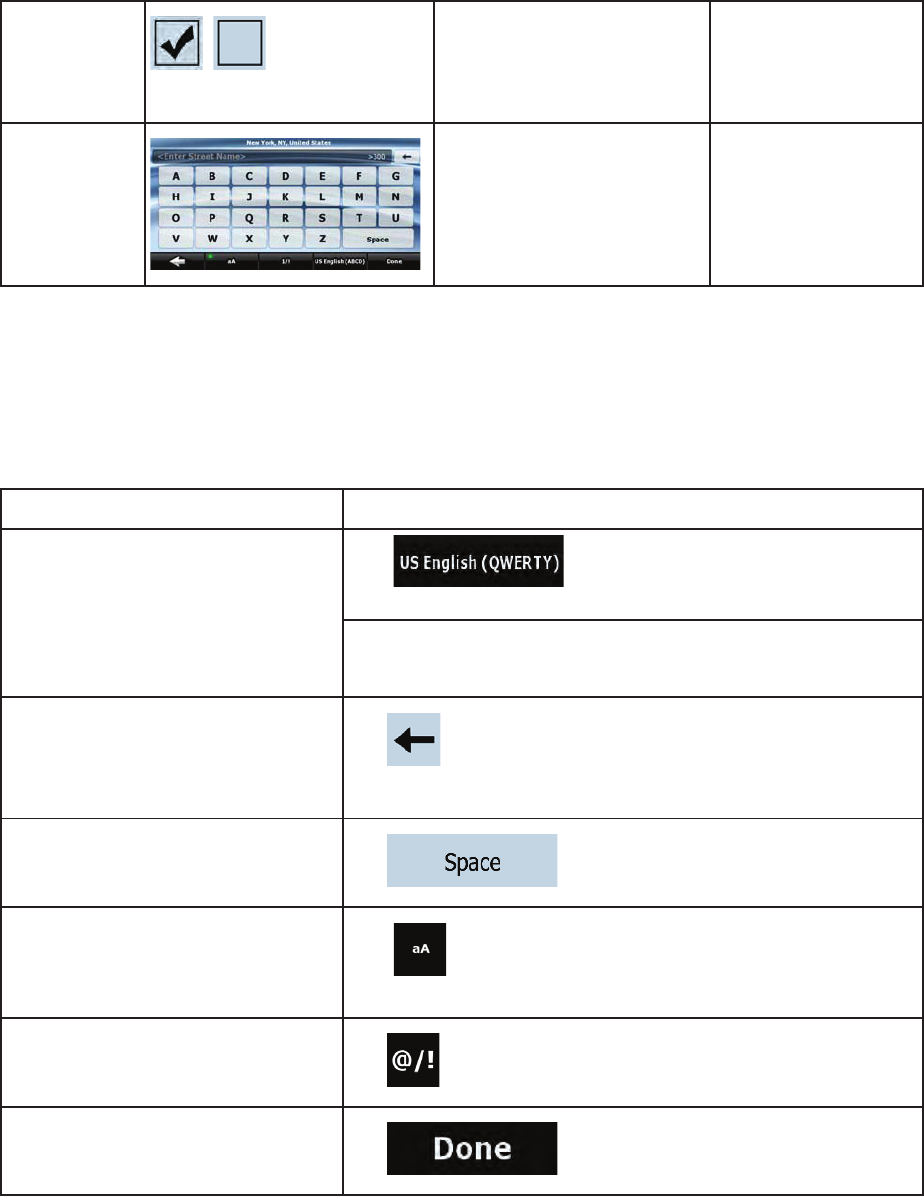
12
Switch
When there are only two
choices, a checkmark shows
whether the feature is
enabled.
Tap it to turn the switch
on or off.
Virtual
keyboard
Alphabetic and alphanumeric
keyboards to enter text and
numbers.
Each key is a touch
screen button.
2.2.1 Using keyboards
You only need to enter letters or numbers in Clarion Mobile Map when you cannot avoid it. You can type
with your fingertips on the full-screen keyboards and you can switch between various keyboard layouts,
for example ABC, QWERTY, or numerical.
Task Details
Switching to another keyboard layout,
for example from an English
QWERTY keyboard to a Greek
keyboard
Tap , and select from the list of available
keyboard types.
Clarion Mobile Map remembers your last keyboard choice and
offers it the next time you need to enter data.
Correcting your entry on the keyboard
Tap to remove the unneeded character(s).
Tap and hold the button to delete the entire input string.
Entering a space, for example
between a first name and a family
name or in multi-word street names Tap .
Entering lowercase or capital letters
Tap to cycle through entering lowercase letters, initial
capitals or all capitals.
Entering symbols
Tap to switch to a keyboard offering symbol characters.
Finalising the keyboard entry
Tap .
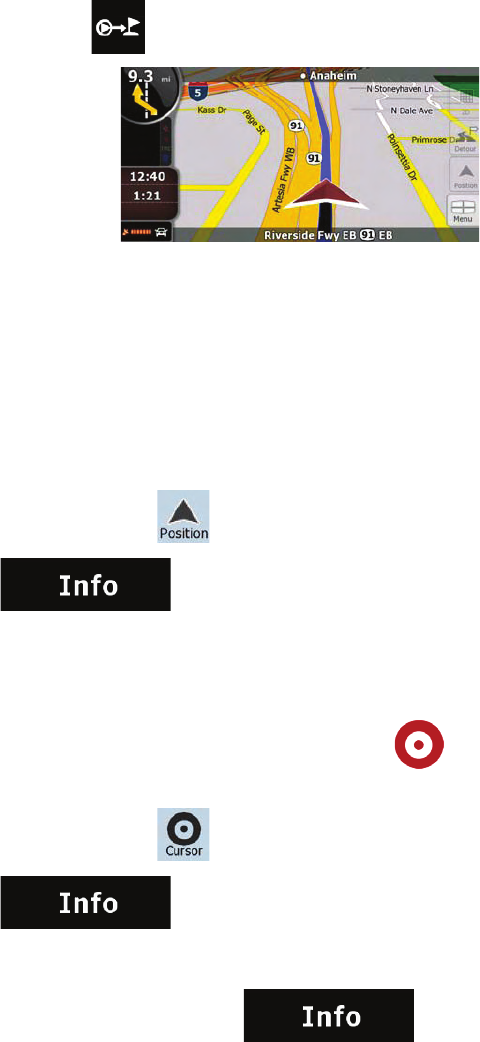
13
2.3 Using the map
The map screen is the most frequently used screen of Clarion Mobile Map. It can be accessed from the
Navigation menu by tapping .
For further information about the map screen, see page 51.
2.3.1 Checking the details of a map location
x If you are interested in the details of your current position during navigation:
1. Check the bottom line of the map. It shows the current street and house number
information.
2. For further details, tap to open the Position menu.
3. Tap . The address, the coordinate and the list of nearby POIs will be
displayed.
x You can check the details of any other location by selecting it on the map:
1. Tap the map anywhere to open the map control buttons.
2. Tap the desired location on the map. The Cursor ( ) appears there. The address of the
location is displayed at the bottom of the map.
3. For further details, tap to open the Cursor menu.
4. Tap . The address, the coordinate and the list of nearby POIs will be
displayed.
x It is even easier if you select the desired point in the Find menu. Then the Cursor menu opens
automatically. You only need to tap the button.
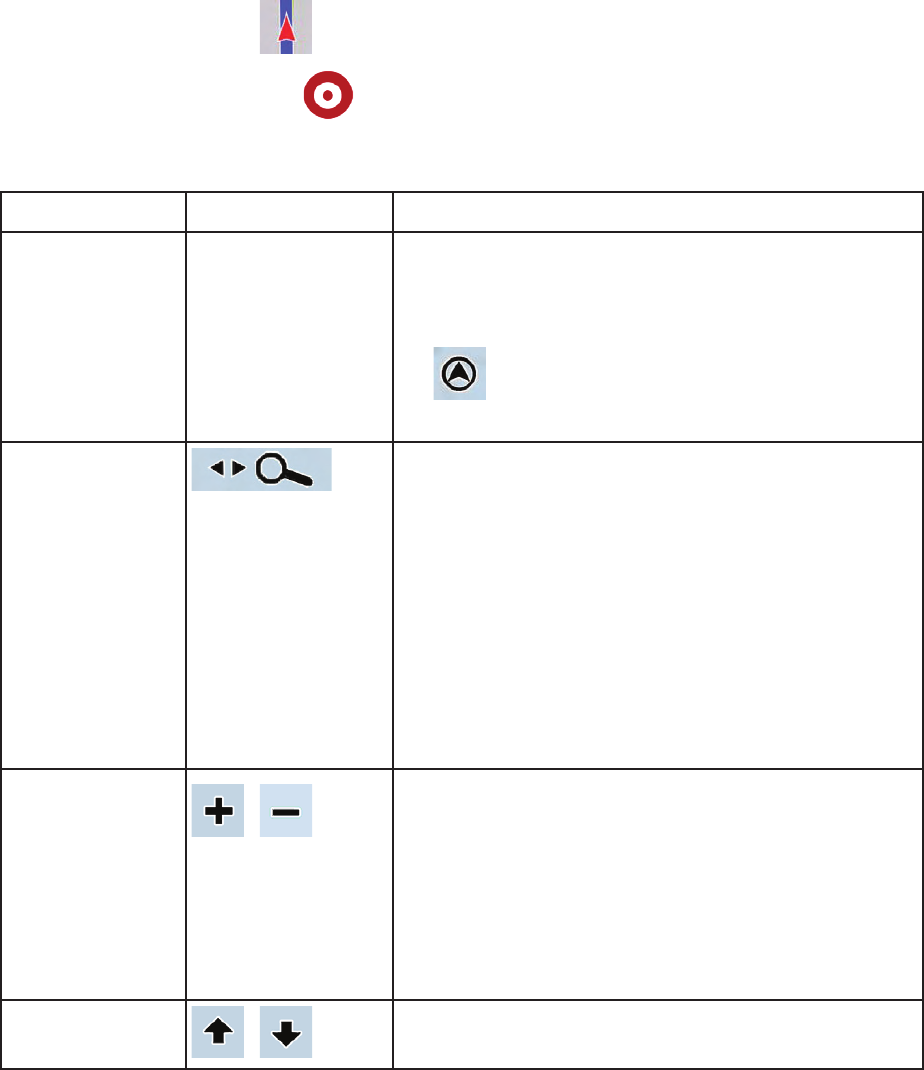
14
2.3.2 Manipulating the map
Position markers on the map:
x Current GPS position: (page 22)
x Selected location (Cursor): (page 23)
The following controls help you modify the map view to suit your actual needs the best. Most of these
controls appear only if you tap the map once, and disappear after a few seconds of inactivity.
Action Button(s) Description
Moving the map No buttons You can move the map into any direction. Tap the map at
any desired location. The point you hit on the map moves to
the center of the screen.
If GPS position is available and you have moved the map,
the button appears. Tap this button to return to the
GPS position.
Opening/closing
map control buttons Tap this button to show or hide the following map control
buttons:
x Zoom in/out
x Rotate left/right (3D map only)
x Tilt up/down (3D map only)
x Zoom preset buttons (2D map only)
x Tilt and zoom preset buttons (3D map only)
x Return to GPS position button
x Smart Zoom button
Zooming in and out
,
Changes how much of the map is displayed on the screen.
Clarion Mobile Map uses high-quality vector maps that let
you see the map at various zoom levels, always with
optimized content. It always displays street names and
other text with the same font size, never upside-down, and
you only see the streets and objects that you need.
Map scaling has different limits in 2D and in 3D map view
modes.
Tilting up and down
,
Changes the vertical view angle of the map in 3D mode.
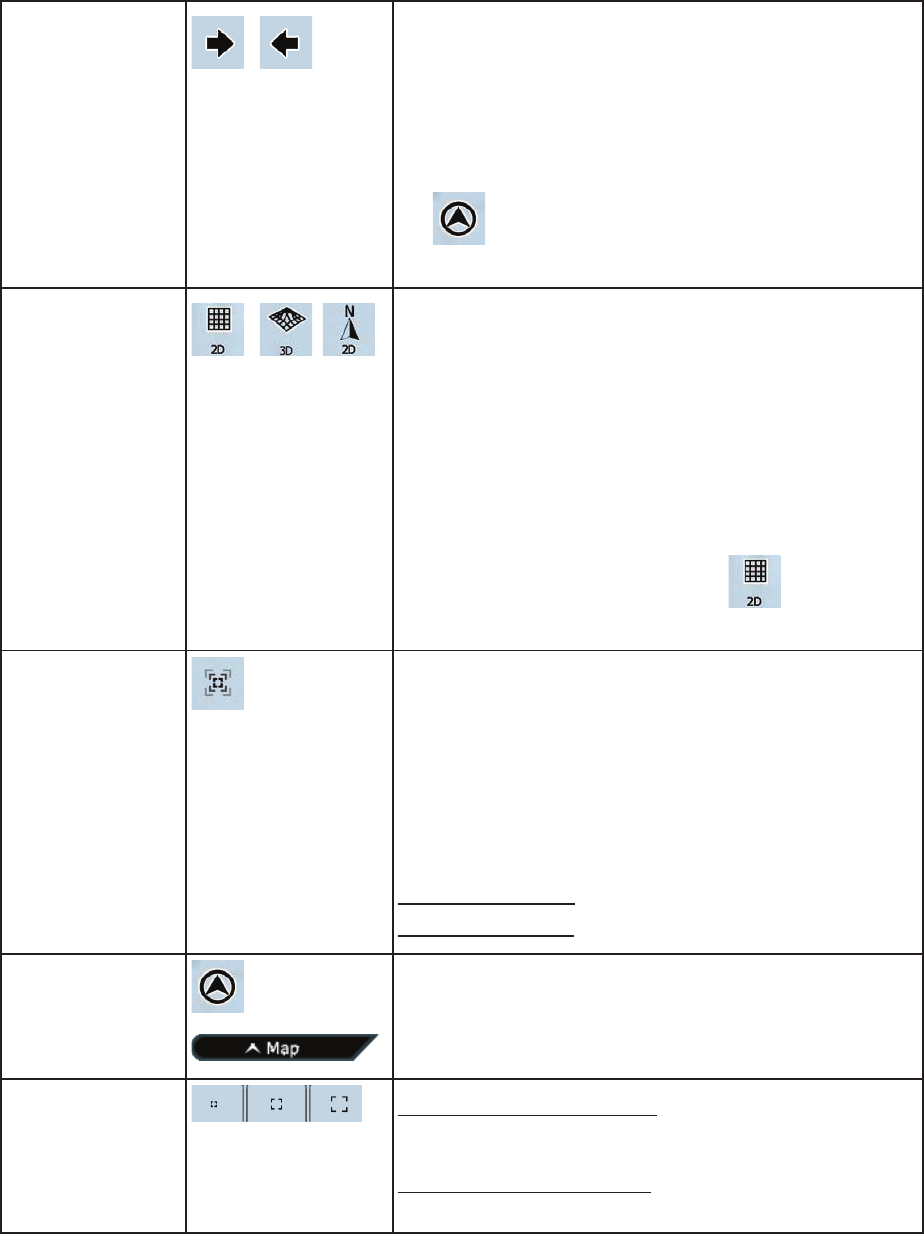
15
Rotating left and
right
,
Changes the horizontal view angle of the map in 3D mode
or in rotated 2D mode.
When GPS position is available, Clarion Mobile Map always
rotates the map so its top faces your direction of travel
(Track-Up orientation). You can turn away from Track-Up
with these buttons.
If GPS position is available and you have rotated the map,
the button appears. Tap this button to re-enable the
automatic map rotation.
Viewing modes
, ,
Gives you the following map perspectives in Clarion Mobile
Map:
x classic top-down view (2D), the top of the map
always faces North
x top-down view (2D), the top of the map always points
in the current driving direction
x perspective view (3D) the top of the map always
points in the current driving direction
The icon always shows the mode the button switches to: If
you are in 3D mode, you can see the button and you
need to tap it to switch to 2D mode.
Smart Zoom
Clarion Mobile Map can automatically rotate, scale and tilt
the map and give you the optimal view:
x When you are approaching a turn, Clarion Mobile
Map zooms in and raises the view angle to let you
easily recognize your maneuver at the next junction.
x If the next turn is at a distance, Clarion Mobile Map
zooms out and lowers the view angle to show you
the road in front of you.
Tap this button once to enable Smart Zoom.
Tap&hold the button to set the zoom limits of Smart Zoom.
Returning to normal
navigation (back to
the GPS position
with automatic map
rotation)
Tap this button to move the map back to the current GPS
position. If the map has been rotated, automatic map
rotation is also re-enabled.
Zoom preset
buttons (available in
Advanced mode
only)
Tap one of the preset buttons to set the zoom level to a fix,
predefined value. Smart Zoom is disabled. These buttons
are available in 2D mode.
Tap&hold any of the buttons to set its value to the current
zoom level, or to reset it to its original value.
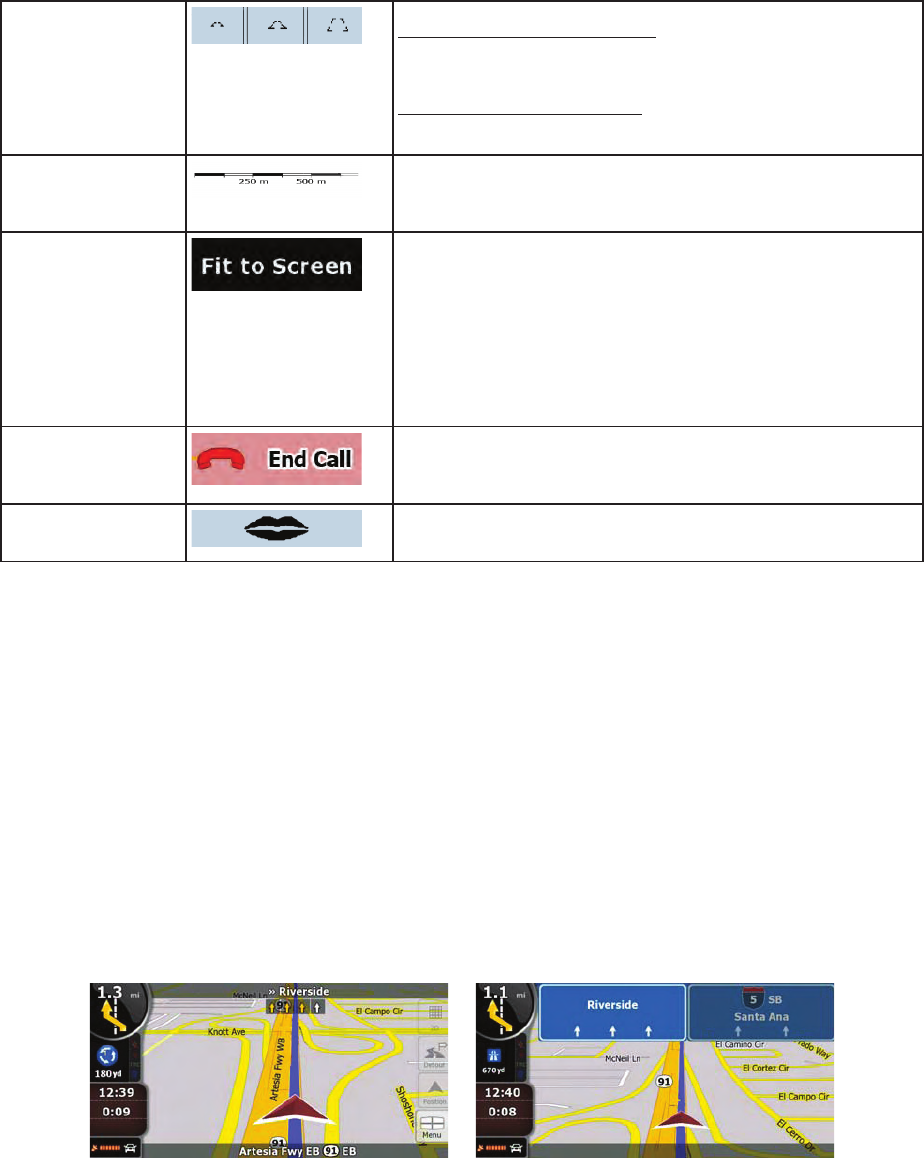
16
Tilt and zoom
preset buttons
(available in
Advanced mode
only)
Tap one of the preset buttons to set the tilt and zoom levels
to fix, predefined values. Smart Zoom is disabled. These
buttons are available in 3D mode.
Tap&hold any of the buttons to set its value to the current tilt
and zoom levels, or to reset it to its original value.
Map scale Clarion Mobile Map shows the scale of the map in 2D
mode.
Fit-to-screen
This button does not appear on the Map screen. It is
available on the following screens:
x Plan on Map screen: When you have an active route,
you can display it in its full length on the map.
x Track Information screen: A track log can be
displayed in its full length on the map.
End Call
This button is displayed only during a phone call. Tap the
button to hang up.
Repeat Voice
Instruction Tap this button to repeat the current voice instruction. The
distance is updated to always describe the current situation.
2.3.3 Lane information and Signposts
When navigating on multilane roads, it is important to take the appropriate lane in order to follow the
recommended route. If lane information is available in the map data, Clarion Mobile Map displays the
lanes and their directions using small arrows either at the bottom or at the top of the map (the position of
these arrows can be modified in Map Screen settings). Arrows in yellow represent the lanes you need to
take.
Where there is additional information available, signposts substitute arrows. Signposts are always
displayed at the top of the map. The color and style of the signposts are similar to the real ones you can
see above road or by the roadside. They show the available destinations and the number of the road the
lane leads to.
All signposts look similar when cruising (when there is no recommended route). When navigating a route,
only that signpost is displayed in vivid colors that points to the lane(s) to be taken; all others are darkened
out.
17
2.3.4 Status information and hidden controls on the map
The following information appears in the rounded field in the top left corner, the Turn Preview field. When
tapping this area, the result depends on the information currently shown.
Icon Information Details Action
There is no active route
in Simple mode If there is no route to be
navigated in Simple mode,
this icon appears in the Turn
Preview field.
Tap this area to open Find
Address.
There is no active route
in Advanced mode
If there is no route to be
navigated in
A
dvanced
mode, this icon appears in
the Turn Preview field.
Tap this area to open Find.
,
There is no valid GPS
position.
If an active route exists, and
there is no valid GPS
position, the view of the sky
above you is shown with
colored dots for each
satellite. Some dots need to
turn green to be able to
navigate.
Tap this area to open the Route
Information screen.
If the icon is a static
picture, route
calculation is needed
GPS position and an active
route are available, but
automatic off-route
recalculation is switched off,
and you deviated from the
route.
Tap this area to make Clarion
Mobile Map recalculate the
recommended route.
If the icon is animated,
route calculation is in
progress
Clarion Mobile Map is
calculating or recalculating
the route.
Nothing happens if you tap this
area of the screen.
,
Next route event (next
maneuver) GPS position and an active
route are available, and you
navigate the recommended
route. This area gives you
information about the type
and distance of the next
route event.
Tap this area to open the Route
Information screen.

18
The following area appears next to the above described rounded area. When tapping this area, the result
depends on the information currently shown.
Icon Information Details Action
There is no valid GPS
position If there is no valid GPS
position, this symbol
appears here.
Tap this area to open the GPS
Data screen to check the signal
status or the connection settings.
Traffic restriction When GPS position is
available but there is no
route to be navigated, the
traffic restriction of the
upcoming intersection is
shown here if there is any.
Nothing happens if you tap this
area of the screen.
,
Second route event
(maneuver after the
next maneuver)
When GPS position and an
active route are both
available, this field shows
the route event that follows
the next route event shown
in the above described area.
Tap this area to open the Itinerary
screen with the turn by turn
guidance instructions.
Approaching a Road
Safety Camera This icon appears when you
are approaching a Road
Safety Camera, and the
warning for cameras is
enabled in Settings.
Tap this area to suppress the
audible camera warning.
Tap again to display the second
route event with the possibility to
open the Itinerary.
Stops the running
simulation This icon appears during
Route Fly Over, Route
Simulation, and Track Log
playback.
Tap this area to stop the
simulation.
Route recalculation
progress During route recalculation,
this field shows the
recalculation progress
between 0% and 100%.
Nothing happens if you tap this
area of the screen.
Indicator strip - sounds muted/enabled
- Track Log recording
- Bluetooth status
Tap this area to open the Itinerary
screen with the turn by turn
guidance instructions.
19
The following symbols appear in the Indicator strip:
Icon Description
The sound output of Clarion Mobile Map is muted.
The sound output of Clarion Mobile Map is enabled.
Clarion Mobile Map records a Track log when GPS position is available.
Track log recording is disabled.
The Bluetooth radio is switched off.
The Bluetooth radio is turned on, but no telephone is connected.
There is an error in the Bluetooth connection.
Clarion Mobile Map is connected to a telephone as a handsfree set via Bluetooth.
A phone call is in progress over the Bluetooth connection.
The following information can be seen in the three data fields shown on the map screen. Tap this area to
open the Trip Information screen where you can select which values to be shown in these three fields.
When there is no active route, these fields show the following information: current speed, compass and
the current time of day.
Icon Type More information
Compass Shows the direction of your heading both when the map is
automatically rotated (3D) and when the map is always facing
North (2D).
Speed information There are speed values that can be shown:
x Current speed
x Speed limit on the current road
Time information There are time values that can be shown:
x Current GPS time
x Time remaining to reach the destination
x Time remaining to reach the next via point

20
x Estimated arrival time at the destination
x Estimated arrival time at the next via point
Distance information There are distance type values that can be shown:
x Distance remaining to reach the destination
x Distance remaining to reach the next via point
x Current altitude
The next area is a combined status indicator field. Tap this area to open the Quick menu (page 66).
Icon Status for More information
GPS position quality A higher number of lit bars indicates better GPS position
accuracy.
Vehicle type The symbol displays the vehicle type used for route
calculation.
2.3.5 Using the Cursor (the selected map location)
First, place the Cursor at the desired map location with one of the following options:
x Use the Find menu to select a location. The map returns with the selected point (the Cursor) in the
middle, and the Cursor menu appears with the available options.
x Tap the screen to place the Cursor at the desired location. Now tap to open the Cursor
menu.
You can perform the following actions in Simple mode:
Button Action
Creates a new route with the Cursor as the destination. The previous route (if exists)
is deleted.
Saves the Cursor as a Favorite destination
Opens a screen with the name, address and coordinate information of the Cursor,
and the list of POIs near it
21
The following options are available in Advanced mode only:
Button Action
In the active route, uses the Cursor as the start point by replacing the current GPS
position (available in Advanced mode only)
Creates a new route with the Cursor as the destination. The previous route (if
exists) is deleted.
In the active route, uses the Cursor as a via point (an intermediate destination)
preceding the destination (available in Advanced mode only)
In the active route, uses the Cursor as the destination while keeping the previous
destination as a via point (available in Advanced mode only)
Shows the different routes calculated by the available routing methods. Choose
the one that suits your needs the best (available in Advanced mode only)
Marks the map with a Pin at the Cursor (available in Advanced mode only)
Saves the Cursor as a POI (available in Advanced mode only)
Saves the Cursor as a Road Safety Camera location (available in Advanced mode
only)
This button is not displayed when GPS position is not available or if you are in
certain countries where Road Safety Camera warning is prohibited. Even if the
button is available, you are responsible for checking whether it is legal to use this
feature at your location.
2.4 Clarion Mobile Map concepts
2.4.1 Smart Zoom
Smart Zoom provides much more than just a usual automatic zoom feature:
x While following a route calculated by Clarion Mobile Map: when approaching a turn, it will
zoom in and raise the view angle to let you easily recognize your maneuver at the next junction. If
the next turn is at a distance, it will zoom out and lower the view angle to be flat so you can see the
road in front of you.
x While driving without an active route in Clarion Mobile Map: Smart Zoom will zoom in if you
drive slowly and zoom out when you drive at high speed.
22
Enabling Smart Zoom
Tap the map to let the map control buttons appear, and then tap to enable Smart Zoom.
Fine-tuning Smart Zoom
Tap the map to let the map control buttons appear, and then tap and hold to open the Smart Zoom
Settings window. Modify the zoom limits of Smart Zoom if necessary.
2.4.2 Position markers
2.4.2.1 Current GPS position and Lock-on-Road
When your GPS position is available, Clarion Mobile Map marks your current position with the icon
on the map.
The icon may not show your exact GPS position and heading. If roads are near, it is aligned to the
nearest road to suppress GPS position errors, and the direction of the icon is aligned to the direction of
the road.
To use the current GPS position, tap . The Position menu appears and you can save the GPS
position as one of the following:
x a Favorite
x a Road Safety Camera
x a POI
x a map marker Pin
2.4.2.2 Returning to normal navigation
When GPS position is available, and you have moved the map (the icon is moving or is not even
visible), or you have rotated the map in 3D mode, the button appears. Tap it to move the map back
to the GPS position and re-enable Track-up map orientation (automatic map rotation).
Note! Even if you move the map while you are driving, Clarion Mobile Map continues navigating
if there is an active route: it plays the voice instructions and displays the turn preview icons
23
according to your current GPS position.
2.4.2.3 Selected location (Cursor)
If you select a location in the Find menu, or you tap the map, the Cursor appears at the selected point on
the map. Clarion Mobile Map displays the Cursor with a radiating red dot ( ) to make it visible at all
zoom levels, even when it is in the background of a 3D map view.
When the Cursor is set, tap . The Cursor menu appears and you can use the Cursor as one of the
following:
x the start point of a route
x a via point in a route
x the destination of a route
You can also search for POIs around the Cursor.
Or you can save the location of the Cursor as:
x a Favorite
x a Road Safety Camera
x a POI
x a map marker Pin
2.4.2.4 Original position in the Cursor menu
When the Cursor menu is open, a special icon ( ) shows the Cursor position the menu was opened
with.
You can move and zoom the map, and you can set the Cursor to a different place. The usual Cursor
() appears, and the buttons of the Cursor menu initiate actions for this new location.
To return to the original Cursor position, tap . The map jumps back to the position with which the
Cursor menu was opened, and the icon appears again.
24
2.4.3 Daytime and night color profiles
Clarion Mobile Map uses different color profiles during the day and during the night.
x Daytime colors are similar to paper road maps.
x The night color profiles use dark colors for large objects to keep the average brightness of the
screen low.
Clarion Mobile Map offers different daytime and night color profiles. It can also switch automatically
between the daytime and the night schemes depending on the illumination setting.
2.4.4 Color scheme in tunnels
When entering a tunnel, the colors of the map change. All buildings disappear, large objects (such as
surface waters or forests) and empty areas between roads become black.
However, roads and streets keep their original colors from the daytime or night color scheme currently
used.
After leaving the tunnel, the original colors return.
2.4.5 Route calculation and recalculation
Clarion Mobile Map calculates the route based on your preferences:
x Route calculation method:
x Fast
x Short
x Economical
x Easy
x Vehicle types :
x Car
x Taxi
x Bus
x Emergency vehicles
x Road types
x Unpaved Roads
x Permit Needed
x Freeways
x Toll Roads
x Charge Roads
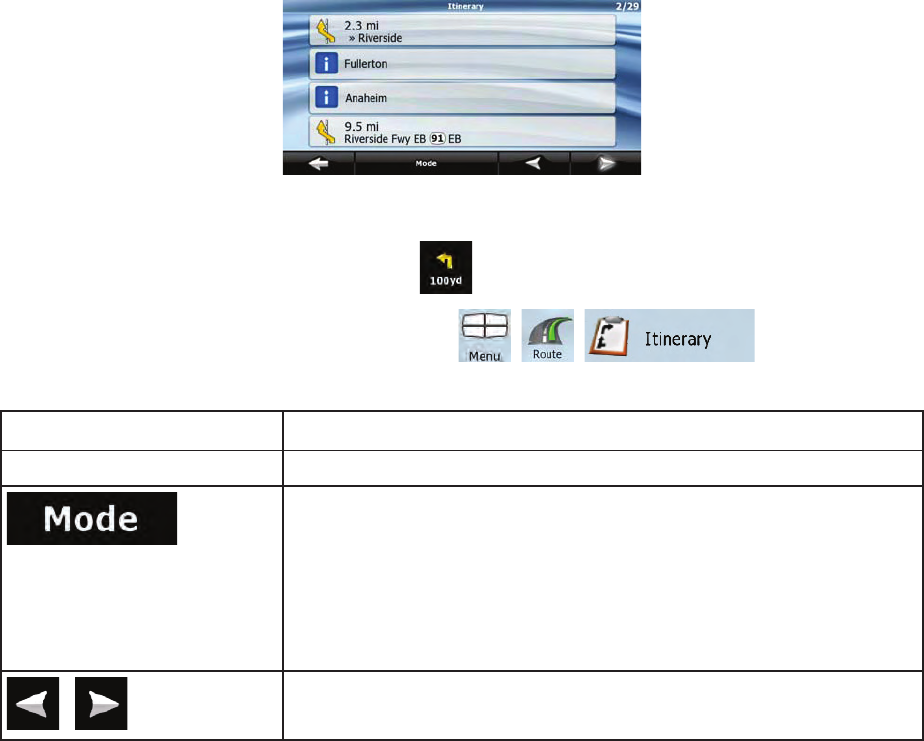
25
x Ferries
x Cross-border Planning
x Carpool (appears only when used in the USA)
Clarion Mobile Map automatically recalculates the route if you deviate from the proposed itinerary.
For further information about Route Planning options, see page 79.
2.4.6 Itinerary
The Itinerary is the list of the route events, that is, the driving instructions.
When you are on the Map screen, you can display the Itinerary in one of the following ways:
x Tap the area between the Turn preview and the Travel data fields where the symbol of the second
next maneuver is displayed (for example ).
x In Advanced mode, tap the following buttons: , , .
You have the following options on the Itinerary screen:
Button Description
Any of the list items Opens the map with the selected maneuver in the middle.
Changes the detail level of the Itinerary. The levels are as follows:
x Detailed Instructions: all intersections are listed
x Itinerary: only significant intersections (the ones announced in
voice guidance) are listed
x Road list: the list of the roads used while navigating the route
,
Moves between pages for additional list items.
26
When the map is open with a maneuver in the middle:
Button Description
Zooms in the map.
Zooms out the map.
,
Moves the map to show the previous or next maneuver.
Opens a screen where you can avoid a part of the route starting from the
selected maneuver.
2.4.7 Track Logs
Clarion Mobile Map can log the track that you drive (page 47).
A Track Log is a recording of how your GPS position changed and it is independent of the route Clarion
Mobile Map calculated.
Track Logs can be recorded, renamed, replayed, shown on the map, exported to a memory card in GPX
format, and deleted. See page 71.
Independently of the normal track log, you can instruct Clarion Mobile Map to record the native GPS data
received from the GPS device. These logs are saved as separate text files on the memory card, and they
cannot be shown or replayed in Clarion Mobile Map.
To turn on NMEA/SIRF log saving, tap the following buttons: , , ,
.
2.4.8 Route demonstration
A simulation drives you through the route, following the driving instructions (page 45). You can choose
from a simulation at high speed or at normal driving speed.
You can use it, for example, to see which bridge Clarion Mobile Map planned for the route; if you do not
want to take that bridge, you can avoid it.
Route demonstrations can be started from the Route menu by tapping the (high
speed simulation) or the (simulation at normal speed) button.
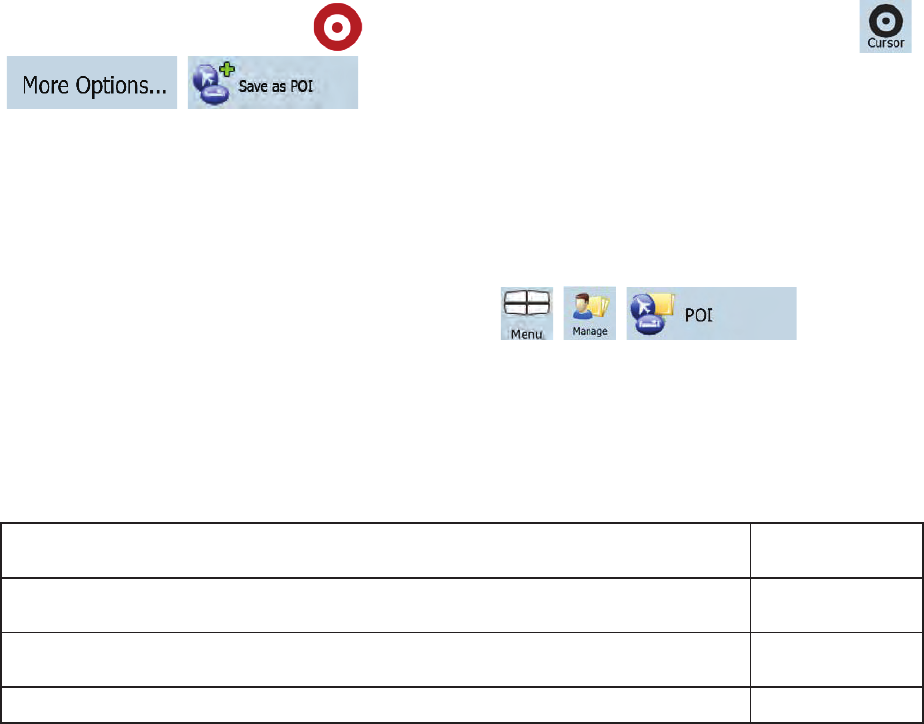
27
2.4.9 POI (Points of Interest)
A point of interest (POI) is a location that someone might find useful or interesting. Clarion Mobile Map is
delivered with thousands of POIs and you can also create your own POIs in the application.
POI locations are marked on the map with special icons. POI icons are quite large so you can easily
recognize the symbol. The icons are semi-transparent: they do not cover the streets and intersections
behind them.
POIs are grouped into several levels of categories and subcategories. The icon of a POI that comes with
the map shows the symbol of the POI category. If you save your own POI, you can select an icon for it
independently of the POI category you have put it in.
Saving POIs
To save a POI, place the Cursor ( ) at the desired location, then tap the following buttons: ,
, .
Managing POIs
You can select which POI groups to show and which ones to hide on the map, and from which zoom
levels POI icons are visible. At the same place you can manage your saved POIs. A saved POI can be
renamed, moved to a different POI group, its icon can be changed, or a phone number and additional
information can be added to it. Tap the following buttons: , , .
2.4.10 Road Safety Cameras
The location of a Road Safety Camera is a special POI. These cannot be searched like other POIs, and
there is a special proximity warning only for cameras.
Is Clarion NX700 shipped with a built-in database of Road Safety Cameras? No
Can you upload Road Safety Camera locations from naviextras.com? Yes
Can Road Safety Camera locations be uploaded in a text file? Yes
Can you save the Cursor as the location of a Road Safety Camera? Yes

28
Saving Road Safety Cameras
To save the location of a Road Safety Camera, place the Cursor ( ) at the desired location, then tap
the following buttons: , , .
Note! This button is not displayed when GPS position is not available or if you are in certain
countries where Road Safety Camera warning is prohibited. Even if the button is available,
you are responsible for checking whether it is legal to use this feature at your location.
Camera warning
The warning for Road Safety Cameras can be turned on in Warning Settings. Tap the following buttons:
, , , .
When you approach a Road Safety Camera with the warning enabled, the following happens:
x Visible Warning: The type and distance of the camera is displayed in the secondary Turn Preview
field (for example ).
x Audible Warning: If there is no speed limit specified for the camera, or your speed is under the
specified speed limit, single beeps warn you about the camera.
x If you exceed the speed limit of the camera, the following also happens:
x Visible Warning: A symbol with the speed limit appears in the corner of the map (for
example: ),
x Audible Warning: A special alert sound is played.
2.4.10.1 Camera types
There are different types of Road Safety Cameras.
Icon Type Description
Fixed Some speed cameras stand by the roadside, looking in one direction,
measuring one or both directions of the traffic. They measure your current
speed. For these speed cameras you can specify the controlled traffic
direction and the speed limit. Clarion Mobile Map warns you when you
approach these speed cameras in the measured direction. If your speed
exceeds the speed limit near the speed camera, Clarion Mobile Map plays a
special warning sound.
Mobile Some speed cameras are operated from vehicles. They do not always work
and they are not set to check a preset speed limit. The warning is similar to
29
fixed speed cameras, but as there is no speed limit given, only the proximity
is announced.
Built-in Some speed cameras are built into traffic lights. They work like fixed speed
cameras, but they are difficult to spot. The warning for proximity and speeding
is the same as for the fixed speed cameras.
Section
control These speed cameras work in pairs, and do not measure your current speed
but your average speed between the two speed cameras. Both identify your
car and record the exact time you pass them. They use the difference
between the two points in time to calculate your average speed.
Clarion Mobile Map warns you when you approach one of these speed
cameras, but as you pass by, the warning stays on, and your average speed
is measured until you reach another speed camera of this type. If your
average speed exceeds the speed limit between the two speed cameras, you
receive the same special warning sound as with the other speed camera
types.
In the rare case Clarion Mobile Map cannot register the moment you pass the
second speed camera (for example, it is placed at the exit of a tunnel where
GPS position is not yet available) the warning continues. Just tap the speed
camera symbol displayed on the screen to stop the warning.
Tap again to display the second route event with the possibility to open the
Itinerary.
Red light These cameras check if you obey traffic lights. The warning is similar to
mobile speed cameras: as there is no speed limit given, only the proximity is
announced.
2.4.10.2 Camera directions
A speed camera can measure the speed of one direction of the traffic, both directions, or even several
directions in an intersection, when they are mounted on a rotating base. The same directions apply to red
light cameras. Clarion Mobile Map warns you only if you drive in a measured or possibly measured
direction. The measured direction of the camera appears with the following symbols:
Icon Description
The camera checks speed in the direction into which you are driving.
The camera checks speed in the opposite driving direction.
The camera checks speed in both directions on the road.
The camera can check speed in any direction.

30
2.4.11 Speed limit warning
Maps sometimes contain information about the speed limits of the road segments. This information may
not be available for your region (ask your local dealer) or may not be fully correct for all roads on the map.
You can configure Clarion Mobile Map to warn you if you exceed the current limit. Tap the following
buttons: , , , .
When you exceed the speed limit, a voice message is played using the selected voice guidance profile.
31
3 Navigating with Clarion Mobile Map
You can set up your route in Clarion Mobile Map in several ways:
x if you need a simple route (a route with only one destination, without any intermediate via points),
you can select the destination and start navigating to it right away
x you can plan a multi-point route (available in Advanced mode only)
x you can also plan a route independently of your current GPS position or even without GPS
reception (available in Advanced mode only)
3.1 Selecting the destination of a route
Clarion Mobile Map offers you several ways of choosing your destination and via points (intermediate
destinations):
x Use the selected location on the map (the Cursor) (page 31).
x Enter a full address or a part of an address, for example a street name without a house number or
the names of two intersecting streets (page 32).
x Enter an address with ZIP code (page 38). This way you do not need to select the name of the city
and the search for street names might be faster as well.
x Use a coordinate (page 42)
x Use a saved location:
x a Favorite (page 40)
x a POI (page 40)
x the History of previously set destinations and waypoints (page 42)
Tip! If you are going to use a route later, save it before you start navigating. Tap the following
buttons: , , .
3.1.1 Selecting the Cursor as the destination
1. Locate your destination on the map: move and scale the map as needed (page 14).
2. Tap the location that you want to select as your destination. The Cursor ( ) appears.
3. Tap to open the Cursor menu.
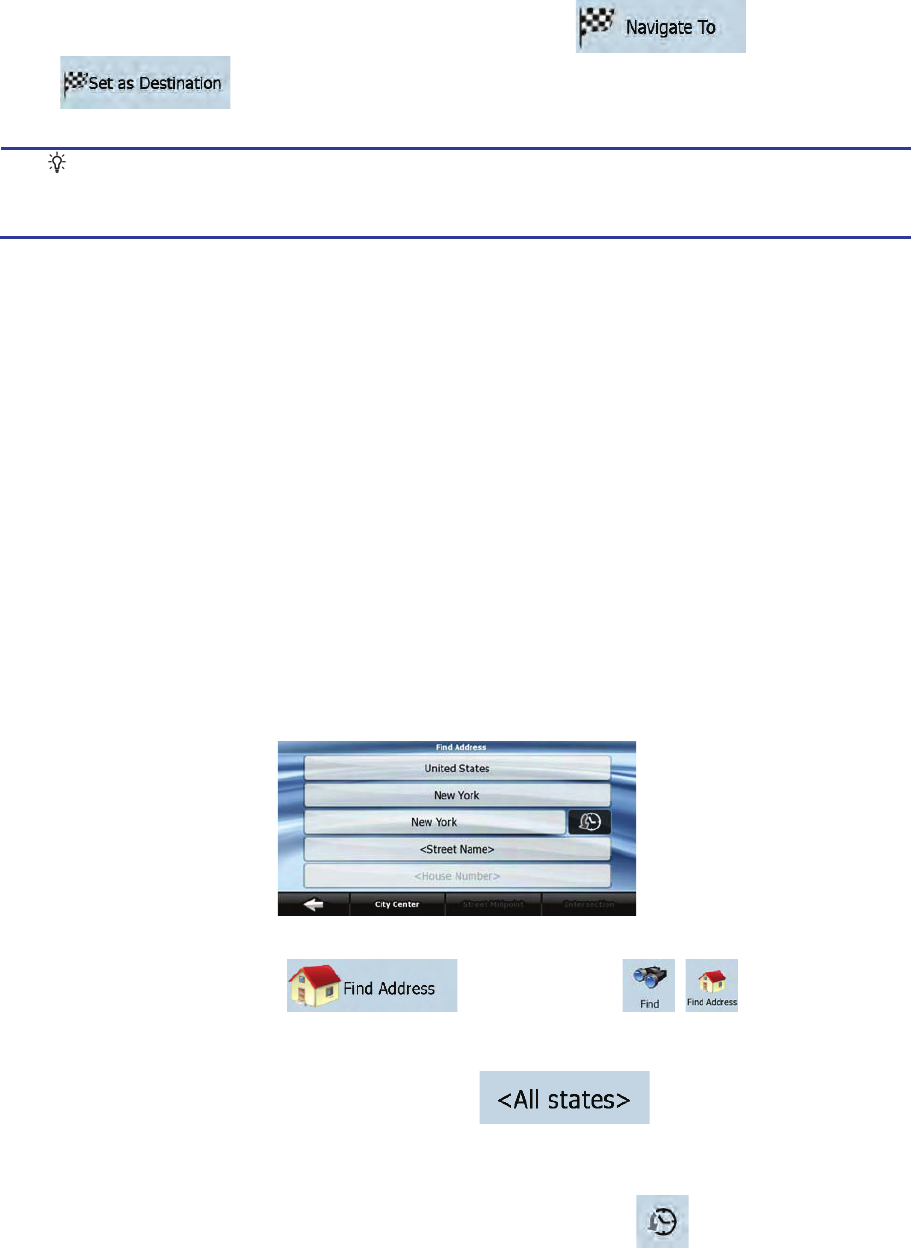
32
4. The map appears with the selected point in the middle. Tap (Simple mode) or
(Advanced mode) from the Cursor menu. The route is then automatically
calculated, and you can start navigating.
Tip! If you know that you will use a destination later, when the Cursor menu appears, save it
as a POI (in Advanced mode only), or put it on the list of your Favorites first. The Curso
r
menu returns automatically with the same point. Now you can use it as a route point.
3.1.2 Entering an address or part of an address
If you know at least a part of the address, it is the quickest way to select the destination of the route.
Using the same screen, you can find an address by entering:
x the exact address, including house number
x the center of a city
x an intersection
x the midpoint of a street
x any of the above, starting the search with the ZIP code (page 38)
3.1.2.1 Entering an address
The parts of the address are shown on buttons. Start reading from the top, and if you want to change any
of them, tap the button.
The procedure is explained starting from the Navigation menu.
1. Tap the following buttons: (Simple mode), or , (Advanced mode).
2. By default, Clarion Mobile Map proposes the country, state and city where you are. If needed, tap
the button with the name of the country, and select a different one from the list. If you select a new
country, you also need to select the state, or tap to search for a city regardless
of the state it is in.
3. If needed, change the city:
x To select the city from the list of recently used ones, tap the button.
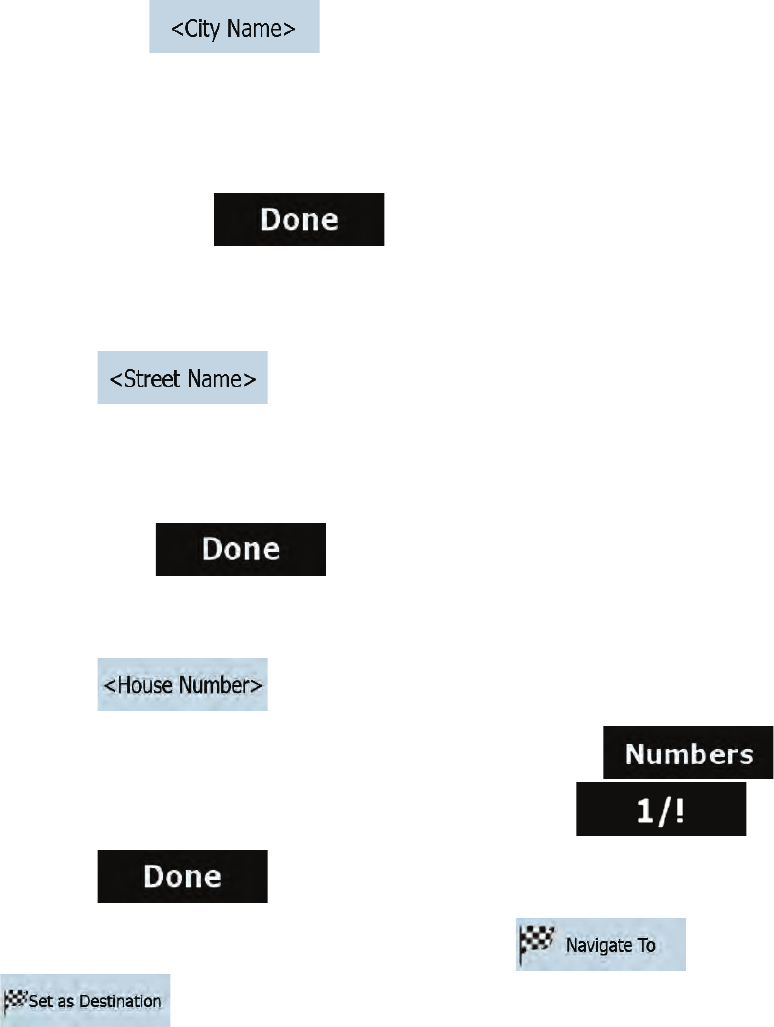
33
x To enter a new city:
1. Tap the button with the name of the city, or if you have changed the country/state,
tap .
2. Start entering the city name on the keyboard.
3. Get to the list of search results:
x After entering a couple of characters, the names that match the string appear
in a list.
x Tap to open the list of results before it appears
automatically.
4. Select the city from the list.
4. Enter the street name:
1. Tap .
2. Start entering the street name on the keyboard.
3. Get to the list of results:
x After entering a couple of characters, the names that match the string appear in a list.
x Tap to open the list of results before it appears automatically.
4. Select the street from the list.
5. Enter the house number:
1. Tap .
2. Enter the house number on the keyboard. (To enter letters, tap and
select an alphabetic keyboard layout. To enter symbols, tap ).
3. Tap to finish entering the address.
6. The map appears with the selected point in the middle. Tap (Simple mode) or
(Advanced mode) from the Cursor menu. The route is then automatically
calculated, and you can start navigating.
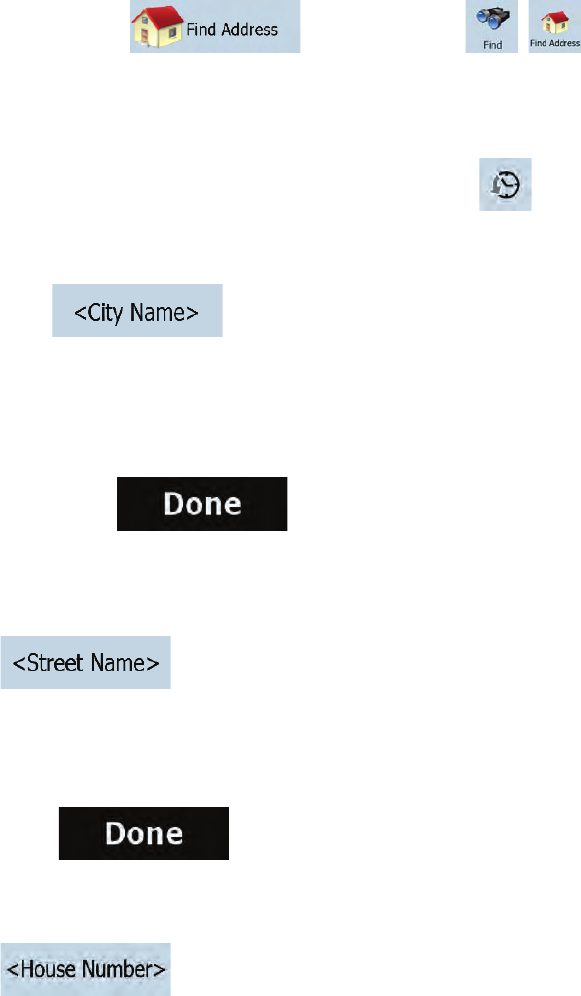
34
3.1.2.2 Entering an address if house numbering is restarted
There are long roads where house numbering is restarted at some point. This way the same house
number can appear twice or even more times on the same road. If this is the case, after entering the
house number, you need to select the appropriate address by the district/suburb information.
The procedure is explained starting from the Navigation menu.
1. Tap the following buttons: (Simple mode), or , (Advanced mode).
2. By default, Clarion Mobile Map proposes the country/state and city where you are. If needed, tap
the button with the name of the country/state, and select a different one from the list.
3. If needed, change the city:
x To select the city from the list of recently used ones, tap the button.
x To enter a new city:
1. Tap the button with the name of the city, or if you have changed the country/state,
tap .
2. Start entering the city name on the keyboard.
3. Get to the list of search results:
x After entering a couple of characters, the names that match the string appear
in a list.
x Tap to open the list of results before it appears
automatically.
4. Select the city from the list.
4. Enter the street name:
1. Tap .
2. Start entering the street name on the keyboard.
3. Get to the list of results:
x After entering a couple of characters, the names that match the string appear in a list.
x Tap to open the list of results before it appears automatically.
4. Select the street from the list.
5. Enter the house number:
1. Tap .
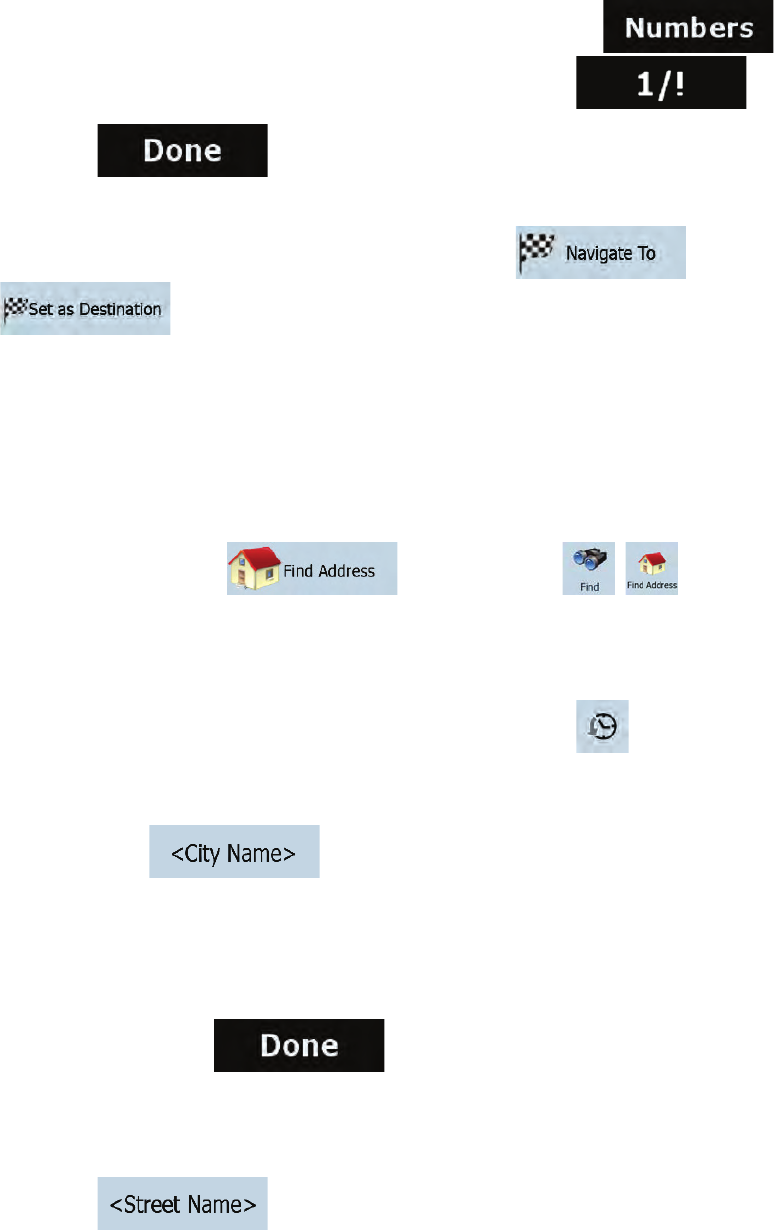
35
2. Enter the house number on the keyboard. (To enter letters, tap and
select an alphabetic keyboard layout. To enter symbols, tap ).
3. Tap to finish entering the address.
6. A list appears with the matching addresses. Tap the desired one.
7. The map appears with the selected point in the middle. Tap (Simple mode) or
(Advanced mode) from the Cursor menu. The route is then automatically
calculated, and you can start navigating.
3.1.2.3 Entering an address without knowing the district/suburb
Long roads can run across several districts or suburbs. You may not know what particular house number
is located where. In this case, follow the instructions below:
The procedure is explained starting from the Navigation menu.
1. Tap the following buttons: (Simple mode), or , (Advanced mode).
2. By default, Clarion Mobile Map proposes the country/state and city where you are. If needed, tap
the button with the name of the country/state, and select a different one from the list.
3. If needed, change the city:
x To select the city from the list of recently used ones, tap the button.
x To enter a new city:
1. Tap the button with the name of the city, or if you have changed the country/state,
tap .
2. Start entering the city name on the keyboard.
3. Get to the list of search results:
x After entering a couple of characters, the names that match the string appear
in a list.
x Tap to open the list of results before it appears
automatically.
4. Select the city from the list.
4. Enter the street name:
1. Tap .
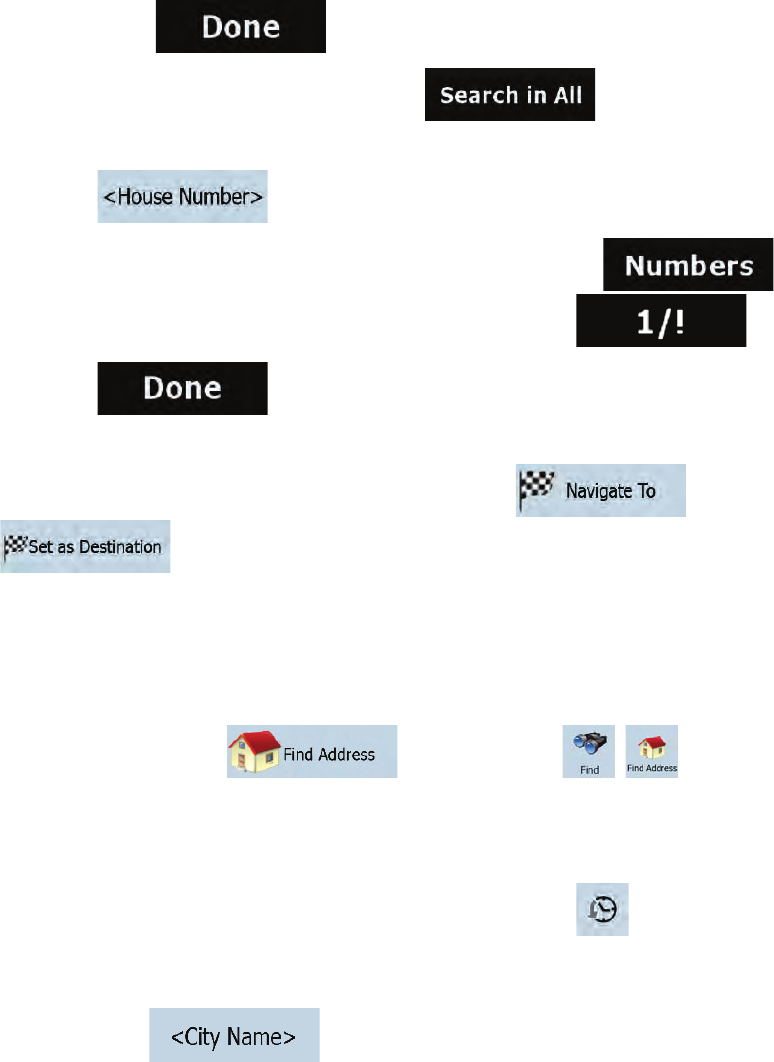
36
2. Start entering the street name on the keyboard.
3. Get to the list of results:
x After entering a couple of characters, the names that match the string appear in a list.
x Tap to open the list of results before it appears automatically.
4. Instead of selecting one of the streets, tap .
5. Enter the house number:
1. Tap .
2. Enter the house number on the keyboard. (To enter letters, tap and
select an alphabetic keyboard layout. To enter symbols, tap ).
3. Tap to finish entering the address.
6. A list appears with the matching addresses. Tap the desired one.
7. The map appears with the selected point in the middle. Tap (Simple mode) or
(Advanced mode) from the Cursor menu. The route is then automatically
calculated, and you can start navigating.
3.1.2.4 Selecting an intersection as the destination
The procedure is explained starting from the Navigation menu.
1. Tap the following buttons: (Simple mode), or , (Advanced mode).
2. By default, Clarion Mobile Map proposes the country/state and city where you are. If needed, tap
the button with the name of the country/state, and select a different one from the list.
3. If needed, change the city:
x To select the city from the list of recently used ones, tap the button.
x To enter a new city:
1. Tap the button with the name of the city, or if you have changed the country/state,
tap .
2. Start entering the city name on the keyboard.
3. Get to the list of search results:
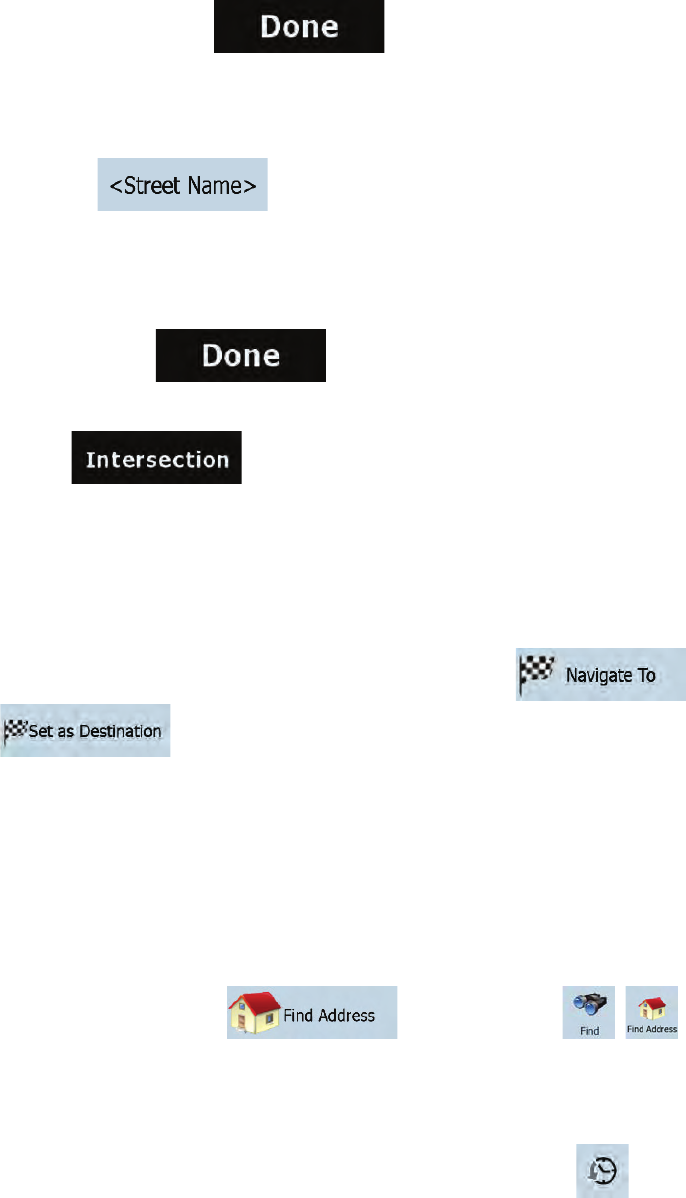
37
x After entering a couple of characters, the names that match the string appear
in a list.
x Tap to open the list of results before it appears
automatically.
4. Select the city from the list.
4. Enter the street name:
1. Tap .
2. Start entering the street name on the keyboard.
3. Get to the list of results:
x After entering a couple of characters, the names that match the string appear in a list.
x Tap to open the list of results before it appears automatically.
4. Select the street from the list.
5. Tap the button.
x If only a few intersecting streets exist, their list appears immediately.
x In case of a longer street, a keyboard screen appears. Start entering the name of the
intersecting street on the keyboard. As you type, if the matching streets can be shown on
one screen, their list appears automatically.
6. Tap the desired intersecting street in the list.
7. The map appears with the selected point in the middle. Tap (Simple mode) or
(Advanced mode) from the Cursor menu. The route is then automatically
calculated, and you can start navigating.
3.1.2.5 Selecting a city center as the destination
The City Center is not the geometric center of the city but an arbitrary point the map creators have
chosen. In towns and villages, it is usually the most important intersection; in larger cities, it is an
important intersection.
The procedure is explained starting from the Navigation menu.
1. Tap the following buttons: (Simple mode), or , (Advanced mode).
2. By default, Clarion Mobile Map proposes the country/state and city where you are. If needed, tap
the button with the name of the country/state, and select a different one from the list.
3. If needed, change the city:
x To select the city from the list of recently used ones, tap the button.
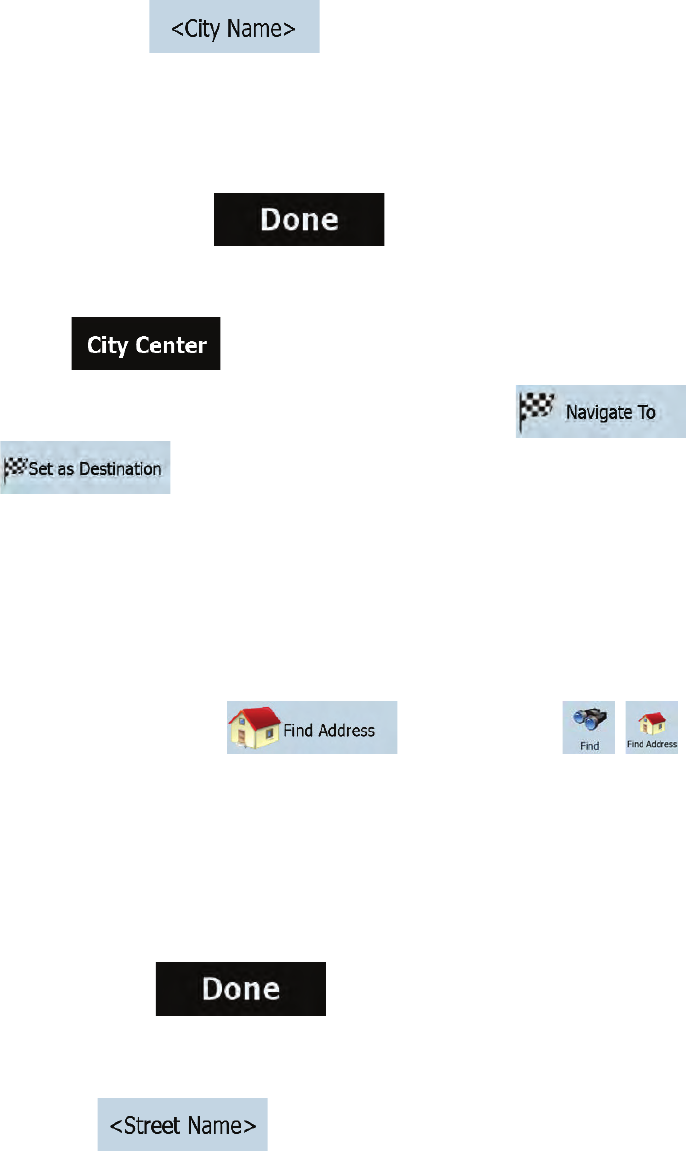
38
x To enter a new city:
1. Tap the button with the name of the city, or if you have changed the country/state,
tap .
2. Start entering the city name on the keyboard.
3. Get to the list of search results:
x After entering a couple of characters, the names that match the string appear
in a list.
x Tap to open the list of results before it appears
automatically.
4. Select the city from the list.
4. Tap the button.
5. The map appears with the selected point in the middle. Tap (Simple mode) or
(Advanced mode) from the Cursor menu. The route is then automatically
calculated, and you can start navigating.
3.1.2.6 Entering an address with a ZIP code
All of the above address searching possibilities can be performed with entering the ZIP code instead of
the city name. Find below an example with a full address:
The procedure is explained starting from the Navigation menu.
1. Tap the following buttons: (Simple mode), or , (Advanced mode).
2. By default, Clarion Mobile Map proposes the country/state and city where you are. If needed, tap
the button with the name of the country/state, and select a different one from the list.
3. Tap the button with the name of the city, and enter the ZIP code:
1. Start entering the ZIP code on the keyboard.
2. Get to the list of results:
x After entering a couple of numbers, matching results appear in a list.
x Tap to open the list of results before it appears automatically.
3. Pick the city from the list.
4. Enter the street name:
1. Tap .
2. Start entering the street name on the keyboard.
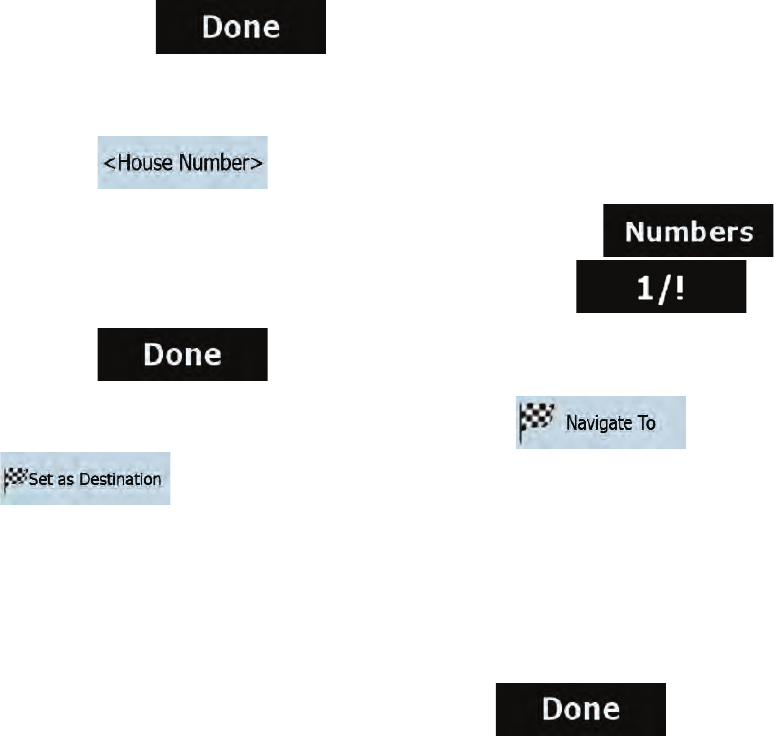
39
3. Get to the list of results:
x After entering a couple of characters, the names that match the string appear in a list.
x Tap to open the list of results before it appears automatically.
4. Select the street from the list.
5. Enter the house number:
1. Tap .
2. Enter the house number on the keyboard. (To enter letters, tap and
select an alphabetic keyboard layout. To enter symbols, tap ).
3. Tap to finish entering the address.
6. The map appears with the selected point in the middle. Tap (Simple mode) or
(Advanced mode) from the Cursor menu. The route is then automatically
calculated, and you can start navigating.
3.1.2.7 Tips on entering addresses quickly
x When you are entering the name of a city or a street, Clarion Mobile Map only displays those
characters that appear in possible search results. The other characters are grayed out.
x When entering the city name or the street name, tap the button after a couple
of letters; Clarion Mobile Map lists the items that contain the specified letters.
x You can speed up finding an intersection:
x Search first for the street with a less common or less usual name; fewer letters are enough
to find it.
x If one of the streets is shorter, search for that one first. You can then find the second one
faster.
x You can search for both the type and the name of a road. If the same word appears in several
names, for example in the name of streets, roads and avenues, you can obtain the result faster if
you enter the first letter of the street type: For example, enter Pi A to obtain Pine Avenue and skip
all Pine Streets and Pickwick Roads.
x You can also search in ZIP codes. This is useful when a street name is common and it is used in
several districts of a city.
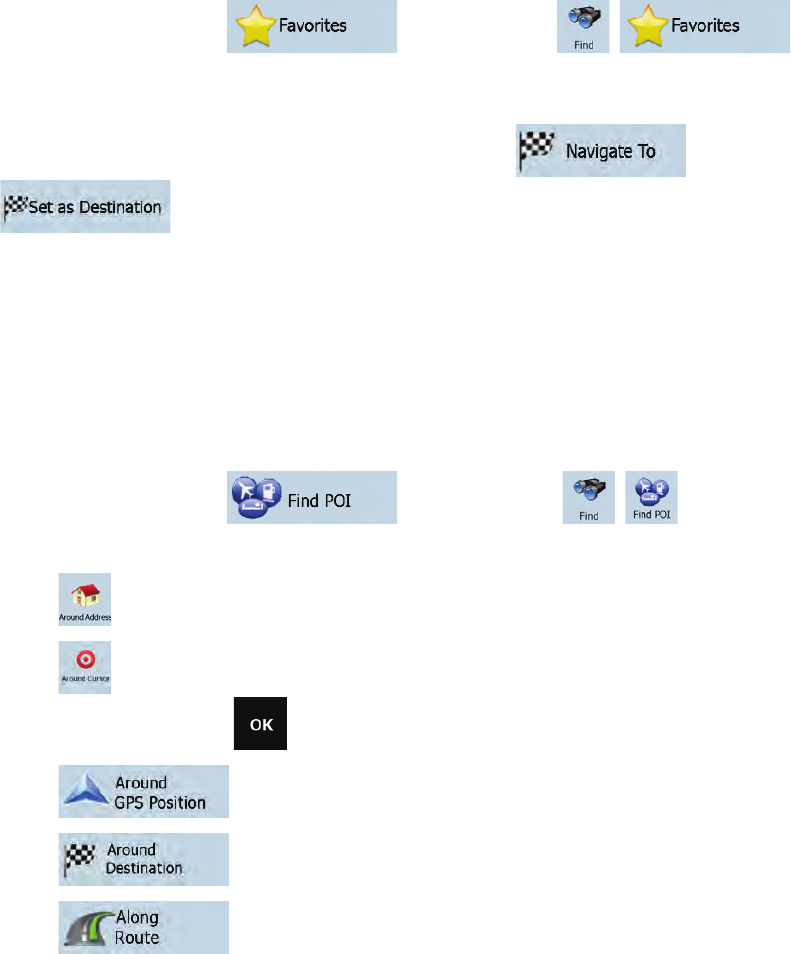
40
3.1.3 Selecting the destination from your Favorites
You can select a location that you have already saved as a Favorite to be your destination.
The procedure is explained starting from the Navigation menu.
1. Tap the following buttons: (Simple mode) or ,
(Advanced mode).
2. Tap the Favorite that you want to set as your destination.
3. The map appears with the selected point in the middle. Tap (Simple mode) or
(Advanced mode) from the Cursor menu. The route is then automatically
calculated, and you can start navigating.
3.1.4 Selecting the destination from the POIs
You can select your destination from the POIs included with Clarion Mobile Map or from the ones you
have previously created.
The procedure is explained starting from the Navigation menu.
1. Tap the following buttons: (Simple mode), or , (Advanced mode).
2. Select the area around which the POI should be searched for:
x : The POI will be searched for around a given address.
x : The map appears with the Cursor in the middle. Modify the location of the Cursor if
necessary, then tap . The POI will be searched for around the given location.
x : The POI will be searched for around the current GPS position.
x : The POI will be searched for around the destination of the active route.
x : The POI will be searched for not around a given point, but by the size
of the detour it adds to the active route. This can be useful if you search for a later stopover
that causes only a minimal detour, for example upcoming gas stations or restaurants.
3. You can narrow the search with the following:
x Select the POI group (e.g. Accommodation), and after that, if needed, select the POI
subgroup (e.g. Hotel or Motel).
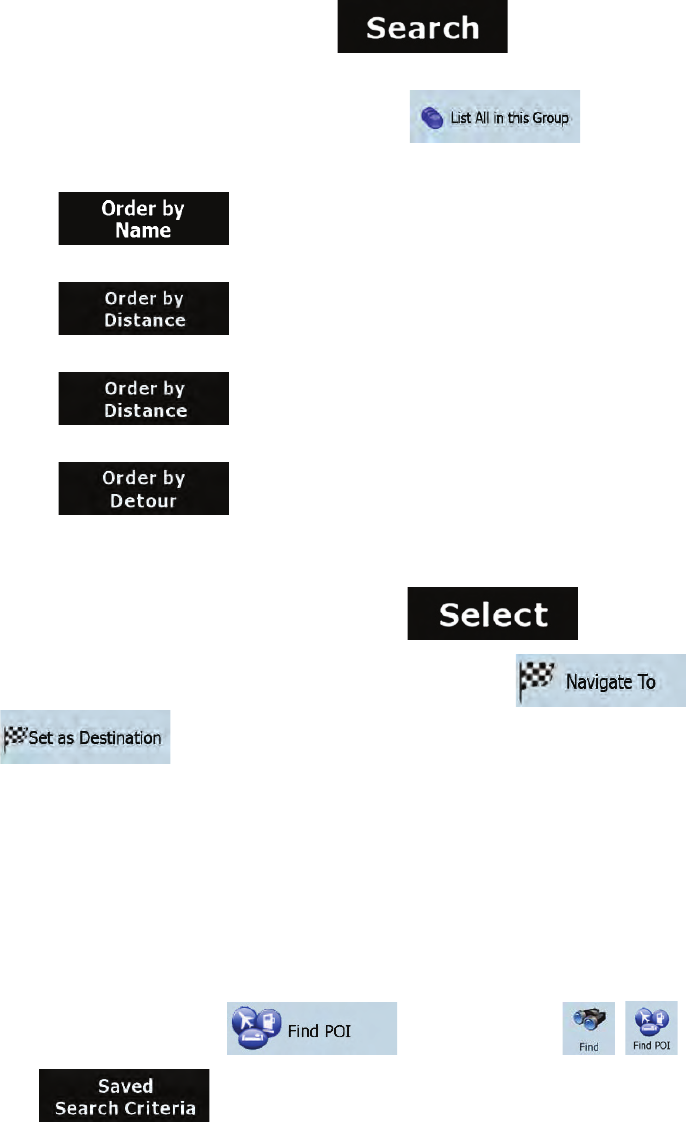
41
x To find the POI by its name, tap , and use the keyboard to enter a part
of the name.
x To list all POIs in a given POI group, tap .
4. [optional] When finally the list of results appear, you can sort the list:
x : sort the list alphabetically (available when you search around a single
location)
x : sort the list by the distance from your current position in a straight line
(available when you search around a single location)
x : sort the list by the distance to drive on route from your current position
(available when you search along the active route)
x : sort the list by the size of the needed detour (available when you
search along the active route)
5. Tap the desired POI in the list.
6. Review the details of the selected item and tap .
7. The map appears with the selected point in the middle. Tap (Simple mode) or
(Advanced mode) from the Cursor menu. The route is then automatically
calculated, and you can start navigating.
3.1.5 Selecting the destination with saved POI search criteria
POI search criteria can be saved in the POI section of the Manage menu, but Clarion Mobile Map is
already shipped with some saved criteria you can use instantly when searching for a POI.
The procedure is explained starting from the Navigation menu.
1. Tap the following buttons: (Simple mode), or , (Advanced mode).
2. Tap .
3. Select one of the saved criteria, and the list of matching POIs appears.
4. Tap the desired POI in the list.
42
5. The map appears with the selected point in the middle. Tap (Simple mode) or
(Advanced mode) from the Cursor menu. The route is then automatically
calculated, and you can start navigating.
3.1.6 Selecting the destination from the History
The destinations that you have set earlier appear in the History.
The procedure is explained starting from the Navigation menu.
1. Tap the following buttons: (Simple mode), or ,
(Advanced mode).
2. If necessary, move between pages with to see earlier destinations.
3. Tap the desired item.
4. The map appears with the selected point in the middle. Tap (Simple mode) or
(Advanced mode) from the Cursor menu. The route is then automatically
calculated, and you can start navigating.
3.1.7 Selecting the destination by entering its coordinates
This feature is available in Advanced mode only.
The procedure is explained starting from the Navigation menu.
1. Tap the following buttons: , .
2. [optional] Tap to change the format of the displayed coordinates.
3. Tap the latitude or longitude value to change the coordinates.
4. Enter the coordinate values in WGS84 format on the keyboard: the latitude (N or S) and the
longitude (E or W).
5. Tap .
43
6. The map appears with the selected point in the middle. Tap (Simple mode) or
(Advanced mode) from the Cursor menu. The route is then automatically
calculated, and you can start navigating.
3.2 Creating a multi-point route (inserting a via point)
Multi-point routes are created from simple routes, so a route must be active first. One of the ways of
expanding the route is to keep the destination, and to add via points (intermediate destinations).
This feature is available in Advanced mode only.
1. Select a new location as you did in the previous sections. This will be the additional destination in
the route.
2. The map appears with the selected point in the middle, and the Cursor menu opens automatically.
3. Tap to add the point as an intermediate destination preceding the final
destination of the route.
4. [optional] To add more points to the route, repeat the above steps as many times as you like.
If you insert a via point in a route that is already a multi-point route, you will automatically be taken to the
Edit Route screen where you can determine the position of the intermediate route point. When you enter
the screen, the new via point is placed as the first via point to be reached. The new point is the
highlighted point in the list.
You have the following options:
Button Action
The selected point moves up in the list (becomes a via point to be reached earlier).
Tap this button repeatedly, and the point becomes the start point of the route
(when routing from a given location) or the first via point to reach (when routing
from the GPS position).
The selected point moves down in the list (becomes a via point to be reached
later). Tap this button repeatedly, and the point becomes the final destination of
the route.
Tap this button to reverse the route. The start point becomes the destination, the
destination becomes the start point, and all via points are to be reached in the
opposite order than before.
Tap this button to optimize the route. The start point and the destination remain at
their position, but the via points are reordered to make the shortest possible route.
Tap this button to remove the selected point from the route. The route remains as
it was before adding the new point.
Every time a new point is added, the route is recalculated automatically, and you can start navigating right
away.
44
3.3 Creating a multi-point route (appending a new destination)
destination Multi-point routes are created from simple routes, so a route must be active first. One of the
ways of expanding the route is to add a new destination. The previous destination becomes the last via
point of the route.
This feature is available in Advanced mode only.
1. Select a new location as you did in the previous sections. This will be the additional destination in
the route.
2. The map appears with the selected point in the middle, and the Cursor menu opens automatically.
3. Tap to open the full Cursor menu with the additional functions.
4. Tap to add the point as a new final destination demoting the previous one to
the last intermediate destination.
5. [optional] To add more points to the route, repeat the above steps as many times as you like.
Every time a new point is added, the route is recalculated automatically and you can start navigating right
away.
3.4 Editing the route
This feature is available in Advanced mode only.
Tap the following buttons: , , .
The list of route points appear with the start point at the top of the list and the final destination at the
bottom. If several via points exist, you might need to scroll between pages.
Tap one of the route points in the list. You have the following options:
Button Action
The selected point moves up in the list (becomes a via point to be reached earlier).
Tap this button repeatedly, and the point becomes the start point of the route (when
routing from a given location) or the first via point to reach (when routing from the
GPS position).
The selected point moves down in the list (becomes a via point to be reached later).
Tap this button repeatedly, and the point becomes the final destination of the route.
Tap this button to reverse the route. The start point becomes the destination, the
destination becomes the start point, and all via points are to be reached in the
opposite order than before.
Tap this button to optimize the route. The start point and the destination remain at
their position, but the via points are reordered to make the shortest possible route.

45
Tap this button to remove the selected point from the route.
As soon as you leave this screen, the route is recalculated automatically, and you can start navigating
right away.
3.5 Viewing the entire route on the map (Fit-to-Screen)
The map can be moved and scaled to show the whole line of the route. You do not need to manipulate
the map manually. The Plan on Map feature does it for you.
In Advanced mode you have the following options to enter Plan on Map:
x Via the Find menu: tap , , .
x Via the Route Information screen: tap , , , .
x Via the Route Information screen using a shortcut: tap , .
In Simple mode the last option is available only.
3.6 Watching the simulation of the route
This feature is available in Advanced mode only.
The procedure is explained starting from the Map screen.
1. Tap the following buttons: , .
2. The Route menu appears. There are two ways of running the route simulation:
x Tap to run the simulation at high speed to give you a quick overview of
the route.
x Tap to run the simulation at normal speed and with voice guidance
instructions announced. This option is for demonstration purposes, or for checking difficult
parts of the route in advance.
3. The simulation can be aborted any time by tapping .
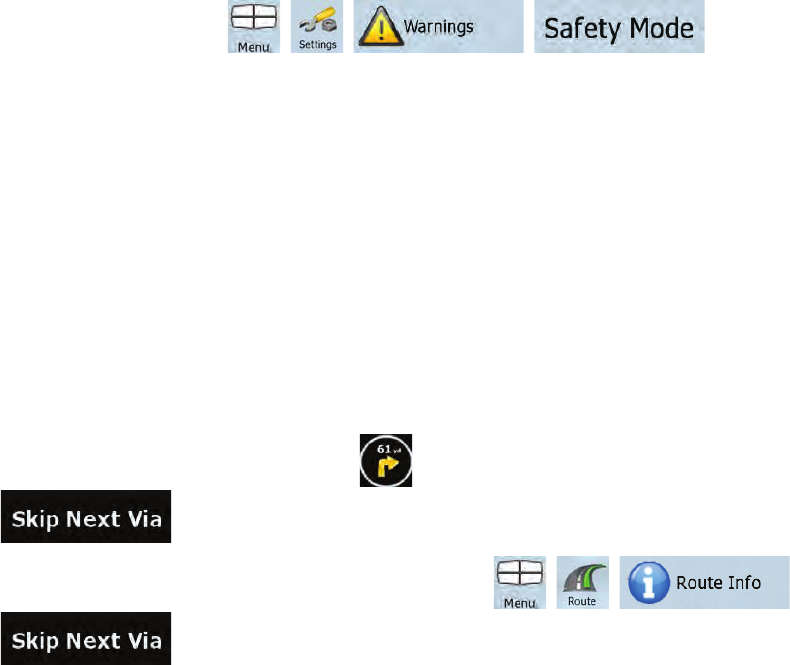
46
3.7 Enabling Safety Mode
This feature is available in Advanced mode only.
Safety Mode disables the touch screen above 10 km/h (6 mph) to keep your attention on the road. While
driving, you will not be able to set a new destination or to change settings. The only screen control that
remains enabled is the gesture that puts you back on the Map screen.
The procedure is explained starting from the Map screen.
Tap the following buttons: , , , .
3.8 Pausing the active route
You do not need to pause the active route: when you start driving again, Clarion Mobile Map restarts the
voice instructions from your position.
3.9 Deleting the next via point from the route
The easiest way to delete the upcoming route point (the next via point) is to open the Route Information
screen by tapping the Turn Preview field ( ) on the Map screen, and then tapping
.
Alternatively, you can do it through the Navigation menu: , , ,
.
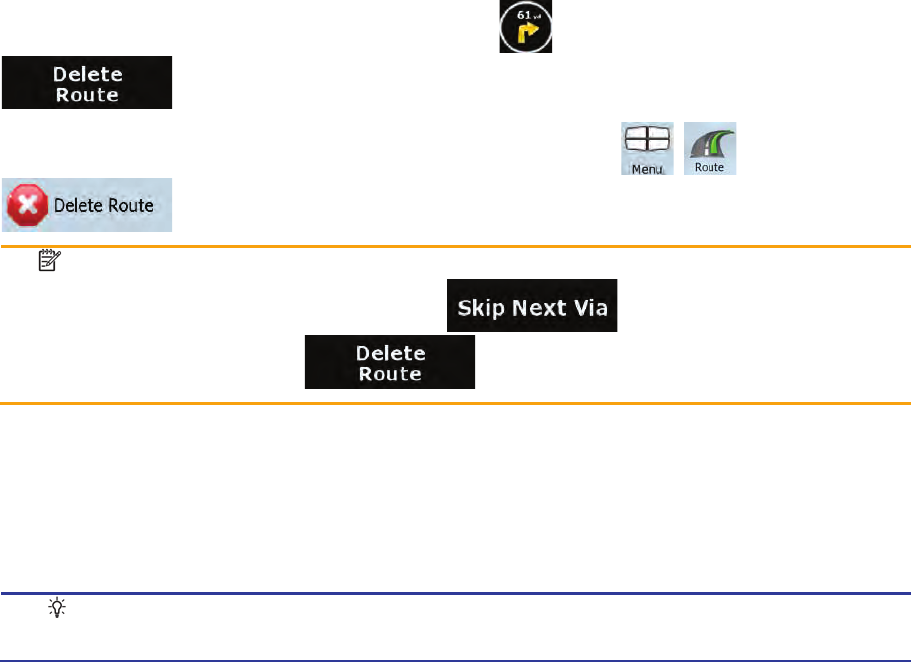
47
3.10 Deleting the active route
The easiest way to delete the active route in both Simple mode and Advanced mode is to open the Route
Information screen by tapping the Turn Preview field ( ) on the Map screen, and then tapping
.
In Advanced mode, you have another option. Tap the following buttons: , ,
.
Note! If via points exist in the active route, you cannot delete the route immediately on the
Route Information screen. Tap repeatedly until all via points
disappear and the button appears. Tap it to cancel the whole route.
3.11 Using Track Logs
Clarion Mobile Map can record the track (how your GPS position changed) that you drive.
Tip! You do not need to select a destination and create a route for this; you can also record
your driving path while cruising.
This feature is available in Advanced mode only.
The procedure is explained starting from the Map screen.
48
Recording the traveled path (creating a Track Log)
1. Start driving.
2. Tap the following buttons: , , .
3. Start the recording: tap the button.
You return to the map and you can continue driving.
4. Repeat the above steps, then tap later to stop the recording. Clarion Mobile
Map labels the Track Log with a time stamp.
(As an alternative, you can tap the button in the Quick menu to start, and later to stop the Track
Log recording.)
Simulating a Track Log on the map
1. Tap the following buttons: , , .
2. Locate the desired Track Log, and then tap the button next to it.
3. The map returns, and the Track Log simulation (a life-like replay) begins.
4. You can stop the replay any time by tapping the button.
Changing the color of a Track Log
1. Tap the following buttons: , , .
2. Tap the desired Track Log and then tap one of the color buttons.
49
3.12 Saving the active route
This feature is available in Advanced mode only.
The procedure is explained starting from the Map screen.
1. Tap the following buttons: , , .
2. Enter a name for the saved route, and then tap .
When you save a route, Clarion Mobile Map not only saves the route points but the whole itinerary:
x If you updated your map since you first saved the route, Clarion Mobile Map recognizes the
change, and recalculates the driving instructions according to the latest available map information.
x If you want to save the route, you need to save it before you start navigating. During navigation,
Clarion Mobile Map deletes any via points that you already left behind together with the road
segments used to reach it.
3.13 Loading a saved route
This feature is available in Advanced mode only.
The procedure is explained starting from the Map screen.
1. Tap the following buttons: , , .
2. Tap the route you wish to navigate.
3. In the very likely case when the start position of the saved route is different from the current GPS
position, you need to confirm whether you want to stop navigating from the current GPS position to
use the start point of the loaded route.
x If you choose this option, automatic off-route recalculation will be disabled.
x If you choose to keep the current GPS position as the start point, the route will be
recalculated starting from your current position.
4. The map appears, and you can start navigating.

50
4 Reference Guide (Advanced mode)
On the following pages you will find the description of the different menu screens of Clarion Mobile Map in
Advanced mode. In Simple mode, these functions work the same way, but only a few of them are
available.
The Navigation menu:
Clarion Mobile Map starts with the Navigation menu. From there you can access the following screens:
Screen Button Description
Map
This button opens the Map screen.
Find
Selecting the destination (for example an address or a POI) or
using the search engine of Clarion Mobile Map for any other
reason (for example to look for the phone number of a POI).
Route
Managing the active route (obtaining information about it,
changing or deleting it or parts of it) or planning a route without
GPS reception.
Manage
Managing user data, such as saved locations (POIs, Favorites,
Pins, and History items), Saved Routes, and Track Logs.
Settings
Managing the behavior of Clarion Mobile Map, for example the
map layout during navigation, the used languages or the
warnings.
Bluetooth
This button opens the phone application. You can pair your
Clarion NX700 with your cell phone as a hands-free device.
Audio Visual
This button opens the Audio Visual screen. You can operate
the Audio Visual functions of your Clarion NX700.
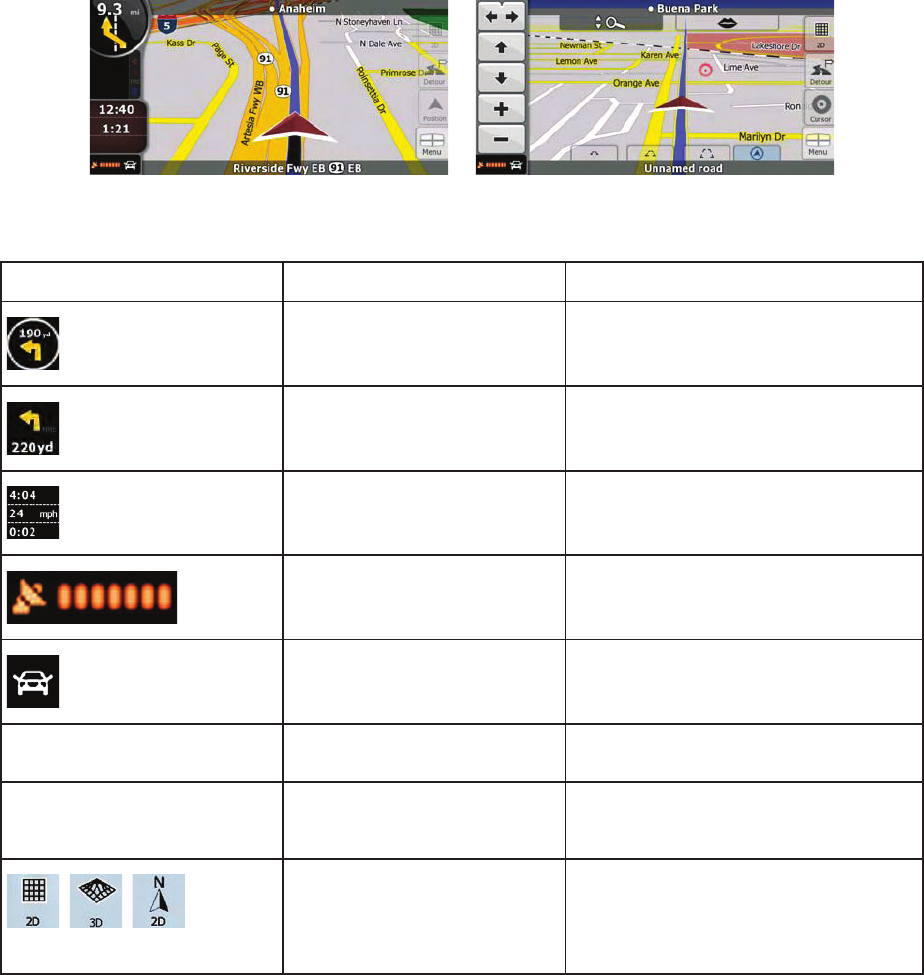
51
4.1 Map screen
Clarion Mobile Map is primarily intended for land navigation. That is why maps in Clarion Mobile Map look
similar to paper road maps. However, Clarion Mobile Map provides much more than regular paper maps:
you can customize the look and the content of the map.
The most important and most often used screen of Clarion Mobile Map is the Map screen.
During navigation, the screen shows route information and trip data (left screenshot), but when you tap
the map, additional buttons and controls appear for a few seconds (right screenshot). Most parts of the
screen behave as buttons.
Symbol Name Action
Turn Preview, that is, the next
route event
Opens the Route Information screen
Second upcoming route event Opens the Itinerary
Trip data Opens the Trip Information screen
GPS position quality Opens the Quick menu
Vehicle used in route
calculation
Opens the Quick menu
Top row Next street or Next city
A
dditional buttons and controls appear
for a few seconds
Bottom row Current street and house
numbers on left and right
A
dditional buttons and controls appear
for a few seconds
, ,
Map view modes Switches between 2D and 3D map
modes:
x 2D North-up
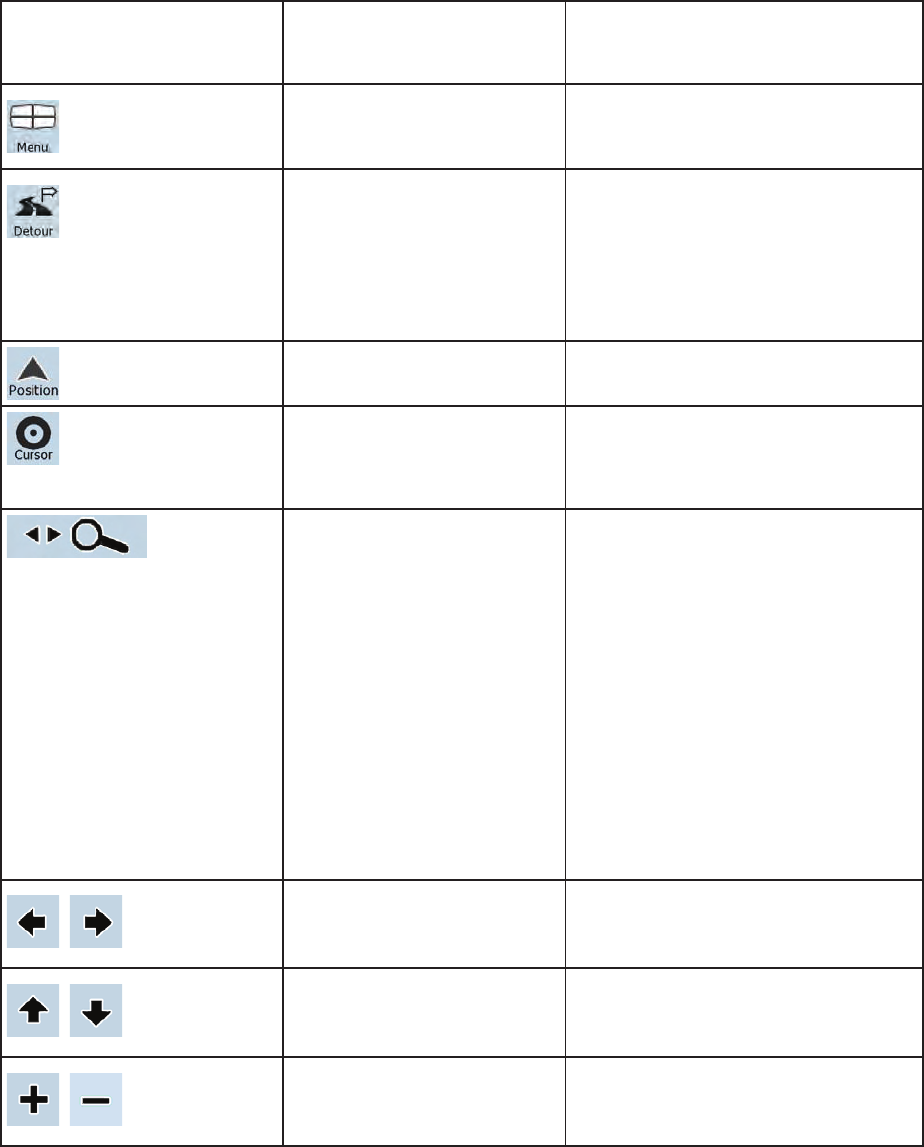
52
x 2D rotated
x 3D rotated
Menu Opens the Navigation menu
Detour Opens the Detour screen, offering two
ways of modifying the route:
x the list of Saved Search Criteria
x a button to avoid parts of the
route
Position menu (appears when
navigating a route)
Opens the Position menu
Cursor menu (appears when
there is no GPS position or the
Cursor is not at the current
GPS position)
Opens the Cursor menu
Open/Close Map control
buttons Tap this button to show or hide the
following map control buttons:
x Zoom in/out
x Rotate left/right (3D map only)
x Tilt up/down (3D map only)
x Zoom preset buttons (2D map
only)
x Tilt and zoom preset buttons (3D
map only)
x Return to GPS position button
x Smart Zoom button
,
Rotate left, rotate right Rotates the 3D map left or right
,
Tilt up, tilt down Tilts the 3D map
,
Zoom in, zoom out Scales the map
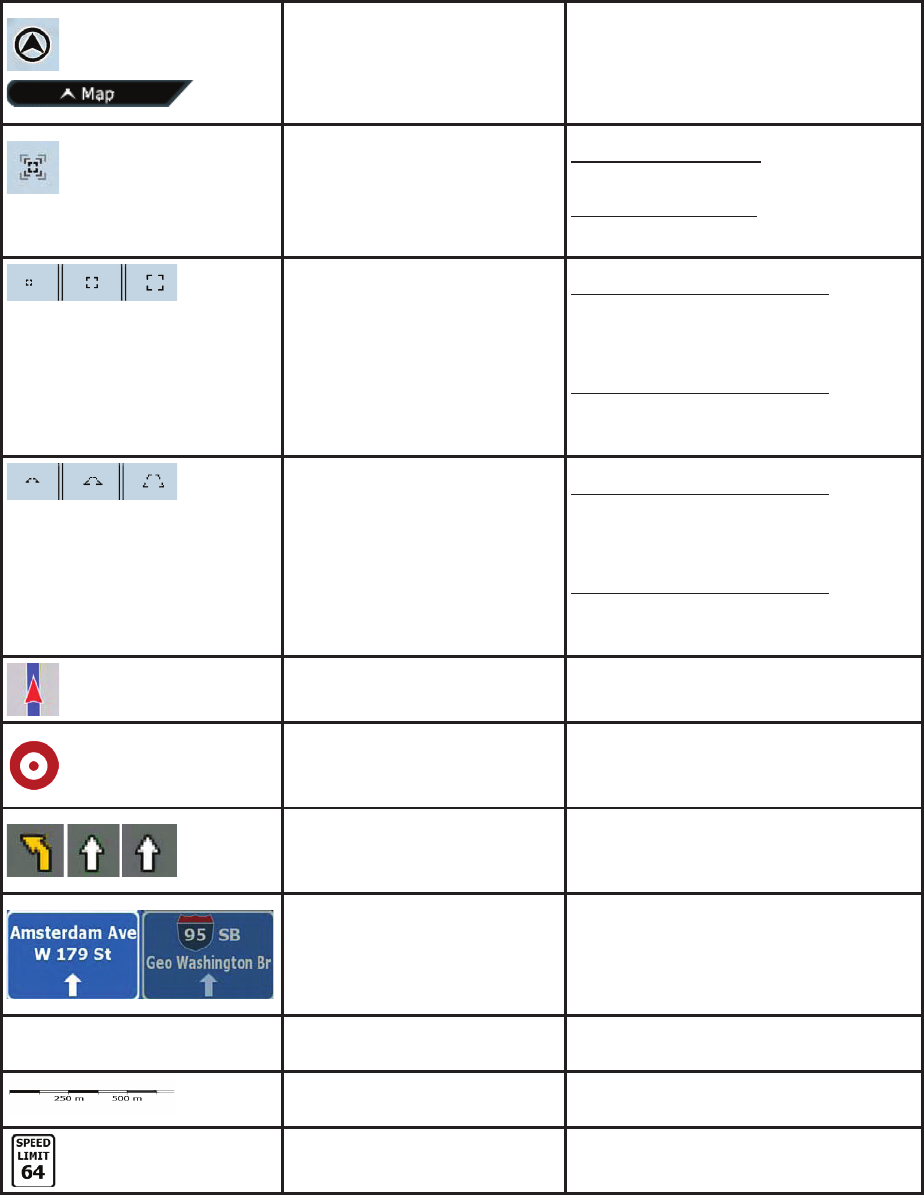
53
Return to GPS position
(appears when GPS position is
available and you have moved
the map)
Tap this button to move the map back
to the current GPS position. If the map
has been rotated, automatic map
rotation is also re-enabled.
Enable Smart Zoom (replaces
the previous button if there is
no GPS position or the map
has not been moved)
Tap this button once to enable Smart
Zoom.
Tap&hold the button to set the zoom
limits of Smart Zoom.
Zoom preset buttons (available
in Advanced mode only) Tap one of the preset buttons to set the
zoom level to a fix, predefined value.
Smart Zoom is disabled. These buttons
are available in 2D mode.
Tap&hold any of the buttons to set its
value to the current zoom level, or to
reset it to its original value.
Tilt preset buttons (available in
Advanced mode only) Tap one of the preset buttons to set the
tilt and zoom levels to fix, predefined
values. Smart Zoom is disabled. These
buttons are available in 3D mode.
Tap&hold any of the buttons to set its
value to the current tilt and zoom levels,
or to reset it to its original value.
Current GPS position (on
nearest road)
n/a
Cursor (selected map location) n/a
Lane information n/a
Signpost information n/a
Blue line Active route n/a
Map scale (2D map only) n/a
Speed limit n/a
54
Phone call in progress This button is displayed only during a
phone call. Tap the button to hang up.
Repeat Voice Instruction Tap this button to repeat the current
voice instruction. The distance is
updated to always describe the current
situation.
4.1.1 Icons on the map
There are several status icons on the map. Most of them also function as a button. The information they
provide is as follows:
x GPS position quality
x Vehicle type used for route calculation
x Sound status (muted or enabled)
x Track log recording status
x Bluetooth connection and communication status
4.1.1.1 GPS position quality and Vehicle type indicator
This area is a multiple status indicator, and also acts as a button that opens the Quick menu.
GPS reception quality shows the current accuracy of the position information.
Icon Description
Clarion Mobile Map has no connection to the GPS receiver: GPS navigation is
not possible.
Devices with a built-in GPS receiver are permanently connected. On such
devices, the icon does not appear in normal circumstances.
Clarion Mobile Map is connected to the GPS receiver, but the signal is too weak
and the receiver cannot determine the GPS position.
GPS navigation is not possible.
Only a few satellites are received. Position information is available, but elevation
(altitude) cannot be calculated.
GPS navigation is possible, but the position error may be significant.
Altitude information is available, the position is a 3D position.
GPS navigation is possible.
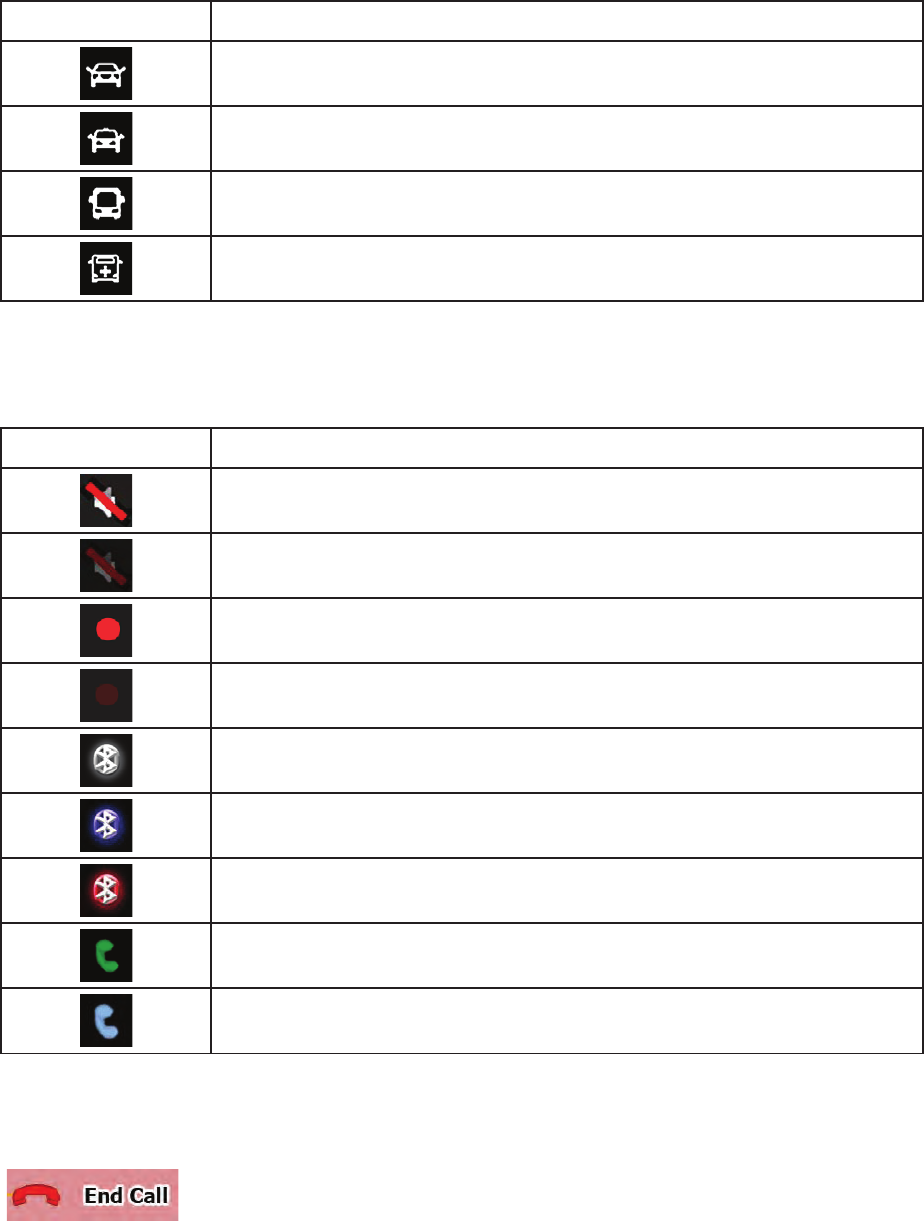
55
The remaining part of the field shows the vehicle type used for route calculation.
Icon Vehicle type
Car
Taxi
Bus
Emergency vehicles
4.1.1.2 Status indicator strip
This is a multiple status indicator. It indicates the following status information on a single strip:
Icon Description
The sound output of Clarion Mobile Map is muted.
The sound output of Clarion Mobile Map is enabled.
Clarion Mobile Map records a Track log when GPS position is available.
Track log recording is disabled.
The Bluetooth radio is switched off.
The Bluetooth radio is turned on, but no telephone is connected.
There is an error in the Bluetooth connection.
Clarion Mobile Map is connected to a telephone as a handsfree set via Bluetooth.
A phone call is in progress over the Bluetooth connection.
4.1.1.3 Phone call in progress
When connected to a cell phone as a hands-free device with a phone call in progress, the
button appears on the Map screen. Tap this button to hang up the call.
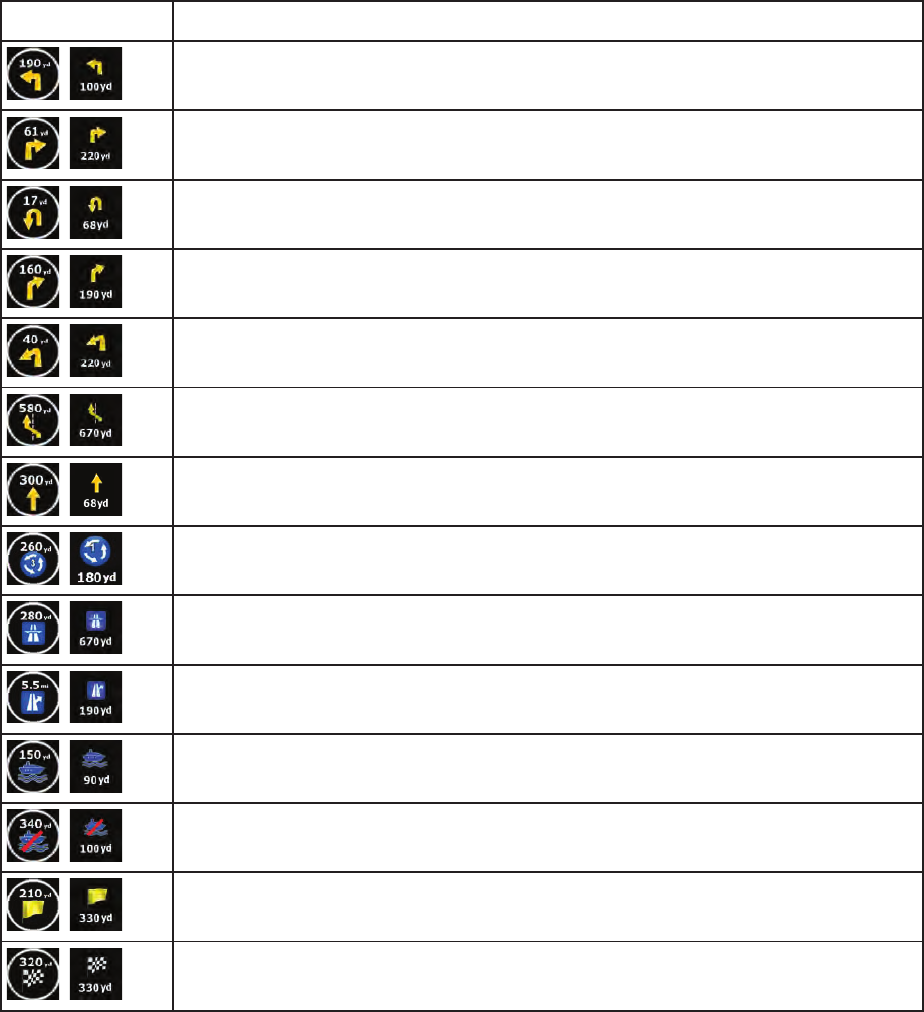
56
4.1.1.4 Next two route events (Turn Preview fields)
There are two fields reserved on the Map screen to display the next two maneuvers (route events that are
listed in the Itinerary). Both the type of the event (turn, traffic circle, exiting freeway, etc.) and its distance
from the current GPS position is displayed.
Most of these icons are very intuitive and you also know them as road signs. The following table lists
some of the frequently shown route events. The same symbols are used in both fields:
Icon Description
,
Turn left.
,
Turn right.
,
Turn back.
,
Bear right.
,
Turn sharp left.
,
Keep left.
,
Continue straight in the intersection.
,
Enter traffic circle. The number of the exit is shown in the circle, but only for the next
turn.
,
Enter freeway.
,
Exit freeway.
,
Board ferry.
,
Leave ferry.
,
Approaching the next via point.
,
Approaching the destination.
In certain situations when route events are not important, these fields show other useful pieces of
information. They are described here: page 17.
57
4.1.2 Objects on the map
4.1.2.1 Streets and roads
Clarion Mobile Map shows the streets in a way that is similar to how the paper road maps show them.
Their width and colors correspond to their importance: you can easily tell a freeway from a small street.
Tip! If you prefer not to see street names during navigation, turn them off (page 77).
4.1.2.2 3D object types
Clarion Mobile Map supports the following 3D object types:
Type Description
3D landmarks Landmarks are 3D artistic or block representations of prominent or well-known
objects. 3D landmarks are only available in selected cities and countries.
Elevation model Hills and mountains are shown in the background of the 3D map view, and illustrated
by color on the 2D map.
Elevated roads Complex intersections and vertically isolated roads (such as overpasses or bridges)
are displayed in 3D.
3D buildings Full 3D city building data that represents actual building size and position on the map.
Building data is limited to the city centers of major cities in the US and Europe.
3D terrain 3D terrain map data shows changes in terrain, elevations or depressions in the land
when you view the map, and use it to plot the route map in 3D when you navigate.
To fine-tune 3D visualization on the map, tap the following buttons: , , ,
.
4.1.2.3 Elements of the active route
Clarion Mobile Map shows the route in the following way:
Symbol Name Description
Current GPS position Your current position displayed on the map. If roads are
near, it is aligned to the nearest road.
Cursor (selected map location) The location selected in the Find menu, or a map point
selected by tapping the map.
Start point The first point of the route.
58
Normally if GPS position is available, it is the start point
of the route. If there is no valid GPS position, Clarion
Mobile Map uses the last known GPS position as the
start point.
When you are using a saved route, Clarion Mobile Map
asks you if you want to use your GPS position or the
first point in the saved route as the start point.
You can also modify the start point in the Cursor menu.
If you do so, automatic off-route recalculation needs to
be turned off to keep the selected point as the start
point.
If automatic off-route recalculation is disabled for any of
the above, tapping the icon in the Turn Preview
field not only initiates route recalculation from the
current GPS position, but it will re-enable the automatic
off-route recalculation as well.
Via point A via point is an intermediate destination. You can place
as many via points as you want.
Destination (end point) The last point of the route, the final destination.
Route color The route always stands out with its color on the map,
both in daytime and in night color mode. The active leg
of the route is always displayed in a brighter shade than
the inactive (upcoming) legs.
Active leg of the route The section of the route on which you are driving.
If you have not added any via points (only a
destination), the entire route is the active leg. If you
have added via points, the active leg is the part of the
route from your current location to the next route point
(the next via point, or the destination if there are no
more via points to reach).
Inactive legs of the route The future sections of the route; each of them becomes
active when you reach the via point at its beginning.
Streets and roads that are
excluded from the navigation
You can choose whether you want to use or avoid
certain road types (page 79). However, when Clarion
Mobile Map cannot avoid such roads, the route will
include them and it will show them in a color that is
different from the route color.
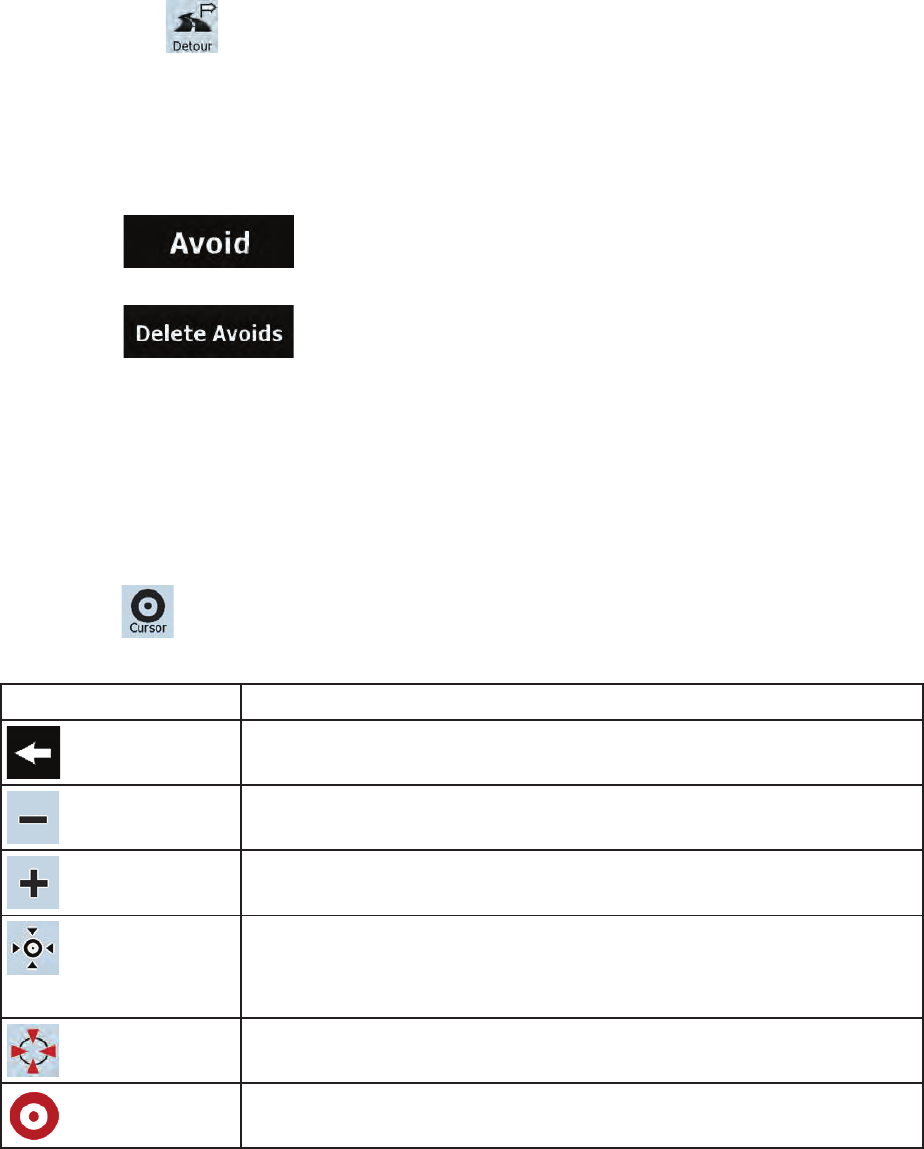
59
4.1.3 Detour menu
This screen contains quick detour possibilities during navigation. It can be opened directly from the Map
screen by tapping .
You have the following options:
x On the main part of the screen you can see the first page of Saved Search Criteria. Select any of
the criteria to quickly receive the list of nearest matching POIs, and instantly plan a new route to
the desired one, or insert it as a via point in your active route.
x In Advanced mode more buttons appear at the bottom:
x : If you want to bypass a part of the route starting from the next
intersection, tap this button, and select a distance to bypass.
x : If you have used the above function before, tap this button to clear the
restrictions from the map.
4.1.4 Cursor menu
As soon as you select one point in the Find menu, the map appears with the Cursor menu, a menu with
possible actions for the selected point.
Alternatively when you tap the map, control buttons appear. Tap again to place the Cursor, a radiating red
dot. Now tap , and the Cursor menu opens with a list of options.
You can perform the following actions in Simple mode:
Button Description
Closes the Cursor menu, and returns to the previous screen.
Zooms out the map.
Zooms in the map.
With the Cursor menu open, you can still move or scale the map, and tap the
map anywhere to place the Cursor to a new location, but when you use this
button, the Cursor jumps back to the place where it was at the time when you
opened the Cursor menu.
Displayed at the Cursor if it is at the same location with which the Cursor
menu was opened.
Displayed at the Cursor if it has been relocated since the Cursor menu was
opened.

60
Creates a new route with the Cursor as the destination. The previous route (if
exists) is deleted.
The location of the Cursor is added to the list of frequently visited
destinations, the so called Favorites. You can give a name for the Favorite.
Opens a new screen with the address and coordinate of the Cursor, and the
list of nearby POIs.
The following options are available in Advanced mode only:
Button Description
Creates a new route with the Cursor as the destination. The previous route (if
exists) is deleted.
If the Cursor is at or near the destination, this button replaces the previous
one, and deletes the current destination from the route. The last via point is
promoted as destination, or if there are no via points, the route is deleted.
The Cursor is added to the active route as an intermediate route point, a point
to be reached before the destination. If there is already a via point in the
route, the Edit Route screen opens to let you decide where the new via point
is to appear in the route.
If the Cursor is at or near one of the via points, this button replaces the
previous one, and deletes the selected via point from the route. The route is
recalculated without the deleted point.
Map locations can be marked with Pins. Unlike POIs, a Pin has no name and
other details, only a color to let you tell one from another on the map.
If the Cursor is at or near a Pin, this button replaces the previous one, and
deletes the Pin the Cursor is near to.
Opens the full-screen Cursor menu with all the possible options.
The Cursor is appended at the end of the route as the new destination. The
previous destination is demoted, and becomes the last via point.
This button is similar to the button, but a new screen
opens, and the route is calculated with all the possible route calculation
methods (Fast, Short, Economical and Easy). Observe the results, and
choose one of the routes to navigate.
The Cursor becomes the start point of the route. This means that the route is
not started from the current GPS position, and Automatic Off-route
Recalculation needs to be turned off to keep the selected point as the start
point.
If the Cursor is at or near the selected start point, this button replaces the
previous one and deletes the start point from the route. The current GPS
position is used again as the start point, and Automatic Off-route

61
Recalculation is re-enabled.
The Cursor is saved as a user POI. Select the POI group and give a name for
the POI, then select a suitable icon, enter a phone number, and additional
information if you like.
The Cursor is saved as the location of a Road Safety Camera (speed camera
or red light camera).
A
new screen appears where you can set the type of the
camera, the direction of the measured traffic, and the speed limit checked for
(if applicable).
This button is not displayed when GPS position is not available or if you are in
certain countries where Road Safety Camera warning is prohibited. Even if
the button is available, you are responsible for checking whether it is legal to
use this feature at your location.
If the Cursor is at or near a Road Safety Camera, this button replaces the
previous one, and opens a new screen where you can edit the details of the
camera.
4.1.5 Position menu
When you follow the recommended route on the map (the Cursor is the current GPS position), the
Position menu replaces the Cursor menu. It does not contain buttons that modify the current route, as the
GPS position is not useful as a route point.
To open the Position menu, tap .
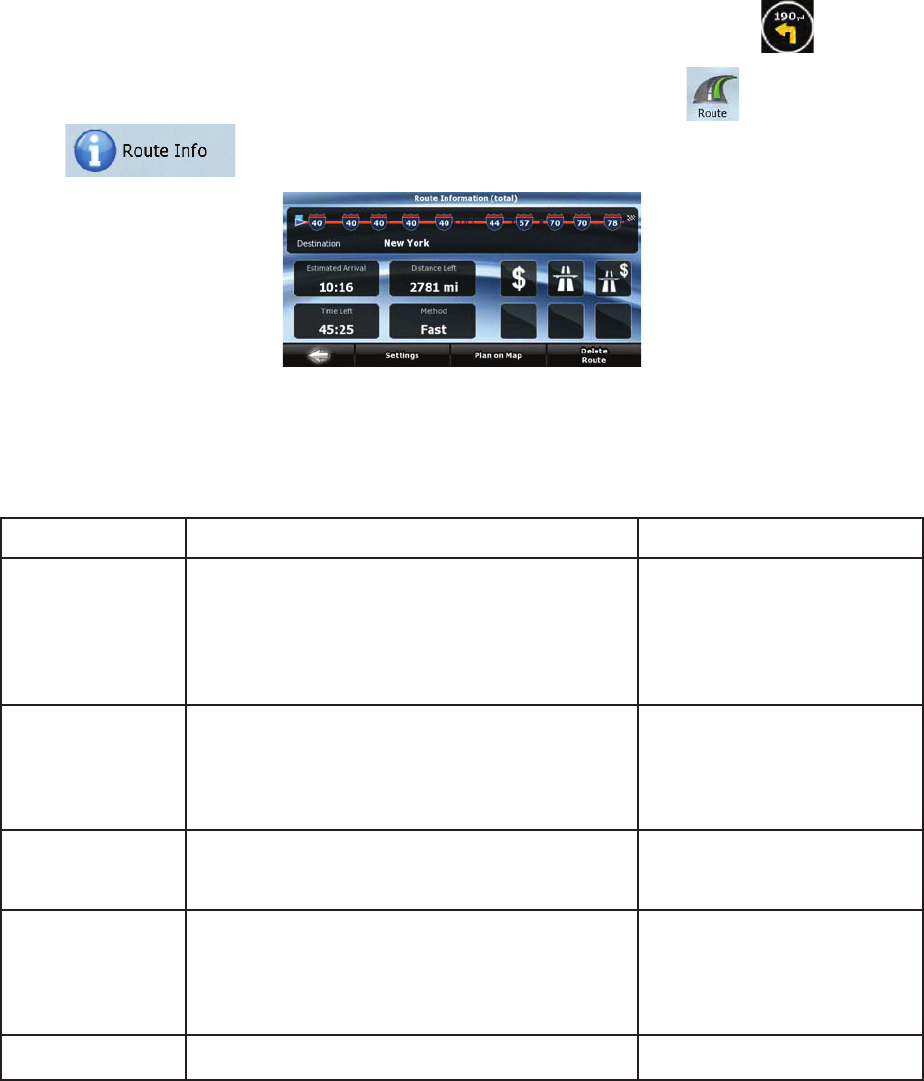
62
4.1.6 Route Information screen
The Route Information screen has all the data and some of the functions you need while you navigate.
There are two ways to open this screen:
x It can be opened directly from the Map screen by tapping the Turn Preview field ( ).
x In Advanced mode, from the Navigation menu tap the following buttons: ,
.
In the top section of the screen you see information about the current route. The fields on this screen are
continuously updated while you keep the screen open.
When you open the screen, all fields contain information about reaching your final destination. Tap any of
the fields to see data on the via points starting from the first one through the final destination again.
You have the following data and functions on this screen:
Name Description Function
Route line The upper part of this screen shows your planned
route as a horizontal line. Its leftmost point is the
start of the route, the rightmost one is the final
destination, and you can see your via point flags
along the line, spaced in proportion to their
distance.
Tap this field to change the
content of all data fields to via
point information.
Estimated Arrival Shows the estimated arrival time at the final
destination of the route based on information
available for the remaining segments of the route.
The calculation cannot take into account traffic
jams and other possible delays.
Tap this field to change the
content of all data fields to via
point information.
Distance Left Shows the distance you need to travel on the route
before reaching your final destination.
Tap this field to change the
content of all data fields to via
point information.
Time Left Shows the time needed to reach the final
destination of the route based on information
available for the remaining segments of the route.
The calculation cannot take into account traffic
jams and other possible delays.
Tap this field to change the
content of all data fields to via
point information.
Method This field shows how the route was calculated. It Tap this field to change the
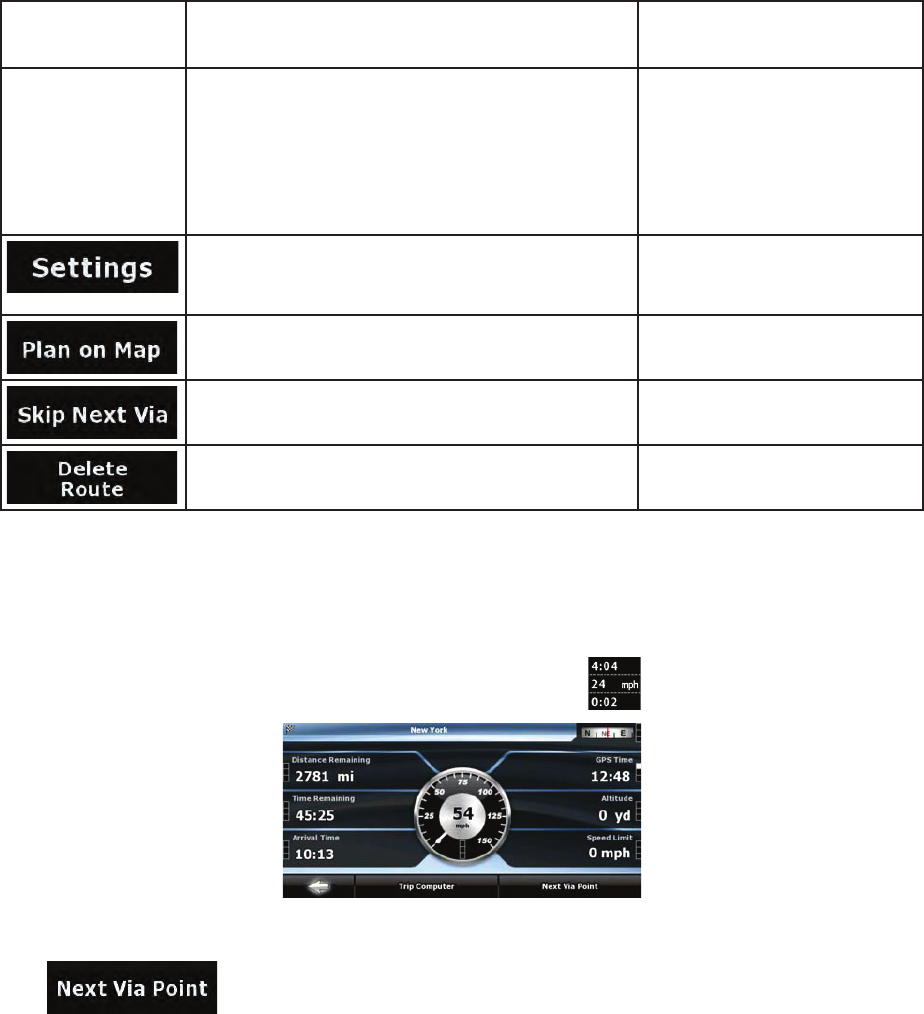
63
either displays the Route Calculation Method or
the Vehicle field from the Route Planning options.
content of all data fields to via
point information.
Warning icons In these square fields graphical symbols are
displayed in case warnings are attached to the
planned route. These are warnings, so icons
always show information for the whole route, even
if the data fields display values from your current
position to a via point only.
Tap any of the icons for an
explanation.
Opens the Route Planning
options screen from
theSettings menu.
Opens the map screen
designed for route planning.
Appears only if at least one via point exists. Deletes the next via point from
the route.
Appears only if there are no via points in the route. Deletes the active route.
4.1.7 Trip Information screen
The Trip Information screen has both route and travel data you might need during your journey. It can be
opened directly from the Map screen by tapping the Trip Data field ( ).
The fields on this screen are continuously updated while you keep the screen open.
When you open the screen, all route data fields contain information about reaching your final destination.
Tap and the fields concerning your route display data for the next via point. Tap the
button repeatedly to toggle between the two options.

64
You have the following data and functions on this screen:
Name Description Function
or
Shows whether the route data fields show
information about the final destination (checkered
flag) or about the next via point (yellow flag) .
Field next to the flag Shows the name or number of the current street
or road.
Turn Preview Shows the type and distance of the next route
event.
Compass Shows the current heading. Tap this field to show it on the
map screen in one of the Trip
Data fields.
Speedometer Shows the current speed both graphically and as
a number.
Tap this field to show it on the
map screen in one of the Trip
Data fields.
Distance Remaining Shows the distance you need to travel on the
route before reaching your final destination.
Tap this field to show it on the
map screen in one of the Trip
Data fields.
Time Remaining Shows the time needed to reach the final
destination of the route based on information
available for the remaining segments of the route.
The calculation cannot take into account traffic
jams and other possible delays.
Tap this field to show it on the
map screen in one of the Trip
Data fields.
Arrival Time Shows the estimated arrival time at the final
destination of the route based on information
available for the remaining segments of the route.
The calculation cannot take into account traffic
jams and other possible delays.
Tap this field to show it on the
map screen in one of the Trip
Data fields.
GPS Time Shows the current time corrected with time zone
offset. The accurate time comes from the GPS
satellites, and the time zone information comes
from the map or it can be set manually in
Regional settings.
Tap this field to show it on the
map screen in one of the Trip
Data fields.
Altitude Shows the elevation if it is provided by the GPS
receiver.
Tap this field to show it on the
map screen in one of the Trip
Data fields.
Speed Limit Shows the speed limit of the current road if the
map contains it.
Tap this field to show it on the
map screen in one of the Trip
Data fields.
Opens a new screen with three
resettable Trip Computers.
Tap this button to change the
content of the Route Data fields
to show information about the
next via point.
65
If you tap the previous button, this one replaces
it.
Tap this button and the Route
Data fields show information
about the final destination
again.
Most of the fields on this screen have a symbol next to them. This symbol shows whether the field it is
attached to is shown on the map as a Trip Data. It also shows the position of the data as follows:
Symbol Description
This value is not shown on the map screen.
This value appears on the map screen in the Trip Data area. This is the value at the
top.
This value appears on the map screen in the Trip Data area. This is the value in the
middle.
This value appears on the map screen in the Trip Data area. This is the value at the
bottom.
4.1.7.1 Trip Computer screen
The Trip Computer screen provides collected trip data. It can be opened from the Trip Information screen
by tapping .
The fields on this screen are continuously updated while you keep the screen open.
You can switch between the trips, pause then resume them, or reset their data.
You have the following functions on this screen:
Button Description
Pauses the trip currently shown on the screen. Values on the screen stop changing.
This button replaces the previous one if it has been activated. Tap it to resume
collecting trip data.
Resets all counters of the currently shown trip. Collecting trip data is restarted only
when Clarion Mobile Map receives a position from the GPS.
,
Cycles through all trips.
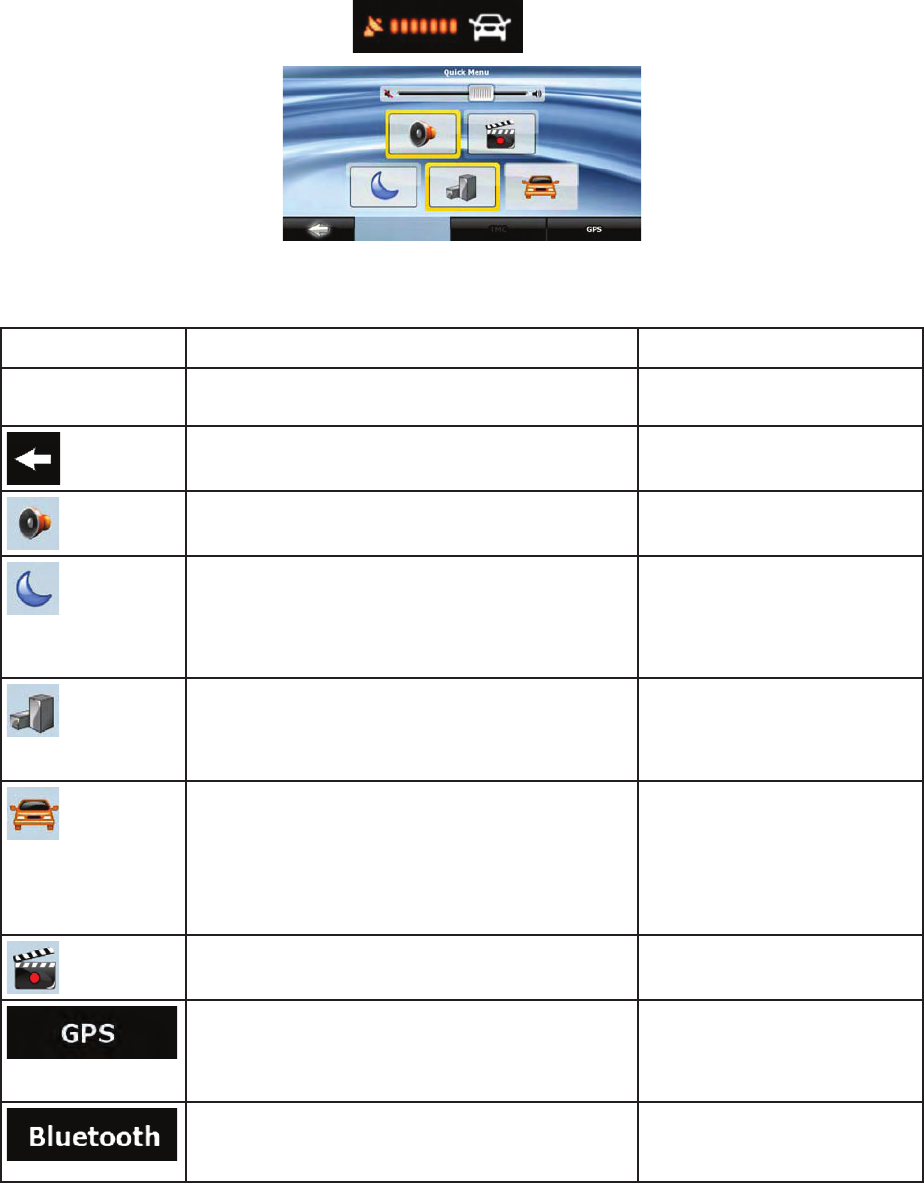
66
4.1.8 Quick menu
The Quick menu is a selection of controls that are frequently needed during navigation. It can be opened
directly from the Map screen by tapping .
If you tap any of the switches in the Quick menu except for the Vehicle type, the Map screen immediately
returns. A switch is on if its lamp is lit. The Vehicle type button is different. It is a multi-value button. It
opens a list of available choices, and the symbol of the selected vehicle is shown on the button.
Button Main function (single tap) Function (tap and hold)
Master Volume
slider
Adjusts the sound volume of the device.
A
ll sounds
of the application are affected.
n/a
If you only adjust the volume, you need to use this
button to return to the Map screen.
Opens the Navigation menu.
Mutes all sounds of Clarion Mobile Map. Opens Sound settings.
Switches between the daytime and night color
schemes manually. This will not disable the
automatic switching between the two schemes: the
other color scheme returns later.
Opens Color Profiles settings.
3D buildings can be displayed on the map. Use
this switch to suppress them temporarily. Please
note that 3D landmarks are displayed regardless of
this button wherever they are available.
Opens 3D Settings.
Tap this button and select the Vehicle type to be
used for route calculation. Otherwise it is selected
in Route Planning options in Settings (page 79).
Changing the Vehicle type triggers an automatic
route recalculation.
Opens Route Planning options.
Turns track log recording on or off otherwise
controlled on the Manage Track Logs screen.
Opens Manage Track Logs.
Opens the GPS Data screen with satellite
information, data coming from the GPS receiver,
and a shortcut to the GPS Settings screen if
needed (GPS receiver detection is automatic).
n/a
This button opens the phone application. You can
pair your Clarion NX700 with your cell phone as a
hands-free device.
n/a
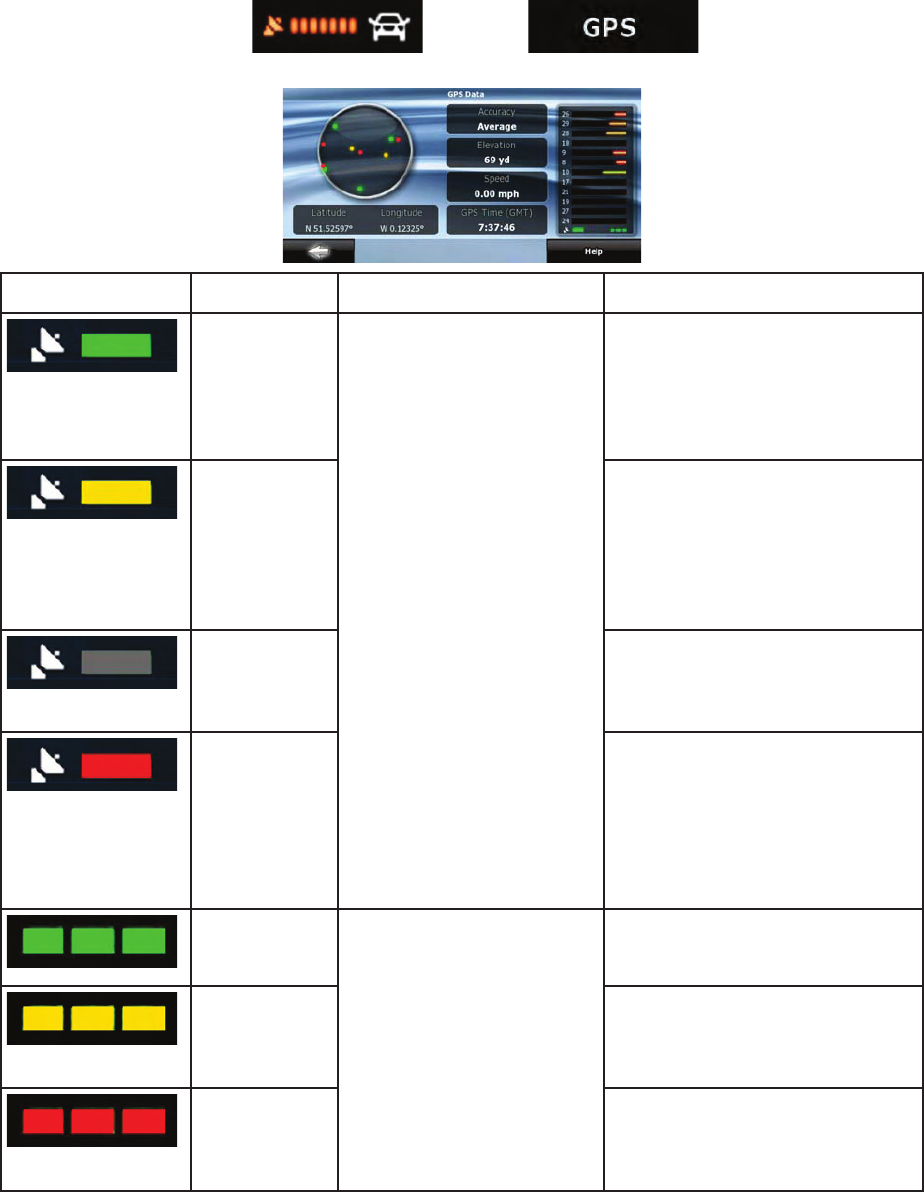
67
4.1.9 GPS Data screen
Tap the following buttons: , and then to open the GPS Data
screen and to see the status of GPS reception.
Icon Color Name Description
Green GPS position quality indicator Clarion Mobile Map has a
connection to the GPS receiver and
GPS position information is
available in 3D: Clarion Mobile Map
can calculate both your horizontal
and vertical GPS position.
Yellow Clarion Mobile Map has a
connection to the GPS receiver and
GPS position information is
available in 2D: only the horizontal
position is calculated, Clarion
Mobile Map cannot calculate your
vertical GPS position.
Gray Clarion Mobile Map has a
connection to the GPS receiver but
GPS position information is not
available.
Red Clarion Mobile Map has no
connection to the GPS receiver.
Since the device has a built-in GPS
receiver, this status should not
appear under normal
circumstances.
Green, blinking GPS connection quality
indicator Clarion Mobile Map is connected to
the GPS receiver.
Yellow, blinking Clarion Mobile Map has no
connection to the GPS receiver but
it is still trying to establish a
connection.
Red, blinking Clarion Mobile Map has no
connection to the GPS receiver and
is not trying to establish a
connection.
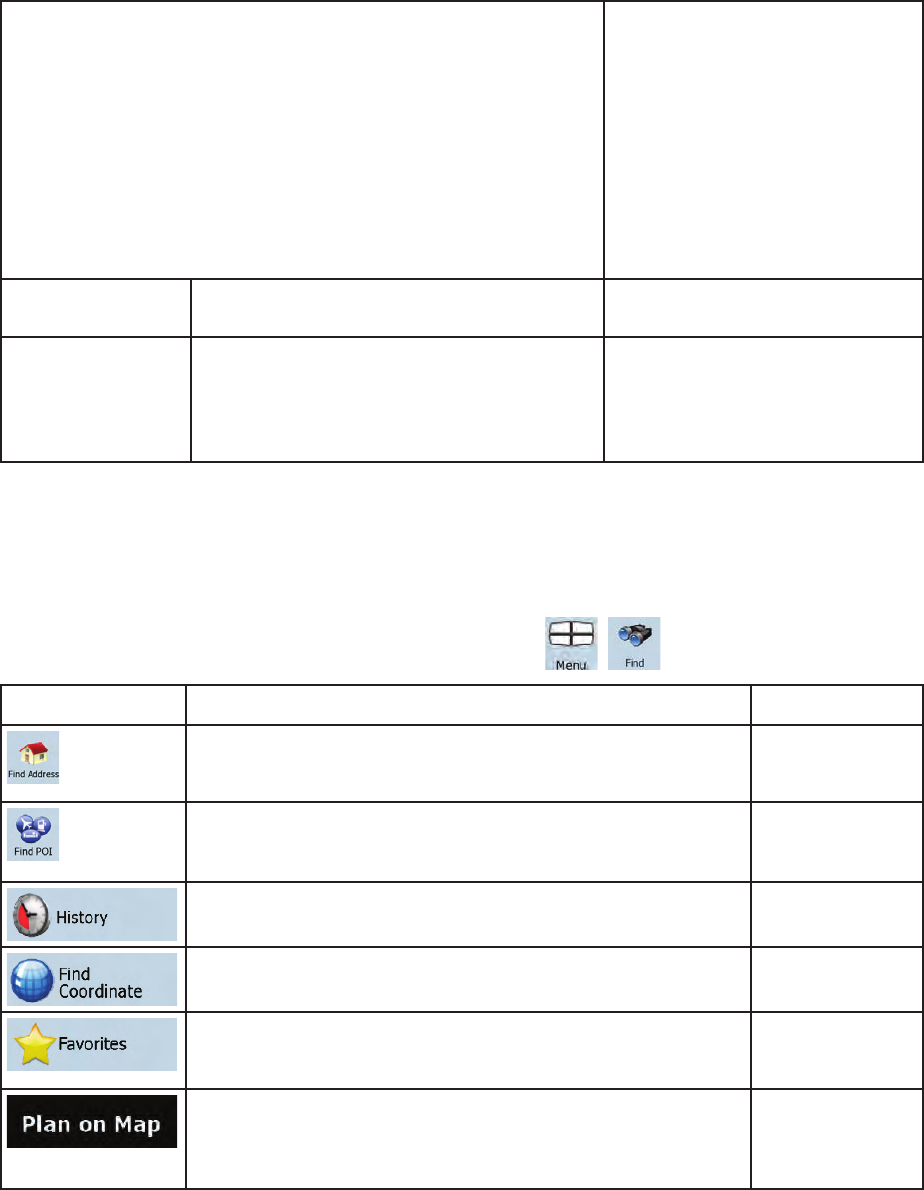
68
Sky view circle The virtual sky shows the visible
part of the sky above you, with your
position as the center. The
satellites are shown at their current
positions. The GPS receives data
from both the green and yellow
satellites. Signals from the yellow
satellites are only received, while
green ones are used by the GPS
receiver to calculate your current
location.
n/a Coordinates Your current GPS position in
WGS84 format.
n/a Status bar for the satellites Dark bars are for the yellow and lit
bars are for the green satellites.
The more satellites your GPS
tracks (the green ones), the better
is your calculated position.
4.2 Find menu
Select the destination of your route. Tap the following buttons: , .
Button Description Reference
If you know at least a part of the address, this is the quickest
way to find the location.
page 32
You can select your destination from the thousands of POIs
included with Clarion Mobile Map or from the ones you have
previously created.
page 40
The destinations that you have already entered in Clarion
Mobile Map are available in the History list.
page 42
You can select your destination by entering its coordinates. page 42
You can select as your destination a location that you have
already saved as a Favorite.
page 40
Opens a special 2D map screen optimized for route planning.
Only the Zoom in and Zoom out buttons and the route
modification buttons of the Cursor menu appear.
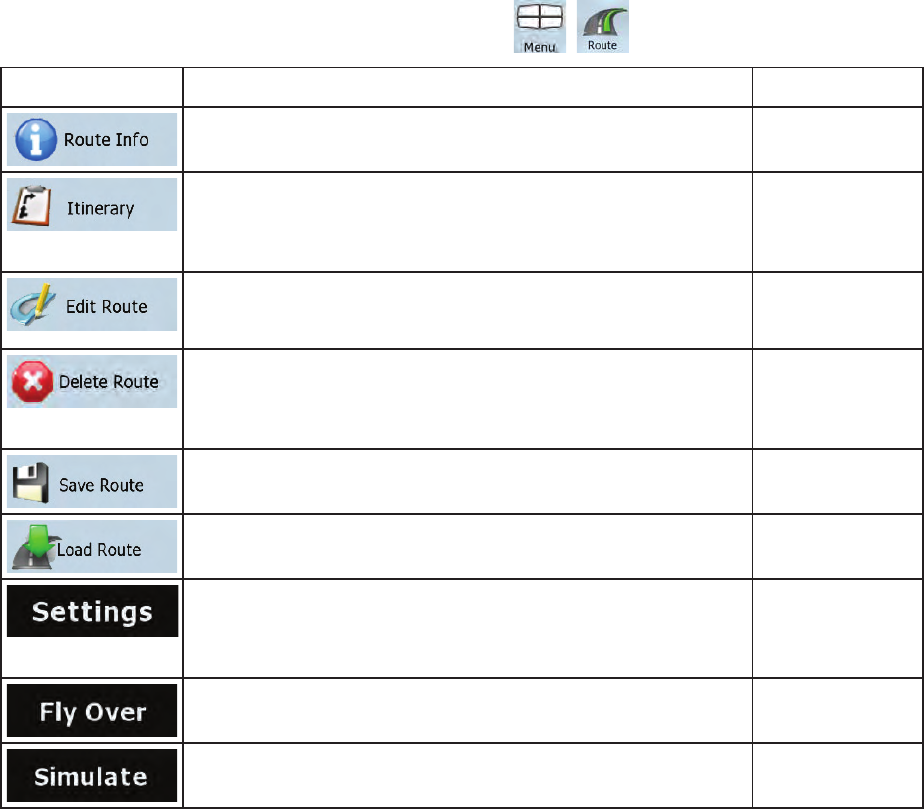
69
4.3 Route menu
Save, load and edit your routes. Tap the following buttons: , .
Button Description Reference
Opens a screen with useful route data. page 62
You can browse the driving instructions that Clarion Mobile Map
follows during navigation. You can exclude maneuvers or streets
to adjust the route to your preferences.
page 25
You can modify the route: remove route points or change their
order.
page 44
Erase the active route with all its route points (start point, via
points and destination). If you later decide that you need the
same route, you will have to rebuild it from scratch.
page 47
You can save the active route for later use. page 49
You can load a previously saved route for navigation. page 49
Opens the Route settings screen with controls to modify the
vehicle, the road types used for route calculation, or the route
calculation method.
page 79
You can run a demonstration of the route at high speed. page 26
You can run a demonstration of the route at normal speed. page 26
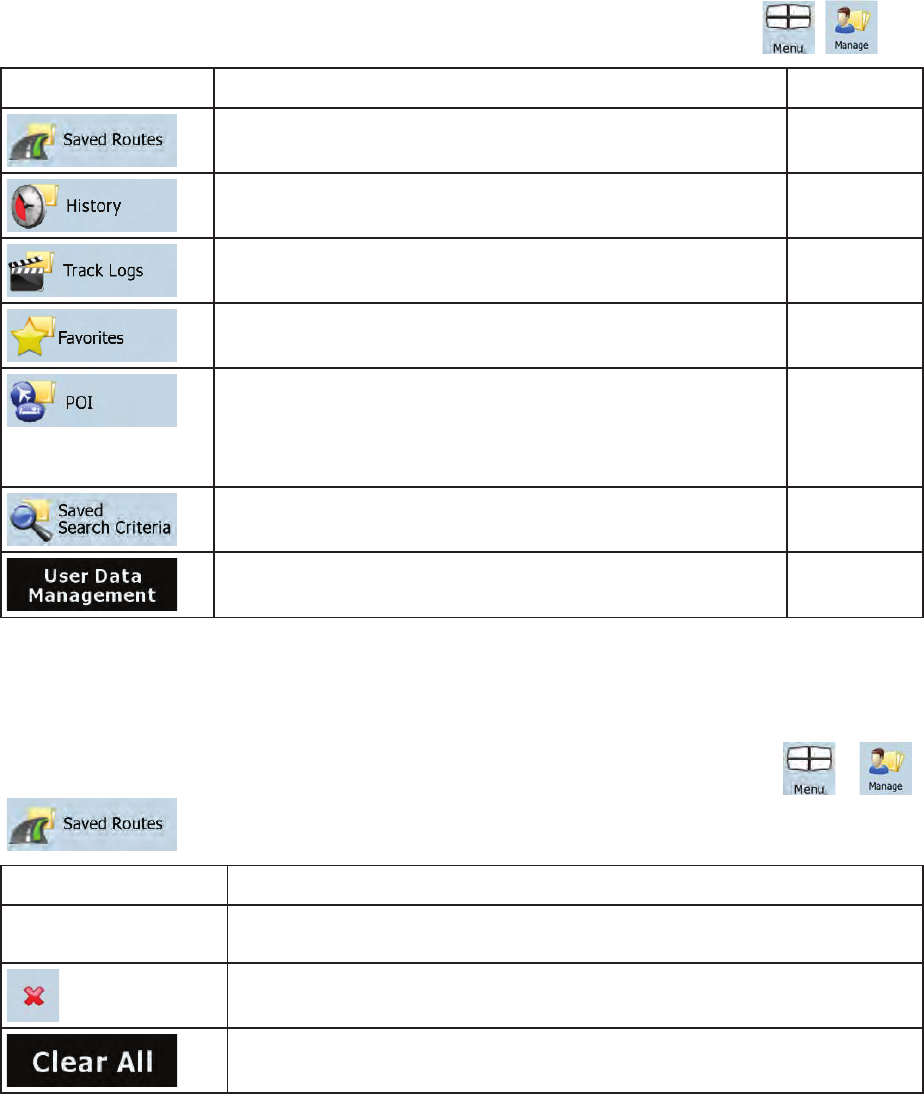
70
4.4 Manage menu
You can manage the content that Clarion Mobile Map stores. Tap the following buttons: , .
Button Description Reference
Renaming or deleting saved routes page 70
Deleting History items page 71
Recording, simulating, renaming or deleting track logs, assigning
color to them to be shown on the map
page 71
Renaming or deleting Favorites page 72
Creating, updating or deleting POIs
Creating, updating or deleting POI groups
Modifying POI visibility settings
page 73
Creating, renaming or deleting Saved Search Criteria page 74
You can manage the data you have saved (e.g. POIs, Favorites
or History) and the settings you have made in the program.
page 75
4.4.1 Manage Saved Routes
You can manage the previously saved routes. Tap the following buttons: , ,
.
Button Description
Button with the name of
the saved route
Opens the selected route for editing.
Deletes the selected route.
Clears the list of saved routes.
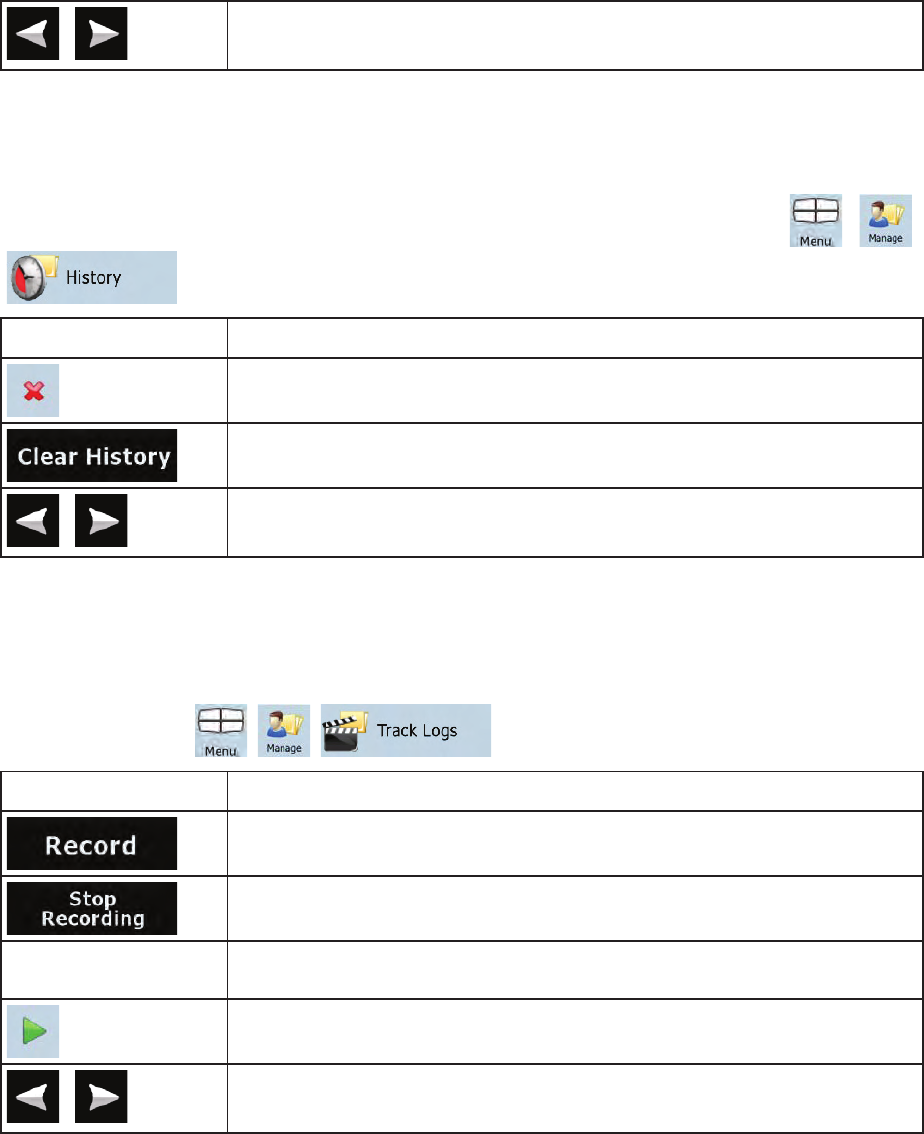
71
,
Moves between pages for additional list items.
4.4.2 Manage History
You can manage the list of locations you used lately. Tap the following buttons: , ,
.
Button Description
Deletes the selected item in the History.
Deletes the entire History.
,
Moves between pages for additional list items.
4.4.3 Manage Track Logs
You can record Track Logs, then play them back, display them on the map, and view their details. Tap
the following buttons: , , .
Button Description
Starts recording the track that you drive. (You can also start recording a track
log in the Quick menu.)
Stops the ongoing Track Log recording. (You can also stop track log recording
in the Quick menu.)
Button with the name of
the track log
Shows the details of the selected Track Log.
Starts a simulated playback of the selected Track Log on the map.
,
Moves between pages for additional list items.
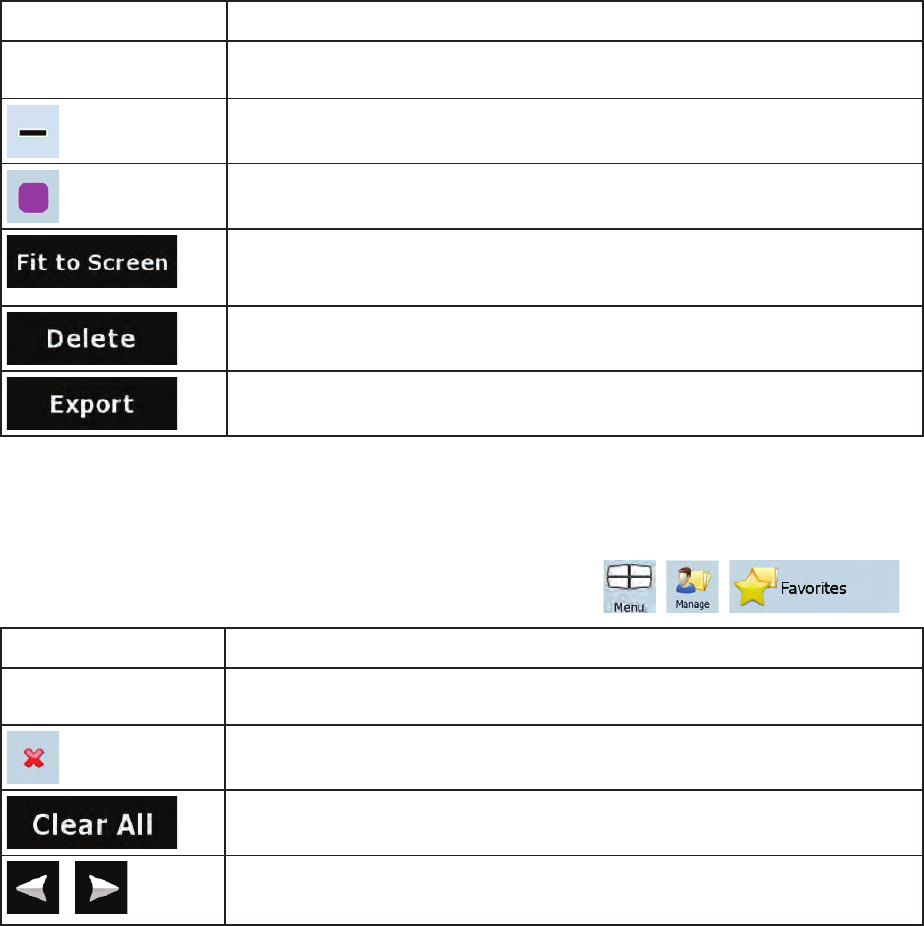
72
When track log details are shown:
Button Description
Button with the name of
the Track Log
Opens a keyboard screen to let you rename the Track Log.
Tap this button to hide the Track Log on the map. No color will be assigned to
the Track Log.
Tap one of the colored buttons to assign a color to the Track Log. The Track
Log will be shown on the map with this color.
The map returns with the Track Log. The map is scaled to show the whole
Track Log.
Deletes the selected Track Log.
Saves the Track Log on the inserted memory card in GPX format.
4.4.4 Manage Favorites
You can manage the list of your Favorites. Tap the following buttons: , , .
Button Description
Button with the name of
the Favorite
Opens the selected Favorite for editing.
Deletes the selected item in the list of Favorites.
Clears the list of Favorites.
,
Moves between pages for additional list items.
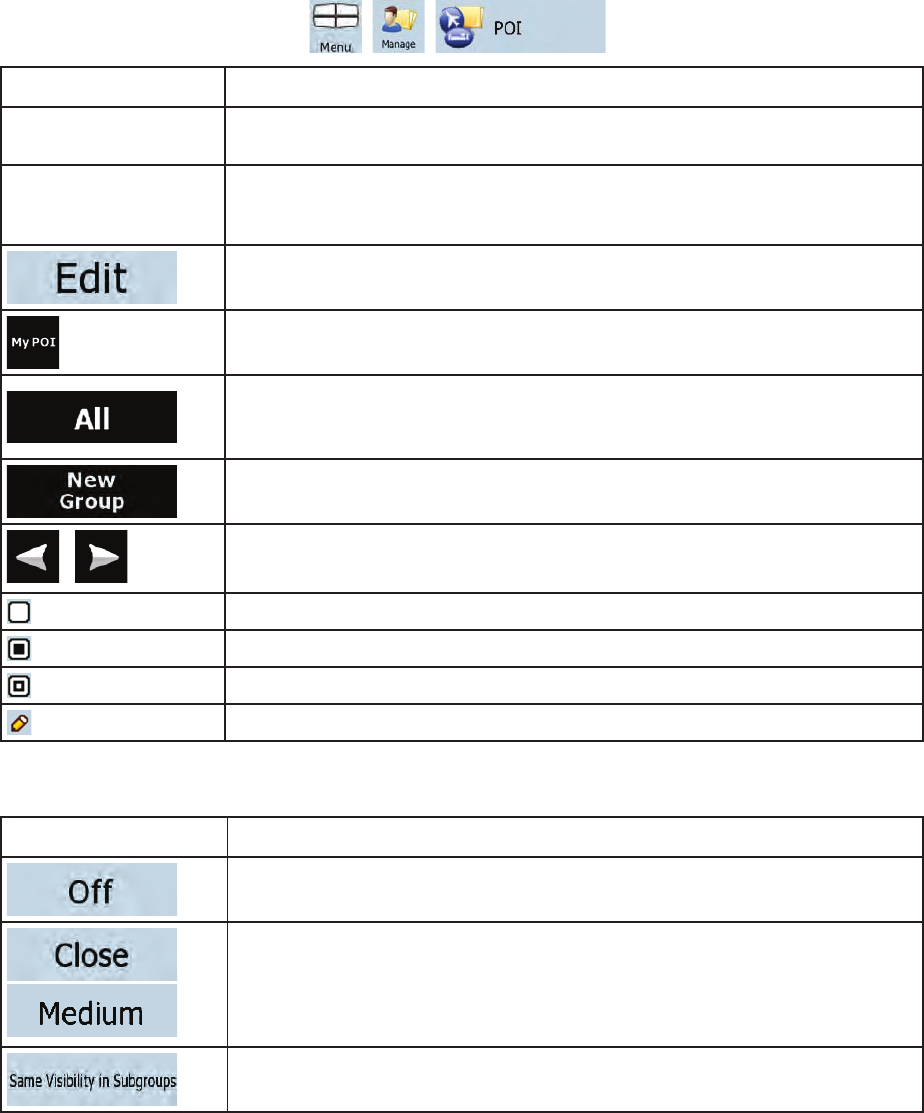
73
4.4.5 Manage POIs
You can manage your POIs, and set POI visibility for both your POIs and the ones that came with the
product. Tap the following buttons: , , .
Button / Icon Description
Button with the name of
the POI group
Opens the list of the subgroups of this POI group. The new list behaves the
same as this one.
Button with the name
and address of a POI
item
Opens the selected POI for editing. Only the POIs you have created appear in
this list.
Opens the selected POI group for editing.
Tap to filter the list to contain only the POIs that you saved.
Tap to see all POIs in the list.
Creates a new POI group at the given group level.
,
Moves between pages for additional list items.
This POI group is not shown on the map.
This POI group and all its subgroups are shown on the map.
This POI group and some of its subgroups are shown on the map.
This POI group contains POIs that you saved.
When a POI group is open for editing:
Button Description
Items in the POI group will not be shown on the map.
,
, ...
The distance buttons set the zoom level from which the items in the POI group
will be shown on the map.
Subgroups under the edited POI group will inherit the visibility settings of the
POI group.
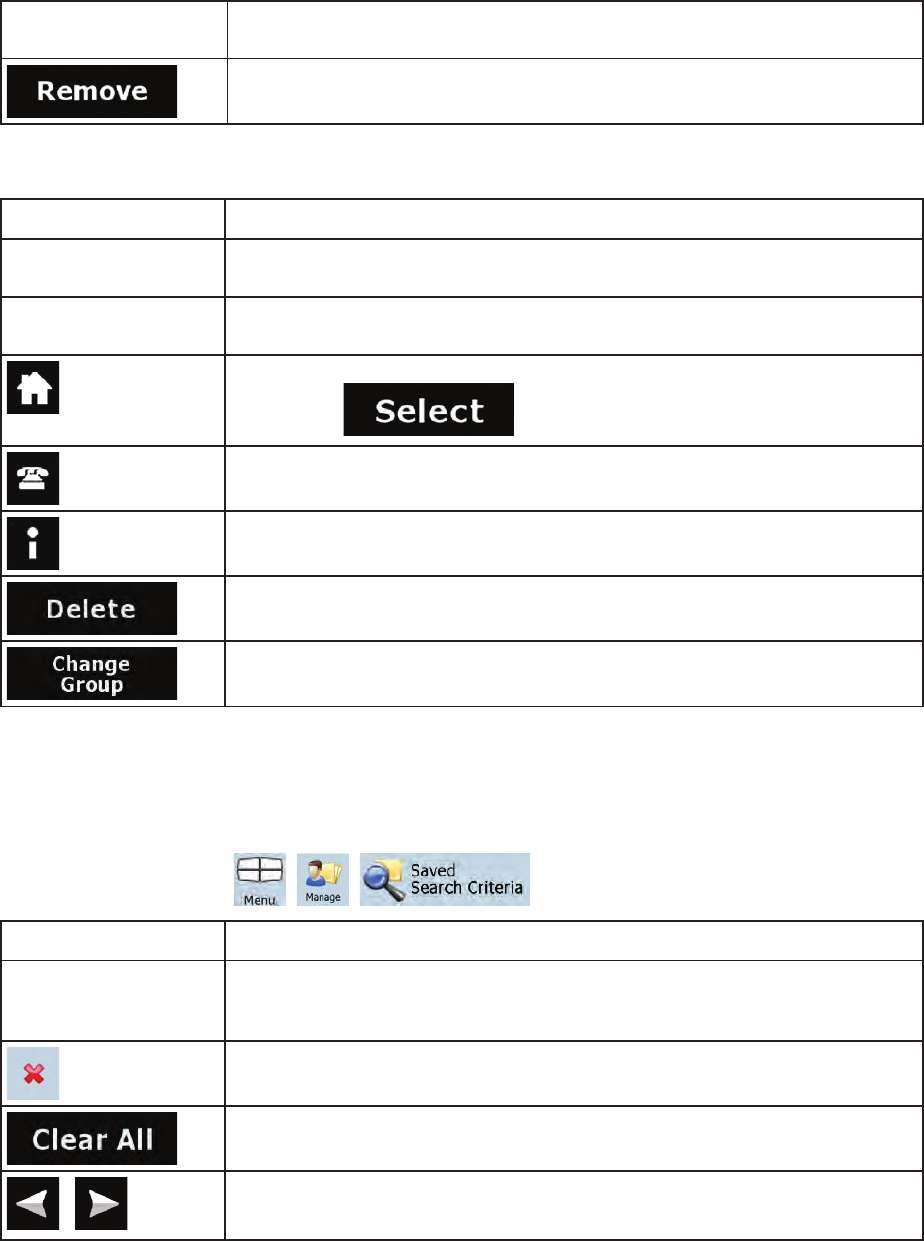
74
Button with the icon of
the POI group
Tap this button to select a new icon for the POI group.
Deletes the edited POI group. You are only allowed to remove POI groups that
you have created.
When a POI item is open for editing:
Button Description
Button with the name of
the POI
Tap this button to rename the POI.
Button with the icon of
the POI
Tap this button to select a new icon for the POI.
Tap this button to modify the location of the POI. Select a new location on the
map and tap to relocate the POI.
Tap this button to enter a telephone number for the POI.
Tap this button to enter additional information for the POI.
Tap this button to delete the selected POI.
Tap this button to move the POI to another POI group or subgroup.
4.4.6 Manage Saved Search Criteria
You can manage the list of search criteria previously saved to easily find frequently searched POI types.
Tap the following buttons: , , .
Button Description
Button with the name of
the Saved Search
Criteria
Tap to rename the saved query.
Deletes the selected item in the list.
Deletes the entire list.
,
Moves between pages for additional list items.
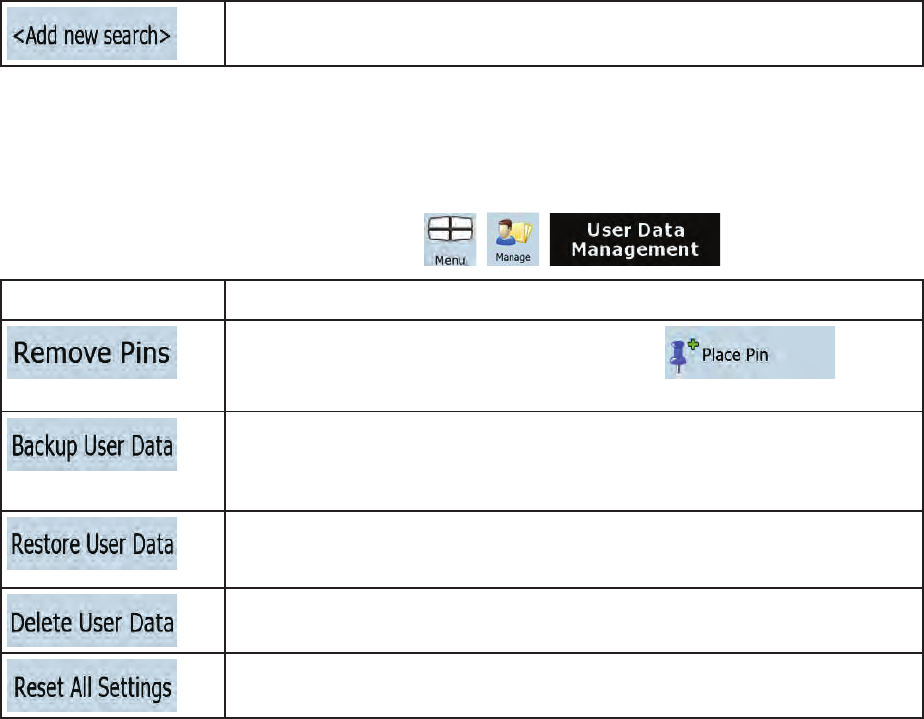
75
Tap to save a new search criteria. Similar to how you search for a POI, select
the search reference first, then select the POI group or subgroup to search in.
4.4.7 User Data Management
You can manage the data you have saved (e.g. POIs, Favorites or History) and the settings you have
made in the program. Tap the following buttons: , , .
Button Description
Map locations can be marked with Pins using the button in
the Cursor menu. Tap this button to remove all your Pins from the map.
All user data and the current settings will be saved on the inserted memory
card. There is always one backup file. If you perform a backup later, the
previous backup will be overwritten with the new information.
A
ll user data and settings will be overwritten with the information stored in the
backup file. Data and settings created after the latest backup will be lost.
All user data will be deleted, and settings will return to their factory defaults.
The application needs to restart.
All settings will return to their factory defaults, but no user data will be deleted.
The application needs to restart.
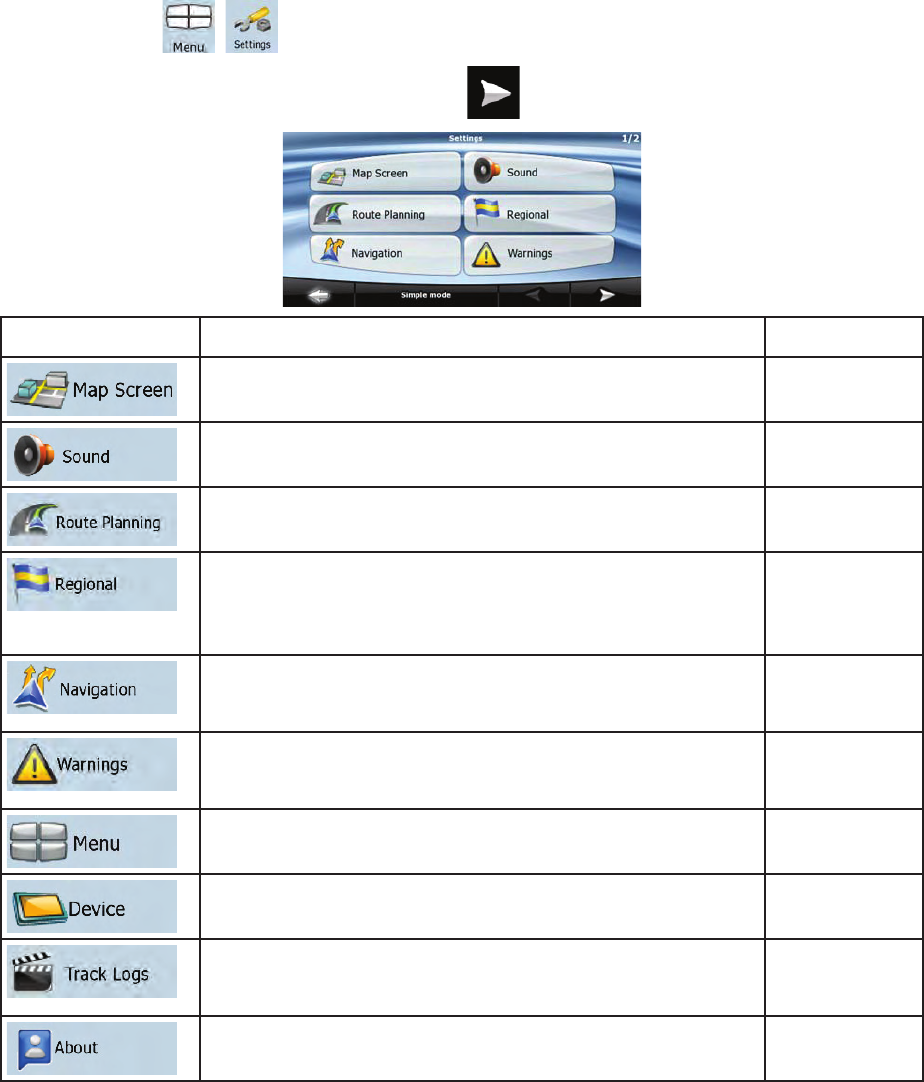
76
4.5 Settings menu
You can configure the program settings, and modify the behavior of Clarion Mobile Map. Tap the
following buttons: , .
The Settings menu has two pages of submenus. Tap to access the other options.
Button Description Reference
You can fine-tune the appearance and content of the Map
screen.
page 77
You can adjust the sounds of Clarion Mobile Map. page 78
These settings determine how routes will be calculated. page 79
These settings allow you to customize the application for your
local language, measurement units, time and date settings and
formats, as well as to choose the voice guidance profile you
prefer.
page 81
You can control how Clarion Mobile Map behaves during
navigation.
page 82
You can enable some useful warnings, and disable the touch
screen in a moving vehicle with Safety Mode.
page 83
You can modify the look and behavior of the Menu screens. page 84
You can fine-tune device related settings in this menu. page 84
You can set up automatic Track Log saving and fine-tune
related settings.
page 85
This screen has no navigation feature. It merely provides
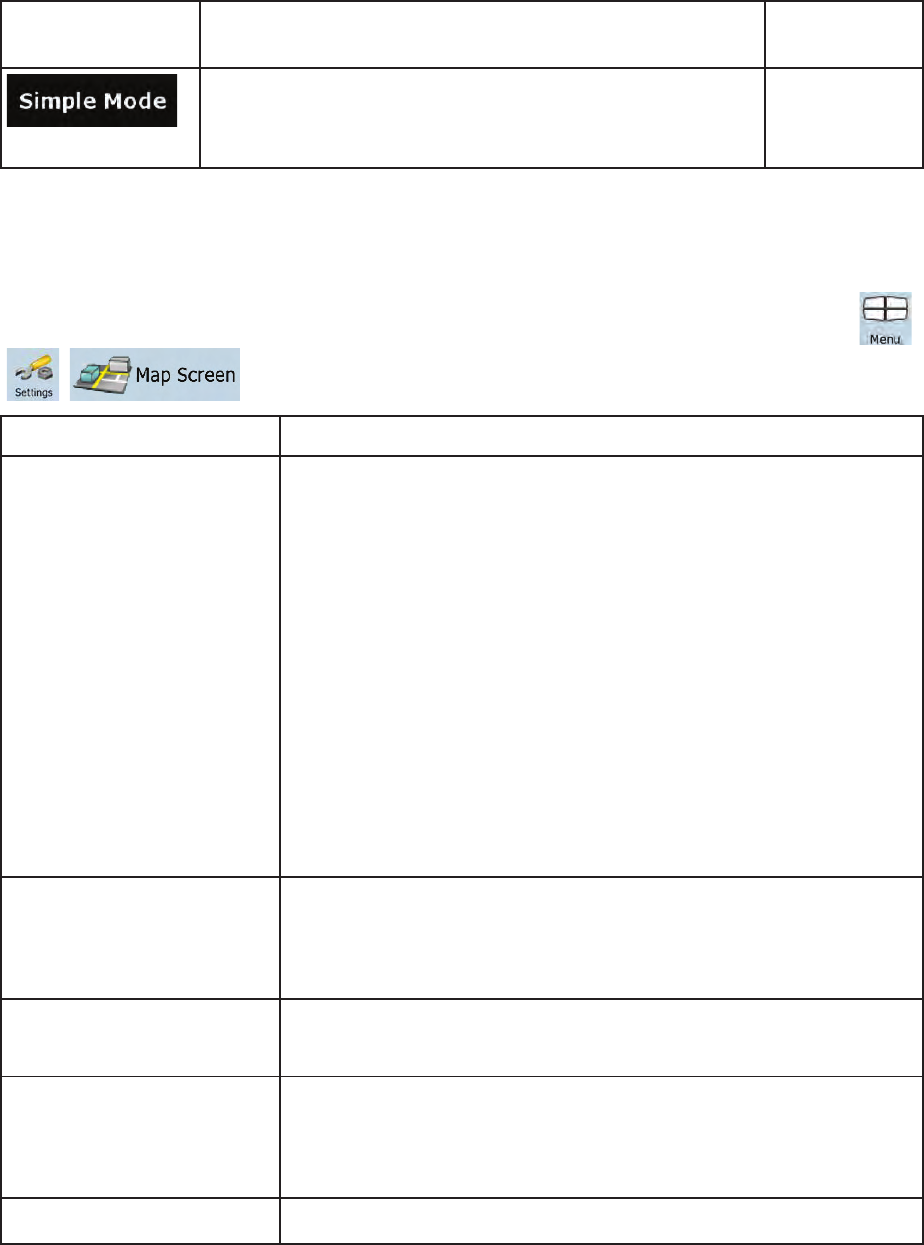
77
information about the maps and licenses included with your
navigation system.
You can switch to Simple mode. In Simple mode only a few of
the above settings are available. The rest of the settings are set
to values that are optimal for typical use.
page 10
4.5.1 Map Screen settings
You can fine-tune the appearance and content of the Map screen. Tap the following buttons: ,
, .
Button Description
3D Settings Use 3D settings to determine which of the present 3D objects are shown
on the map, and adjust the level of 3D visual detail. The options are as
follows:
x Landmarks: Landmarks are 3D artistic or block representations of
prominent or well-known objects. 3D landmarks are only available
in selected cities and countries.
x Elevated Roads: Complex intersections and vertically isolated
roads (such as overpasses or underground tunnels) are displayed
in 3D.
x Building Visibility: Full 3D city building data that represents actual
building size and position on the map. Building data is limited to
the city centers of major cities in the US and Europe.
x Terrain Detail Level: 3D terrain map data shows changes in
terrain, elevations or depressions in the land when you view the
map, and use it to plot the route map in 3D when you navigate.
Color Profiles Clarion Mobile Map is able to show the map and the menus in different
colors during the day and during the night. Select the color profiles to be
used in each mode, and select the automatic or manual switching
between the daytime and night color profiles.
Elevation on 2D Map 2D maps can also display 3D information. These top-down maps can
display elevation by colors and shading.
Street Names During
Navigation Street names and POI icons can be disturbing on the map during
navigation. With this switch you can suppress these map elements when
Clarion Mobile Map is following your position on the map. If you move the
map, both the street names and POI icons reappear immediately.
Lane Information Some maps contain lane information to help you position your car in the
78
upcoming intersection. This setting tells Clarion Mobile Map whether to
display this information at the top or at the bottom of the map.
Interrupt AV When Clarion Mobile Map is working in the background, the map can be
displayed on the screen when approaching a maneuver.
4.5.2 Sound settings
You can adjust the sounds of Clarion Mobile Map. Tap the following buttons: , ,
.
Button Description
Master Volume Use the switch to mute all sounds of the device and then to re-enable
them again. The position of the slider determines the volume level.
Voice Guidance Volume The slider adjusts the loudness of voice prompts. In its leftmost position,
the voice guidance is suppressed; in its rightmost position, the master
volume applies.
Key Sounds Key sounds provide audible confirmation of either pressing hardware
buttons or tapping the touch screen.
The switch turns key sounds on or off. Key sounds are played at the
master volume level.
Dynamic Volume When driving at high speed, the noise in the car may be too loud to
clearly hear the voice guidance and other sounds. Using Dynamic
Volume you can instruct Clarion Mobile Map to increase the volume
when your speed exceeds a certain minimum, and reach its highest
volume at the given maximum speed.
Trigger Tone A special sound played before voice instructions.
79
4.5.3 Route Planning options
These settings determine how routes will be calculated. Tap the following buttons: , ,
.
Button Description
Vehicle You can set the type of vehicle you will use to navigate the route. Based
upon this setting, some of the road types can be excluded from the route,
or some of the restrictions may not be taken into account in route
calculation.
Road Types Used for Route
Planning To let the route fit your needs, you can also set which road types are to
be considered for or to be excluded from the route if possible.
Excluding a road type is a preference. It does not necessarily mean total
prohibition. If your destination can only be accessed using some of the
excluded road types, they will be used but only as much as necessary. In
this case a warning icon will be shown on the Route Information screen,
and the part of the route not matching your preference will be displayed
in a different color on the map.
Route Calculation Method You can choose from different route types. The routing method can be
changed temporarily while creating the route: when the destination is
selected, tap in the Cursor menu.
Vehicle types:
x Car
x Taxi
x Bus
x Emergency vehicles
x Bicycle
x Pedestrian

80
Road Types Used for Route Planning:
Type Description
Freeways You might need to avoid freeways when you are driving a slow car or you are
towing another vehicle.
Unpaved roads Clarion Mobile Map excludes unpaved roads by default: unpaved roads can be in a
bad condition and usually you cannot reach the speed limit on them.
Per-use Toll By default Clarion Mobile Map includes toll roads (pay roads where there is a per-
use charge) in the routes. If you disable toll roads, Clarion Mobile Map plans the
best toll-free route.
Period Charge Charge roads are pay roads where you can purchase a pass or vignette to use the
road for a longer period of time. They can be enabled or disabled separately from
toll roads.
Permit needed You might need a permit or permission from the owners to use certain roads or to
enter certain areas.
Clarion Mobile Map excludes these roads from the route calculation by default.
Ferries Clarion Mobile Map includes ferries in a planned route by default. However, a map
does not necessarily contain information about the accessibility of temporary
ferries. You might also need to pay a fare on ferries.
Cross-border
planning In some cases the route calculated according to your other navigation and route
preferences would lead through another country. If you wish to always stay within
the same country, turn this option off.
Carpool/HOV This control appears only when navigating in the USA. You should check whether
you are allowed to use carpool lanes before enabling this road type.
Route Calculation Method types:
Option Description
Fast Gives the quickest possible route if you can travel at or near the speed limit on all
roads. Usually the best selection for fast and normal cars.
Short Gives a route that has the smallest total distance of all possible routes between the
route points. It can be practical for slow vehicles.
Economical Combines the benefits of Fast and Short: Clarion Mobile Map calculates as if it
were calculating the Fast route, but it takes other roads as well to save fuel.
Easy Results in a route with fewer turns. With this option, you can make Clarion Mobile
81
Map to take, for example, the freeway instead of series of smaller roads or streets.
4.5.4 Regional settings
These settings allow you to customize the application for your local language, measurement units, time
and date settings and formats, as well as to choose the voice guidance profile you prefer. Tap the
following buttons: , , .
Button Description
Program Language This button displays the current written language of the Clarion Mobile
Map user interface. By tapping the button, you can select a new
language from the list of available languages. The application will restart
if you change this setting; you are asked to confirm this.
Voice Profile This button shows the current voice guidance profile. By tapping the
button, you can select a new profile from the list of available languages
and speakers. Tap any of these to hear a sample voice prompt. Just tap
OK when you have selected the new spoken language.
Units You can set the distance units to be used by the program. Clarion Mobile
Map may not support all the listed units in some voice guidance
languages. If you select a measurement unit not supported by the
chosen voice guidance language, a warning message will appear.
Set Date & Time Format You can set the date and time format. Various international formats are
available.
Time and Time Zone Settings You can access time and time zone settings. Clarion Mobile Map helps
you with correcting the device time to the ever accurate GPS time.
Clarion Mobile Map can also help you set the time zone based on your
current GPS position.
Time and Time Zone Settings:
Button Description
Auto Time Correction to GPS Use this feature to synchronize the clock of your device to the highly
accurate time provided by the GPS receiver.
Use Auto Time Zone Use this feature to synchronize the time zone of the clock of your device
to the time zone based on your current GPS position. This is useful if you
travel abroad.
Set Time Zone Set time zone manually if you do not want to synchronize the time zone
automatically. This allows you to use Auto Time Correction and apply a
time zone offset to obtain the desired time.
Compare GPS and device The current time of the GPS receiver and the device clock are displayed.
82
times Please note that the GPS clock is only available with GPS reception.
This allows you to check whether any correction is needed.
4.5.5 Navigation settings
You can control how Clarion Mobile Map behaves during navigation. Tap the following buttons: ,
, .
Button Description
Keep Position on Road This feature allows car drivers to always correct GPS position errors by
matching the vehicle position to the road network.
By turning off this feature you also turn off the GPS position error
filtering. The position shown on the map will be subject to all position
errors and position fluctuations.
Off-route Recalculation This switch tells Clarion Mobile Map whether to automatically recalculate
the route when you deviate from it. If this feature is turned off, you need
to initiate route recalculation manually otherwise navigation will be
stopped until you return to the originally recommended route.
Setting another point than the current GPS position as the start point of
the active route will automatically disable this feature.
Restore Lock-to-Position If you have moved or rotated the map during navigation, this feature
moves the map back to your current GPS position and re-enables
automatic map rotation after the given period of inactivity.
Automatic Overview This feature switches the map view to Overview mode when the next
route event is at a distance. Overview is a zoomed out 2D view to let you
see the surrounding area. You have the following controls for
A
utomatic
Overview:
x Turn Distance for Overview: The map view will be switched to
Overview mode if the next route event is at least as far as this
value.
x Default Zoom Level: Overview mode will appear with this zoom
level. You can scale the map in Overview mode but next time
Overview appears again, this zoom level will be applied.

83
4.5.6 Warning settings
You can enable some useful warnings, and disable the touch screen in a moving vehicle with Safety
Mode. Tap the following buttons: , , .
Button Description
Warn When Speeding Maps may contain information about the speed limits of the road
segments. Clarion Mobile Map is able to warn you if you exceed the
current limit. This information may not be available for your region (ask
your local dealer), or may not be fully correct for all roads in the map.
This setting lets you decide whether you wish to receive the warnings.
You can set the relative speeding level at which the application warns
you (100% represents the current speed limit):
x In Built-up Areas: in cities and towns
x Elsewhere: at all other locations
The warning itself is a voice message that is played using the selected
voice guidance profile.
Speed Camera Warning This feature allows you to receive a warning when approaching a Road
Safety Camera. You must ensure on your own liability that using this
feature is legal in the country where you intend to use it. You have the
following options:
x Audible Warning: beeps can be played while you are approaching
the camera, or just alert sounds if you exceed the speed limit while
approaching one of these cameras.
x Visible Warning: the type of the camera and the monitored speed
limit appear on the Map screen while you are approaching one of
these cameras.
This button is not displayed when GPS position is not available or if you
are in certain countries where Road Safety Camera warning is prohibited.
Even if the button is available, you are responsible for checking whether
it is legal to use this feature at your location.
Safety Mode Safety Mode disables the touch screen above 10 km/h (6 mph) to keep
your attention on the road. While driving, you will not be able to set a new
destination or to change settings. The only screen control that remains
enabled is the gesture that puts you back on the Map screen.
84
4.5.7 Menu settings
You can modify the look and behavior of the Menu screens. Tap the following buttons: , ,
.
Button Description
Animation You can activate and deactivate the Menu animations. When animation
is turned on, buttons on Menu and keyboard screens appear in an
animated way.
Background You can choose the image to be used as the menu background image.
4.5.8 Device settings
You can fine-tune device related settings in this menu. Tap the following buttons: , ,
.
Button Description
Screen Calibration You can fine-tune the position of the screen content on the display. Tap
this button, use the arrows to reposition the application window, and then
tap to save the changes and exit.
GPS Antenna This field indicates whether the external GPS antenna is connected to
your Clarion NX700.

85
4.5.9 Track Log settings
You can set up automatic Track log saving, and fine-tune related settings. Tap the following buttons:
, , .
Button Description
Update Interval This determines how often track points will be saved. Position
information is normally received once a second from the GPS. If you do
not need such a detailed log, you can increase this number to save track
log space.
Enable Auto-saving When auto-saving is enabled, you do not need to turn track log saving
on and off manually. Clarion Mobile Map will automatically start
recording the track log as soon as GPS position is available.
Track Log Database Size This figure shows how much memory is used by the automatically saved
track logs.
Track Logs Max. Size You can set the maximum database size for the automatically saved
track logs. When the limit is reached, the oldest automatically saved
track logs will be deleted.
Create NMEA/SIRF Log Independently of the normal track log, you can instruct Clarion Mobile
Map to record the native GPS data received from the GPS device. These
logs are saved as separate text files on the memory card, and they
cannot be shown or replayed in Clarion Mobile Map.
86
5 Glossary
2D/3D GPS reception
The GPS receiver uses satellite signals to calculate its (your) position and needs at least four signals to
give a three-dimensional position, including elevation. Because the satellites are moving and because
objects can block the signals, your GPS device might not receive four signals. If three satellites are
available, the receiver can calculate the horizontal GPS position but the accuracy is lower and the GPS
device does not give you elevation data: only 2D reception is possible.
Active route
The currently navigated route. You can save and load routes in Clarion Mobile Map, but only one route
can be active at any given time, and it is always active until you delete it, reach your destination or you
quit Clarion Mobile Map. See also: Route.
City Center
The City Center is not the geometric center of the city but an arbitrary point the map creators have
chosen. In towns and villages, it is usually the most important intersection; in larger cities, it is an
important intersection.
GPS accuracy
Several factors have impact on the deviation between your real position and the one given by the GPS
device. For example, signal delay in the ionosphere or reflecting objects near the GPS device have a
different and varying impact on how accurately the GPS device can calculate your position.
Map
Clarion Mobile Map works with digital maps which are not simply the computerized versions of traditional
paper maps. Similarly to the paper road maps, the 2D mode of digital maps show you streets, roads, and
elevation is also shown by colors.
In 3D mode, you can see the altitude differences, for example valleys and mountains, elevated roads, and
in selected cities 3D landmarks and 3D buildings are also displayed.
You can use digital maps interactively: you can zoom in and out (increase or decrease the scale), you
can tilt them up and down, and rotate them left and right. In GPS-supported navigation, digital maps
facilitate route planning.
North-up map orientation
In North-up mode the map is rotated so its top always faces North. This is the orientation in 2D map view
mode and in Overview mode. See also: Track-up map orientation.
87
Overview mode
You can instruct Clarion Mobile Map to automatically switch to Overview mode if the next route event is in
a distance. In Overview mode the map is shown in 2D but scaled down to a predefined zoom level. When
you approach the next route event, the previous 2D or 3D map view returns automatically.
Route
A series of destinations to be reached one after the other. A simple route contains one start point and
only one destination. Multi-point routes contain one or more via points (intermediate destinations). The
last route point is the final destination and the route is cut into different legs (from one destination to the
next).
Scheme
Clarion Mobile Map comes with different color schemes for the map for daytime or night use. Schemes
are custom graphic settings for the map and they can have different colors for streets, blocks or surface
waters in 2D and 3D modes, and they display shades or shadows in different ways in 3D mode.
One daytime scheme and one night scheme is always selected. Clarion Mobile Map uses them when it
switches from day to night and back.
Track-up map orientation
In Track-up mode the map is rotated so its top always points in the current driving direction. This is the
default orientation in 3D map view mode. See also: North-up map orientation.
Road Safety Camera
A special POI type for speed cameras and red light cameras. Different data sources are available, and
you can also mark the position of a Road Safety Camera on the map.
You can configure Clarion Mobile Map to warn you when you approach one of these cameras.
Detecting the location of Road Safety Cameras is prohibited in certain countries. It is the sole
responsibility of the driver to check whether this feature can be used during the trip.
88
6 End User License Agreement
1 The contracting parties
1.1 This Agreement has been entered into by and between PDAMill Kft. (registered seat: 23 Bérc utca, H-
1016 Budapest, Hungary) as Licensor (hereinafter: Licensor) and You as the User (hereinafter: User; the
User and the Licensor jointly referred to as: Parties) in subject of the use of the software product specified
in this Agreement.
2 Conclusion of the Agreement
2.1 The Parties hereby acknowledge that this Agreement shall be concluded by implicit conduct of the
Parties without signing the Agreement.
2.2 The User hereby acknowledges that following the lawful acquisition of the software product
constituting the object of this Agreement (Section 4), any degree of use, installation into a computer or
other hardware, installation of such hardware into a vehicle, pressing of the “Accept” button displayed by
the software during installation or use (hereinafter referred to as Use) shall mean that the User has
accepted the terms and conditions of this Agreement as legally binding.
2.3 This Agreement shall by no means authorise use of the software product by those persons having
unlawfully acquired the software product or having unlawfully installed it on a computer or in a vehicle.
3 Relevant laws and regulations
3.1 To all issues not regulated by this Agreement, the laws of the Republic of Hungary, with specific
reference to Act IV of 1959 on the Civil Code and to Act LXXVI of 1999 on Copyrights shall apply.
3.2 The original language version of this Agreement is the Hungarian version. This Agreement has
versions in other languages as well. In case of dispute the Hungarian version shall prevail.
4 Object of the Agreement
4.1 The object of this Agreement shall be the navigation guidance software product of Licensor
(hereinafter referred to as the Software Product).
4.2 The Software Product shall include the operating computer program, its complete documentation, the
map database pertaining thereto and any third-party content and services accessible through the
Software Product (hereinafter: Database).
4.3 Any form of display, storage, coding, including printed, electronic or graphic display, storage, source
or object code, or any other as yet undefined form of display, storage, or coding, or any medium thereof
shall be deemed parts of the Software Product.
4.4 Error corrections, additions, updates used by the User following the conclusion of this Agreement
shall also be deemed parts of the Software Product.
5 Rights under copyright
5.1 Unless otherwise provided by law or contractual provisions, the Licensor is the sole and exclusive
owner of all material copyrights vested in the Software Product.
5.2 Copyrights extend to the whole Software Product and to its parts separately as well.
5.3 The owner(s) of the copyrights of the Database forming part of the Software Product is (are) the
natural person(s) or corporate entity(ies) listed in the Appendix to this Agreement or in the “About” menu
item of the operating computer program (hereinafter referred to as Database Owner). The user's manual
of the Software Product includes the name of the menu option where all the owners of the Database
items are listed. The Licensor hereby states that it has obtained sufficient usage and representation rights
from the Database owners in order to utilize the Database, to offer it for utilization and to transfer it for
utilization as set forth in this Agreement.
5.4 Pursuant to this Agreement, all rights vested in the Software Product shall remain in the ownership of
the Licensor, except for those to which the User is entitled under law or by virtue of this Agreement.
6 Rights of the User
89
6.1 The User is entitled to install the Software Product into one hardware device (desktop, handheld,
portable computer, navigation device), and to run and use one copy of the Software Product or a
preinstalled copy of the Software Product thereon.
6.2 The User is entitled to make one backup copy of the Software Product. However, if the Software
Product operates after installation without the use of the original media copy, then the original media copy
shall be deemed to be a backup copy. In all other cases, the User is only entitled to use the backup copy
if the original media copy of the Software Product has been ascertainably and unequivocally rendered
unsuitable for its lawful and intended use.
7 Limitations of use
7.1 The User is not entitled
7.1.1 to duplicate the Software Product (to make a copy thereof);
7.1.2 to lease, rent or lend it or to transfer it to a third person for any reason;
7.1.3 to translate the Software Product (including translation (compilation) to other programming
languages);
7.1.4 to decompile the Software Product;
7.1.5 to evade the protection of the Software Product or to modify, circumvent or obviate such protection
through technological or by any other means;
7.1.6 to modify, extend, transform the Software Product (in whole or in part), to separate it into parts,
combine it with other products, install it in other products, utilize it in other products, not even for the
purpose of achieving interoperability with other devices;
7.1.7 apart from using the computer program, to obtain information from the Database as a part of the
Software Product, to decompile the Database, to use, copy, modify, extend, transform the Database in
whole or in part or the group of data stored therein, or to install it in other products or otherwise, utilize it
in other products or to transfer it, not even with the aim of achieving interoperability with other products.
7.2 The User may only use the contents available through the Software Product and provided by third
parties and the data received through the services provided by third parties (including but not limited to
the traffic data received from the RDS TMC traffic information service) for his/her own personal benefit
and at his/her own risk. It is strictly prohibited to store, to transfer or to distribute these data or contents or
to disclose them in full or in part to the public in any format or to download them from the product.
8 No warranty or limitation of responsibility
8.1 The Licensor hereby informs the User that although the greatest care was taken in producing the
Software Product, given the nature of the Software Product and its technical limitations, the Licensor does
not provide a warranty for the Software Product being completely error-free, and the Licensor is not
bound by any contractual obligation whereby the Software Product obtained by the User should be
completely error-free.
8.2 The Licensor does not warrant that the Software Product is suitable for any purpose defined either by
the Licensor or the User, and does not warrant that the Software Product is capable of interoperating with
any other system, device or product (e.g. software or hardware).
8.3 The Licensor does not assume any responsibility for damages incurred due to an error in the
Software Product (including errors of the computer program, the documentation and the Database).
8.4 The Licensor does not assume any responsibility for damages incurred due to the Software Product
not being applicable for any defined purpose, or due to the error or incompatibility of the Software Product
with any other system, device or product (e.g. software or hardware).
8.5 The Licensor also draws the attention of the User to the fact that, when using the Software Product in
any form of vehicle, observing the traffic regulations and rules (e.g. use of obligatory and/or reasonable
and suitable security measures, proper and generally expected care and attention in the given situation,
and special care and attention required due to the use of the Software Product) is the exclusive
90
responsibility of the User. The Licensor shall not assume any responsibility for any damages occurred in
relation to use of the Software Product in a motor vehicle.
8.6 By concluding the Agreement, the User shall, in particular, acknowledge the information stated in
Section 8 above.
9 Sanctions
9.1 The Licensor hereby informs the User that, if the Licensor finds its rights under the Copyright Act to
be breached, the Licensor may
9.1.1 seek judicial recognition of this breach;
9.1.2 demand that the breach cease and order the person in breach to refrain from continuing such
actions;
9.1.3 demand that the person under breach give proper compensation (even by way of publicity at the
expense of the person in breach);
9.1.4 claim the return of the increase of assets due to the breach;
9.1.5 demand the cease of the wrongful action and, demand restitution to its state before the breach was
committed at the expense of the person in breach, and may demand the destruction of instruments and
materials used to commit the breach as well as of the products created by the breach;
9.1.6 claim for damages.
9.2 The Licensor hereby also informs the User that the breach of copyrights and related rights is a crime
under Act IV of 1978 on the Hungarian Criminal Code, which may be sentenced of two years in prison in
basic cases and up to eight years in prison in aggravated cases.
9.3 Contents and services provided by third parties
The Licensor hereby excludes any liability of its own for the Database in the Software Product and for any
content or service provided by a third party by using the Database. The Licensor does not warrant the
quality, suitability, accuracy, fitness for a specific purpose or territorial coverage of the product or service
or the availability of the service, and it specifically excludes any liability for the suspension of the service,
and any damage arising in relation to the service or for complete cancellation of the service.
The relevant information and data in connection with the contents and services provided by third parties
are available at www.navngo.com. The User hereby acknowledges that the contents and services
provided by third parties may only be used at the risk of the User and for the personal benefit of the User.
9.4 Contents and services provided by the Licensor or an agent of the Licensor
The Licensor or a contractual partner may offer various products and services to the User through
www.naviextras.com. The User may only use these services when the User has read and understood the
relevant end user license agreement(s) at www.naviextras.com and the User is obliged to use the
services in line with the terms and conditions thereof.
9.5 The parties hereby agree that - depending on the nature of the dispute - either the Pest Central
District Court (Pesti Központi Kerületi Bíróság) or the Metropolitan Court of Budapest (Fvárosi Bíróság)
will have exclusive jurisdiction to rule on any disputes arising in connection with this Agreement.
Printed in China / Imprimé en Chine / Impreso en China
2010/1 274-0076-00
Installation Manual
Manuel d’installation
Manual de instalación
Symbol Identifi cation
This manual uses symbols and icons to indicate safety precautions
and concerns during the installation procedure. Be sure to carefully
read and understand each precaution prior to beginning the
installation.
WARNING
This symbol is intended to alert the user to the presence of
important operating instructions. Failure to heed the
instructions may result in severe injury or death.
CAUTION
This symbol is intended to alert the user to the presence of
important operating instructions. Failure to heed the
instructions can result in injury or material damage.
Before Use
WARNING
Confi rm the battery voltage of the vehicle to be installed. This • unit is designed only for vehicles with DC 12V power supply.
Disconnect the negative terminal of the battery before • connecting wires, otherwise an electric shock, injury by short
circuit may occur.
Car battery
Installation Precautions
WARNING
When installing the unit to a vehicle with an airbag system, • never install it in a place where it may affect the operation of
the airbag.
Do not install this unit in the following locations:• A location interfering with the driver’s visual range or
operation.
A location where the gear shift or brake pedal are hindered.
A location where passengers are at risk.
An unstable location, or where the system may fall.
CAUTION
Do not install the system in the locations described below. • This may cause a fi re, accident or electrical shock:
A location exposed to rain or dust.
An unstable location, or where the system may fall.
Do not install this unit in a place exposed to direct sunlight, • heat or a place where the vent holes or heat radiation holes
are covered.
When you install the antenna, mount it in a place where the • elements of the antenna do not protrude beyond the edge of
the front, back, left and right of the vehicle.
If it comes in contact with pedestrians, it may cause an
accident.
Installation Notes
WARNING
Please note the position of pipes, tanks and electrical wirings
before installing the unit into the vehicle; failure in avoiding
these may cause a fi re or malfunction.
CAUTION
Use only the supplied parts. If unspecifi ed parts are used, • they may cause damage.
Any holes made in the body of the vehicle should be sealed • with a silicon adhesive. If exhaust fumes or water penetrates
into the vehicle, this may cause an accident.
Fasten the bolts securely when installing the unit. If the • bolts are loose an accident or malfunction could occur.
Connection Notes
WARNING
Loom all cables according to the instruction manual, so as • not to hinder operation.
Wire the connecting cords/cables away from high • temperature areas. If the coatings of the cables melt, it could
cause an accident/fi re by a short circuit. Take care when
wiring in the engine compartment.
When wiring the connecting cables in a vehicle with an • airbag system, never feed the cables through a place where it
may affect the operation of the airbag.
An airbag not operating correctly in an emergency may
cause increased injury.
CAUTION
Verify wires with a digital multi-meter prior to making any • connections. Many new vehicles use multiplexed and/or low
voltage circuits that can be damaged if a test light or logic
probe is used.
Connect cables appropriately. If a wrong connection is • made, this may cause a fi re or accident.
When passing cables through the body of the vehicle, use • non-conductive grommets. If the coatings of the cables are
worn out by rubbing, this may cause an accident, fi re or a
short circuit.
After wiring cables, fi x them with insulation tape.• Be sure to switch off the vehicle when connecting or • disconnecting cords to/from the unit, otherwise an electric
shock, injury or accident may occur.
WARNING
For your safety, the driver should not watch the DVD video/
movie data or operate the controls while driving. Please note
that watching and operating the DVD video/movie data while
driving are prohibited by law in some countries. Also, while
driving, keep the volume to a level at which external sounds
can be heard.
This equipment has been tested and found to comply with the limits for
a Class B digital device, pursuant to Part 15 of the FCC Rules. These
limits are designed to provide reasonable protection against harmful
interference in a residential installation. This equipment generates,
uses, and can radiate radio frequency energy and, if not installed and
used in accordance with the instructions, may cause harmful
interference to radio communications. However, there is no guarantee
that interference will not occur in a particular installation. If this
equipment does cause harmful interference to radio or television
reception, which can be determined by turning the equipment off and
on, the user is encouraged to consult the dealer or an experienced
radio/TV technician for help.
INFORMATION FOR USERS:
CHANGES OR MODIFICATIONS TO THIS PRODUCT NOT
APPROVED BY THE MANUFACTURER WILL VOID THE
WARRANTY AND WILL VIOLATE FCC APPROVAL.
Identifi cación de los símbolos
Este manual utiliza símbolos e iconos para indicar precauciones de
seguridad y cuestiones que se pueden producir durante el
procedimiento de instalación. Asegúrese de leer detenidamente y
entender cada medida de precaución antes de empezar la instalación.
ADVERTENCIA
Este símbolo se utiliza para avisar al usuario de la presencia
de instrucciones de funcionamiento importantes. Si no se
siguen las instrucciones indicadas se pueden producir
lesiones graves o mortales.
PRECAUCIÓN
Este símbolo se utiliza para avisar al usuario de la presencia
de instrucciones de funcionamiento importantes. Si no se
siguen las instrucciones indicadas se pueden producir
lesiones o daños en los materiales.
Antes de su utilización
ADVERTENCIA
Compruebe el voltaje de la batería del vehículo que se va a • instalar. Esta unidad está diseñada sólo para vehículos con
una fuente de alimentación de 12V CC.
Desconecte el terminal negativo de la batería antes de • conectar los cables, de lo contrario es posible que se
produzca una descarga eléctrica o lesiones debidas a un
cortocircuito.
Batería del automóvil
Precauciones durante la instalación
ADVERTENCIA
Cuando se instale la unidad en un vehículo que tenga un • sistema de airbag, no la instale nunca en un lugar donde
pueda afectar al funcionamiento del airbag.
No instale esta unidad en las ubicaciones siguientes:• Un lugar donde interfi era con el alcance visual del conductor
o su manejo.
Un lugar donde difi culte el manejo de la palanca de cambios
o del pedal del freno.
Un lugar donde los acompañantes corran peligro.
Un lugar inestable o en el que el sistema pueda caerse.
PRECAUCIÓN
No instale el sistema en los lugares que se describen a • continuación. Podría provocar un incendio, un accidente o
una descarga eléctrica:
Un lugar expuesto a la lluvia o al polvo.
Un lugar inestable o en el que el sistema pueda caerse.
No instale esta unidad en un lugar expuesto a la luz directa • del sol, el calor o un lugar donde estén cubiertos los orifi cios
de ventilación o los orifi cios por los que escapa el calor.
Al instalar la antena, móntela en un lugar donde los • elementos de la antena no sobresalgan más allá del borde de
la parte delantera, trasera, izquierda y derecha del vehículo.
Si entra en contacto con los peatones, puede provocar un
accidente.
Notas sobre la instalación
ADVERTENCIA
Tenga en cuenta la posición de los tubos, tanques y cableado
eléctrico antes de instalar la unidad en el vehículo; de lo
contrario puede provocar un incendio o un fallo en el
funcionamiento.
PRECAUCIÓN
Utilice únicamente las piezas que se suministran. Si se • utilizan piezas sin especifi car, pueden provocar daños.
Cualquier orifi cio que se realice en la carrocería del vehículo • debe sellarse con un adhesivo de silicona. Si entra el humo
de los tubos de escape o agua en el vehículo, puede
provocar un accidente.
Apriete los pernos fi rmemente al instalar la unidad. Si los • pernos están fl ojos se puede producir un accidente o un
fallo en el funcionamiento.
Notas sobre la conexión
ADVERTENCIA
Coloque los cables según se indica en el manual de • instrucciones, de modo que no obstruyan el funcionamiento.
Conecte los cables de conexión lejos de zonas que tengan • temperaturas altas. Si el revestimiento de los cables se
derrite, podría provocar un accidente o un incendio debido a
un cortocircuito. Tenga cuidado al realizar el cableado en el
compartimento del motor.
Cuando instale los cables de conexión en un vehículo que • tenga un sistema de airbag, nunca los coloque en un lugar
donde puedan afectar al funcionamiento del airbag.
Un airbag que no funcione correctamente en una emergencia
puede aumentar las lesiones.
PRECAUCIÓN
Verifi que los cables con un multímetro digital antes de • realizar más conexiones. La mayoría de los vehículos
nuevos utilizan circuitos múltiples y/o de bajo voltaje que se
pueden dañar si se utiliza una luz de prueba o una sonda
lógica.
Conecte los cables correctamente. Si se realiza una conexión • incorrecta, puede provocar un incendio o un accidente.
Cuando pase cables a través de la carrocería del vehículo, • utilice anillos que no sean conductores de la electricidad.
Si los revestimientos de los cables están desgastados
debido al rozamiento, se puede provocar un accidente, un
incendio o un cortocircuito.
Después de instalar los cables, sujételos con cinta aislante.• Asegúrese de apagar el vehículo al conectar o desconectar • los cables con la unidad, de lo contrario se podría producir
una descarga eléctrica, una lesión o un accidente.
ADVERTENCIA
Para su seguridad, no permita que el conductor mire la película
o vídeo de DVD ni utilice los controles mientras esté
conduciendo. Tenga en cuenta que, en algunos países, el uso o
la visualización de un vídeo o película de DVD están
prohibidos por la ley. Asimismo, mientras conduzca, mantenga
el volumen a un nivel con el que también puedan oírse los
sonidos externos.
Este equipo ha sido probado y cumple con los límites establecidos
para un dispositivo digital de clase B, de acuerdo con lo dispuesto en
el apartado 15 de las reglas de la FCC. Estos límites se han
establecido para ofrecer protección ante interferencias perjudiciales
en una instalación residencial. Este equipo genera, utiliza y puede
irradiar energía de radiofrecuencia y, si no se instala y utiliza
siguiendo las instrucciones pertinentes, puede originar interferencias
perjudiciales en las radiocomunicaciones. No obstante, no se
garantiza la ausencia de interferencias en una instalación
determinada. Si este equipo provoca interferencias perjudiciales en la
recepción de radio o televisión, lo cual puede determinarse apagando
y encendiendo el aparato, el usuario deberá ponerse en contacto con
su distribuidor o con un técnico especializado en radio y televisión
para solicitar asistencia.
INFORMACIÓN PARA LOS USUARIOS:
CUALQUIER CAMBIO O MODIFICACIÓN DEL
PRODUCTO NO AUTORIZADA POR EL FABRICANTE
ANULARÁ LA GARANTÍA E INFRINGIRÁ LA
AUTORIZACIÓN DE LA FCC.
Identifi cation des symboles
Ce manuel utilise des symboles et des icônes pour indiquer les
consignes de sécurité et les précautions à prendre lors de la
procédure d’installation. Veuillez les lire attentivement et comprendre
chaque précaution à prendre avant de commencer l’installation.
AVERTISSEMENT
Ce symbole a pour objectif d’avertir l’utilisateur de la présence
d’importantes instructions d’utilisation. La non observation de
ces instructions risque d’entraîner des lésions corporelles
susceptibles d’être mortelles.
ATTENTION
Ce symbole a pour objectif d’avertir l’utilisateur de la présence
d’importantes instructions d’utilisation. La non observation de
ces instructions risque d’entraîner des lésions corporelles ou
des dommages matériels.
Avant toute utilisation
AVERTISSEMENT
Vérifi ez la tension de la batterie du véhicule sur lequel • effectuer l’installation. Cet appareil est conçu uniquement
pour les véhicules alimentés en CC12V.
Débranchez la borne négative de la batterie avant de • raccorder les fi ls pour éviter toute électrocution ou blessure
provoquée par un court-circuit.
Batterie du véhicule
Précautions d’installation
AVERTISSEMENT
Lors de l’installation de l’appareil dans un véhicule équipé • d’un système d’airbag, ne le placez jamais à un endroit où il
pourrait entraver le fonctionnement de l’airbag.
N’installez jamais l’appareil dans les endroits suivants:• un endroit où il gênerait le champ de vision ou de manœuvre
du conducteur;
un endroit où il entraverait le fonctionnement du levier de
vitesses ou de la pédale de frein;
un endroit où les passagers seraient en danger;
un endroit instable et où le système risquerait de tomber.
ATTENTION
N’installez pas le système dans les endroits énumérés • ci-dessous. Cela risquerait de provoquer un accident, un
incendie ou une électrocution:
un endroit exposé à la pluie ou à la poussière;
un endroit instable et où le système risquerait de tomber.
N’installez pas l’appareil dans un endroit exposé à la lumière • directe du soleil ou à la chaleur ou dans un endroit où les
orifi ces de ventilation ou les orifi ces d’évacuation de la
chaleur sont obstrués.
Lorsque vous installez l’antenne, fi xez-la à un endroit où les • éléments de l’antenne ne dépassent pas des bords avant,
arrière, gauche et droit du véhicule.
Si elle entre en contact avec des piétons, cela risquerait de
provoquer un accident.
Remarques à propos de l’installation
AVERTISSEMENT
Notez l’emplacement des conduites, réservoirs et câbles • électriques avant d’installer l’appareil sur le véhicule. Sinon,
vous risquer de provoquer un incendie ou un fonctionnement
incorrect.
ATTENTION
Utilisez uniquement les pièces fournies. Si vous utilisez des • pièces non spécifi ées, cela risque d’endommager l’appareil.
Tout orifi ce effectué dans le corps du véhicule doit être • scellé à l’aide d’un adhésif à base de silicone. Si des gaz
d’échappement ou de l’eau pénètre dans le véhicule, cela
risque de provoquer un accident.
Lors de l’installation de l’appareil, serrez fermement les • boulons. Si les boulons sont lâches, cela risque de
provoquer un accident ou d’entraîner un dysfonctionnement.
Remarques à propos du raccordement
AVERTISSEMENT
Isolez tous les câbles conformément au mode d’emploi afi n • de ne pas entraver le fonctionnement.
Branchez les câbles de raccordement à l’écart des zones où • la température est élevé. Si la gaine des câbles fond, un
court-circuit risquerait de survenir et de provoquer un
accident ou un incendie.
Soyez vigilant lorsque vous effectuez les raccordements
dans le compartiment moteur.
Lors de l’installation de l’appareil dans un véhicule équipé • d’un système d’airbag, ne passez jamais ces câbles par des
endroits où ils pourraient entraver le fonctionnement de
l’airbag.
Si l’airbag ne fonctionne pas correctement en cas d’urgence,
cela risque d’aggraver les lésions corporelles.
ATTENTION
Vérifi ez les fi ls à l’aide d’un multimètre numérique avant • d’effectuer tout raccordement. De nombreux nouveaux
véhicules utilisent des circuits à faible tension et/ou
multiplexés qui risquent d’être endommagés en cas
d’utilisation d’une lampe témoin ou d’une sonde logique.
Raccordez correctement les câbles. Un raccordement • incorrect risquerait de provoquer un incendie ou un accident.
Lorsque vous faites passer les câbles à travers la carrosserie • du véhicule, utilisez des rondelles non conductrices. Des
gaines de câbles usées à force de frottements risquent de
provoquer un accident, un incendie ou un court-circuit.
Une fois le câblage terminé, fi xez les câbles à l’aide d’un • ruban isolant.
Veillez à couper le contact du véhicule lors du raccordement • ou du débranchement des câbles depuis/vers l’appareil,
sinon vous risqueriez de vous électrocuter, de vous blesser
ou de provoquer un accident.
AVERTISSEMENT
Pour des raisons de sécurité, le conducteur ne doit pas
regarder des DVD vidéo, ni actionner les commandes en
conduisant. Notez que cela est interdit par la loi dans de
nombreux pays.
Par ailleurs, le volume doit également être réglé à un niveau qui
permette de percevoir les sons extérieurs.
Cet appareil a été testé et jugé conforme aux limites des appareils
numériques de classe B, conformément aux termes de la section15
du règlement du FCC. Ces limites ont pour but d’assurer une
protection raisonnable contre les interférences parasites dans une
installation résidentielle. Cet appareil génère, utilise et peut émettre
une énergie radioélectrique et, s’il n’est pas installé et utilisé en stricte
conformité avec ces instructions, peut provoquer des interférences
parasites dans les liaisons radiophoniques. Ceci ne garantit pas pour
autant qu’une installation particulière n’émettra aucune interférence. Si
l’appareil engendre des interférences parasites avec la réception radio
ou télévision (ce qui peut être déterminé en éteignant puis en
rallumant l’appareil), il est conseillé de consulter votre revendeur ou
un technicien radio/télévision expérimenté.
INFORMATIONS AUX UTILISATEURS:
TOUTE ALTERATION OU MODIFICATION DE
L’APPAREIL NON APPROUVEE PAR LE FABRICANT
ANNULE LA GARANTIE ET CONSTITUE UNE
INFRACTION A L’APPROBATION FCC.
English Français Español
CLARION PRODUCT REGISTRATION INFORMATION
For USA and Canada only
www.clarion.com
Dear Customer:
Congratulations on your purchase of a Clarion mobile electronic product. We are confi dent
that you’ll enjoy your Clarion experience.
There are many benefi ts to registering your product. We invite you to visit our website at
www.clarion.com to register your Clarion product.
We have made product registration simple with our easy to use website. The registration
form is short and easy to complete. Once you’re registered, we can keep you informed of
important product information.
Register at www.clarion.com - it’s easy to keep your Clarion product up to date.
INFORMATIONS DE L’ENREGISTREMENT DE PRODUITS CLARION
Pour les Étas Unis et le Canada seulement
www.clarion.com
Cher client:
Nous vous remercions d’avoir acheté ce produit électronique mobile Clarion. Nous sommes
confi ants que vous apprécierez votre expérience Clarion.
Il y a beaucoup d’avantage à enregistrer votre produits. Nous vous invitons à visiter notre
site Web www.clarion.com pour enregistrer votre produit Clarion.
Nous avons facilité la tache d’enregistrement de produit simple et facile grâce à notre site Web.
Le formulaire d’enregistrement est court et facile à compléter. Lorsque vous êtes enregistrer,
nous pouvons vous tenir informé des informations important de produits.
Enregistrer à www.clarion.com - c’est facile de mettre à jour votre produit Clarion.
INFORMACIÓN DEL REGISTRO DE PRODUCTO DE CLARION
Para USA y Canada nomas
www.clarion.com
Querido Cliente:
Felicitaciones por su compra de producto electrónico móvil de Clarion. Estamos seguros
que usted gozará de su experiencia con el producto de Clarion.
Hay muchas ventajas al registrar su producto. Le invitamos a que visite nuestro sitio en
internet www.clarion.com para registrar su producto de Clarion.
Hemos hecho el registro de producto fácil en nuestro sitio. La forma de registro es corta y
fácil de completar. Una vez que lo registre, podremos proporcionarle la información de su
producto.
Registrese en www.clarion.com - es fácil mantener su producto de Clarion actualizado.
This device complies with Part 15 of the FCC Rules. Operation is subject
to the following two conditions:
(1) this device may not cause harmful interference, and
(2) this device must accept any interference received, including
interference that may cause undesired operation.
This Class B digital apparatus complies with Canadian ICES-003.
Cet appareil numérique de la classe B est conforme à la norme NMB-003
du Canada.
FCC ID: AX2QY5014
IC: 419C-QY5014
English
Français
Español
NX700̲NA.indd1NX700̲NA.indd1 09.12.810:38:00AM09.12.810:38:00AM

■Prepare all articles necessary for installing the main unit 1. before starting.
Install the unit within 30° of the horizontal plane.2.
If you have to do any modifi cation on the car body, such as 3. drilling holes, consult your car dealer beforehand.
Use the included screws for installation. Using other screws 4. can cause damage.
This unit has a fan motor in the left side of the main unit so as 5. not to raise the temperature in the main unit. When the fan
motor vent is covered with cords or mounting bracket, it may
cause a malfunction. Be sure not to cover it when wiring
cords.
This model features an operation panel that slides forward.On 6. some types of cars, the operation panel may make contact
with the dashboard or gearshift lever, in which cause it cannot
be installed. Before installing, check that the unit will not
hamper operation of the gearshift lever or obstruct your view
before selecting the installation location.
■Préparez toutes les pièces nécessaires avant de procéder à 1. l’installation de l’unité principale.
Installez l’appareil avec une inclinaison d’environ 30°.2.
Si l’installation nécessite certaines interventions sur la 3. carrosserie, comme percer des trous, consultez votre
concessionnaire au préalable.
Pour l’installation, utilisez exclusivement les vis fournies. 4. L’utilisation d’autres vis pourrait endommager l’appareil.
Cet appareil est doté d’un moteur de ventilateur (situé à 5. gauche) afi n de contrôler la température de l’unité principale.
Si ce ventilateur est recouvert par des câbles ou un support
de montage, cela peut engendrer un dysfonctionnement.
Veillez à ne pas le recouvrir lorsque vous raccordez des
câbles.
Ce modèle est doté d’un panneau de commande qui coulisse 6. vers l’avant.
Sur certains modèles de véhicules, le panneau de commande
peut venir heurter le tableau de bord ou le levier de vitesses,
auquel cas l’appareil ne pourra pas être installé. Vérifi ez que
l’appareil ne gêne pas le mouvement du levier de vitesses ou
votre champ de vision lors du choix de l’emplacement
d’installation.
■Tenga preparados todos los artículos necesarios para la 1. instalación de la unidad principal antes de empezar.
Instale la unidad dentro de un margen de 30° respecto del 2. plano horizontal.
Si necesita realizar algún trabajo en la carrocería del 3. automóvil, como taladrar orifi cios, póngase en contacto antes
con el proveedor de su automóvil.
Utilice los tornillos suministrados para la instalación. Si utiliza 4. otro tipo de tornillos, podría ocasionar daños.
Esta unidad dispone de un motor de ventilador a la izquierda 5. de la unidad principal para que no suba en exceso la
temperatura de la unidad principal. Si la ventilación del motor
está cubierta con cables o un soporte de montaje, puede
provocar un fallo de funcionamiento. Asegúrese de no cubrirla
con el cableado.
Este modelo incluye un panel de operaciones que se desliza 6. hacia delante.
En algunos tipos de vehículos, es posible que el panel de
operaciones entre en contacto con el salpicadero o con la
palanca de cambios. Antes de realizar la instalación,
compruebe que la unidad no obstaculice la manipulación de
la palanca de cambios ni obstruya la vista antes de
seleccionar la ubicación de instalación.
2. CAUTIONS ON INSTALLATION/PRECAUTIONS D’INSTALLATION/PRECAUCIONES SOBRE LA INSTALACIÓN
Max. 30°
Maxi. 30°
Máx. 30°
Fan motor vent
Ventilateur
Ventilación del motor
Gearshift lever
(check that it does not touch the LCD.)
Levier de vitesses
(il ne doit pas heurter le moniteur LCD.)
Palanca de cambios
(compruebe que no toca con la pantalla LCD).
Dashboard
Tableau de bord
Salpicadero
3. INSTALLING THE MAIN UNIT/INSTALLTION DE L’UNITE PRINCIPALE/INSTALACIÓN DE LA UNIDAD PRINCIPAL
This unit is designed for fi xed installation in the dashboard.
When installing the main unit in NISSAN vehicles, use the parts attached to the 1. unit (see “■ NISSAN”). When installing the main unit in TOYOTA vehicles, use
the parts attached to the vehicle (see “■ TOYOTA”).
Wire as shown in Section 6.2.
Reassemble and secure the unit in the dashboard and set the face panel and 3. center panel.
Cet appareil est conçu pour une installation fi xe dans le tableau de bord.
Lorsque vous installez l’unité principale dans des véhicules NISSAN, 1. servez-vous des pièces fournies avec l’unité (voir « ■ NISSAN »). Lorsque vous
installez l’unité principale dans des véhicules TOYOTA, servez-vous des pièces
fournies avec le véhicule (voir « ■ TOYOTA »).
Effectuez les branchements comme indiqué à la section 6.2.
Remontez et fi xez l’unité sur le tableau de bord et réglez le panneau avant et le 3. panneau central.
Esta unidad se ha diseñado para instalarse de forma fi ja en el salpicadero.
Al instalar la unidad principal en vehículos NISSAN, utilice las piezas que 1. vienen con la unidad (consulte “■ NISSAN”). Al instalar la unidad principal en
vehículos TOYOTA, utilice las piezas que vienen con el vehículo (consulte “■
TOYOTA”).
Conecte los cables tal como se muestra en la sección 6.2.
Vuelva a montar y a asegurar la unidad en el salpicadero y ajuste los paneles 3. frontal y central.
Mounting Screw Holes (Side View of the Main Unit)
Orifices pour vis de fixation (vue latérale de l’unité principale)
Orificios para los tornillos de montaje (vista lateral de la unidad principal)
NISSAN TOYOTA
6-Flat head screw (M5 × 8)
(attached to the main unit)
6 vis à tête plate (M5 × 8)
(fournies à l’unité principale)
6 tornillos de cabeza plana (M5 × 8)
(unidos a la unidad principal)
6-Spacer (thickness: 1 mm)
6 entretoises (épaisseur : 1 mm)
6 espaciadores (grosor: 1 mm)
Mounting bracket (1 pair for the left and right sides)
Support de montage (1 paire pour chaque côté gauche et droit)
Soporte de montaje (1 par para los lados izquierdo y derecho)
Finisher *1
Finition *1
Acabado *1
NISSAN ■
Note:
*1 Position the face panel with its wide edge at the bottom. Fit
the edge into the groove of the main unit.
*2 Some panel openings are too small for the unit depending
on the vehicle type and model. In such a case, trim the upper
and lower sides of the panel frame by about 0.5 to 1.5 mm
so the unit can be inserted smoothly.
*3 If a hook on the installation bracket interferes with the unit,
bend and fl atten it with a nipper or similar tool.
Remarque:
*1 Positionnez le panneau avant avec le bord le plus large vers
le bas. Insérez le bord dans la rainure de l’unité principale.
*2 Certains orifi ces du panneau sont trop petits pour l’unité
selon le type de véhicule et le modèle. Dans ce cas,
effectuez une coupe de 0,5 à 1,5mm dans les parties
inférieures et supérieures du cadre du panneau afi n de
pouvoir insérer l’unité facilement.
*3 Si le crochet du support d’installation est en contact avec
l’unité, pliez-le et aplatissez-le à l’aide d’une pince ou d’un
outil similaire.
Nota:
*1 Coloque el panel frontal con el borde más ancho apoyado
sobre la parte inferior. Encaje el borde en la ranura de la
unidad principal.
*2 Dependiendo del tipo y modelo de vehículo, algunas
aperturas del panel son demasiado pequeñas para la
unidad. En tal caso, recorte los lados superior e inferior del
marco del panel aproximadamente entre 0,5 y 1,5 mm de tal
forma que la unidad pueda insertarse sin problemas.
*3 Si el gancho del soporte de instalación interfi ere con la
unidad, dóblelo y aplánelo con una pinza o una herramienta
similar.
Typical Mounting Brackets
Supports de montage standard
Soportes de montaje habituales
Example 1-3 / Exemple n°1-3 / Ejemplo 1-3
Affix the screws to the ● marks.
Fixez les vis selon les marques ●.
Fije los tornillos sobre las marcas ●.
Vehicles other than NISSAN and TOYOTA ■
In some cases the center panel may require modifi cation.
(Trimming, fi ling, etc.)
Véhicules d’une marque autre que NISSAN ■
et TOYOTA
Dans certains cas, il peut s’avérer nécessaire d’effectuer des
modifi cations sur le panneau central (découpage, remplissage,
etc.).
Otros vehículos que no sean NISSAN ni ■
TOYOTA
En algunos casos, es posible que se tenga que modifi car el
panel central. (Recortar, rellenar, etc.)
Be sure to turn the power off before wiring. Be particularly careful where you route • the wires.
Keep them well away from the engine, and exhaust pipe, etc. Heat may damage the • wires.
If the fuse should blow, check to see if the wiring is correct. If a fuse is blown, • replace it with a new one of the same specifi cation as the original.
To replace the fuse, remove the old fuse of the power supply cord and insert the new • one.
Note:
There are various types of fuse holder. Do not let the battery side touch other metal • parts.
Veillez à mettre l’appareil hors tension avant d’effectuer tout branchement. Soyez • particulièrement vigilant au cheminement des fi ls.
Ne les faites pas passer près du moteur, du tuyau d’échappement, etc. La chaleur • pourrait les endommager.
Si le fusible saute, vérifi ez vos branchements. Si un fusible saute, remplacez-le par • un fusible possédant les mêmes caractéristiques que celui d’origine.
Pour remplacer le fusible, retirez le fusible sauté du cordon d’alimentation et • installez-en un nouveau.
Remarque:
Il existe divers types de porte-fusible. Ne laissez pas le côté batterie toucher • d’autres pièces métalliques.
Antes de conectar los cables, asegúrese de desconectar la alimentación.Tenga • especial cuidado cuando dirija los cables.
Manténgalos alejados del motor, el tubo de escape, etc. El calor podría dañar los • cables.
Si se funde el fusible, compruebe si la conexión de los cables es correcta. Si se • funde un fusible, cámbielo por uno nuevo con las mismas especifi caciones que el
original.
Para sustituir el fusible, retire el fusible usado del cable de la fuente de alimentación • e inserte el nuevo..
Nota:
Existen varios tipos de portafusibles. No permita que el terminal del lado de la • batería toque otras partes metálicas.
4. CAUTIONS ON WIRING
PRECAUTIONS DE BRANCHEMENT
PRECAUCIONES PARA LA CONEXIÓN DE CABLES
Fuse (15A FUSE)
Fusible (15A)
Fusible (15A FUSE)
Fuse holder
Porte-fusible
Portafusibles
After the connection, fi x the cord by a clamp or • insulation tape for protection.
Une fois le branchement effectué, fi xez le cordon • à l’aide d’un serre-fi l ou d’un ruban isolant pour
le protéger.
Después de la conexión, fi je el conductor • con una abrazadera o con cinta aislante para
protegerlo.
5. INSTALLING THE GPS ANTENNA/INSTALLATION DE L’ANTENNE GPS
INSTALACIÓN DE LA ANTENA GPS
WARNING
Do not install the GPS antenna in a place • where it may interfere with the operation of
the airbag or hinder the driver’s visual range.
Do not use the navigation system with the • GPS antenna cord cut off. The power cables
in the cord may be short-circuited.
Note:
The supplied GPS antenna is for installing inside the • vehicle. Do not install it outside the vehicle.
Install the GPS antenna more than 50 cm away from • the main unit, other audio devices such as CD player,
and a radar detector. If it is installed near these
devices, GPS reception may be impaired.
To improve the GPS signal reception, install the GPS • antenna horizontally on a fl at plane.
Do not wax or paint the cover of the GPS antenna. • This may reduce the performance of the GPS
antenna.
Install the GPS antenna at least 10 cm away from the • windshield.
Wipe off the dirt of the mounting surface before • installing the GPS antenna.
AVERTISSEMENT
N’installez pas l’antenne GPS dans un endroit où • elle risque de gêner le fonctionnement de
l’airbag ou d’entraver le champ de vision du
conducteur.
N’utilisez pas ce système avec un câble • d’antenne GPS abîmé. Les cordons
d’alimentation risqueraient d’être court-circuités.
Remarque:
L’antenne GPS fournie est destinée à être installée à • l’intérieur du véhicule. Ne l’installez pas à l’extérieur
du véhicule.
Installez l’antenne GPS à plus de 50 cm de l’appareil • principal, d’autres périphériques externes, tels qu’un
lecteur CD, ou d’un détecteur de radar. Si elle est
installée à proximité de ces appareils, la réception
GPS risque d’être affaiblie.
Pour améliorer la réception des signaux GPS, installez • l’antenne GPS à l’horizontale sur une surface plate.
Ne cirez pas ou ne peignez pas le couvercle de • l’antenne GPS. Cela risquerait de diminuer ses
performances.
Installez l’antenne GPS à 10 cm minimum du • pare-brise.
Nettoyez la surface de montage avant d’installer • l’antenne GPS.
ADVERTENCIA
No instale la antena GPS en un lugar en que • pueda interferir con el funcionamiento del
airbag ni estorbar el rango visual del
conductor.
No utilice este sistema con una antena GPS • cortada. Los cables del terminal podrían
cortocircuitarse.
Nota:
La antena GPS suministrada es para instalarla en el • interior del vehículo. No la instale en el exterior del
vehículo.
Instale la antena GPS a más de 50 cm de la unidad • principal, otros dispositivos de audio como un
reproductor de CD y del detector de radares. Si se
instala cerca de estos dispositivos, la recepción GPS
podría verse afectada.
Para mejorar la recepción de la señal GPS, instale la • antena GPS horizontalmente sobre una superfi cie
plana.
No encere ni pinte la cubierta de la antena GPS. Si lo • hace, podría afectar negativamente al rendimiento de
la antena GPS.
Instale la antena GPS al menos a 10 cm del • parabrisas.
Limpie la suciedad de la superfi cie de montaje antes • de instalar la antena GPS.
Double-sided tape
Ruban adhésif double face
Cinta adhesiva de dos caras
Bottom face of the GPS antenna
Surface inférieure de l’antenne GPS
Cara inferior de la antena GPS
GPS antenna
Antenne GPS
Antena GPS
Cord holder
Serre-câbles
Retén de cable
6. WIRE CONNECTION/BRANCHEMENT DES FILS/CONEXIÓN DE LOS CABLES
English
1Maint Unit
2Connection cable
(included in your iPod/iPhone)
3Connection cable (CCA-723/CCA-748)
44-Channel Amplifi er
5Subwoofer
6Rear Monitor
7Rear Vision Camera
8VTR etc.
9GPS antenna
0Sirius Tuner/XM Mini-Tuner
!Microphone
1+12V main power (Yellow)
2Ground (Black)
3CeNET bus backup (Yellow)
4Rear right + (Purple)
5Rear right - (Purple/Black)
6+12V accessory (Red)
7Front right + (Gray)
8Front right - (Gray/Black)
9Front left + (White)
0Front left - (White/Black)
!No connection (Brown)
@Rear left + (Green)
#Rear left - (Green/Black)
$Amplifi er turn-on cord (Blue/White)
%Illumination (Orange/White)
¥Auto antenna (Blue)
&Parking brake cord (Grass-green)
*Reverse gear cord (Purple/White)
Français
1Unité principale
2Câble de connexion
(fourni avec votre iPod/iPhone)
3Câble de connexion (CCA-723/CCA-748)
4Amplifi cateur 4 canaux
5Subwoofer
6Moniteur arrière
7Caméra de recul
8VTR, etc.
9Antenne GPS
0Tuner Sirius/Mini-Tuner XM
!Microphone
1Alimentation principale +12 V (Jaune)
2Masse (Noir)
3Sauvegarde bus CeNET (Jaune)
4Arrière droit + (Violet)
5Arrière droit - (Violet/Noir)
6Accessoire +12 V (Rouge)
7Avant droit + (Gris)
8Avant droit - (Gris/Noir)
9Avant gauche + (Blanc)
0Avant gauche - (Blanc/Noir)
!Aucun raccordement (Marron)
@Arrière gauche + (Vert)
#Arrière gauche - (Vert/Noir)
$Cordon amplifi cateur (Bleu/Blanc)
%Eclairage (Orange/Blanc)
¥Antenne auto (Bleu)
&Câble de frein à main (Vert pré)
*Câble de marche arrière (Violet/Blanc)
Español
1Unidad principal
2Cable de conexión
(incluido en el iPod/iPhone)
3Cable de conexión (CCA-723/CCA-748)
4Amplifi cador de 4 canales
5Subwoofer
6Monitor trasero
7Cámara de visión trasera
8VTR, etc.
9Antena GPS
0Sintonizador Sirius/Minisintonizador XM
!Micrófono
1Alimentación principal +12V (Amarillo)
2Tierra (Negro)
3Respaldo del bus CeNET (Amarillo)
4Derecho trasero + (Púrpura)
5Derecho trasero - (Púrpura/Negro)
6Accesorio +12V (Rojo)
7Derecho delantero + (Gris)
8Derecho delantero - (Gris/Negro)
9Izquierdo delantero + (Blanco)
0Izquierdo delantero - (Blanco/Negro)
!Sin conexión (Marrón)
@Izquierdo trasero + (Verde)
#Izquierdo trasero - (Verde/Negro)
$Cable de encendido del amplifi cador (Azul/
Blanco)
%Iluminación (Naranja/Blanco)
%Antena automática (Azul)
&Cable de freno de estacionamiento (Verde
hierba)
*Cable de marcha atrás (Púrpura/Blanco)
Note:
*1 Connect to the AUX audio input terminal and the iPod video input terminal. (Audio connection is required
only when [Analog] is selected for the iPod output signal. (See Owner’s Manual.)
Remarque:
*1 Connect to the AUX audio input terminal and the iPod video input terminal. (Audio connection is required
only when [Analog] is selected for the iPod output signal. (See Owner’s Manual.)
Nota:
*1 Connect to the AUX audio input terminal and the iPod video input terminal. (Audio connection is required
only when [Analog] is selected for the iPod output signal. (See Owner’s Manual.)
Connecting the parking brake cord ■
Connect the cord to parking brake lamp ground in the meter panel.
Note:
Connecting the parking brake cord to lamp ground allows you to watch video images when the • parking brake is engaged.
When the parking brake cord is not connected, the monitor will not display video images.•
If “• Audio Only” appears on the screen just after turning on the ACC power of the car, release the
parking brake while confi rming safety, and then engage the parking brake again.
Branchement du câble de frein à main ■
Branchez le fi l à la masse de la lampe du frein à main, dans le panneau de contrôle.
Remarque:
Le branchement du câble du frein à main à la masse de la lampe vous permet de visionner des • images vidéo lorsque le frein à main est enclenché.
Si le câble du frein à main n’est pas raccordé, le moniteur n’affi che pas d’image vidéo.•
Si « • Audio Only » s’affi che à l’écran juste après avoir mis le contact du véhicule, relâchez le frein à
main en vérifi ant que cela ne pose aucun risque de sécurité, puis serrez-le à nouveau.
Conexión del cable del freno de estacionamiento ■
Conecte el cable al indicador luminoso de puesta a tierra del freno de estacionamiento en el
panel de instrumentos.
Nota:
Si conecta el cable del freno de estacionamiento al indicador luminoso de puesta a tierra, podrá ver • las imágenes de vídeo cuando el freno de estacionamiento esté accionado.
Si el cable del freno de estacionamiento no está conectado, el monitor no mostrará las imágenes de • vídeo.
Si “• Audio Only” aparece en la pantalla justo después de encender la alimentación de ACC del
vehículo, quite el freno de estacionamiento garantizando la máxima seguridad y, a continuación,
vuelva a accionarlo.
Parking brake lamp
Voyant du frein à main
Indicador luminoso del freno de estacionamiento
+ cord to battery
Câble + de batterie
+ conductor a la batería Parking brake
Frein à main
Freno de estacionamiento
Parking brake cord (Grass-green)
Câble de frein à main (vert pré)
Cable del freno de estacionamiento (verde hierba)
Electro-tap
(sold separately)
Dérive électrique
(vendu séparément)
Borne eléctrico
(se vende por separado)
Parking brake signal cord
Câble du signal du frein à main
Cable de señal de freno de estacionamiento
Stopper
Butoir
Tope Parking brake cord (Grass-green)
Câble de frein à main (vert pré)
Cable del freno de estacionamiento (verde hierba)
Parking brake signal cord
Câble du signal du frein à main
Cable de señal de freno de estacionamiento
*3
Center Panel *2
Panneau central *2
Panel central *2
8-Hexagonal screw (M5 × 8)
8 vis hexagonales (M5 × 8)
8 tornillos hexagonales (M5 × 8)
Mounting bracket
(1 pair for the left and right sides)
Support de montage
(1paire pour chaque côté gauche et droit)
Soporte de montaje
(1 par para los lados izquierdo y derecho)
TOYOTA ■
Screws marked ★ are attached to the vehicle.
Les vis marquées ★ sont fournies avec le véhicule.
Los tornillos con la marca ★ vienen con el vehículo.
Stick the double-sided tape to the bottom face of the GPS antenna.•
Collez le ruban adhésif double face sur la surface inférieure de l’antenne GPS.•
Pegue la cinta adhesiva de dos caras a la cara inferior de la antena GPS.•
iPod /
iPhone
iPod
with
video /
iPhone
*1
1
2
3
4
5
7
8
9
0
!
@
#
$
%
¥
&
*
6
3A
1. BEFORE STARTING/AVANT DE DEMARRER/ANTES DE COMENZAR
Car battery
Batterie du véhicule
Batería del automóvil
■This set is exclusively for use in cars with a 1. negative ground, 12 V power supply.
Read these instructions carefully.2.
Be sure to disconnect the battery “3. -”
terminal before starting. This is to prevent
short circuits during installation.
■Cet appareil est exclusivement destiné à 1. être utilisé dans les voitures avec une
alimentation 12 V à masse négative.
Lire ces instructions attentivement.2.
S’assurer de débrancher la borne “3. -” de
la batterie avant de commencer. Cela
évitera les court-circuits pendant
l’installation.
■Esta unidad ha sido diseñada para 1. utilizarse exclusivamente en automóviles
con fuente de alimentación de 12 V, y
negativo a masa.
Lea cuidadosamente estas instrucciones.2.
Antes de comenzar, cerciórese de 3. desconectar el terminal “-” de la batería.
Esto es para evitar cortocircuitos durante
la instalación.
CeNET terminal
Borne CeNET
Terminal CeNET
CeNET cable
Câble CeNET
Cable CeNET
Slide cap
Cache
Cubierta deslizante
Connect the CeNET extension cable fully and securely • until it locks. When the CeNET extension cable is pulled,
hold the slide cap part and pull it towards you.
Raccordez fermement le câble prolongateur CeNET • jusqu’à ce qu’il se mette en place. Une fois le câble
prolongateur CeNET correctement raccordé, tenez le
cache et tirez-le vers vous en le faisant glisser.
Conecte el cable de extensión CeNET por completo y de • forma segura hasta que quede fi jado. Al extraer el cable de
extensión CeNET, sostenga la pieza de la cubierta
deslizante y tire de él.
Mount the GPS antenna.• Stick it surely on a fl at plane of the passenger-side dashboard
where GPS signal interruption is minimized.
Wire the GPS antenna cord.• Fasten the cord using the cord holders.
Montez l’antenne GPS.• Placez-la sur une surface stable et plane sur le tableau de
bord côté passager, de sorte à minimiser l’interruption du
signal GPS.
Raccordez le câble d’antenne GPS.• Fixez le câble à l’aide des serre-câbles.
Monte la antena GPS.• Péguela con fi
rmeza en una superfi cie plana del salpicadero
del lado del pasajero (donde la señal GPS es más estable).
Conecte los cables de la antena GPS.• Apriete el cable utilizando los retenes.
Max. 3 mm (M4 screw)/Max. 8 mm (M5 screw)
Maxi. 3 mm (vis M4)/Maxi. 8 mm (vis M5)
3 mm como máximo (tornillo M4)/8 mm como máximo (tornillo M5)
Damage
Incorrect
Daños
Chassis/Carrosserie/Chasis
NX700̲NA.indd2NX700̲NA.indd2 09.12.810:38:01AM09.12.810:38:01AM
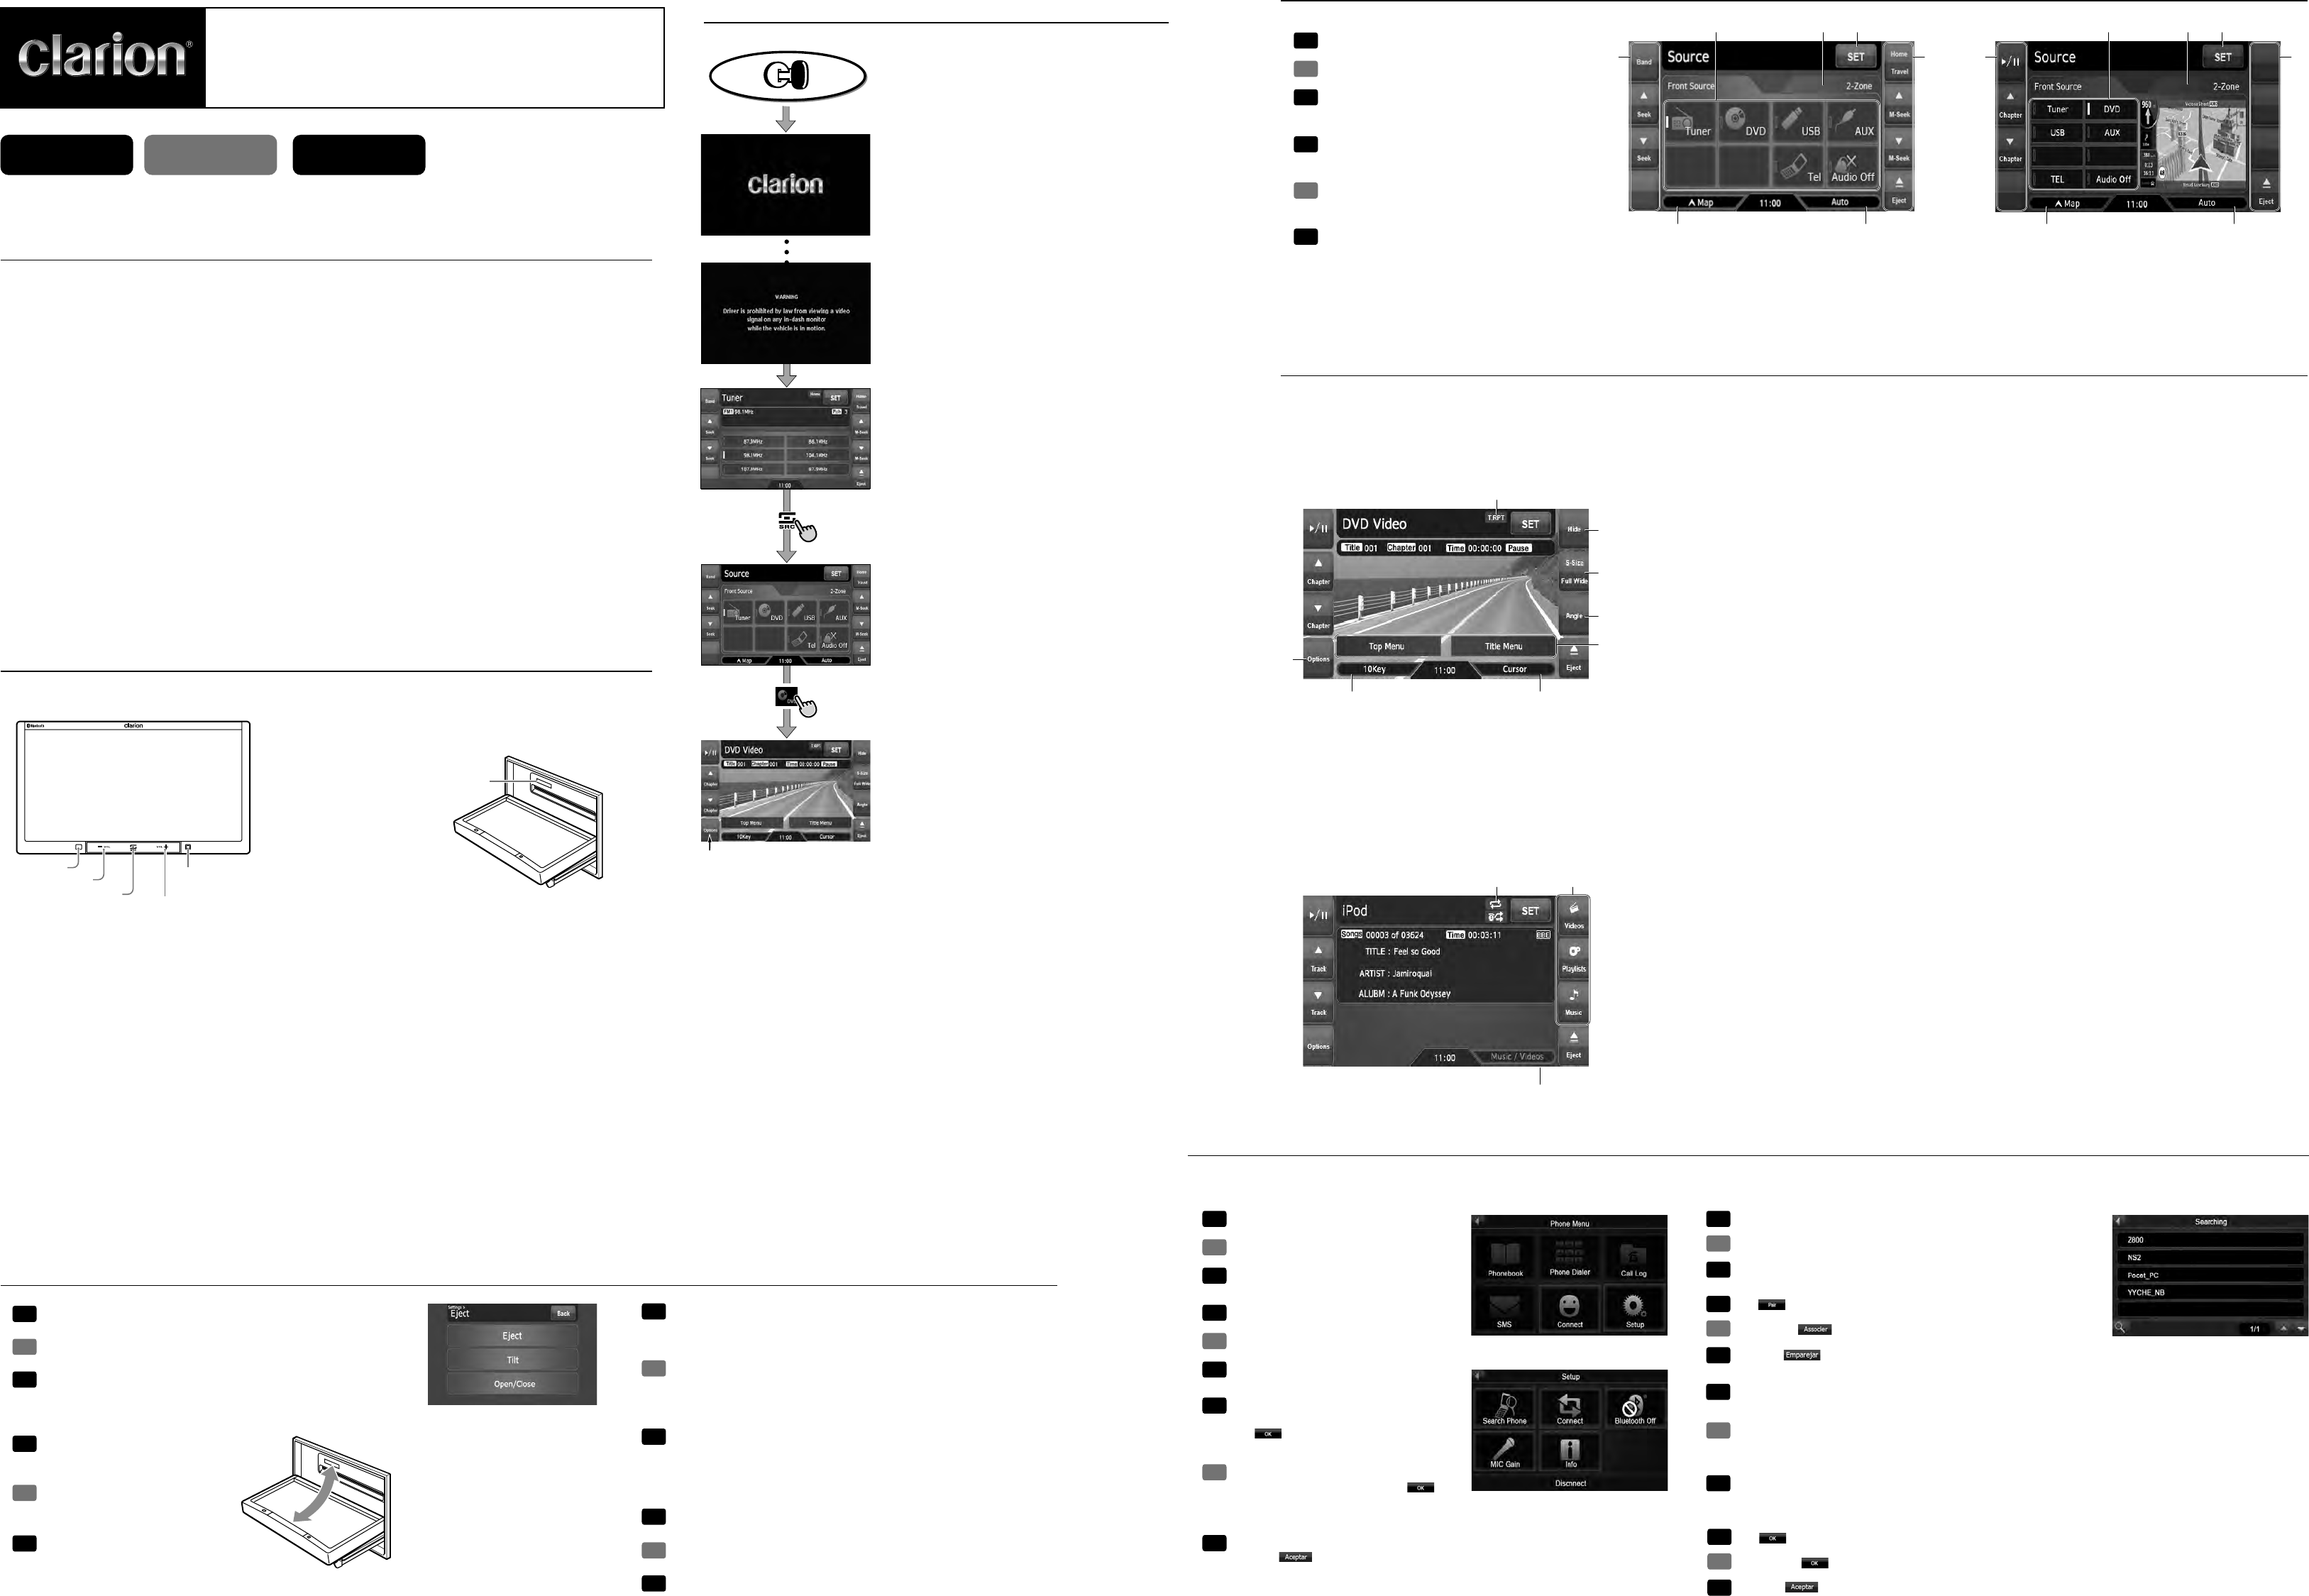
1
2
2
4
5
3
You can change the media sources.
Vous pouvez modifier les supports sources.
Es posible cambiar las fuentes de medios.
NX700
QUICK START GUIDE /
GUIDE DE DÉMARRAGE
RAPIDE /
GUÍA DE INICIO RÁPIDO
English Françals Español
PACKAGE CONTENTS / CONTENU DE L’EMBALLAGE / CONTENIDO DEL PAQUETE
1 Main unit / Unité principale / Unidad principal
2 Quick Start Guide (This Guide) / Guide de démarrage rapide (Ce Guide) / Guía de inicio rápido (Esta Guía)
3 Installation Manual / Manuel d’installation / Manual de instalación
4 CD-ROM / CD-ROM / CD-ROM
s/WNERSMANUAL)NSTALLATION-ANUALMode d’emploi et manuel d’installation / Manual de instrucciones y de instalación
s5SER-ANUAL#LARION-OBILE-APManuel de l’utilisateur - Clarion Mobile Map / Manual de usuario - Clarion Mobile Map
s
User Manual - Bluetooth Connectivity / Manuel de l’utilisateur - Connectivité Bluetooth / Manual de usuario - Conectividad Bluetooth
50OWERSUPPLYCORDCordon d’alimentation / Cable de la fuente de alimentación
6 RCA pin cord / Cordon RCA à broche / Cable de terminales RCA
7 Bag for accessories / Sac d’accessoires / Bolsa de accesorios
&LATHEADSCREWVis à tête plate / Tornillo de cabeza plana (M5 X 8 mm)................................................................................... 8
Hexagonal bolt / Vis hexagonales / Perno hexagonal (M5 X 8 mm) ............................................................................................. 8
Rubber cap (for RCA pin cord) / Capuchon en caoutchouc (pour le cordon RCA à broche) /
Cubierta de caucho (para cables de terminales RCA).................................................................................................................. 14
Lead holder / Support de câble / Sujetacables .............................................................................................................................. 3
Double-sided tape for fastening GPS antenna / Ruban adhésif double face pour fixer l’antenne GPS /
Cinta de doble cara para fijar la antena GPS ................................................................................................................................ 1
8 Remote control unit / Télécommande / Unidad de mando a distancia
9 Battery / Pile / Pilas
0 Finisher / Cadre extérieur / Acabado
! Warranty card / Carte de garantie/ Tarjeta de garantía
@ GPS antenna / Antenne GPS / Antena GPS
# Microphone / Microphone / Micrófono
Note:
sBe sure to read this section while referring to the front diagram.
1
Sensor
s2ECEIVERFORTHEREMOTECONTROLUNITOPERATINGRANGEINALL
directions).
2
[VOL –], [VOL +] buttons
s5SETHESEBUTTONSTOINCREASEDECREASETHEVOLUME
3
[SRC] button
s0RESSTHISBUTTONTODISPLAYHIDETHE3OURCESCREENTOSWITCH
the source mode.
4
Blink LED/Reset button
s7HENTHE"LINK,%$FUNCTIONISSETTOhOn” from the System tab
MENUONTHE'ENERALSCREENBLINKSWHENTHE!##POWERIS
turned off.
5
SD memory card slot
s3$MEMORYCARDFUNCTIONISAVAILABLEINTHE.AVIMODE&OR
more information about the SD memory card function, see your
5SERMANUALFORTHE.AVIMODE
Note:
sWhen you insert the SD memory card stored music files, they cannot
be read in this unit.
Remarque :
s
Lisez attentivement ce chapitre en vous référant aux schémas de la façade.
1
Capteur
s2ÏCEPTEURDELATÏLÏCOMMANDERAYONDEFONCTIONNEMENT
dans toutes les directions).
2
Touches [VOL –], [VOL +]
s5TILISEZCESTOUCHESPOURAUGMENTERDIMINUERLEVOLUME
3
Touche [SRC]
s!PPUYEZSURCETTETOUCHEPOURAFFICHERMASQUER3OURCE
l’écran et changer le mode source.
4
DEL clignotante/bouton de réinitialisation
s3ILAFONCTION"LINK,%$ESTRÏGLÏESURiOn » à partir de
LONGLET3YSTEMDELÏCRAN'ENERALELLECLIGNOTELORSQUEVOUS
coupez le contact du véhicule.
5
Logement de la carte mémoire SD
s
,AFONCTIONDECARTEMÏMOIRE3$ESTDISPONIBLEENMODE.AVI0OUR
plus d’informations sur la fonction de carte mémoire SD, consultez
LE-ANUELDELUTILISATEURSECTIONDÏDIÏEAUMODE.AVI
Remarque :
sSi vous insérez une carte mémoire SD contenant des fichiers
musicaux, il est impossible de lire ces fichiers sur cet appareil.
Nota:
s
Asegúrese de leer esta sección a la vez que consulta el diagrama delantero.
1
Sensor
s2ECEPTORPARALAUNIDADDEMANDOADISTANCIARANGODE
OPERACIØNENTODASLASDIRECCIONES
2
Botones [VOL –], [VOL +]
s5TILÓCELOSPARAAUMENTAROREDUCIRELVOLUMEN
3
Botón [SRC]
s0ULSEESTEBOTØNPARAVISUALIZAROCULTARLAPANTALLA3OURCEY
cambiar al modo de fuente.
4
LED parpadeante/botón de reinicio
s#UANDOLAFUNCIØN"LINK,%$SEESTABLECEENhOn” en el menú
de la ficha System de la pantalla General, parpadea al
desactivar la alimentación de ACC.
5
Ranura para tarjeta de memoria SD
s,AFUNCIØNDETARJETASDEMEMORIA3$ESTÈDISPONIBLEENEL
MODO.AVI0ARAOBTENERMÈSINFORMACIØNSOBRELAFUNCIØNDE
tarjetas de memoria SD, consulte el Manual de usuario
SECCIØNDELMODO.AVI
Nota:
sSi inserta una tarjeta de memoria SD con archivos de música, no
podrán leerse en esta unidad.be read in this unit.
Functions of Buttons / Fonctions des touches / Funciones de los botones
z
Operation Panel / Panneau de commande / Panel de operaciones
z DVD Video mode / DVD Video mode / Modo DVD vídeo
z With the operation panel open /
Lorsque le panneau de commande est ouvert
/
Con el panel de operaciones abierto
Selecting a Media Source / Sélection d’une source multimédia / Selección de una fuente de soporte
Connecting a Bluetooth Mobile Phone / Connexion d’un téléphone portable Bluetooth / Conectar a un Teléfono Móvil Bluetooth
Source Media Modes / Mode Source Multimédia / Modo De Soporte De Fuente
Opening/closing the Operation Panel / Ouverture/fermeture du panneau de commande / Apertura o cierre del panel de operaciones
Appuyez sur le bouton [o (Ejection)] pour afficher l’écran Eject.
4OQUELATECLA;o (Eject)] para visualizar la pantalla Eject.
1. Touch the [o (Eject)] key to display the Eject screen.
2. Touch the [Open/Close] key.
4HEOPERATIONPANELWILLBEOPENED
Appuyez sur la touche [Open/Close].
Le panneau de commande s’ouvre.
4OQUELATECLA;Open/Close].
Se abrirá el panel de operaciones.
3. Touch the [Open/Close=KEYWHENTHEOPERATIONPANELISOPEN
4HEOPERATIONPANELWILLBECLOSED
s4HEOPERATIONPANELWILLCLOSEAUTOMATICALLYWHENLEAVINGITOPENFORAWHILE
Appuyez sur la touche [Open/Close=LORSQUELEPANNEAUDECOMMANDEESTOUVERT
Le panneau de commande se ferme.
s,EPANNEAUDECOMMANDESEFERMEAUTOMATIQUEMENTSIVOUSLELAISSEZOUVERT
pendant un moment.
4OQUELATECLA;Open/Close] cuando el panel de operaciones esté abierto.
Se cerrará el panel de operaciones.
s%LPANELDEOPERACIONESSECERRARÈAUTOMÈTICAMENTESILODEJAABIERTODURANTEUNRATO
Turning the Power On / Mise sous tension /
Encender la alimentación
1. Press the [SRC] button to display the Source screen.
Appuyez sur la touche [SRC] pour afficher l’écran Source.
Pulse el botón [SRC] para ver la pantalla Source.
4OUCHTHEDESIRED3OURCEKEYYOUWISHTOCHANGETO
4HESYSTEMISSWITCHEDTOTHECORRESPONDINGSOURCE
media mode.
!PPUYEZSURLEBOUTON3OURCEQUEVOUSSOUHAITEZACTIVER
Le système active le mode source multimédia
correspondant.
4OQUELATECLADELAFUENTEALAQUEDESEECAMBIAR
El sistema se cambia al modo de soporte de fuente
correspondiente. 1 Control keys for current source /
Boutons de commande de la source actuelle /
Teclas de control para la fuente actual
2 Source keys / Boutons de la source / Teclas de fuente
3 Control 2-Zone / Commande 2-Zone / Control de 2-Zone
1 Displays status of Repeat play.
Affiche l’état de la lecture répétée.
Muestra el estado de la reproducción repetida.
2 Hides the control keys.
-ASQUELESBOUTONSDECOMMANDE
Oculta las teclas de control.
3 Changes the screen size to suit to the playback film.
Modifie la taille de l’écran selon le type de film lu.
#AMBIAELTAMA×ODELAPANTALLAPARAQUESEADAPTEALAPELÓCULAQUESEESTÈREPRODUCIENDO
43WITCHESAMONGTHEANGLESWHENTHEVIDEOIMAGESARERECORDEDINTWOORMOREANGLES
#OMMUTELESANGLESLORSQUELESIMAGESVIDÏOSONTENREGISTRÏESSOUSDEUXOUPLUSIEURSANGLES
Cambia entre los ángulos si las imágenes de vídeo se han grabado en dos o más ángulos.
5 Displays the DVD menu.
Affiche le menu DVD.
Muestra el menú DVD.
6 Displays the Cursor-Key Pad panel to operate the DVD menu.
Affiche le curseur pour pouvoir utiliser le menu DVD.
Muestra el panel de teclado-cursor para utilizar las funciones del menú DVD.
7$ISPLAYSTHE.UMERIC+EY0ADPANELTOOPERATETHE$6$MENU
!FFICHELEPAVÏNUMÏRIQUEPOURPOUVOIRUTILISERLEMENU$6$
Muestra el panel de teclado numérico para utilizar las funciones del menú DVD.
8 Displays the Options screen to specify other settings.
Affiche l’écran Options pour spécifier d’autres réglages.
Muestra la pantalla Options para especificar otros ajustes.
4 Enter Settings screen / Pour afficher l’écran Settings /
Pantalla de introducción de ajustes (Settings)
5 Set DIMMER mode / Pour régler le mode DIMMER /
Establecer modo DIMMER
63WITCHTO.AVIMODE0OURACTIVERLEMODE.AVI /
#AMBIARAMODO.AVI
3TARTTHEENGINE4HEPOWERISSUPPLIEDTOTHISUNIT
Démarrez le moteur. L’appareil est alimenté.
Encienda el motor. Esta unidad recibe la alimentación.
7HENYOUSELECTTHEDESIREDSOURCEMODEFOREXAMPLETHE$6$6IDEOORI0ODMODETHEFOLLOWINGSCREENWILLAPPEAR
,ORSQUEVOUSSÏLECTIONNEZLEMODESOURCEDEVOTRECHOIXPAREXEMPLELEMODE$6$VIDÏOOUI0ODLÏCRANSUIVANTSAFFICHE
Cuando selecciona el modo de fuente deseado (por ejemplo, DVD Vídeo o iPod), aparece la siguiente pantalla.
Press the [SRC] button to display the Source screen.
Appuyez sur la touche [SRC] pour afficher l’écran Source.
Pulse el botón [SRC] para ver la pantalla Source.
Touch the [DVD] key to select the DVD Video screen.
Appuyez sur le bouton [DVD] pour sélectionner le mode
DVD vidéo.
4OQUELATECLA;DVD] para seleccionar el modo DVD
vídeo.
Fr
Es Fr
Es
Fr
Es
En En
Fr
Es
En
En
4. Touch the [Back] key to return to the previous screen.
Appuyez sur la touche [Back] pour revenir à l’écran précédent.
4OQUELATECLA;Back] para regresar a la pantalla anterior.
Fr
Es
En
1. Tap TEL on the Source screen.
Pressez sur le bouton TEL sur l’écran Source.
Presione el botón TEL en la pantalla Source
(Fuente).
Fr
Es
En 4. 4APTHEMOBILEPHONEYOUWANTTOCONNECT
Les résultats s’afficheront sur l’écran.
,APANTALLAMOSTRARÈLOSRESULTADOSDELABÞSQUEDA
Fr
Es
En
5. 4APTOCONNECTTHISSYSTEMWITHTHEMOBILEPHONE
Pressez sur pour connecter votre appareil au téléphone portable.
Presione para conectar su dispositivo con el teléfono móvil.
Fr
Es
Fr
Es
En
2. Tap Setup
➜ Search Phone.
Pressez sur Paramètres ➜ Rech. téléph.
Presione Configuración
➜ Buscar teléfono.
Fr
Es
En
Fr
Es
En
3. Make sure that your Bluetooth mobile
phone is in discoverable mode.
Tap for the program to search for
nearby Bluetooth mobile phone.
6ÏRIFIEZQUEVOTRETÏLÏPHONEPORTABLEESTEN
mode de découverte. Pressez sur le
programme commence à chercher tous les
téléphones portables Bluetooth à proximité.
!SEGÞRESEDEQUESUTELÏFONOMØVIL"LUETOOTHESTÈENMODOVISIBLE
Presione para buscar teléfonos móviles Bluetooth cercanos.
Fr
Es
En
7HENYOUPAIRYOUR"LUETOOTHMOBILEPHONEWITHTHISSYSTEMFOR
THEFIRSTTIMEYOUNEEDTODOTHEFOLLOWING
➜
6. When prompted, enter the passkey 1234 on your mobile phone to establish a connection.
Depending on the mobile phone model, you may need to select the hands-free service to complete the connection.
En
,ORSQUEDEMANDÏENTREZLEMOTDEPASSESURVOTRETÏLÏPHONEPORTABLEPOURÏTABLIRLACONNEXION
Vous devrez peut-être choisir, en fonction du type de téléphone portable utilisé, le service mains-libres avant de
pouvoir établir la connexion.
#UANDOSELEINDIQUEINTRODUZCALACONTRASE×AENSUTELÏFONOMØVILPARAESTABLECERUNACONEXIØN
$EPENDIENDODELMODELODETELÏFONOMØVILPUEDEQUENECESITESELECCIONARELSERVICIOMANOSLIBRESPARA
completar la conexión.
7. Tap . The Phone Menu screen appears.
Pressez sur . L’écran Menu du téléphone apparaît.
Presione . Aparecerá la pantalla del Menú del Teléfono.
Fr
Es
En
,ORSQUEVOUSAPPAIREZVOTRETÏLÏPHONEPORTABLE"LUETOOTHËCE
SYSTÒMEPOURLAPREMIÒREFOISPROCÏDEZCOMMESUIT
Cuando empareje su teléfono móvil Bluetooth con este sistema
PORPRIMERAVEZDEBEHACERLOSIGUIENTE
NX700
8
4
3
2
5
1
76
[Options] key / Bouton [Options] / Tecla [Options]z iPod mode / iPod mode / Modo iPod
1 Displays status of Repeat and Shuffle play.
Affiche l’état de la lecture répétée et de la lecture aléatoire.
Muestra el estado de la reproducción repetida o aleatoria.
2 Displays the corresponding list screen to select track to be played.
Affiche l’écran de liste correspondant en vue de sélectionner la plage à lire.
Muestra la pantalla de la lista correspondiente para seleccionar una pista y reproducirla
33WITCHESTHEOPERATIONMODETOTHE6IDEOMODEOR-USICMODE
s%NABLEDINTHE3IMPLE#ONTROLMODE
"ASCULELEMODEDEFONCTIONNEMENTSURVIDÏOOUSURMUSIQUE
s$ISPONIBLEENMODEDECOMMANDESIMPLE
Cambia el modo de funcionamiento del modo de vídeo al modo de música y viceversa.
s3EACTIVAENELMODODECONTROLSIMPLE
1 2
3
Printed in China / Imprimé en Chine / Impreso en China 280-8884-00
1111
42 23 43
656 5
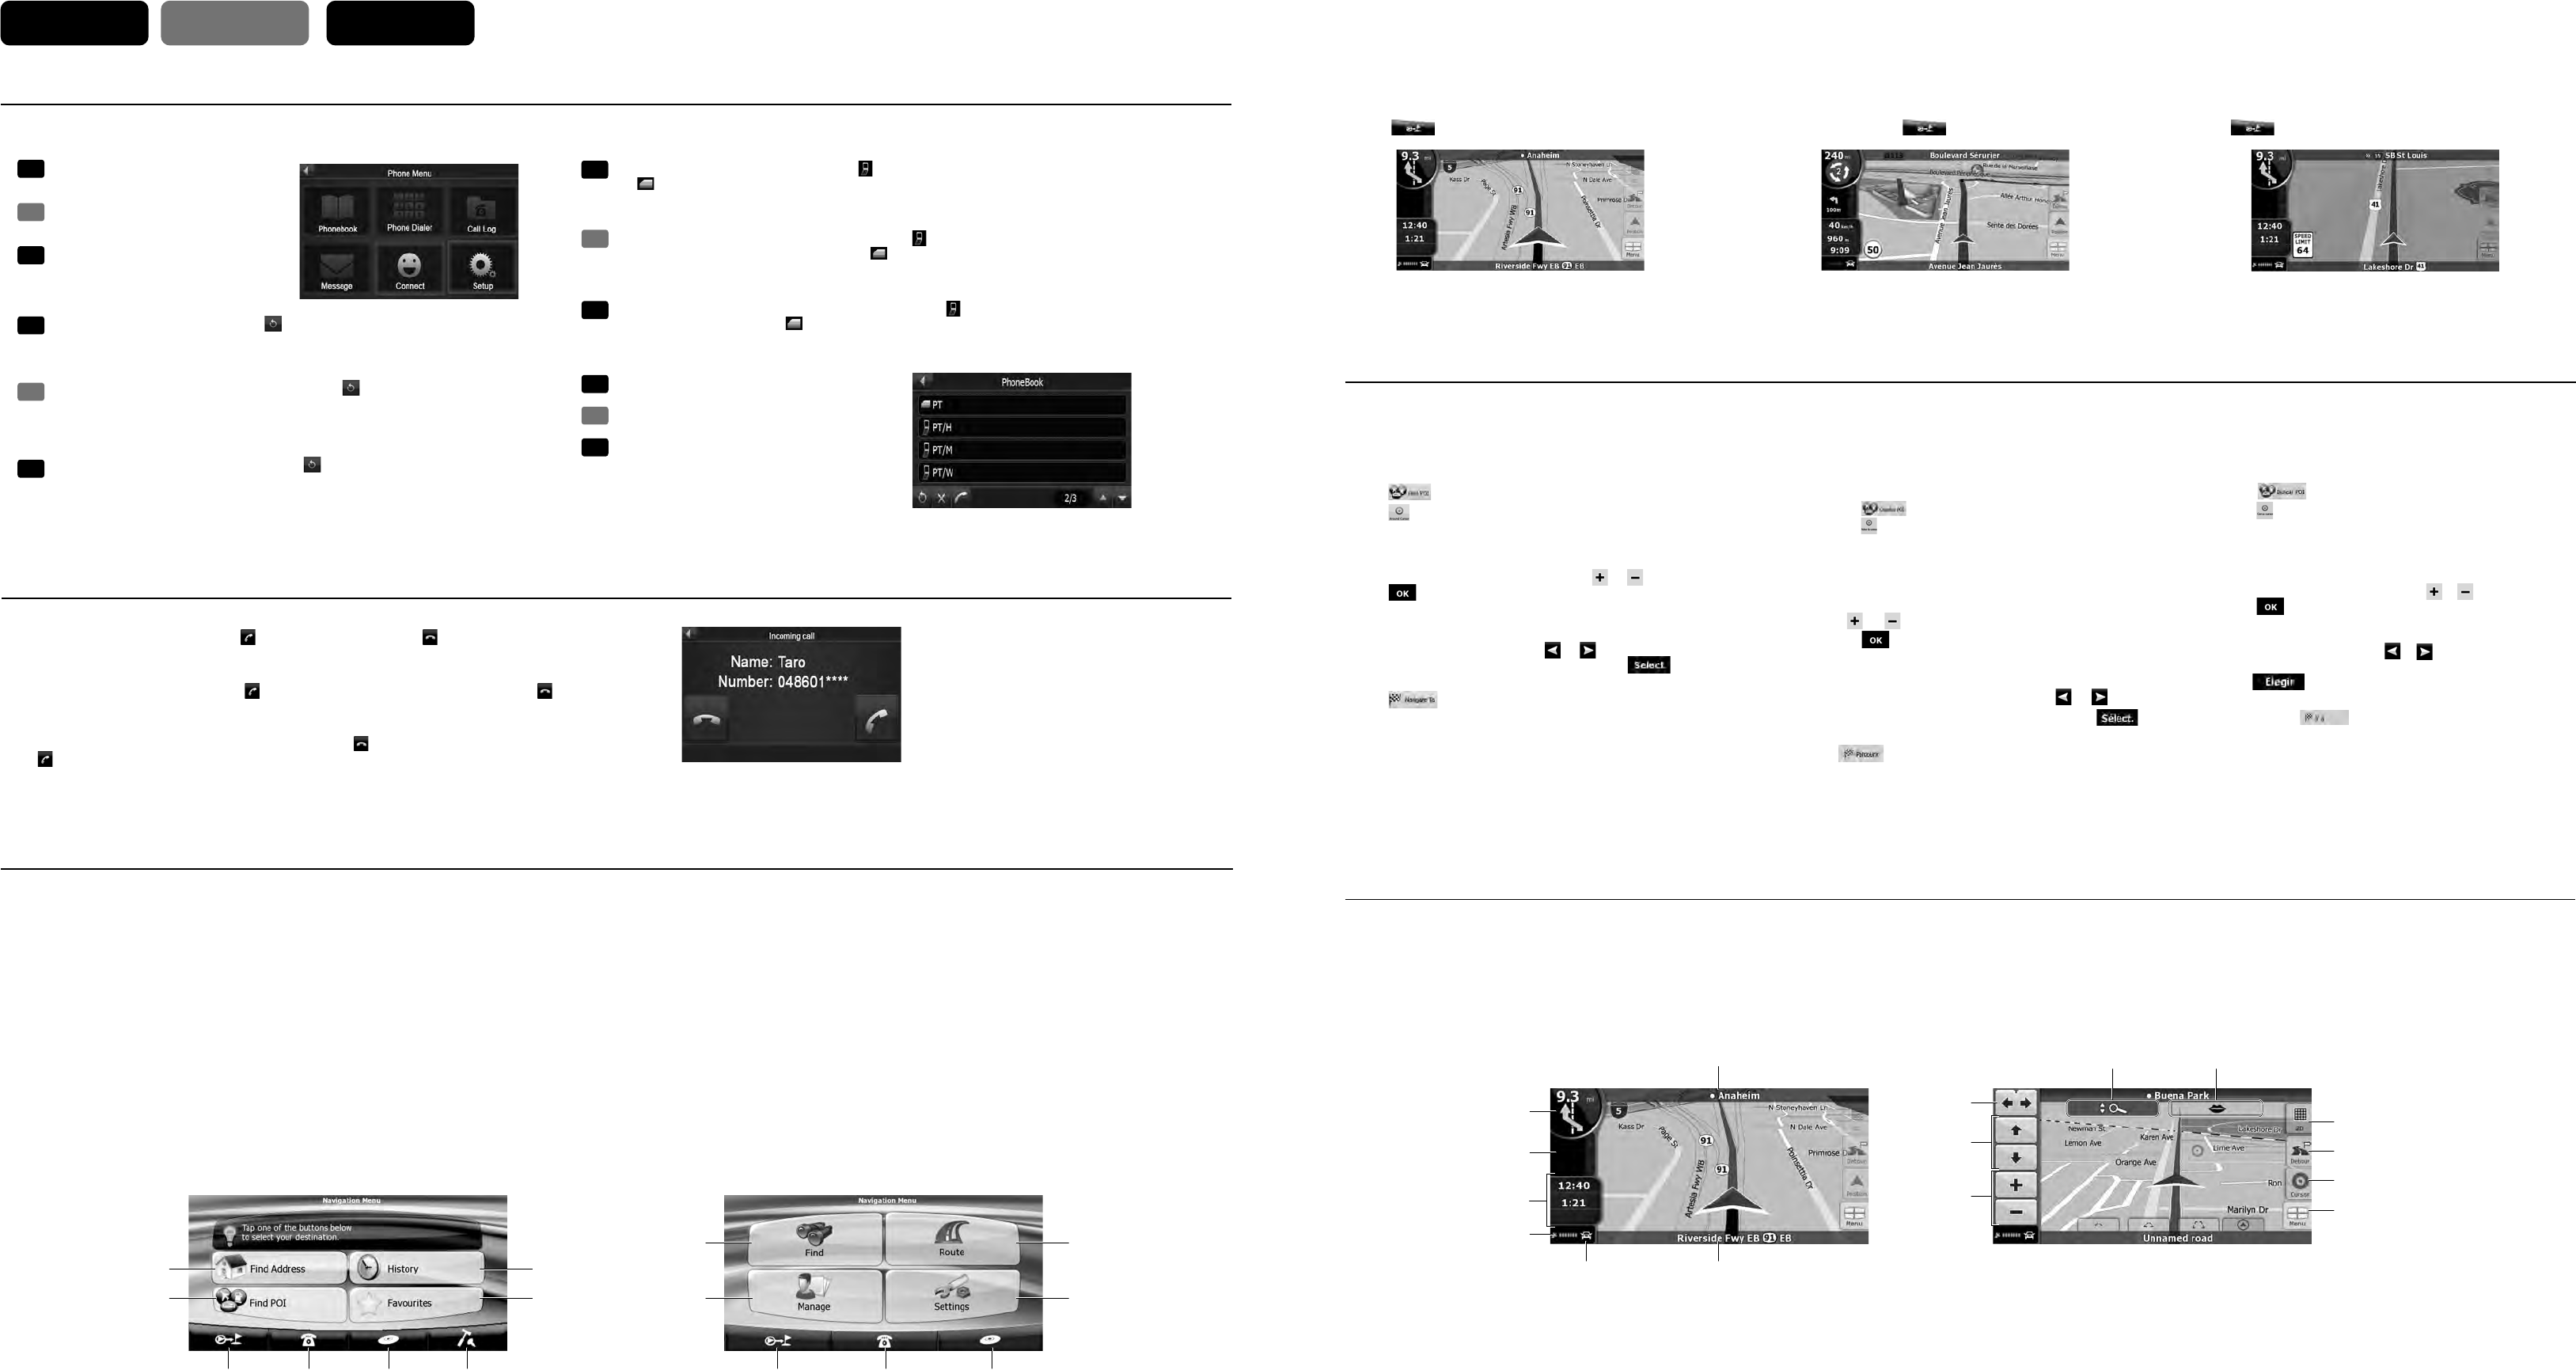
8
3
4
1
2
765
@
!
9
0
765
1
2
4
3
7
5 6
8
9
0
$
#
@
!
¥%
Simple mode / Mode Simple / Modo simple Advanced mode / Mode Avancé / Modo avanzado
English Françals Español
En
Fr
Es
En
Fr
Es
En
Fr
Es
En
Start using Clarion Mobile Map / Première utilisation de Clarion Mobile Map / Inicio de Clarion Mobile Map
Map Screen / Écran Carte / La pantalla Mapa
Selecting the Destination from the POIs / Sélection de la destination à partir des POI / Selección del destino desde los POI
When Clarion Mobile Map is started the first time, you need to do
the following:
1. Select the written language of the application interface. Later
you can change it in Settings.
2. Select the language and speaker used for voice guidance
messages. Later you can change it in Settings.
3. Read and accept the End User Licence Agreement.
4. Select whether to start the program in Simple mode or in
Advanced mode. Later you can switch between the two
operating modes in Settings.
5. Read and accept the road safety warning.
After this, the Navigation menu appears and you can start using
Clarion Mobile Map.
1 Selecting a destination by entering the address.
2 Selecting a destination from the POIs included with Clarion
Mobile Map.
3 Displaying the destinations that you have set earlier.
4 Displaying the locations that you have already saved as your
destination.
5 This button opens the Map screen.
6 This button opens the phone application.
7 This buttons opens the Audio Visual screen.
8 This button opens the Settings screen. You can switch from
Simple mode to Advanced mode.
9 Selecting the destination (for example an address or a POI) or
using the search engine of Clarion Mobile Map for any other
reason (for example to look for the phone number of a POI).
0 Managing user data, such as saved locations (POIs,
Favourites, Pins, and History items), Saved Routes, and Track
Logs.
! Managing the active route (obtaining information about it,
changing or deleting it or parts of it) or planning a route without
GPS reception.
@ Managing the behaviour of Clarion Mobile Map, for example the
map layout during navigation, the used languages or the
warnings. You can also switch from Advanced mode to Simple
mode.
During navigation, the screen shows route information and trip
data (left screenshot), but when you tap the map, additional
buttons and controls appear for a few seconds (right screenshot).
Most parts of the screen behave as buttons.
1 Turn Preview, that is, the next route event.
Opens the Route Information screen.
2 Second upcoming route event.
Opens the linerary.
3 Trip Data.
Opens the Trip Information screen.
4 GPS position quality.
Opens the Quick menu.
5 Vehicle used in route calculation.
Opens the Quick menu.
6 Current street and house numbers on left and right.
7 Next street or Next settlement.
8 Rotates the 3D map left or right.
9 Tilts the 3D map.
0 Scales the map.
! Opens the Navigation menu.
@ s/PENSTHE0OSITIONMENUAPPEARSWHENNAVIGATINGAROUTE
s/PENSTHE#URSORMENUAPPEARSWHENTHEREISNO'03
position or the Cursor is not at the current GPS position).
# Opens the Detour screen to modify the current route.
$ Switches between 2D and 3D map modes.
% Repeats the current voice instruction.
¥ Opens/Closes the Map control buttons.
Pendant la navigation, l’écran affiche les informations sur
l’itinéraire et les données du trajet (à gauche), mais lorsque vous
touchez l’écran, des boutons et des commandes supplémentaires
apparaissent pendant quelques secondes (à droite). La plupart
des zones de l'écran agissent comme des boutons.
1
Présentation du virage, c
’
est-àdire le prochain événement de l
’
itinéraire.
Ouvre l
’
écran Informations sur l'itinéraire.
2 Deuxième événement de l’itinéraire.
Ouvre l'itinéraire.
3 Données du trajet.
Ouvre l’écran Informations sur le trajet.
4 Qualité position GPS.
Ouvre le menu Rapide.
5 Véhicule utilisé pour le calcul de l'itinéraire.
Ouvre le menu Rapide.
6 Rue actuelle et numéros des habitations à gauche et à droite.
7 Prochaine rue ou Prochaine localité.
8 Fait pivoter la carte 3D à gauche ou à droitet.
9 Incline la carte 3D.
0 Modifie l’échelle de la carte.
! Ouvre le menu de Navigation.
@ sOuvre le menu Position (apparaît lorsque vous naviguez en
suivant l’itinéraire).
sOuvre le menu Curseur (apparaît lorsqu’il n’y a pas de
position GPS ou que le curseur ne se trouve pas sur la
position GPS actuelle).
# Ouvre l’écran Détour pour modifier l’itinéraire actuel.
$ Passe du mode 2D au mode 3D et viceversa.
% Répète l’instruction vocale actuelle.
¥ Ouvrir/fermer les boutons de contrôle de la carte.
Durante el proceso de navegación, la pantalla muestra
información de ruta y datos de viaje (imagen de la izquierda), pero
cuando toca el mapa, aparecen botones y controles adicionales
durante unos segundos (imagen a la derecha). La mayoría de las
pantallas funcionan como botones.
1 Vista previa próximo giro, es decir, el siguiente elemento de
ruta.
2 Segundo elemento de ruta.
Abre la opción Itinerario.
3 Datos de viaje.
Abre la pantalla Información de viaje.
4 Calidad de posición GPS.
Abre el menú rápido.
5 Vehículo usado para calcular la ruta.
Abre el menú rápido.
6 Calle actual y números del inmueble a izquierda y derecha.
7 Siguiente calle o Siguiente población.
8 Gira el mapa 3D hacia la izquierda o hacia la derecha.
9 Inclina el mapa 3D.
0 Aumenta o reduce la escala del mapa.
! Abre el Menú de navegación.
@ s!BREELMENÞ0OSICIØNAPARECEALNAVEGARPORUNARUTA
s!BREELMENÞ#URSORAPARECECUANDONOEXISTEUNA
posición GPS o el cursor no se encuentra en la posición
GPS actual).
# Abre la pantalla Desvío para modificar la ruta actual.
$ Cambia entre los modos de mapa 2D y 3D.
% Repite la instrucción de voz actual.
¥ Abrir/cerrar los botones de control del mapa.
Clarion Mobile Map offers you several ways of choosing your
destination. In this section, we explain the simplest way using the
POIs included with Clarion Mobile Map.
The procedure is explained starting from the Navigation menu.
1. Tap on the Navigation Menu screen.
2. Tap .
s&ORTHEINFORMATIONABOUTOTHERWAYSSEETHE5SER-ANUAL
3. Tap the map to select the area around which the POI should be
searched for.
s9OUCANZOOMINOUTTHEMAPBYUSINGOR
4. Tap .
5. Tap the desired POI in the list.
s&OREXAMPLE;!CCOMMODATION=➜;#AMPING'ROUND=➜
desired POI.
s9OUCANSCROLLPAGESBYUSINGOR
6. Review the details of the selected item and tap .
7. The map appears with the selected point in the middle.
Tap from the Cursor menu.
The route is then automatically calculated, and you can start
navigating.
The map screen is the most frequently used screen of Clarion
Mobile Map. It can be accessed from the Navigation menu by
tapping .
Clarion Mobile Map vous propose plusieurs méthodes de sélection
de votre destination. Dans cette section, nous vous expliquons la
méthode la plus simple, c’est à dire à l’aide des POI inclus dans
Clarion Mobile Map.
Cette procédure est expliquée à partir du menu de Navigation.
1. Appuyez sur sur l’écran du menu de Navigation.
2. Appuyez sur .
s0OURPLUSDINFORMATIONSSURLESAUTRESMÏTHODESCONSULTEZ
le Manuel de l’utilisateur.
3. Appuyez sur la carte pour sélectionner la zone dans laquelle le
POI doit être recherché.
s6OUSPOUVEZEFFECTUERUNZOOMAVANTARRIÒRESURLACARTEË
l’aide de ou .
4. Appuyez sur .
5. Touchez le POI voulu dans la liste.
s0AREXEMPLE;(ÏBERGEMENT=➜;4ERRAINDECAMPING=➜ POI
souhaité.
s6OUSPOUVEZFAIREDÏFILERLESPAGESËLAIDEDEOU
6.
Examinez les détails de l
’
élément sélectionné et touchez
.
7. La carte apparaît. Le point sélectionné figure au milieu.
Touchez à partir du menu Curseur. L’itinéraire est
ensuite calculé automatiquement et vous pouvez commencer à
naviguer.
Clarion Mobile Map ofrece varias formas de elegir un destino. En
esta sección, se explica el método más sencillo a partir de los POI
incluidos con Clarion Mobile Map.
El procedimiento arranca desde el Menú de navegación.
1. Toque en la pantalla Menú de navegación.
2. Toque .
s0ARAOBTENERINFORMACIØNSOBRELOSOTROSMÏTODOSCONSULTE
el Manual de usuario.
3. Toque el mapa para seleccionar la zona en la que se debe
buscar el POI.
s0UEDEAMPLIARREDUCIRELMAPACONO
4. Toque .
5. Toque el POI que desee en la lista.
s0OREJEMPLO;(OTELES=➜;#AMPING=➜ POI deseado.
s0UEDEPASARDEPÈGINACONO
6. Consulte la información de la entrada seleccionada y
toque .
7. El mapa vuelve a aparecer con el punto seleccionado en el
centro. Toque en el menú Cursor. La ruta se calcula
automáticamente y, a continuación, puede empezar a navegar.
Lorsque vous démarrez Clarion Mobile Map la première fois, vous
devez effectuer les opérations suivantes:
1. Sélectionnez la langue écrite de l’interface de l'application.
Vous pourrez les modifier ultérieurement dans Réglages.
2.
Sélectionnez la langue et le locuteur à utiliser pour les instructions
vocales. Vous pourrez les modifier ultérieurement dans Réglages.
3.
Vous devez lire et accepter le Contrat de Licence Utilisateur Final.
4.
Sélectionnez si vous souhaitez que le programme démarre en mode
Simple ou en mode Avancé. Vous pourrez basculer ultérieurement
entre ces deux modes de fonctionnement dans Réglages.
5. Lisez et acceptez l'avertissement de sécurité routière.
Ensuite, le menu de Navigation apparaît et vous pouvez
commencer à utiliser Clarion Mobile Map.
1 Sélection d’une destination à partir de l’adresse.
2 Sélection d’une destination à partir des POI inclus dans Clarion
Mobile Map.
3
Affichage des destinations que vous avez définies précédemment.
4 Affichage des emplacements que vous avez déjà enregistrés
comme votre destination.
5 Ce bouton ouvre l'écran Carte.
6 Ce bouton ouvre l'application de téléphone.
7 Ce bouton ouvre l'écran Audiovisuel.
8 Ce bouton permet d’ouvrir l’écran Réglages. Vous pouvez
passer du Mode simple au Mode Avancé.
9
Sélection de la destination (par exemple une adresse ou un POI) ou
utilisation du moteur de recherche de Clarion Mobile Map pour toute autre
raison (par exemple pour rechercher le numéro de téléphone d'un POI).
0 Gestion de l'itinéraire actif (obtention d'informations sur ce
dernier, modification ou suppression) ou planification d'un
itinéraire sans réception GPS.
! Gestion des données utilisateurs, telles que les emplacements
enregistrés (POI, favoris, marqueurs et éléments de
l'historique), les itinéraires enregistrés et les journaux de trajet.
@ Gestion du comportement de Clarion Mobile Map, par exemple
la présentation de la carte lors de la navigation, les langues
utilisées ou les avertissements. Vous pouvez également passer
du Mode Avancé au Mode simple.
L’écran Carte est l’écran le plus fréquemment utilisé dans Clarion
Mobile Map. Il est possible d’y accéder à partir du menu de
Navigation en touchant .
La primera vez que inicia Clarion Mobile Map, es necesario que
lleve a cabo los siguientes pasos:
1. Seleccione el idioma de la interfaz de la aplicación. Podrá
cambiarlo más adelante desde Ajustes.
2.
Seleccione el idioma y la voz que se emplearán para los mensajes
de la guía de voz. Podrá cambiarlo más adelante desde Ajustes.
3. Debe leer y aceptar el Contrato de licencia para usuario final.
4. Seleccione si desea iniciar el programa en Modo simple o en
Modo avanzado. Más tarde también podrá pasar de un modo
operativo a otro desde Ajustes.
5. Debe leer y aceptar la recomendación de conductas seguras
en la carretera.
A continuación, aparece el Menú de navegación y ya puede
empezar a utilizar Clarion Mobile Map.
1 Selección de un destino introduciendo la dirección.
2 Puede seleccionar un destino a partir de los POI incluidos con
Clarion Mobile Map.
3 Visualización de destinos definidos previamente.
4 Visualización de ubicaciones ya guardadas como destino.
5 Este botón abre la pantalla Mapa.
6 Este botón abre la aplicación del teléfono.
7 Este botón abre la pantalla Audiovisual.
8 Este botón abre la pantalla Ajustes. Puede cambiar entre Modo
sencillo y Modo Avanzado.
9 Permite seleccionar el destino (por ejemplo, una dirección o un
POI) o utilizar el motor de búsqueda de Clarion Mobile Map
para cualquier otra función (por ejemplo, para buscar el
número de teléfono de un POI).
0 Permite gestionar la ruta activa (obtener información sobre la
ruta, modificarla o eliminarla total o parcialmente) o planificar
una ruta sin recepción de GPS.
! Permite gestionar datos del usuario, como, por ejemplo, los
sitios guardados (elementos de POI, Favoritos, Chinchetas e
Historial), rutas almacenadas y registros de ruta.
@ Permite gestionar el comportamiento de Clarion Mobile Map,
como la disposición del mapa durante la navegación, los
idiomas utilizados o las advertencias. También puede cambiar
entre Modo Avanzado y Modo sencillo.
La pantalla Mapa es la que más se utiliza en Clarion Mobile Map.
Se puede acceder a ella desde el Menú de navegación con solo
tocar .
Placing a Call / Faire un appel / Realizar una llamada
Receiving a Call / Recevoir un appel / Recibir una Llamada
1. Tap Phonebook button on the Phone
Menu screen.
Pressez sur Annuaire dans le Menu du
téléphone.
Presione el botón Libreta tlfs. en la
pantalla del Menú del Teléfono.
Fr
Es
4. Select a contact to place a call.
Choisissez le contact à appeler.
Seleccione un contacto para realizar una llamada.
2. If the contact list does not display, tap to download the contact list from the
mobile phone.
Note: Not all mobile phone models support the downloading of such data.
Si la liste des contacts ne s’affiche pas, pressez sur pour télécharger la liste
des contacts du téléphone portable.
REMARQUE: Tous les modèles de téléphone portable ne prennent pas en charge le
téléchargement de telles données.
Si no aparece la lista de contactos, presione para descargar la lista de contactos
desde el teléfono móvil.
Nota: No todos los modelos de teléfonos móviles soportan la descarga de estos datos.
3. The contact list appears on the screen with meaning the contacts saved in the mobile phone’s memory
and meaning the contacts saved in the SIM card.
Note: Not all mobile phone models support the downloading of such data.
After pairing with a mobile phone, this system will ring and display the incoming call screen when there
is an incoming call. To receive the call, tap . To reject or end the call, tap .
After pairing with a mobile phone, you can place a call. Après l’appairage du téléphone portable, vous pouvez passer un appel. Tras emparejarse con un teléfono móvil, podrá realizar una llamada.
Après l’appairage du téléphone portable, ce système sonne et affiche l’écran de l’appel entrant, le cas
échéant. Pour prendre l’appel, pressez sur . Pour refuser l’appel ou y mettre fin, pressez sur .
Tras emparejarse con un teléfono móvil, el sistema sonará y mostrará la pantalla de llamada entrante
cuando se reciba una llamada. Para aceptar la llamada, toque . Para rechazar o finalizar la llamada,
toque .
La lista de contactos aparece en la pantalla con el símbolo que significa que son contactos guardados en
la memoria del teléfono, y con que significa que son contactos guardados en la tarjeta SIM.
Nota: No todos los modelos de teléfonos móviles soportan la descarga de estos datos.
La liste des contacts apparaît sur l’écran; le symbole indique que ces contacts sont enregistrés dans la
mémoire du téléphone portable et le symbole indique que ces contacts sont enregistrés sur la carte SIM.
REMARQUE: Tous les modèles de téléphone portable ne prennent pas en charge le téléchargement de telles données.
