Clearsounds Communications A700 Amplified Cordless Phone with Answering Machine User Manual A700 Manual 12082015 indd
Clearsounds Communications Inc. Amplified Cordless Phone with Answering Machine A700 Manual 12082015 indd
Users Manual
A700 (DECT 6.0)
Amplified Cordless Phone
User’s Guide
Instructions are included for
optional additional handsets.

1
Welcome!
Thank you for purchasing the ClearSounds A700
amplied cordless telephone.
If you purchased additional A700E expandable
handsets: This guide also applies to your expandable
handsets.
We hope that you enjoy the robust feature set of
your new phone!
• Large, backlit keys
• Backlit display of date, time, number of unheard
messages, and the name and number being
called
• Handset ashlight
• Alarm clock with snooze function
• One-touch calling via three handset memory
keys
• SOS emergency key (programmable)
• Ten ring tones with selectable, extra-loud vol-
umes
• Bright strobe-light ringing notication and hand-
set vibration
• Handset volume amplication and tone adjust-
ment
• Speakerphones with volume control
• Mute, call transfer, and conference calling
• Last number redial
• Dialed calls list (last ten calls)

2
Welcome!
• Personal phonebook
• Headset-compatible
• 11 handset languages
• Answering machine (with voice prompts and memo)
• Compatible with hearing aid T-coil feature and
audio neckloops
• If contracted with your service provider:
• Voicemail (message waiting indication)
• Caller ID, talking caller ID and non-viewed
calls indication
• Call waiting icon
Contact information
Please contact us with any questions that you might
have. We are happy to assist you!
ClearSounds Communications, Inc.
1743 Quincy Avenue, Suite 143
Naperville, IL 60540 USA
800-965-9043 (toll-free)
www.clearsounds.com

3
Safety precautions
Carefully read and observe the warnings and
cautions in this manual and on the equipment.
Warnings
Warnings must be observed to prevent bodily
injury.
WARNING: Use the phone only in the
described manner to avoid bodily injury or
damage to the equipment.
WARNING: Locate and use the phone
away from water and damp areas, such as
swimming pools, bathtubs, sinks and damp
basements, and do not use the phone when
you are wet, to avoid electrical shock. If the
phone is submerged, unplug the base from AC
power before you retrieve the phone.
WARNING: Do not overload extension cords
or power strips. This can result in electric
shock.
WARNING: Use this phone only with the sup-
plied AC power adapter assembly. Other types
of power adapter assemblies can damage the
phone and cause personal injury.
WARNING: Avoid using the phone during
an electrical storm. There is a slight risk of
electrical shock from lightning during a storm.

4
Safety precautions
WARNING: The phone can emit excessive
volume and amplication that can cause
hearing loss. For each user to adjust the
volume to personal preferences, keep the
volume adjusted to low level. Do not place
your ear next to a handset ringer or the base
ringer.
WARNING: Do not spill liquid on the phone or
clean the phone while it is plugged in to AC
power. This can cause a short circuit, a re or
electric shock.
WARNING: Do not push any type of object
into the telephone. Contact with dangerous
voltage points can occur, resulting in re,
electric shock or parts damage.
WARNING: Do not disassemble the phone.
Dangerous voltages or other risks can occur.
Use after incorrect reassembly can lead to
electric shock.
WARNING: If you are in the vicinity of a gas leak,
do not use the phone. The phone can produce
a spark that can lead to re or explosion.
Cautions
Cautions indicate practices that could harm the
phone or other objects.

5
CAUTION: Do not place objects on the cables
or cords, and place them away from foot trafc.
CAUTION: Locate the phone away from heat
sources of any type. Keep slots and openings
on the components uncovered to enable
ventilation and protection against overheating.
CAUTION: Connect the supplied AC power
adapter assembly into a surge protector.
Power surges can damage the phone.
CAUTION: Use only a damp cloth to clean the
unit. Do not use liquid or aerosol cleaners.
CAUTION: In the following circumstances,
unplug the phone from AC power, and refer to
qualied service personnel:
• Liquid spills in the phone, or it is exposed to
rain or precipitation.
• The phone does not operate according to
descriptions in this manual, or performance
of the phone distinctly changes.
• The phone is dropped or the casing is
damaged.
CAUTION: Do not place objects on the line
cord that may cause damage.
CAUTION: If the handset will not be used for
a long period of time, remove the batteries to
prevent possible damage.

6
Contents
Setup ................................................................ 10
Unpack ........................................................ 10
Remove the protective lms ........................ 11
Phone placement ........................................ 11
Install handset batteries .............................. 11
Connect the cords ....................................... 13
Charge the batteries.................................... 14
Important concepts ........................................... 15
Personalize your phone .............................. 15
Choose answering machine or voicemail.... 16
Register additional handsets ....................... 17
Let's begin! ....................................................... 18
Place a call .................................................. 18
Answer a call ............................................... 19
Handset ............................................................ 22
Backlighting ................................................. 23
Home screen ............................................... 23
Icons............................................................ 24
Let’s navigate .............................................. 25
Handset keys .............................................. 26
A700 base ........................................................ 29
Area settings..................................................... 33
Language .................................................... 33
Display .............................................................. 35
Screen contrast ........................................... 35
Time and date ............................................. 36
Audio ................................................................ 39
Volume and tone ......................................... 39
Consistent amplication .............................. 41
Keypad tones .............................................. 43
Paging and alarms............................................ 44
Page a lost handset .................................... 44
Alarm clock .................................................. 44

7
Out-of-range alarm ...................................... 46
Assistive listening ............................................. 48
T-Coil ........................................................... 48
Neckloops ................................................... 48
Call notication ................................................. 51
Ringtones .................................................... 52
Ringer volume ............................................. 53
Lights and vibration ..................................... 54
One-touch keys ................................................ 56
Store a one-touch number .......................... 56
Replace or edit a one-touch entry ............... 57
Delete a one-touch entry ............................. 58
Keypad tips ....................................................... 59
Using the keypads....................................... 59
Insert a pause ................................................... 61
What is a pause? ........................................ 61
Insert pauses while storing a number ......... 62
Phonebooks...................................................... 63
Add phonebook entries ............................... 63
Edit a phonebook entry ............................... 65
Delete one or all phonebook entries ........... 66
View details of phonebook entries .............. 66
View phonebook status ............................... 67
Caller ID book ............................................. 68
View and dial caller ID numbers .................. 68
Add caller ID numbers to phonebook .......... 69
Delete a number in the caller ID book ......... 70
Delete all numbers in the caller ID book ..... 71
Memos .............................................................. 72
Record a memo........................................... 72
Calls.................................................................. 73
Auto answering ........................................... 73
Place, answer or end a call ......................... 74

8
Contents
Place a one-touch call ................................. 79
Call from your phonebook ........................... 80
Redial a number .......................................... 81
Call from the inbound calls list .................... 83
Place an SOS emergency call .................... 84
During calls ....................................................... 85
Use a speakerphone ................................... 85
Screen a call ............................................... 86
Use a headset ............................................. 87
Mute the microphone .................................. 89
Answer a second call (call waiting) ............. 89
Transfer a call ............................................. 92
Set up a conference call.............................. 92
Answering machine .......................................... 94
Is the answering machine right for you? ..... 94
Answering machine with call waiting ........... 95
Turn on the answering machine .................. 96
Record a personalized message................. 97
Listen to your recorded message ................ 98
Day of the week settings ............................. 99
Restore the default message ...................... 99
Record time ............................................... 100
Voice prompt and language ...................... 101
Change the number of rings before pickup 102
Voicemail & calls............................................. 103
Visual indicators of calls and messages ... 104
View missed calls ...................................... 105
Listen to voicemail messages ................... 105
Remote access ......................................... 106
Button function .......................................... 107
Machine messages......................................... 108
Visual indicators of messages ................... 108
Listen to answering machine messages ... 109

9
Delete answering machine messages .......111
List maintenance ............................................ 112
Delete entries from the dialed calls list...... 112
Delete entries from the inbound calls list .. 114
Restore defaults ............................................. 115
Restore handset default settings............... 115
Additional handsets ........................................ 116
Register additional handsets to the base .. 116
vfSelect a base ............................................ 117
Name a handset ........................................ 118
Troubleshooting .............................................. 119
Specications ................................................. 126
Compliance..................................................... 127
Warranty ......................................................... 132
Accessories .................................................... 134
Service............................................................ 135
10
Setup
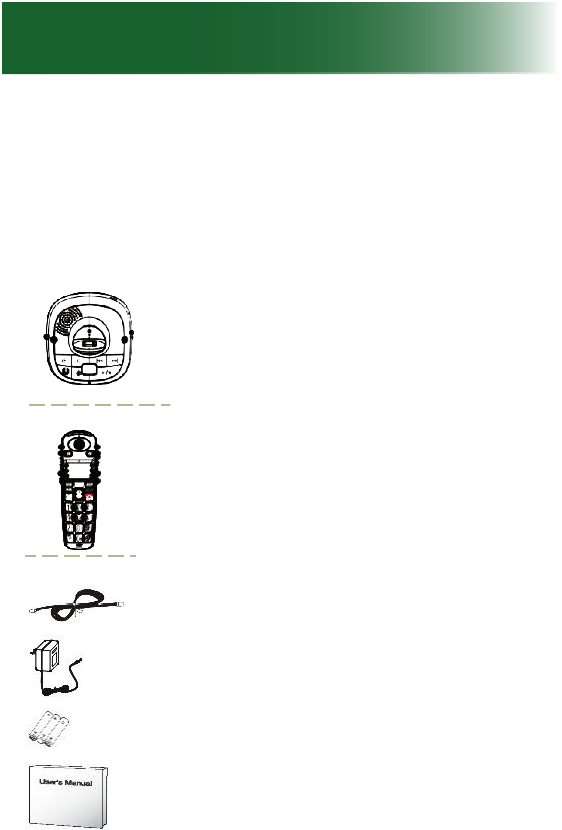
Unpack
Ensure that your packing box includes all of these
parts. If any parts are missing or damaged, please
contact your vendor or ClearSounds.
Telephone base
Handset
(Optional) additional A700E
handsets are available. Each
additional handset comes with
an A700E base, a power adapter,
batteries, and a Setup Guide.
Phone line cord
AC power adapter assembly
Three rechargeable AAA NiMH
batteries
Setup Guide and User's Guide

11
IMPORTANT: YOUR RECEIPT IS REQUIRED FOR
WARRANTY. PLEASE RETAIN YOUR RECEIPT.
Remove the protective films
Remove the protective lms that are attached to
handset displays and the base display.
Phone placement
To enjoy optimal base speakerphone performance,
locate the phone away from these areas:
• Recessed areas, such as corners, under or next
to cabinets.
• Surfaces affected by vibration
• Areas with high background noise
Install handset batteries
Follow these warnings to avoid explosive or caustic
reactions.
WARNING: Insert batteries according to the
marked polarity symbols.
WARNING: Use only rechargeable AAA NiMH
batteries. Other types of batteries can damage
the phone and cause personal injury. Do not
mix battery brands, battery types (chemistries)
or exhausted/full batteries.
12
Setup
WARNING: Do not attempt to recharge a
battery unless it is marked “rechargeable.”
WARNING: Immediately remove exhausted
batteries, and dispose of them properly.
WARNING: Do not burn exhausted batteries.
WARNING: Do not dispose of batteries with
household waste. Recycle or dispose of
batteries according to regulations of your local
municipality.
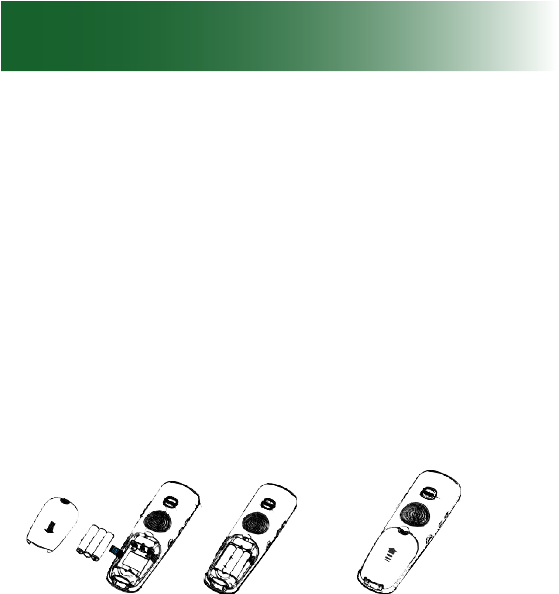
To install handset batteries
1. Slide back the battery cover and remove the
cover.
2. Insert the batteries according to the marked
polarity symbols.
The at side of each battery presses against a
spring.
3. Slide the battery cover until it snaps into place.
13
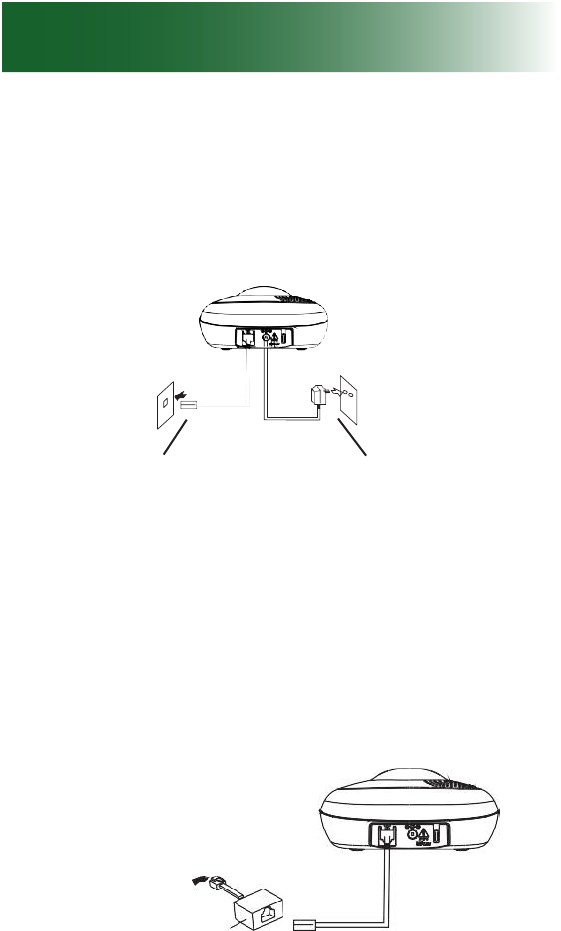
Connect the cords
To avoid potential interference, place the phone
away from electronic equipment.
A700 base
To phone jack To AC outlet
If you subscribe to DSL service
Please attach a noise lter (contact your DSL
provider) to the telephone line between the base
unit and the telephone line jack in the event of the
following:
• Noise is heard during conversations
• Caller ID features do not function properly
To single-line
telephone jack
Noise lter
14
Charge the batteries
Before you use the phone for the rst time, fully
charge the batteries for approximately 24 hours.
Recharge the batteries regularly.
Note: If or appears on the screen, the
battery charge is low or depleted. If you attempt
to fully recharge the batteries and the battery icon
does not return to , insert fresh rechargeable Ni-
MH batteries.
Note: When replacing the batteries, always
use good quality Ni-MH rechargeable batteries.
Never use other batteries or conventional alkaline
batteries.
To charge the batteries
1. Place the telephone handset on the base station.
A beep occurs and the screen lights and shows
Charging....
Setup

15
Important concepts
Personalize your phone
The ClearSounds A700 phone is feature-rich.
This manual describes all available features and
how to personalize your phone.
The features are described in unique topics that
lend themselves to scanning. If you see an inter-
esting feature, you can take the time to personalize
your phone using the instructions for that feature.
The default remote access PIN for this phone is
0000.

16
Important concepts
Choose answering machine or voicemail
Before you set up and personalize your new phone,
you must decide how you will store messages. You
must choose one method as a primary message
retrieval method: answering machine or voicemail.
The phone includes a built-in answering machine.
Voicemail service is purchased through your
telephone service provider. Each method has
unique features and benets.
When your line is engaged, voicemail service detects
and stores a record of incoming calls and messages,
whereas the answering machine does not.
If you prefer using an answering machine for
easy message access, but you also want to be
alerted to incoming calls when you are on the
line with another caller, you can primarily use the
answering machine and purchase voicemail with
the call waiting feature. For further information, see
page 95.
By default, the answering machine is turned off. To
turn on the answering machine and set it up, see
page 96.

17
Register additional handsets
Your telephone handset is registered to the base
(Base 1).
If you purchased additional ClearSounds A700E
handsets, you must register each additional
handset to the base. For registration instructions,
see page 116.
18
Let's begin!
All descriptions in this manual assume that the
handset is in standby mode. Set the telephone to
standby mode by pressing the key for no more
than 2 seconds.
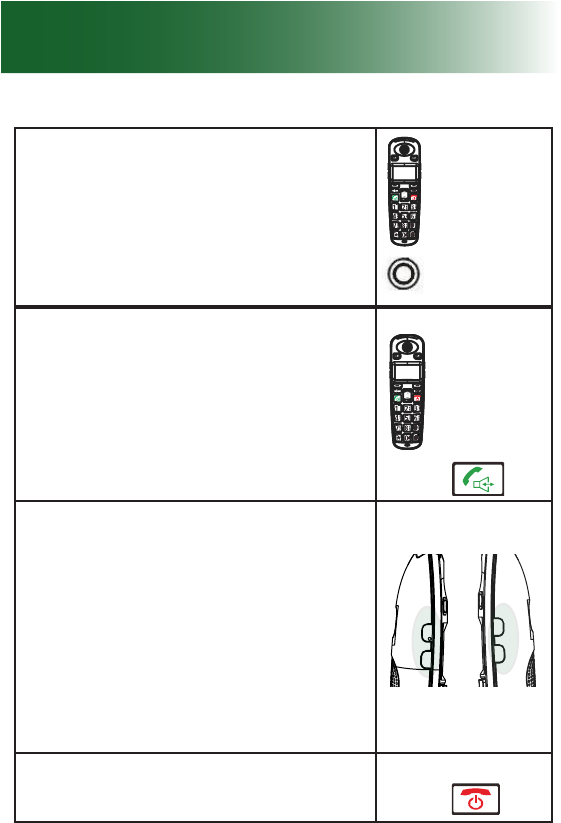
Place a call
To place a call using the handset
Tip: Steps one and two can be reversed, but you
see large numbers on the screen if you press the
alphanumeric keys rst.
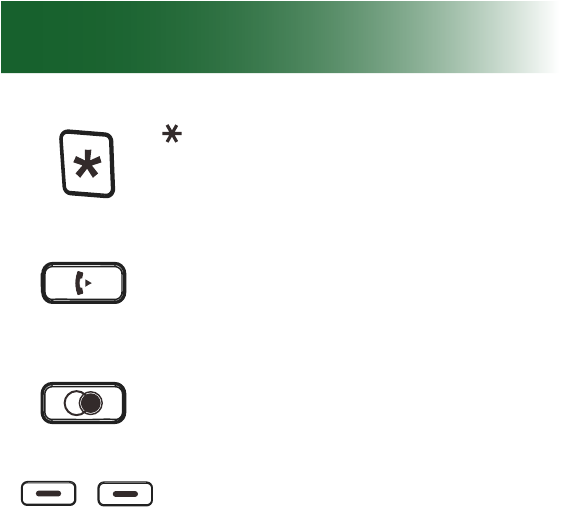
1. Pick up the handset and press the key.
Result: The icon appears on the LCD.
2. Dial a telephone number.
3. To end the call, either press the key or
replace the handset on the base.
Predialing
You can enter the desired number in Standby mode,
which allows you to make corrections before dialing to
connect the call. Follow these steps:
1. Enter a telephone number (up to 24 digits).
Check it. You can also use the Redial key
to insert a pause

19
2. When the number appears correctly, press the
Dial key.
Note: If you make a mistake while entering a
number, press the Erase soft key to clear the last
digit.
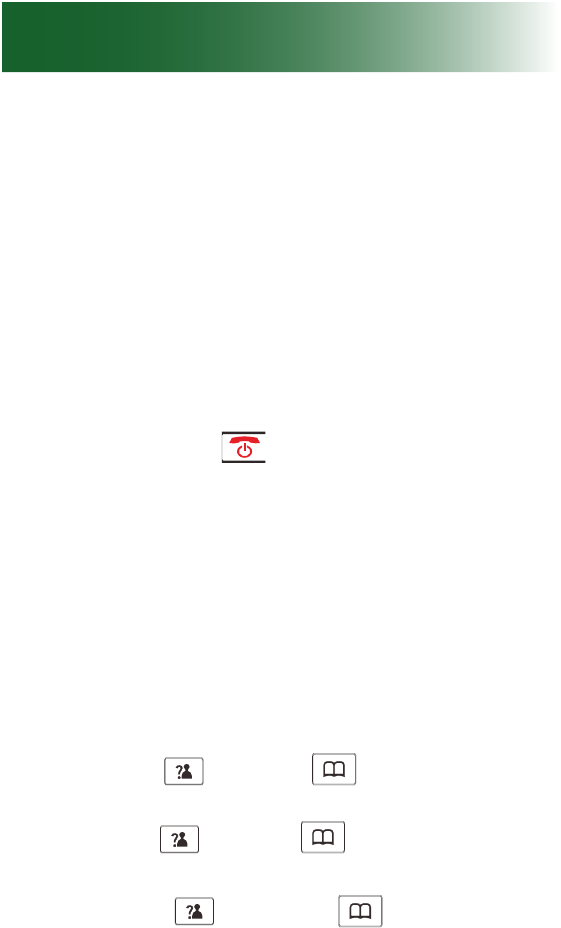
Answer a call
To answer a call using the handset
When a call is received, Call information will
appear. If the caller can be identied, the caller's
phone number is displayed. If the caller cannot be
identied, only the Call information displays.
1. To answer the call, press the key. If you
have activated the Auto Answer function, when
the handset is on the base, simply lift it up to
answer.
2. To end the call, either press the key or
replace the handset on the base.
If you have a voice message, the "MSG WTG ON"
and icon will show on the LCD. The phone will
not ring in the case of "MSG WTG ON".
Notes:
• You can select the ringer volume by using Up
key or Down
key when the phone
20
rings with an incoming call.
• If you want to delete the icon, press the Up
key in standby mode, then press and hold the
key for several seconds. After that, press
the key to return to standby mode. (The
handset must be registered to the base.)
• If the polyphonic ring tone is set, the ring
tone may continue for 4 seconds after the
callers hang-up or after the parallel phone had
answered the call.
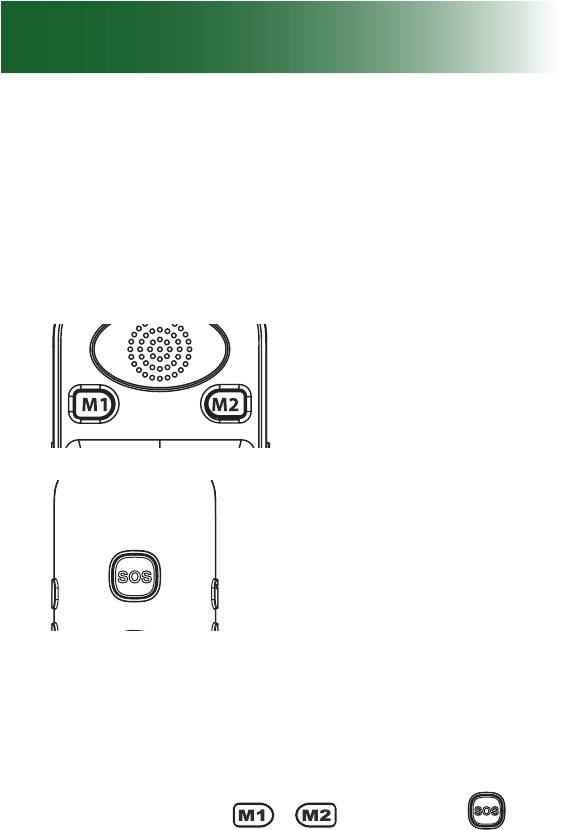
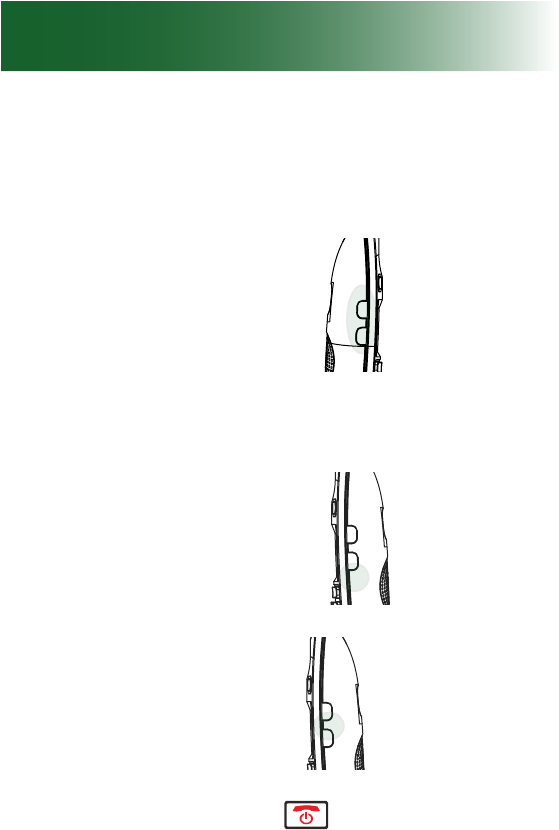
Calling with more than one
handset
If you have more than one handset registered to the
same base, you can make internal calls.
Making an internal call
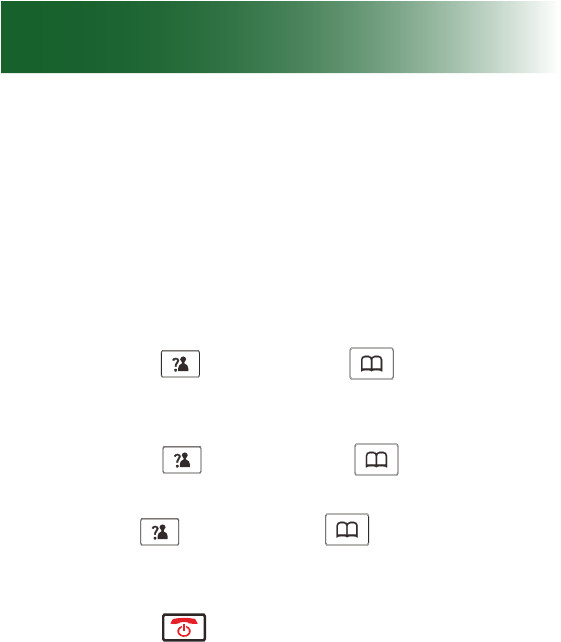
1. Press the
key, then enter the handset
number you want to call. Enter "9" to call all
other handsets registered to the same base.
2. If the handset entered is valid, the called handset
will ring. The called party can press the key
to answer the internal call.
3. At the end of your conversation, press the
key.
Let's begin!

21
Note: During the internal call, if an external call
comes in, the LCD will show the caller's number.
You should press the key to end the internal
call rst then press the key to answer the call
22
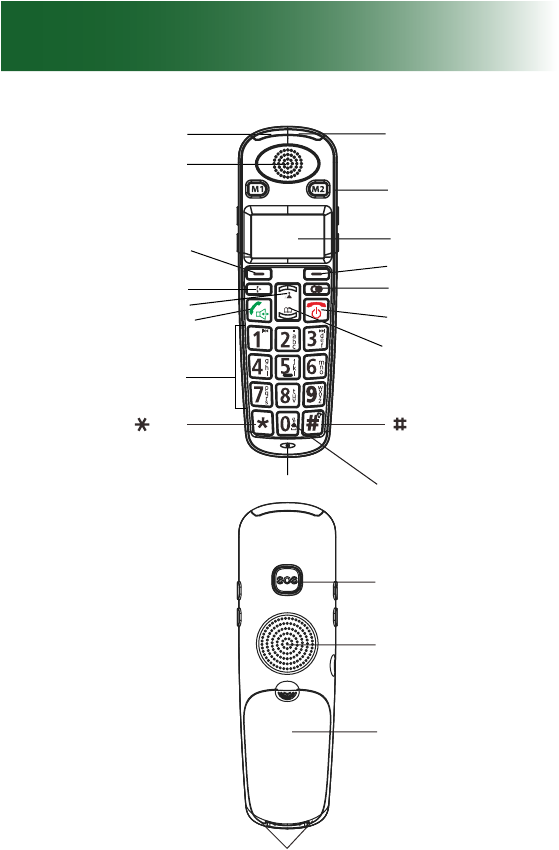
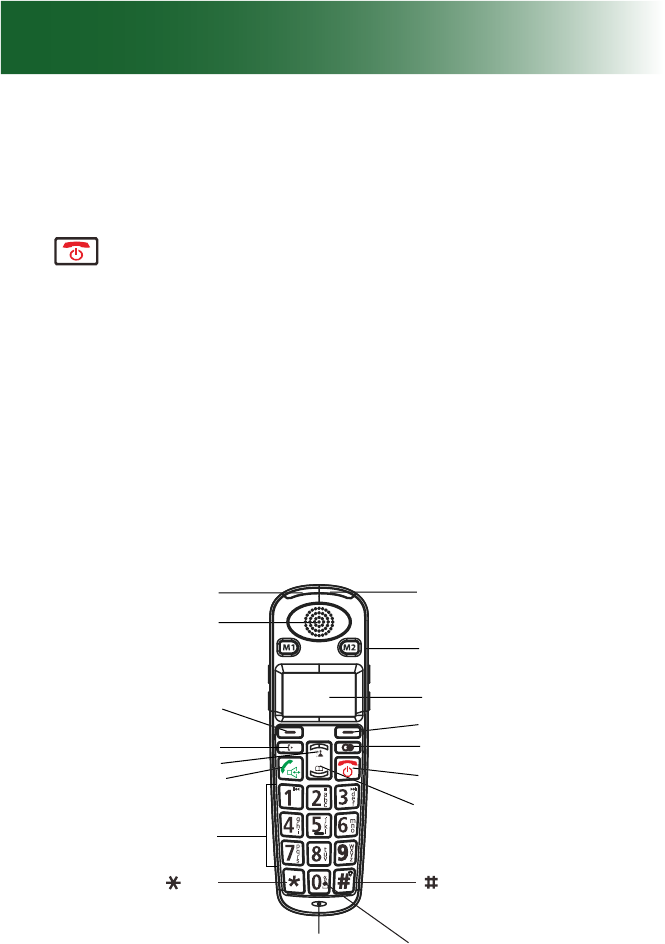
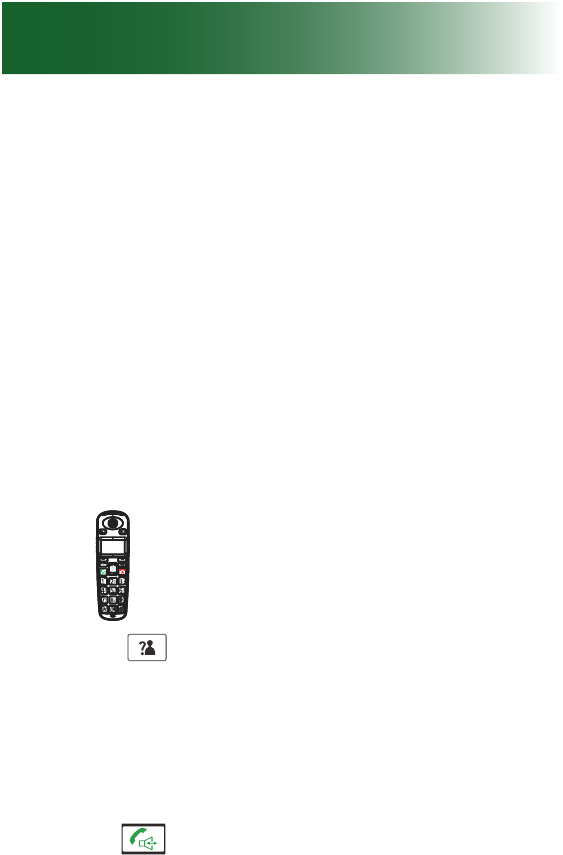
Handset
Flash light
Earpiece
Left soft key
Up/CID key
Int key
Dial/Speaker key
Alphanumeric
keypad
key
Microphone
key/Flashlight
function key
Down/Phonebook
key
End key
Redial key
Right soft key
Display
One-touch
Memories
M1~M2
Amplify indicator
Shaker/Visual ringer
SOS button
Speaker
Battery compartment
cover
Charging contacts

23
Backlighting
The display and keys light when you lift the handset
from the base or when you press handset keys.
After 10 seconds, the backlighting turns off. To turn
it back on again, press .
Home screen
The home screen is the phone display that you see
when the phone is at rest or when you press .
24
Handset
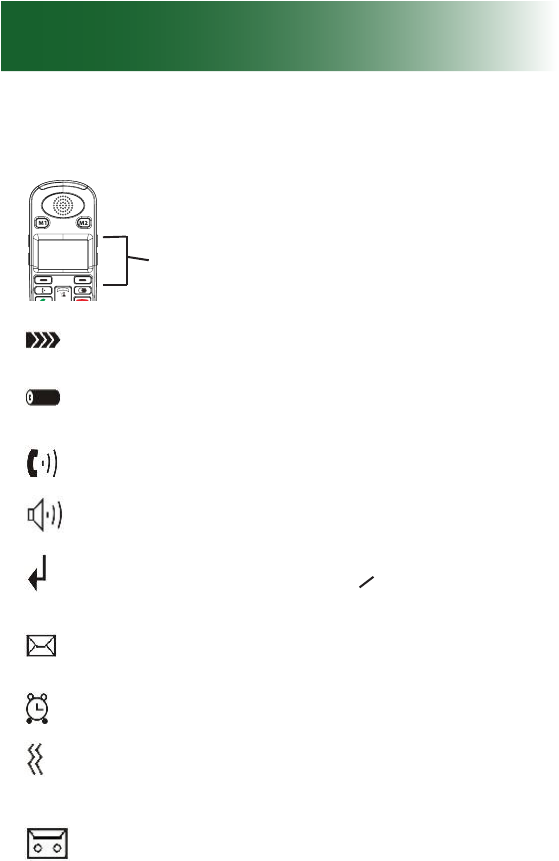
Icons
Signal strength Blinks if the handset is
out of range of the base.
Battery strength Black = fully charged
White = depleted.
Line in Use The phone line is engaged.
Speakerphone on The handsfree speaker-
phone is on.
Missed calls
(caller ID service)
One or more calls were
unanswered. Flashes if the
inbound calls list is full.
Messages
(Voicemail service)
One or more voicemail
messages are waiting.
Alarm clock set The alarm is set to ring.
Ringing indicators
(handset vibration
and light ) are set
The handset vibration
and ashing light ringing
indicators are set.
Messages
(answering machine)
One or more answering
machine messages or
memos are unheard.
Display icons appear here.
25
Let’s navigate
Take these steps to practice basic navigation
through the menus.
All instructions in this manual begin from
the home screen.
To begin steps from the home screen, press
.
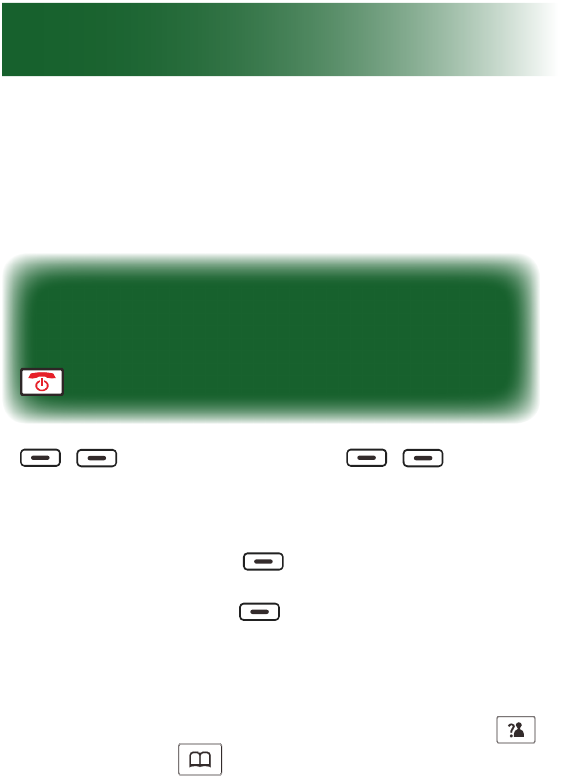
Soft keys
When you press beneath
a selected command on the
screen, you select or implement
the command. For example, if you
press beneath Back, you
return to the previous screen. If you
press beneath Select, you
select the displayed menu item.
1. To display menu items, press the Menu soft key.
2. To scroll through menu options, press Up
f
key or Down
key repeatedly.
3. To select a menu, press the Select soft key
when the desired menu appears on the LCD.
4. Repeat if necessary.
26
Handset
To return to standby mode
If you press the Back soft key from any menu, the
phone returns to the previous screen
To return to standby mode from any menu, press the
j key.
Also, the phone will automatically return to standby
mode from any menu if no key is pressed in the next
40 seconds.
Handset keys
Most keys have several functions. Take a few minutes
to explore all of the keys.
This is a good time to become familiar with the keys.
Later, you can refer to these diagrams, as necessary.
Flash light
Earpiece
Left soft key
Up/CID key
Int key
Dial/Speaker key
Alphanumeric
keypad
key
Microphone
key/Flashlight
function key
Down/Phonebook
key
End key
Redial key
Right soft key
Display
One-touch
Memories
M1~M2
Amplify indicator
Shaker/Visual ringer
27
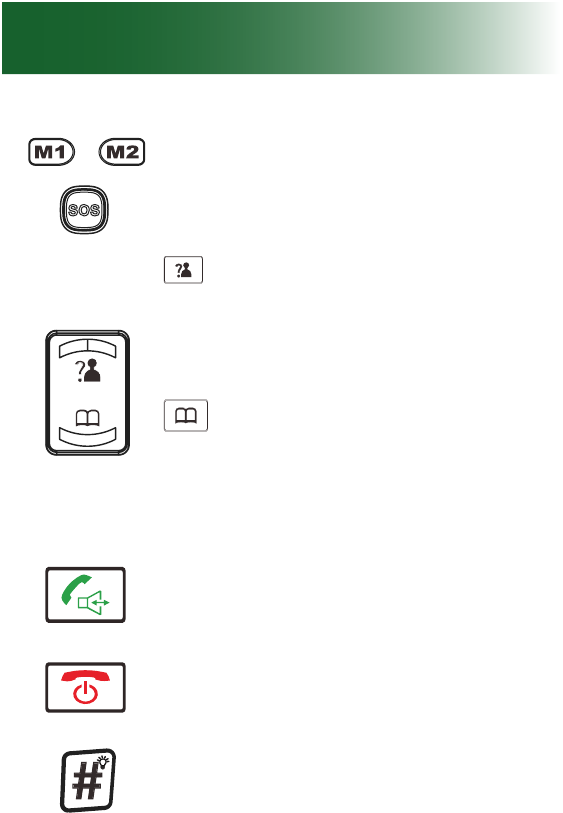
One-touch memory keys For one-
touch calling, you can store one
commonly called number in each of
the three memory keys.
Up/Caller ID key Scroll up
through lists and menu options.
Increase the earpiece/speakerphone
volume during a call. Enter the Caller
ID.
Down/Phonebook key Scroll
down through lists and menu
options. Decrease the earpiece/
speakerphone volume during a call.
Enter the Phonebook.
Dial/Speaker key Make/Answer a
call. Activates the speakerphone
if pressed during a call.
End key End a call. Long press to
activate power on/off. Press this key
and return to the home screen.
Flashlight To turn on the ashlight
beam at the top of the handset,
press and hold the key. Press and
hold again to turn it off.
28
Handset
key Set up a conference call.
Int key Set up an internal call
to another handset. Transfer an
incoming call to another handset. Set
up a conference call with an external
line and an internal handset.
Redial key Enter the redial book. Insert a
pause when pre-dialing a number.
Left/Right soft keys Perform the
functions indicated by the text
immediately over it (on the bottom
line of the display) which changes
time by time.
29
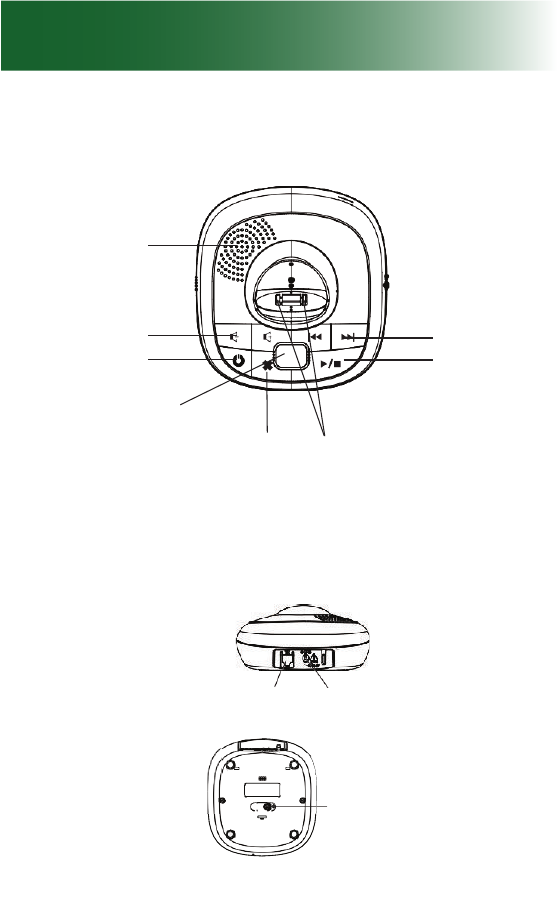
A700 base
Rear and bottom View
Phone Line
P
ower
J
ac
k
Pa
g
e button
Speaker
Volume up/down
Answer Machine
on/off
Message indicator
Delete
key
Charge pins
Play/Stop key
Repeat/Skip key
30
A700 base
Base keys
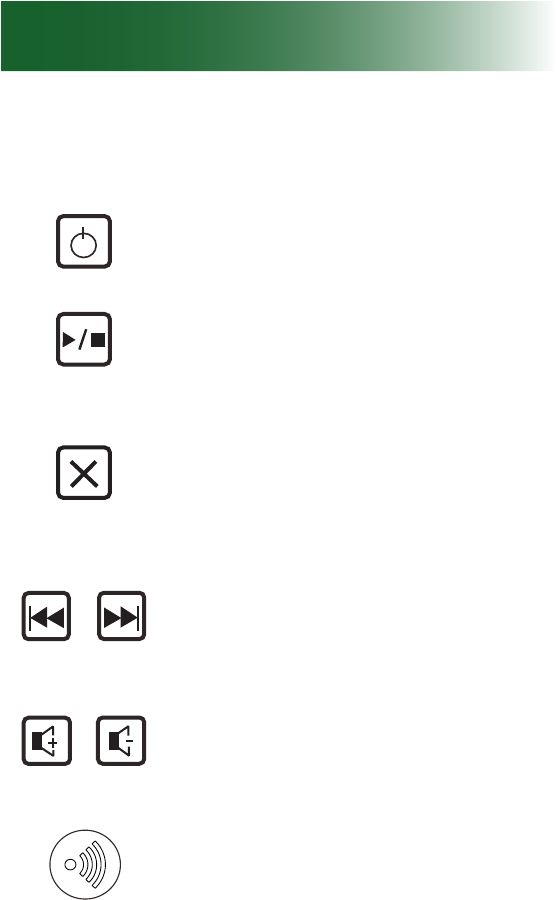
Answer machine on/off key Press
to turn on or off the answer-record
feature and the phone announces
"Answer on" or "Answer off".
Play/Stop key Press to start or stop
the message or Memo playing.
Del key When playing an ICM
(incoming message), press and
hold to delete the current message.
In active mode (all lights on) press
and hold the key to delete all the
messages.
Repeat/Skip key Press to play the
current or next message. (Press the
Repeat key twice to play the previous
message.)
Volume up/down key When playing
announcement or messages, press
to increase or decrease the relevant
volume.
Page button Press this button to
page the handset registered to the
base.

31
BS Settings
Delete Handset
This function allows you to delete a handset
registration from the base.
1. Press the Menu soft key.
2. Press Up
key or Down
key to choose
BS Settings, then press the Select soft key.
3. Press the Select soft key to choose the Delete
HS menu. The display shows "PIN?" to prompt
you to enter the PIN Code (The default PIN
Code is "0000"). Then press the Select soft key.
4. Use Up
key or Down
key to select a
handset, press the Select soft key to conrm.
After that, the deleted handset cannot be used
with the base. If you select the current handset,
a warning tone will be heard.
Flash Time
Flash time is used for switching between your
current call and the call waiting if you subscribe to
call waiting service. You can select to change the
Flash time by the following steps:
1. Press the Menu soft key.

32
2. Press Up
key or Down
key to choose
BS Settings, the press the Select soft key
3. Press Up
key or Down
key to choose
Flash Time menu. Press the Select soft key.
4. The display shows the current setting. Use Up
key or Down
key to select Flash-1
(100ms) /Flash-2 (300ms) /Flash-3 (600ms),
press Select soft key.
A700 base

33
Area settings
Language
The default language on the phone is English. You
can change these language functions:
• Handset: Displayed language
• Base: Displayed language
Answering machine voice prompt language
To change the display language of the handset
The handset supports uo to 11 predened languages:
English, German, French, Netherlands, Swedish, Polish,
Italian, Turkish, Spanish, Portuguese, and Slovak. You
can change the language used to display the menu
messages.
1. Press the Menu soft key.
2. Press Up
key or Down
key repeatedly
to choose HS Settings, then press the Select
soft key.
3. Press Up
key or Down
key to choose
Language, then press the Select soft key.
4. The languages will be displayed. Use Up
key or Down
key to scroll through the
options. Each language will be displayed in its
own native translation.
5. Press Select soft key to select the required
language and you will hear a conrm beep.

34
Area settings
To change the answering machine voice prompt
language
If you use the answering machine to retrieve your
messages, the machine gives you voice prompts
as you review.
English, French and German prompts are available.
1. Press the TAM soft key.
2. Press Up
key or Down
key repeatedly
to choose TAM Settings, press the Select soft
key.
3. Press Up
key or Down
key repeatedly
to choose TAM Language, press the Select
soft key.
4. The languages will be displayed. Use Up
key or Down
key to scroll through the
options. Each language will be displayed in its
own native translation.
5. Press the Select soft key to choose the required
language and you will hear a conrm beep.
35
Display
Screen contrast
You can adjust the contrast of the handset screen to
optimize visibility in different environmental conditions.
17 contrast levels are available.
To adjust the screen contrast for the handset
1. Press the Menu soft key.
2. Press Up
key or Down
key repeatedly
to choose HS Settings, then press the Select
soft key.
3. Press Up
key or Down
key to choose
LCD Contrast, then press the Select soft key.
4. Use Up
key or Down
key repeatedly to
choose among the 17 available contrast levels,
then press the Save soft key.
5. Press the key to return to standby mode.
36
Display
Time and date
You can manually set the time and date and the
time and date formats that appear on the screen.
However, if you subscribe to caller ID service, your
phone automatically sets the time and date when
the rst call arrives after phone setup or after a time
change.
To set the hour format for the handset
You can select the 12-hour format or the 24-hour
format.
1. Press the Menu soft key.
2. Press Up
key or Down
key repeatedly
to choose HS Settings, then press the Select
soft key.
3. Press Up
key or Down
key to choose
Date & Time menu, press the Select soft key.
4. Use Up
key or Down
key to choose
Time Format, press the Select soft key.
5. You can use Up
key or Down
key to
choose the Time Format (12-Hour/24-Hour),
press the Save soft key to save.
Notes:
• If you select 12-Hour, AM/PM will appear on the
37
right of the time in standby mode.
• At step 3 you need to enter the time in 24-Hour
format.
To set the time for the handset
If you do not subscribe to caller ID service, you must
set the time and date that your phone displays.
1. Press the Menu soft key.
2. Press Up
key or Down
key repeatedly
to choose HS Settings, then press the Select
soft key.
3. Press Up
key or Down
key to choose
Date & Time menu, press the Select soft key.
4. Use Up
key or Down
key to choose Set
Time, press the Select soft key.
5. Enter the current time by numeric keypad and
press the Save soft key to save and exit.
To set the date format for the handset
You can select the MM-DD-YY (month-day-year)
format or the DD-MM-YY (day-month-year) format.
1. Press the Menu soft key.
2. Press Up
key or Down
key repeatedly
to choose HS Settings, then press the Select
38
Display
soft key.
3. Press Up
key or Down
key to choose
Date & Time menu, press the Select soft key.
4. Use Up
key or Down
key to choose
Date Format, press the Select soft key.
5. You can use Up
key or Down
key to
choose the Date Format (DD-MM-YY/MM-DD-
YY), press the Save soft key to save.
To set the date for the handset
If you do not subscribe to caller ID service, you must
set the time and date that your phone displays.
1. Press the Menu soft key.
2. Press Up
key or Down
key repeatedly
to choose HS Settings, then press the Select
soft key.
3. Press Up
key or Down
key to choose
Date & Time menu, press the Select soft key.
4. Use Up
key or Down
key to choose Set
Date, press the Select soft key.
5. Enter the current date by numeric keypad and
press the Save soft key to save and exit.
39
Audio
Volume and tone
Use these controls to adjust handset volume during
a call. After you hang up, volume and tone settings
remain set for the next call.
Amplication resets to off when a call ends. If you
prefer amplication always on, see page 41.
To adjust the handset's volume and tone
Your phone is equipped with a specialized
amplication function designed to t your needs.
During a conversation you can adjust the Vol
+ or Vol - control on the left side of the handset
and use the AMP key on the right side. You can
also adjust the Tone control to t the levels to your
hearing requirements. The selected volume will be
displayed on the LCD.
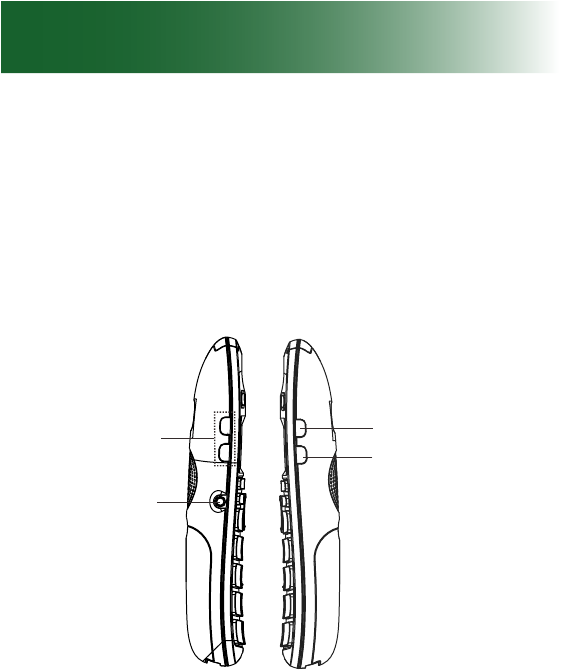
Volume Control
Headset Jack
Tone Control ( )
Amplify ( )
Button
Tone
AMP
Tone
AMP
Vol + Vol -

40
Audio
When you press the AMP key in receiver mode
during a conversation, the Amplify indicator (red
light on top of the handset) turns on. If you press
the AMP key again, the indicator will go out.
Note: When the word "MUTE" appears in the right
corner of the screen, the phone is NOT muted.

41
Consistent amplification
By default, when you end an amplied call,
amplication turns off for the next call.
If you prefer amplication consistently on, you can
set it to automatically turn on each time that a call
begins.
During conversation, you can still temporarily turn
off amplication.
WARNING: Consider the hearing levels of
other phone users before you set amplication
consistently ON. The phone can emit excessive
volume and amplication that can cause hearing
loss.
Your phone is equipped with a specialized amplication
function designed to t yout needs. If you switch this
function on, the handset receiver volume adjustment is
15-30 dB. Otherwise the receiver volume adjustment
is 0-15 dB.
42
Audio
To turn on or off consistent handset amplification
1. Press the Menu soft key.
2. Press Up
or Down
key repeatedly to
choose HS Settings, then press the Select soft
key.
3. Press Up
key or Down
key to choose
Amplied, press the Select soft key.
4. You can use Up
key or Down
key to
choose On or Off to enable or disable the
function.
5. Press the Save soft key.
6. Press . During calls, handset illumination at
the top indicates that amplication is on.

43
Keypad tones
When you press a key, a tone sounds. If you prefer
silent key presses , you can turn off keypad tones.
To turn off or on keypad tones for the handset
1. Press the Menu soft key.
2. Press Up
or Down
key repeatedly to
choose HS Settings, then press the Select soft
key.
3. Press Up
key or Down
key to choose
Tone Setup, press the Select soft key.
4. Press the Select soft key again to choose Key
Tone.
5. Use Up
key or Down
key to choose On
or Off to enable or disable the function.
6. Press the Select soft key.
Note: For normal use, we recommend you leave
the key tone enabled. This makes the phone easier
to use.
Rear and bottom View
Phone Line
P
ower
J
ac
k
Pa
g
e button
Rear and bottom View
Phone Line
P
ower
J
ac
k
Pa
g
e button
44
Paging and alarms
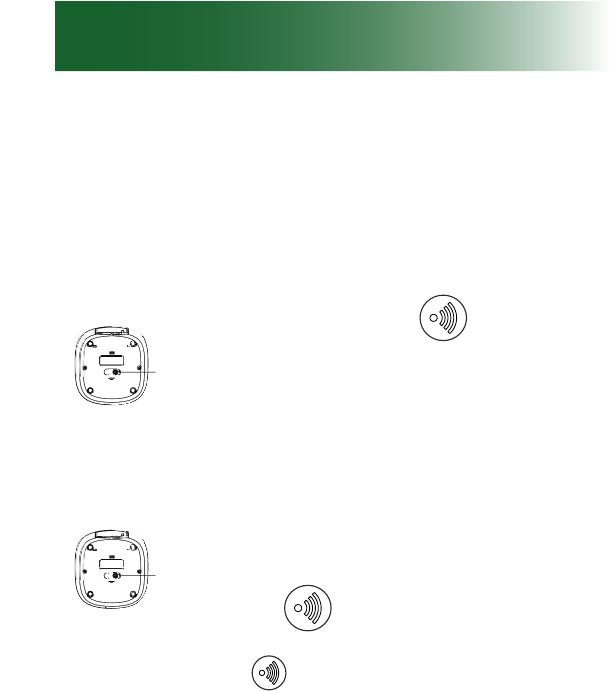
Page a lost handset
You can page lost handsets that are registered to
the ClearSounds A700 base.
To page a handset
• Press and hold
(located on
the bottom of the base) for less
than ve seconds.
All handsets registered to the base
beep for about one minute.
To stop paging
• Press
again.
Note: On a long
key press, more than or equal
to 5 seconds, the base will enter registration mode.
Alarm clock
You can use the handset as an alarm clock. The
alarm clock also has a snooze function.
To set the handset alarm clock
1. Press the Menu soft key.
45
2. Press Up
or Down
key repeatedly to
choose HS Settings, then press the Select soft
key.
3. Press the Select soft key to choose Alarm
menu.
4. You can use Up
key or Down
key
to choose On or Off to enable or disable the
function.
5. Press the Select soft key.
6. Take one of these steps:
• If you selected Off, press . The alarm clock
is off.
• If you selected On:
a. Press numeric keys to enter the alarm time
in 24-Hour format (HH:MM), including an
initial zero when appropriate. Then press the
Select soft key.
b. Press the Snooze soft key and use Up
key or Down
to enable or disable the
snooze function. Press the Select soft key.
c. Press . The alarm clock is set and v
appears on the home screen.
46
To turn off a ringing handset alarm
1. Press any key.
The alarming stops. If snooze is set on, the alarm
rings again in 4 minutes.
2. To turn off snooze alarming, press
Out-of-range alarm
When a handset is outside of communication range
with the base during a call, the handset beeps to
alert you.
If you prefer no beeping for out-of-range handsets,
you can turn off this function.
To turn off or on a handset's out-of-range alarm feature
1. Press the Menu soft key.
2. Press Up
or Down
key repeatedly to
choose HS Settings, then press the Select soft
key.
3. Press Up
key or Down
key to choose
Tone Setup, press the Select soft key.
4. Press Up
key or Down
key to choose
Range Alarm, press the Select soft key.
5. You can use Up
key or Down
key
to choose On or Off to enable or disable the
function.
Paging and alarms

47
6. Press the Select soft key and you will hear a
conrm beep.
7. Press .

48
Assistive listening
The ClearSounds A700 DECT 6 phone is compat-
ible with these assistive listening devices:
• Hearing aids that are equipped with telecoil
(T-coil)
• Audio neckloops, with or without built-in
microphones.
T-Coil
To use the phone with T-coil-equipped hearing aids
1. Move your hearing aid T-switch to
the T position.
2. Hold the handset close to your
hearing aid.
Neckloops
Neckloops amplify phone sound in T-coil-equipped
hearing aids.
In order to use a neckloop with a 3.5 mm plug, you
will need to purchase a 2.5 mm to 3.5 mm adapter
that is sold separately. We recommend the CS-
CL004 by ClearSounds.
To use an audio-only neckloop
Audio-only neckloops do not include microphones,
so you must speak through the handset.

49
Volume Control
Headset Jack
1. Connect an audio neckloop to the
2.5 mm AUDIO NECKLOOP jack
on the left side of the handset.
2. Position the neckloop around your
neck.
3. Accomplish these tasks as usual:
• Answer or place calls
• Adjust handset or speakerphone
volume
• End calls
To use a neckloop with a built-in microphone
You can speak handsfree through neckloops that
include built-in microphones.
1. Before or during a call, connect the
neckloop to the 2.5 mm handset
jack:
• Handset jack: on the left side
2. Position the neckloop around your
neck.
50
Assistive listening
jack
• Answer a call
• Place a call
• Engage a connected call
Press .
• Adjust volume, tone, or amplification Left Right
Vol + Tone
Vol - AMP
• End a call Press .
Tone
AMP
Vol + Vol -

51
Call notification
Your phone can notify you of incoming calls in
several ways.
• Ringer (selectable)
• Handset light and vibration (selectable)
• Caller ID displays and call waiting
When you subscribe to Call Waiting service from
your local telephone company, the telephone
will display the name and number of the second
caller while you are having a conversation.
Caller 1
4361234 Caller 1
4Caller 2
2915678
Caller two's info rmation
is displayed
Caller ID info display
1. When you are on the line, the telephone will
automatically display the name and number
of the second caller.
2. Press the Flash soft key (on the left side) to
answer the second caller.
3. When you have nished, press the Flash
soft key to continue your conversation with
the rst caller.
Note: If you have transferred an external call to

52
Call notification
another handset, you cannot use the call waiting
function via the second handset.
Ringtones
Ten ringtones are available for the handset.
You can also choose a unique handset tone for
internal calls from other handsets that are registered
to the ClearSounds A700 base.
To select a ringtone for the handset
1. Press the Menu soft key.
2. Press Up
or Down
key to choose HS
Settings, then press the Select soft key.
3. Press Up
or Down
key to choose Ring
Setup, then press the Select soft key.
4. Press the Select soft key to choose INT Ring or
press Down
key to choose EXT Ring then
press the Select soft key.
Result: You can select the ring tone from Melody
1 to 10. When you adjust the ring tone, the
phone sounds the selected melody.
5. Press the Select soft key to conrm.
53
Ringer volume
You can adjust the ringer volume or turn off the ringer
for the handset and the phone base, separately.
There are ve volume levels.
To temporarily turn off or on the handset's ringer
To turn off the ringer:
1. Lift the handset from the base.
2. Press and hold until the screen is blank.
The handset turns off.
3. Do not return the handset to the base: place it on an
alternate surface.
To turn on the ringer:
Replace the handset on the base.
To adjust or turn off the handset's ringer volume
1. Press the Menu soft key.
2. Press Up
or Down
key to choose HS
Settings, then press the Select soft key.
3. Press Up
or Down
key to choose Ring
Setup, then press the Select soft key.
4. Press Up
or Down
key to choose

54
Call notification
Volume, then press the Select soft key.
5. Press Up
or Down
key to choose Off
or the volume that you prefer, then press the
Select soft key.
Note: If you set the volume to "Off", when a call
comes in, only the New Call information appears
on the LCD.
Lights and vibration
You can enable or disable these light and vibration
indicators of incoming calls:
• On the handset, a white ashing light and vibration
Handset light and vibration
To turn on light and vibration
• Press and hold until the heandset vibrates.
appears on the screen. If the phone rings, the
handset vibrates and the light ashes.
To turn off light and vibration
• Press and hold . disappears from the
screen.

55
Note: If you activate the shaker and visual ringer
function, when a call comes in the handset will
shake and the visual ringer will also ash with the
ringer you have set.
Flashlight
If you turn this feature on, a steady white light will
remain lit and can be used as a ashlight.
To turn the ashlight on
• In standby mode, press the key until the light
turns on.
To turn the ashlight off
• Press the key until the light turns off.
56
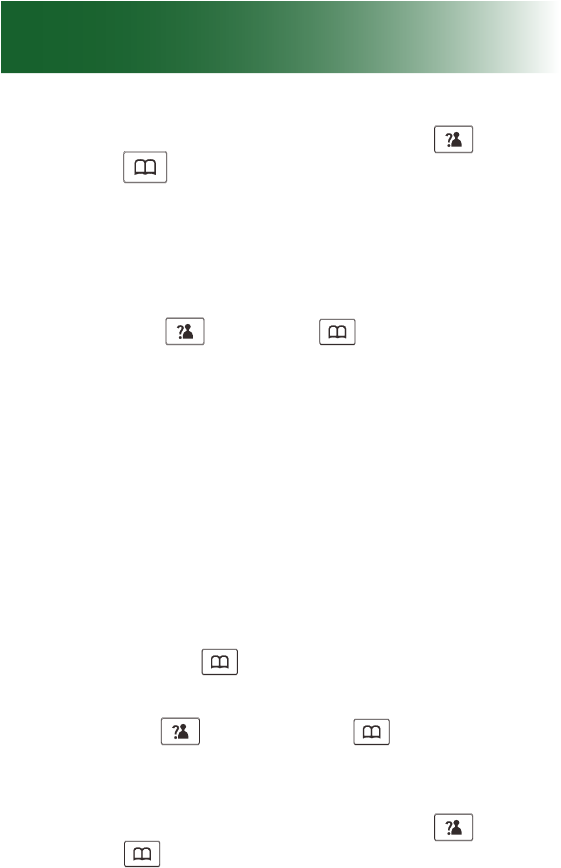
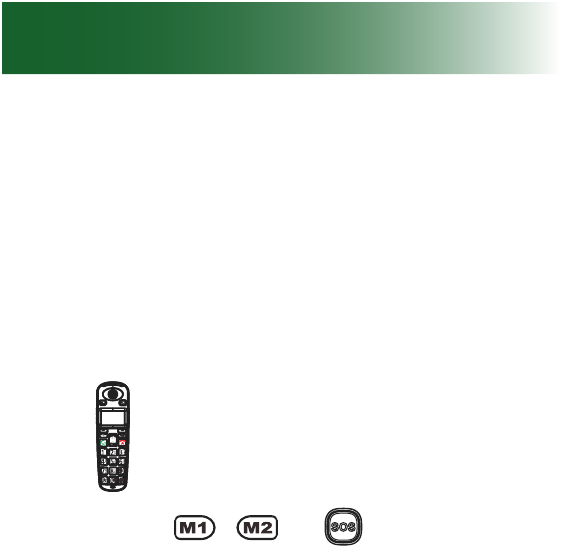
One-touch keys
One-touch keys
You can store up to 3 frequently called or important
numbers and associate them with one-touch keys.
All the numbers will be stored in the Phone Book.
Handset
• Two memory keys
• SOS emergency key
To store a handset memory-key or
SOS number
1. Press one of the keys or the j key
in standby mode. "Number?" appears on the
screen.
2. Press numeric keys to enter the telephone

57
number that you wish to store (up to 20 digits).
Include long distance code and area code if
necessary.
3. Check the number. If it needs to be corrected,
press the Erase soft key.
4. Press the Save soft key.
5. Press Up
or Down
key to scroll to a
ringtone that you want associated with this caller.
Then press the Select soft key. A conrmation
tone occurs and the number appears.
Note: The memory default names are M1, M2, and
SOS. You can add a name after them but cannot
delete the default name (e.g. you can modify M1 to
M1:home).
Replace or edit a one-touch entry
To replace or edit a memory-key or SOS entry in
the handset
1. Press the Menu soft key.
2. Press Down
key to choose Phonebook,
press the Select soft key.
3. Press Up
key or Down
key repeatedly
until the entry you want to edit displays, press
the Select soft key to conrm.
58
4. The display shows New, use Up
key or
Down
key to move on to Edit. Press the
Select soft key.
5. If necessary, press the Erase soft key to clear
the digit(s) then enter the desired name and
number. Press the Save soft key.
6. Press Up
or Down
key to scroll to a
ringtone that you want associated with this caller.
Then press the Select soft key. A conrmation
tone occurs and the number appears.
Delete a one-touch entry
To delete a memory-key entry in the handset
1. Press the Menu soft key.
2. Press Down
key to choose Phonebook,
press the Select soft key.
3. Press Up
key or Down
key repeatedly
until the entry you want to edit displays, press
the Select soft key to conrm.
4. The display shows New, use Up
key or
Down
key to move on to Edit. Press the
Select soft key.
5. Press the Erase soft key to clear the digit(s),
then press the Save soft key.
One-touch keys

59
Keypad tips
Using the keypads
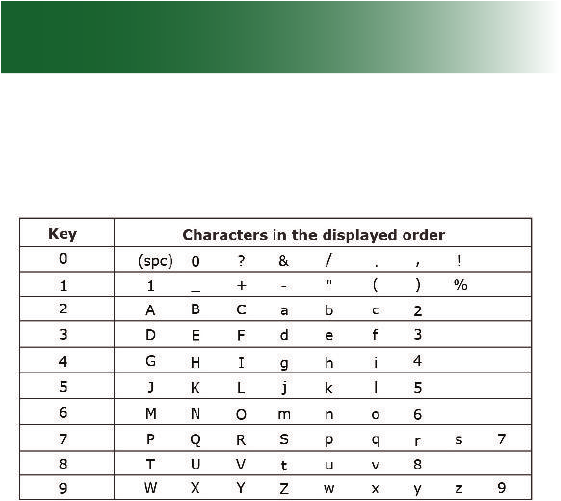
• Letter or number: When you press an
alphanumeric key on a keypad, the number
is selected (for tasks where numbers are
appropriate) or a letter is selected (for tasks
where letters are appropriate).
• Which letter?: Each key has more than one
letter available, and you nd a letter by continuing
to press the key until you see it.
• Case: Press a key repeatedly until you see
the letter of your choice. The uppercase letters
appear in order, and they are followed by the
same letters in lower case.
• Enter the next character: Press the next key.
If the next character resides on the same key,
wait until the cursor moves to the next position
before you press the key again.
• Enter spaces: On the handset: Press .
• Corrections: To erase the last character that
you entered, on the handset: Press the Erase
60
Keypad tips
soft key.
• Special characters: Press the numeric key
repeatedly until you see the special character.

61
Insert a pause
What is a pause?
Do you frequently call an automated service number
that includes interactive voice prompts? A service
that requests passwords or steps you through menu
choices, like your bank or your voicemail?
If so, you can save a great deal of time by storing the
service number and all of the required responses into
a one-touch memory key. It takes a little patience to
set up, but once it is stored, whenever you press the
one-touch key, the phone does all of the work for
you!
Automated service messages always include a few
seconds before each prompt begins. So when you
program the one-touch key, you must insert one or
more pauses to wait for each prompt to begin. After
pauses, you enter the additional numbers that the
prompt requires.
In the ClearSounds A700 phone, a pause is
three seconds long. To insert a pause, rst dial
the telephone number in standby mode (up to 24
digits). Press the key to insert a pause, then
press key.

62
Insert a pause
Insert pauses while storing a number
A pause is 3 seconds long. While storing an
automated service number and all of its required
responses into a one-touch number, you must enter
pauses before each automated prompt.
To store an automated service number and responses
1. Jot down the automated service number.
2. Call the number, and jot down the following, until
you reach the destination:
a. The number of seconds between the last
number dialed and the rst prompt
b. The next required response
3. Using your notes, follow the instructions for
storing a one-touch number (for instructions,
see page 56).
While storing the number and required
responses, press one or more times
in sequence to equal the number of seconds
before each prompt.
P appears on the screen for each pause.

63
Phonebooks
You can build personal phonebooks in each
handset so that you can easily make calls with a
few key presses. You can store up to 50 entries in
the handset.
Adding phonebook entries
Note: Enter long distance codes and area codes that
are required for dialing, so that you can simply select
the phonebook entry and pick up the handset to call.
You can enter up to 30 digits and pauses.
To add a phonebook entry in the handset
1. Press the Menu soft key.
2. Press Down
key to choose Phonebook,
press the Select soft key. The rst entry in the
phonebook appears or "Empty" appears.
3. Press the Select soft key and "Name?" appears.
4. Press alphanumeric keys to enter the name. To
enter a space, press . To enter another letter
on the same key, wait for the cursor to move
forward. Press the Save soft key. "Number?"
appears.
5. Press alphanumeric keys to enter the number
(up to 24 digits), and then press the Save soft
key.

64
Phonebooks
6. Press Up
or Down
key to scroll to a
ringtone that you want associated with this
caller. Then press the Select soft key.
Notes:
• If you make a mistake while entering a number,
use the Erase soft key to correct it. Each time
you press the key, the last digit is deleted. To
clear all digital, press and hold the Erase key.
• If you want to set a VIP number, you should
select a special ring tone for it. The ring tone
should be different from the external ring you
have set. You can set up to 9 VIP ring tones
associated with 9 VIP numbers/groups.
65
Edit a phonebook entry
To edit a phonebook entry
1. Press the Menu soft key.
2. Press Down
key to choose Phonebook,
press the Select soft key.
3. Press Up
key or Down
key repeatedly
until the entry you want to edit displays, press
the Select soft key to conrm.
4. The display shows New, use Up
key or
Down
key to move on to Edit. Press the
Select soft key.
5. If necessary, press the Erase soft key to clear
the digit(s) then enter the desired name and
number. Press the Save soft key.
6. Press Up
or Down
key to scroll to a
ringtone that you want associated with this
caller. Then press the Select soft key.
66
Phonebooks
Delete one or all phonebook entries
To delete phonebook entries
1. Press the Menu soft key.
2. Press Down
key to choose Phonebook,
press the Select soft key.
3. Press Up
key or Down
key repeatedly
until the entry you want to delete displays, press
the Select soft key to conrm.
4. Press Up
key or Down
key to choose
Delete, press the Select soft key to conrm.
Then the display shows the next entry.
5. At step 4, if you choose Delete All menu and
press the Select soft key, the display will show
"Conrm". You can press the Select soft key to
delete all the entries or press the Back soft key
to cancel and exit.
View details of phonebook
entries
1. Press the Menu soft key.
2. Press Down
key to choose Phonebook,
press the Select soft key.
67
3. Press Up
key or Down
key repeatedly
until the entry you want to delete displays, press
the Select soft key to conrm.
4. The display shows New, use Up
key or
Down
key to move on to View. Press the
Select soft key.
5. The display shows the details of the selected
entry.
View phonebook status
The phonebook can hold 50 entries. You can view
the number of stored entries.
To view the phonebook status
1. Press the Menu soft key.
2. Press Down
key to choose Phonebook,
press the Select soft key.
3. Press the Select soft key. The display shows
New, use Up
key or Down
key to move
on to PB Status. Press the Select soft key.
4. The display shows the current phonebook
status, for example, 07/50 Used. It means
the phonebook entries can be up to 50, and 7
entries have been stored.

68
Phonebooks
Caller ID book
When you receive a call, if the caller's information is
transmitted from the network on which the call was
made (and the caller doesn't hide it), the caller's
phone number is displayed. Moreover, if you missed
one or more calls, the icon will appear on the
LCD. If the Caller ID memory is full, the icon will
ash on the LCD.
Out of area
This message will display when someone calls
from an area where the telephone company is not
offering the caller identication services or is not yet
providing number delivery to your area.
Private
If the caller has exercised the option to prevent his
name and number from being sent, the message
will show on the LCD.
View and dial caller ID numbers
1. Press the Menu soft key.
2. Use the Select soft key to choose the CID Book
and, if available, the numbers are displayed.
(You can also access the CID book directly by
pressing the Up
key in standby mode.)
69
3. Use the Up
key or Down
key to view
the numbers. You can make a call by pressing
the key. You can also add the entry to the
phonebook.
Note: At step 3, each item of the incoming list is
marked with the icon is the call has been reviewed
or with the icon if the call hasn't been reviewed
yet.
Add caller ID number to
phonebook
The caller ID number is a temporary record of who
called and when. The phonebook is permanent
until deleted. Adding the caller ID number to
the phonebook makes the caller ID information
permanent.
1. Press the Menu soft key.
2. Press the Select soft key to choose the CID
Book.
3. Use the Up
key or Down
key to view the
numbers. When the desired number displays on
the LCD, press the More soft key to enter Add
to PB menu.
4. Press the Select soft key, you are prompted to
enter the name.

70
Phonebooks
5. Enter the name and press the Save soft key.
Now you can modify the number you want to
store.
6. Press the Save soft key. You are able to select
a ring tone from Melody 1 through Melody 10.
Press the Select soft key to conm and exit.
You will hear a conrmation beep.
Delete a number in the caller ID
book
1. Press the Menu soft key.
2. Press the Select soft key to choose the CID
Book.
3. Scroll to the number you want to delete by using
Up
key or Down
key.
4. When the desired number appears on the
display, press the More soft key.
5. Use the Up
key or Down
key to choose
Delete, press the Select soft key. You will hear
a beep and the LCD shows the next number.

71
Delete all numbers in the caller
ID book
1. Press the Menu soft key.
2. Press the Select soft key to choose the CID
Book.
3. Press the More soft key and use Up
key
or Down
key to choose Delete All menu.
Press the Select soft key.
4. The display shows "Conrm", press the Select
soft key.
Result: You hear a beep and the phone returns
to standby mode after clearing all the caller ID
numbers.

72
Memos
Record a memo
You can use your phone to record memo messages
(each can be up to 3 minutes) for another user of
your phone. This memo can be played back as a
message.
To record a memo from the handset
1. Press the TAM soft key in standby mode.
2. Press the Select soft key to choose Message.
3. Press Up
key or Down
key repeatedly
to choose Memo, press the Select soft key.
4. You can record your message after a tone.
Recording will stop automatically after 3 minutes.
You can also conrm and end the recording by
pressing the OK soft key. During recording the
LCD shows "Recording".
Note: If someone leaves you a memo, the vffbv
icon will appear on the LCD when in standby mode.
73
Calls
Auto answering
By default, you answer calls by removing the
handset from the base and pressing .
If you prefer to answer calls by simply removing the
handset from the base, you can turn on the auto
answer feature for the handset. If the handset rings
when it is off of the base, you must still press
to answer the call.
To turn on or off auto answering
1. Press the Menu soft key.
2. Press Up
or Down
key to choose HS
Settings, then press the Select soft key.
3. Press
and scroll to Auto Answer, then
press the Select soft key.
4. Press
and scroll to On or Off to enable/
disable the function. Press the Select soft key.
You will hear a conrmation beep.
Note: When the answering machine starts working,
this feature will be deactivated.
74
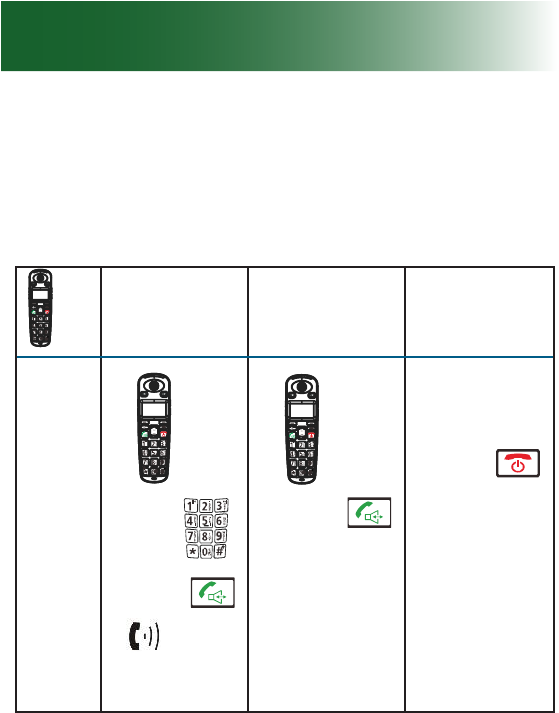
Place, answer, or end a call
To place, answer, or end a call using the
handset
Place Answer End
1. Lift.
2. Dial .
3. Press .
appears on
the screen.
1. Lift.
2. Press .
• Press .
Call
duration
appears
on the
screen.
Note: If you set the handset to auto answer, simply
lift the handset from the base to answer a call. For
instructions to set auto answer, see page 73.
Calls
75
Making a call
1. Pick up the handset and press the key. The
icon appears on the LCD.
2. Dial a telelphone number.
3. To end the call either press the key or
replace the handset on the base.
Note: To make a call to the last number you dialed,
use the Redial feature. For details, see page
You can enter the desired telephone number (up
to 32 digits) in Standby mode, which allows you
to make corrections before dialing. Follow these
steps:
1. Enter a telephone number (up to 24 digits).
Check it. You cna also use the key to insert
a pause. When the number appears correctly,
press the key.
Note: If you make a mistake while entering a
number, press the Erase soft key to clear the last
digit.
Receiving a call
76
When a call is received, Call information will
appear. If the caller can be identied, the caller's
phone number is displayed. If the caller cannot be
identied, only the Call information displays. If you
have a voice message, the "MSG WTG ON" and
jnfk icon will be shown on the LCD.
1. To answer a call, press the key. If you have
activated the Auto Answer function, when the
handset is on the base, simply lift it up.
2. You can speak. To end the call, either press the
key or replace the handset on the base.
After you hang up, the LCD displays the call
duration.
Notes:
• You can select the ringer volume by using Up
key or Down
key when the phone rings
with an incoming call.
• If you want to delete the icon, press the Up
key in standby mode, then press and hold the
key for several seconds. After that, press
the fkey to return to standby mode. (The
handset must be registered to the base.)
• If the polyphonic ring tone is set, the ring
tone may continue for 4 seconds after the
callers hang-up or after the parallel phone had
answered the call.
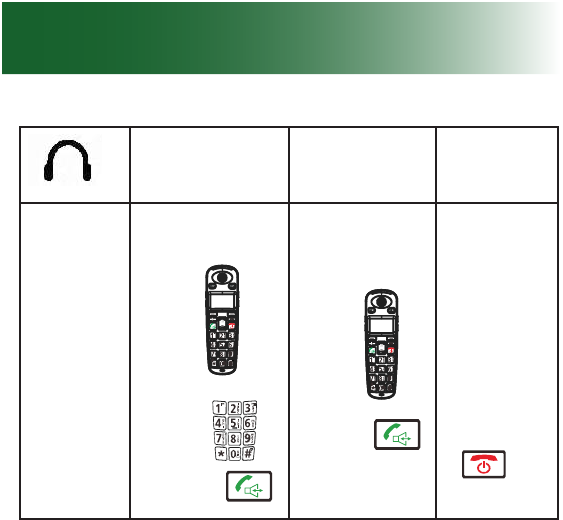
To place, answer or end a call using a headset
Calls
77
Place Answer End
1. Lift .
2. Dial .
3. Press .
1. Lift .
2. Press .• Press
.
To call other handsets in your home

78
If additional handsets are registered to your
ClearSounds A700 base, you can place internal
calls among the handsets.
1. Lift .
2. Press
Available handset numbers appear.
3. Indicate the phone(s) that you wish to call:
• To call one handset: Press the numeric key
that indicates the number of the handset that
you wish to call.
Call FR HS X appears on the recipient
phone.
• To call all handsets: Press 9.
Call All HS appears on the recipient
phone.
If an external call comes in while you converse
on an internal call, press to end the internal
call before you answer the external call.
Calls
79
Place a one-touch call
If you have stored numbers for the one-touch memory
keys, you can call these numbers with one touch.
If you need instructions for storing one-touch
numbers, see page 56.
To place a one-touch call using the handset
1. Lift .
2. Press the or that you wish to
call.
The number appears on the screen and the
phone dials.
80
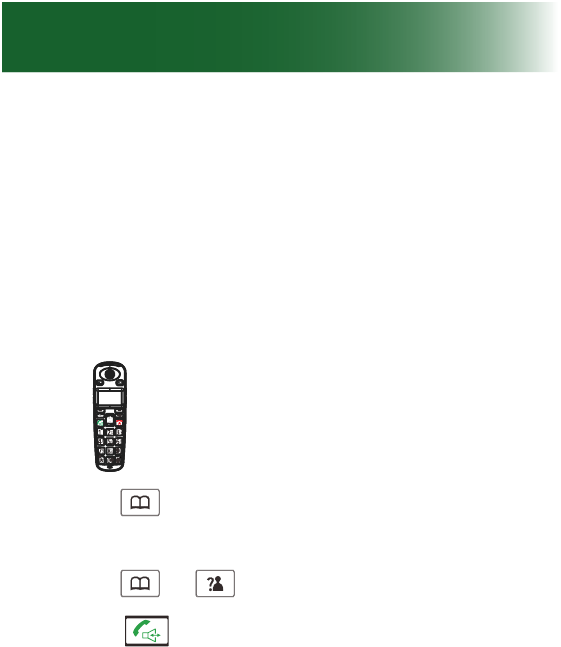
Call from your phonebook
If you have stored a number in your handset or
base phonebook, you can call it quickly.
If you need instructions for storing phonebook
numbers, see page 63.
To call a handset phonebook number
1. Lift .
2. Press
.
The rst phonebook entry appears.
3. Press
or
and scroll to the name.
4. Press .
The phone dials.
Calls
81
Redial a number
You can quickly redial any of the last 10 numbers
that were dialed from your handset or base.
The same list of 10 numbers is available on the
handsets and the base.
To redial the last-dialed number
1. Press the Redial key in standby mode. The
LCD displays the last number you dialed.
2. Press the key to dial the number.
To redial a recently dialed number
1. Press the Redial key in standby mode.
2. If you want to scroll through the memory, press Up
key or Down
key repeatedly until you nd
the number you want to dial.
3. Once the desired number appears on the display,
press the key to dial the number.
Notes:
• If no numbers are found, "Empty" is displayed.
• When the redial book is full, each time you dial
a new number, the oldest number stored in the
redial book is automatically erased.
82
Use redial book options
Using the redial book options, you can add a
number to the phonebook or delete a number in the
redial book
1. Press the Redial key.
2. Scroll to the desired number by using Up
key or Down
key.
3. When the desired number appears on the
display, press the More soft key to choose the
desired option:
• Add to PB: allows you yo add the number to
the phonebook. See page 63.
• Delete: allows you to delete the selected
number
• Delete All: allows you to delete the entire
redial book
4. To return to standby mode, press the key.
Note: At step 3, when you select Delete or Delete
All options, a message "Conrm?" will ask you to
conrm the deletion. To conrm, press the Del or
Del All soft key. To escape, press the Cancel soft
key.
Calls
83
Call from the inbound calls list
If you subscribe to caller ID service with your
telephone service provider, the handsets store the
last calls made to your telephone. Handsets store 40
calls each.
The inbound calls list includes these entries:
• Received calls
• Missed calls
• Voicemail messages (voicemail service required)
You can quickly dial any of the numbers stored in the list.
To call from the inbound calls list using the handset
1. Lift .
2. Press
and scroll to the number that you
want to call.
Inbound calls appear on the screen, the most
recent, rst.
To add an area code or 1, press the More soft
key, and then scroll to the format of your choice.
3. Press .
The phone dials.

84
Place an SOS emergency call
If you have stored an SOS emergency number,
you can press the SOS key to dial the number. For
instructions to store an SOS number, see page 56.
1. Lift .
2. On the back of the handset, press .
The number appears on the screen and the
phone dials.
Calls
85
During calls
When the line is engaged:
• Line in Use appears on the base screen
• appears on each handset screen
• The ongoing call length displays on the screen.
Use a speakerphone
If you remain close to the handset, you can converse
handsfree and listen over the base speakerphone or
the handset speakerphone.
To enjoy optimal speakerphone performance, locate
the handset away from areas with high background
noise.
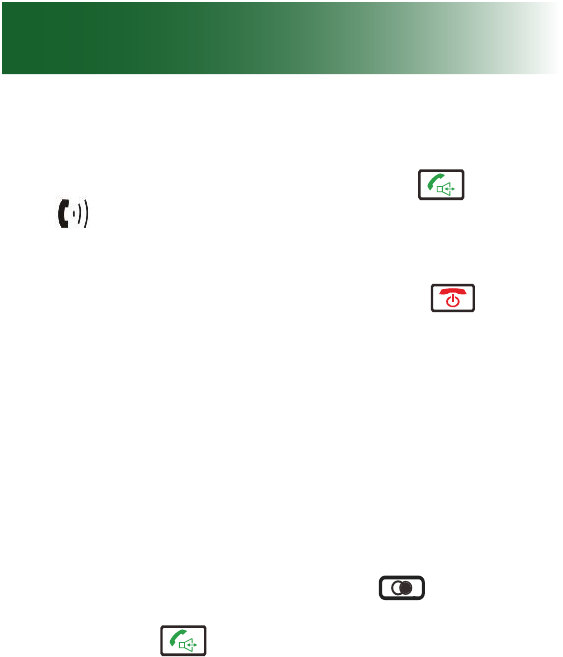
To turn on the handset speakerphone during a call
To turn the speakerphone feature on:
• Press the key during a call (line engaged).
The icon appears on the LCD.
To turn the speakerphone feature off:
• Press the key again. The icon will
disappear.
Notes:
• Before putting the handset near your ears, be
sure you have turned the speakerphone feature
off.
• To adjust the speakerphone volume, see page
39

86
Screen a call
If you hear a caller leaving an answering machine
message, and you want to speak to the caller, you
can intercept and speak to the caller.
Note: You must use the handset to intercept a call.
To intercept a caller leaving a message
• Pick up the handset and press .
The answering machine stops recording.
During calls

87
Use a headset
You can plug in a headset to the handset and
converse handsfree while listening discretely
through the headset.
To connect a headset to the handset during a call
The headset jack is located in the left side of the
handset and is a 2.5mm standard plug. Simply plug
the headset into this jack and the headset will be
activated.
Note: When the headset is plugged into the headset
jack the microphone on the handset will be deactivated.
Earphone
Microphone
Clip
Headset Jack
Vol + Vol -
88
1. On the side of the handset, connect the headset
to the jack.
2. Place the headset on your head.
3. (Optional):
• To adjust volume: Press
Vol +, Vol -
• To amplify sound: Press .
AMP
• To adjust tone: Press .
Tone
4. To end the call, press .
During calls
Left side
Right side
Right side
Tone
AMP
Tone
AMP
Vol + Vol -

89
Mute the microphone
You can mute the handset or the base so that the
other party cannot hear any noise or conversation on
your end of the line. You can still hear the other party.
Muting also works when you use a speakerphone
or headset.
To mute and unmute the handset microphone
1. Press the Mute soft key. "Call Muted" appears
on the screen when you have muted the
conversation.
2. To unmute the microphone and return to
conversation, press the Unmute soft key.
Answer a second call (call waiting)
If you subscribe to call waiting service with your
telephone service provider, and a new call comes
in during a phone conversation, the phone noties
you of the incoming call.
If you choose to answer the second call, you can
switch between callers, and the waiting party
remains on hold until he or she disconnects. If you
do not answer the call, a record of it is stored in the
inbound calls list.
Call waiting notication depends on your service
90
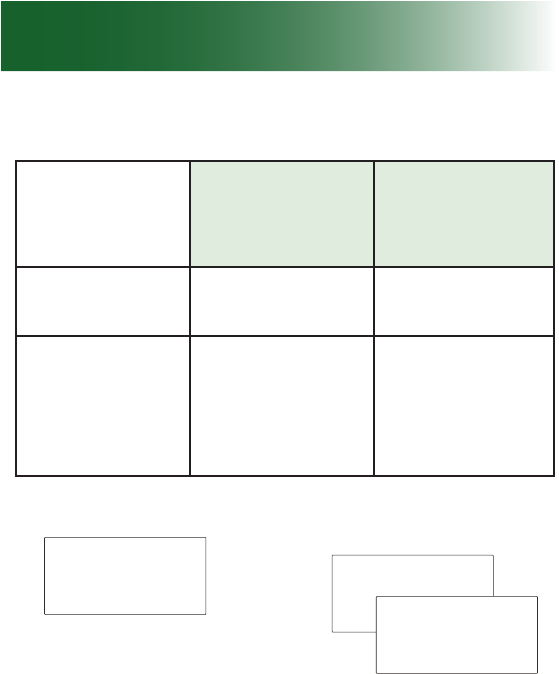
and your personal phone settings, as follows:
Call waiting
service
Caller ID on
call waiting
service
Tone sounds
on the line √ √
Handset
displays
information
√
If caller and local
service make it
available
Caller 1
4361234 Caller 1
4Caller 2
2915678
Caller two's info rmation
is displayed
Caller ID info displayed
During calls

91
To answer a second call while using the handset
1. Tell the rst caller that you will put him or her
on hold.
2. Press the Flash soft key..
3. To reconnect with the rst caller, press the
Flash soft key again.
Note: If you have transferred an external call to
another handset, you cannot use the call waiting
function via the second handset.
92
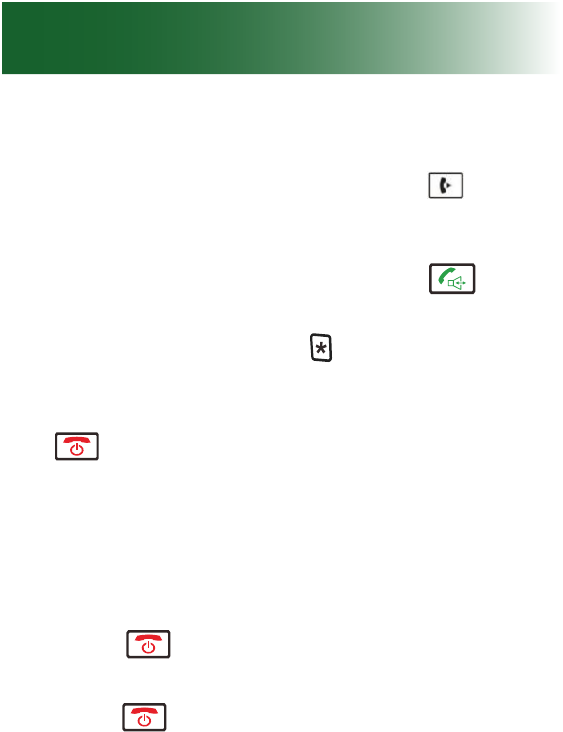
Transfer a call
If multiple handsets are registered to your ClearSounds
A700 base, you can transfer external calls between the
handsets.
Each handset number shows on its screen. For
example, HS 2 is handset two.
To transfer a call
1. During an external call. press the key and
then the number of the handset you want to
transfer the call to.
2. If the called party can answer your call, he'she
can press the key to talk with you only. At
this time you can inform him/her of the incoming
call.
3. When the called handset answers, press the
key or replace the handset to the base to
complete the transfer.
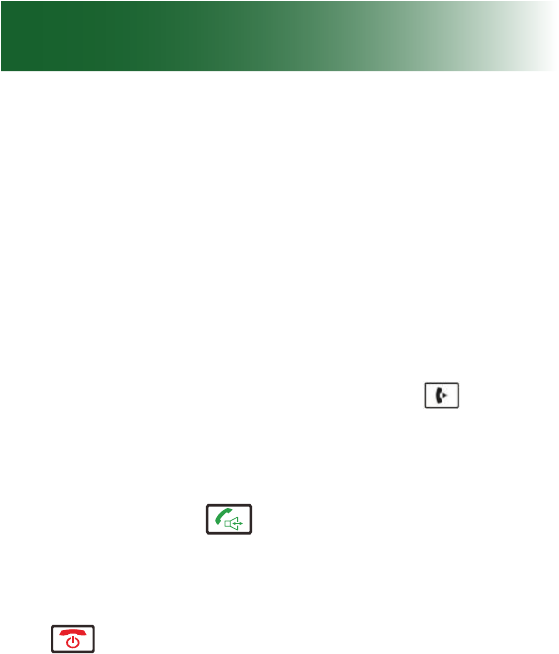
Set up a conference call
You can set up a three-party call with an external
caller and a person using an A700 handset that is
also registered to your base.
During calls
93
To set up a conference call
1. During an external call, press the key and
then dial the number of the handset you want to
join the 3-way call.
2. The dialed handset presses the key to
answer.
3. The caller can press the key to start the 3-way
call.
4. Either of the two internal handsets can press the
key to leave the conference call at any time.
Note: If one of the handsets drops the conference
call, the remaining handsets will continue to
conference.
To leave a conference call
• Press .
The other parties remain connected until they
press .

94
Answering machine
Is the answering machine right for you?
The phone includes a built-in answering machine.
You must choose one method as a primary message
retrieval method: answering machine or voicemail.
Each method has unique features and benets.
Answering machine
• Call screening: You can hear the caller leave a
message and pick up the handset to speak.
• One-touch message retrieval ( )
• Holds 15 minutes of messages.
Voicemail service
• Detects and stores a record of incoming calls and mes-
sages that come through when your line is engaged
• Purchased through your telephone service
provider

95
Answering machine with call waiting
If you prefer using an answering machine, but you
also want to be alerted to incoming calls when you
are on the line with another caller, you can primarily
use the answering machine and purchase voicemail
with the call waiting feature from your telephone
service provider.
If you do not answer the second caller and the
caller leaves a message, the message becomes a
voicemail.
To set up your phone in this way, you must set the
number of “rings before pickup” for the answering
machine to be less than the number of rings before
voicemail pickup. The number of rings before
voicemail pickup is determined when you set up
voicemail with your service provider.
For answering machine ring setup instructions, see
page 102.

96
Turn on the answering machine
The answering machine records incoming messages
and memos.
You must turn on the answering machine to record
messages, but you can record memos even if the
answering machine is turned off.
To turn on or off the telephone answering machine (TAM)
using the menu
1. Press the TAM soft key.
2. Press Up
key or Down
key to choose
TAM setup, and then press the Select soft key.
3. Press the Select soft key.TAM ON/OFF is
selected.
4. Press Up
key or Down
key to choose
ON or OFF, and then press the Select soft key.
5. Press the Back soft key until you arrive at the
home screen.
To turn on or off the telephone answering machine (TAM)
using the base
• Press key on the base unit to enable or
disable this function. The current state will be
announced.
Answering machine

97
Record a personalized message
By default, the answering machine message is
"Hello, your call cannot be taken at the moment. To
record your message, please speak after the tone."
You can replace the default message by recording a
personalized message that is as long as 3 minutes.
To record a personalized outgoing message
1. Press the TAM soft key in standby mode.
2. Press Down
key to choose Announce,
press the Select soft key.
3. Press the Select key again to choose ANS &
REC.
4. Press Down
key to choose Record Mess,
press the Select soft key.
5. You can record your announcement after a tone.
Recording will stop automatically after 3 minutes.
You can also conrm and end the recording by
pressing the OK key. During recording, the LCD
shows "Recording".

98
Listen to your recorded message
To listen to your recorded message using the
handset
1. Press the TAM soft key in standby mode.
2. Press the Select soft key to choose Message.
3. Press the Select soft key to choose MSG
Playback.
4. The phone will announce "You have x
new message(s)" or "You have x saved
message(s)". The relevant messages will be
played one by one. You can use the key to
delete the current message or the Back soft key
to stop playing and exit.
To listen to your recorded message using the
base unit
When you have one or several new messages,
press the key to play the message(s). If there
are no new messages, press this key to play the
saved messages. Press the key once to re-
play the current message, press it twice to play
the previous message. Press the key once to
play the next message. Press the key again to
nish.
Answering machine
99
Note: While playing messages, you can press the
keys to adjust the volume.
Day of the week setting
Before each message is played, the week and time
it was received will be announced. You are able to
use the base to set the day of the week.
1. Press and hold the key on the base until the
current setting is announced.
2. Quickly press the key repeatedly to set the
correct day of the week. Every time you press
the key, the system will announce the
corresponding day of the week.
3. Press the key to save the change.
Note: If you remove the battery or pull out the
adapter, you need to re-set the day of the week.
Restore the default message
You can restore the phone's default outgoing
message.

100
To restore the default outgoing message
1. Press the TAM soft key in standby mode.
2. Press Down
key to choose Announce,
press the Select soft key.
3. Press the Select soft key to choose Playback.
4. The current Announce1 will be played. DURING
the playback, press the OK soft key to restore
the default Announce1.
Record time
You are able to select the record time. Of you select
Unlimited, the messages can be recorded until the
memory is full.
1. Press the TAM soft key in standby mode.
2. Press Up
key or Down
key repeatedly
to choose TAM Setting, and then press the
Select soft key.
3. Press Up
key or Down
key repeatedly
to choose Record Time, press the Select soft
key.
4. Use Up
key or Down
key to select
between 60s, 120s, 180s, and Unlimited.
5. Press the Select soft key to conrm.
Answering machine
101
Voice prompt language
You are able to select the language used to play the
TAM voice prompt messages.
1. Press the TAM soft key in standby mode.
2. Press Up
key or Down
key repeatedly
to choose TAM Setting, and then press the
Select soft key.
3. Press Up
key or Down
key repeatedly
to choose TAM Language, press the Select
soft key.
4. The languages will be displayed. Use Up
key or Down
key to scroll through the
options. Each language will be displayed in its
own native translation.
5. Press the Select soft key to choose the required
language and you will hear a conrmation beep.

102
Change the number of rings before pickup
By default, your answering machine picks up calls
after the sixth ring. You can set it to pick up after
2-8 rings.
If you use the answering machine together with
voicemail and call waiting service, you must set the
number of rings before pickup to be less than the
number of rings before pickup for voicemail service.
Voicemail pickup is determined by your service
provider. For more information, see page 95.
To change the number of rings before pickup
1. Press the TAM soft key in standby mode.
2. Press Up
key or Down
key repeatedly
to choose TAM Setting, and then press the
Select soft key.
3. Press Up
key or Down
key repeatedly
to choose Set Ring, press the Select soft key.
4. Use Up
key or Down
key to choose
the number of rings (2 Rings - 8 Rings or Toll
Saver), press the Select key.
Answering machine

103
If you subscribe to Voicemail and Caller ID services
with your telephone service provider, the handset(s)
and base store the last calls made to your telephone
in the inbound calls list. Each handset stores 40
calls.
Caller name and number are stored if the caller and
telephone service providers make them available.
Voicemail & calls
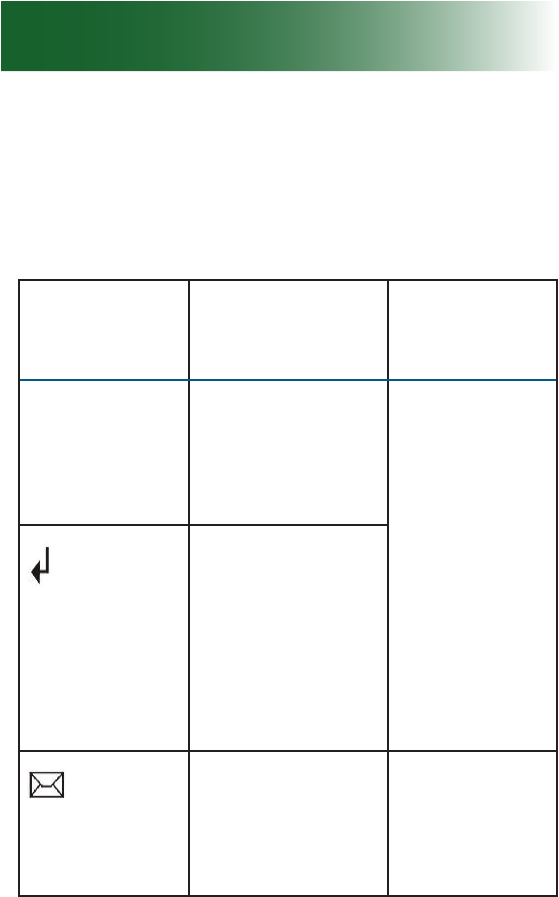
104
Visual indicators of calls and messages
The handset provides these visual indicators.
Handset call and message indicators
Visual
indicator Meaning Clear it
X New Calls The number of
non-viwed calls
Scroll on
the handset
through all
Caller ID
entries.
One or more
nonviewed calls.
If it ashes, your
Caller ID list
is full, and the
oldest call in the
list has been
deleted.
One or more
unheard
voicemail
messages
Listen to
all unheard
voicemal
messages.
Voicemail & calls
105
View missed calls
To scroll missed calls on the handset
1. Press
. The newest call appears.
2. Press
and scroll through the list.
Number = Call order
= Reviewed call.
= Unreviewed call
disappears from the home screen after you
review the last missed call.
3. Press .
Listen to voicemail messages
If you have unheard voicemail messages, when you
open the line to make a call, you hear a stutter dial tone.
To listen to voicemail messages
• Call your voicemail access number, as specied
by your telephone service provider.
If you are interested in storing your voicemail
access number for one-touch calling, see page
56 for instructions.

106
Remote access
You can access many features of your answering
machine remotely from any touch tone telephone. A
four digit security code (remote code) is required to
access the system and it is 0000. To enter remote
access:
1. Dial your telephone number from any touch tone
telephone.
2. When the Announce1 starts to play, you may
enter the remote access mode by inputting the
remote code.
3. After you enter the remote code, the system
will play the menu of commands. You can then
follow the commands to operate.
Note: If you enter the remote code incorrectly, the
answering machine will prompt you to enter the
code again. You are then given two more attempts
to enter the correct remote code before the line is
disconnected.
Voicemail & calls
107
Remote access commands
Button Function
Play the new message
Stop
Play the next message
Delete the current message
Switch the answering machine
on/off
Record Announce1
When you press key to replay the current
message, press to play the next message,
press four times to play back the messages,
press to stop and exit, press to delete the
current message.
After you record the Announce1, press the key
or the key to nish. The system will play the
announcement you have recorded.

108
Visual indicators of messages
When the answering machine is turned on, it holds
15 minutes of messages and indicates unheard
messages, as follows.
Handset indicators
Indicator Meaning Clear it
Unheard
answering
machine
message(s).
Listen on the
base or handset
to all unheard
messages.
Machine messages
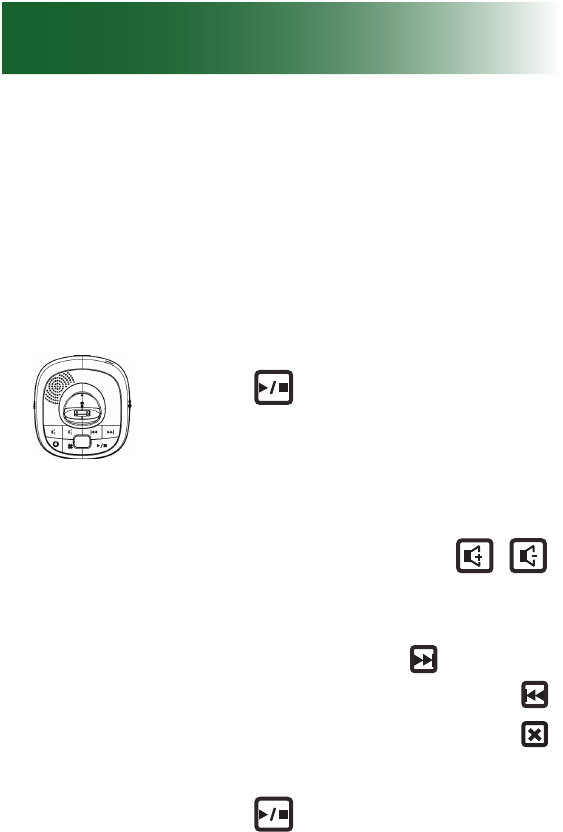
109
Listen to answering machine messages
You can listen to answering machine messages on
the base or on the handset.
To listen to answering machine messages on the base
Messages play on the base speakerphone.
1. Press .
The newest message or memo
plays.
2. (Optional) Adjust volume or skip,
replay or delete the message:
• To adjust volume: Press
along the side of the base.
• To skip ahead to the next memo
or message: Press .
• To replay the message: Press
• To delete the message: Press
as the message plays.
3. Press .
The announcements stop.
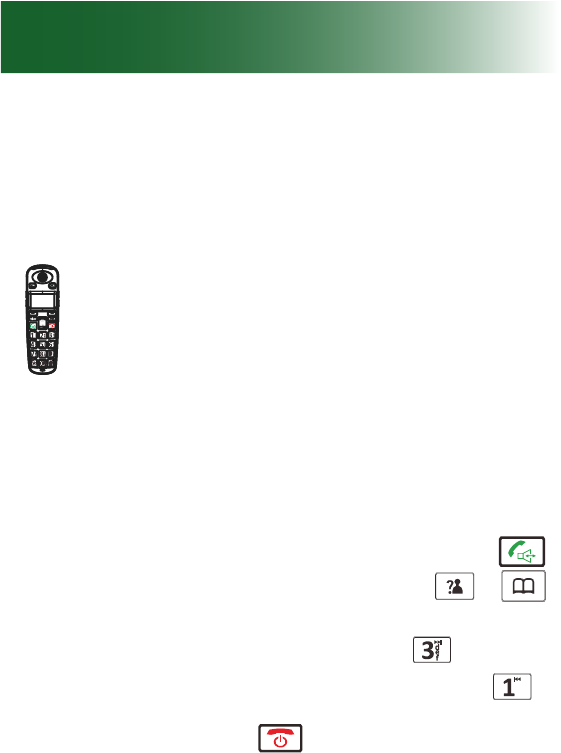
110
Machine messages
To listen to answering machine messages on the handset
Messages play on the handset speakerphone, but
you can turn off the speaker if you prefer to listen
discretely.
1. Press the TAM soft key.
2. Press the Select soft key to choose
Message.
3. Press the Select soft key to
choose MSG Playback. The
newest message or memo plays.
4. (Optional) Adjust sound or skip,
replay or delete the message:
• To turn off the speaker: Press .
• To adjust volume: Press
or
.
• To skip ahead to the next memo
or message: Press .
• To replay the message: Press .
5. Press .
The announcements stop.

111
Delete answering machine messages
It is important to delete old messages and memos on your
answering machine, to make space for new messages.
The machine holds 15 minutes of messages. If the
machine is full, the caller hears the line disconnect,
and the handset shows TAM Full.
To delete all answering machine messages
Using the menu:
1. Press the TAM soft key
2. Press the Select soft key to choose Message.
3. Press Up
key or Down
key to choose
Delete All, press the Select key to conrm.
4. The LCD will show Conrm. Press the OK key
to delete all the messages or press the Back
key to exit.
Using the base unit:
Press and hold the key to delete all the messages.
Voice prompting will be heard. If you press and hold
this key while a message is playing, the message
will be deleted.

112
The ClearSounds A700 phone stores two lists:
• Dialed calls list: The last 10 numbers that were
called from your handsets and base
• Inbound calls list (Caller ID service required)
The last callers who called you. Each handset
stores 40 calls.
Delete entries from the dialed calls list
The oldest call automatically drops from the list
when the list is full. You can remove calls manually
if you wish.
To delete calls from the handset dialed calls list
1. Press . The last-dialed number appears.
2. Press and scroll to a number that you want
to delete.
3. Press the More soft key..
4. Take one of these steps:
• To erase the selected number: Press and
scroll to Delete, and then press the Select
soft key. A conrmation tone occurs and the
next number appears.
List maintenance

113
• To erase all numbers in the list:
a. Press and scroll to Delete All, and
then press the Select soft key.
b. Press the Select soft key again. A
conrmation tone occurs and Empty
appears.
5. Press .

114
Delete entries from the inbound calls list
When the list becomes full, the oldest call drops from
the list. You can remove calls manually if you wish.
To delete calls from the handset inbound calls list
1. Press the Menu soft key.
2. Press the Select soft key. The Caller ID Book is
selected.
3. Press the More soft key.
4. Take one of these steps:
• To erase the selected number: Press and
scroll to Delete, and then press the Select soft
key. A conrmation tone occurs and the next
number appears.
• To erase all numbers in the list:
a. Press and scroll to Delete All, and
then press the Select soft key.
b. Press the Select key again. A conrma-
tion tone occurs and Empty appears.
5. Press .
List maintenance

115
Restore defaults
Restore handset default settings
You can reset your handset to factory default
settings. These settings are restored:
• Alarm clock
• Audio
• Ringtones and ring volume
• Key tone
• Out of range alarm
• Language
• Handset name
• Auto answer
• Date and time
You must enter the ClearSounds A700 PIN to reset
the defaults. The PIN is 0000.
To restore handset default settings
1. Press the Menu soft key.
2. Press and scroll to Default, and then press
the Select soft key. Pin? appears.
3. Press numeric keys and enter 0000, and then
press the Select soft key. Conrm? appears.
4. Press the Select soft key. A conrmation tone
occurs. The settings are reset.

116
Additional handsets
Register additional handsets to the base
Your telephone handset is registered to the base
(Base-1).
If you purchased additional ClearSounds A700
handsets, you must register each additional
handset to the ClearSounds A700 base. The base
can accommodate a total of ve handsets.
Each handset’s registration number appears on the
handset’s home screen.
Before registering a handset to the base, you
should press and hold the
key (on the bottom of
the base) for about 5 seconds.
To register an additional handset to the base
1. Press the Menu soft key.
2. Press Up
key or Down
key repeatedly
to choose the Registration menu. Press the
Select soft key.
3. Press the Select soft key again to choose Base
1. The handset will search for the requested
base and the relevant information will ash on
the LCD.
4. If the base is found, you will be prompted to enter
the PIN code (0000). Enter the PIN then press
the Select soft key. If the PIN is code is correct,
the registration tone will sound and then the base

117
assigns a number to the handset. Otherwise, a
warning tone will sound and the handset returns
to the previous registration state.
5. If the base is not found, the handset will behave
according to the Out of Range condition.
Selecting a base
This function allows you to select a base from those
already registered to the handset. You can access
the options by scrolling the menu.
1. Press the Menu soft key.
2. Press Up
key or Down
key repeatedly
to choose HS Settings, then press the Select
soft key.
3. Press Up
key or Down
key to choose
Selected BS menu. Press the Select soft key.
4. You can use Up
key or Down
key to
select the base you want to use, then press the
Select soft key.
5. BS Selected appears after Searching.

118
Additional handsets
Name a handset
The default "name" at the top of a handset is
"ClearSounds.
You can remove ClearSounds and give the handset
a personalized name.
To name a handset
1. Press the Menu soft key.
2. Press Up
key or Down
key repeatedly
to choose HS Settings, then press the Select
soft key.
3. Press Up
key or Down
key to choose
HS Name, then press the Select soft key.
4. Press the Erase soft key until all letters are
removed.
5. Press alphanumeric keys and enter the name,
and then press the Save soft key.
6. Press :
The new name appears on the home screen.

119
Troubleshooting
General operation
Symptom Solutions
Phone is
non-operational.
• Secure the power adapter
connection in the wall outlet.
• Secure the cords and cables.
• Fully charge the handset
batteries and install them
properly.
• Turn on the handset (page
53).
• Plug in another phone to the
same wall jack to ensure
that the phone service is
operational.
No dial tone • Connect the phone line
cord.
• Check that the power adapter
is properly connected.
Handset batteries
seem to have
short lives
• Use only AAA NiMH
rechargeable batteries.
Never use alkaline batteries!
• Clean the charging contacts.
When I lift the
handset from the
base, the line
doesn't open.
• Turn on the auto answer
feature (page 73).

120
Troubleshooting
Symptom Solutions
There is noise,
static or
interference.
• If you subscribe to DSL
service, install a DSL lter
(page 13).
• Plug in the power adapter to
the wall outlet and securely
connect it to the phone.
• Do not plug in other
appliances to the same wall
outlet.
• Move the phone to a location
that is free of interference.
• If you are located near radio
towers, install a lter.
No display • Check that the handset
batteries are installed
properly.
• Check that the handset
batteries are in full power.
• Check that the handset is
on.

121
Symptom Solutions
Caller's number is
not displayed
• Makes sure you have
subscribed to a Caller ID
service via your network.
• The caller may have witheld
their details.
• Let the phone ring a couple
of times as there may be a
delay in receiving the Caller
ID information.
Voicemail and call waiting services
Symptom Solutions
Call waiting does
not work.
• Conrm that you subscribe
to call waiting service.
• If another handset is engaged
on the line, call waiting
information doesn't show.

122
Troubleshooting
Symptom Solutions
New Voice Mail
doesn't appear
on the handset
screen, but I have
a voicemail.
Conditions:
• You primarily use the
answering machine to
retrieve messages, but you
also subscribe to voicemail
and call waiting services.
• A second caller leaves a
voicemail while you are
talking to the rst caller.
• You also have unheard
answering machine messages.
Result
New voice mail doesn't appear
until you hear all answering
machine messages.
There is no caller
ID information on
the screen.
• Conrm that you subscribe to
caller ID service and to caller
ID on call waiting service.
• Some callers withhold details.
• ID information can be
delayed: Check after the
phone rings a few times.
• If answering machine is on,
set it to answer after at least
two rings.

123
Call notification
Symptom Solutions
There is no
audible ringer.
• Turn on the ringer and turn
up the ringer volume (page
56).
• Plug in the power adapter to
the wall outlet and securely
connect it to the phone.
• Unplug one or more devices
that share the phone line.
Handset visual
ringer indications
do not function.
• Turn on the handset light
and vibration feature (page
54).
Dialing
Symptom Solutions
A memory button
does not function.
• Program the number (page
53).

124
Troubleshooting
Symptom Solutions
Area codes or long
distance codes are
missing from lists.
• Some services add them and
some do not. Always check
the numbers that you enter
into your phonebook.
• When dialing out using a
number from the inbound
calls list, after you locate the
number, press these keys to
select a different format before
you dial:
Press More on the handset.
(page 73).
Audio
Symptom Solutions
Low earpiece
or speakerphone
volume or
amplification
• Plug in the power adapter to
the wall outlet and securely
connect it to the phone.
• Turn up the volume and
amplication settings (page
39)
• By default, amplication turns
off after each call. If you pre-
fer it on consistently, turn it on
(page 39).
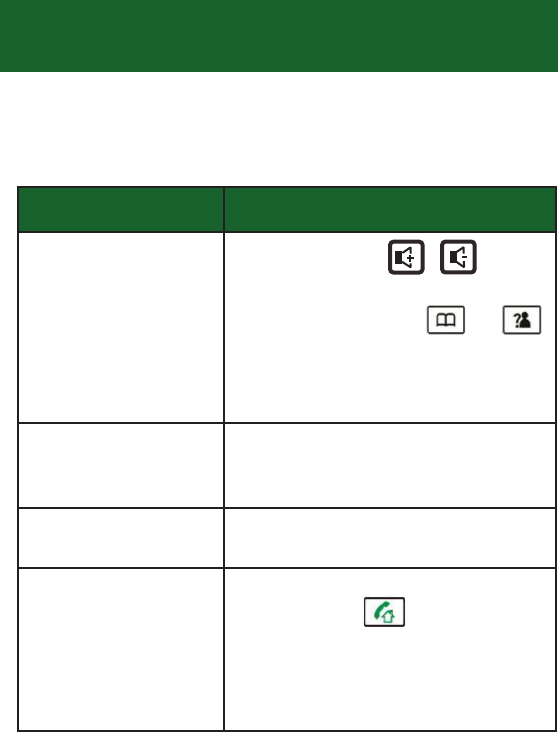
125
Answering machine
Symptom Solutions
When listening to
messages, volume
is too low or too
high.
• Base: Adjust on the
side of the base.
• Handset: Adjust or .
Handset Vol + and Vol - does
not work in this instance.
Incomplete caller
messages occur.
The memory is full. Delete
some or all messages (page
111).
I forgot my remote
access PIN.
Your PIN is 0000.
When I try to in-
tercept a caller
leaving an an-
swering machine
message, I can't
break in.
• You must lift the handset
and press .
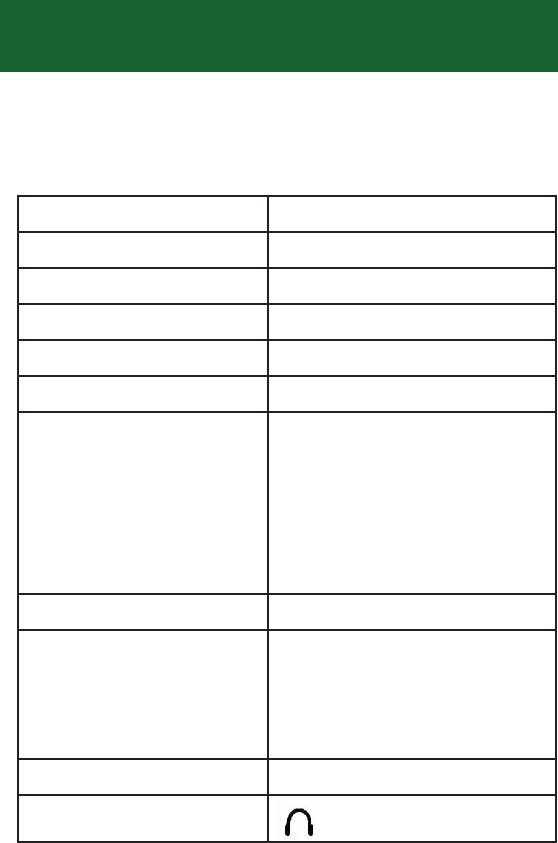
126
Specifications
Design and specications are subject to change
without notice.
Frequency range 1.921536-1.928448 GHz
Frequency stability < +/- 50 KHz
Modulation GFSK
Carrier power < 250 mW
Channels 120 duplex channels
Amplication Up to +40 dB
Ambient temperature Normal: 59 degrees F to
95 degrees F (15 degrees
C to 35 degrees C)
Extreme: 32 degrees F to
104 degrees F (0 degrees
C to 40 degrees C)
Humidity 0%-90%
Power supply A700 base input: 7.5 V,
1000 mA
Handset input: Ni-MH 1.2
V x 3, 800 mAh
Charging time 15 hours
Jacks (Headset) 2.5 mm

127
Compliance
InterferenceInformation
ThisdevicecomplieswithPart15oftheFCCRules.Operationissubjecttothefollowing
twoconditions:(1)thisdevicemaynotcauseharmfulinterference,and(2)thisdevice
mustacceptanyinterferencereceived,includinginterferencethatmaycauseundesired
operation.
ThisequipmenthasbeentestedandfoundtocomplywiththelimitsforaClassBdigital
device,pursuanttoPart15oftheFCCRules.Theselimitsaredesignedtoprovide
reasonableprotectionagainstharmfulinterferenceinaresidentialinstallation.This
equipmentgenerates,usesandcanradiateradiofrequencyenergyand,ifnotinstalled
andusedinaccordancewiththeinstructions,maycauseharmfulinterferencetoradio
communications.However,thereisnoguaranteethatinterferencewillnotoccurina
particularinstallation.Ifthisequipmentdoescauseharmfulinterferencetoradioor
televisionreception,whichcanbedeterminedbyturningtheequipmentoffandon,the
userisencouragedtotrytocorrecttheinterferencebyoneormoreofthefollowing
measures:
Reorientorrelocatethereceivingantenna.
Increasetheseparationbetweentheequipmentandreceiver.
Connecttheequipmentintoanoutletonacircuitdifferentfromthattowhichthe
receiverisconnected.
Consultthedealeroranexperiencedradio/TVtechnicianforhelp.
Privacyofcommunicationsmaynotbeensuredwhenusingthisequipment.
RegulatoryInformationUnitedStates
Modificationsnotexpresslyapprovedby couldvoidtheuser'sauthority
theequipment.
tooperate
Clearsounds

128
Compliance
ExposuretoRadioFrequency(RF)Signals
Thiswirelessphoneisaradiotransmitterandreceiver.Itisdesignedandmanufactured
nottoexceedtheemissionlimitsforexposuretoradiofrequency(RF)energysetbythe
FederalCommunicationsCommission(FCC)oftheU.S.Government.Theselimitsarepart
ofcomprehensiveguidelinesandestablishpermittedlevelsofRFenergyforthegeneral
population.TheguidelinesarebasedonthesafetystandardspreviouslysetbybothU.S.
andinternationalstandardsbodies.Thesestandardsincludeasubstantialsafetymargin
designedtoassurethesafetyofallpersons,regardlessofageandhealth.Thisdeviceand
itsantennamustnotbeco‐locatedoroperatinginconjunctionwithanyotherantenna
ortransmitter.
Thisproducthasbeenshowntobecapableofcomplianceforlocalizedspecific
absorptionrate(SAR)foruncontrolledenvironment/generalpopulationexposurelimits
specifiedinANSI/IEEEStd.C95.1‐2005andhadbeentestedinaccordancewiththe
measurementproceduresspecifiedin“KDB447498andIEEE1528‐2013”.
Forbodywornoperation,thishandsethasalsobeentestedandmeetstheFCCRF
exposureguidelinewhenusedwiththebeltclipsuppliedwiththisproduct.Useofother
accessoriesmaynotensurecompliancewithFCCRFexposureguidelines.

Customer Information
1. This equipment complies with Part 68 of the FC C rules and the requirements adopted by the ACTA. On the
bottom of this equipment is a label that contains, among other in formation, a product identifier in the format
US:AAAEQ##TXXXX. If requested, this number must be provided to the telephone company.
2. A plug and jack used to connect this equipment to the premises wiring and telephone network must comply
with the applicable FCC Part 68 rules and requirements adopted by the ACTA. A compliant telephone cord
and modular plug is provided with this product. It is designed to be connected to a compatible modular jack
that is also compliant. See installation instructions for details.
3. If this equipment [US:CLSW401BA700] causes harm to the telephone n etwork, the telephone company will
notify you in advance that temporary discontinuance of service may be required. But if advance notice isn't
practical, the telephone company will no tify the customer as soon as possible. Also, you will b e advised of
your right to file a complaint with the FCC if you believe it is necessary.
4. The telephone company may make ch anges in its facilities, equipment, operations or procedures that could
affect the operation of th e equipment. If this happens the telephone company will provide advance notice in
order for you to make necessary modifications to maintain uninterrupted service.
5. If trouble is experienced with this equipment [US:CLSW401BA700], for repair or warranty information,
Service can be facilitated through our office at:
U.S. Agent Company name:ClearsoundsCommunications,Inc.
Address:1743QuincyAvenue, Naperville,IL60540,USA
Tel:630.654.9200
Fax:630.654.9219
If the equipment is causing harm to the telephone network, the telephone company may request that you
disconnect the equipment until the problem is resolved.
6. Please follow instructions for repairing if any (e.g. battery replacement section); otherwise do not alternate or
repair any parts of device ex cept specified. For r epair procedures, follow the instructions outlined under th e
limited warranty.
7. Connection to p arty line service is s ubject to state tariffs. Contact the state public utility commission, public
service commission or corporation commission for information.
8. If your home h as specially wired alar m equipment connected to the telephon e line, ensure the installation of
this [W4] does not disab le your alarm equ ipment. If you h ave questions abo ut what will d isable alarm
equipment, consult your telephone company or a qualified installer.
9. If the telephone company requests information on what equipment is connected to their lines, inform them of:
a) The ringer equivalence number [0.1B]
b) The USOC jack required [RJ11C]
c) Facility Interface Codes (“FIC”) [02LS2]
d) Service Order Codes (“SOC”) [9.0Y]
e) The FCC Registration Number [US:CLSW401BA700]
10. The REN is used to determine the number of devices that may be connected to a telephone line. Excessive
RENs on a telephone line may result in the devices not ringing in response to an incoming call. In most but
not all areas, the sum of RENs should not exceed five (5.0). To be certain of the number of devices that may
be connected to a line, as determined by the total RENs, contact the local telephone company. The REN for
this product is part of the product identifier that has the format US:AAAEQ##TXXXX. The digits represented
by ## are the REN without a decimal point. For this product the FCC Registration number is
[US:CLSW401BA700] indicates the REN would be 0.1B.
Compliance
129
HearingAidCompatibility(HAC/VC)
The DECTHandset meettheFCCstandardforHearingAidCompatibility.
Suite 143

130
Compliance
Conformémentàlaréglementationd’IndustrieCanada,leprésentémetteurradiopeut
fonctionneravecuneantenned’untypeetd’ungainmaximal(ouinférieur)approuvé
pourl’émetteurparIndustrieCanada.Danslebutderéduirelesrisquesdebrouillage
radioélectriqueàl’intentiondesautresutilisateurs,ilfautchoisirletyped’antenneet
songaindesortequelapuissanceisotroperayonnéeéquivalente(p.i.r.e.)nedépasse
pasl’intensiténécessaireàl’établissementd’unecommunicationsatisfaisante.
InterferenceInformation
ThisproductmeetstheapplicableIndustryCanadatechnicalspecifications.
Leprésentmatérielestconformeauxspecificationstechniquesapplicablesd’Industrie
Canada.
ThisdevicecomplieswithIndustryCanadalicence‐exemptRSSstandard(s).Operationis
subjecttothefollowingtwoconditions:
(1)thisdevicemaynotcauseinterference,and
(2)thisdevicemustacceptanyinterference,includinginterferencethatmaycause
undesiredoperationofthedevice.LeprésentappareilestconformeauxCNRd’Industrie
Canadaapplicablesauxappareilsradioexemptsdelicence.L’exploitationestautorisée
auxdeuxconditionssuivantes:
(1)l’appareilnedoitpasproduiredebrouillage,et
(2)l’utilisateurdel’appareildoitacceptertoutbrouillageradioélectriquesubi,mêmesile
brouillageestsusceptibled’en
compromettrelefonctionnement.
ThisClassBdigitalapparatuscomplieswithCanadianICES‐003.
CetappareilnumériquedelaclasseBestconformeàlanormeNMB‐003duCanada.
UnderIndustryCanadaregulations,thisradiotransmittermayonlyoperateusingan
antennaofatypeandmaximum(orlesser)gainapprovedforthetransmitterbyIndustry
Canada.Toreducepotentialradiointerferencetootherusers,theantennatypeandits
gainshouldbesochosenthattheequivalentisotropicallyradiatedpower(e.i.r.p.)isnot
morethanthatnecessaryforsuccessfulcommunication.
RegulatoryInformationCanada
ThedeviceiscompliancewithRFfieldstrengthlimits,userscanobtainCanadian
informationonRFexposureandcompliance.
Leprésentappareilestconformeauxlimitesd’intensitédechampRF,lesutilisateurs
peuventsurl’expositionauxradiofréquencesetlaconformitéandcomplianced’acquérir
lesinformationscorrespondantes.

131
Compliance
ExposuretoRadioFrequency(RF)Signals
Thiswirelesstelephoneisaradiotransmitterandreceiver.Itisdesignedand
manufacturednottoexceedtheemissionlimitsforexposuretoradiofrequency(RF)
energysettheMinistryofHealth(Canada),SafetyCode6.Theselimitsarepartof
comprehensiveguidelinesandestablishpermittedlevelsofRFenergyforthegeneral
population.TheguidelinesarebasedonthesafetystandardspreviouslysetbybothU.S.
andinternationalstandardsbodies.Thesestandardsincludeasubstantialsafetymargin
designedtoassurethesafetyofallpersons,regardlessofageandhealth.
Thisdeviceanditsantennamustnotbeco‐locatedoroperatinginconjunctionwithany
otherantennaortransmitter.Thisdevicehasbeenshowntobecapableofcompliance
forlocalizedspecificabsorptionrate(SAR)foruncontrolledenvironment/general
populationexposurelimitsspecifiedinANSI/IEEEStandardC95.1:2005andhasbeen
testedinaccordancewiththemeasurementproceduresspecifiedinIEEE1528‐2013.
HearingAidCompatibility(HAC/VC)
The
DECTHandsetsmeettheICCS‐03issue9PartVstandardforHearing
Aid Compatibility.
Le présent matériel est conforme aux specifications techniques applicables d’Industrie Canada.
TheRingerEquivalenceNumber(REN)isanindicationofthemaximumnumber
ofdevicesallowedtobeconnectedtoatelephoneinterface.Theterminationof
aninterfacemayconsistofanycombinationofdevicessubjectonlytothe
requirementthatthesumoftheRENsofallthedevicesnotexceedfive.
/L’indiced’équivalencedelasonnerie(IES)sertàindiquerlenombre
maximaldeterminauxquipeuventêtreraccordésàuneinterface
téléphonique.Laterminaisond’uneinterfacepeutconsisterenune
combinaisonquelconquededispositifs,àlaseulecondition
quelasommed’indicesd’équivalencedelasonneriedetouslesdispositifs
n’excèdepascinq.
REN: 0.1A

132
Your ClearSounds A700 DECT phone and A700E
phone come with a (1) year limited warranty from
the date of purchase. These products are warranted
by ClearSounds against manufacturing defect in
material and workmanship under normal use. In the
event that this product fails to function properly due
to defects in materials or workmanship within one
year of the original purchase, return the unit (freight
prepaid) with proof of purchase (sales receipt
or packing slip, no exceptions) to ClearSounds
Communications. ClearSounds Communications
will either repair or replace the unit (with a
refurbished unit or unit of equal condition) and
return it you (using UPS/USPS ground shipping)
at no cost to you. The warranty replacement or
repair will be warranted for a period of 90 days or
the remainder of the original warranty period (from
original purchase date), whichever is longer.
The warranty does not cover accidents, negligence
or breakage to any parts. This includes shipping
damage, failure to follow instructions, misuse, re,
oods, use of incompatible accessories, acts of
God or failure in your phone service carrier’s line
service. The product must not be tampered with
or taken apart by anyone who is not an authorized
ClearSounds Communications® representative.
Tampering with the phone will void any written or
implied warranties.
If a defect covered by this warranty should occur,
promptly contact a Customer Service representative
by phone, or log on to www.clearsounds.com to
Warranty

133
obtain a Return Merchandise Authorization (RMA)
number and shipping instructions before shipping
the product to us. Any shipment without an RMA
number will not be accepted and will be returned
to you at your expense. All authorized returned
products must be accompanied with proof of
purchase and a brief explanation of the problem.
For out-of-warranty repairs and service, please
contact our Customer Service department for
instructions. The repair shall be warranted for 90
days.
IMPORTANT: YOUR RECEIPT IS PART OF YOUR
WARRANTY AND MUST BE RETAINED AND
PRODUCED IN THE EVENT OF A WARRANTY
CLAIM.
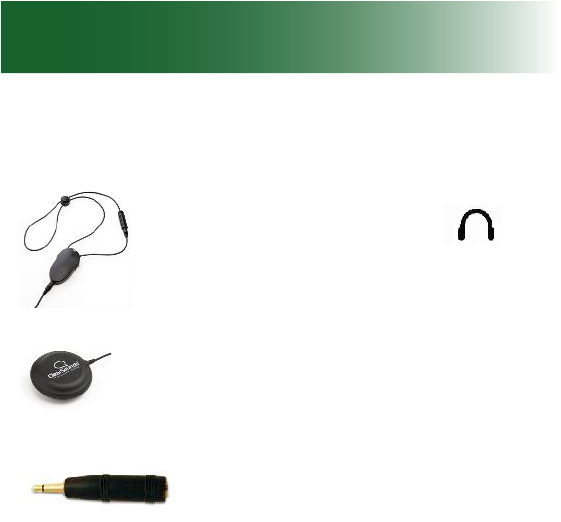
134
Please visit the ClearSounds website or call
ClearSounds for additional accessories.
CS-CLA7V2 neckloop connects
to your phone’s 2.5 mm jack
for hands-free conversation.
Requires hearing aid(s) or cochlear
implant(s) with t-coil(s).
CS-SHK vibrating pad slides
nicely beneath a mattress or
cushion and noties you of
incoming calls.
The CL004 connects your
ClearLink and/or CLA7V2
Neckloop to your iPod, MP3
player, CD Players, or any other
device that has a 3.5mm audio
output.
Accessories

135
Service
Service in United States and Canada
ClearSounds Communications
Attention: Repair Center
1743 Quincy Avenue, Suite 143
Naperville, IL 60540
USA
800-965-9043 (Toll-free)
www.ClearSounds.com

© 2015 ClearSounds
CS-A700UG Ver 1