Climax Technology Co PB Panic Button User Manual PB 15 20141224
Climax Technology Co Ltd Panic Button PB 15 20141224
Users Manual
Panic Button (PB-15)
The Panic Button is used to activate (or deactivate) a panic alarm.
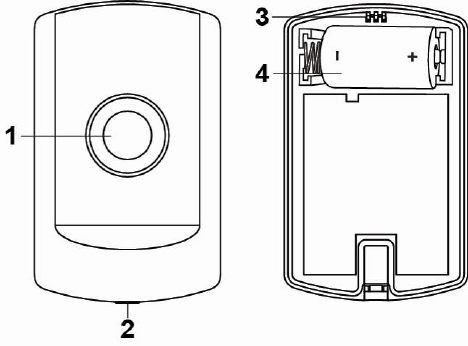
Parts
1. Panic Button / LED Indicator
Button usage:
1. Press to send a learn code or activate a
panic alarm.
2. Press and hold the button for 8 seconds to
send a Cancel Code to the Control Panel.
(This function is not compatiable with
every control panel)
LED Indicator:
The LED indicator will light up briefly
when the device is transmitting a signal.
2. Cover-Fixing Screw
3. Fixing Hook
4. Battery Compartment
Battery
The Panic Button is powered by one CR2 3V Lithium battery.
The Panic Button will transmit any detected low battery status along with any regular status
signal transmission to the Control Panel for display accordingly.
When changing battery, after removing the old battery, press the button twice to fully discharge
before inserting new battery.
Supervisory Signal
The Panic Button will automatically transmit Supervisory Signals every 30 to 50 minutes.
If the Control Panel has not received the signal from the Panic Button for a preset period of time,
the Control Panel will indicate that the Panic Button is out-of-signal range or is out of order.
Getting Started
Remove the cover-fixing screw using a Philips screwdriver and separate the cover from the
base.
Insert the battery according to the marked polarities.
Replace the top over the base by hooking the base onto the fixing hook and pushing the cover
towards the base.
Lightly tighten the screw.
Put Control Panel into learn mode
Press the button on the Panic Button to transmit a learn code.
Refer to your Control Panel’s operation manual to complete the learn-in process.
Walk Test
Place the Control Panel in the walk test mode.
Press the Button once.
The Panel will display the RSSi (Radio Strength Signal) strength and sound a 2-tone beep.
Operation
After the Panic Button is learned successfully, press the Button to activate a Panic Alarm.
Press and hold the Button for 8 seconds or more will send a Cancel Code to the Control Panel
to stop the alarm. (This function is not compatible with all control panels.)
Mounting the Panic Button
The Panic Button can be mounted using two methods: Self-adhesive or Screw mounting.
Self adhesive mounting
I. Clean the surface with a suitable degreaser.
II. Remove the protective covering from one side of double-sided adhesive pad and firmly
apply to the back of the device.
III. Remove the other covering and firmly place/press the device in the desired location.
<
<
N
NO
OT
TE
E
>
>
Do not use the Self-adhesive mounting method on poorly painted and/or rough
surfaces.
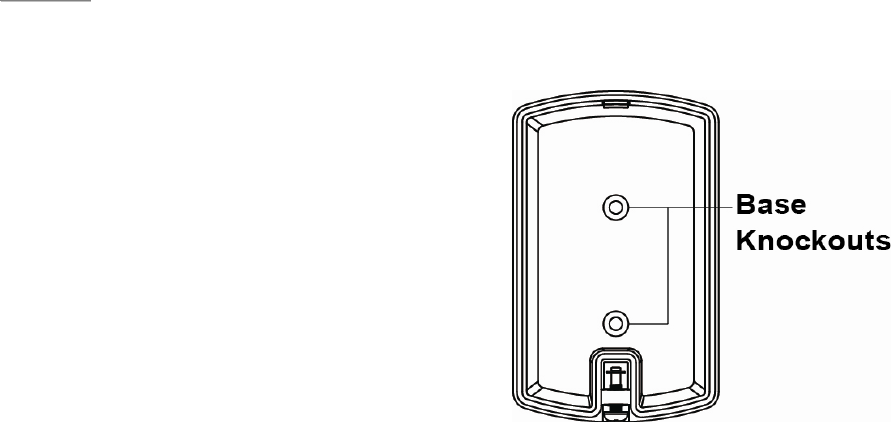
Screw Mounting
The base has two screw knockouts, where the
plastic is thinner for mounting purposes. To
mount the Panic Button:
I. Remove the cover-fixing screw and
separate the top cover from the base.
II. Break through the knockouts on the base.
III. Use the holes as a template to drill two
holes and insert the wall plugs.
IV. Screw the base into the wall plugs.
V. Replace the top over the base by hooking
the base onto the fixing hook and pushing
the cover towards the base.
VI. Lightly tighten the screw.
This device complies with Part 15 of the FCC Rules. Operation is subject to the following two
conditions:
(1) This device may not cause harmful interference, and
(2) This device must accept any interference received, including interference that may cause
undesired operation.