Cobra Electronics 9905 Sports camera User Manual
Cobra Electronics Corporation Sports camera
Contents
- 1. Users Manual
- 2. User Manual-r1
User Manual-r1
WASPcam 9905
Sports camera
User Manual
Please read through this user manual before using the product and keep the manual for
future use.
Please operate the camera on basis of full understanding of the manual.
Any alteration of product appearance and specification below are without further notice.
Contents
Camera Precaution…………………
Accessories………………………
Operation Interface Introduction
Camera Mounting Description
LED light
Battery charging introduction
Insert and Take out Storage Card……
Menu Interface Introduction
Zoom in/out
Capture Mode
Clear Screen
Playback Mode
Delete and protect File
Play back video footage on TV
Open webcam
Technical
Specification
…
……
………
……
Precaution
Pls be well noted with the following guidelines before you use this camera,
* Pls refer to manual instruction and operate the camera correctly. Illegal operation may
cause damage to camera internal components.
* Do not fall or hit the camera, it may damage the internal components.
* For your safety, please keep the camera from the children and animals, in order to avoid
accident
* Do not place the camera in a damp or dusty location for extended periods of time. This
may cause a fire or an electrical shock.
* Do not leave the camera in places exposed to extremely high temperatures, such as
under direct sunlight for extended periods of time. This may affect the camera housing
and internal components
*We recommend using batteries in temperatures between 0 to 40.℃℃
Turn off the camera before removing the memory card, in case of the damage of card or
storage data.
*The camera is matched with waterproof case. Pls use it when the camera needs to keep
water away. We should take no responsibilities for the damage of camera or leakage
because of it.
* The temperature rise is normal after using the digital cameras for a long time
*Do not touch the lens during using the camera, so as not to influence the photography
effect
* Please use the air blower (special lens blowing equipment) to clean lens or use special
lens-cleaning cloth to clean fingerprint or dust on the surface.
Accessories
Standard Accessories
1, USB cable
2,Handlebar mount
3, Helmet pedestal
4, Helmet activity pedestal
5, Long screw
6, User manual
7, Battery
,
Watch remote
control
, 3M pads
, Nylon
velcro
strap
,
Waterproof
USB
cable
8
9
10
11

Operation Interface Introduction
1) Interface Introduction
1, Lens
2, Led night
3, Power key
4, REC key
5, LCD screen
6, Mode key
7, Menu key
8, OK key
9, LED on/off key
10, Left key
11, Right key
12, Working indicator
13, Charge indicator
14, USB port
15, HDMI port
16, Back cover
17, Locker
18, SD slot
Button function Introduction
Power key( ):To turn on/off the camera; to clear screen character, to delete files
under playback mode
Mode key ( ): to switch to capture mode, video mode and the playback mode
REC key ( ): take photos and videos, and stop taking videos, return capture and video
mode under menu mode.
Menu key ( ): to enter into and exit menu setting,
OK key ( ): to browse photos and videos, to enter and confirm settings under setting
mode.
Left key ( ): to choose the last menu or file, zoom out the image, and reduce voice
volume under playback mode. Back to the last frame under one frame playback
Right key ( ): to choose the next menu or file, to zoom in the image, and increase
sound volume under playback mode. Enter to the next frame under one frame playback.
LED light“ ” :to switch strong, normal, flash and off light

Power on/off camera
1, Turn on
Press “ ” key for 3 secs, with one beeping sound, the working indicator light up,
and “welcom” show on screen. Camera starts up and enter standby(default is record
mode) .
On the top of LCD screen it displays the record icon,anti-shaking icon, remaining
recording time of card icon;
at the bottom of LCD screen it displays the battery icon, date and time icon.
At the left of LCD screen it display loop-recording, white-balance and sound
recording icon,
At the left of LCD screen it display resolution, SD card icon.
2, Turn off
Press “ ”key for 3 secs, it will turn off after one beeping sound.
Mounting Description
The camera can be mounted in many ways. The methods of mounting are suggested as
below:
1, Mount to the top of helmet
Thread the nylon strap into helmet pedestal, then thread the nylon strap into helmet and
fasten it, then fix pedestal more firmly using 3M pads. (Pic. 1, 2, 3, 4)
Pic. 1: Pic. 2, Pic. 3: Pic. 4:
2, Mount handlebar grip
As shown in below pictures insert the camera to the handlebar mount then install onto the
motorcycle or bike.
LED light
Press once “ ” to open stronger light, press again to open normal light, press
the 3rd time to open flash, and press the 4th time to off light,
Battery charging
Connect camera and power supply using USB and charger. During charging, the red
indicator is on. When it is fully charged, the indicator will be off.
Notice:
1, To improve the charging efficiency, please turn off camera during charging.
2, Please make sure power is on during charging.

Insert and take out storage card
1, Insert the card: open the lock of back cover, press the card slot at right direction, put
the card according to the right direction, then lock the card slot.
2, Take out the storage card .
1) Turn off the camera
2) open the lock of back cover, press the card slot at right direction, then take out
the card.
Notice
Please confirm the inserting direction of the TF card. Reversed inserting may
cause damage to the camera and the card.
l FWVer:2.0/20141031
Menu Interface Introduction
Under standby mode, press twice “menu” key to enter system setting , press /
key to choose option, press OK key to confirm, press “menu” key to quit.
System Setting
Under standby mode and playback mode, press twice “menu” key to enter system setting ,
press / key to choose option, press OK key to confirm, press “menu” key to
quit.
l WIFI:on/off
l WIFI SSID:user name setting, the default is Shengon
l WIFI password:password setting,the default is 12345678
l Image rotation: on/ off
l Anti-shaking: on/off
LCD off: 30secs/1min/off
l Remote: off/on/remote match
Date/time: YYYY/MM/DD/HH/MM/SS
Date Stamp: off,Date, date/ time
Auto power off: off/1min /5 mins
l Language: :ENGLISH/FRANÇAIS/ESPAÑOL/Portuguese/DEUTSCH/ ITALANO/
简体中文/繁體中文/PYCCKЙЙ/日本语/한국어/Polski
l TV mode: NTSC/PAL
l TV out: off/ on
l Frequency: 60 HZ / 50HZ
l Format: SD card
Default: Cancel / ok
l Version:FWVer:2.0/20141031
Under power on, press twice “menu” key to enter system setting, press / key to
choose remote: and select Remote match, LCD show” wat remote match” , and camera enter
pairing status already,
At this time, press both buttons on remote controller to start pairing, Pairing success:
LCD show :”Remote match OK” and auto disappear.
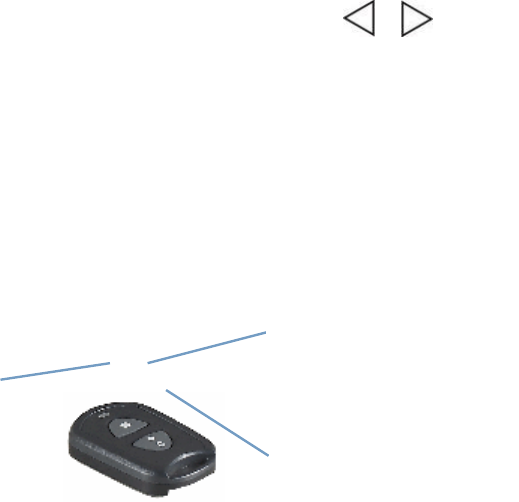
Remote control Description
Key description: 1. dual-color indicator
2. Inquiry key 3. Shutter key
dual-color indicator
Key functions description:
1. Inquiry key: short press, you can check the present status of camera (see below
remote control indicator status explanation) .
2. Shutter key: short press to take photo, long press for 3 seconds to start/stop recording.
3. Pressing the inquiry key and Shutter key simultaneously to enter Pairing operation.
The status of Remote control indicator instructions:
Shutter key
Inquiry key

WIFI Function
Notice: Before use this fuction, we download and install application of APP in your Apple
phone(IOS system), or Google play(Android system).
Under power on, press twice “menu” key to enter system setting, press / key to
choose wifi: select open: the wifi icon will show on screen, Search the Wlan using your
mobile, find network name of “Shengon”, connect and enter password :12345678
and confirm.
Connecting successed, the LCD will show “wifi connected”, then open APP, and
search camera ID, and enter password :12345678 and confirm.
Then preview the camera's imaging, take video, take photo and also make menu
setting directly from mobile to your camera (such as video resolution , photo size etc)
Capture Setting
Under capture mode, press “menu” key to enter capture setting , press / key
to choose option, press OK key to confirm, press “menu” key to quit.
Status/LED Red LED indicator Blue LED indicator
Standby 1 time/sec frequence
Flickers about 5sec off
Recording off Light on 3 secs
then off
Status inquiry
power off Light on 3 secs
then off off
matching Long light Long light
success Light on 3 secs
then off
Light on 3 secs
then off
Matching operati
on
failure off off
start recording Flickers 5 secs at
frequency of 1 time/sec
Flickers 5 secs at
frequency of 1 time/
sec
stop recording Flickers 5 secs at
2time/sec frequency
Flickers 5 secs at
2time/sec frequency
photo off off

Capture mode: signal/3s Timer/ 10s Timer/30s Timer
Auto photo:off/3seconds/5seconds/10seconds
resolution: 12M/10M/5M
Sequence: off/ on
Quality: Fine/Normal/Economy
Sharpness: Strong/ Normal/Soft
White Balance: Auto/Daylight/Cloudy/Tungsten/Fluorescent/Underwater
Color: color/B&W/ Sepia
ISO: Auto//100/200/400
Exposure: +0.0,-1/2,-1.0,-3/2,-2.0
Quick Review:Off/2seconds/5seconds
The default is recording mode after power on, press “menu” key to enter capture setting ,
now camera is the preview status,on the top of LCD screen display Photo,
anti-shaking,and the photos amount icon, on the left display white-balance, Exposure, ISO
icon, on the right will show size, memory, battery icon.
1. Normal photo
Under capture mode, press REC key to make photo.
2.Capture mode: signal/3s Timer/ 10s Timer/30s Timer
press “menu” key to enter camera setting , press / key to choose capture and
select the time, press OK key to confirm, press REC key will auto photo according to the
time.
Press REC key again to stop, or change the capture mode to signal.
Notice: When taking pictures. Please do not move the camera, or affect the picture effect.
3. Auto photo:off/3seconds/5seconds/10seconds
press “menu” key to enter camera setting , press / key to choose auto photo
and select the time, press OK key to confirm, press REC key will auto photo
according to the time you set. The screen will show countdown, when time is up the
camera will make photo automatically and save the photo, then continue photoing
according to the time you set.
To stop, Pls change the auto photo setting to Off.
3. Sequence: off/ on
press “menu” key to enter camera setting , press / key to choose Sequence to
on, press OK key to confirm, press REC key will auto photo 3pcs and save the
photo,
To stop, Pls change the Sequence setting to Off.

4. Quick Review:Off/2seconds/5seconds
press “menu” key to enter camera setting , press / key to choose Quick Review
and select the time, press OK key to confirm, press REC key will photo 1pcs and
auto preview 2sec(according to the time you set), then back to photo standby
mode;
Video setting
Under Video mode, press twice “menu” key to enter Video setting , press / key
to choose option, press OK key to confirm, press “menu” key to quit.
l Resolution:1080P30FPS/1080P25FPS/720P60FPS/720P50FPS/720P30FPS/72
0P25FPS/WVGA60 FPS /WVGA50 FPS /WVGA30 FPS /WVGA25 FPS
/VGA120FPS
Cyclic Record: Off/2Minutes/5Minutes/10Minutes
Exposure: +0.0,-1/2,-1.0,-3/2,-2.0
White Balance: Auto/Daylight/Cloudy/Tungsten/Fluorescent/Underwater
Motion Detection:Off/30Seconds/2Minutes/5Minutes
Record Audio: Off/ On
1, Normal Recording
When the camera is on, set the menu of “Cyclic Record” to “off” (Pls refer to
“Video Mode” setting), press “ REC “ key once to take video, and the green LED
will flash,the recorded time and recording icon are displayed on the top of LCD
screen, .press” REC ” key again to stop recording and save , the remaining
recording time is displayed on the top of LCD screen.
(Remark: Camera gives out different sounds between starting recording and
stopping recording)
2.Loop recording
a. Set “Cyclic Record” time say for 2 mins for example (pls refer to “Video Mode”
setting), the camera enters loop recording mode, press key to start recording ,
when records to 2 mins (according to the time you set), camera will stop recording
automatically and save the video, then continue recording; When SD card is full,
camera will delete the first video footage automatically and continue recording.
b. During recording, press key to stop and save the video, the remaining time
will display on the LCD screen.
3.Motion Detection
Set “Cyclic Record” to “off”, Set Motion Detection say for 30 SEC for example.(pls

refer to Video setting), “Motion Detecting”and icon showed on the screen, press
once key to enter motion detection.
If Object is moving, camera will auto record 30sec(according to the time you set) and
stop, If no object is moving, it will stop recording automatically., If there is always
object moving, it will detect the object circularly according to the time you set.
If you need pause recording, press once key to stop.“Motion Detecting”showed
on the screen,
If you need cancel motion detection. Pls set to Off.
Zoom in/out
Under recording or capture mode, press / key to zoom in/out the image.
Capture/Snap Shot
During video recording , press key to capture image.
(Note: When capture the image, the video recording is continuous processing, you
can check the capture images only under browse mode)
Clear screen
Under standby, video, capture or playback mode, press key once to clear all
characters on screen. Press key once again, the characters will recover.
Playback mode
Under standby mode, press “ mode” key to enter into playback mode, Press /
key to choose the options, press” OK” key to confirm.Press again to pause, then
press “OK” key again to go on play.
During Video playback, Long press / key to fast reverse or forwards
playback. Long press / key to stop.
Shot press / key to adjust volume.
During picture browsing, press “menu”key to select slide show, and select time.
Press “OK:key to confirm, press “OK:key to quit.
Press “MODE” key to return.
Delete and protect the file
1. Delete File
Under standby mode, press “ mode” key to enter into playback mode, press “power”
key or “Men” key to enter delete and protect setting, Press / key to choose
the options, press” OK” key to confirm.

Press / to choose “Delete all” or “Delete Current”, press” OK ” key to confirm,
Press / to “Cancel” or “ok” deleting the file. Press "ok" to confirm delete mode will
exit.
2.Protect Files
Under standby mode, press twice“ MODE ” button to enter into playback mode, Press
/ to choose file, Press "MENU" button to enter and Press / select “protect
“setting. press "OK" to confirm, and then press / select "Lock Current""Unlock
current””lock all” “unlock all”, press "OK" to confirm,Press “Menu” key to return.
3.Slide Show
Under standby mode, press twice“ MODE ” button to enter into playback mode,
Press / to choose file Press "MENU" button to enter and Press /
select " Slide show ", press” OK ” key to confirm, then press / select
“2Seconds’”“5Seconds”“8Seconds”,then press” OK ” key to confirm. Press “Menu” key to
return.
Play back video footage on TV
Turn the camera on, connect the HDMI port of camera to TV via the HDMI cable, choose
HDMI mode on TV. The LCD screen of camera will be off automatically, all operation
functions can be shown on TV.
Technical specification
Sensor: 3M CMOS
Video Resolution: 1080P30FPS/1080P25FPS/720P60FPS/720P50FPS
/720P30FPS/720P25FPS/VGA120FPS
Image size: 12M/8M/5M
Storage: TF card, support up to 32G
Lens : 160°
Video format: AVI
Image format: JPG
WIFI: 802.11b/g/n
Remote: 2.4G remote control
Audio: Built in MIC, speaker
Port: USB、HDMI、TV OUT
Power: Li-ion rechargeable battery 1050mAh
Screen: 1.5 inch TFT
FCC Statement
This device complies with part 15 of the FCC Rules. Operation is subject to the
following two conditions: (1) This device may not cause harmful interference, and (2)
this device must accept any interference received, including interference that may
cause undesired operation.
This equipment has been tested and found to comply with the limits for a Class B
digital device, pursuant to part 15 of the FCC Rules.
These limits are designed to provide reasonable protection against harmful
interference in a residential installation. This equipment generates uses and can
radiate radio frequency energy and, if not installed and used in accordance with the
instructions, may cause harmful interference to radio communications. However,
there is no guarantee that interference will not occur in a particular installation. If
this equipment does cause harmful interference to radio or television reception,
which can be determined by turning the equipment off and on, the user is
encouraged to try to correct the interference by one or more of the following
measures:
—Reorient or relocate the receiving antenna.
—Increase the separation between the equipment and receiver.
—Connect the equipment into an outlet on a circuit different from that to which the
receiver is connected.
—Consult the dealer or an experienced radio/TV technician for help.
Changes or modifications not expressly approved by the party responsible for
compliance could void the user's authority to operate the equipment.
IC Statement
This device complies with Industry Canada’s licence-exempt RSSs. Operation is
subject to the following two conditions:
(1) This device may not cause interference; and
(2) This device must accept any interference, including interfe
The term “IC: “ before the certification/registration number only signifies that the
Industry Canada technical specifications were
met. This product meets the applicable Industry Canada technical specifications.
Le présent appareil est conforme aux CNR d'Industrie Canada applicable aux
appareils radio exempts de licence.
L'exploitation est autorisée aux deux conditions suivantes : (1) l'appareil ne doit pas
produire de brouillage,
et (2) l'utilisateur de l'appareil doit accepter tout brouillage radioélectrique subi,
même si le brouillage est susceptible d'en
compromettre le fonctionnement
FCCRegulatoryCompliance
Body worn operation
The device complies with RF specifications when used near your ear or at a
distance of 0cm from your body. Ensure that the device accessories, such as a
device case and device holster, are not composed of metal components. Keep
the device away from your body to meet the distance requirement.
Certification information (SAR)
This device is also designed to meet the requirements for exposure to radio
waves established by the Federal Communications Commission (USA). The
SAR limit adopted by the USA is 1.6 W/kg averaged over one gram of tissue.
The highest SAR value reported to the FCC for this device type complies with
this limit. The highest SAR value reported to the FCC for this device type when
properly worn on the body is 0.13 W/kg.