Cobra Electronics PR3100 FRS/GMRS TRANSCEIVER User Manual PR3000 5a English
Cobra Electronics Corporation FRS/GMRS TRANSCEIVER PR3000 5a English
UserManual.wiki
>
Cobra Electronics
>
PR3100 User Manual
USERS MANUAL
Navigation menu
Upload a User Manual
Namespaces
Wiki Guide
HTML
PDF
Info
Views
User Manual
Discussion / Help
Navigation

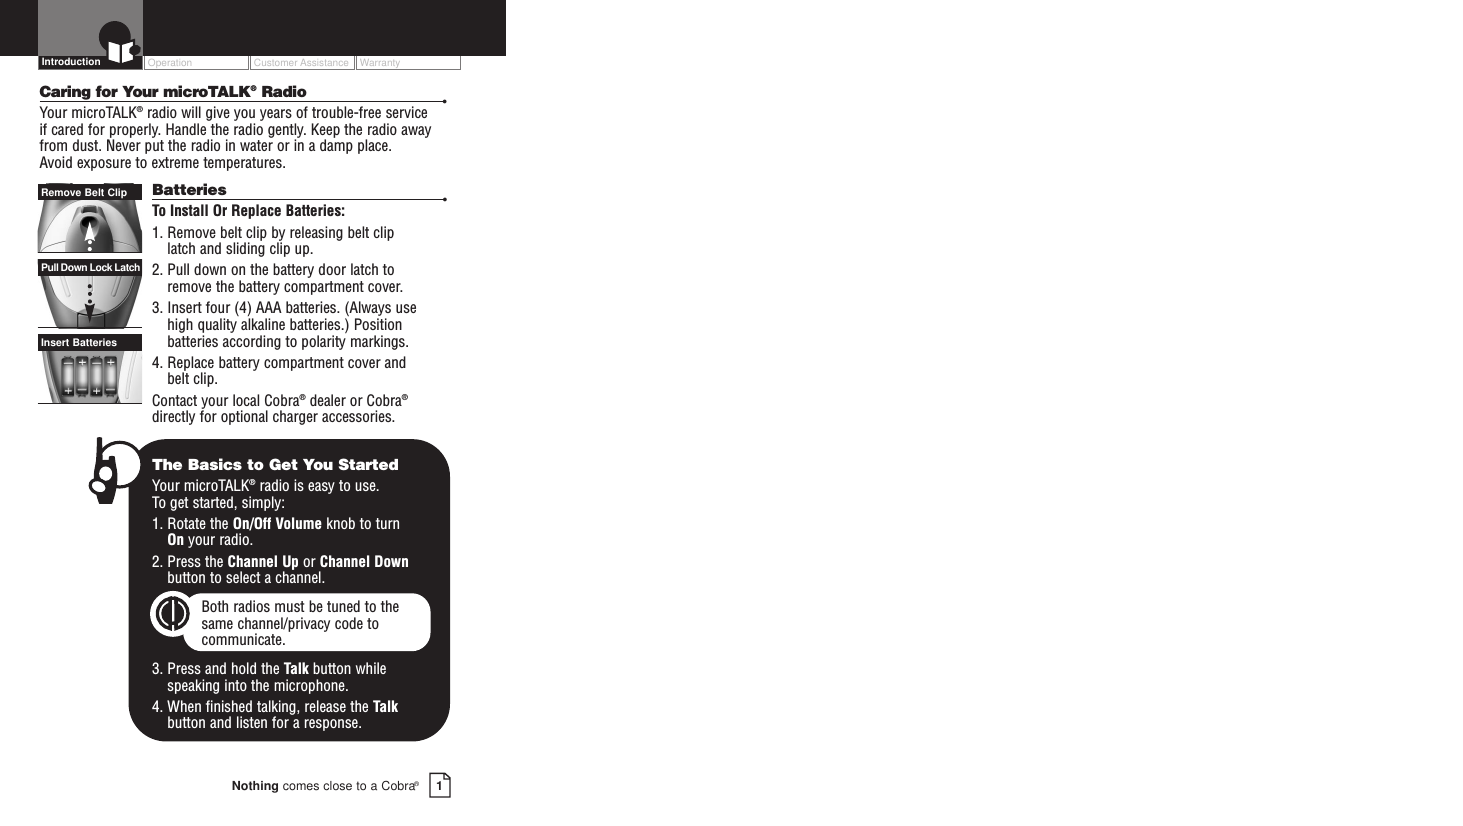
![Customer Assistance WarrantyIntroduction3Nothing comes close to a Cobra™Operation2EnglishUsing Your RadioTurning On Your microTALK®Radio •To Turn On Your Radio:1. Rotate the On/Off Volume knob clockwise to turn On your radio and adjust the volume. A series of tones will indicate the radio is On.Your microTALK®radio is now in Standby mode, ready to receive transmissions. The radiois always in Standby mode, except when theTalk, Call or Mode buttons are pressed.Battery Low •Your microTALK®radio has a battery level meterthat shows when battery power is decreasing.The greater the number of ascending bars visible,the stronger the battery level. When the batterylevel is low, the last bar and “bALo” will flashindicating your batteries should be replaced orrecharged, if using rechargeable batteries. Auto Battery Save •Your microTALK®radio has a unique circuitdesigned to extend battery life. If there are no transmissions within ten (10) seconds, the radio will automatically switch to BatterySave mode and the Power Saver icon will flashin the display. This will not affect the radio’sability to receive incoming transmissions.Communicating with Another Person •To Talk To Another Person:1. Press and hold the Talk button.2. With the microphone about two (2) inches [five (5) cm] from your mouth, speak in anormal voice.3. Release the Talk button when you are finished talking and listen for a response.You cannot receive incoming calls while pressing the Talk button.Both radios must be tuned to the same channel/privacy code tocommunicate.Channels •To Select A Channel:1. With the radio On, select any of the 22 channels by pressing the Channel Upor Channel Down button. Both radios must be tuned to the same channel to communicate.Channels 1 through 7 are shared with FRS/GMRS. Channels 8 through 14 are FRS only.Channels 15 through 22 are GMRS only.See page 21 for FRS/GMRS frequencyallocations and compatibility charts.Listening for a Response •When You Are Finished Talking:1. Release the Talk button to receive incomingtransmissions. Your microTALK®radio isalways in Standby mode while the Talk or Call buttons are not pressed.On/Off PowerBattery LowBattery Save ModeTalk ButtonChannel ButtonChannel NumberOperationTwo (2) Inches [Five(5) cm] From MouthListening](https://usermanual.wiki/Cobra-Electronics/PR3100/User-Guide-374958-Page-4.png)