Cobra Electronics XRSR8-RDU WIRELESS REMOTE CONTROLLER/DISPLAY MODULE User Manual Layout 1
Cobra Electronics Corporation WIRELESS REMOTE CONTROLLER/DISPLAY MODULE Layout 1
UserManual.wiki
>
Cobra Electronics
>
XRSR8 RDU User Manual
Users Manual
Navigation menu
Upload a User Manual
Namespaces
Wiki Guide
HTML
PDF
Info
Views
User Manual
Discussion / Help
Navigation
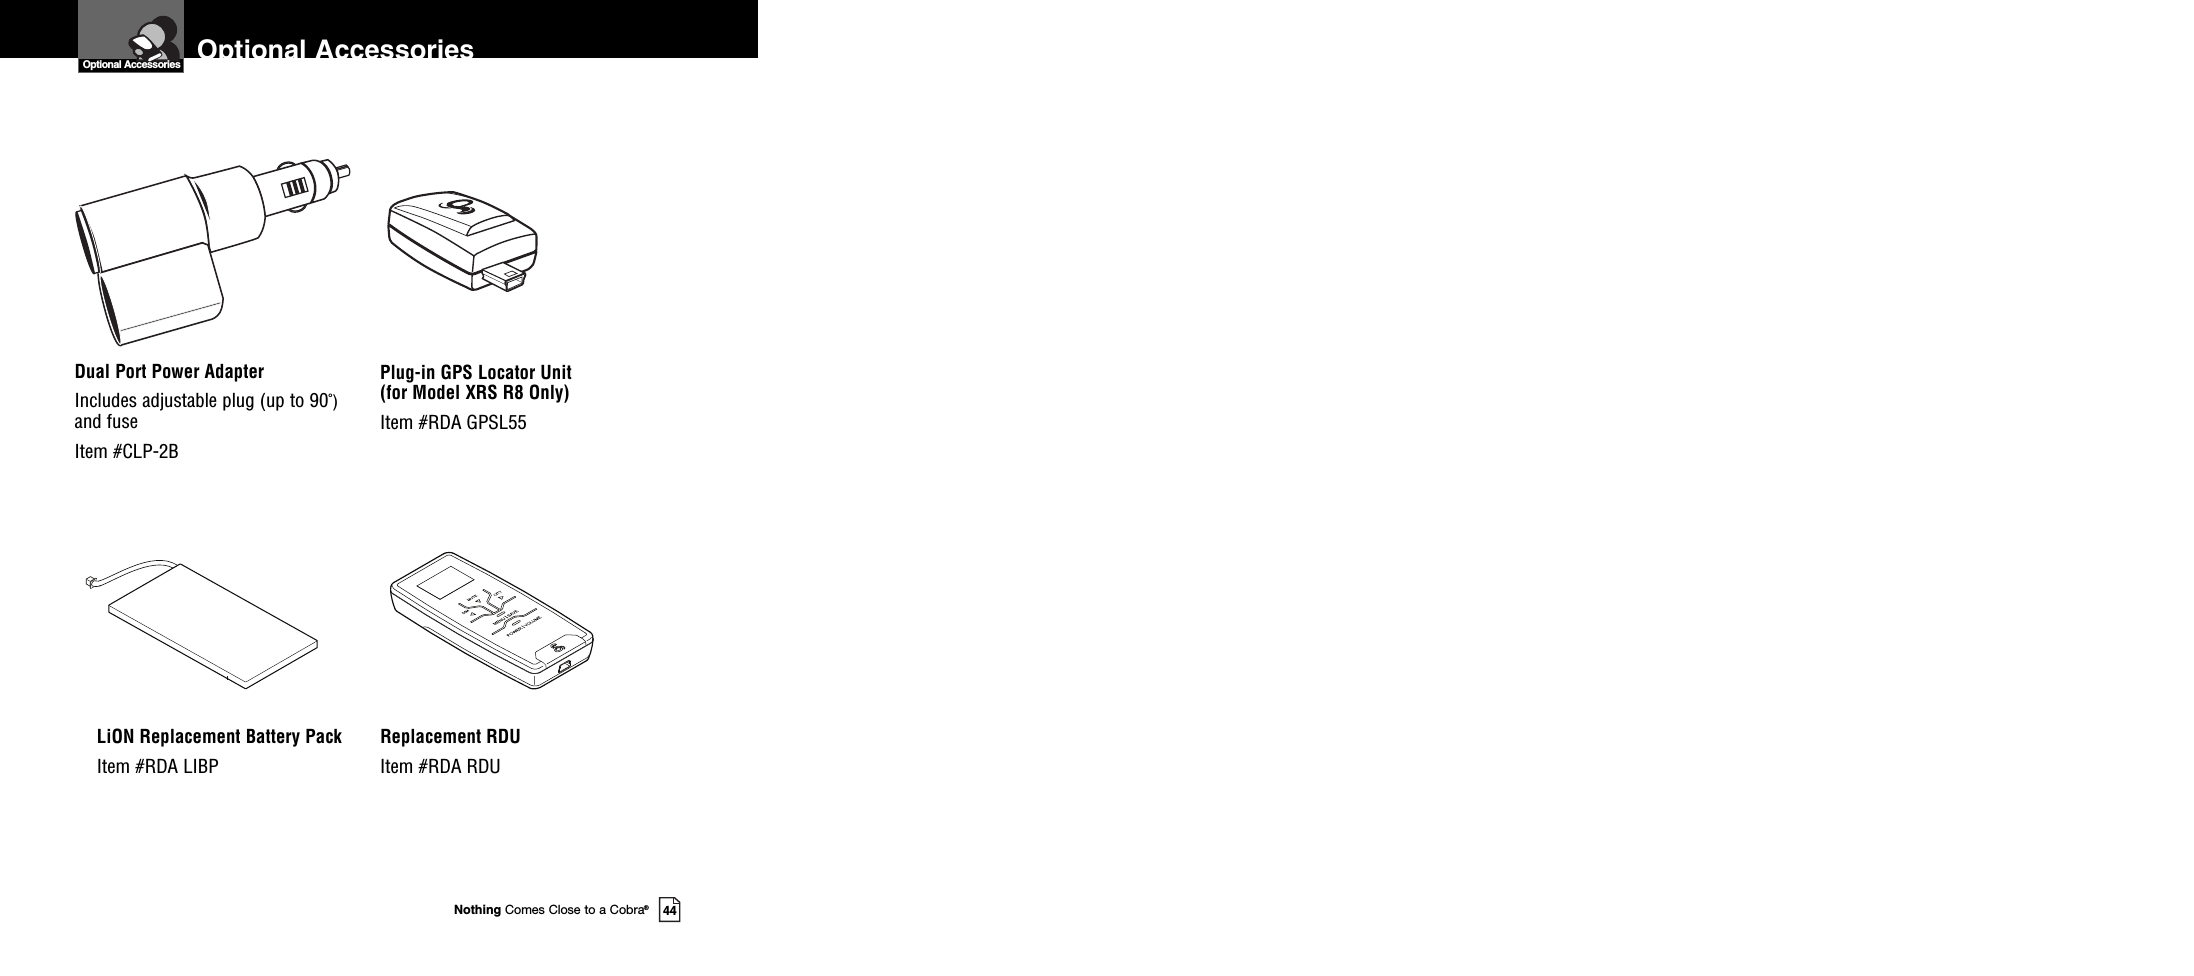
![Adapter for Database Updates(R10G Only)Accessories Order Info andTrademark AcknowledgementCustomer AssistanceOrdering From U.S.A.Call 773-889-3087 for pricing or visit www.cobra.com.For Credit Card OrdersCall 773-889-3087 [Press one from the main menu] 8:00 a.m. to 6:00 p.m. Central Time,Monday through Friday.Make Check or Money Order Payable ToCobra Electronics, Attn: Accessories Dept.,6500 West Cortland Street, Chicago, IL 60707 U.S.A.To Order OnlinePlease visit our website: www.cobra.comItem # DescriptionCLP-2B Dual Port Power AdapterRDA GPSL55 GPS Locator Upgrade (for Model XRS R8 Only)RDA LIBP LiON Replacement Battery PackRDA RDU Replacement RDUIntroductionNothing Comes Close to a Cobra®A3Accessories In This PackageAccessories In This Package •RDU USB to Mini-USB Retractable CableRDU Holster and Vent/Visor ClipsRDU 12V to 5V USB Power AdapterControls, Indicatorsand ConnectionsIntroductionA2 EnglishIntelliLink™Remote Display Unit (RDU)Full-ColorExtreme BrightDataGrafix™DisplayPlug-in Global PositioningSystem LocatorUSB Power Connectorfor Recharging Battery 12V Power ConnectorUSB ConnectorPowerButtonTwo-Piece,Self-AdhesiveFastenersMain Detector Unit (MDU)SpeakerGPS Locator for Model XRS R10G (Optional for Model XRS R8)The XRS R8 provides detection capabilities for radar, laser and strobe signals.The XRS R10G has all the features of the XRS R8 plus a GPS locator modulewhich provides alerts when approaching photo-enforced intersections, roadswith fixed red light/speed cameras and caution areas (such as a high-accidentintersection). The XRS R10G can store up to 1,000 additional user-programmableLocation Alerts.USB Port forConnection ofGPS LocatorMDU 12V Power Cord with In-lineFuse for Hardwired InstallationMDU 12V Power Cord with In-lineFuse and Cigarette Lighter PlugHook and Loop Strips for AlternateHolster Mounting.MDU Power Cord Clips and Pre-cutAdhesive TapesNothing Comes Close to a Cobra®45Trademark Acknowledgement •Cobra®, DigiView®, EasySet®, Extra Sensory Detection®, IntelliMute®, IntelliMute®Pro,IntelliShield®, LaserEye®, Nothing Comes Close to a Cobra®, Safety Alert®TrafficWarning System, Strobe Alert®, VG-2 Alert®, Xtreme Range Superheterodyne®andthe snake design are registered trademarks of Cobra Electronics Corporation, USA.Cobra Electronics Corporation™, 14 Band™, 15 Band™, Extreme Bright DataGrafix™,IntelliLink™, IntelliScope™, IntelliView™, Revolution™ Series, SmartPower™,Spectre Alert™, Super-Xtreme Range Superheterodyne™, S-XRS™, UltraBright™,and Voice Alert™ are trademarks of Cobra Electronics Corporation, USA.Opticom™ is a trademark of 3M Corporation. Instaclear®for Ford is a registeredtrademark of Ford Motor Company, Inc. Electriclear®for GM is a registered trademarkof General Motors Corporation. 20-20™ and Ultra-Lyte™ are trademarks of LaserTechnology, Inc. ProLaser™ and ProLaser III™ are trademarks of Kustom Signals,Inc. Bee III™ and Pop™ are a trademarks of MPH Industries. Stalker™ LIDAR is atrademark of Applied Concepts, Inc. Spectre I™ and Spectre IV+™ are trademarks ofStealth Micro Systems Pty. Ltd. SpeedLaser™ is a trademark of Laser Atlanta, LLC.Interceptor VG-2™ is a trademark of TechniSonic Industries LTD. Tomar®is aregistered trademark of TOMAR Electronics, Inc.](https://usermanual.wiki/Cobra-Electronics/XRSR8-RDU/User-Guide-1039869-Page-2.png)

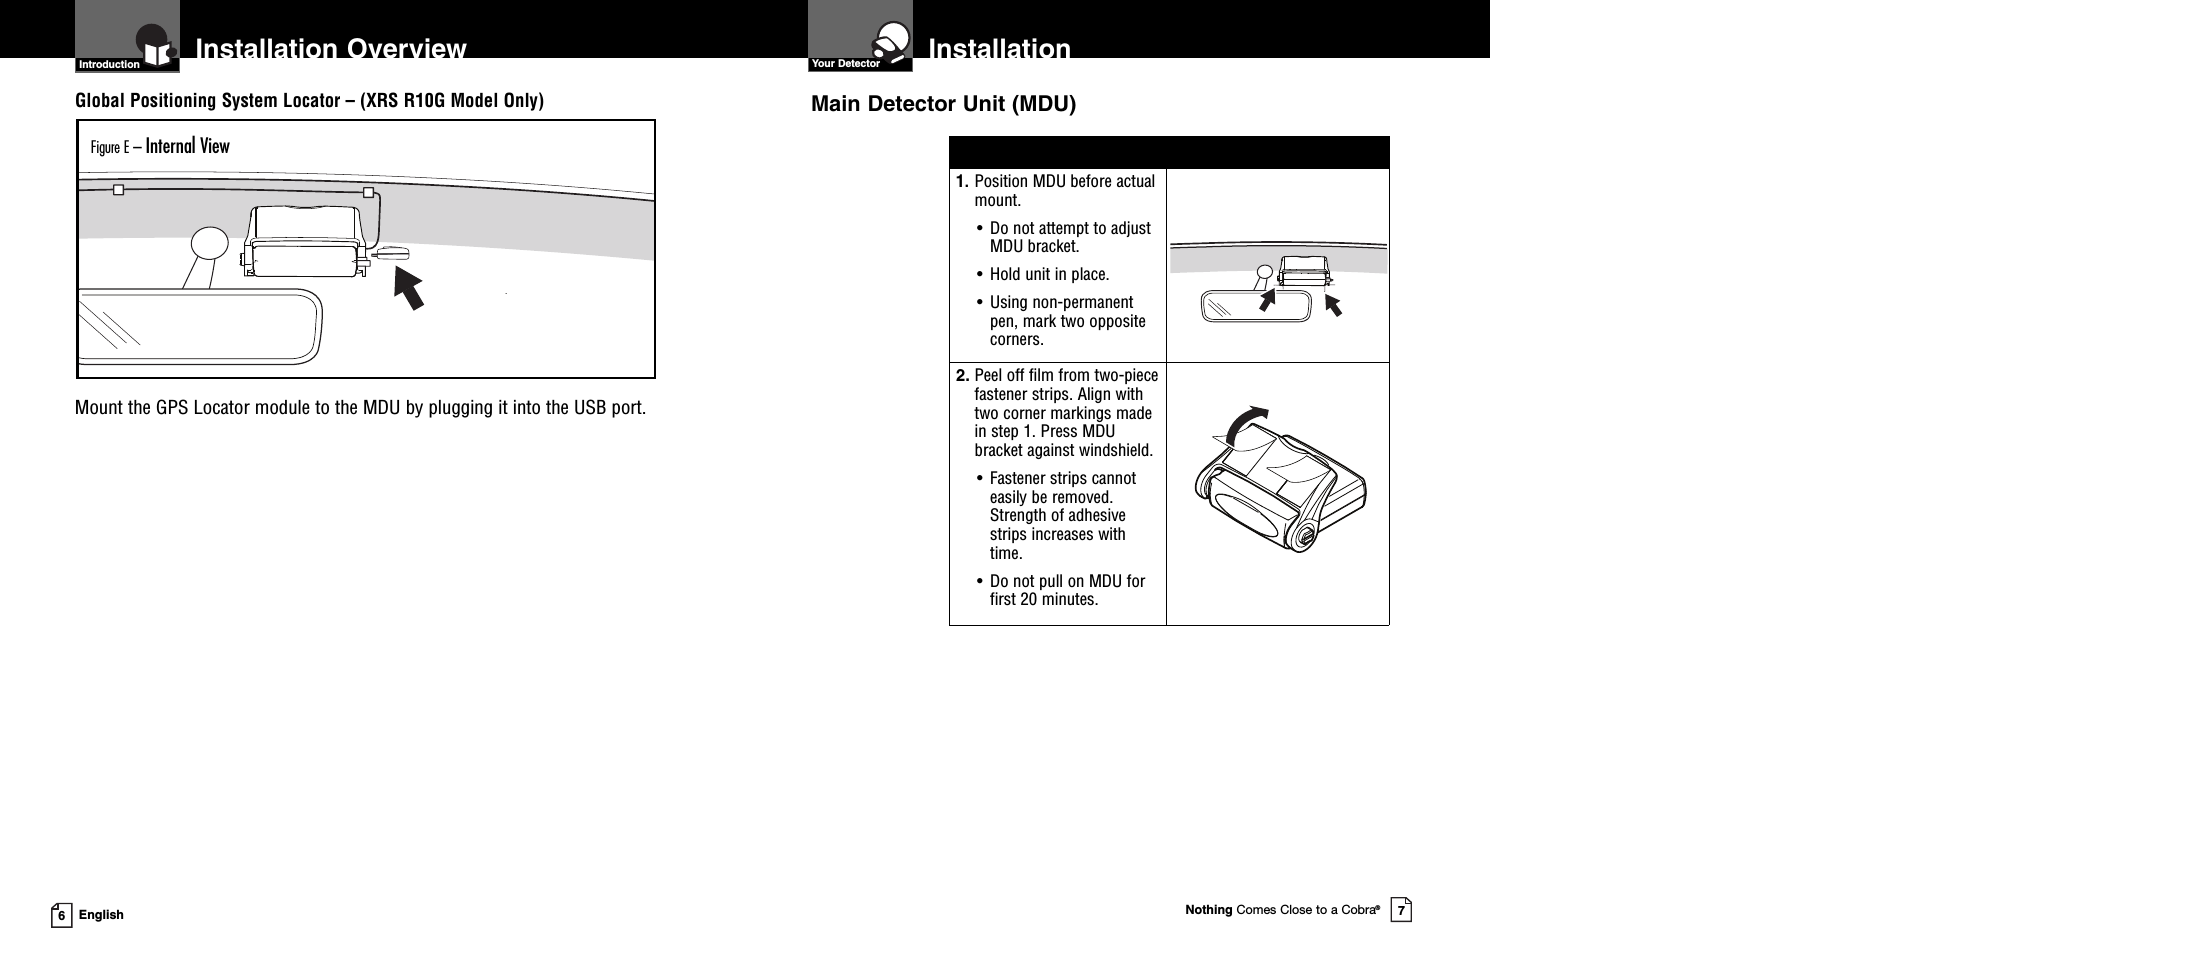
![Installation OverviewNothing Comes Close to a Cobra®5Mount the MDU high on windshield to right of rear view mirror (Figure B).The MDU must have a clear view through the windshield, be parallel to theroad (Figure C) and have clearance to snap into the “up” position.Position the MDU for easy access to power switch, cable connections and formirror movement. Mount the MDU on the windshield close to the headliner.(See page 7 for details.)IMPORTANT: Do not block the MDU lens with the sun-shaded area of thewindshield (Figure D).Heated windshields currently available on some vehicles (Instaclear for Ford,Electriclear for GM), may block or weaken incoming signals. Consult yourautomobile manufacturer.4EnglishInstallation OverviewMount UnitMain Detector Unit (MDU)Note: To power the MDU, use one of the two power cords provided(See Page A3).•12V Power Cord with In-line Fuse for Hardwired Installation:For connection to vehicle’s fuse box or battery, or•12V Power Cord with In-line Fuse and Cigarette Lighter Plug:For connection to 12-volt vehicle accessory outlet (cigarette lighterplug).Fuse box hard wiring is recommended. Use this configuration toprovide a more discreet installation. If you are unsure about makingthis connection yourself, contact a professional installer. Cobradoes not warrant any damages to the product or vehicle that mayoccur as a result of improper installation.On a negative grounded vehicle:1. Connect the positive wire [marked with a tag (+)] of the DC power cordto an accessory 12V fuse that is controlled by the ignition switch(Figure A).2. Connect negative wire (-) to a chassis ground location (Figure A). Bodypaint may need to be removed to assure a good ground connection.Introduction IntroductionFigure B Figure CFigure D – External ViewACCFigure AMDU Lens](https://usermanual.wiki/Cobra-Electronics/XRSR8-RDU/User-Guide-1039869-Page-5.png)