Collage Investments STAR5 Mobile Phone User Manual Manual
Collage Investments LLC. Mobile Phone Manual
Contents
- 1. User Manual
- 2. User manual
User Manual

UserManual
1
Collage Investments LLC
Mobile Phone
SMOOTH STAR 5 Manual
UserManual
1.APPEARANCEANDKEYPADOPERATIONS...........................................................................1
2.USINGMEMORYCARDASUDISK...................................................................................2
3.WIFI ..............................................................................................................................................3
4.BLUETOOTH................................................................................................................4
5.MAIL..............................................................................................................................................5
6.DIALLING....................................................................................................................6
7.MESSAGING................................................................................................................7
8.CONTACTS..................................................................................................................8
9.BROWSER...................................................................................................................9
10.SOUNDRECO..........................................................................................................10
11.CLOCK.............................................................................................................................................7
12.CACULATOR...............................................................................................................7
13.CAMERA..................................................................................................................7
14.GALLERY..................................................................................................................8
15.MUSIC.............................................................................................................................................9
16.CALENDAR................................................................................................................9
17.FMRADIO.............................................................................................................10
18.SETTINGS...............................................................................................................10
19.NOTICESFORTHEUSEOFPHONE.................................................................................19

UserManual
2
1. AppearanceandKeypadOperations
Keys Functions
home Pressthisbuttontoreturnhomefromanyapplicationorinterface.
Pressittoopenrecentlyopenedapplicationwindow.
menu Press it to start the menu,which allows you to perform actions in the current
interfaceoroptions’menu.
back Pressittoreturntothepreviousinterface,ortoclosedialogbox 、options’menu、
notificationpanelorthekeypad.
power Pressittoopenthephone’smenu,thenyoucouldchoosetolockthescreen、turn
offthephone,orsetittothesilentmode.
up Pressittoincreasethevolume
Pressittoturnthephonetovibrationmodefromthesilentmode.
down Pressittodecreasethevolume.
2.UsingMemoryCardasUDisk
Ifyouwanttosendmusic,picturesorotherfilestothephone’s memory card from the computer,you
shouldsetmemorycardasudiskfirst.Setmemorycardasudisk1〉Connectthephonetothecomputerwith
USBcable.Thenotificationiconwillappearinthestatusbox.2〉Openthenotificationpanel.3〉Inthenotification
panel,touchUSBisconnected ,thentouch“OpentheUSBStorageDevice”.Notices:Ifyouconnectyourphonetothe
computerthenchooseopentheUSBdevice,thephonecan’treadthememorycard.Youtemporarilycannotusesome
applications,suchascamera.UninstalltheUDiskfromcomputer、Thesameasthemethodofconnectingit,
seethefollowingpicture
3.Wifi
Wi‐Fiprovidesasfaras300feet(100M)rangeofwirelessnetworkaccess.Ifyouusecellphonetoconnect
wifi,youshouldconnecttothewirelessaccesspointor「hotspots」.Notices:Theavailabilityandcoverage
ofWi‐Fisignaldependonthenumber,infrastructureandotherobjectspenetratedbythesignal.OpenWi‐fi
andtoconnecttothewirelessnetwork、Presshome>menu,thentouchsettings>wifiandinternet、Select
thewi‐fibox,toopenWi‐Fi.Phonewillautomaticallyscanforavailablewirelessnetworks.TouchWi‐Fisettings.Then
alistofWi‐Finetworkwillshowthefoundednetworknameandsecuritysettings.(opennetworkorWEP、
WPA/WPA2withpassword).Ifyouenablethenotificationin Wi‐Fisettings,Thestatusboxwillshowthis
icon( )whenopen available wirelessnetworkfounded.Touchone oftheWi‐Fichoicestoconnectthe
network. When youchoose open network, phone will connect to it automatically. If you choose WEP、
WPA/WPA2withpassword,youshouldtypethepasswordfirst,thentouchtoconnectit.Notices:whenthe
phoneisconnectedtothewirelessnetwork,
Connect to other Wi‐Fi networks、Intheinterfaceofwirelessandnetwork,touchWi‐Fisettings.The
foundedWi‐FinetworkswillshowontheWi‐Finetworklist.TouchotherWi‐Finetworks,andthenyoucan
connecttothisnetwork.Notices:inaddition,youcansurftheinternetviaGPRS.WedefaultthattheGPRS
inSIM1is opened afterstarted,users canselect manually ,the specific locationis “settings>wireless and
internet>data connection”,touch “SIM1、no data connection”,whenthedotturnsgreen,it’salready

UserManual
3
opened.
4.Bluetooth
TurnonBluetoothorsetthephonecanbedetected、Presshome>menu,thetouchsettings.、Touchwireless
andinternet,thenchooseBluetoothboxtoopentheBluetoothfunction.Afterstarted,thestatusboxwill
show this icon ( ).Touch“scanfordevices”theitstartstoscanforalldevices within range.Touch
Bluetoothsettings,allthedevicesfoundedwilldisplayinthelistundertheicon.(selectthebox“canbe
detected”,setittobedetected,theotherBluetoothdeviceswillbeabletofindthephone.)important:the
maximumdetectingtime ofthephoneis 2minutes.PairingandconnectionofBluetoothheadset1)Press
home>menu,thentouchsettings.2)Touchwirelessandinternet>Bluetoothsettings,thenselectBluetooth
box,thenyourphonewillscanfortheBluetoothdeviceswithinrange,andshowthefoundeddevicesinthe
listundertheicon.Tips:Ifthelistcan’tfindyourequipment,touchscanningequipmenttore‐scanit.Make
surethatthedeviceswantedareunderthedetectedmode.Touchheadsetintheequipmentlisttofinish
theconnection.Notices:generallyBluetoothdevicesneedpasswordtobepaired,oftenuse「0000」asthe
defaultpassword.4)ThepairingandconnectingstatuswillshowundertheheadsetintheBluetoothdevices
list.Whentheheadsetconnectedtoyourphone,thestatusboxwillshowthisicon( )meansconnected.
Thenyoucanusetheheadsettomakeorreceivecallings..Cutthe connection to the
Bluetooth;Presshome>menu>settings>wireless;and;internet>Bluetoth settings.In the list of Bluetooth
equipment, touch or tap and hold the connected hand‐free headset.Press and select “cancel the
pairing”.Bluetooth proximity sensorAfter pairing the two device,you can test out the signal is strong or
weakbytheBluetoothproximitysensordevice
5.Mail
LoadEmail、Enterthecorrectaddressandpassword>settingscorrectportandPOPserver,checktheserver
settingsautomatically.SetthecorrectSMTPserver,checkthemailsserver’ssendingandreceivingsettings,
thenenterthespecifiedaccountnameanddisplayednameontheoutinge‐mail.> Finish.Createandsend
mails、Whencreatingmails,selectmails>createmails.Entertheaddress(recipient)、themeandcontents.
PressMENUyoucould‘append’、‘AddCc/Bcc’, selectsendordiscardedorsaveasdraft.

UserManual
4
6.Dialling
Whentheiconofinternetserverappearsinthescreen,youcoulddialorreceivecallings.Thesignalbaron
thetoprightcornershowthestrengthofnetworksignal(themaximumwith4signalbars).Startdialing 、
Open application’s main menu>dial. You could choose SIM1 or SIM2 to do the dialing.Dialing、At the
interfaceof“dialer”,enterthephonenumber,andthenclickthedialingkey,afterthat,youshouldchoose
oneSIMcardorinternetcall.Ifneededtocalltheextension,youcouldclickthe“dialpad”inthebottomof
thescreentoopentheinterfaceorpressmenukeytoselect“delay2seconds”,andthenenterthenumber
of the extension.Telephone calls in the call log、Every telephone number called and received in“SIM1、
SIM2”will reserved in phone’s menu of call log. On the top left of every call record will show“SIM1 or
SIM2”Allnumbersinthecalllogcanbedialedbyclickingthebutton”dial”ontherightsideofthescreen.
Whennumberlistappearing,clickittocatchdetails;pressitforlongyoucoulddialvia“SIM1orSIM2”,
meanwhileyoucanedit,delete,savethenumberordootheroperations.
Receive callings/When calling comes(top left will show from which SIM card)press“Answer”and slide
towardsrightuntilthemiddlebutton,thenyoucanreceivecallings.
Proximitysensor/Accordingtothedistancebetweenphoneandhumanbody,itwilladjustautomatically
the switch of the backlight.During the call, close the phone totheear,thebacklightwillturnoff
automatically,whichcouldsavebatteriesandpreventinadvertentlytouching.
Refusetoanswerthephone/Whenstandby,callingcomes,press“refuse”buttonandslidetowardsleftside
until the middle button, then you could refuse the calling./When using,calling comes,click on the
“refuse”buttontorefusethecalling.Two‐waycall/multipartycall(conferencecall)
Notices:thisfunctionneedsthatSIMcardopenmultipartycallfeatures.Alreadyexistacallinthephone、
Click“Add calls” ,dial another call (or receive another call ,phone default open ”call waiting”
(settings–dialingsettings–otherdialingsettings),afterbothconnected,couldviewthestatusofcalling.
select“combinecall”–youcancombinetwocallsintooneway.aftermultipartycallconnected ,youcould
separatethecallsorhanguponeofthemvia“thesmallarrowofconferencecall”.Telephonerecording、
Duringthecall,more>startrecord,youcouldrecordthedialogofthecall.
1)settings>setotherfunctionsofthecallinthedialingsettings,forexample:CallTransfer–afterallthe
settings finished and turned on,you could transfer the call to a certain number.2)In settings>dialing
settings>otherdialing settings,open“callwaiting”.Afterturnedon,youcanreceiveanothercallwhen
alreadyexistone,Theansweringandrejectingfunctionsarejustliketheordinaryphone

UserManual
5
7.Messaging
Important:themessagetitleofthisphoneisthephonenumber,willbereservedinssimilarforofdialog,
insteadoftheusualfolderstructure.Messageswithbluebackground are those received, and messages
withwhitebackgroundarethose sent. SendSMS tocertainphone number、Presshome>messaging,
touch“newmessages”.Intheinterfaceof“edit”:Click“recipient”boxtostartinputmethod,youcanalso
click“enter”boxtostartinputmethod,inthatwayyoucanentercharacters.Clickthebuttonof“sendfrom
SiM1 or SIM2”to start sending.Send MMS to certain phone number、When creating message,it was
defaultedasSMS,itwillbeturnedtoMMSwhenfollowingoperationsweredone.YoucansendMMSvia
clicking“send”afterediting.Intheinterfaceof“edit”,Clickthebuttonof“Menu”:Click“append”,youcan
spendthefollowingattachments,thenitwillbeturnedtoMMSautomatically.Sendmessagestomultiple
numbers、Enter multiple numbers in the box of entering,eachnumberisdividedbythecommain
English.Notices:For now this phone can mass messages to almost 20 numbers,the correct number
dependsonthecharacters,youcanonlyenter312charactersintheboxof“recipient”.Whenamessageis
sentorsentagain,alittleyellowletterwillappear.Thenumber1or2ontheletterreferstoSIM1orSIM2.
Whenmessagesendingfailed,aredtrianglewithexclamationwillappear.wheneditinginformationother
functionsofMenubutto
8.Contacts

UserManual
6
Open the menu of applications>contacts Default display phone contactsandSIMcardcontacts,sort
contactsbyfirstletterofalphabet.ClicktheSearchicontoenter the contact search interface
Clickthe"+"tocreatenewcontact1)contacts>Menu>newcontact>SelectSavecontactstophoneorSIM
card,thenintotheinterfaceofeditingcontactsYoucaneditthecontacts’picture,name,phonenumber,
e‐mail,postaladdress,thentouch“finish”.2)contacts>Menu>searchera.Enternumbersorletters,ifmatch
withcontacts,theywillbedisplayedinthesearchresults.b.Ifthereisnosearchtomatchthecontacts,the
interface will be 'no matching contacts’. 3) contact>Menu>delete contacts a. You can select all, click the
deletebuttontodeleteallcontacts,includingthecontactsofphoneandSIMcard b.Youcanselectoneor
moreindividualcontact,clickDelete,deletealltheselectedcontacts.4)contacts>Menu>groupsa.default
group include:VIP,Schoolmate,friends,Family,Co‐worker. b. Select Add Groups, edit the new group name,
andgotothecontactsearchinterface,youcanaddthegroupcontact.5)contacts>menu>speeddial a.
Voicemailb.No.2‐9numbers,click”Taptoaddspeeddail”,selectacontactasaspeeddail.Aftersuccessfully
settingthedialerinterface,longpressthenumberkeys,youcandialthecontactnumber.6)contacts>more
a. click import/export,In the local phone, SIM card and SD cardthreecopiesofeachothertoachieve
contactinformation.Youcanselect"CopySource"andthenselectNext,selectthecontactstocopy,soshat
completethecopyofcontacts. b.Dispayoptions,canselectthewholeorpartscontactsin“Onlycontacts
withphones”,”PhoneContacts”or”SIMsContacts”c.Accounts,can choose the”Backgroup
data”and”Auto‐sync”. d. Share Visible contacts,all of the contactscanbeimportedintotheSDcard,or
sharingviaBluetooth,TextmessageorGmail.Addcommoncontactstothecollectioninterface.1)Touch
contacttab.2) Touchthecontactthatyouwanttoaddtothecollection(contactsreservedontheSIMcard
cannotbeadded).3)Inthedetailedinformationofcontacts,touchthisicon besidesthecontact.4)
Press for longthe contact inthe pop‐up menuto addit tothe collection.Theinterfaceofcontacts>press
Menu button>select search a Enter the first letter of the namesinthelist(Chineseorletter)tofindthe
matchedcontact.bEnterthefirstnumberin thesearchingboxtofindcontactsnamedundernumbers.c
Entertheexactlymatchednumberswithcontactsinthesearchingbox,thenpressthe“search”button.dIf
thereisnomatchingcontact,thentheinterfacewillappear“nocontactfounded”
9.Browser
Internetexplorer1)Intheinterfaceofinternetexplorer,touchaddressfiledandentertheURL.2)Usekeypad
toenterURL.Theappropriatewebsiteswillappearonthescreen.Youcantouchitdirectlygotothepage
orcontinuetoenterURL.
Homepage、Select“homepage”,youcouldloadinthesethomepage.Ifyoudonotsetit,youwillusethe
vendor’spre‐setsites.Functionsofmenu、Menu>Backward、Afterbrowsingthroughmultiplepages,will
returntothepreviouspagethecurrentpage.Menu>Farward、Afterbrowsingthroughmultiplepages,will
movetoawebpageafterthecurrentpage.Menu>Windows、You can view all open windows to the
current.Menu>Bookmarks、Clickthe“Bookmarks”tomakethecurrentURLasabookmarksaved.Clickthe
bookmarkunderthebookmarkslist,willopentheURL.Menu>More
Add bookmarks,save the current URL as bookmark.Find on page,searchwhatyouneedincurrent
page.Selecttext,inthetext,clickanddragtoselectapieceoftext.Pageinfo,displaypageaddressandother
informationofthecurrentbrowsing.
Share page,select the Bluetooth or SMS to share the current page.Downloads,show all the content
downloaded. History, Show your browsing history, and view the most visited pages of
information.Setting,containtsavarietyofbrowsersettings.

UserManual
7
10.SoundReco
Recordercanrecordvoice,andsenditquicklyviaBluetoothorMMSaswellasmakeitasring
tone.Notices:recordercanonlysavetheaudiofilesasAMRformat.1)Clickthe recorder application.2)
Keepthephone’smicrophonenearthevoicesource.3)Clickrecordertorecordvoices,andclicktostopor
playback.
Allrecordingssaveinmyrecordingfolderinthedefaultmusicprogram.
11.Clock
Openthemenuofapplication,click AlarmAfterfunctionsset,phonewillarrivesinthesettingtimeto
alertyoubyringingorvibratingtoachieveit’sfunction.PressMenutoaddalarm,youcanalsoadditfrom
theaddinginterface.Youcouldsetthealarmaccordingtoyourneeds.Intheinterfaceofalarmwillshow
threeclosedalarms(twoalarm clocksareMondaytoFriday8:30,9:00).Edit You can editthe current
alarm,youcouldedittime、ringingtones、vibration、repeatformandtabs.
Pressforlongthetimeyoucould:stopthealarm、changealarmsettings、cancelalarm.Intheinterfaceof
alarmsettings,youcouldperformtheoperationsofchangingtime、repeat 、ringtones、vibration、tabs,
etc.
12.Caculator
this function can turn your phone into calculator, it can do some simple calculations.Touch the
numberkeystomakeitappearintheblankbox.Intheinterfaceofcalculator,pressMENUbuttonorhold
downthescreentotheleft,thentheseniorpanelappears.
13.Camera
Priorpreparation、Installmemorycardbeforeusingthecameraorvideocamera.Allyourphotosorvideos
taken by the phone are stored in memory card.Open camera、Press home, touch menu, select camera.
Choosethevideomodeifyouwanttomakevideos.Thescreenwill automatically switch to landscape
mode.
TakepicturesAimyourobjectwiththescreen.Touchthe“shutter” button on the screen.After taking,
photos will save to the camera’s galley folder with the name oftakingtime.Youcanviewthephotosby
touchingthepreviewboxbutton.Camerasettings、You cantouchthe buttonof“set” intheinterfaceof
cameratodothesettings、Undercameraviewfindermode,pressMenu,youcanswitchtovideoorphotos’
gallery.
Onthe toprightofcameraviewfindermode,displaythepreviewofthepreviouspicture.Touchpreview
box,thephotodisplayonfullscreenandyoucanenlargeittoviewdetails.Camerasettings:button1:Focus
mode, exposure, framing mode, picture size, picture quality, color effect.button 2:Camera mode,
high‐speedcontinuousshooting,ISOsensitivity,self‐timer,focusmode,facerecognition,meteringmode,
toavoidflicker,sharpness,hue,saturation,brightness,contrast.button3:Storagelocation.button4:White
balance.button5:Flashmode.button6:Zoom.Touch“set”button,youcandosettingsinthecamera.
13.2 Videocamera、PriorpreparationInstallmemorycardbeforeusingthecameraorvideocamera.Allyour
photosorvideostakenbythephonearestoredinmemorycard.Open camera Press home, touch
menu,selectcamera.Choosevideocameramode. Thescreenwill automaticallyswitchtolandscape
mode.TakepicturesAim yourobjectwith thescreen.Touchthe “shutter” buttononthe screen.After
taking,photoswillsavetothecamera’sgalleyfolderwiththenameoftakingtime.Youcanviewthe

UserManual
8
videosbytouchingthepreviewboxbutton.VideocamerasettingsYoucantouchthebuttonof“set”in
theinterfaceofcameratodothesettingsUndercameraviewfindermode,pressMenu,youcanswitch
tovideoorphotos’gallery.
Onthetoprightofcameraviewfindermode,displaythepreviewofthepreviousvideo.Touchpreview
box,thevideowilldisplayonfullscreenandyoucantouchtheplaybuttontoviewit.Videocamerasettings
button1:Focusmode,anti‐focus,exposure,framingmode,videoquality,videolength,coloreffects.button
2:Voice recording, avoiding flicker, sharpness, hue, saturation, brightness, contrast, camera.button 3:
Whitebalancebutton4:Flashmode button5:Zoom.
Touch“set”button,youcandosettingsinthecamera.
14.Gallery
OpenGalleryPresshome,touch label of applications,thentouchphotos’galley.Intheinterfaceof
camera,Pressmenutoopenit,thentouchtooperate.UseimagesAftertakingpictures,youcanviewthem
and share them with your friends.View images1) In the picture interface, touch photo album to view
images.2) Touch the thumbnail to view pictures on full screen.Youcanchoosetodisplaysmallorlarge
thumbnails.Holddownthescreentowardstheleftsidetoviewthenextphotoortowardsrighttoviewthe
previous one.In the photo album or list, press and hold down the picture towards left to view the next
picture,ortowardsrighttoviewthepreviousone.CropimagesInthephotos’gallery,pressthephotoyou
wanttocrop,choosemenu,‘more’and‘crop’,thentheinstrumentsofcroppingwillappear.a.Toadjustthe
trimmersize,pressandholdthe edgeofcuttingtool.Afterthetrimmerarrowappears,dragyourfinger
fromthecenterinwardoroutward,thenyoucanadjustthesize.b.Tokeeptheratioofthetrimmer,please
pressanyoneofthefourcorners.。c.Tomovethetrimmertootherareasofthepicture,holddownthe
centerofcuttingdevice,thendragyourfingertocertainposition.SendimagesviamailsIntheimages
gallery, press the wanted photo, choose menu, then touch share.TouchGmailwhentipsappear.Picturewillbe
automaticallyattachedtoe‐mail.Editthemail,thentouchsend.Send imagesviamessagesIntheimagesgallery,
press the wanted photo, choose menu, then touch share. Touch Gmail when tips appear.Picture will be
automaticallyattachedtomessage.Editthemail,andthentouchsend.UsevideosAftervideotaken,you
canviewitorshareitwithyourfriends.Watchmovies1)Intheinterfaceofphotos’gallery, touchvideos
album.Youcanwatchmoviesaftertouchingthewantedvideo.2)Touchthescreen,thentheplaycontrol
keysappear.

UserManual
9
15.Music
The phonecanplaydigitalaudiofilesinmemorycard.Thefollowingformatsareavailable:AMR、M4A、
MIDI、MP3、WAV、OGG.OpenMusicPresshome,touchthelabelofapplications,touchmusic.Thentheinterface
ofMusicMediaappears.MusicMediaYourmusicfilesareclassifiedaccordingtothefollowingfourcategories:Artists,
albums, songs and play lists. Touch one of these categories; youcanviewthelist inside.Continue the operations,
untilyourwantedmusicappears.Suchas,ifyouchooseArtistsalistofartistssortedbythenumbersin
Englishwillappear.Chooseanyontoopenthelist,thenallthealbumsandsongswillappear.Selectone
album,thenthesongsinitwillbeplayed.Tips: You can play all of the songs in the interface of music
media,inrandomsequence .Press Menu,andthentouchthePartyShuffle.Thenwillstartplayingthe
first song randomly selected . To close the Party Shuffle, press Menu, then touch to turn off the Party
Shuffle.View lyrics When the corresponding tracks have lyrics file,theplayerdisplaysthelyricssources.
Clicktheuparrow,youcanplaymusic,viewlyricsatthesametime.CreateaplaylistTouchanycategoryof
musicmediaonthescreen.Inthelist,youcanpressandslideupanddownthescreentobrowsetheartist,
albumorsong thatyouwanttoaddtotheplaylist.Presstheartist,albumor song,and thentouchthe
optionsmenuintheplaylist.Intheinterfaceofaddingtotheplaylistwindow,touchthenewplaylist.Enter
the new name of the play list, and then touch to save.Manage theplaylistEntertheinterfaceofmusic
mediathentouchtheplaylist.Toplaysongsoftheplaylist,touchthenameofplaylist.Todeleteaplaylist,
pressandholdthePlaylist,andthentouchRemove.Torefreshthelistofsongsorremovesongs,holddown
theplaylist,andthentouchtheoptionsmenuintheeditor.Todeletethelistofsongs,holddownthesongs,
andthentouchplaylisttodeleteit.Torenameaplaylist,pressandholdtheplaylist,thentouchOptions
menurenamed.Enterthenewplaylistname,andthentouch“save".Ifyouwanttosetthesongtothering
tones,andthentouchthesongasaringtone.Thesongwillbesetasthedefaultringtone.ifyouwantto
usethe song as noticeringtone,youcanpressmenu and touchthe song asringtone.andthen touchthe
Noticeringtone.Thesongwillbesetasthenoticeringtone.ifyouwanttocutthesongtotheringtone,you
can press the menu and select the song as ringtone,and then touchthecutringtone.Asshown,youcan
choosethestarttimeandtheendtime,atlasttouchthe‘save’,itwillbesavedtoringtone.Itcanbesetto
thedefaulttingtone,canbeassignedtothecontactastheringtoneofthecontacts.
16.Calendar
EnterthecalenderapplicationLoadGogglesaccounts,entertheapplication,Intheinterfaceofmonthor
weekwillusegraytohighlighttheday. Displaydefaultthedateon thecurrentmonth.Intheinterface,
pressmenu,4displaymodeswillappear:
1)ScheduleIntrfaceshowsacertainschedule(clickontheinitialtimeandviewforward,clickthefinaltime
toviewbackwards)
2)dayInterfacedisplaysaday'sschedule(lastclickeddate),Slidearoundtoturnpageaccoringday.3)
week Interfacedisplaysa week'sschedule(lastclickeddate),Slidearoundtoturnpageaccoringweek.4)
today Interface displays a day's schedule, In the interface ofmonthorweekusegraytohighlightthe
day.5)monthnterfacedisplaysamonth'sschedule(lastclicked date) Slide around to turn page
accoringmonth.Newactivities、Pressmenu,more<touchnewactivities.Enterthenameofactivityintheactivities’
box.Notices:Suchasspecialoccasionssuchasbirthdayoradaywithevents,settheall‐dayoptiontoYes.If
theactivityisatacertaintimeperiod,selectthestarttimeandendtime.3)Entertheeventlocation,description,
guests,repeat,remindtime.4) Clickfinishto returntocalendar.Notices:All‐dayevents appear inthe calendar
heading.Itwillnotshowtheperiodofcalendar.Cancelactivities:Inthetimeframe,pressforlongtodelete
theactivity.
UserManual
10
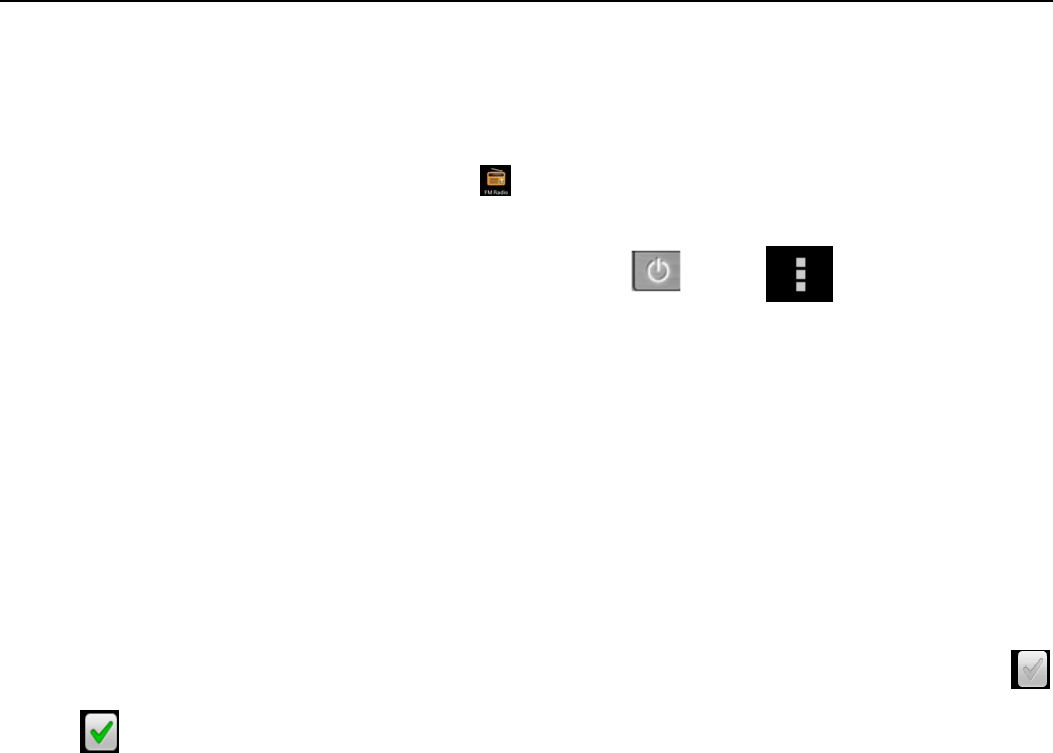
17.FMRadio
FMRadioThroughthisprogram,youmaylistentoFMradioonthedevice,FMradiousethewired
headset as an antenna to receive signals, before opening this program ,you can install the original
equipment‐headphones,whenlistening,youcanswitchitmanually tospeakersorthemodewithwired
headphones.OpenFMradioTouchthislabel toopentheapplicationofFMradio.
ClicktheBackbutton,theradioprogrammovetothebackground,andyoucanstillcontinuetolistento
programsandotherapplicationsrunatthesametime.Pressmenuandclick toselect“exit”
radio.Collect the channel you are favorite Press the menu button in the FM interface,click the
“search&save”,and then view the channel list,presslongone channel,click “Add toFavorite”to rename
thechannel.
18.Settings
Yourserviceprovidermaydefaultsomedevicesettings,soyoumaynotbeabletochangethesesettings.
SIMcardmanage1)TouchittochooseortodisabletheSIMcard,thecardisgreywhendisabled,theflight
modedisplaysonstatusbar.2)ThedefaultSIMcard,youcanchooseVoicecall,Videocall,Messaging,Data
connection.
WirelessandinternetFlightmodeTouchtoopenorclose.Wi‐FiandWi‐FisettingsTouchWi‐Fi
toopen .OpenWi‐Fi,itcansearchforavailablenetworksautomatically,networkswithoutpassword
canbeuseddirectly,othersneedtoenterthepasswordfirst.Notice:OpenWi‐Fithentheflightmode,
Wi‐Fi will close automatically;OpenflightmodethenconnectWi‐Fi,itcanbeusednormally.WPS
connection,wireless AP and mobile phone are needed to support AOSS,youcandirectyconnectwithout
entering akey.Bluetooth and Bluetooth setting.Tethering&portablehotspotShareyourdigitaldatavia
USBVirtualPrivateNetworks(VPN)Settings.Mobilenetworkenter“mobilenetworksettings”which
include: aDataroaming bAccesspintnamecNetworkoperators.GPRStransferpreferCallingsettings
VoiceCall
Voice mail,in the voice settings,you can enter the voice mail number.Call forward,You can set Always
forward,Forward when busy,Forward when unanswer,Forward when unreachable.Call barring Additingal
settings,CallIDandCallwaitingVideoCall
Pictureforreplacinglocalvideo,setapicturetodisplaywhencameraoffuse.Enablebackcamera,available
toswitchcamerasifturnoff.Peer videobiggerthanlocalvideo,trunontomakepeervideobiggerthan
localvideoLocalvideodisply,tomakeoutgoingvideocallorincomingvideocall.Othersettings,includecall
forward,callbarring,additionalsettings.
Internet Call Can add accouts Other settings Fixed Dialing NumbersCallcostCellbroadcast
Minutereminder
PhonesettingsTTYsettingsExtrasettingsApplicationsallow application moving or select install
ocationDisplayanimated、rotatin Input input behavior,buttonInterfaceadjust
interface、crossborder
AudionprofilesThisoptiongivesthephonetones’settingsunderthestatusofreceivingcallsornotification.
Including:Vibration,volume,ringtones,ringtonesnotificationandfeedback(Buttonoperationtone,select

UserManual
11
Sound, screen lock tone, touch).To adapt every environment.Select “Standard / Mute / Conference /
Outdoor,Touchthespotontheright,whenturnsgreen,itopens.Volume:Includingtheringvolumeand
alarmclocksettings,youcanmanuallyslidetoselect.DisplaysBrightnessAdjustthebrightnessb.Auto
rotatingscreen RotatephonetochangedirectionAnimation Choosetodisplayanimations d.Screen
Timeout AdjustthedelaybeforethescreenautomaticallylocksLocationUsewirelessUsewireless
tofindlocationsintheapplication(Googlemap).Touchittoopenorclose
WhenusingtheGPSsatellitepositioning,setaccuracytostreetlevel(cancelittosavebattery).Touchitto
openorcloseGPSEPOassistance,useGPSassistancedata(EPO)tospeeduoGPSpoditioning
A‐GPSUseauxiliarydatacanacceleratetheprocessofGPSpositioning.Open it and remind you“it
produceGPRS flowswhenusing A—GPS”.safetySet upscreen locks Useimages、PINor password to
lockthescreen.a.Touch“images”, thefirsttimetherewillbeasimpleunlockinstructionsandexamples,
click“nextstep”tocontinuethestep“maketheunlockingimage”b.TouchPINEnterPINnumberstounlock
the screen. c. Touch password Set password to unlock the screen.d.Touch“no”Stopthis
application.2)SetupSIMcardlockEnter
(4‐8numbers)
PINtosetthelockofSIM.SIMcardPIN(Personal
Identification Number) is to prevent unauthorized use of SIM cards.PIN code provided with SIM. The
serviceprovidergivestheinitialvalue.ChangeablockedPINcode,youneedtoopenthe"SIMLock",then
gotoChangePasswordscreen,thephonewillautomaticallypromptentertheoldPINcodeandaskedto
enteranewPINcodetwice,finallythephonewillpromptthatchangethecodesuccessfully.Ifyouenter
thePINwitherrorforthreetimes,SIMcardPINcodeswillbeautomaticallylocked,PUKcodesisusually
suppliedwithSIMcard.Ifno,youshouldgototheserviceprovider for the codes.If you enter 10 times
wrongPUKcode,theSIMcardwillbepermanentlylocked.
3)PasswordvisiblePasswordvisiblewhenenterit4)SelectdeviceadministrationAddordelete
devicemanager.5)UsesecuritycredentialsAllowapplication visit security credentials or other
credentials.6)InstallfromSDcardInstalltheencryptedcertificatefromSDcard.7)setpassword
SetorchangeCertificatestorepassword8)clearstorageClearallthecontentsofthecertificatestore
and reset their passwords.Applications1) Unknown sources Allow to install non‐electronic market
applications2)ManageapplicationsManageanddeletetheinstalledapplications.3)Runningservices
Touchanyoftheserviceslistedin>popup'tostoptheservice?'two‐buttonoperationbox,touchthe'Stop
'theserviceisstopped,anddisappearfromthe"runningservices"list.4)Storageuseyoucanviewthe
program of downloaded,all,on sd card or running how many memory space they occupy 5)Battery use
youcanseetheusingpowersituationofcellStandyby,Phoneidle,DisplayandBrowser.6)developmenta.
USBdebug:USBdebugonlyapplyinthedevelopprocess.Thisfunctionallowscopydataincomputerand
mobile devices.AccountsandSynchronize1)BackgrounddataApplicationsusingthebackgrounddata
synchronization at any time, send and receive data, disable the background data extend battery life and
reduce data usage. However, some applications will use the background data for the
connection.2)Automatic synchronization turn on/off Automatic synchronization, applications
Automaticallysynchronizedataorasynchronousdata
PrivacyBackupMyDataBackupmysettingsanddataofotherapplications.RestoringAutomatically
ThesystemwillrestoresettingsorotherbackupdataafteracertainapplicationisInstalled. Resettingto
FactorySettingsClearalldatastoredonthephone.Storage1) View SD Card and Phone Memory.2)
UninstallorFormatSDCard.
Languages and keyboard 1) Selecting Language District Include all the languages on the phone and

UserManual
12
totallyamountof12kinds.2)UserDictionaryAddwordstocustomdictionaryordelete.3)Keyboard
SettingsVibratingwhenbuttonsarepressed,Playingsound whenbuttons are pressed, Capitalizing
automatically, Speech Input(by microphone on the keyboard), Inputting words(speech can be altered by
slidingfingeronspacekey),Displaying
tips(activatepredictivefunctionwhenyouinputwords);Auto‐Text(Automaticallyinputcertainwordswhen
press space keyor specified keys)4) InputmethodyoucanselectAndroidkeyboardorgooglepinyin
inputmethod.SpeechInputandOutputSettings1)Voicerecognizersettings、Language selectthedefault
language、SafeSearch only applies to Googlesearch by voice Block offensivewordshiderecognized
offensive voice results Test‐to‐Speech Conversion Setting Listentoanexampleplayashort
demonstrationofspeechsynthesisAlwaysusemysettingsdefaultsettingbelowoverride
applicationsettingsDefaultEnginesetsthespeechsynthesisenginetobeusedforspokentextInstall
voice data install the voice data required for speech synthesisSpeechratespeedat
whichthetextisspokenLanguage setsthelanguage‐specificvoiceforthespokentextPicoTTSAuxiliary
Function
1)Endupcallingwhenyoupresspowerkey on/off 2)QuickbootDateandTime
1)AutomationUsedateandtimeprovidedbyNetwork.2)SettingDateTouch“+”and”‐”toset
date.3)SelectingTimeZoneSelectTimeZoneaccordingtowhereyouare.ForChinapleaseselect
“GMT+08:00,ChinaStandardTime”.
4)SettingTimeTouch“+”and”‐”tosettime.5)Use24HourTimeFormatON/OFF
6)SelectDateFormatThereare3kindsofformatsyoucanchoose from: Month‐Day‐Year,
Day‐Month‐YearandYear‐Month‐Day,amongwhichYear‐Month‐Dayisthedefaultsetting.Schedulepower
on/off Youcansettimeofbootorshutdownbytouchingit.Youmayalsoselecttorepeatitoracertain
dayduringaweek.AboutphoneYoucanchecktheinformationonstatusbarandremainingpower.
19.Noticesfortheuseofphone、Your phoneisa productofsuperior designandcraftsmanshipandshould be
treatedwith care.The followingsuggestionscanhelpyoucomplywiththetermsofrepairkits,toextendthelifeof
mobilephone.Placethemobilephoneandtheirpartsandcomponentsoutofreachofsmallchildren.Keepthephone
dry,rain,humidityandalltypesofliquidswhichcontainmineralswillcorrodeelectroniccircuits.Don’ttouchthephone
withwethandswhencharging,itwillcauseelectricshockordamage the phone.Avoid place the device in high
temperatureenvironment.Temperatureswillshortenthelifeofelectronicdevices,damagebatteries,andwarpormelt
certainplastics.Avoidplacethedeviceintoolowtemperatureenvironment.Whenthetemperaturerises,thephone
willproducewatervaporthatmaydamage electroniccircuit.Avoidplacethephoneindusty,dirtyplaces,otherwise
partsmaybedamaged.Toavoidthephoneinalitcigarette,nearopenflameoranyheatsource.Donotopenthedevice,
non‐professionalapproachwilldodamagetothephone.Donotthrowitfromheight,knockorshakethephone,rough
handling can damage internal circuit boards.Do not paint the phone,becausethepaintwillblockheadphones,
microphonesorotherremovableparts,andleaditnotwork.Useclean,soft,dryclothtocleanthecamera,lightsensor
lenses.Prohibittheuseofharmfulchemicalsandcleaningagents,cleaningfluidstocleanthephoneIfmobilephone,
battery,charger,ormobilephoneaccessoriesaredefective,sendtothenearestqualifiedservicecenterforinspection.If
nessary,ServiceCentrestaffwillassistyouandwillarrangeforphonerepairs.

UserManual
13
ThestatusboxwillshowthisWi‐Fiicon( ),andtheapproximatesignalstrengthen(thenumberoflit
bars).Iftouchtheconnected 、network,willdisplaythenameofWi—Fi network,status,speed, signal,strength,
security,informationandIPaddress.Ifyouwanttodeletethewirelesssettings,pleasetouch“notreserve”asintheright
picture.Ifyouwanttoconnecttothisnetwork,you、shouldre‐enterthesesettings. Notices:Unlessyouchoosenotto
reservethenetwork,otherwise,thereisnoneedtore‐enterthecorrespondingpasswordwhennexttimeconnecting
to the previously encrypted wireless network. Wi‐Fi will search automatically, that is, phone needn’t to perform
additionalstepstoconnectWi‐Finetworks.Notices:Unlessyouchoosenottoreservethenetworkwithpassword,
otherwise, there is no need to re‐enter the corresponding password when next time connecting to the previously
encrypted wireless network. Wi‐Fi will search automatically, thatis,phoneneedn’ttoperformadditionalstepsto
connectWi‐Finetwork
FCC Statement
This equipment has been tested and found to comply with the limits for a Class B digital device, pursuant to
Part 15 of the FCC Rules. These limits are designed to provide reasonable protection against harmful
interference in a residential installation. This equipment generates uses and can radiate radio frequency
energy and, if not installed and used in accordance with the instructions, may cause harmful interference to
radio communications. However, there is no guarantee that interference will not occur in a particular
installation. If this equipment does cause harmful interference to radio or television reception, which can be
determined by turning the equipment off and on, the user is encouraged to try to correct the interference by
one or more of the following measures:
-- Reorient or relocate the receiving antenna.
-- Increase the separation between the equipment and receiver.
-- Connect the equipment into an outlet on a circuit different from that to which the receiver is connected.
-- Consult the dealer or an experienced radio/TV technician for help.
This device complies with part 15 of the FCC Rules. Operation is subject to the
condition that this device does not cause harmful interference
Changes or modifications not expressly approved by the party responsible for compliance could void the
user's authority to operate the equipment.
Your wireless phone is a radio transmitter and receiver. It is designed and manufactured not to exceed
the emission limits for exposure to radiofrequency (RF) energy set by the Federal Communications
Commission of the U.S. Government. These limits are part of comprehensive guidelines and establish
permitted levels of RF energy for the general population. The guidelines are based on standards that
were developed by independent scientific organizations through periodic and thorough evaluation of
scientific studies. The standards include a substantial safety margin designed to assure the safety of all
persons, regardless of age and health. The exposure standard for wireless mobile phones employs a
unit of measurement known as the Specific Absorption Rate, or SAR. The SAR limit set by the FCC is
1.6 W/kg. * Tests for SAR are conducted with the phone transmitting at its highest certified power level
in all tested frequency bands. Although the SAR is determined at the highest certified power level, the
actual SAR level of the phone while operating can be well below the maximum value. This is because
the phone is designed to operate at multiple power levels so as to use only the power required to reach
the network. In general, the closer you are to a wireless base station antenna, the lower the power
output. Before a phone model is available for sale to the public, it must be tested and certified to the
FCC that it does not exceed the limit established by the government adopted requirement for safe
exposure. The tests are performed in positions and locations (e.g., at the ear and worn on the body) as
required by the FCC for each model. The highest SAR value for this model phone when tested for use
at the ear is 0.330W/Kg and when worn on the body, as described in this user guide, is 0.580W/Kg.
(Body-worn measurements differ among phone models, depending upon available accessories and
FCC requirements). While there may be differences between the SAR levels of various phones and at
various positions, they all meet the government requirement for safe exposure. The FCC has granted
an Equipment Authorization for this model phone with all reported SAR levels evaluated as in
compliance with the FCC RFexposure guidelines. SAR information on this model phone is on file with
the FCC and can be found under the Display Grant section of http://www.fcc.gov/ oet/fccid after
searching on FCC ID: GAO-STAR5
Additional information on Specific Absorption Rates (SAR) can be found on the Cellular
Telecommunications Industry Asso-ciation (CTIA) web-site at http://www.wow-com.com. * In the United
States and Canada, the SAR limit for mobile phones used by the public is 1.6 watts/kg (W/kg) averaged
over one gram of tissue. The standard incorporates a sub-stantial margin of safety to give additional
protection for the public and to account for any variations in measurements.
This device was tested for typical body-worn operations. To comply with RF exposure requirements, a
minimum separation distance of 10 mm must be maintained between the user's body and the handset,
including the antenna. Third-party belt-clips, holsters, and similar accessories used by this device
should not contain any metallic components. Body-worn accessories that do not meet these
requirements may not comply with RF exposure requirements and should be avoided. Use only the
supplied or an approved antenna.