Compal Electronics VT820 Tri-Mode Dual-Band Phone (AMPS/CDMA/ PCS CDMA) User Manual
Compal Electronics Inc Tri-Mode Dual-Band Phone (AMPS/CDMA/ PCS CDMA)
UserManual.wiki
>
Compal Electronics
>
VT820 User Manual
User Manual
Navigation menu
Upload a User Manual
Namespaces
Wiki Guide
HTML
PDF
Info
Views
User Manual
Discussion / Help
Navigation

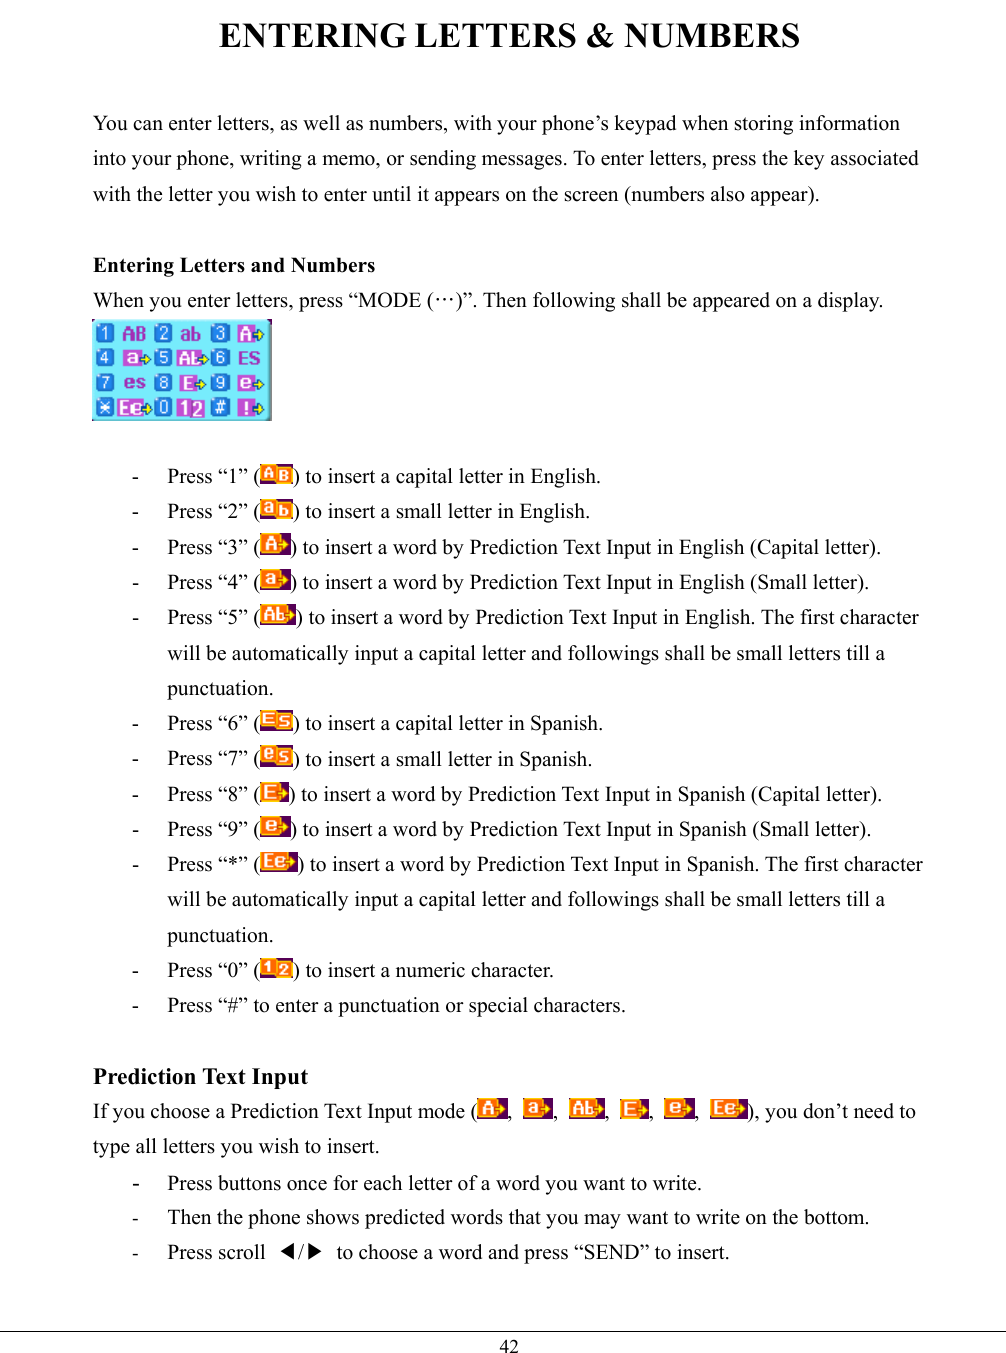
![23 V. Voice Service 1. Voice Portal 2. Ring Back Tone 3. Vivo Information 4. Call Forward a. Activate - Press “MENU(‥)”, “5. Voice Service”, “4. Call Forward” and “ 1. Activate”. - Choose “Phone Book” or “Manual” and press “OK(‥)” to set. b. Deactivate - Press “MENU(‥)”, “5. Voice Service”, “4. Call Forward” and “ 1. Activate”. - Press “OK(‥)” to deactivate call forward. VI. Utility 1. Phone Book a. Adding Entries in Phonebook After selecting “MENU (‥)”, “6. Utility”, “1. Phone Book ” and “1. PB Add” to add a phone number; - Choose a type of the phone number among the image of Mobile, Home, Office and Etc by scrolling “◀ ▶”. - Scroll “▲/▼” to edit the name, location number, and phone number. - Assign the phone number as a Mobile, Home, Office, or Etc by scrolling “◀/▶”. ※ Note) A yellow frame outlining characters indicates that you can edit or type. For example, if “No Name” has a yellow frame outside of each character, you can enter the name. Or if [001] has a yellow frame outside of each number, you can change the location number. To add Group, E-mail Address, Memo, or Bell Type for CID incoming rings, scroll “◀/▶” before you press “OK (‥)”. - Group: Scroll “◀/▶” to choose Group and press “NEXT (…)” to scroll through Family, Friends, Business, and No Group. - E-mail: Press “EDIT (…)” to enter an e-mail address. Press “OK (‥)” to complete. - Memo: Press “EDIT (…)” to write a memo. Press “OK (‥)” to complete. For more information on writing memos, refer to ‘ENTERING LETTERS & NUMBERS’ on page ___.](https://usermanual.wiki/Compal-Electronics/VT820/User-Guide-579542-Page-23.png)