Compal Electronics XGT GMS Cellphone User Manual
Compal Electronics Inc GMS Cellphone
UserManual.wiki
>
Compal Electronics
>
XGT User Manual
Users Manual
Navigation menu
Upload a User Manual
Namespaces
Wiki Guide
HTML
PDF
Info
Views
User Manual
Discussion / Help
Navigation


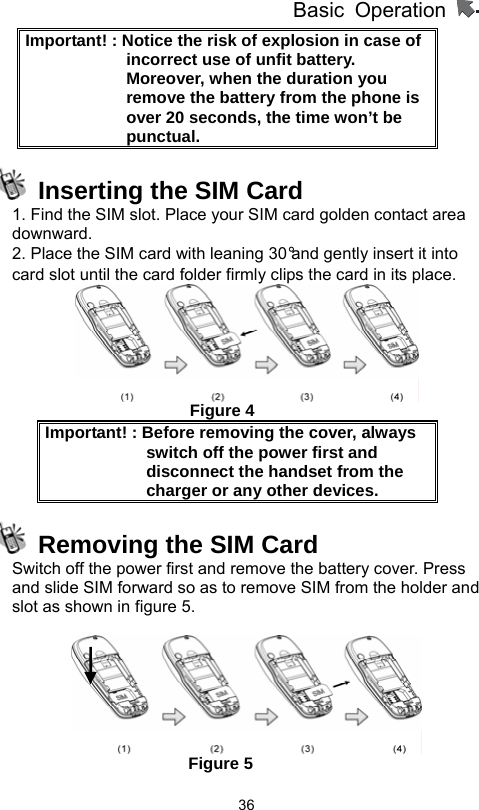
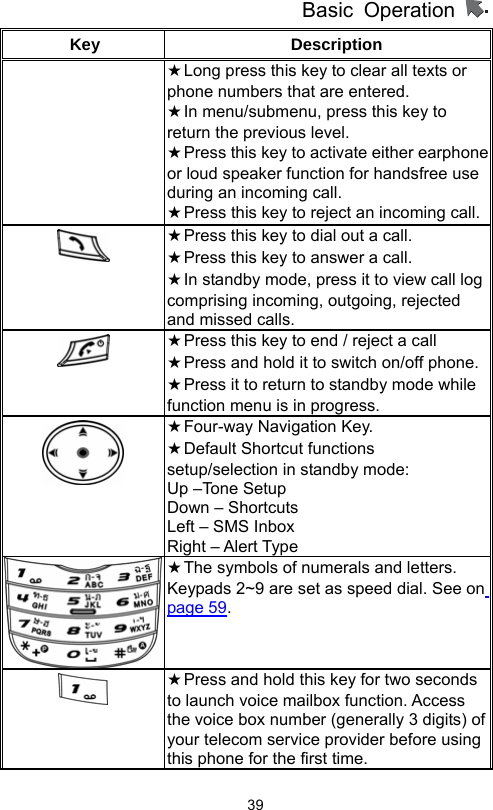
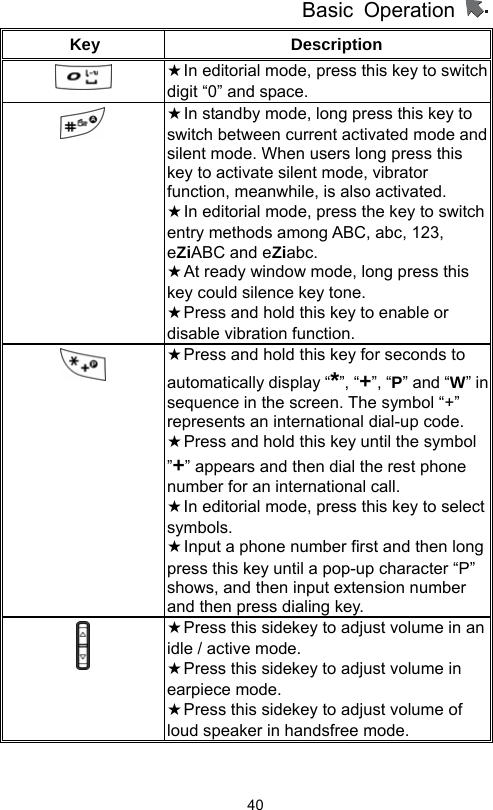
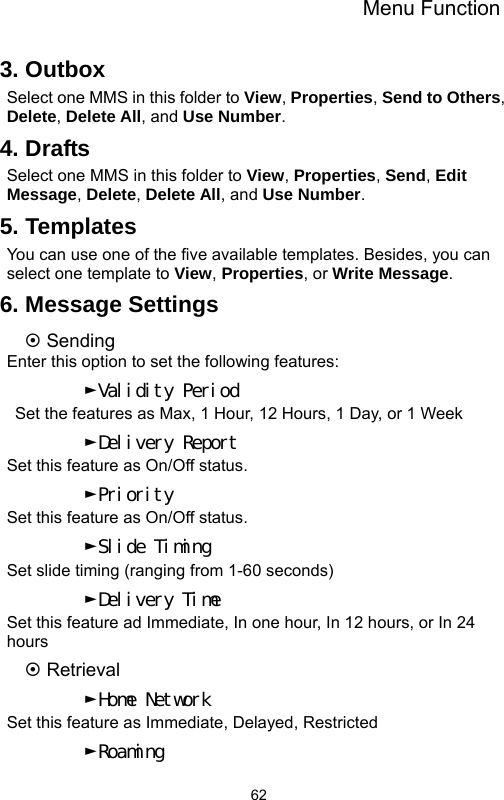
![Basic Operation 41 Alphanumeric Mapping The alphabetical and numerical keypad mapping relations are listed on the following table: Upper Case Mode Lower Case Mode 1 ﹒﹐﹣ ? ! ` @ :﹟$/ _ 1 ﹒﹐﹣ ? ! ` @ :﹟$/ _ 12 A B C 2 a b c 2 3 D E F 3 d e f 3 4 G H I 4 g h i 4 5 J K L 5 J k l 5 6 M N O 6 m n o 6 7 P Q R S 7 p q r s 7 8 T U V 8 t u v 8 9 W X Y Z 9 w x y z 9 0 space 0 space 0 * Select symbols as below:﹒﹐? ! ' " ﴾ ﴿ @ \/:_ ; + - * = % & <>£$¥ § € ¤ [ ] { }~ ﹟Select symbols as below:﹒﹐? ! ' " ﴾ ﴿ @ \/:_ ; + - * = % & <>£$¥ § € ¤ [ ] { }~ ﹟](https://usermanual.wiki/Compal-Electronics/XGT/User-Guide-556300-Page-41.png)