Companion Medical INPEN REUSABLE PEN INJECTOR User Manual
Companion Medical, Inc. REUSABLE PEN INJECTOR Users Manual
UserManual.wiki
>
Companion Medical
>
INPEN User Manual
Users Manual
Navigation menu
Upload a User Manual
Namespaces
Wiki Guide
HTML
PDF
Info
Views
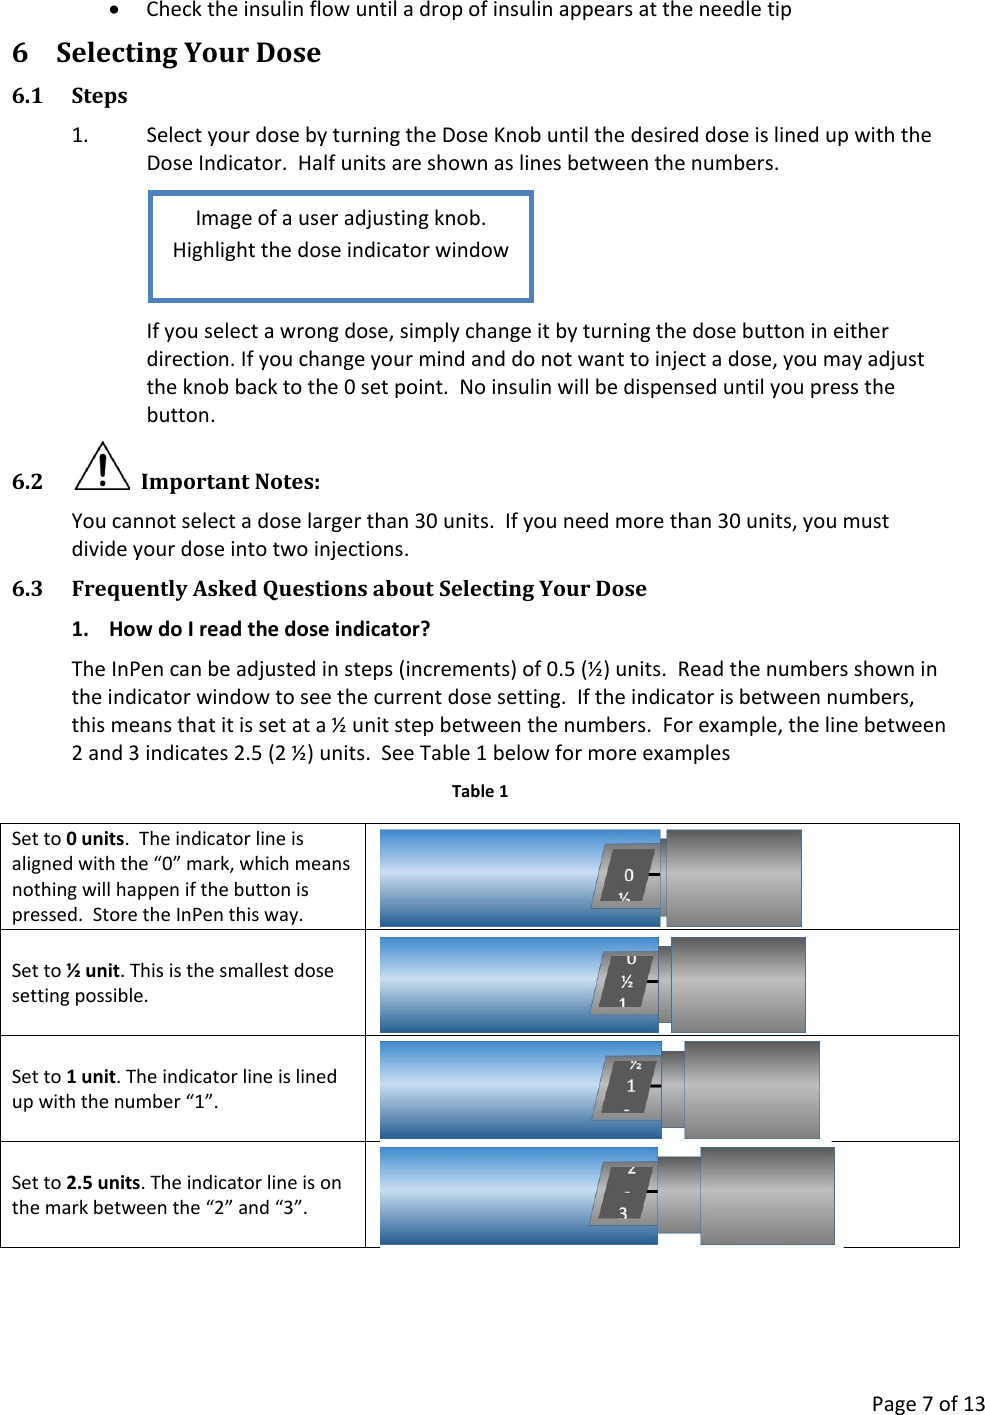
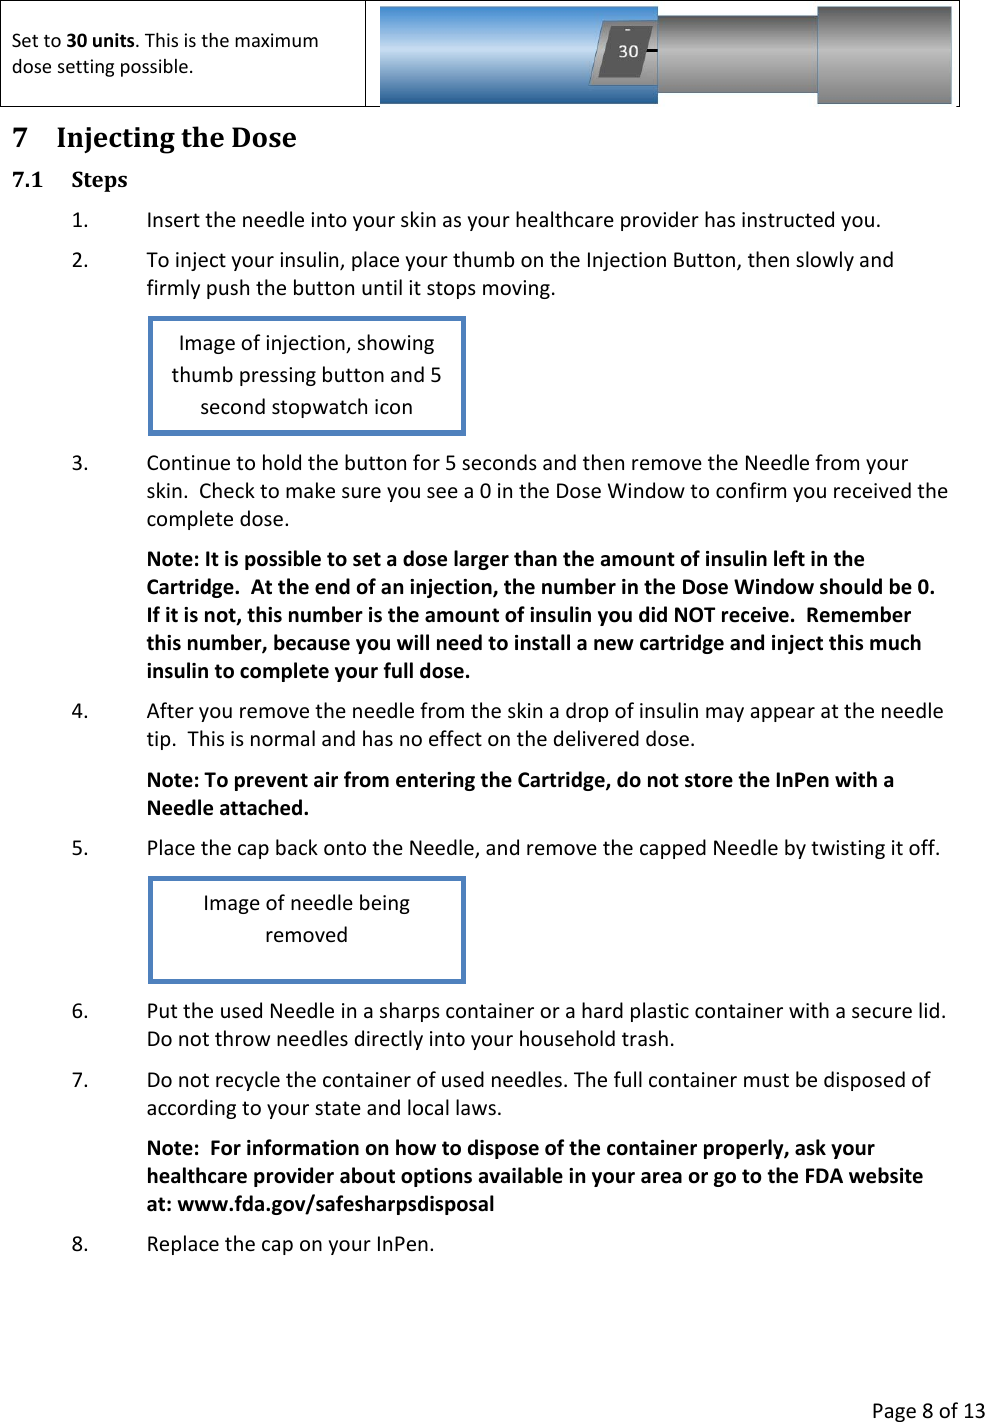
User Manual
Discussion / Help
Navigation

![Page 13 of 13 Radio Frequency Common Mode EN 61000-4-6 3 Vrms 150 kHz-80 MHz 3 Vrms 150 kHz-80 MHz See the following table, Recommended Separation Distance between RF Transmitters and the InPen. Radiated RF IEC 61000-4-3 28 V/m 80 MHz-2.5 GHz 3 V/m 80 MHz-2.5 GHz Note: UT is the mains voltage prior to application of the test level. Recommended Separation Distances Between RF Transmitters and the InPen The InPen is intended for use in the professional healthcare and home healthcare environments. The user of the device can help prevent electromagnetic interference by maintaining a minimum distance between the transmitter (portable and mobile RF equipment, fixed transmitters for cordless/cellular phones, AM/FM/TV broadcast) and any part of the system as recommended below. Maximum output power of transmitter [W] Minimum Separation between transmitter and system [m] 150 kHz-80 MHz 𝑑= 3.528 √𝑃 80 MHz-800 MHz 𝑑= 3.528 √𝑃 800 MHz-2.5 GHz 𝑑= 728 √𝑃 0.01 0.0125 0.0125 0.025 0.1 0.0395 0.0395 0.079 1 0.125 0.125 0.25 10 0.395 0.395 0.79 100 1.25 1.25 2.5 1000 3.95 3.95 7.9 10000 12.5 12.5 25 Guidance: Electromagnetic propagation is affected by absorption and reflection from structures, objects, and people. As such, these guidelines may not apply in all situations. If abnormal performance of the system is observed, additional measures may be necessary, such as re-orienting or relocating the system. Declaration of Conformity Companion Medical declares that this product is in conformity with the essential requirements of Directive 1995/5/EC on Radio and Telecommunications Terminal Equipment and Council Directive 93/42/EEC of 14 June 1993 concerning medical devices (M5). For information contact: Companion Medical, Inc. 13014 Texana St. San Diego, CA 92129 USA www.CompanionMedical.com © 2015 Companion Medical, Inc. LBL-00020-AA](https://usermanual.wiki/Companion-Medical/INPEN/User-Guide-2940900-Page-13.png)