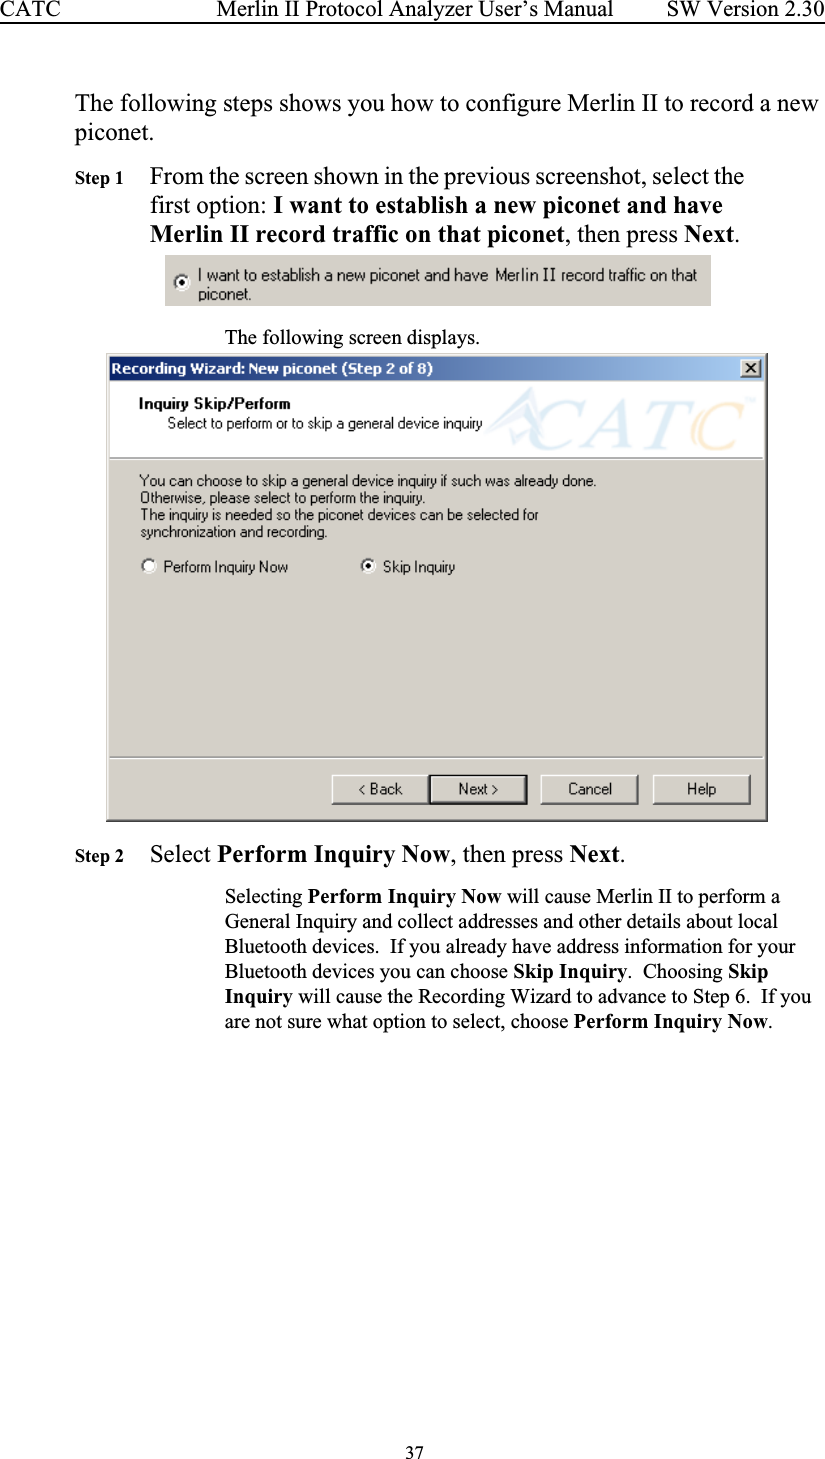
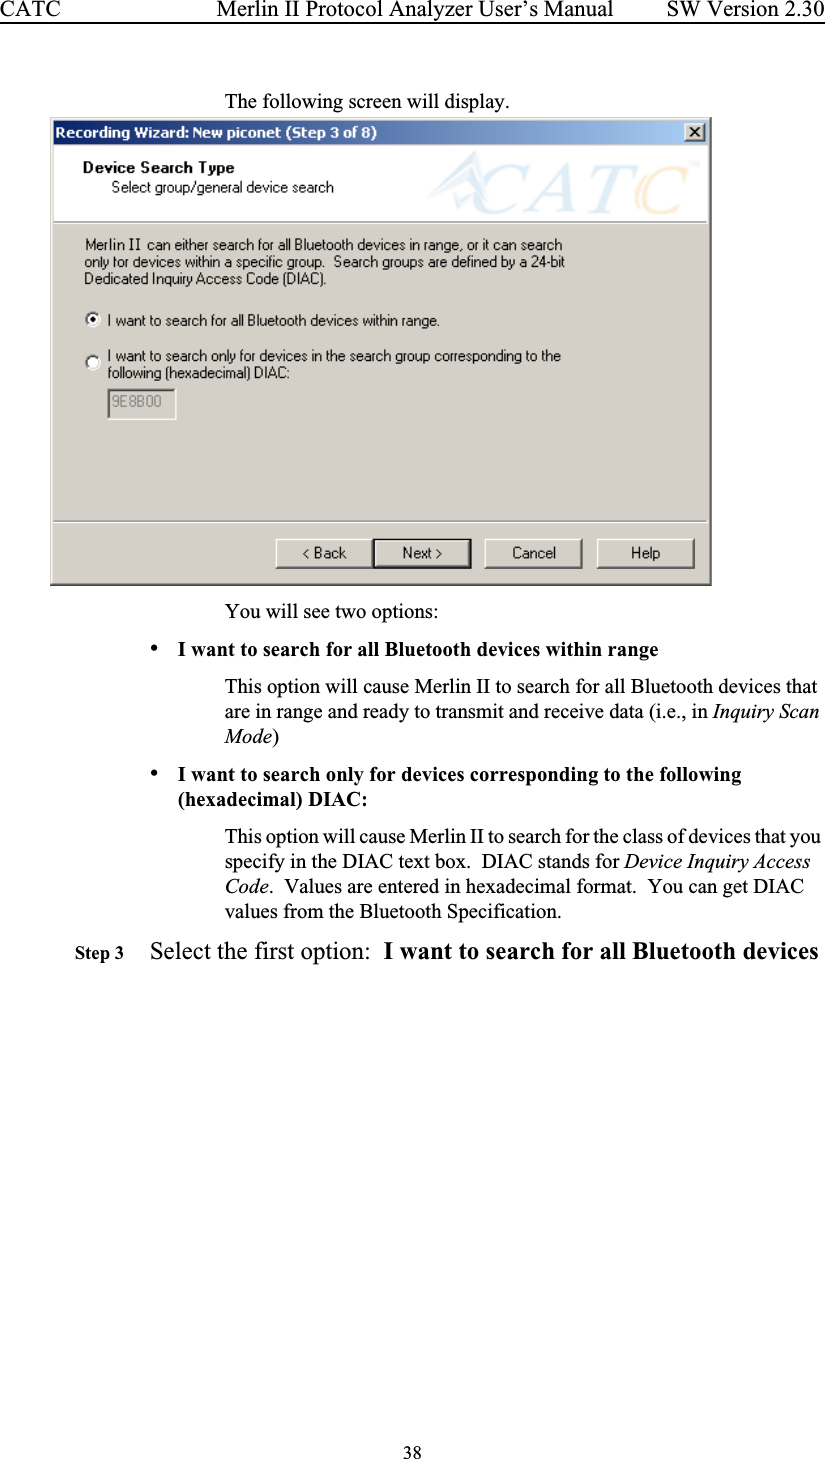
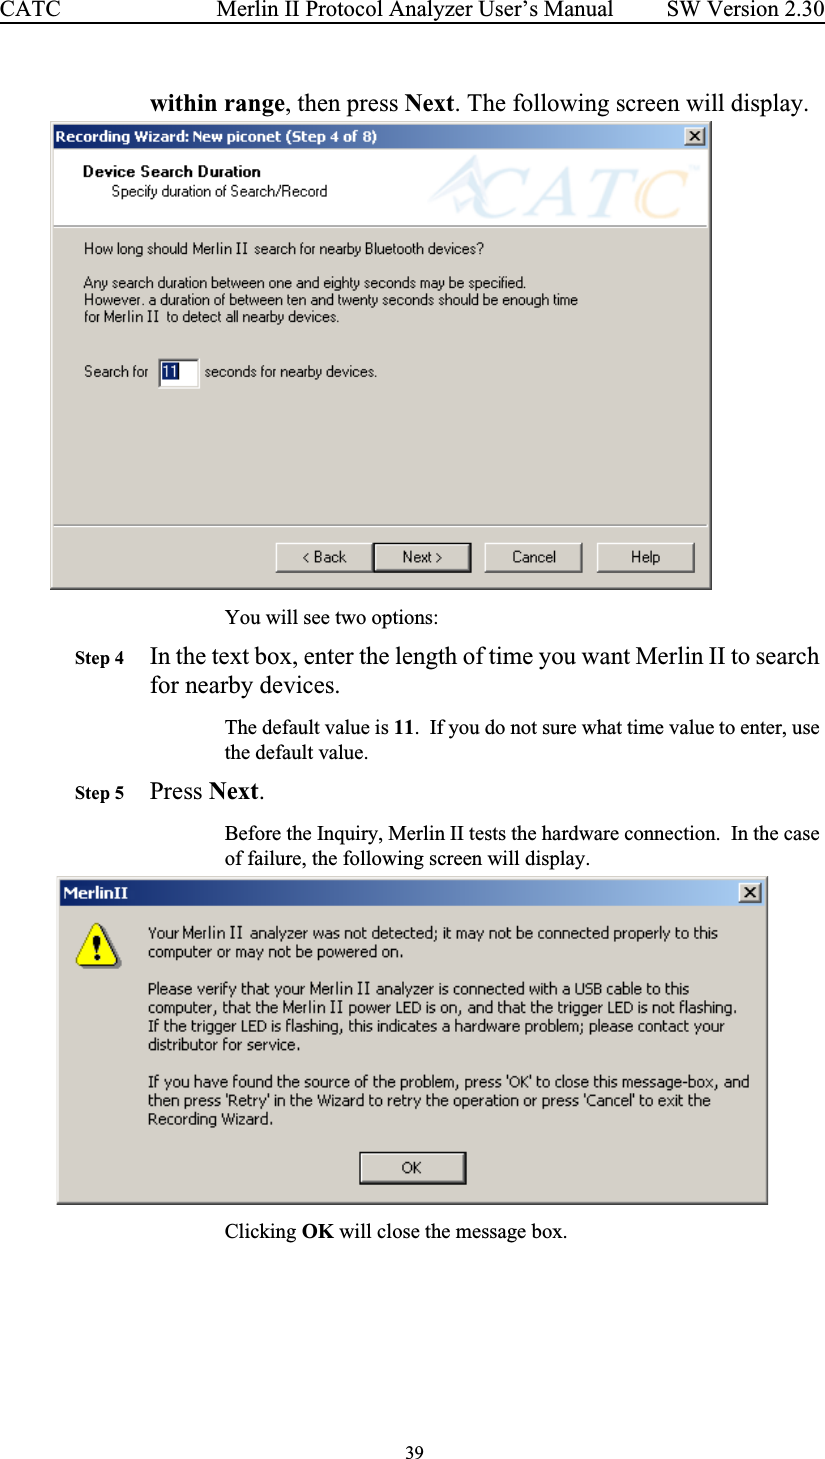
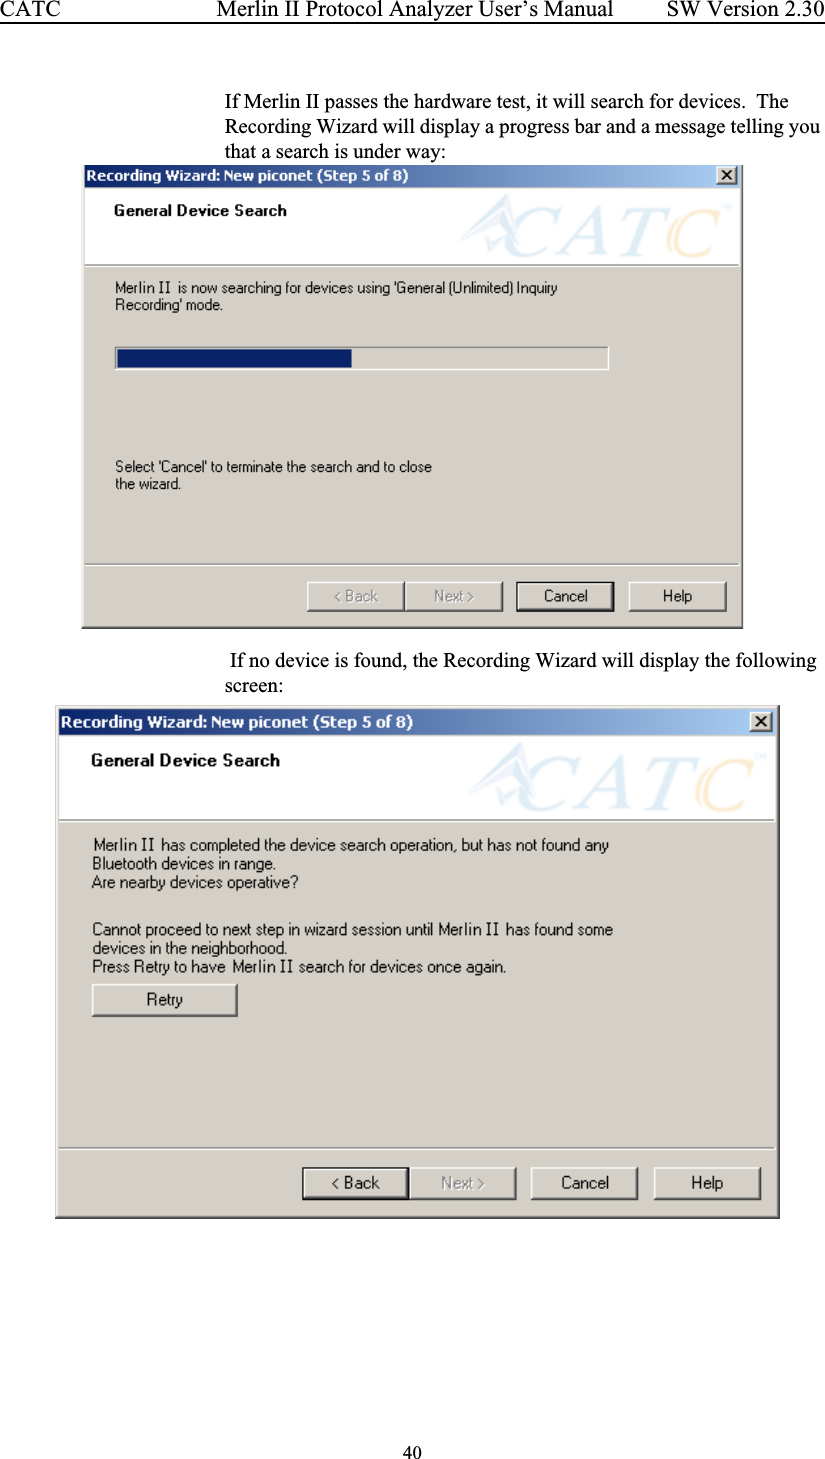
Computer Access Technology BT006UAA-X Bluetooth Protocol Analyzer User Manual 01 Merlinii
Computer Access Technology Corporation Bluetooth Protocol Analyzer 01 Merlinii
UserManual.wiki
>
Computer Access Technology
>
BT006UAA-X User Manual
>
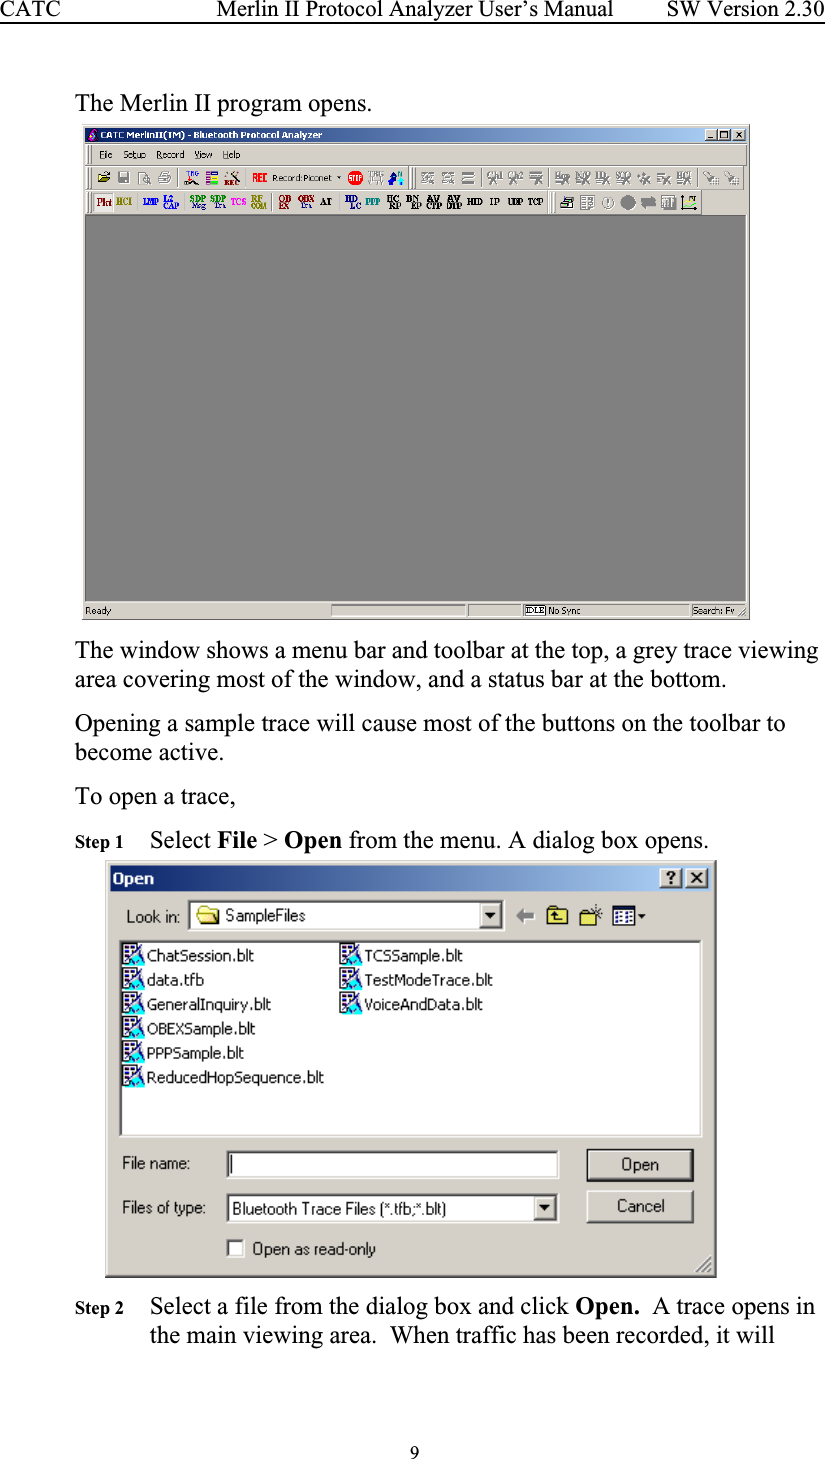
User Manual 1 of 2
Contents
1.
User Manual 1 of 2
2.
User Manual 2 of 2
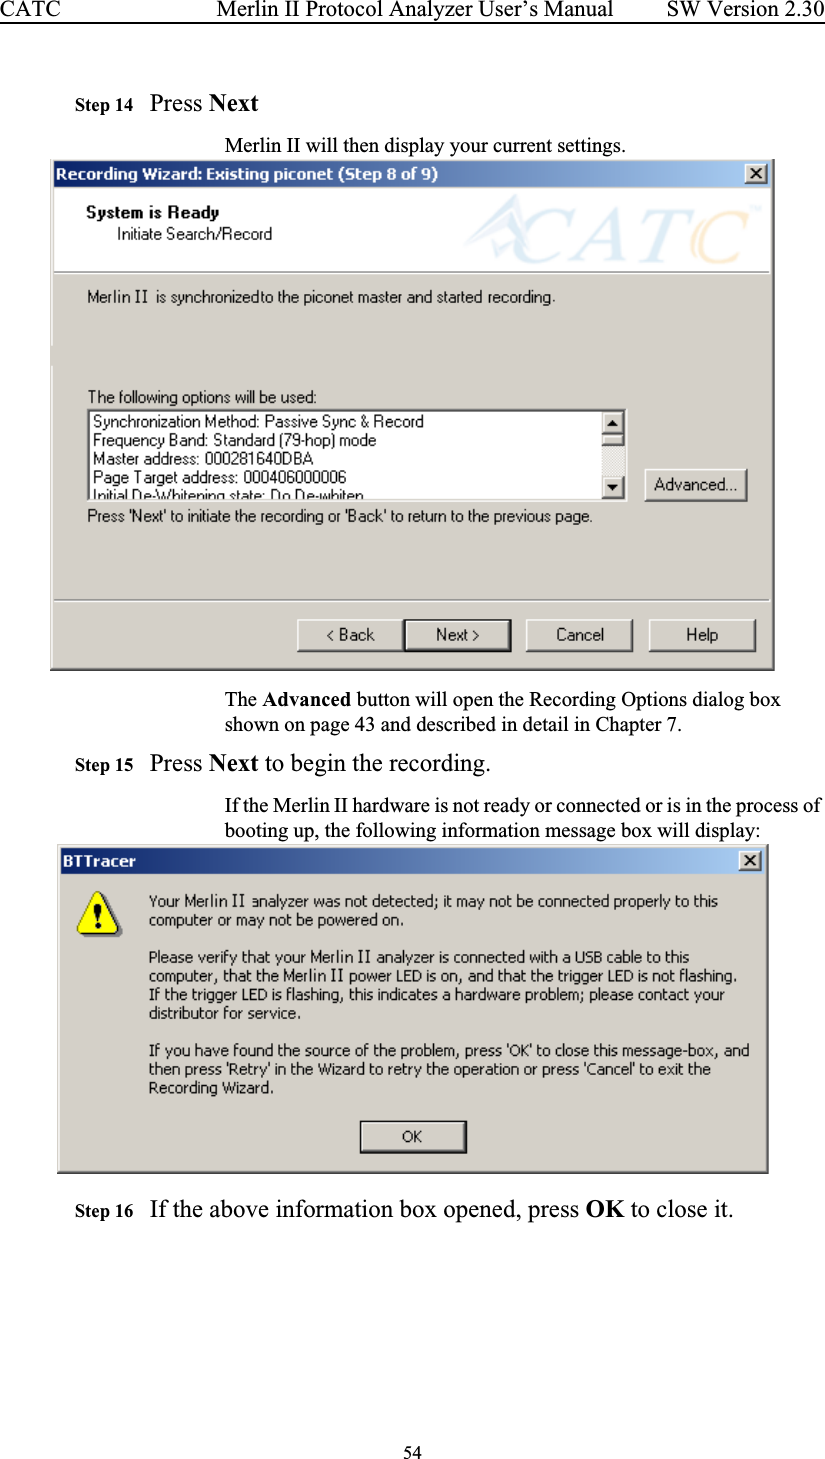
User Manual 1 of 2
Navigation menu
Upload a User Manual
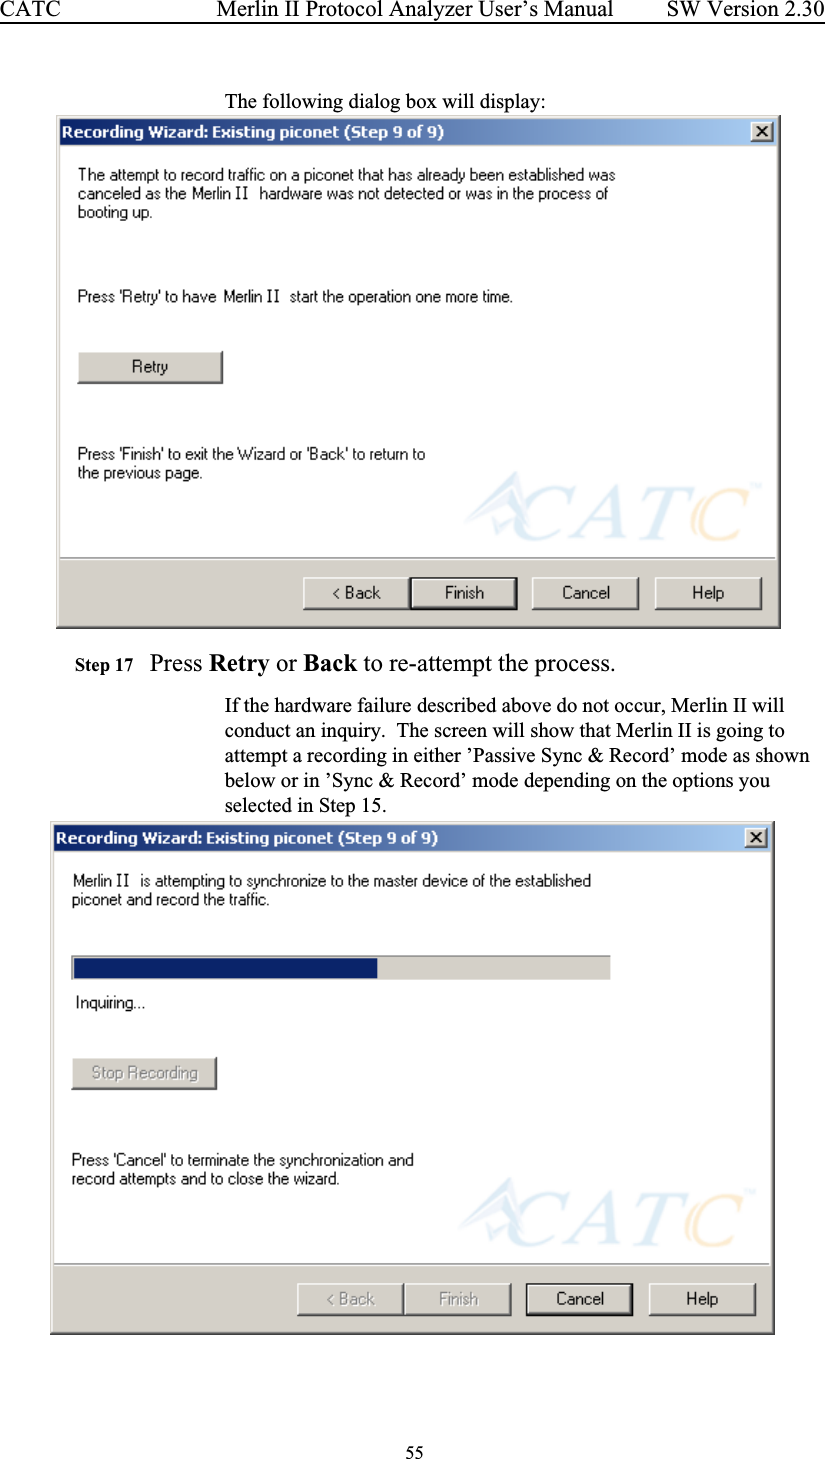
Namespaces
Wiki Guide
HTML
PDF
Info
Views
User Manual
Discussion / Help
Navigation


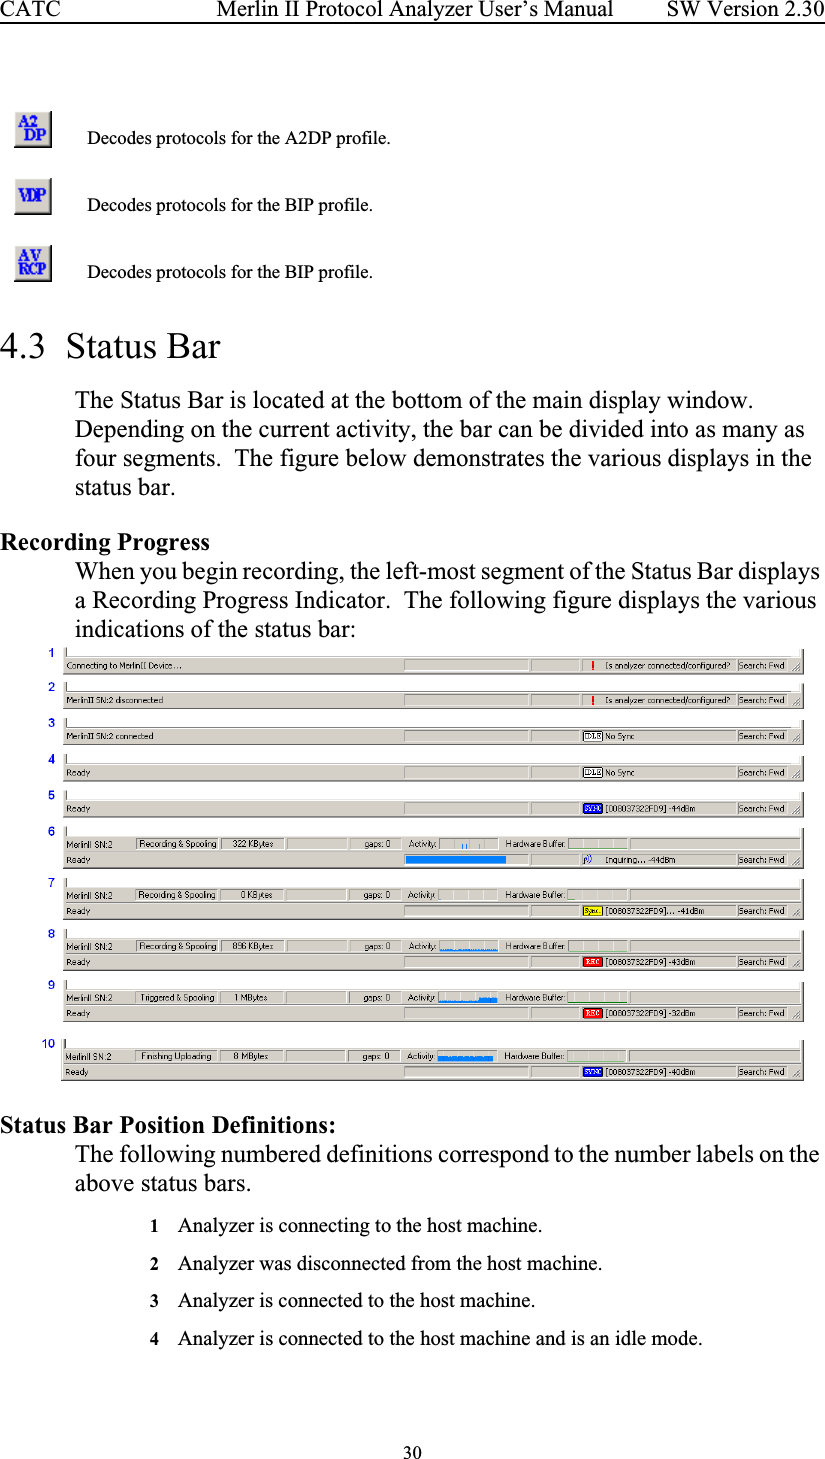

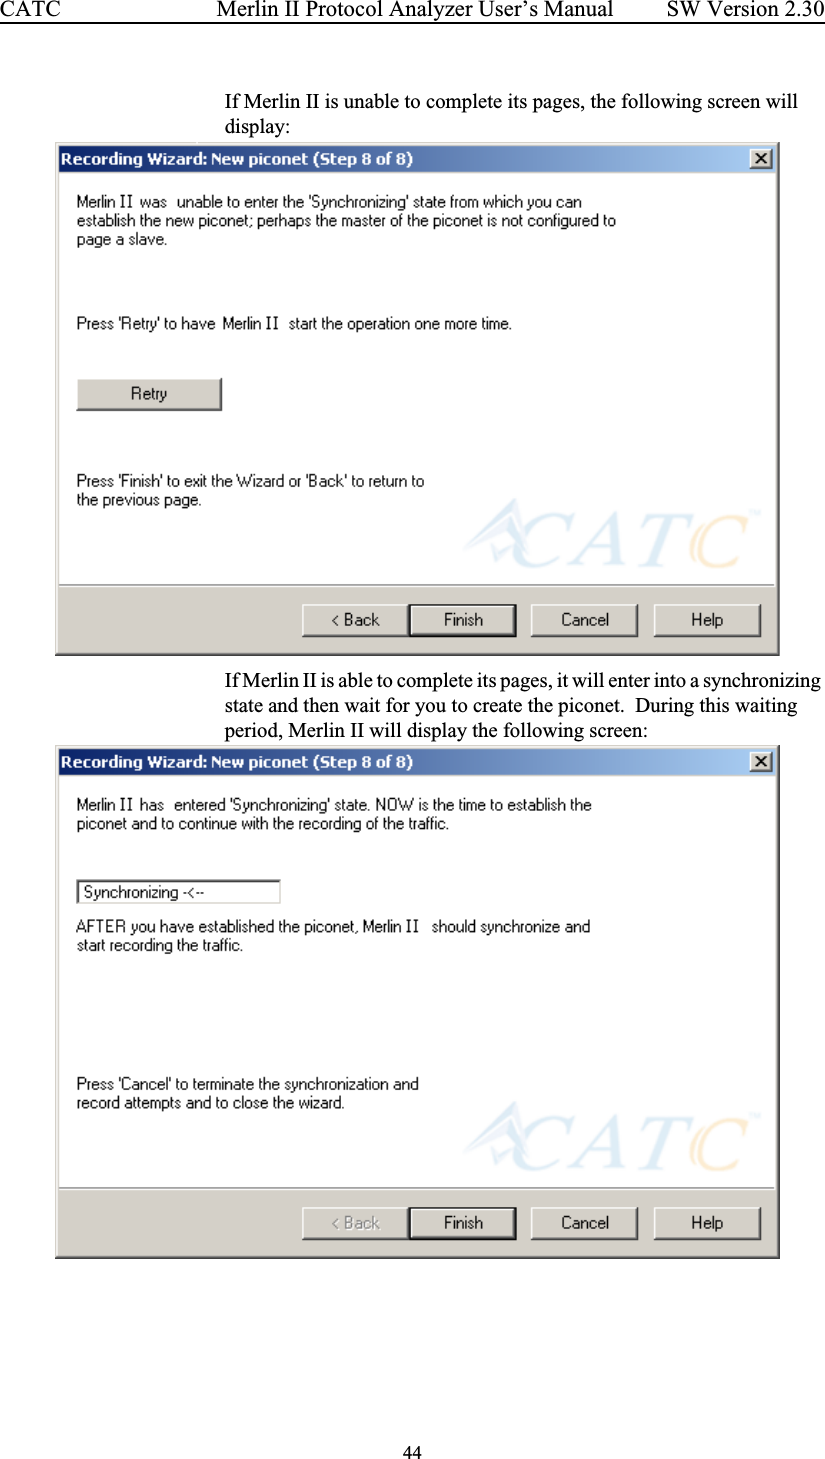
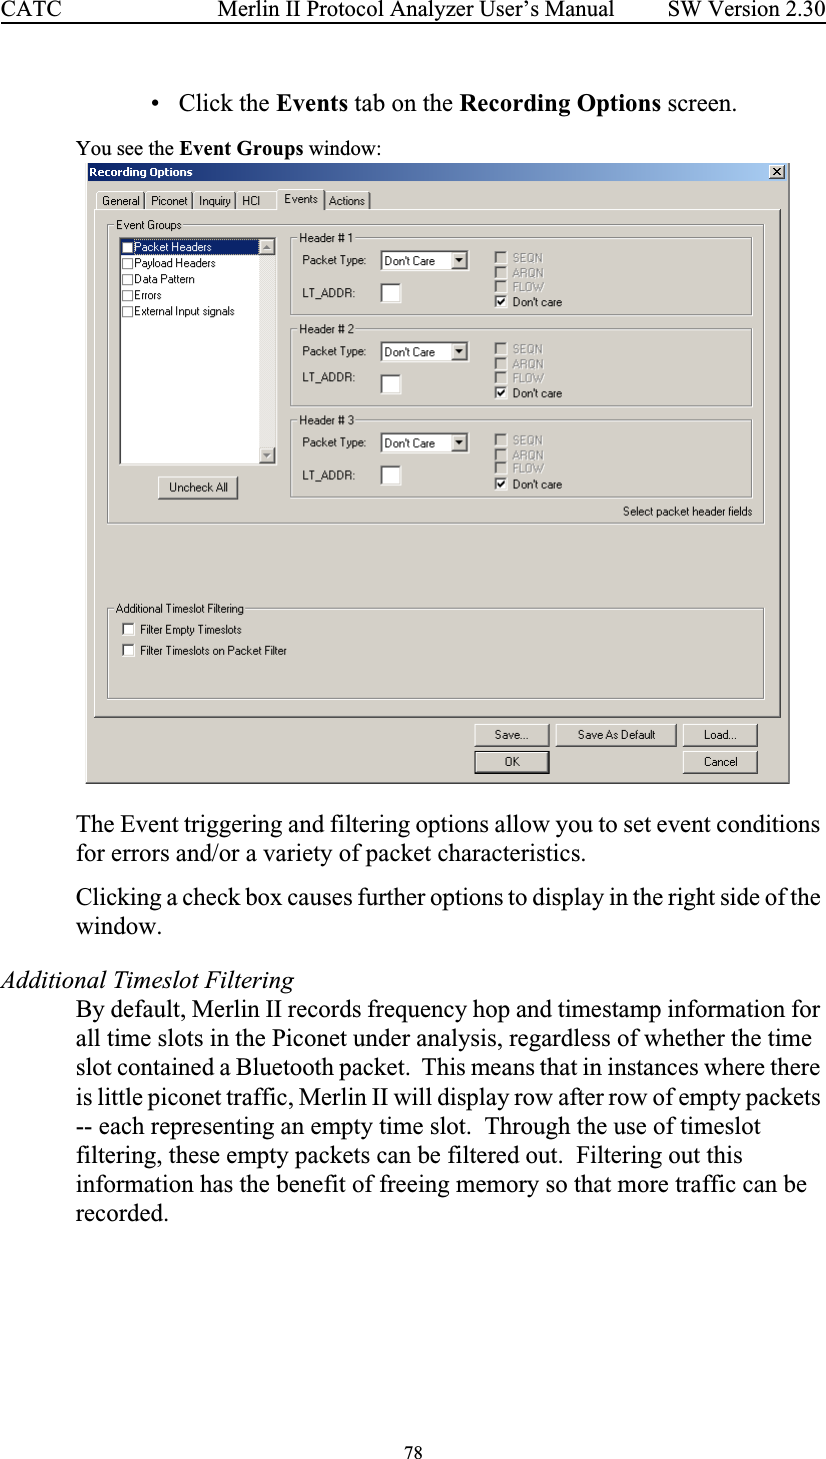
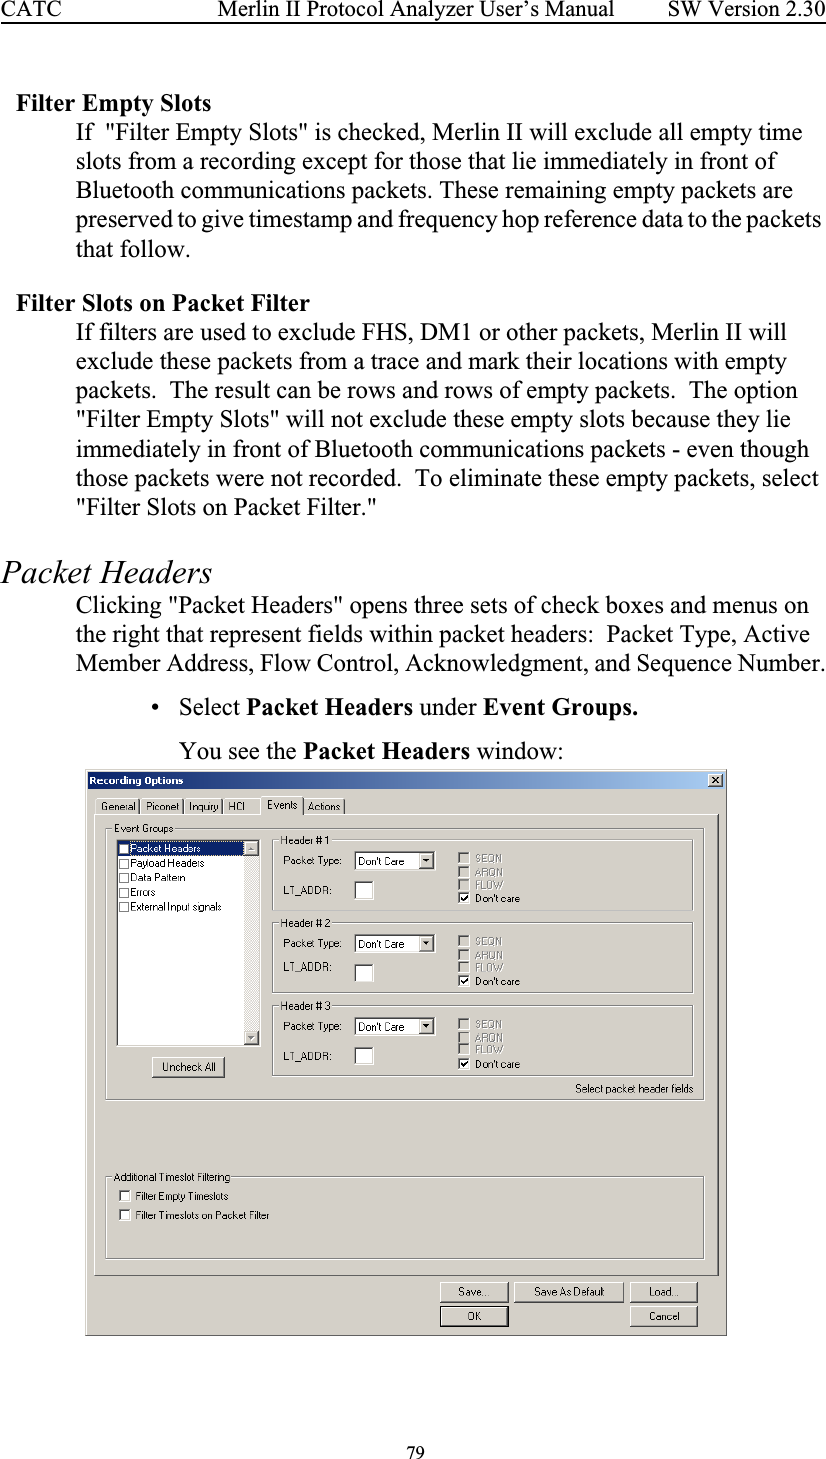
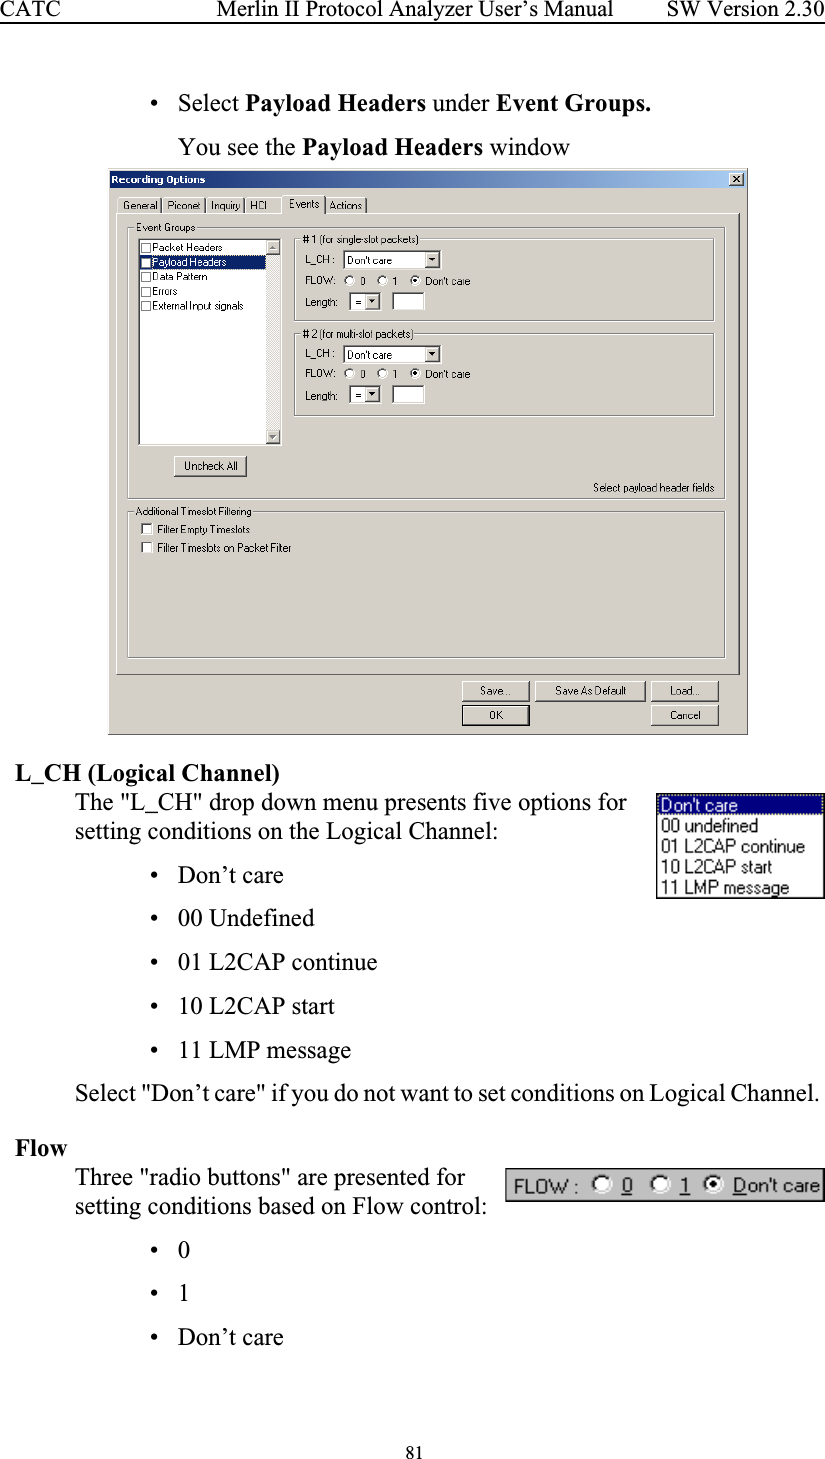
![32 Merlin II Protocol Analyzer User’s ManualCATC SW Version 2.30—Recording & Spooling—UploadingAfter recording stops, —The flashing message changes to Uploading data–x% done (x% indicates the percentage completion of the data uploading process). —The traffic data is copied to disk (overwriting any previous version of this file) using the default file name data.tfb or a new name specified in the Recording options.To abort the upload process,•Press Esc on your keyboardORAgain click in the Tool Bar. You are prompted to choose whether to keep the partially uploaded data or to throw it away.When the data is saved, the Recorded Data file appears in the main display window and the Recording Status window is cleared. •If the recording resulted from a Trigger Event, the first packet following the Trigger (or the packet that caused the Trigger) is initially positioned second from the top of the display.•If the recording did not result from a Trigger Event, the display begins with the first packet in the traffic file.Analyzer StatusThe third segment in the status bar displays analyzer status. The status will display one of the following:No Sync - the system is not synced to any piconetInquiring... - The system is performing an Bluetooth InquiryInquiring (infinite) ...- The timeout is set to 0.Sync [XXX]... - The system is attempting to synchronize to a piconet where the device with BD_Address XXX is the master.Sync [XXX] - The system is synchronized to a piconet where the device with BD_Address XXX is the master.Rec [XXX] - System is recording the Bluetooth traffic of the piconet where the device with BD_Address XXX is the master.](https://usermanual.wiki/Computer-Access-Technology/BT006UAA-X.User-Manual-1-of-2/User-Guide-386208-Page-40.png)