Condeco T201509 Desk V2 Screen User Manual Title Here
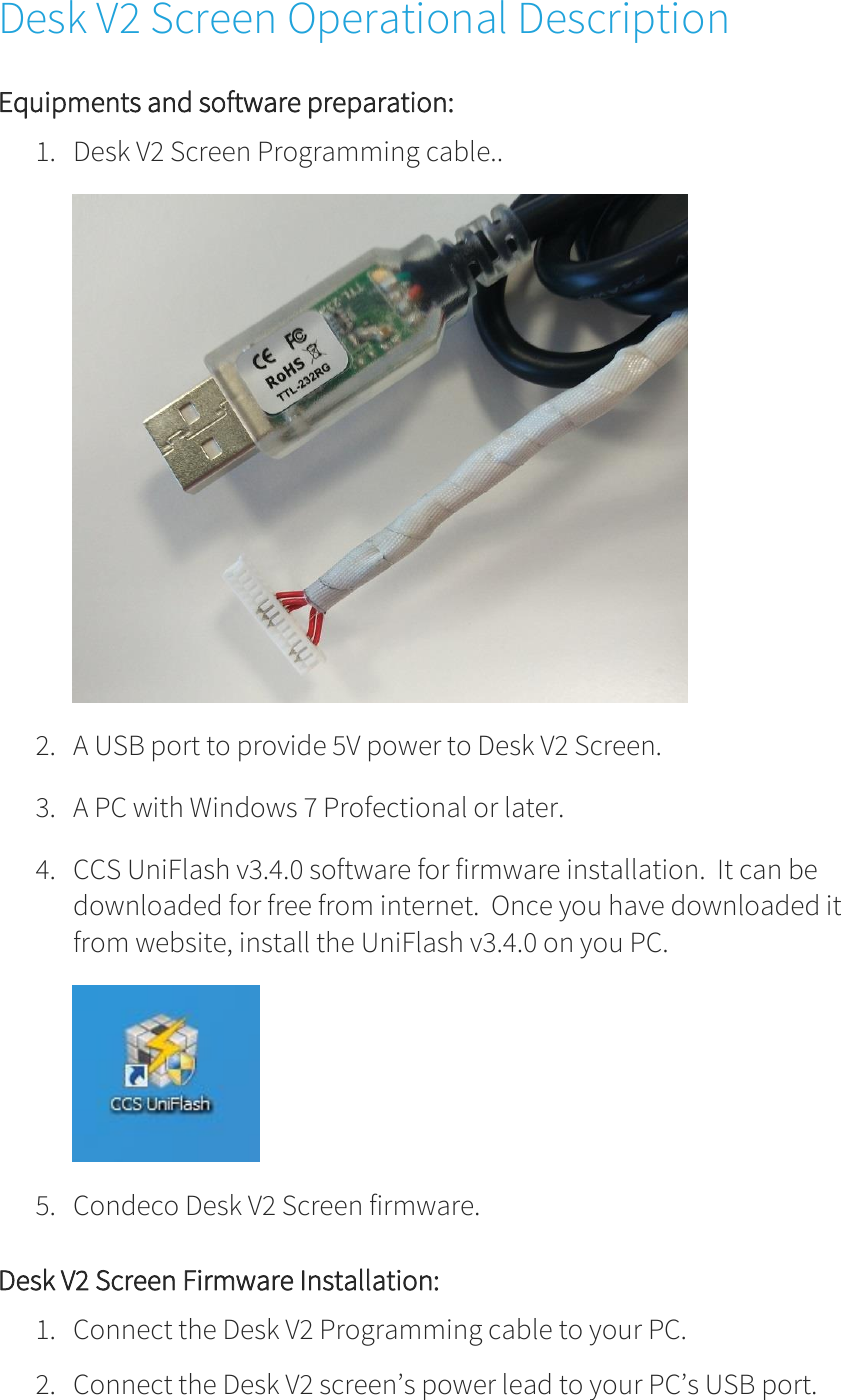
Condeco Ltd Desk V2 Screen Title Here
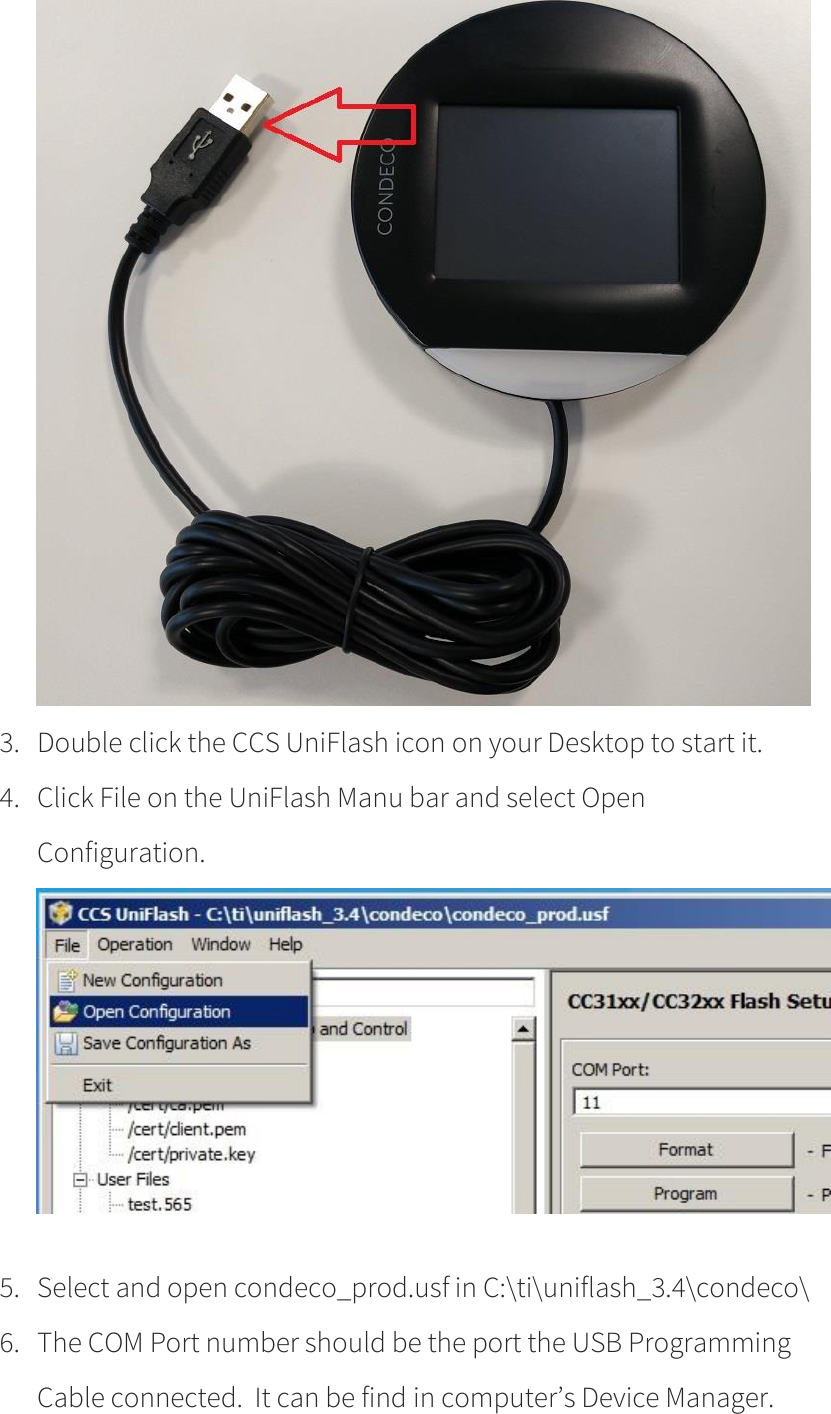
UserManual.wiki
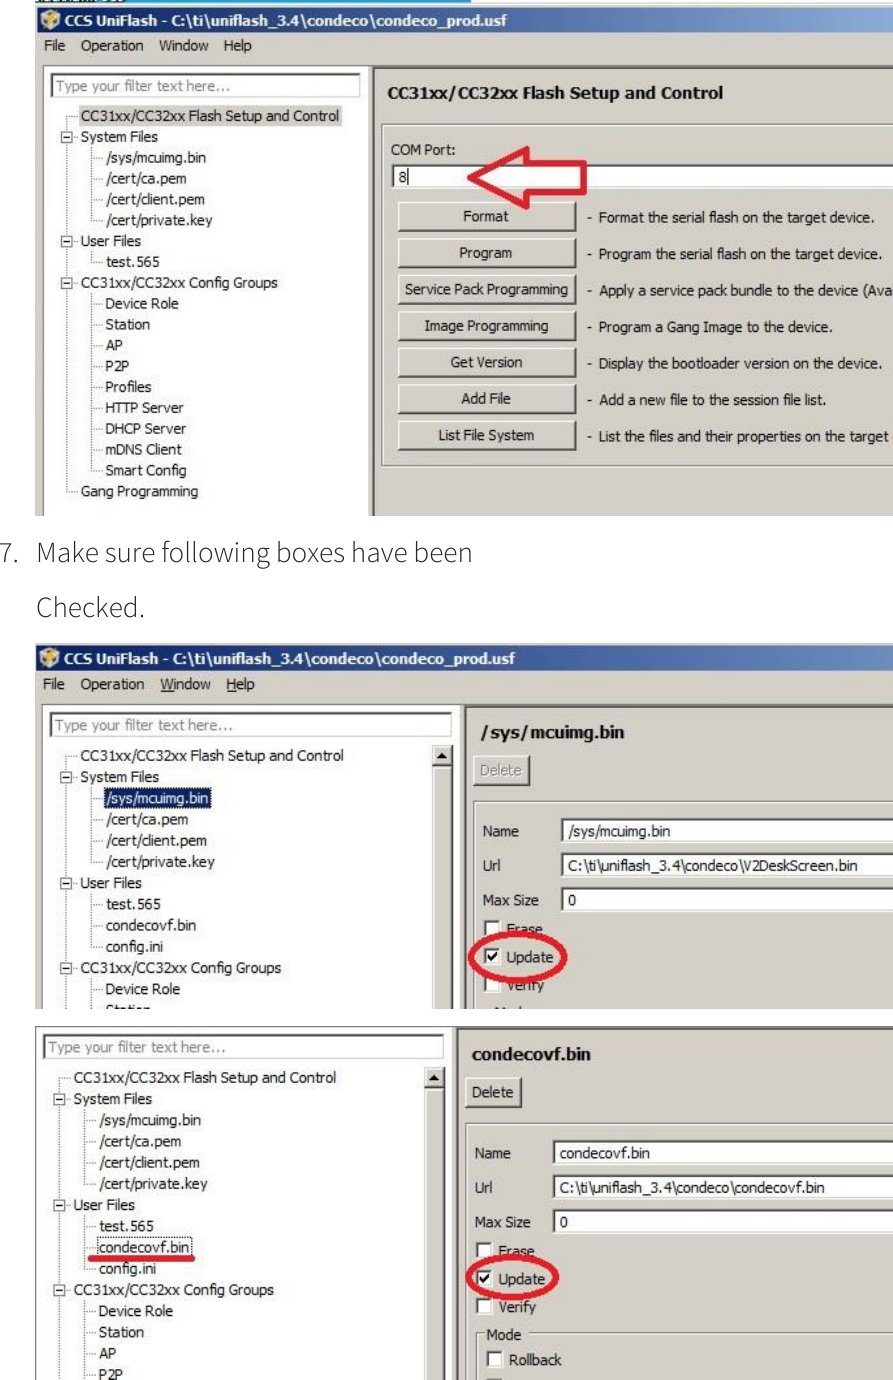
>
Condeco
>
T201509 User Manual
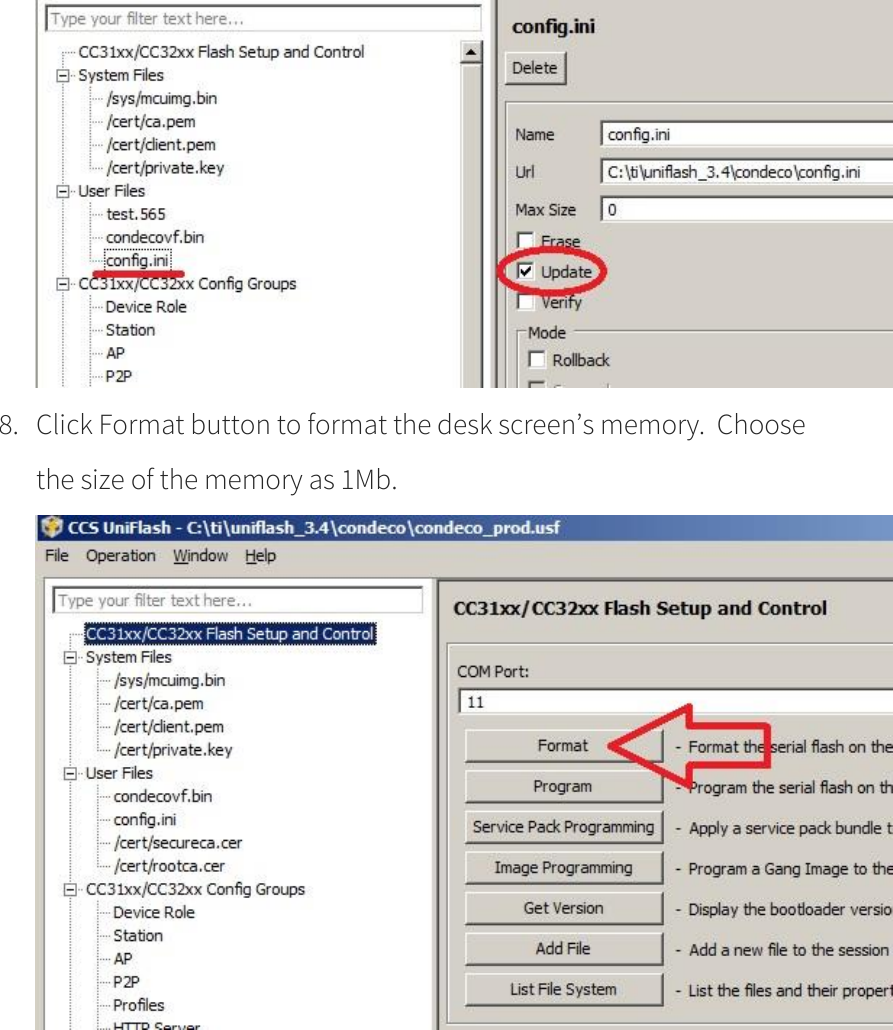
User manual
Navigation menu
Upload a User Manual
Namespaces
Wiki Guide
HTML
PDF
Info
Views
User Manual
Discussion / Help
Navigation
![Desk V2 Screen Design Spec 1. Display: 2.8” LCD 320 x 240 (QVGA) , 4 Wire SPI [KD028FM-1-TP] 2. Touch sensor: 4 wire Resistive touch 3. LED Light bar to display status 4. Processor: CC3200 from Texas Instruments with integrated ARM Cortex M4 processor 5. SRAM 256KB 6. Permanent storage: External Flash 16MB 7. Power Supply Voltages: 5V provide by USB cable. 8. Power Consumption: 0.3A, 1.5W. 9. WiFi 802.11 b/g/n single band, 2.4GHz [CC3200] 10. RFID HID Prox: 125KHz Mifare, iClass and Desfire: 13.56MHz 11. Operational temperature +15°C to +35°C 12. Storage temperature 0°C to +70°C](https://usermanual.wiki/Condeco/T201509/User-Guide-3421279-Page-3.png)