Condeco TIX6-GW Sense Gateway User Manual Condeco Sense Proposal for Company
Condeco Ltd Sense Gateway Condeco Sense Proposal for Company
Condeco >
User manual

Condeco Sense Gateway
User Manual and Configuration

Page 2 of 11
Condeco Sense
Contents
Overview............................................................................................................................. 3
Accessing the Gateway UI ................................................................................................... 4
Network Configuration ....................................................................................................... 5
Condeco Network Settings ............................................................................................. 5
Provisioning Certificates for the VPN tunnel ................................................................... 6
Updating time and date .................................................................................................. 6
Condeco System Settings ................................................................................................... 8
Sense Network Settings ................................................................................................. 8
Condeco Sense Discovery ................................................................................................... 9
Condeco Sense Management ............................................................................................. 9
Condeco Status ................................................................................................................. 10
De-installation ................................................................................................................... 11

Page 3 of 11
Condeco Sense
Overview
This guide will run through the basic configuration steps needed to implement a gateway
for a sense installation. This focuses on setting a network connection using 3G, although
you will have the option to set up a connection via LAN and Wifi.
To set a 3G connection, you will be required to insert a sim card onto the PCB. You will be
required to remove the gateway casing. Make sure the gateway is not powered when
exposing the PCB to insert the sim card.
Page 4 of 11
Condeco Sense
Accessing the Gateway UI
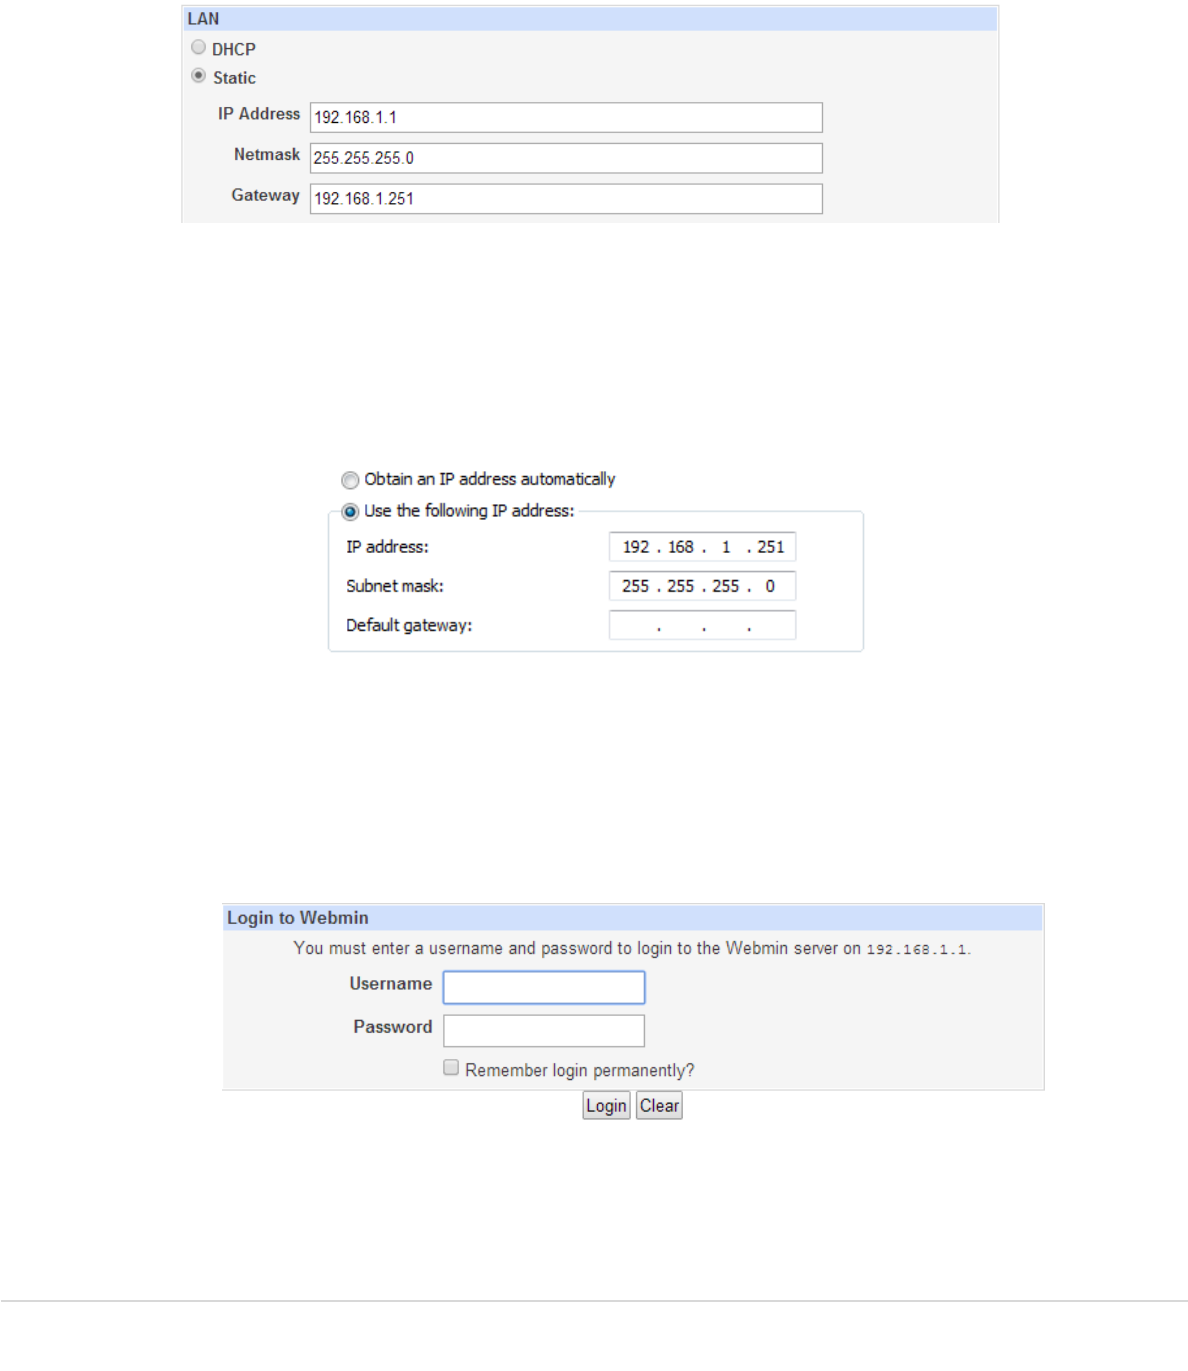
The gateways are configured with this static address.
To access to UI run through the follow.
1) Power the gateway on and connect to a laptop/PC using a network cable.
2) On the Local Area Connection, open the properties for the Internet Protocol
Version 4 (TCP/IPv4)
3) Set the Static address as
4) Save and close.
5) Open IE or Crome and browse to http://192.168.1.1:10000
6) Once you browse to the link above, you will reach the login to Webmin page. Use
these credentials and select Login.
Username: condeco
Password: c0nd3c0gw
Page 5 of 11
Condeco Sense
Network Configuration
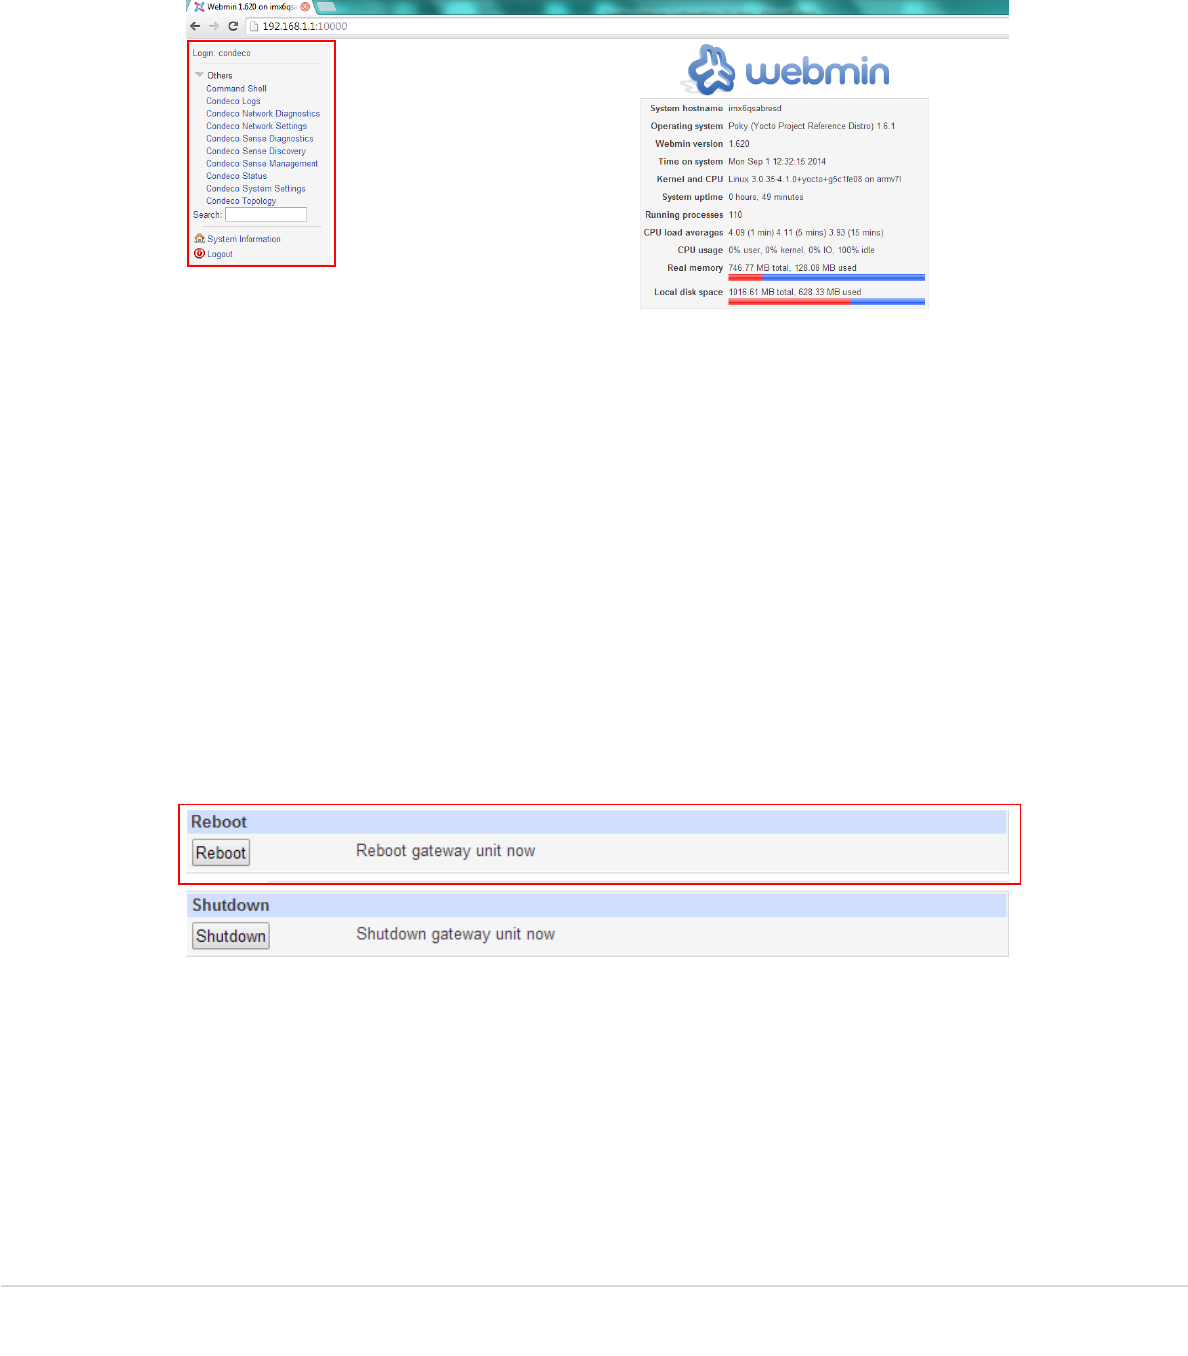
Once logged in to the UI expand Others on the left to open up the available options as
highlighted below. Navigate to Condeco Network Settings
Condeco Network Settings
Under network settings, the option to set a connection via LAN, Wifi and 3G are available.
The purpose of this guide is to set up a 3G connection. Once the 3G sim card has been
inserted, the options will need to be configured in the following order for them to update
successfully.
1) Under LAN set your DNS1 entry to 8.8.8.8 and then Update.
2) At the end of the page, the default routing preference will be set to unknown.
Change this order to: GSM-WIRED-WIFI and then Update.
3) Go online and find the APN details for the 3G network provider you are using.
Change this to the correct details and select Update.
4) After you update each section, you will be promt to Restart to use the new
settings. Navigate to Condeco System Settings on the left.
5) Navigate to the end of the page. You will have Reboot and Shutdown available
here. Select Reboot for the changes to take affect.
6) After the reboot, navigate back to Condeco Network Settings and ensure the
settings saved successfully.
Page 6 of 11
Condeco Sense
Provisioning Certificates for the VPN tunnel
After the reboot, navigate back to Condeco Network Settings and ensure the changes
saved successfully.
Next, the VPN connection needs to be established. Navigate to the end of the page to find
VPN Settings. By default, VPN settings should be enabled.
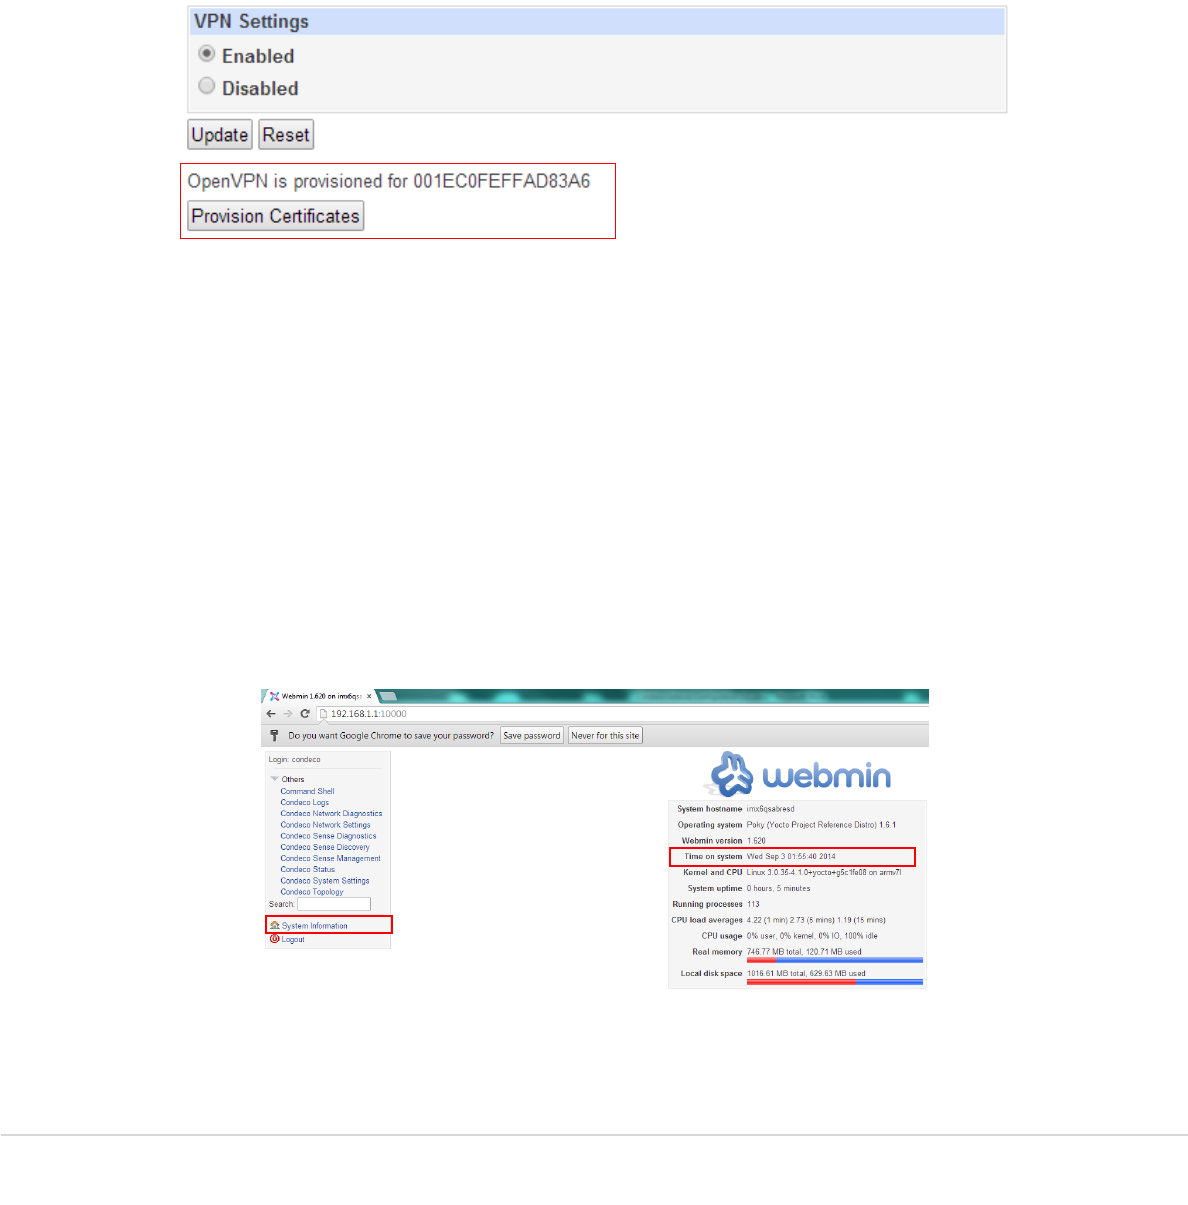
As highlight below, OpenVPN should be provisioned for this gateway. Select Provision
Certificates and wait for confirmation to reboot to use the new configuration. Navigate to
System Settings to reboot.
Note: If this does not appear on the gateway being configured, there could be two
reasons why.
1) Check you have a valid network connection. If you have run through the steps
above and have set your 3G connection up successfully, proceed to step 2.
2) The Condeco Support team have not provisioned a connection for this gateway.
Send an email with the gateway EUI64 number to
sense.support@condecosoftware.com
Updating time and date
NOTE: Once you have successful set your network settings, navigate back to the
System Information page. Ensure that the Time on system has updated. The time will
be in UTC(0) for all locations. If the time has not automatically updated, proceed and
run through steps 1 – 4.

Page 7 of 11
Condeco Sense
1) Navigate to Condeco Network Settings
2) Locate the Time Settings section and Update.
3) Once successfully updated, navigate to Condeco System Settings and locate
Reboot.
4) Reboot the gateway.
Page 8 of 11
Condeco Sense
Condeco System Settings
Under the system settings, you will be able to:
Change the gateway password
Configure the mesh settings for sense
Reset the sense database
Create, Restore, Download and Upload a database backup
Reboot and Shutdown
As the Condeco Support team will be managing the gateway, it is recommended that the
password is left as default.
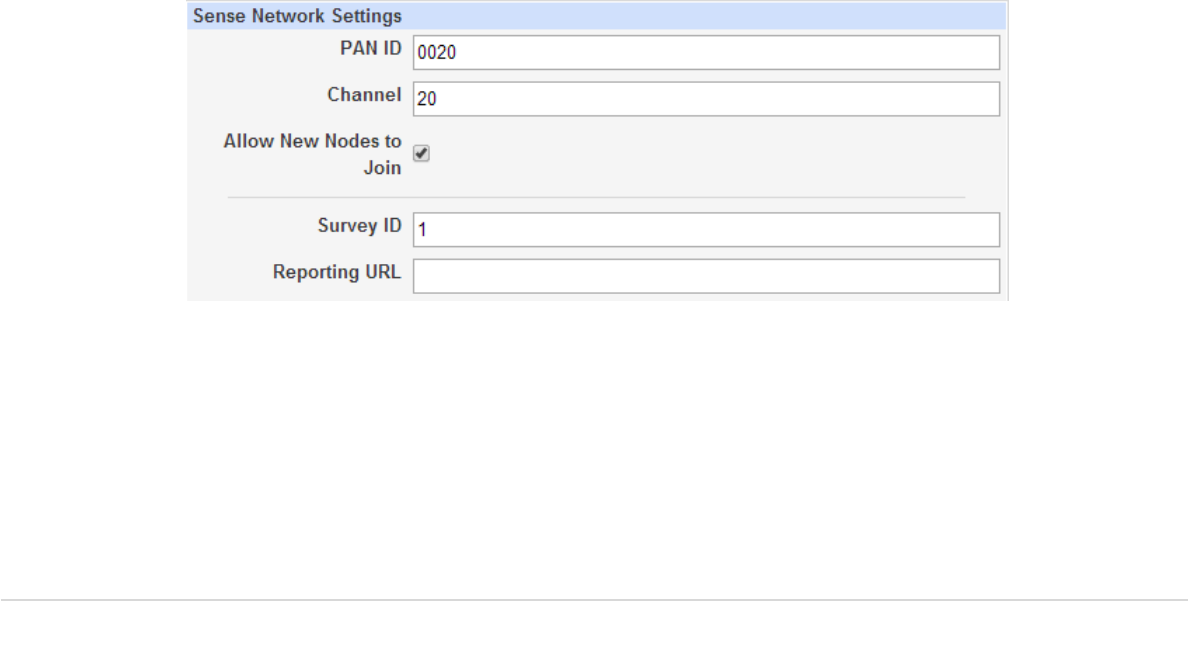
Sense Network Settings
Update your Sense Channel and PAN ID to allow the sensors to join. The Channel number
of the sensor will be on the sensors. The PAN ID will be the hex value of the channel.
Update your Survey ID supplied. If an ID was not supplied, please contact the support
team, stating the client that the gateway is for. Sense.support@condecosoftware.com
The reporting URL is:
http://data.sense.condeco.co.uk/services/sensemanager.asmx/HandleBaseUnitInfo
NOTE: Do not configure the URL until you are ready to send data.
Once all the sensors have joined this gateway, untick Allow New Nodes to Join. This will
prevent the gateway from picking up any unnecessary sensors.
Page 9 of 11
Condeco Sense
Condeco Sense Discovery
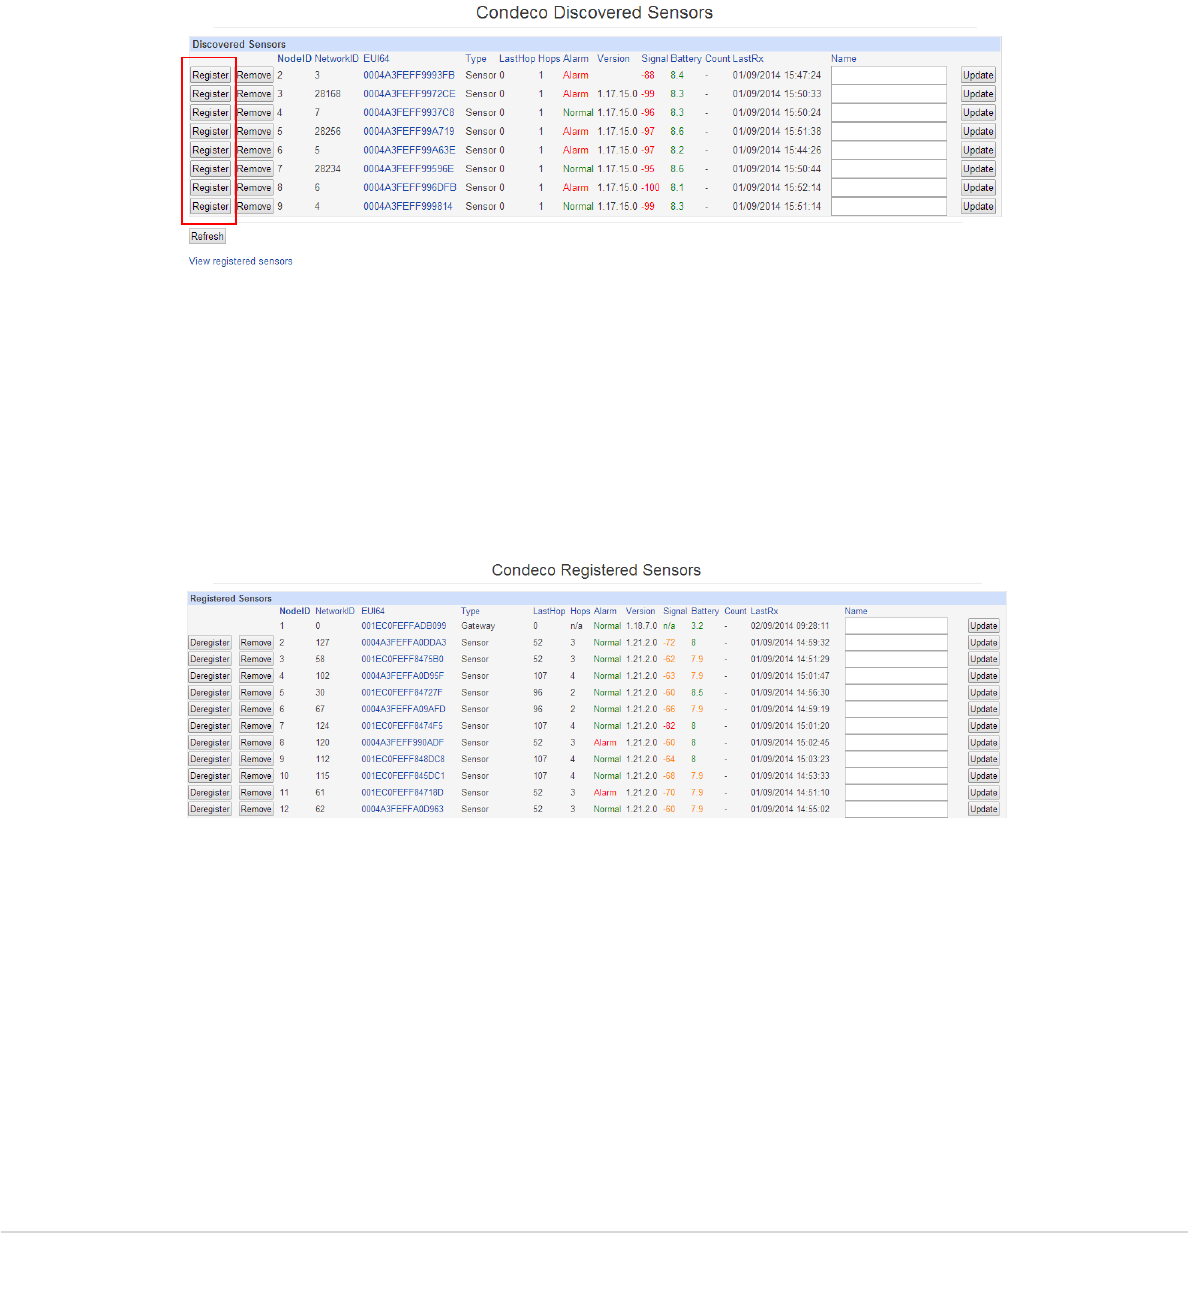
The sense discovery will display all the sensors that are on the channel that was configured
previously. The sensors need to be registered to the gateway before they start collecting
and sending data. Select Register to join the sensors to the gateway.
Condeco Sense Management
The Condeco sense management will show all your sensors currently connected to the
gateway. Deregister/remove any sensors that should not be connected to this gateway.
Once the URL has been configured, the sensors listed here will start sending data.
Page 10 of 11
Condeco Sense
Condeco Status
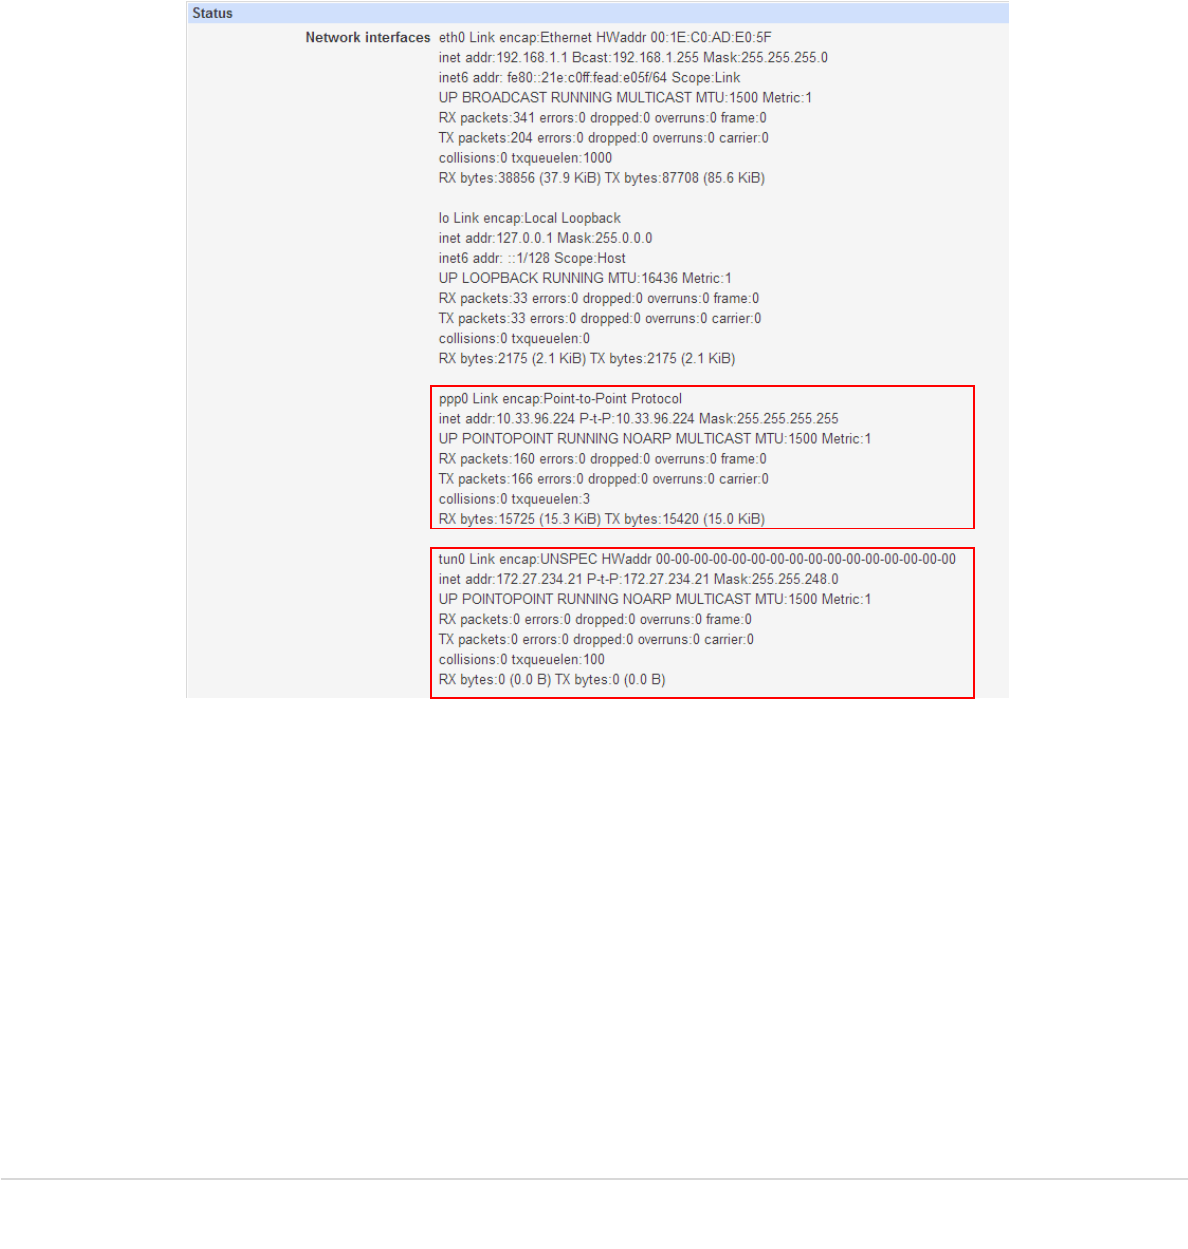
When the 3G connection has been updated, and the VPN certificates have been
provisioned, the Condeco Status will show all the links that have been established. The two
main ones for 3G and VPN connections are:
Ppp0 link – Established a 3G connection
Tun0 Link – Established a VPN connection
Page 11 of 11
Condeco Sense
De-installation
Once a sense study has finished, the gateway will need to be reset back to its default
settings ready for the next sense deployment.
Before resetting the database, make a backup of both the logs and database. Run through
these steps to take your backups and reset back to defaults.
1) Navigate to Condeco Logs
2) Select Download Log Archive
3) Take a copy of the download
4) Navigate to Condeco System Settings
5) Locate Create Backup Archive and select Backup
6) Locate Download Backup Archive and download a copy of the database backup
7) Locate Reset SNG Database and reset the database
8) Locate the Sense Network Settings on the same page
9) Delete the Channel, PAN ID, Survey ID, and Reporting URL.
10) Select Update for these changes to take effect
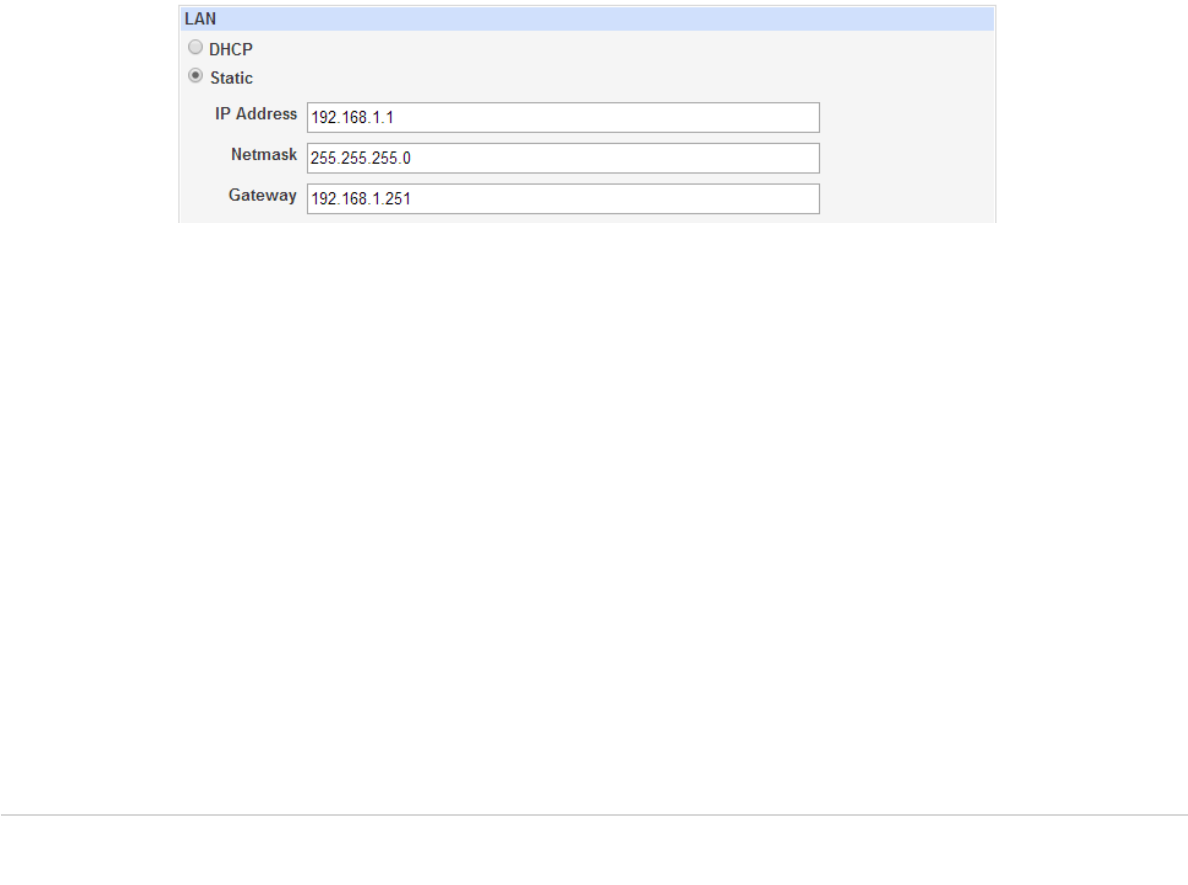
Now the sense settings have been reset, navigate to Condeco Network Settings. Make
sure the LAN settings are set to the static address of:
Change the Routing Preference to none. Make sure you update the changes you make for
them to take effect.
Caution:
This device must be installed by Condeco authorised technical professionals.
FCC Statements:
This device complies with Part 15 of the FCC Rules. Operation is subject to the following two
conditions: (1) this device may not cause harmful interference, and (2) this device must accept
any interference received, including interference that may cause undesired operation.
Changes or modifications not expressly approved by the party responsible for compliance could
void the user's authority to operate the equipment.
NOTE: This equipment has been tested and found to comply with the limits for a Class B digital
device, pursuant to Part 15 of the FCC Rules. These limits are designed to provide reasonable
protection against harmful interference in a residential installation. This equipment generates, uses
instructions, may cause harmful interference to radio communications. However, there is no
guarantee that interference will not occur in a particular installation. If this equipment does cause
harmful interference to radio or television reception, which can be determined by turning the
equipment off and on, the user is encouraged to try to correct the interference by one or more of
the following measures:
-- Reorient or relocate the receiving antenna.
-- Increase the separation between the equipment and receiver.
-- Connect the equipment into an outlet on a circuit different from that to which the receiver is
connected.
-- Consult the dealer or an experienced radio/TV technician for help.
RF Exposure Statements;
The distance between human bodys and this product shall be no less than 20 cm during the normal
operations.