Continental Automotive Systems 3290X Vehicle Data Recorder User Manual
Continental Automotive Systems, Inc Vehicle Data Recorder
UserManual.wiki
>
Continental Automotive Systems
>
3290X User Manual
User Manual
Navigation menu
Upload a User Manual
Namespaces
Wiki Guide
HTML
PDF
Info
Views
User Manual
Discussion / Help
Navigation
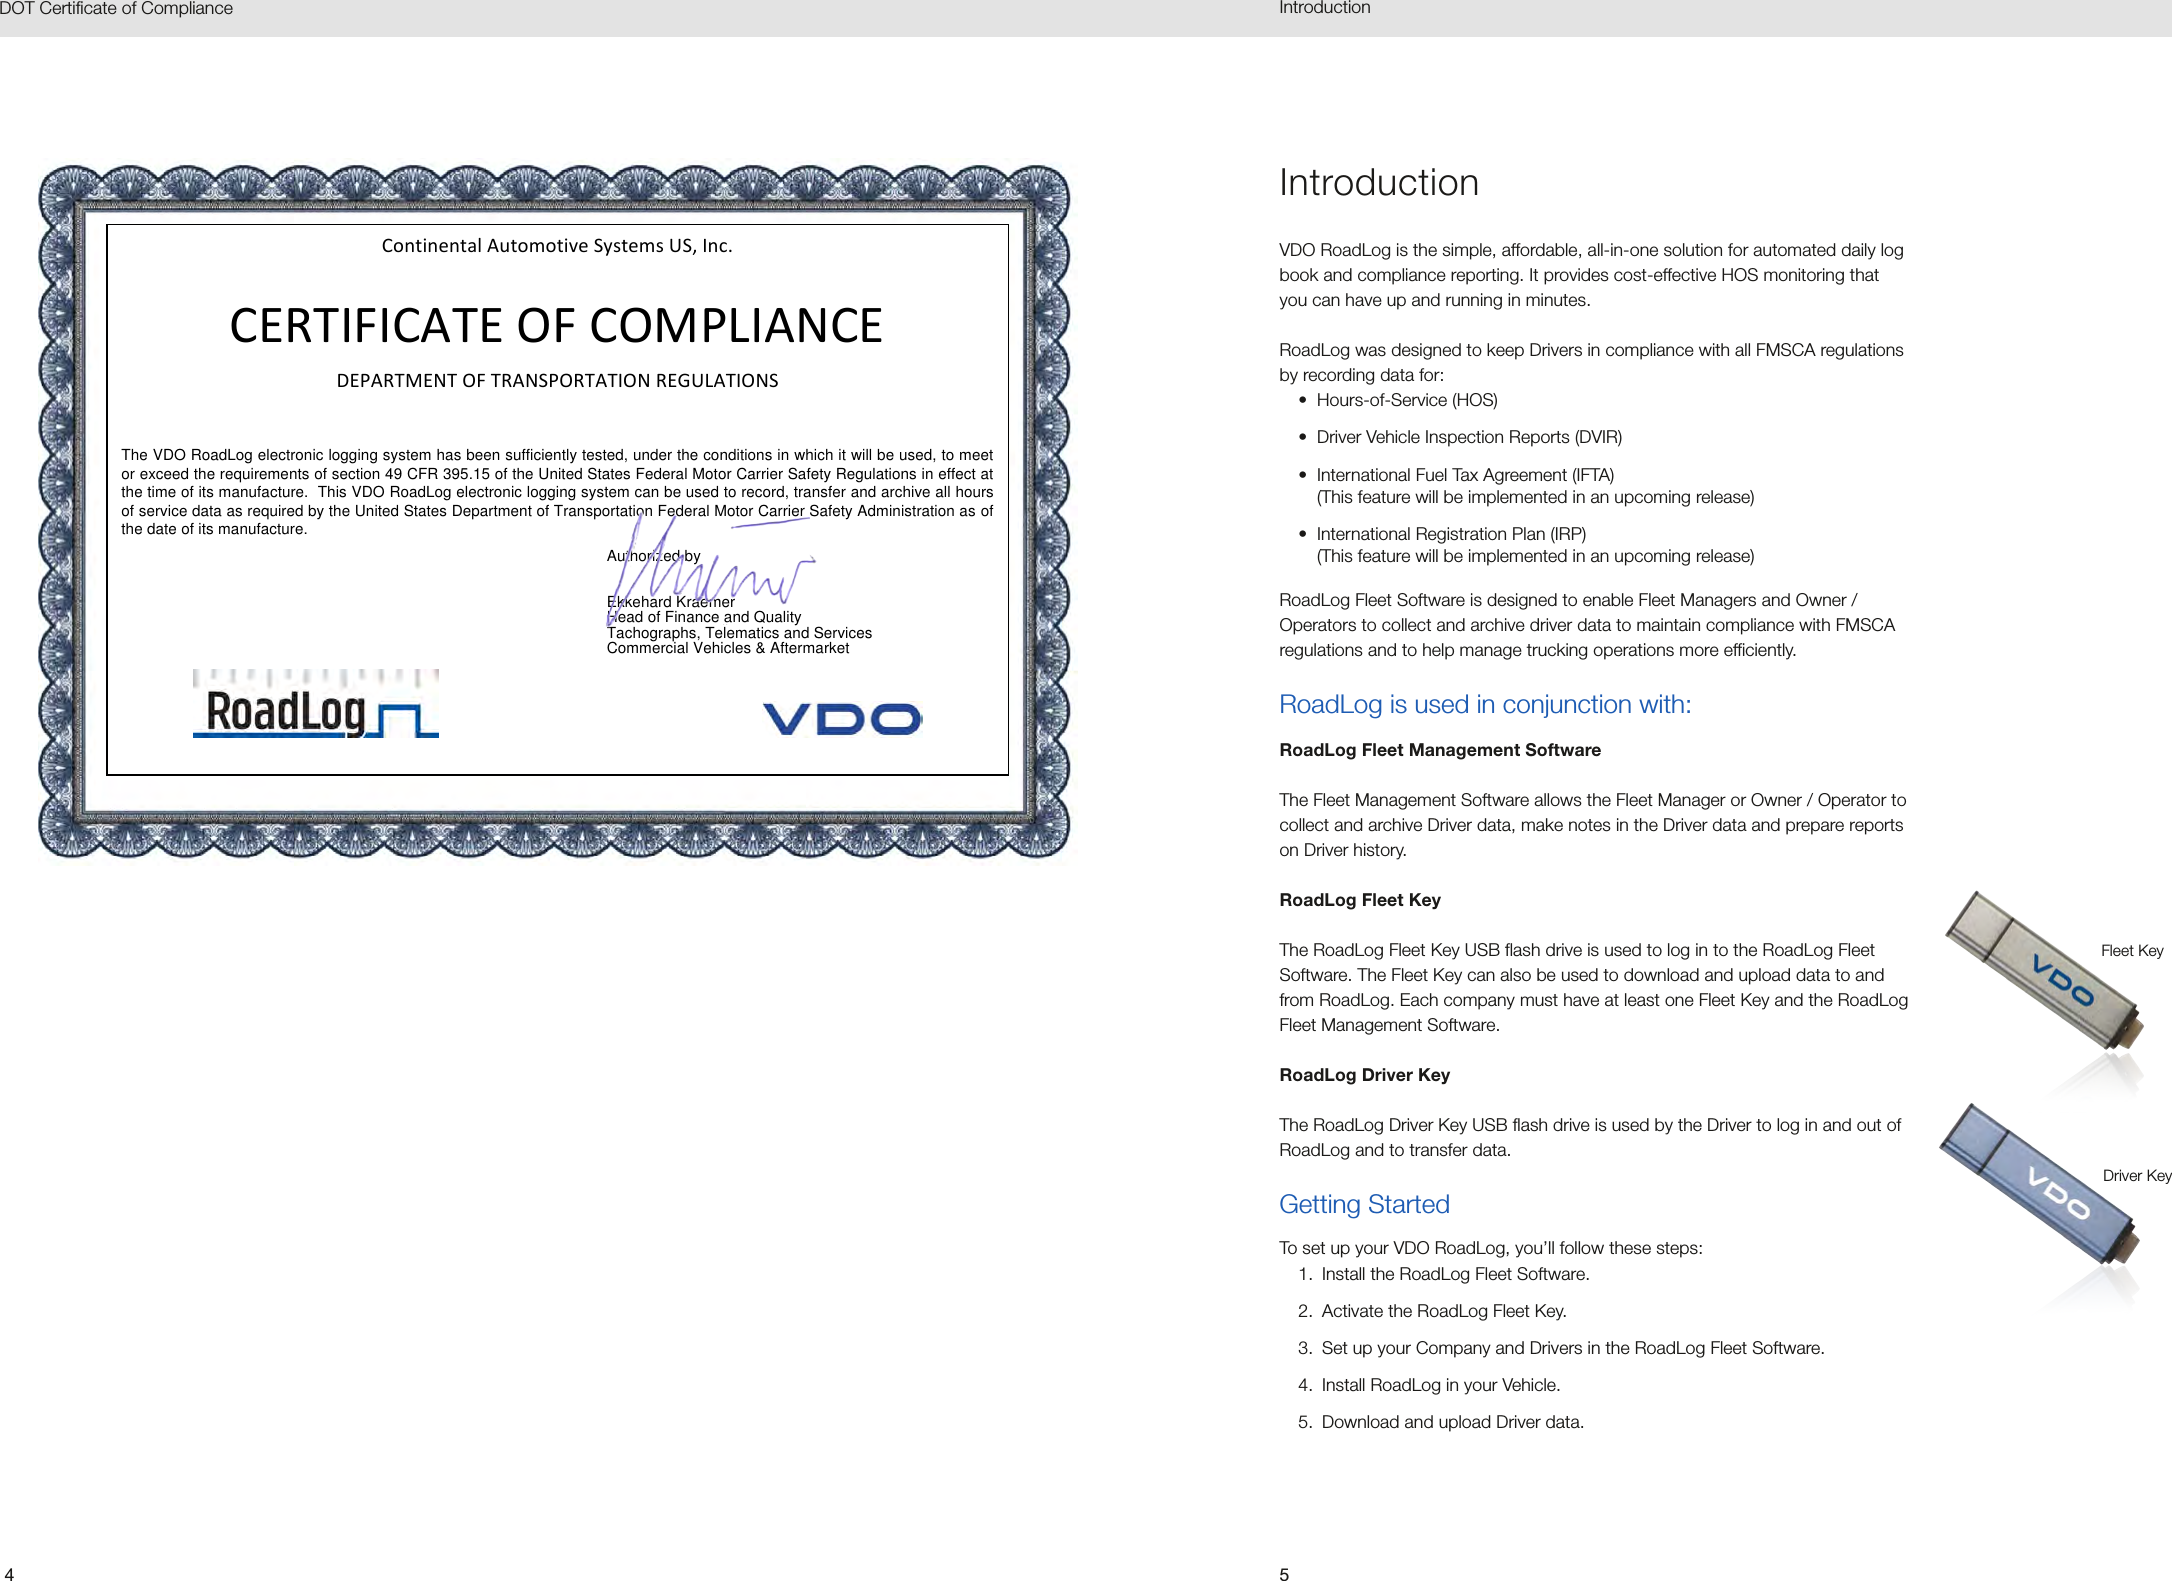
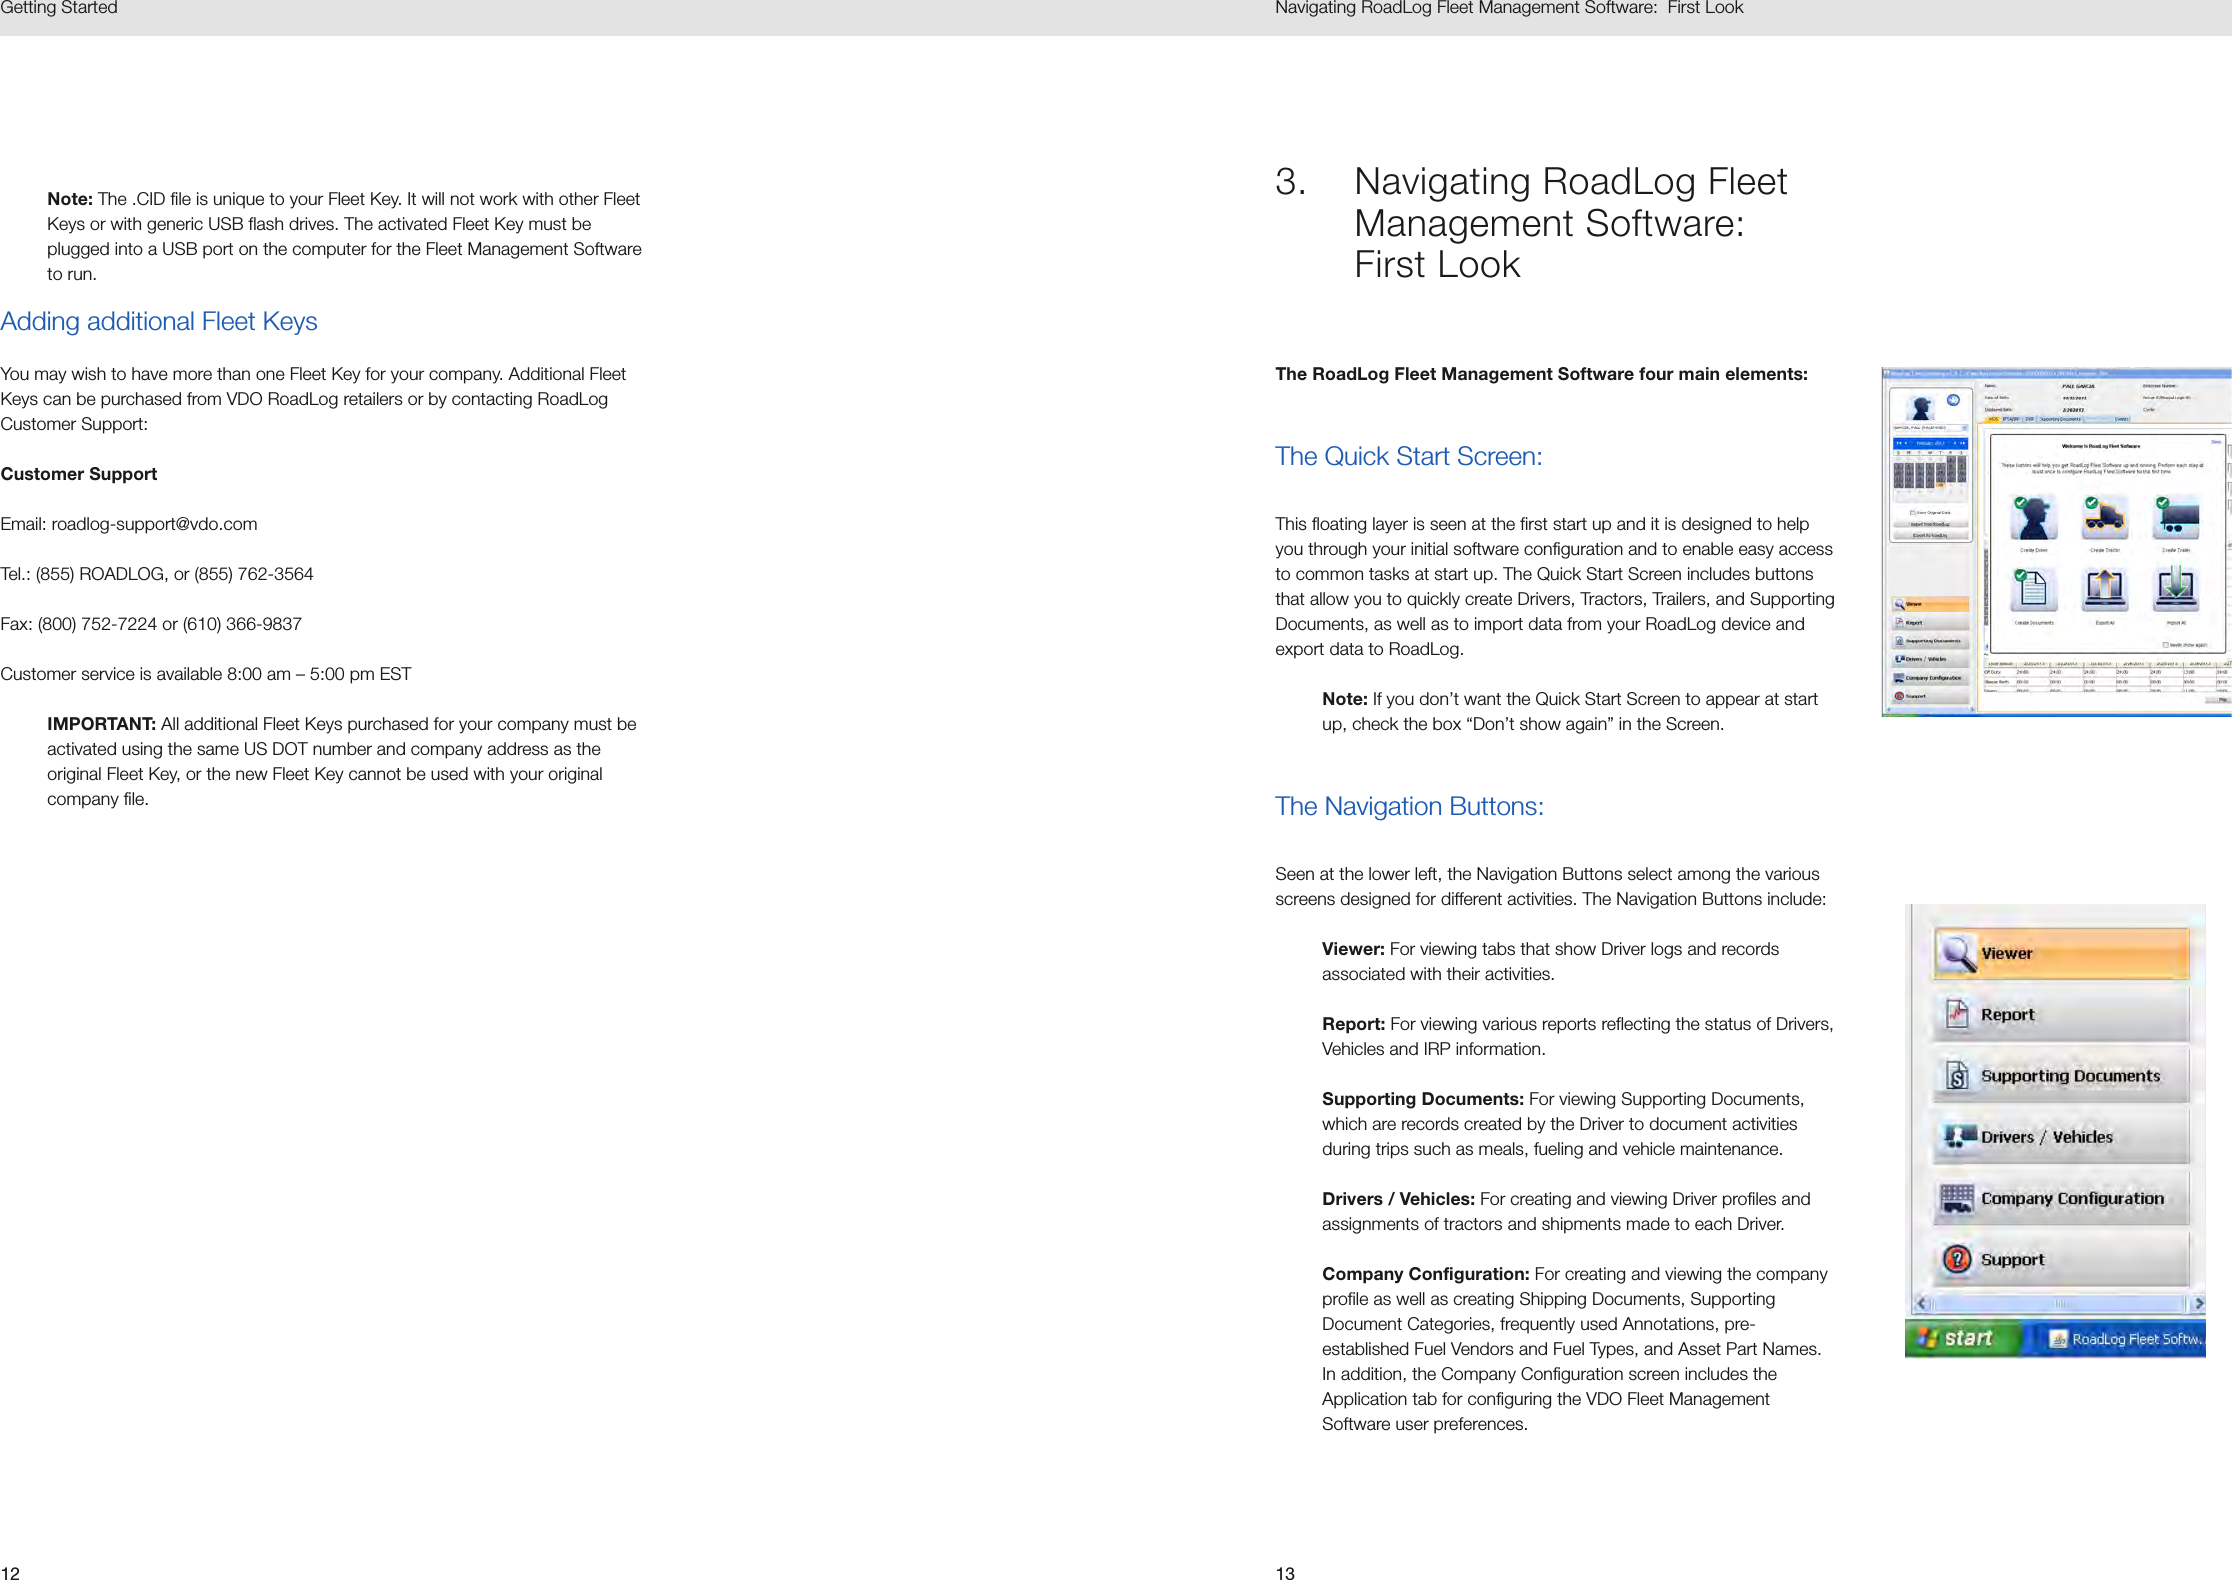
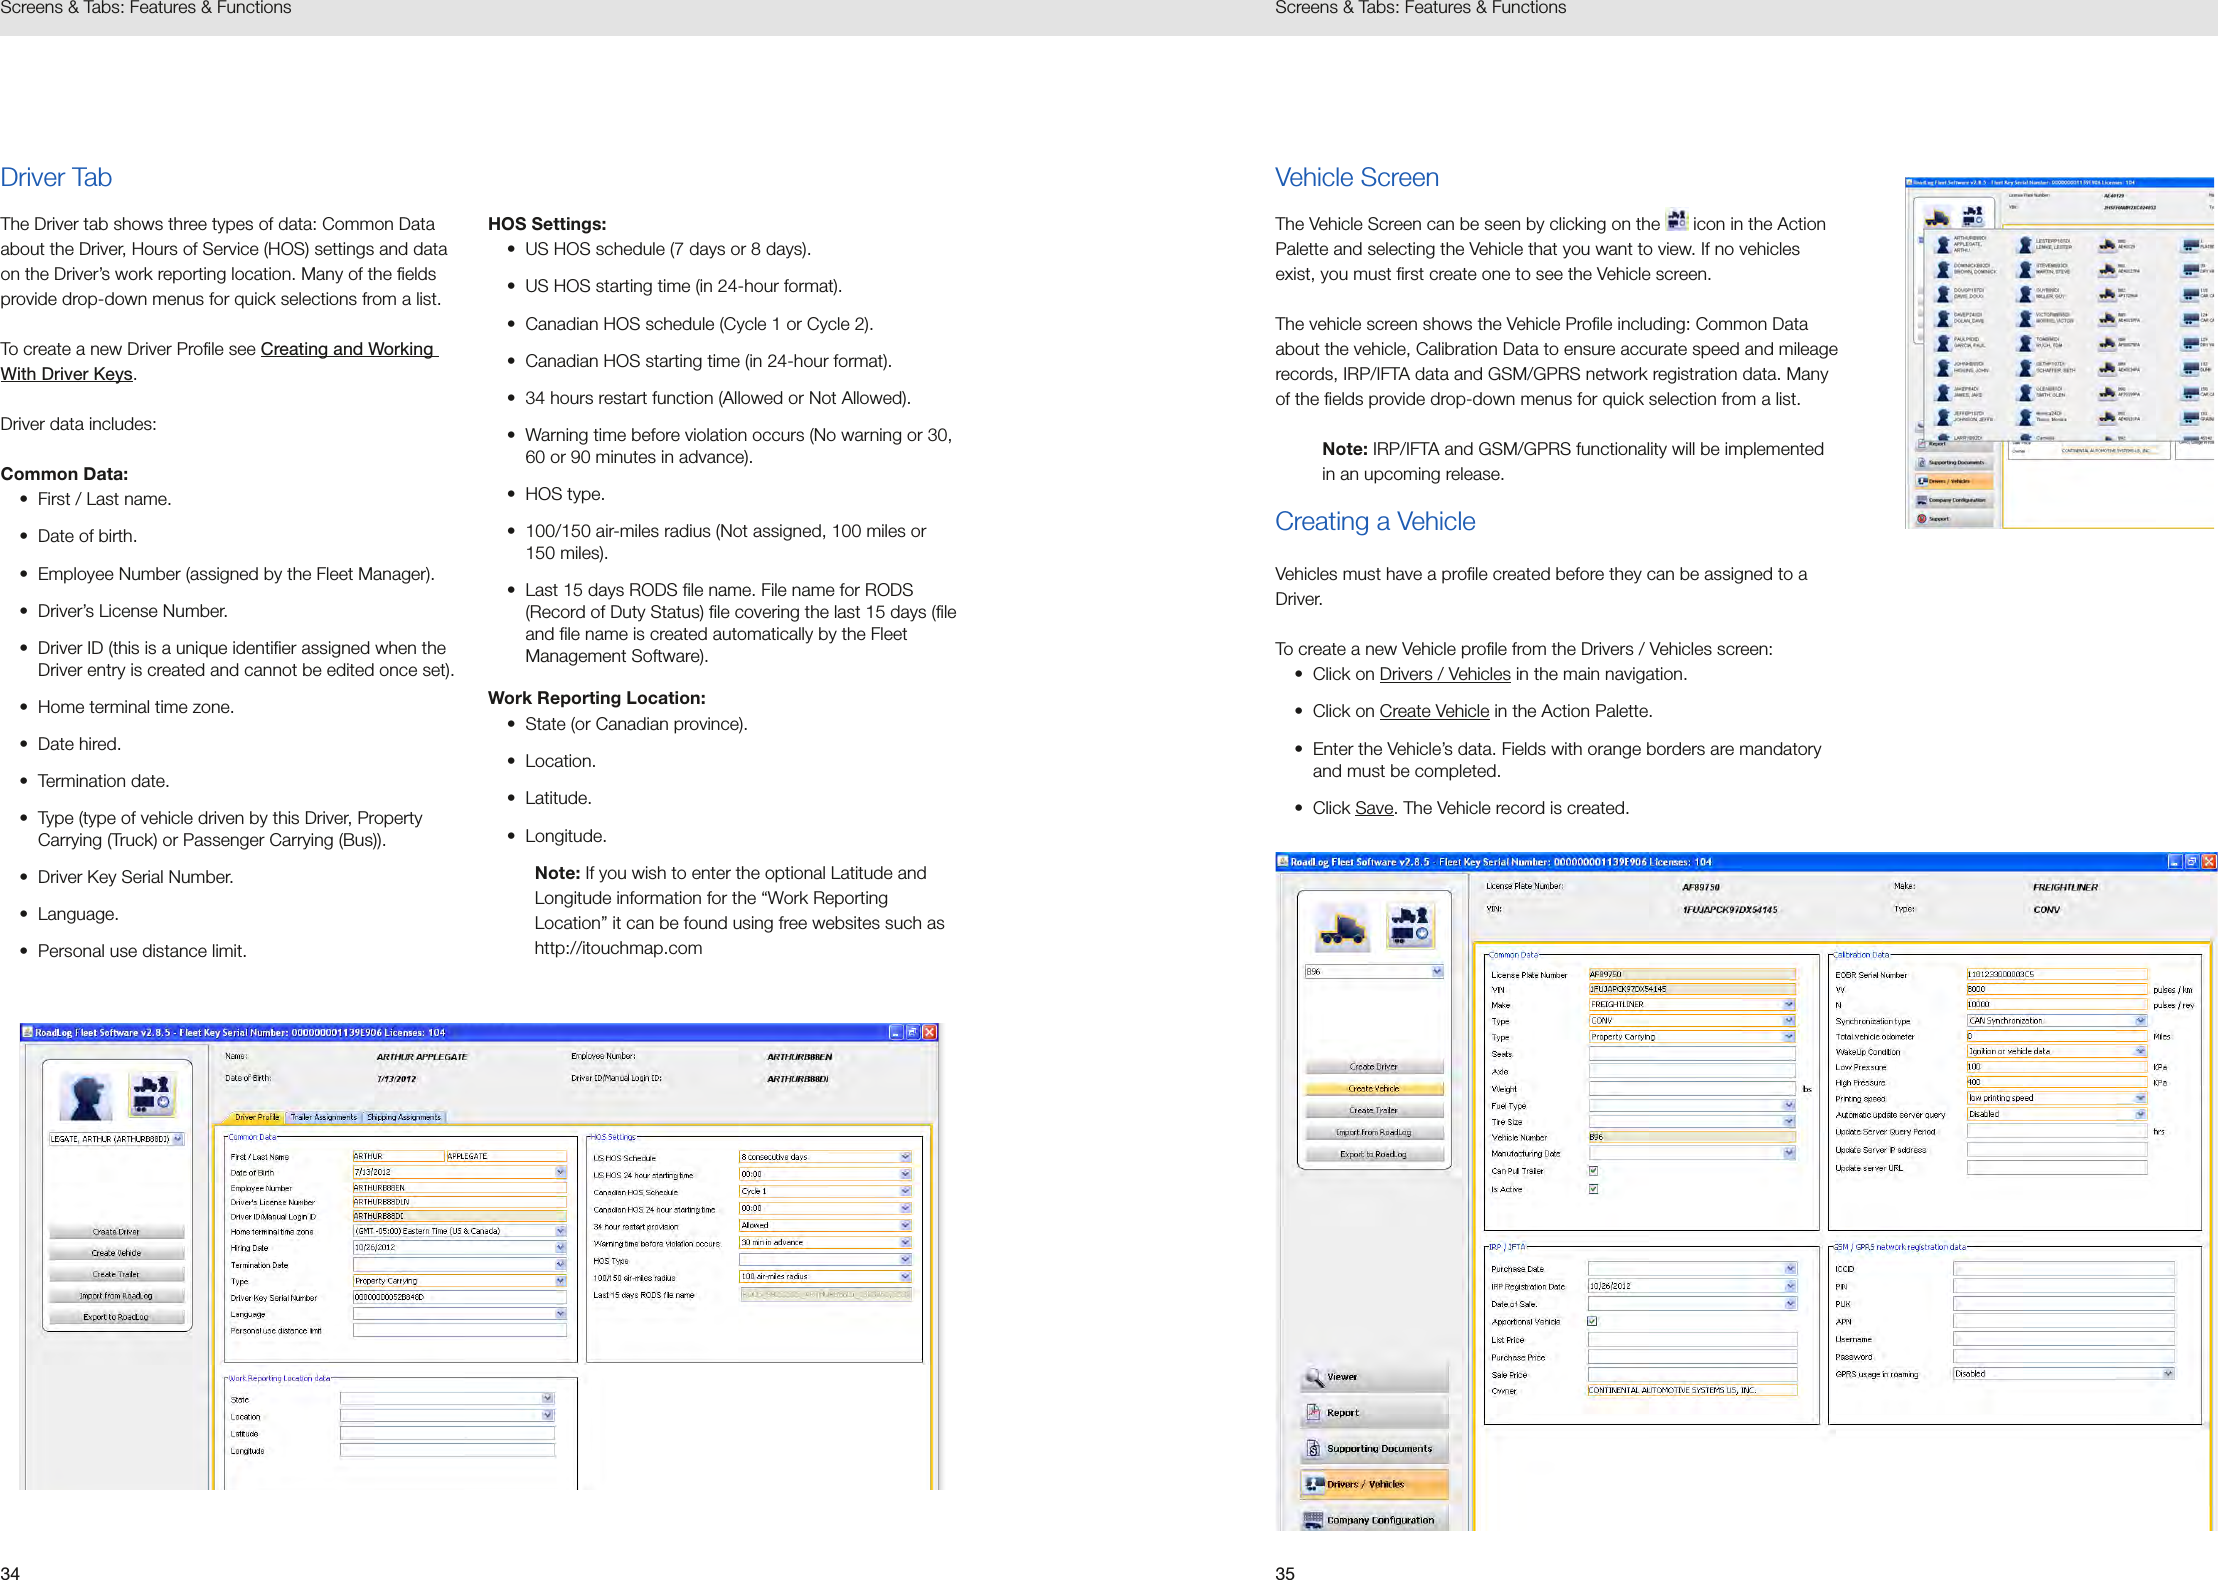
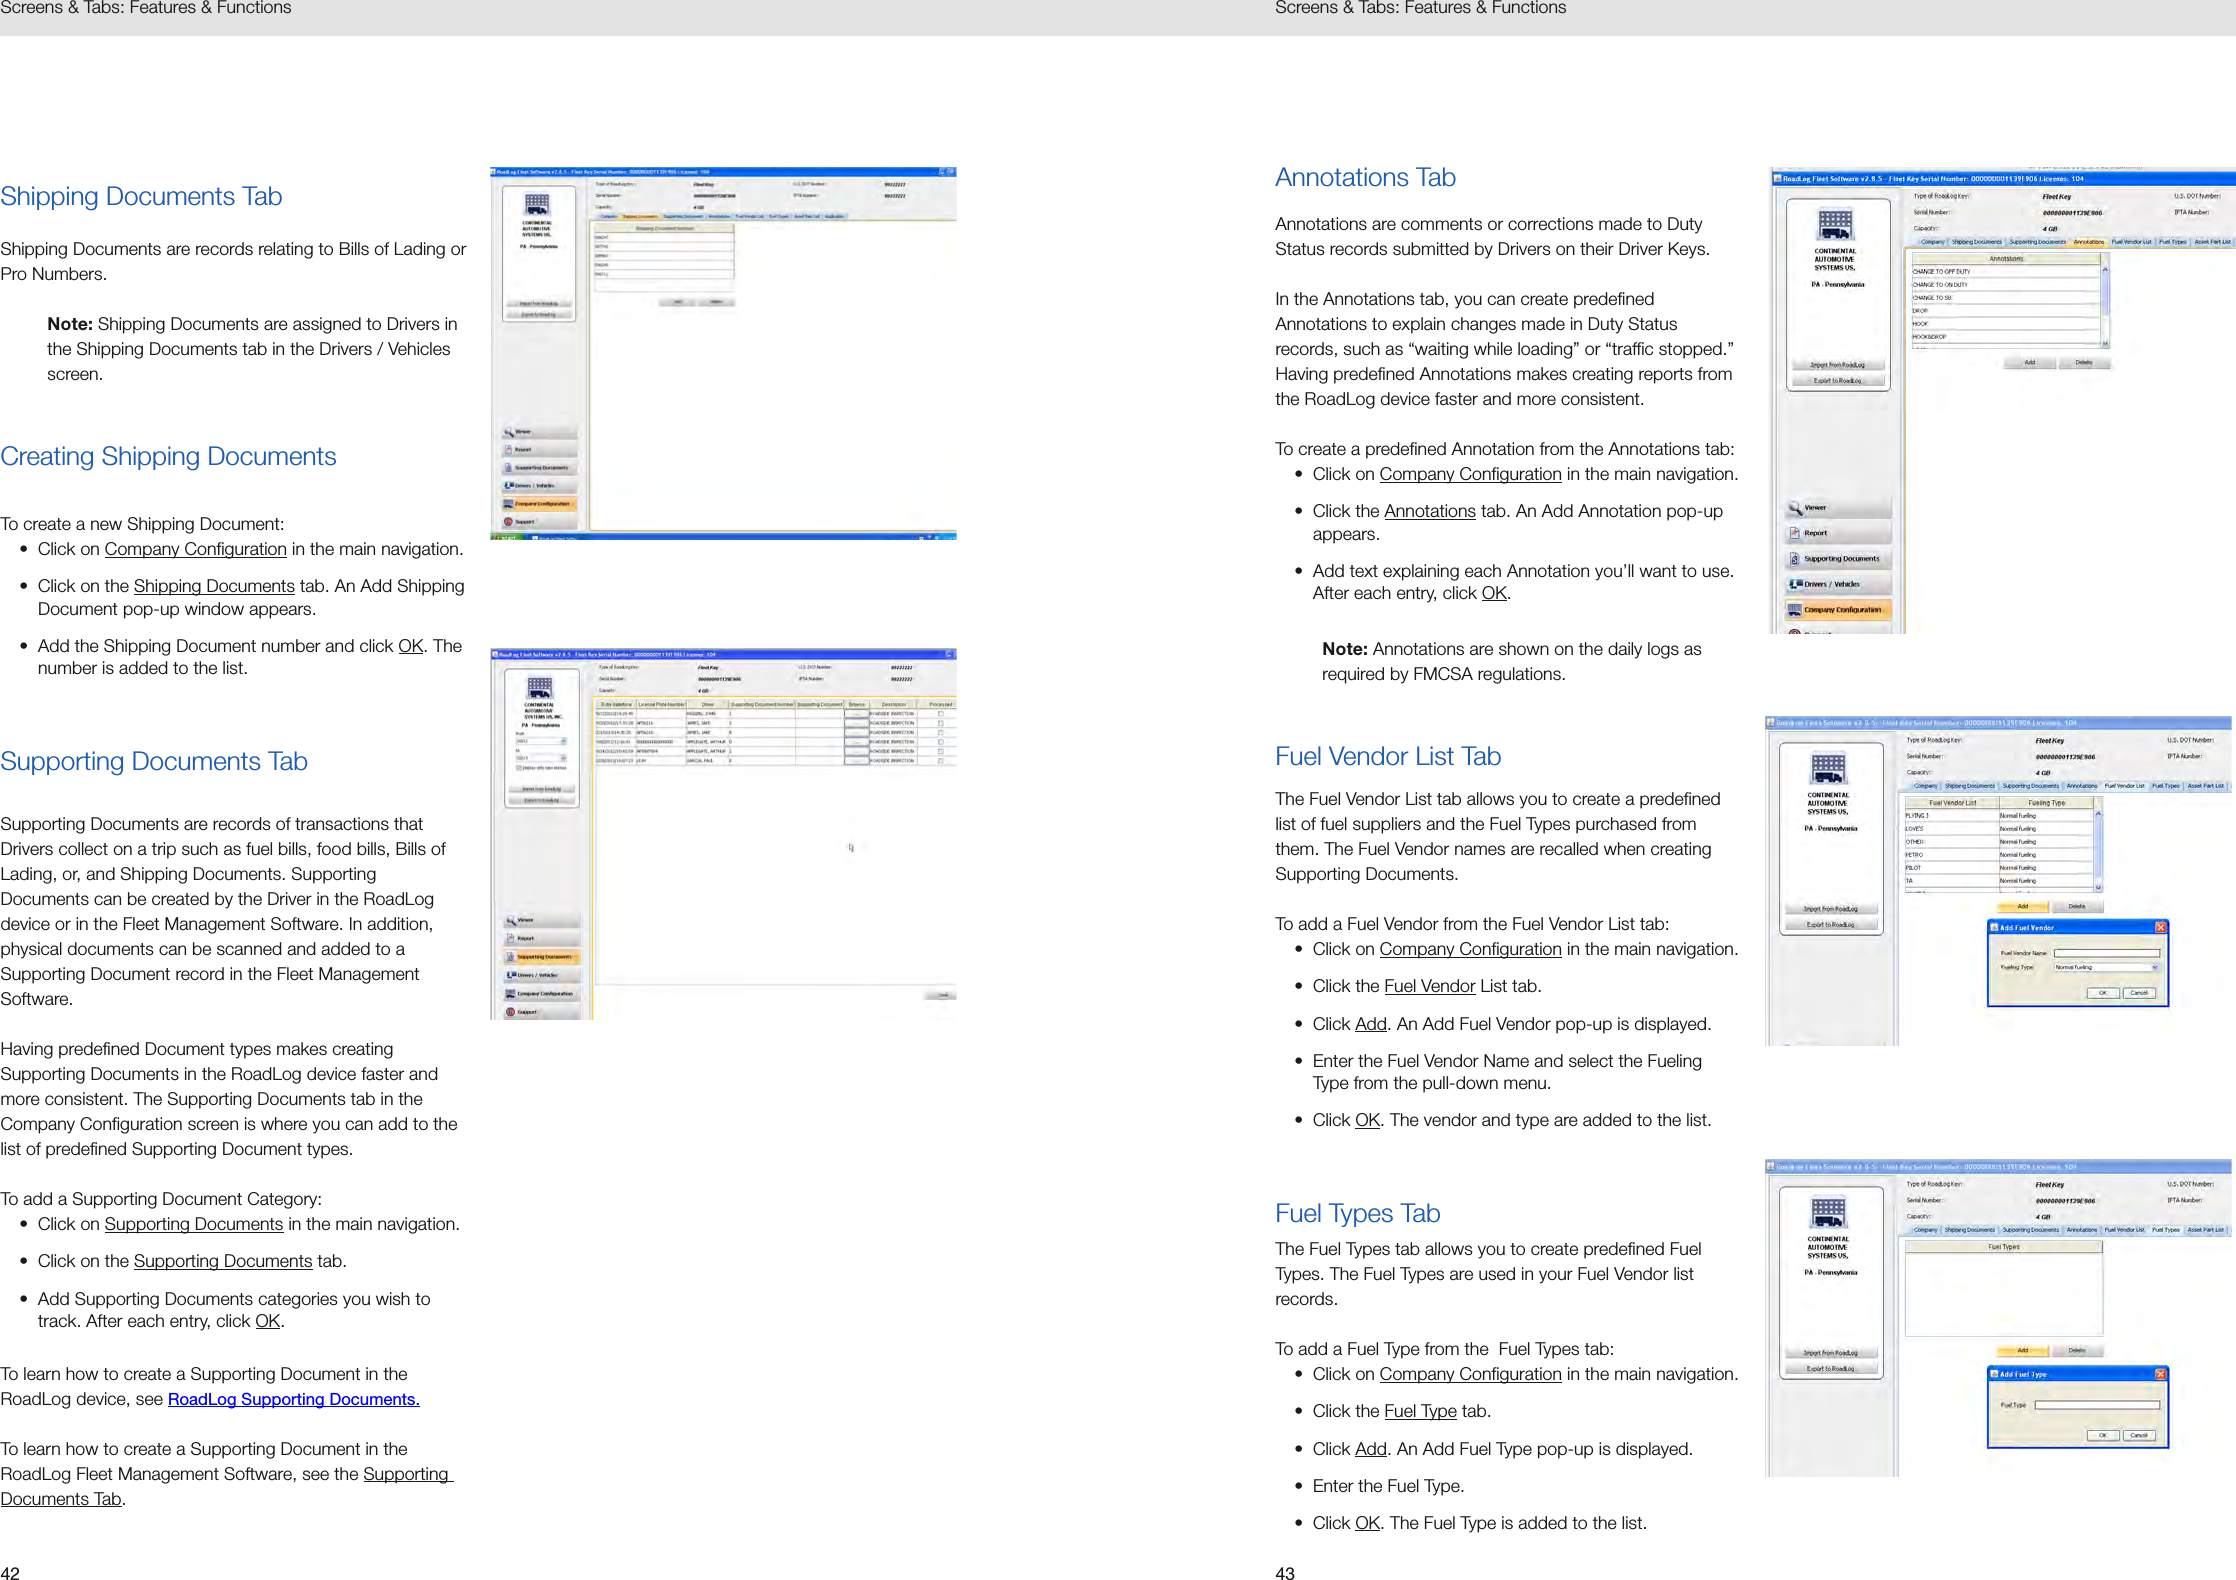
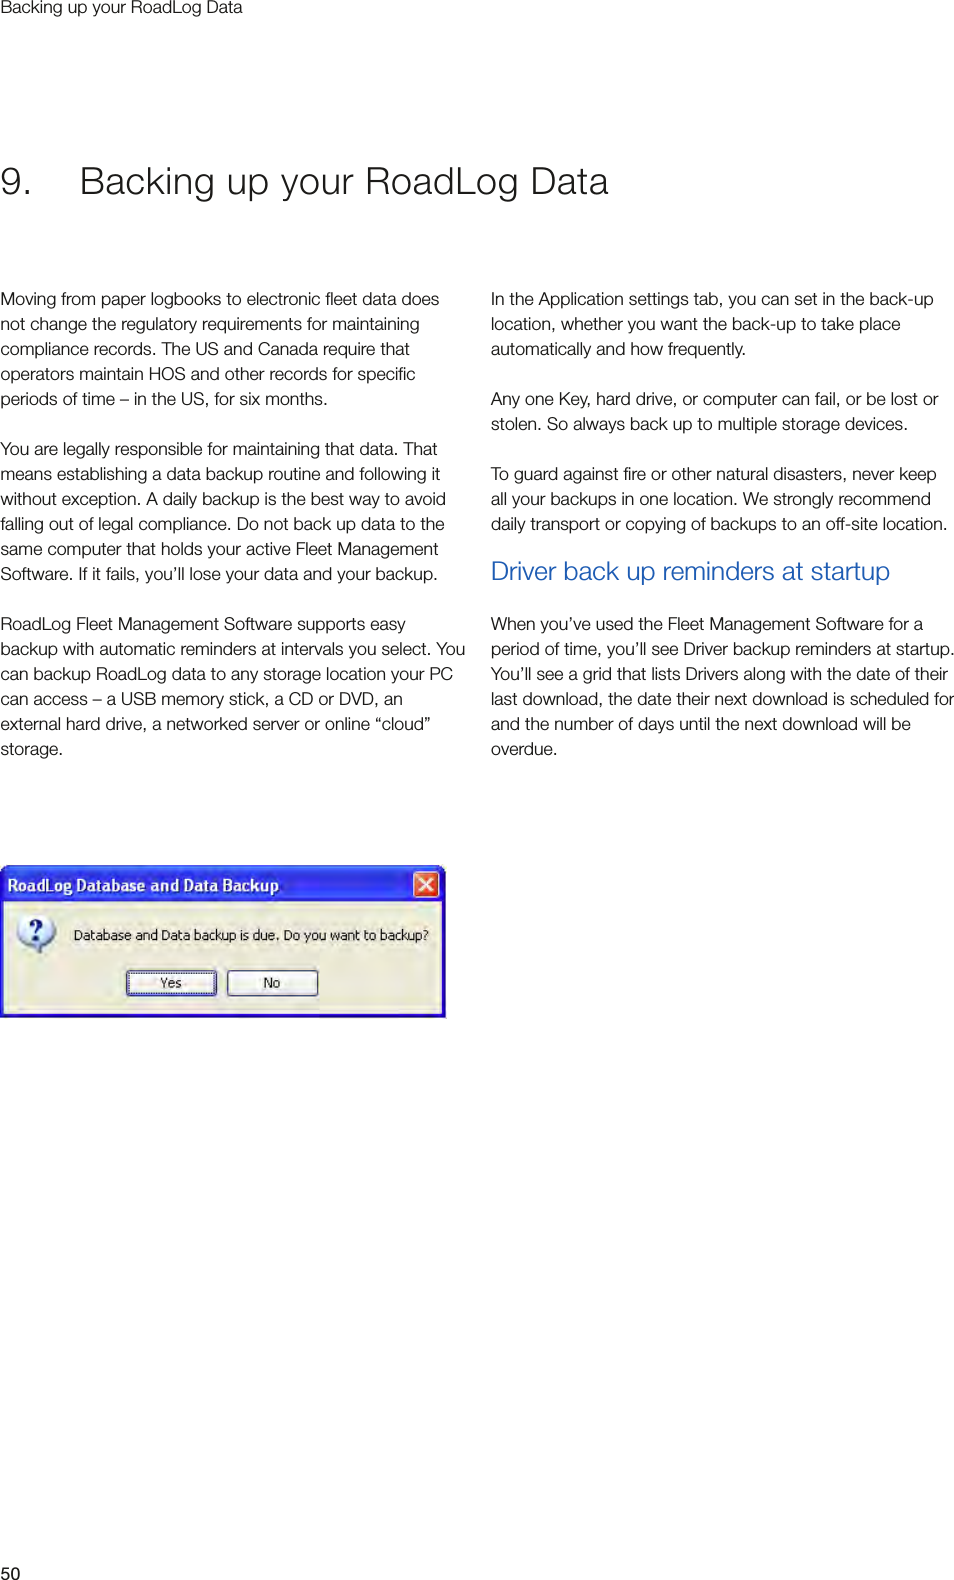
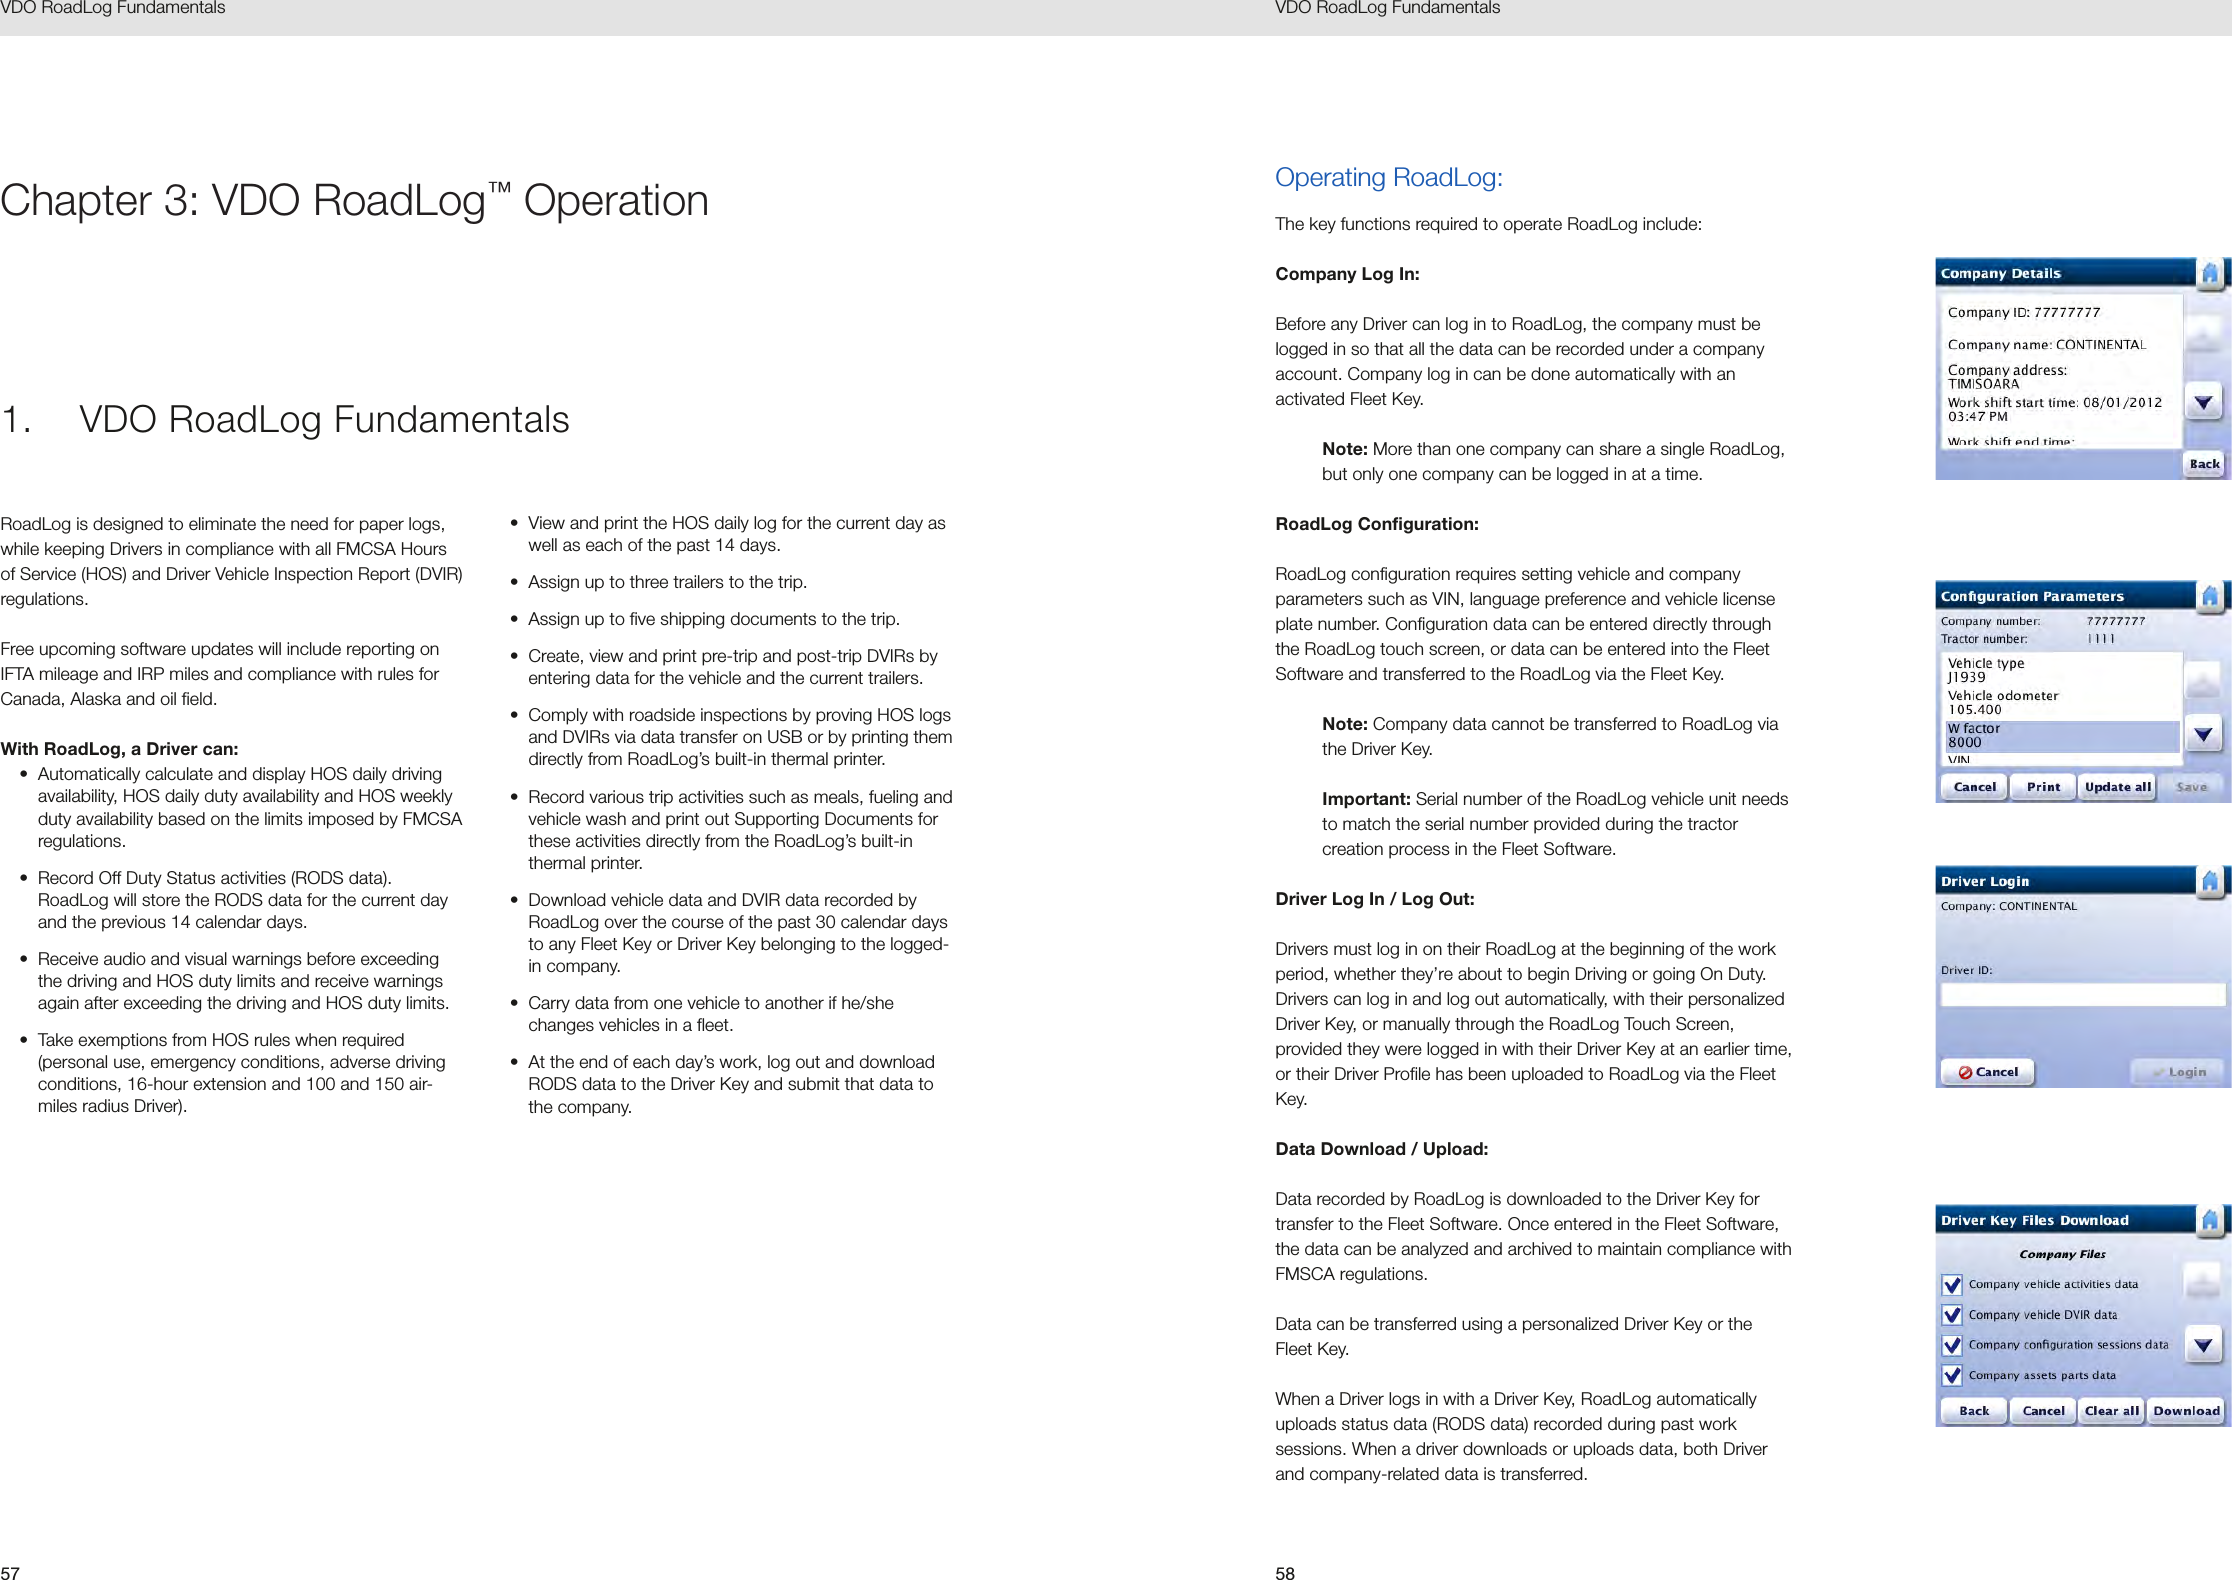
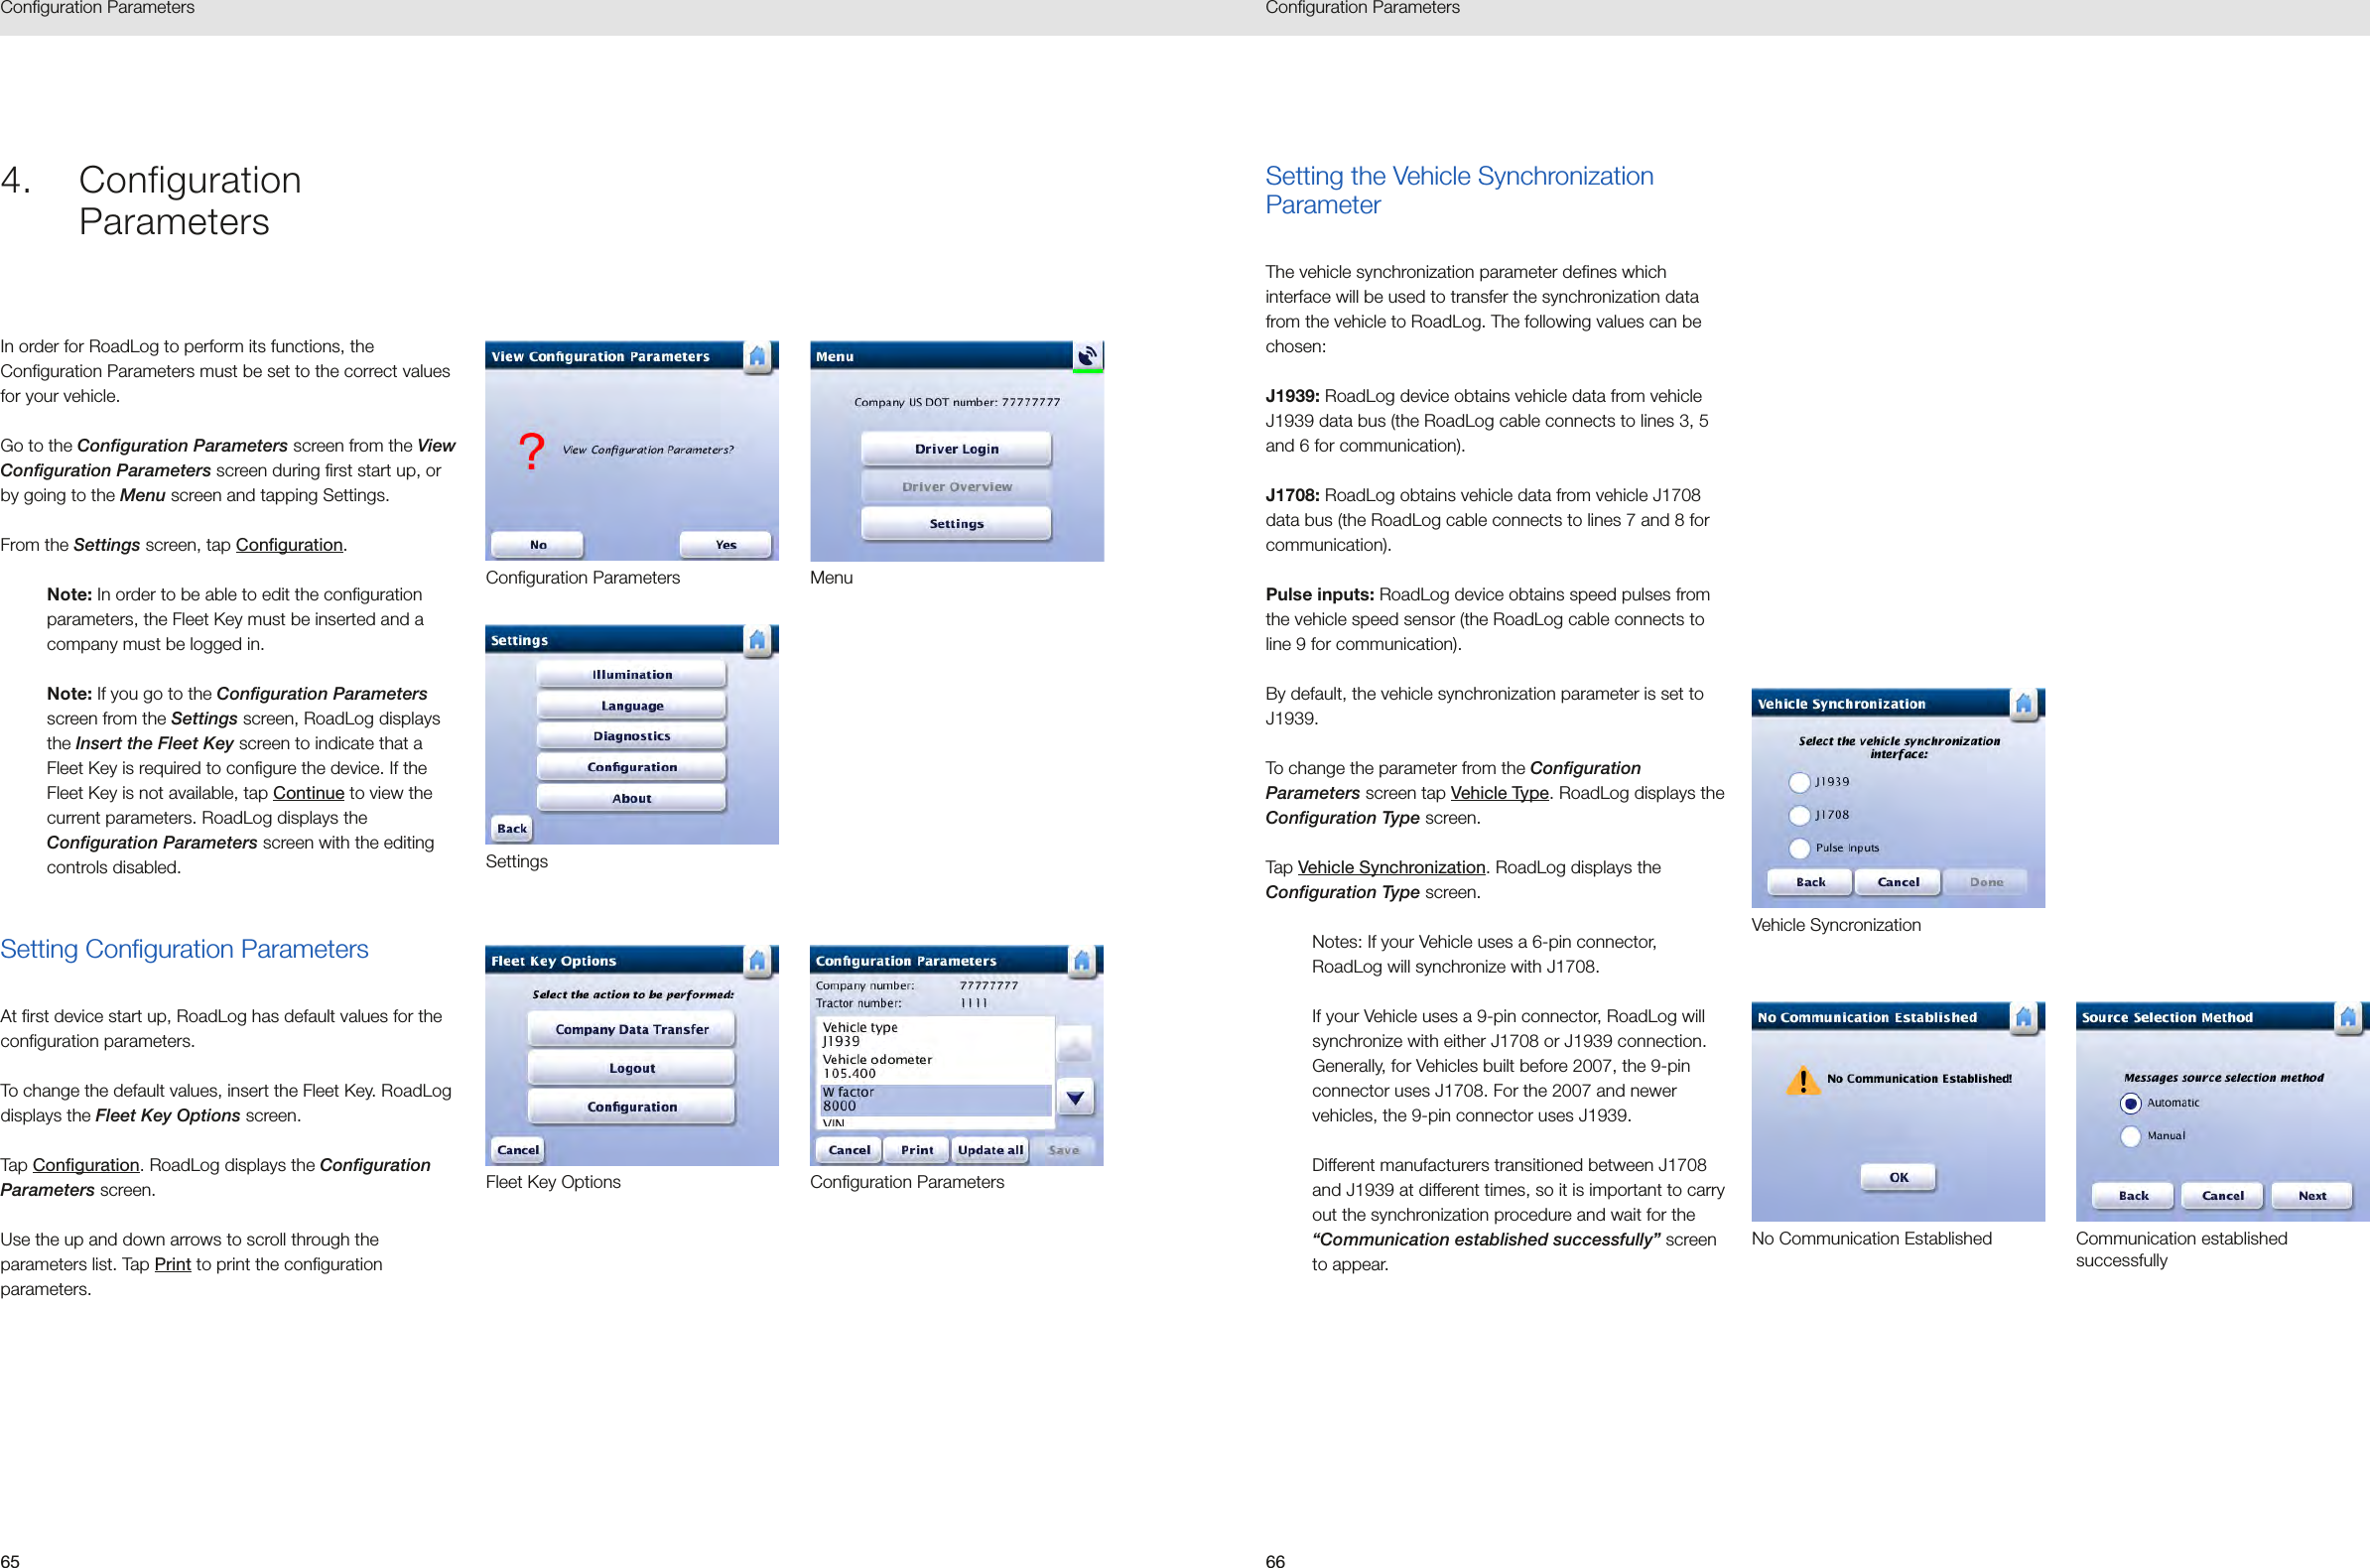
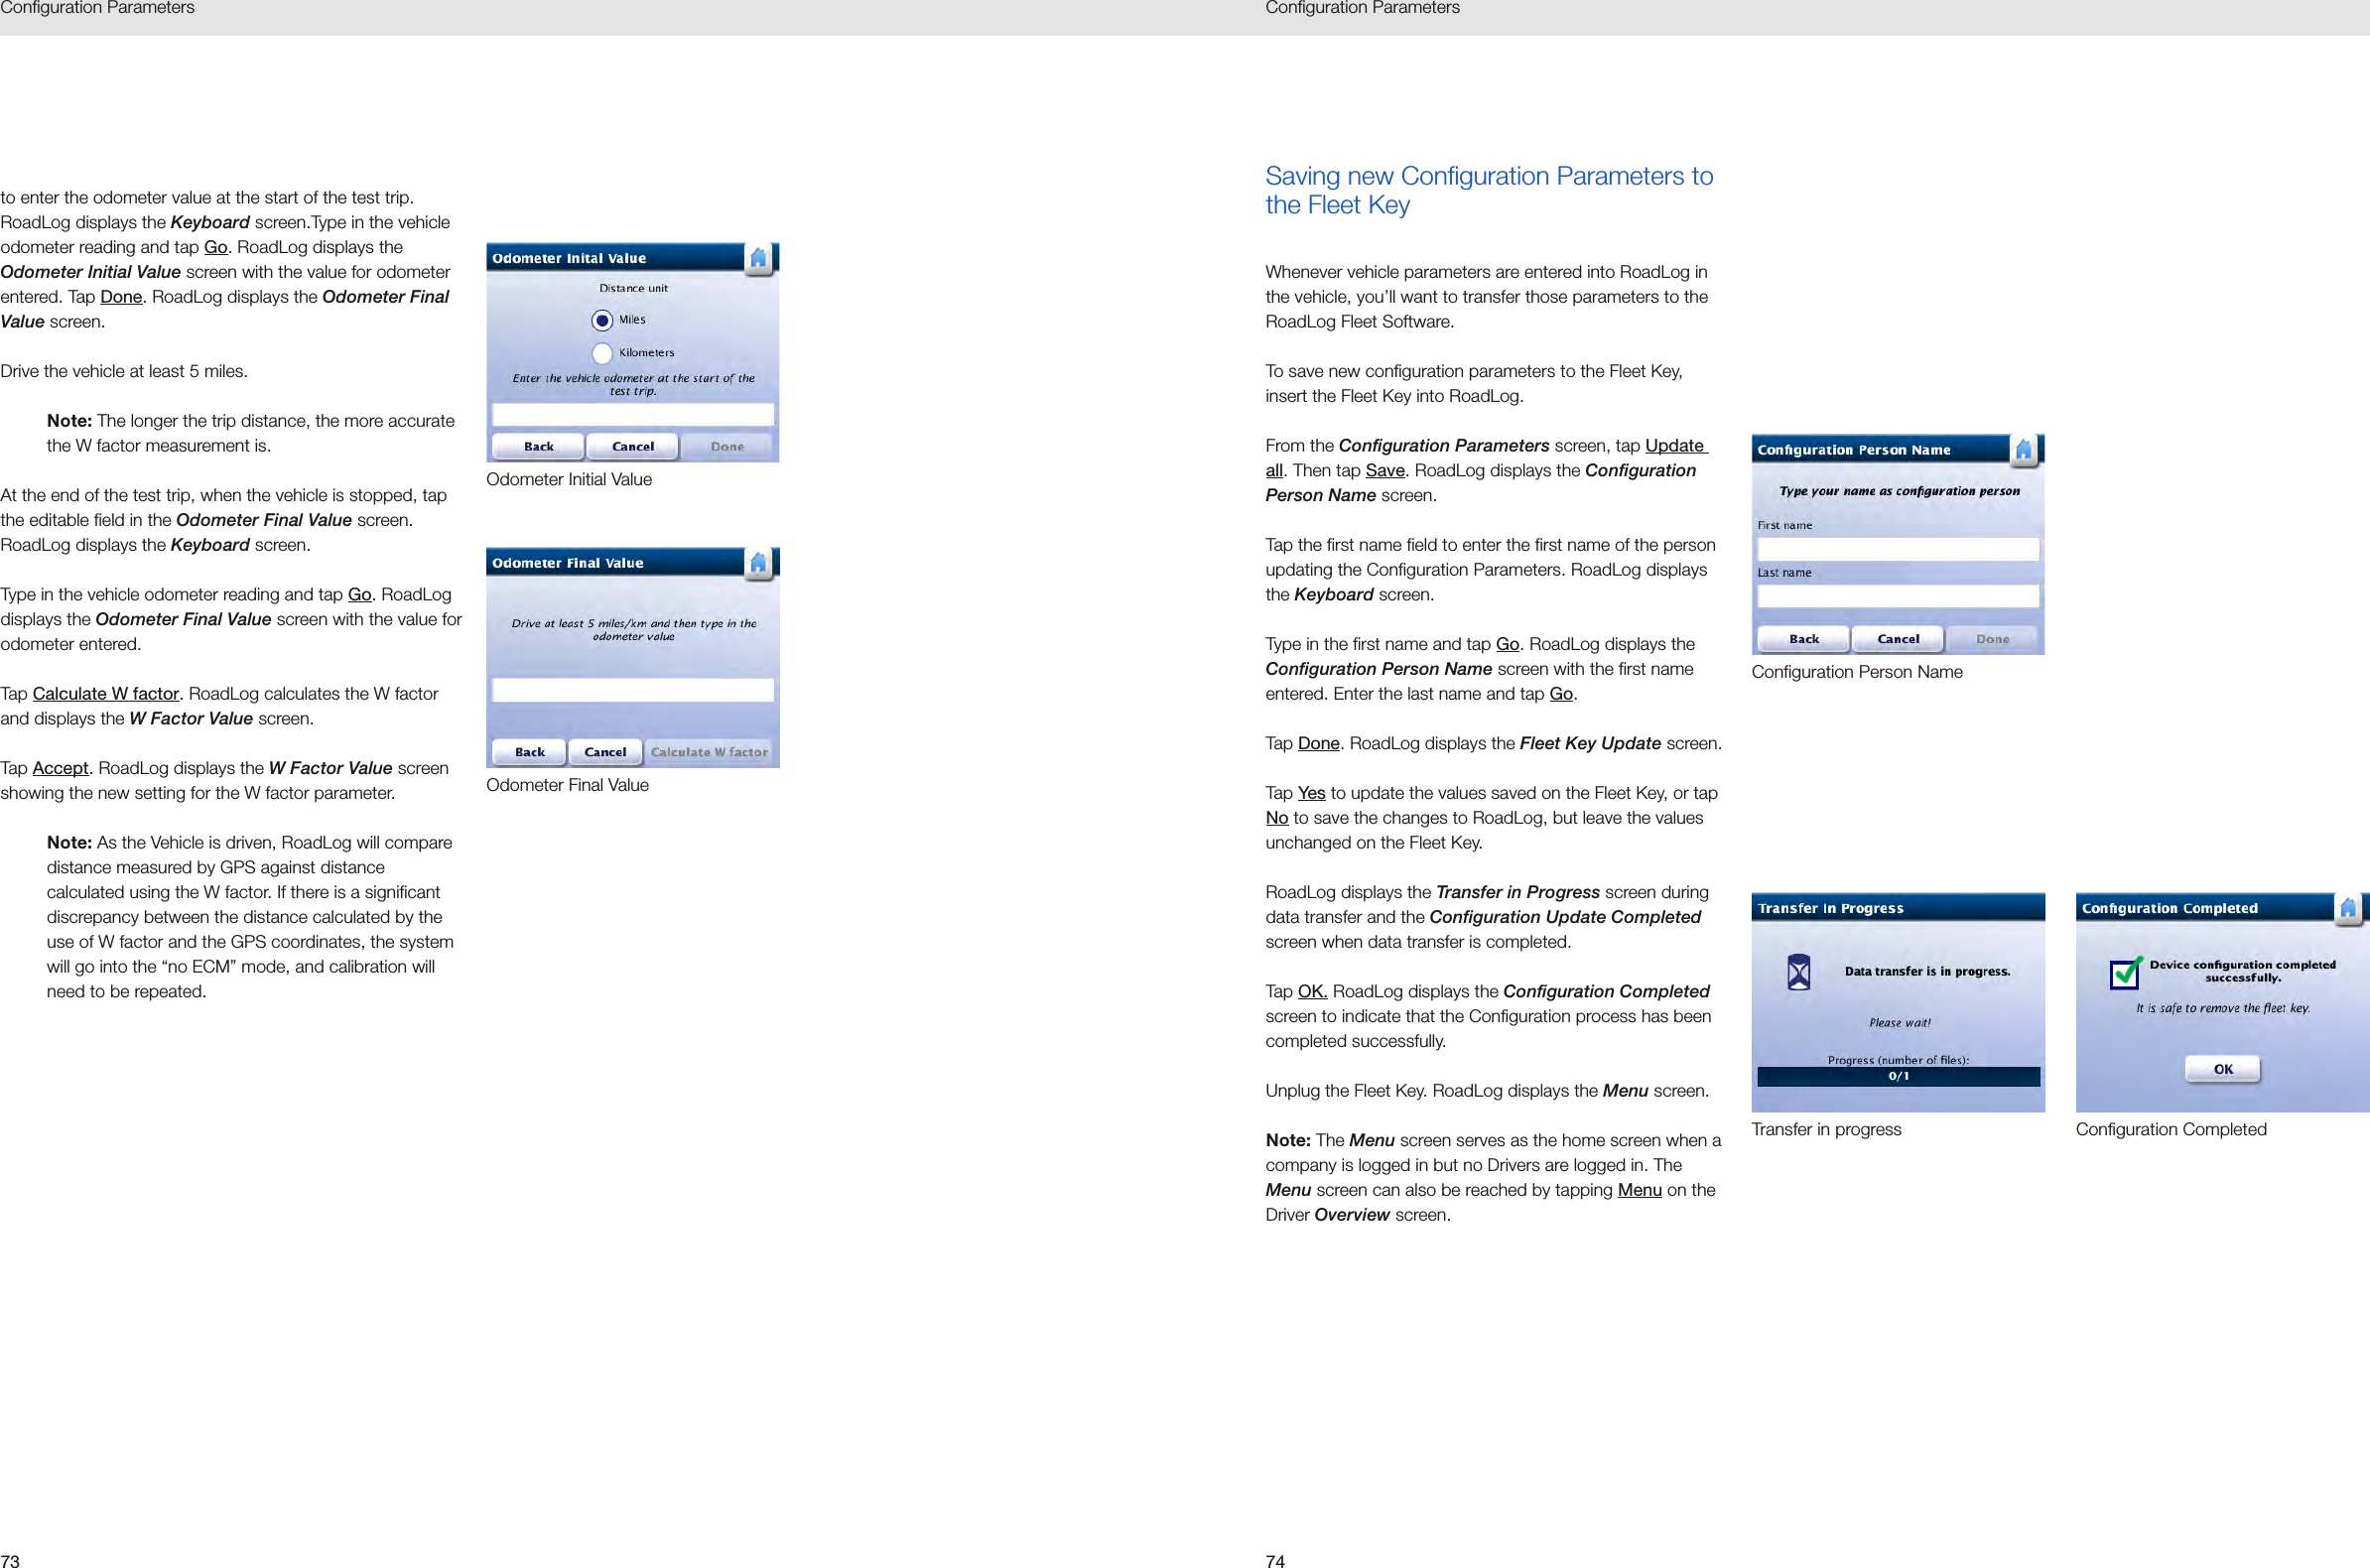
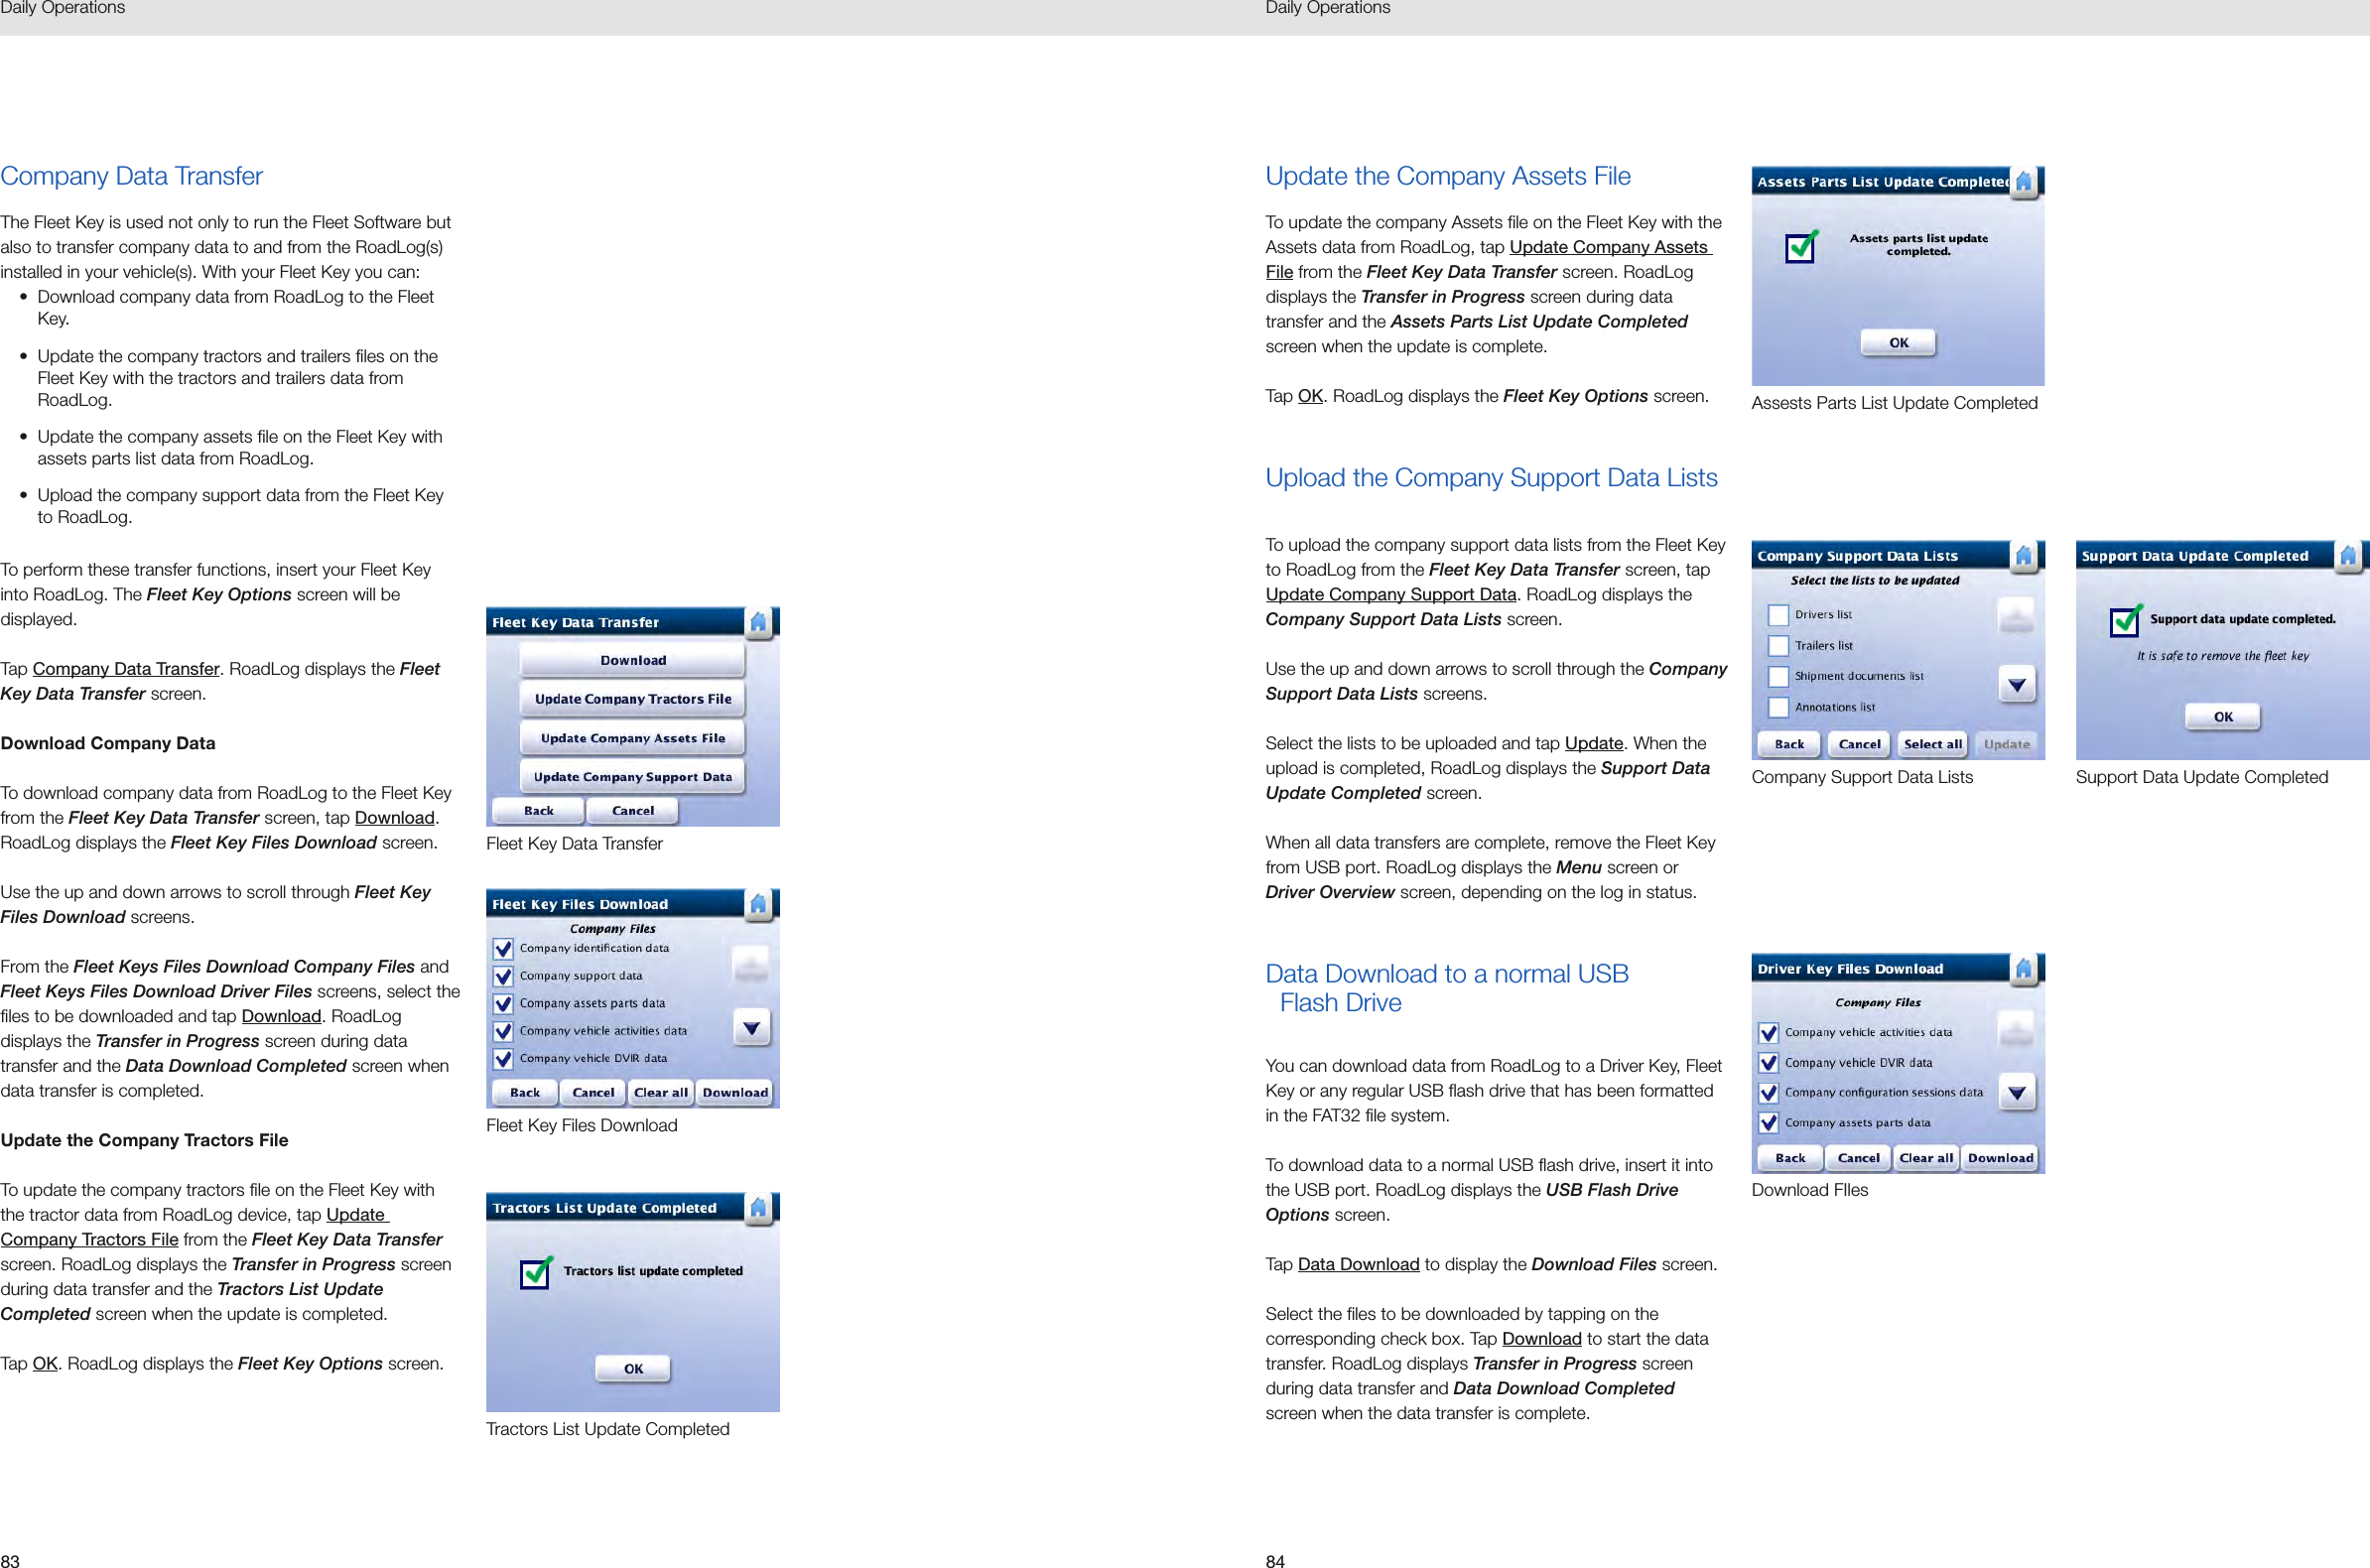
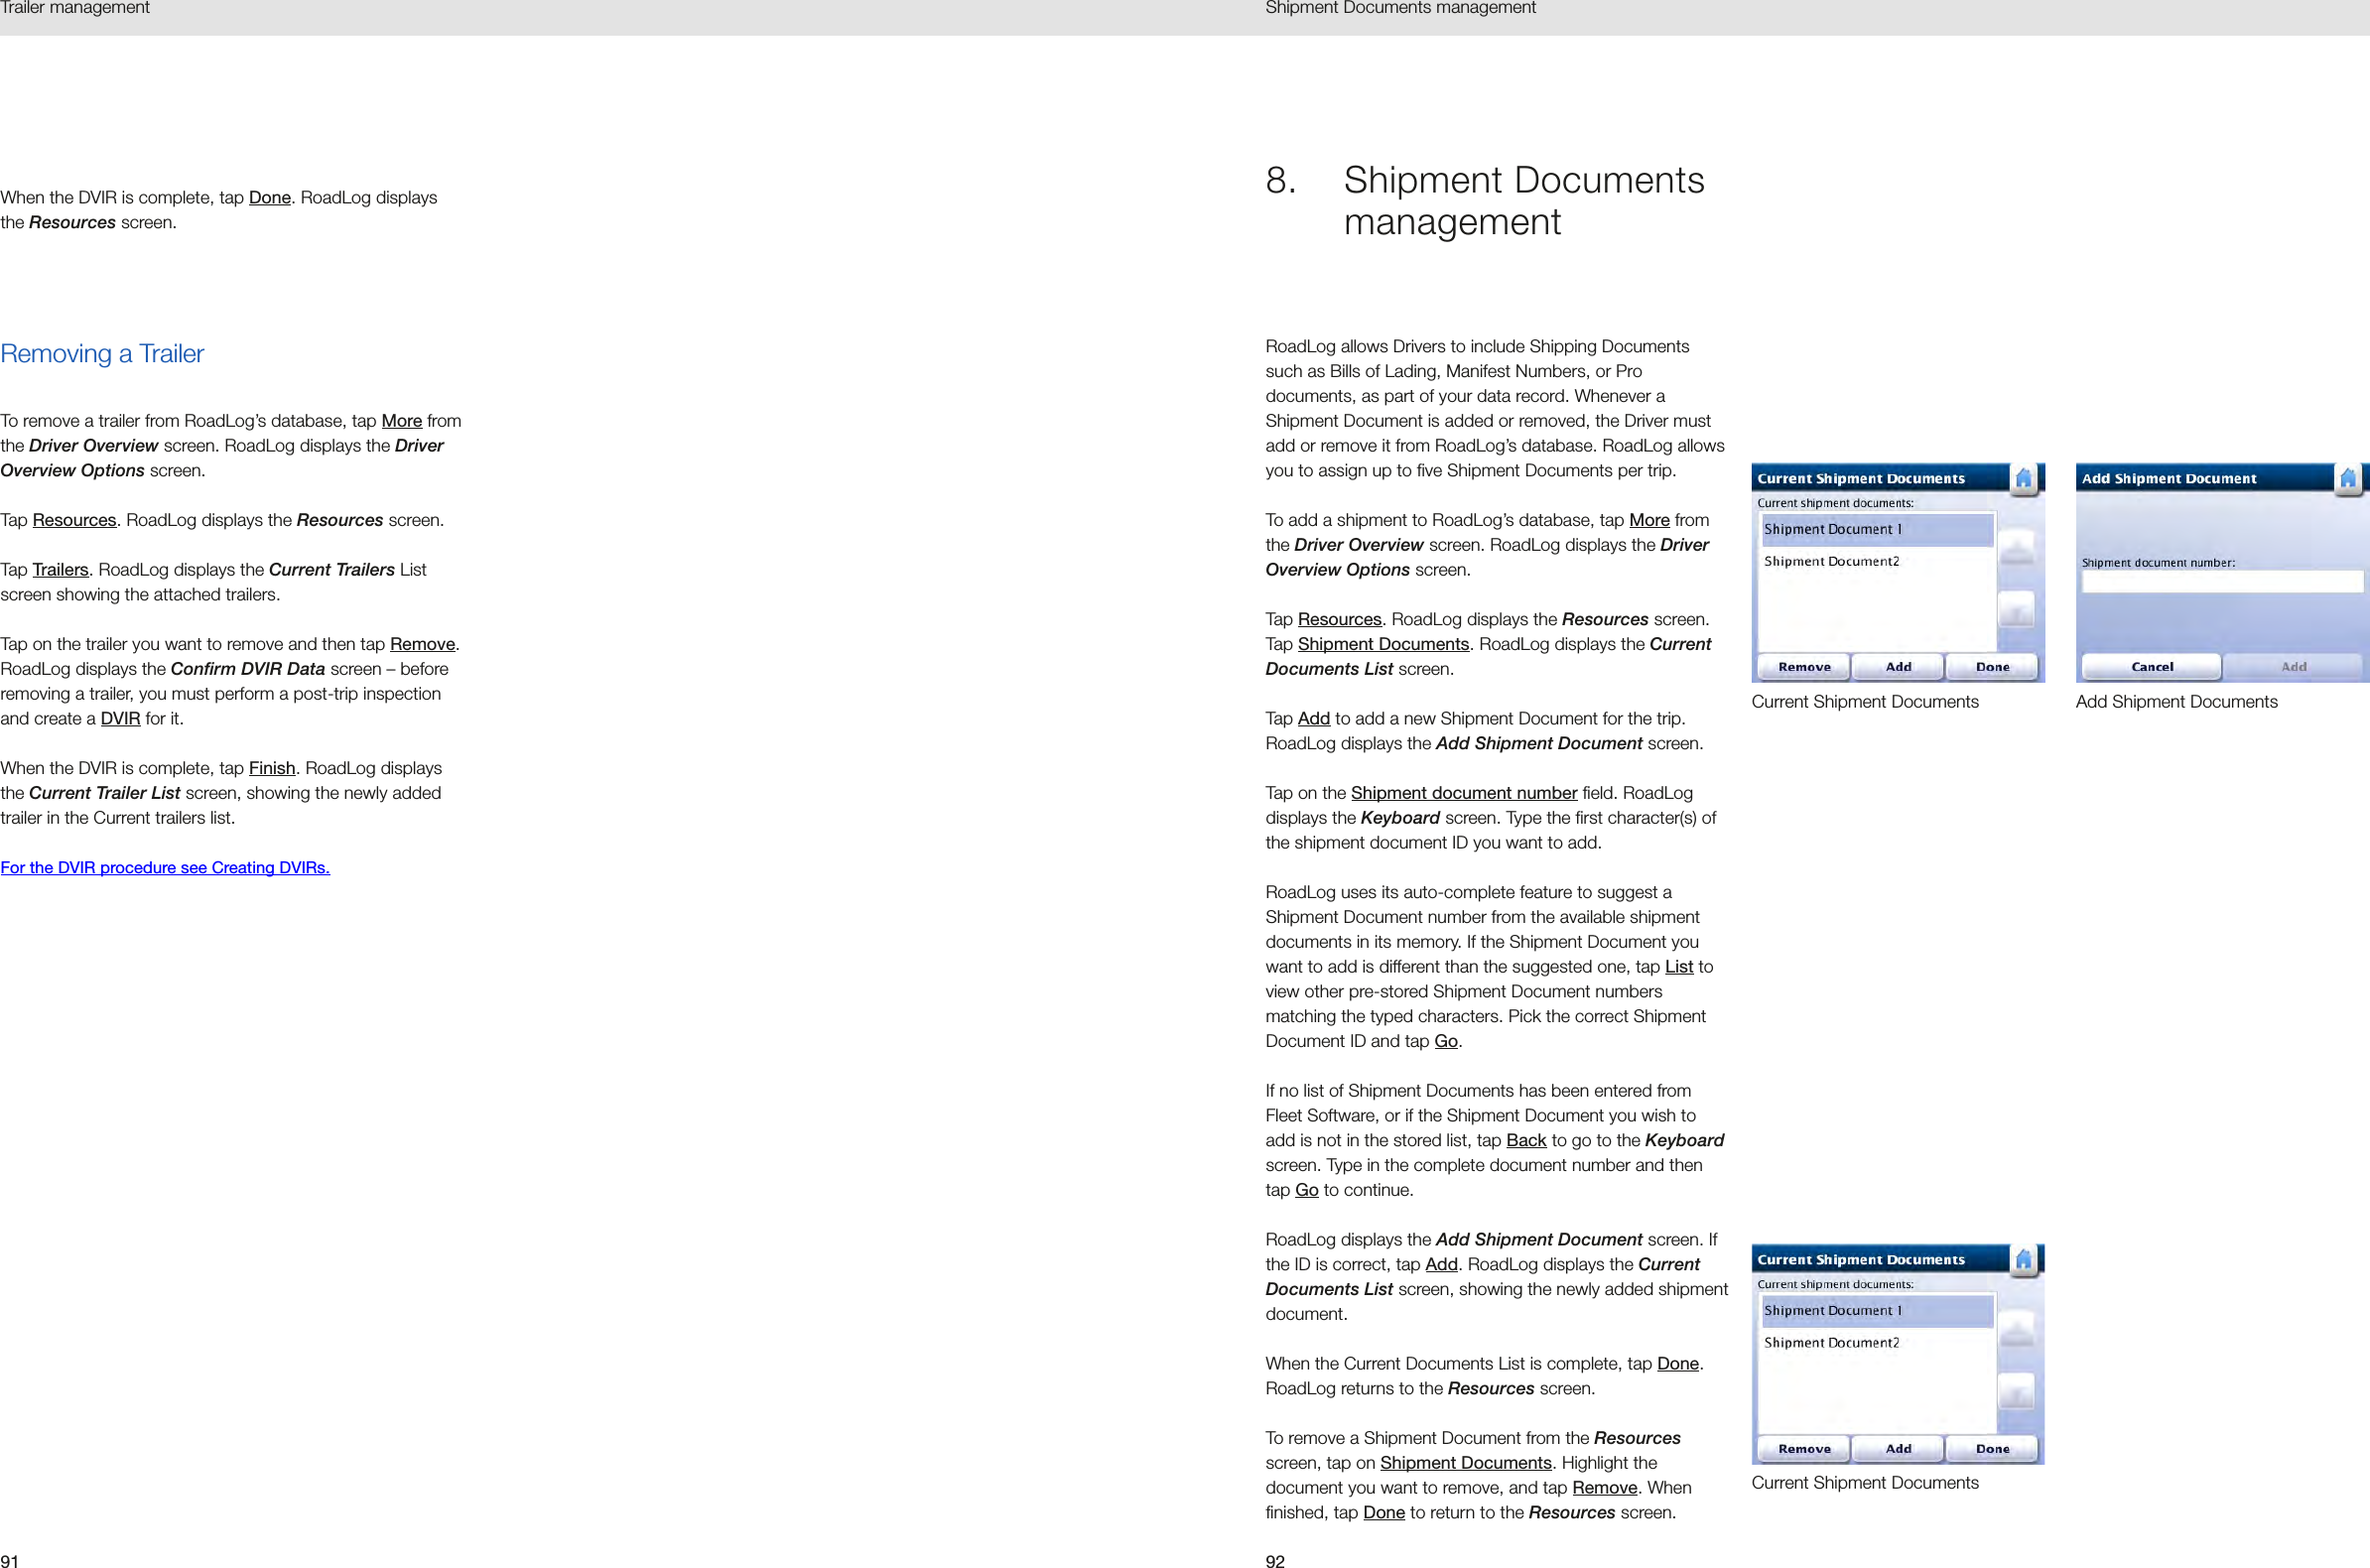
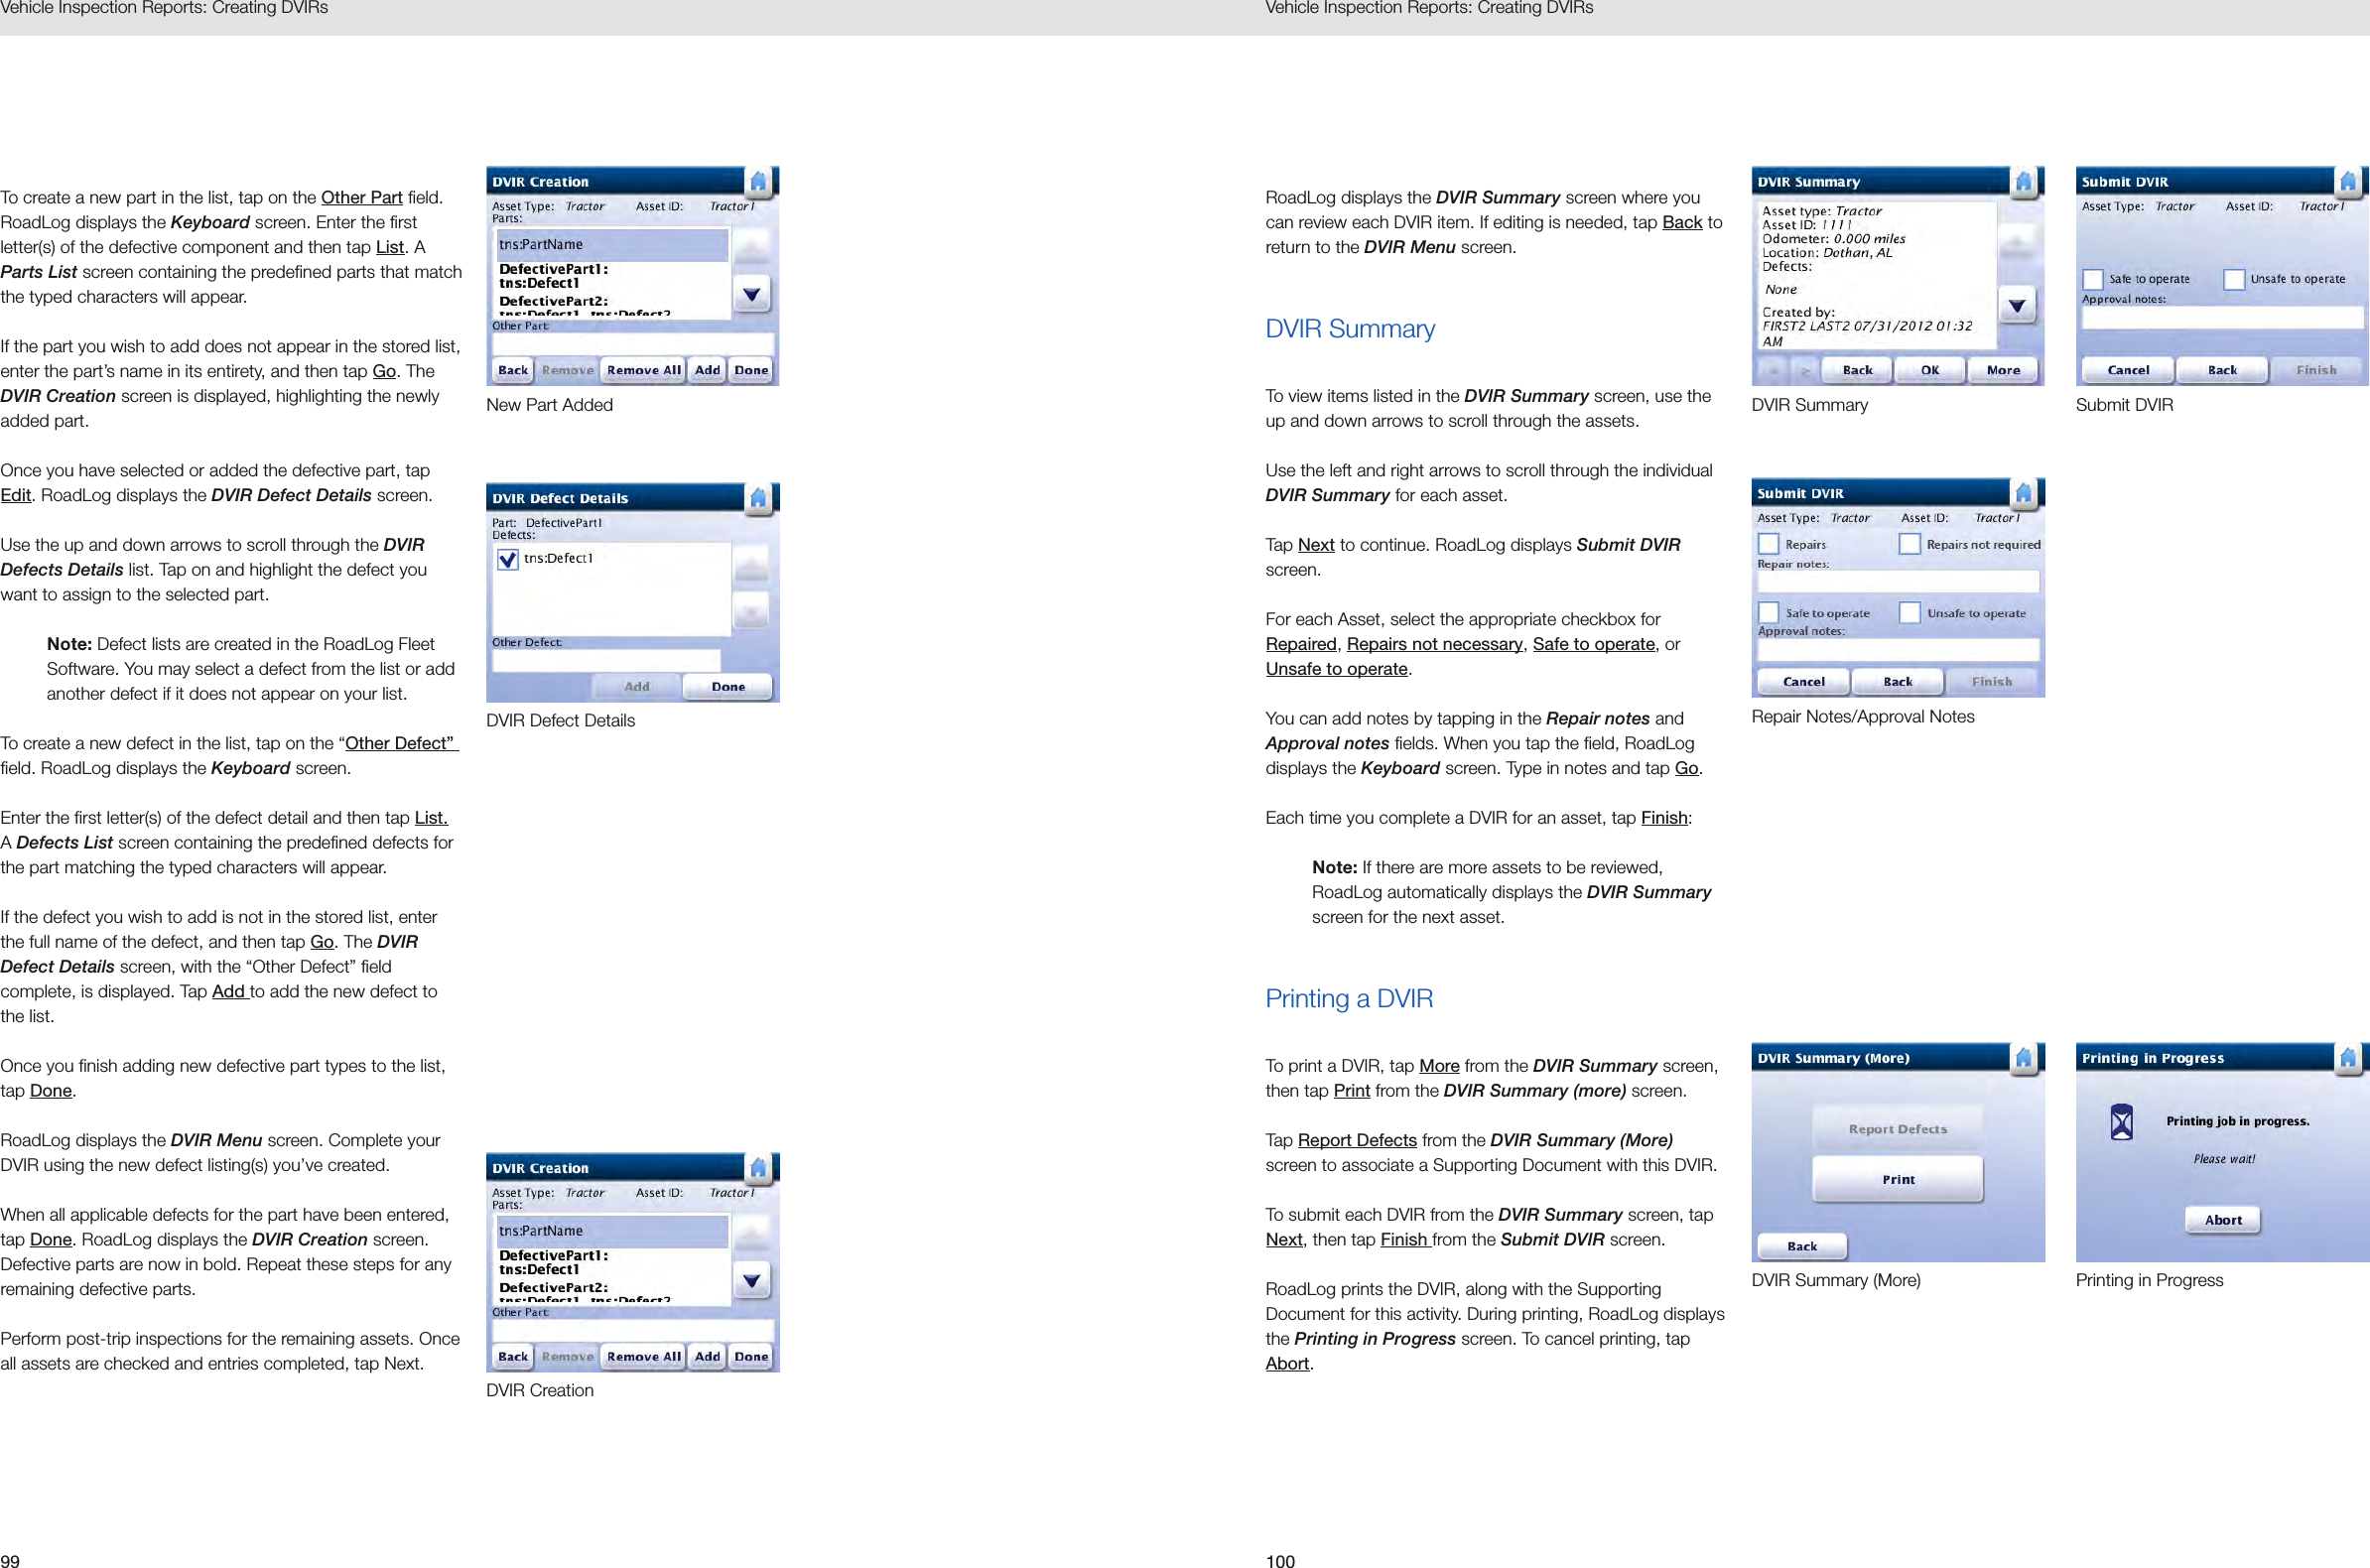
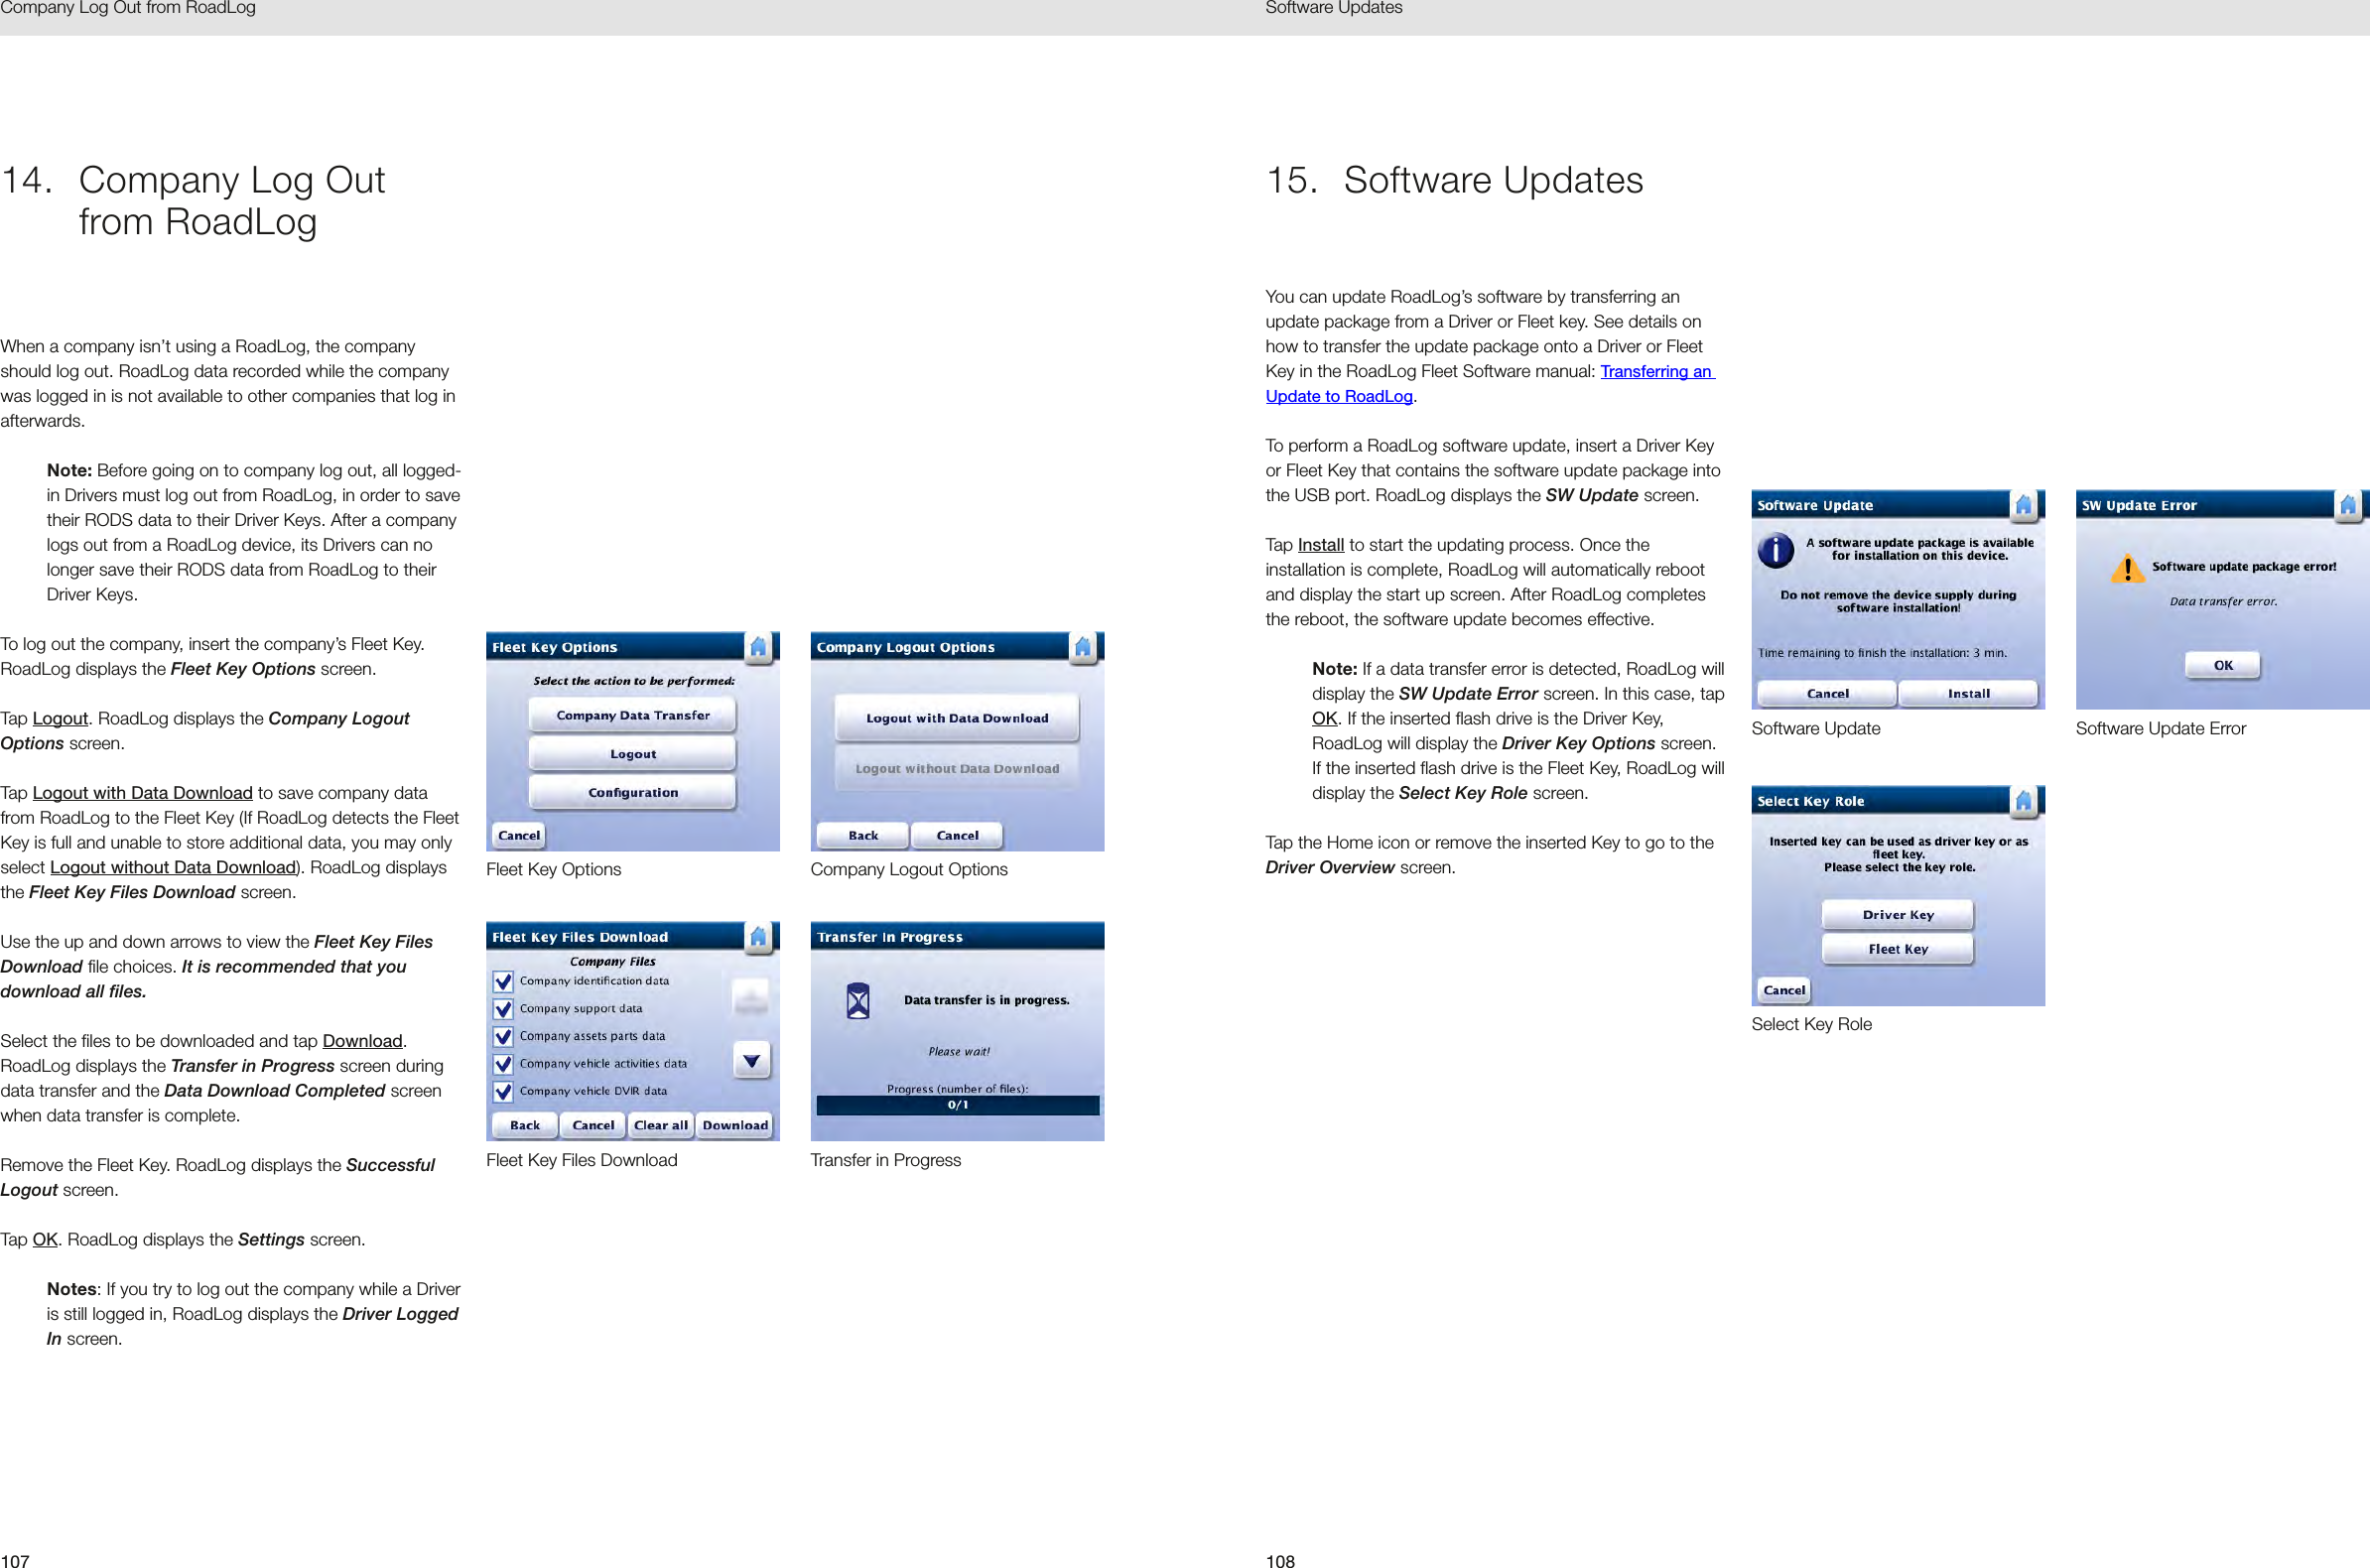
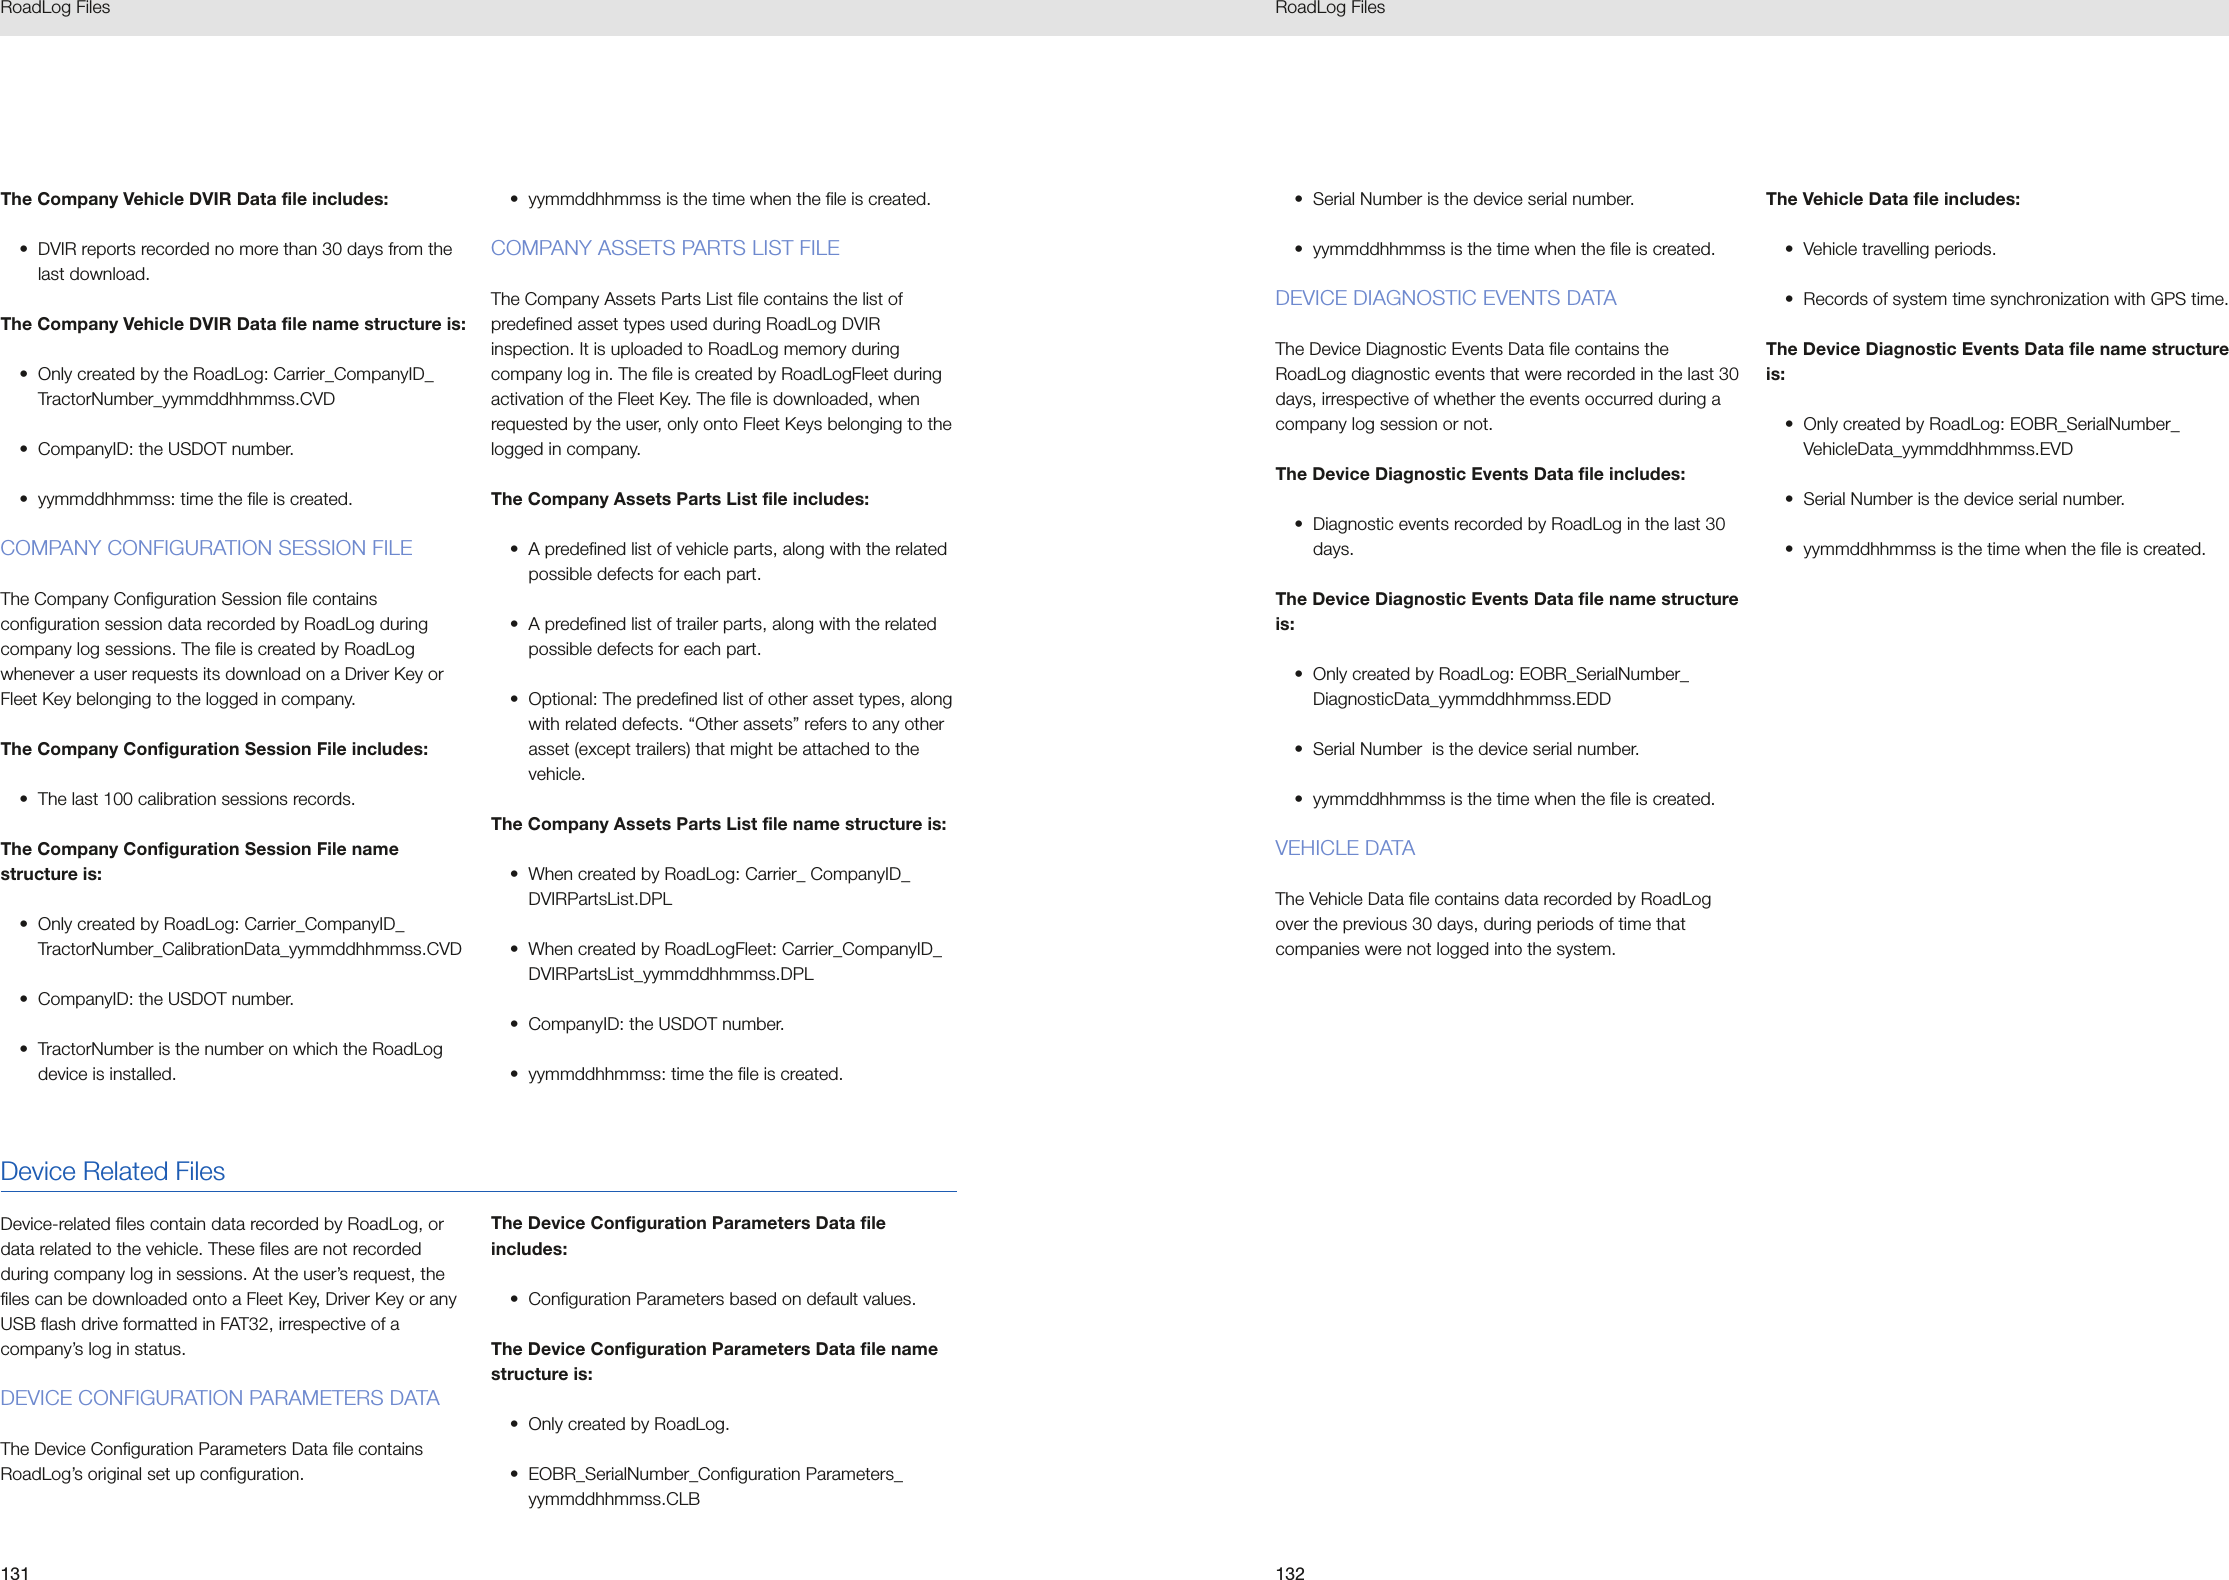
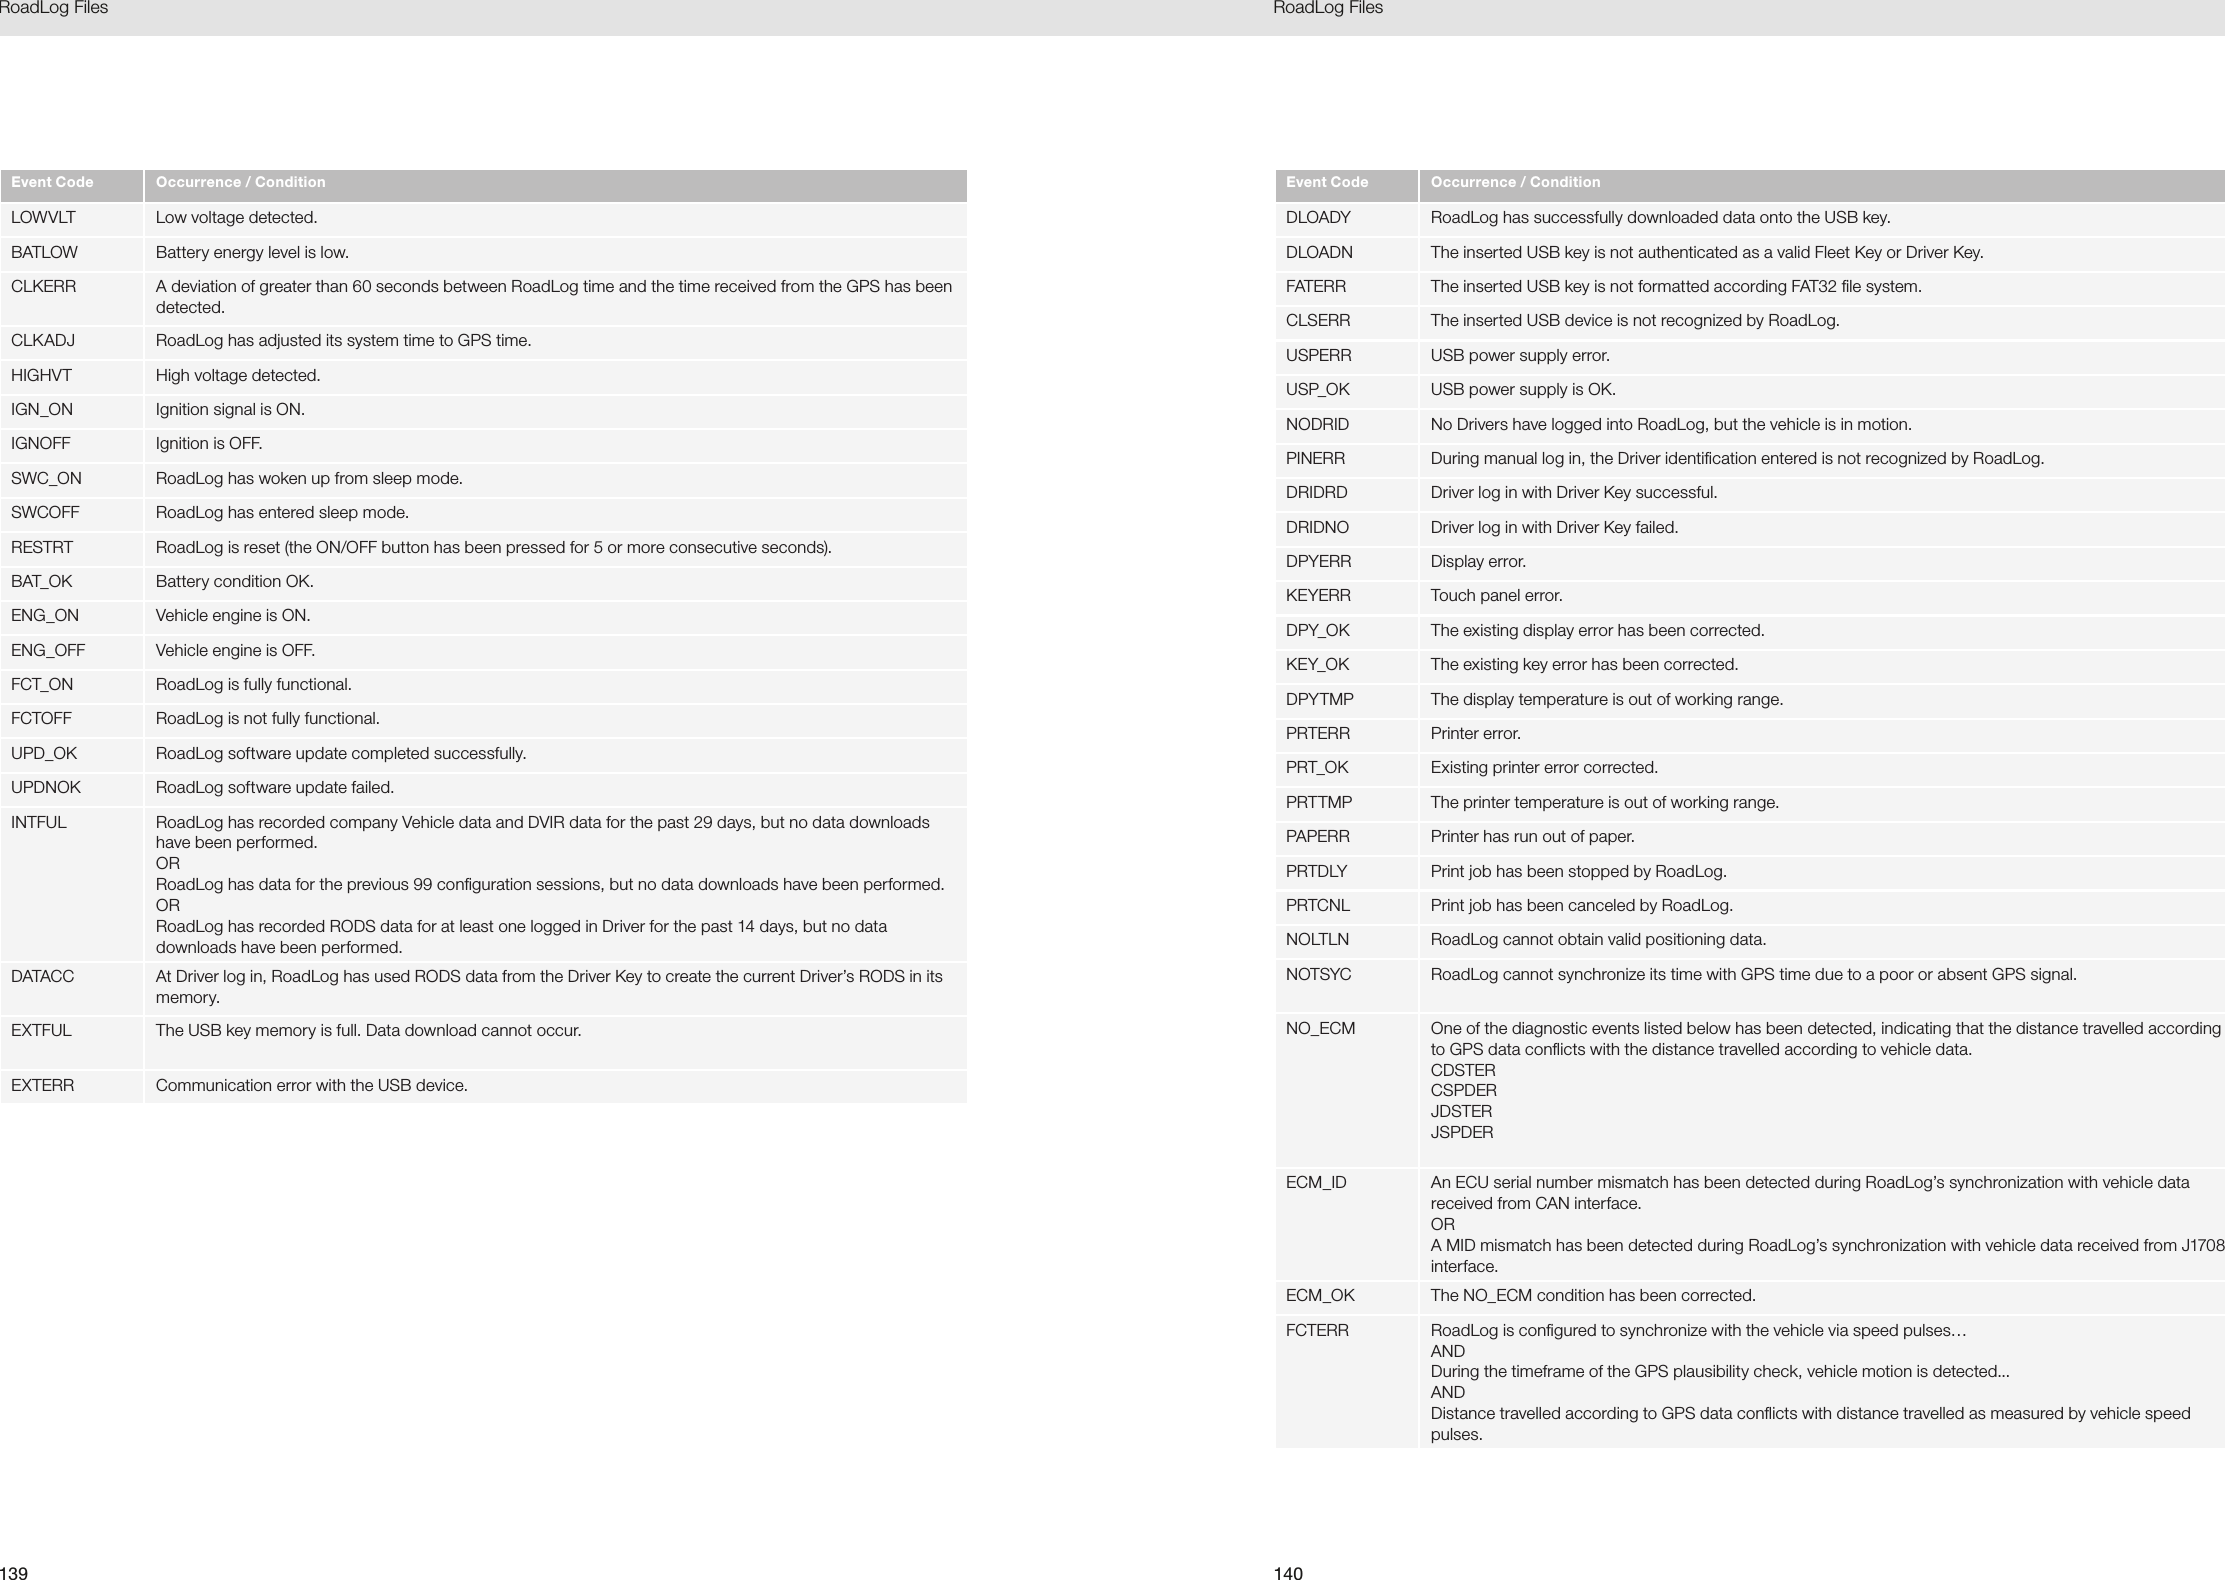
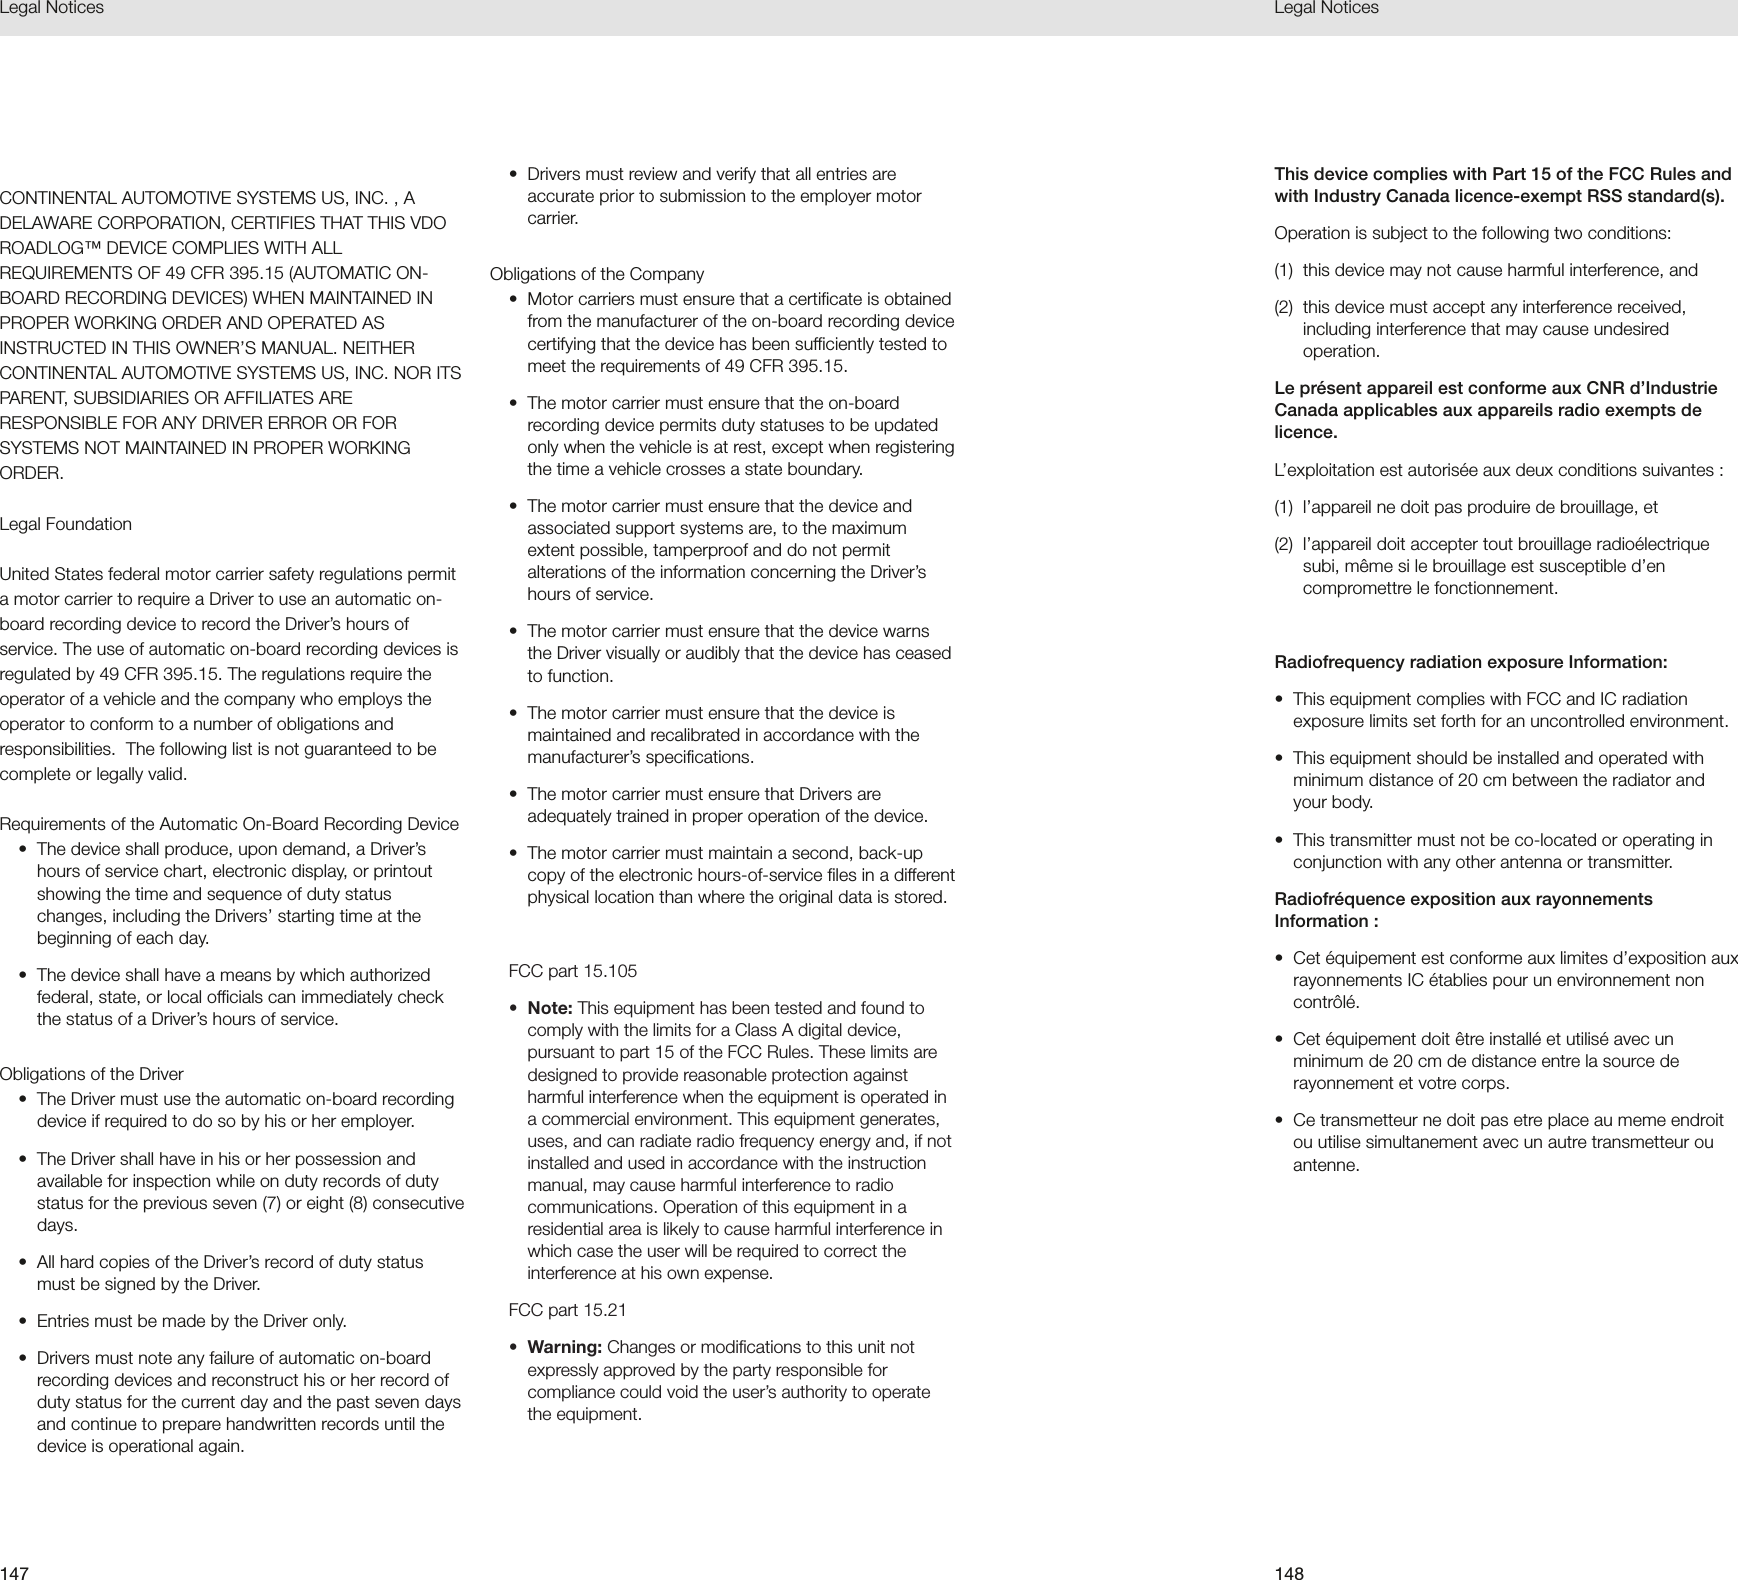
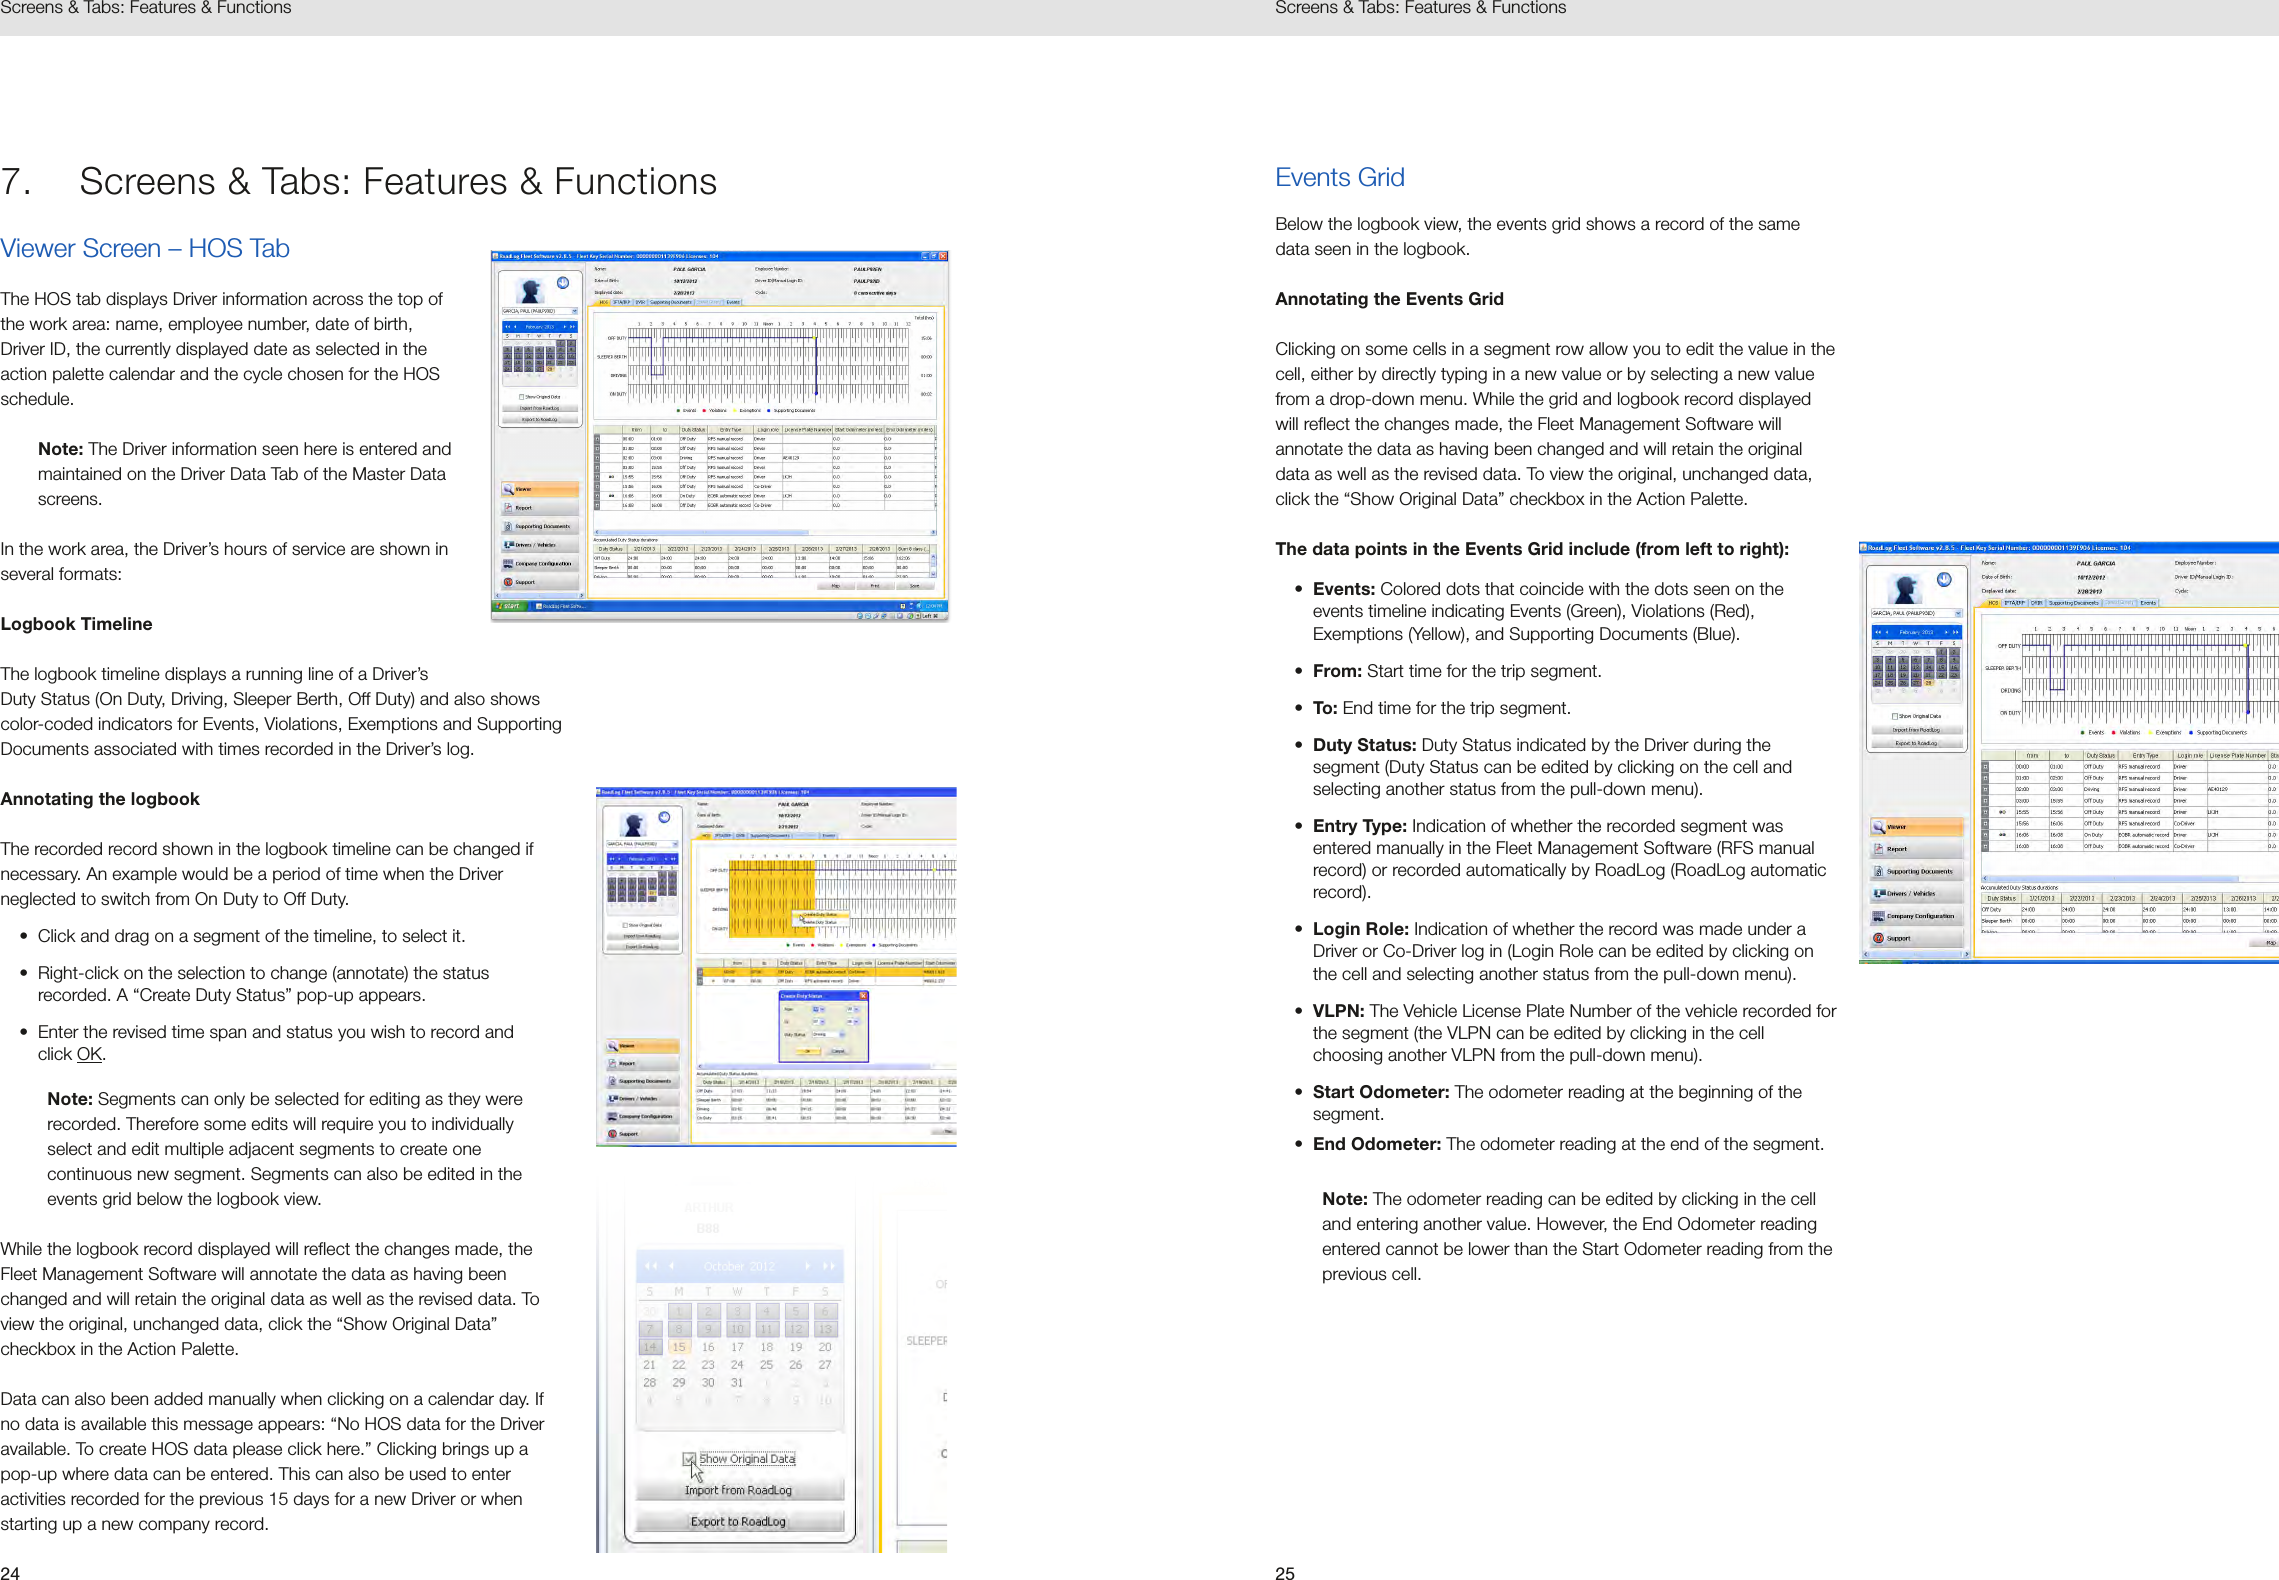
![1514Navigating RoadLog Fleet Management Software: First Look Navigating work area Screens and TabsThe Action Palettes:Seen at the upper left, the Action Palette provides access to the frequently used actions. The options shown in the Action Palette change, depending on which Navigation button is active. Viewer Action Palette: When the Viewer Navigation Button is active, the Action Palette shows the interactive calendar used to select dates you’ll view and buttons to import or export data from or to a RoadLog Fleet Key or Driver Key. The icon at the top of the Action Palette toggles to reveal the list of all Drivers that have been created for the company. You may also select the Driver or vehicle from the drop-down menu. The “Show Original Data” check box will cause the HOS tab screen to show original data automatically recorded by the RoadLog device rather than data that was manually edited by a RoadLog Fleet Management Software user.Report Action Palette: When the Report Navigation Button is active, the Action Palette is inactive and shows only the Company icon. You may use the default Company Icon, or if you wish, you can change the Company icon to an image of your choosing, such as your logo, by clicking on it. Supporting Documents Action Palette: When the Supporting Documents Navigation Button is active, the Action Palette shows timeline selectors that define the time period from which you will see recorded Supporting Documents. The “Display only new entries” checkbox will cause the software to display only newly recorded entries.Drivers / Vehicles Action Palette: When the Drivers / Vehicles Navigation Button is active, the Action Palette shows buttons to create Drivers, vehicles and trailers as well as buttons to import or export data from or to a RoadLog Fleet Key or Driver Key. The icon at the top of the Action Palette toggles to reveal the list of all Drivers that have been created for the company. Company Configuration Action Palette: When the Company Configuration Navigation Button is active, the Action palette shows buttons to import or export data from or to a RoadLog Fleet Key or Driver Key.Support Action Palette: When the Support Navigation Button is active, the Action Palette is inactive, and shows only the Company icon.The Work Area:The Work Area displays the tabbed screens and fields you’ll work in. The screens seen here change according to which of the Navigation Buttons is active and which tab you’ve clicked on.Note: As with the Company icon mentioned above, you can change the icons for Driver, Trailer or Vehicle, to images of your choosing. Create your icon at 75 x 75 pixels. Click on the icon you wish to replace and choose your icon from the dialog box that appears.4. Navigating work area Screens and TabsThe easiest way to understand the Fleet Software’s capabilities is to review the screens and their tabs’ functions. An overview of the functions of each section is described below; a detailed explanation of how to work in the screen and tabs is provided in Screens & Tabs: Features & Functions.Viewer ScreenHOS Tab: • View, edit and print Driver HOS data in logbook, tabular and map form. • View start/end times for Events, Violations, Exemptions and Supporting Documents. • View and edit accumulated times for each Duty Status recorded; Off Duty, Sleeper Berth, Driving and On DutyIFTA/IRP Tab:• [This feature will be implemented in a free upcoming release]DVIR Tab:• View and annotate DVIR records created by the Driver.Supporting Documents Tab:• View Supporting Documents records such as fuel and meal receipts.• Manually create new Supporting Documents.• Add scanned documents to the Supporting Documents records.](https://usermanual.wiki/Continental-Automotive-Systems/3290X/User-Guide-3041349-Page-8.png)
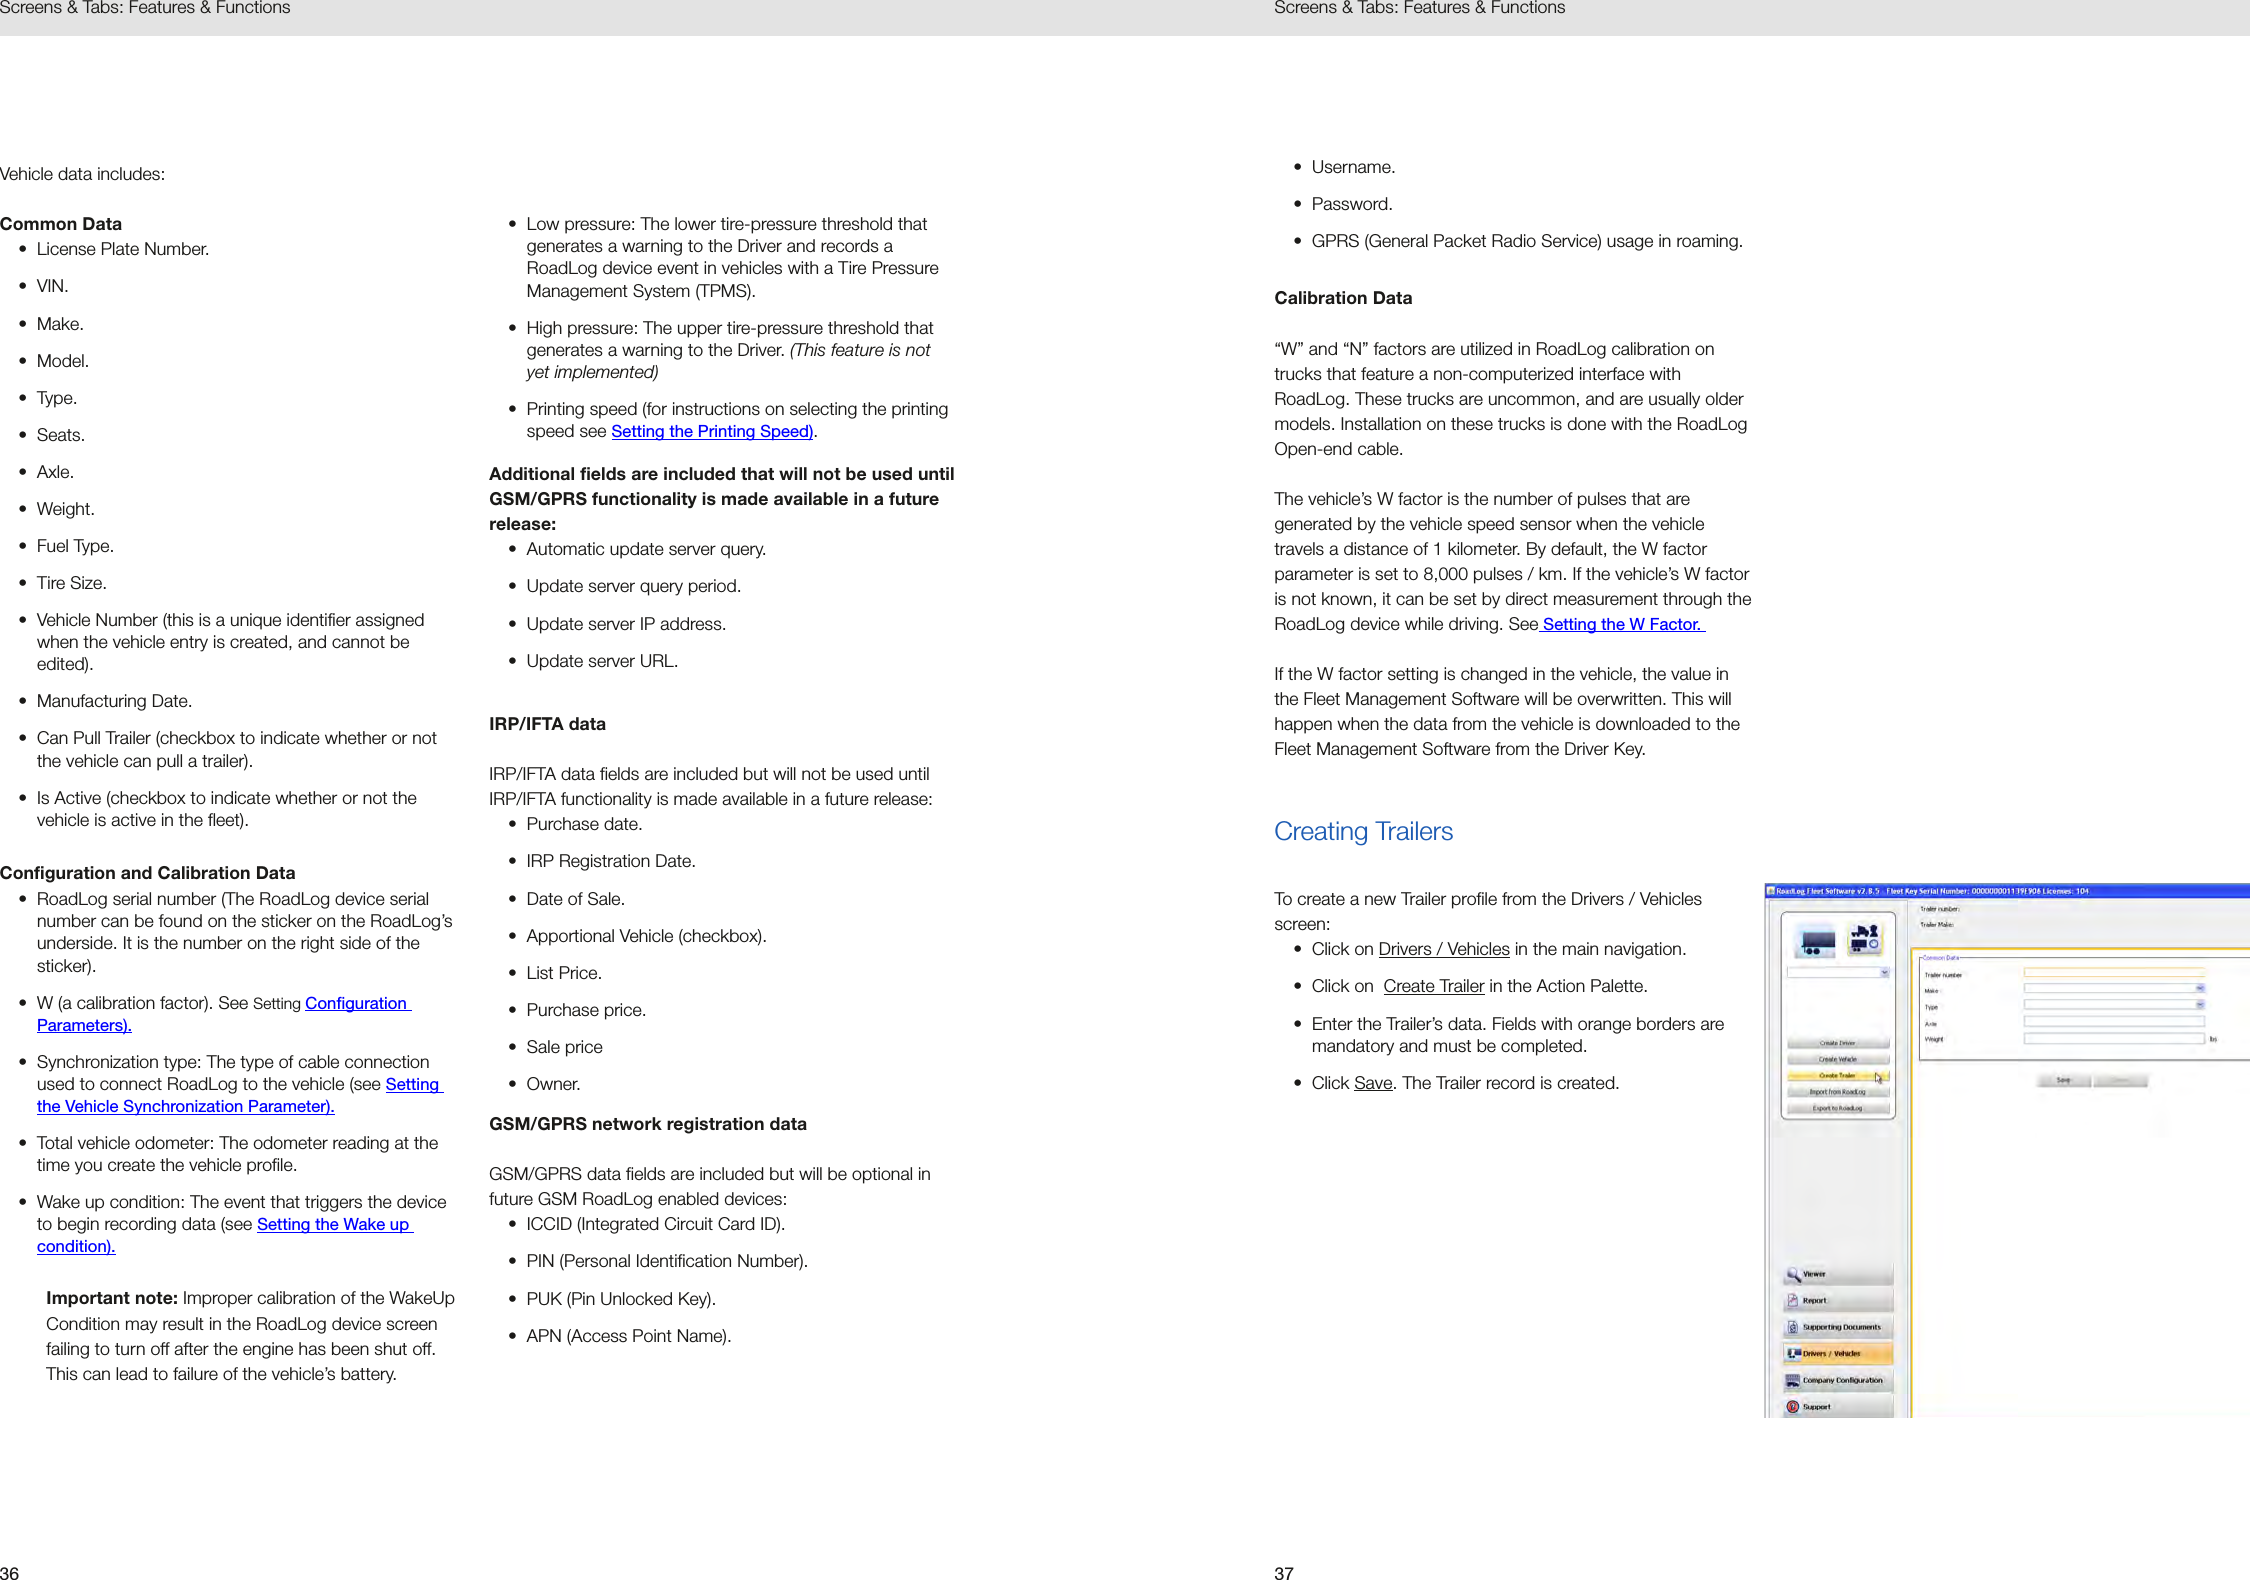
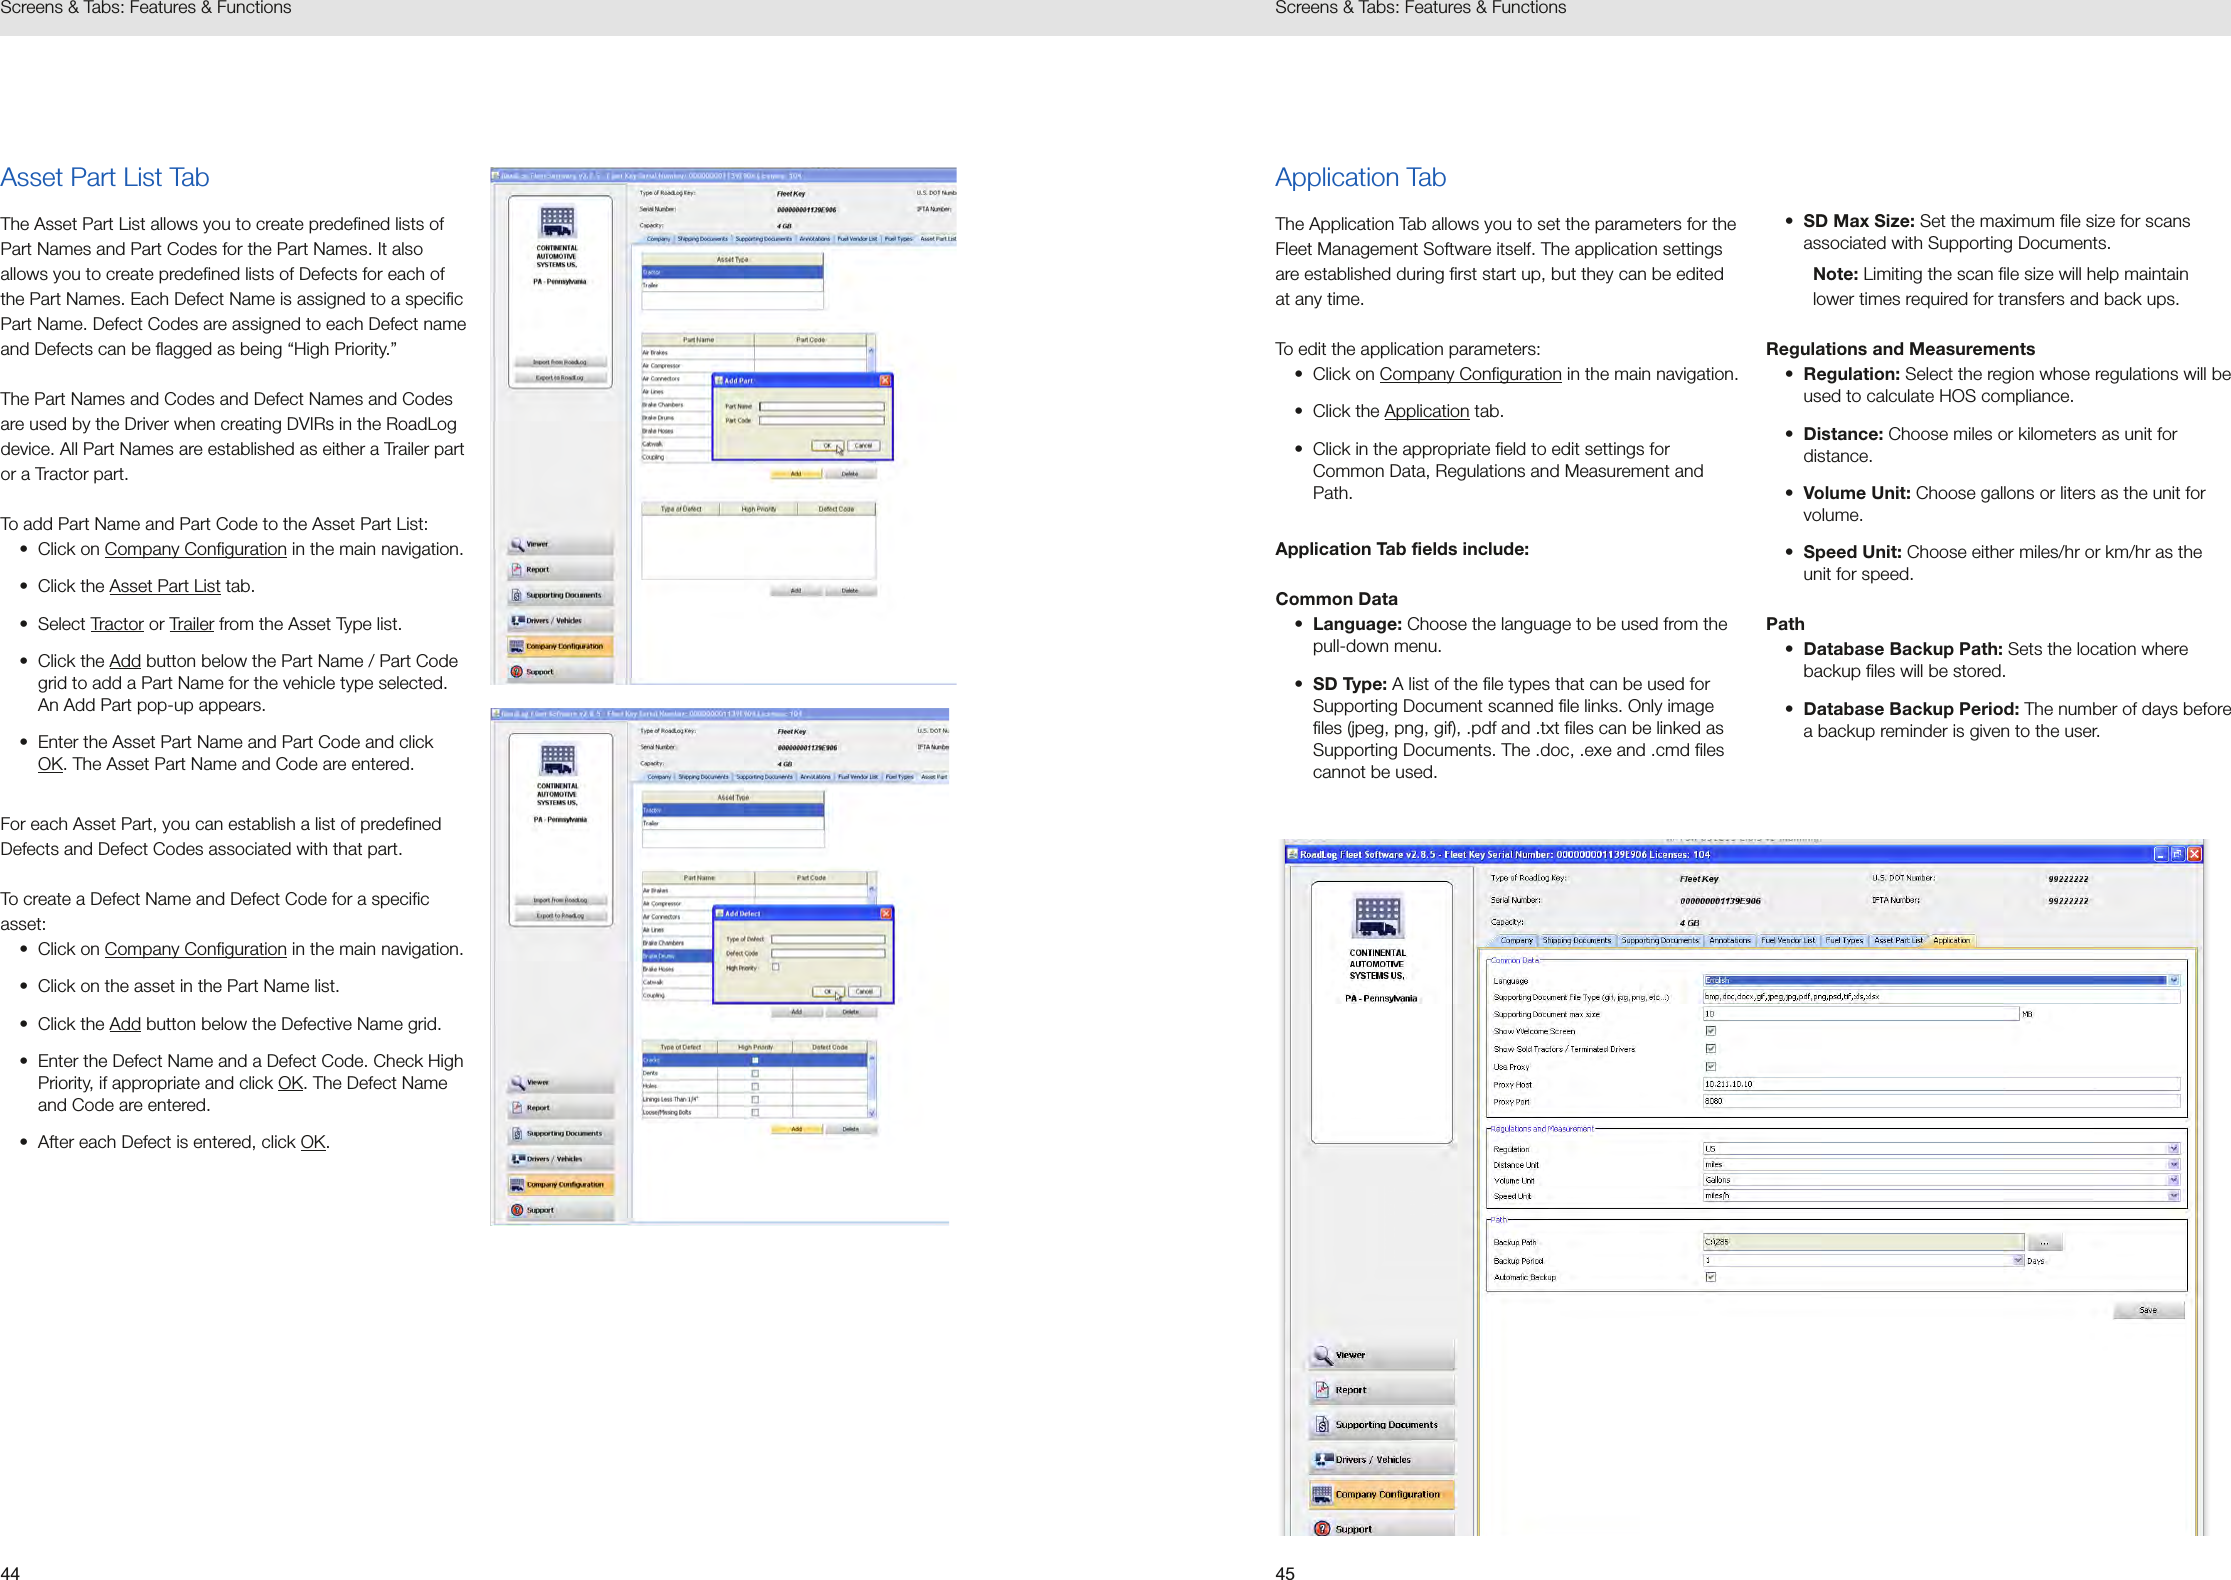
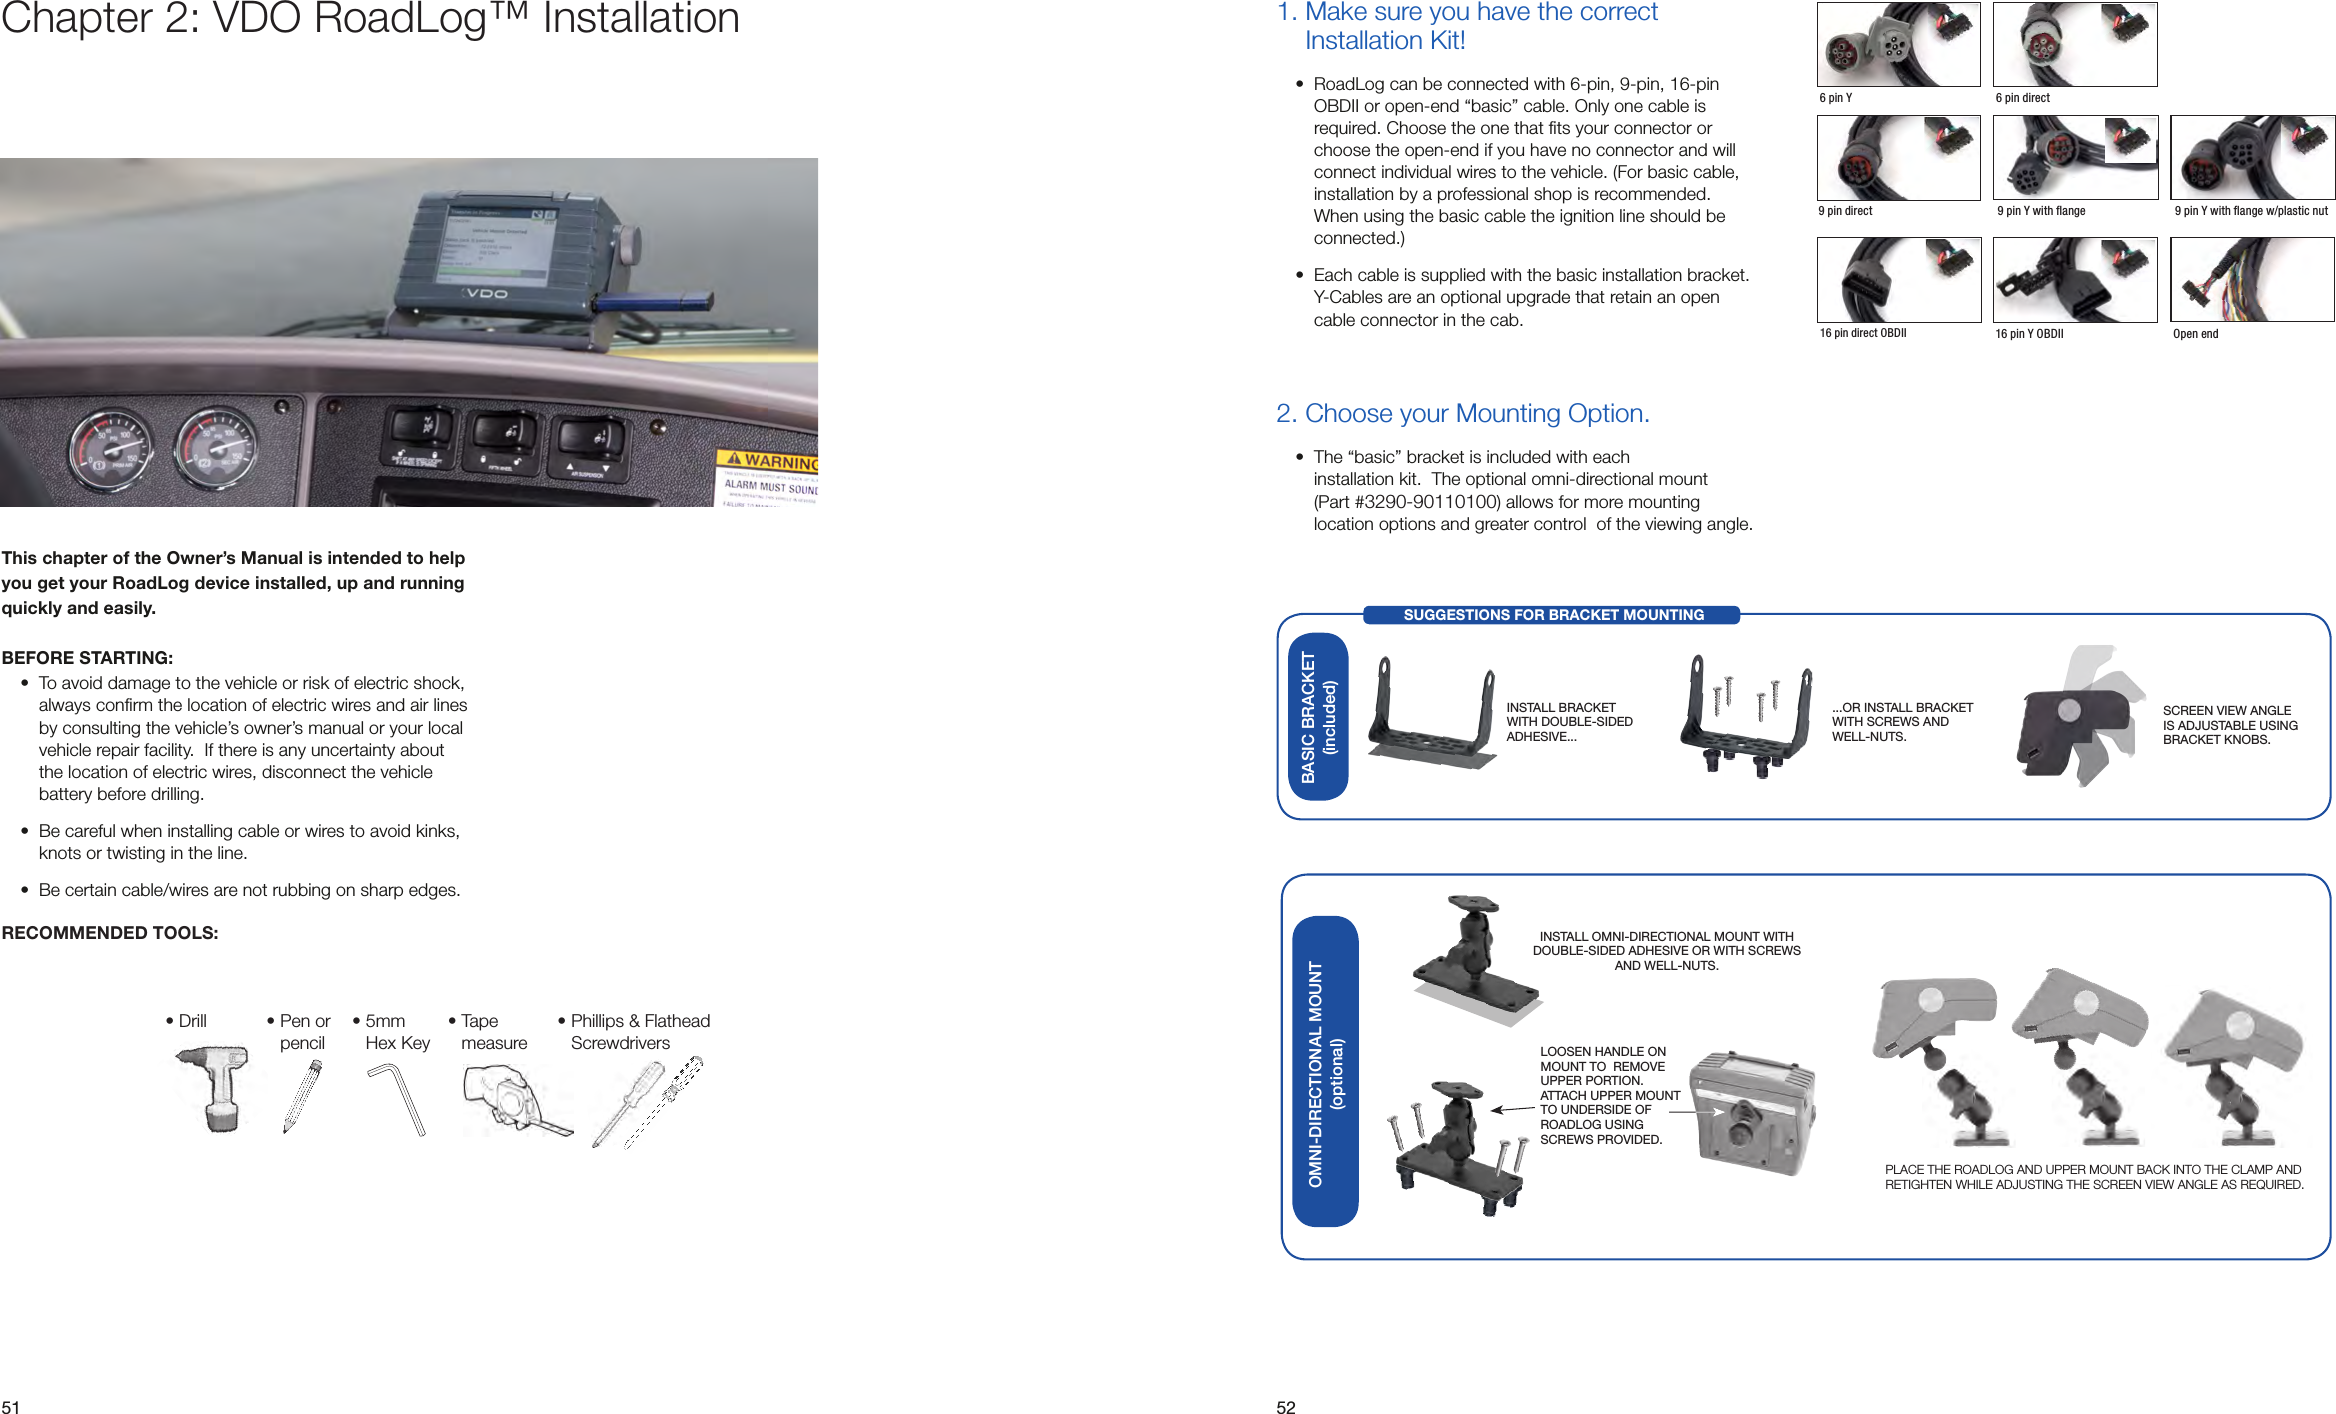
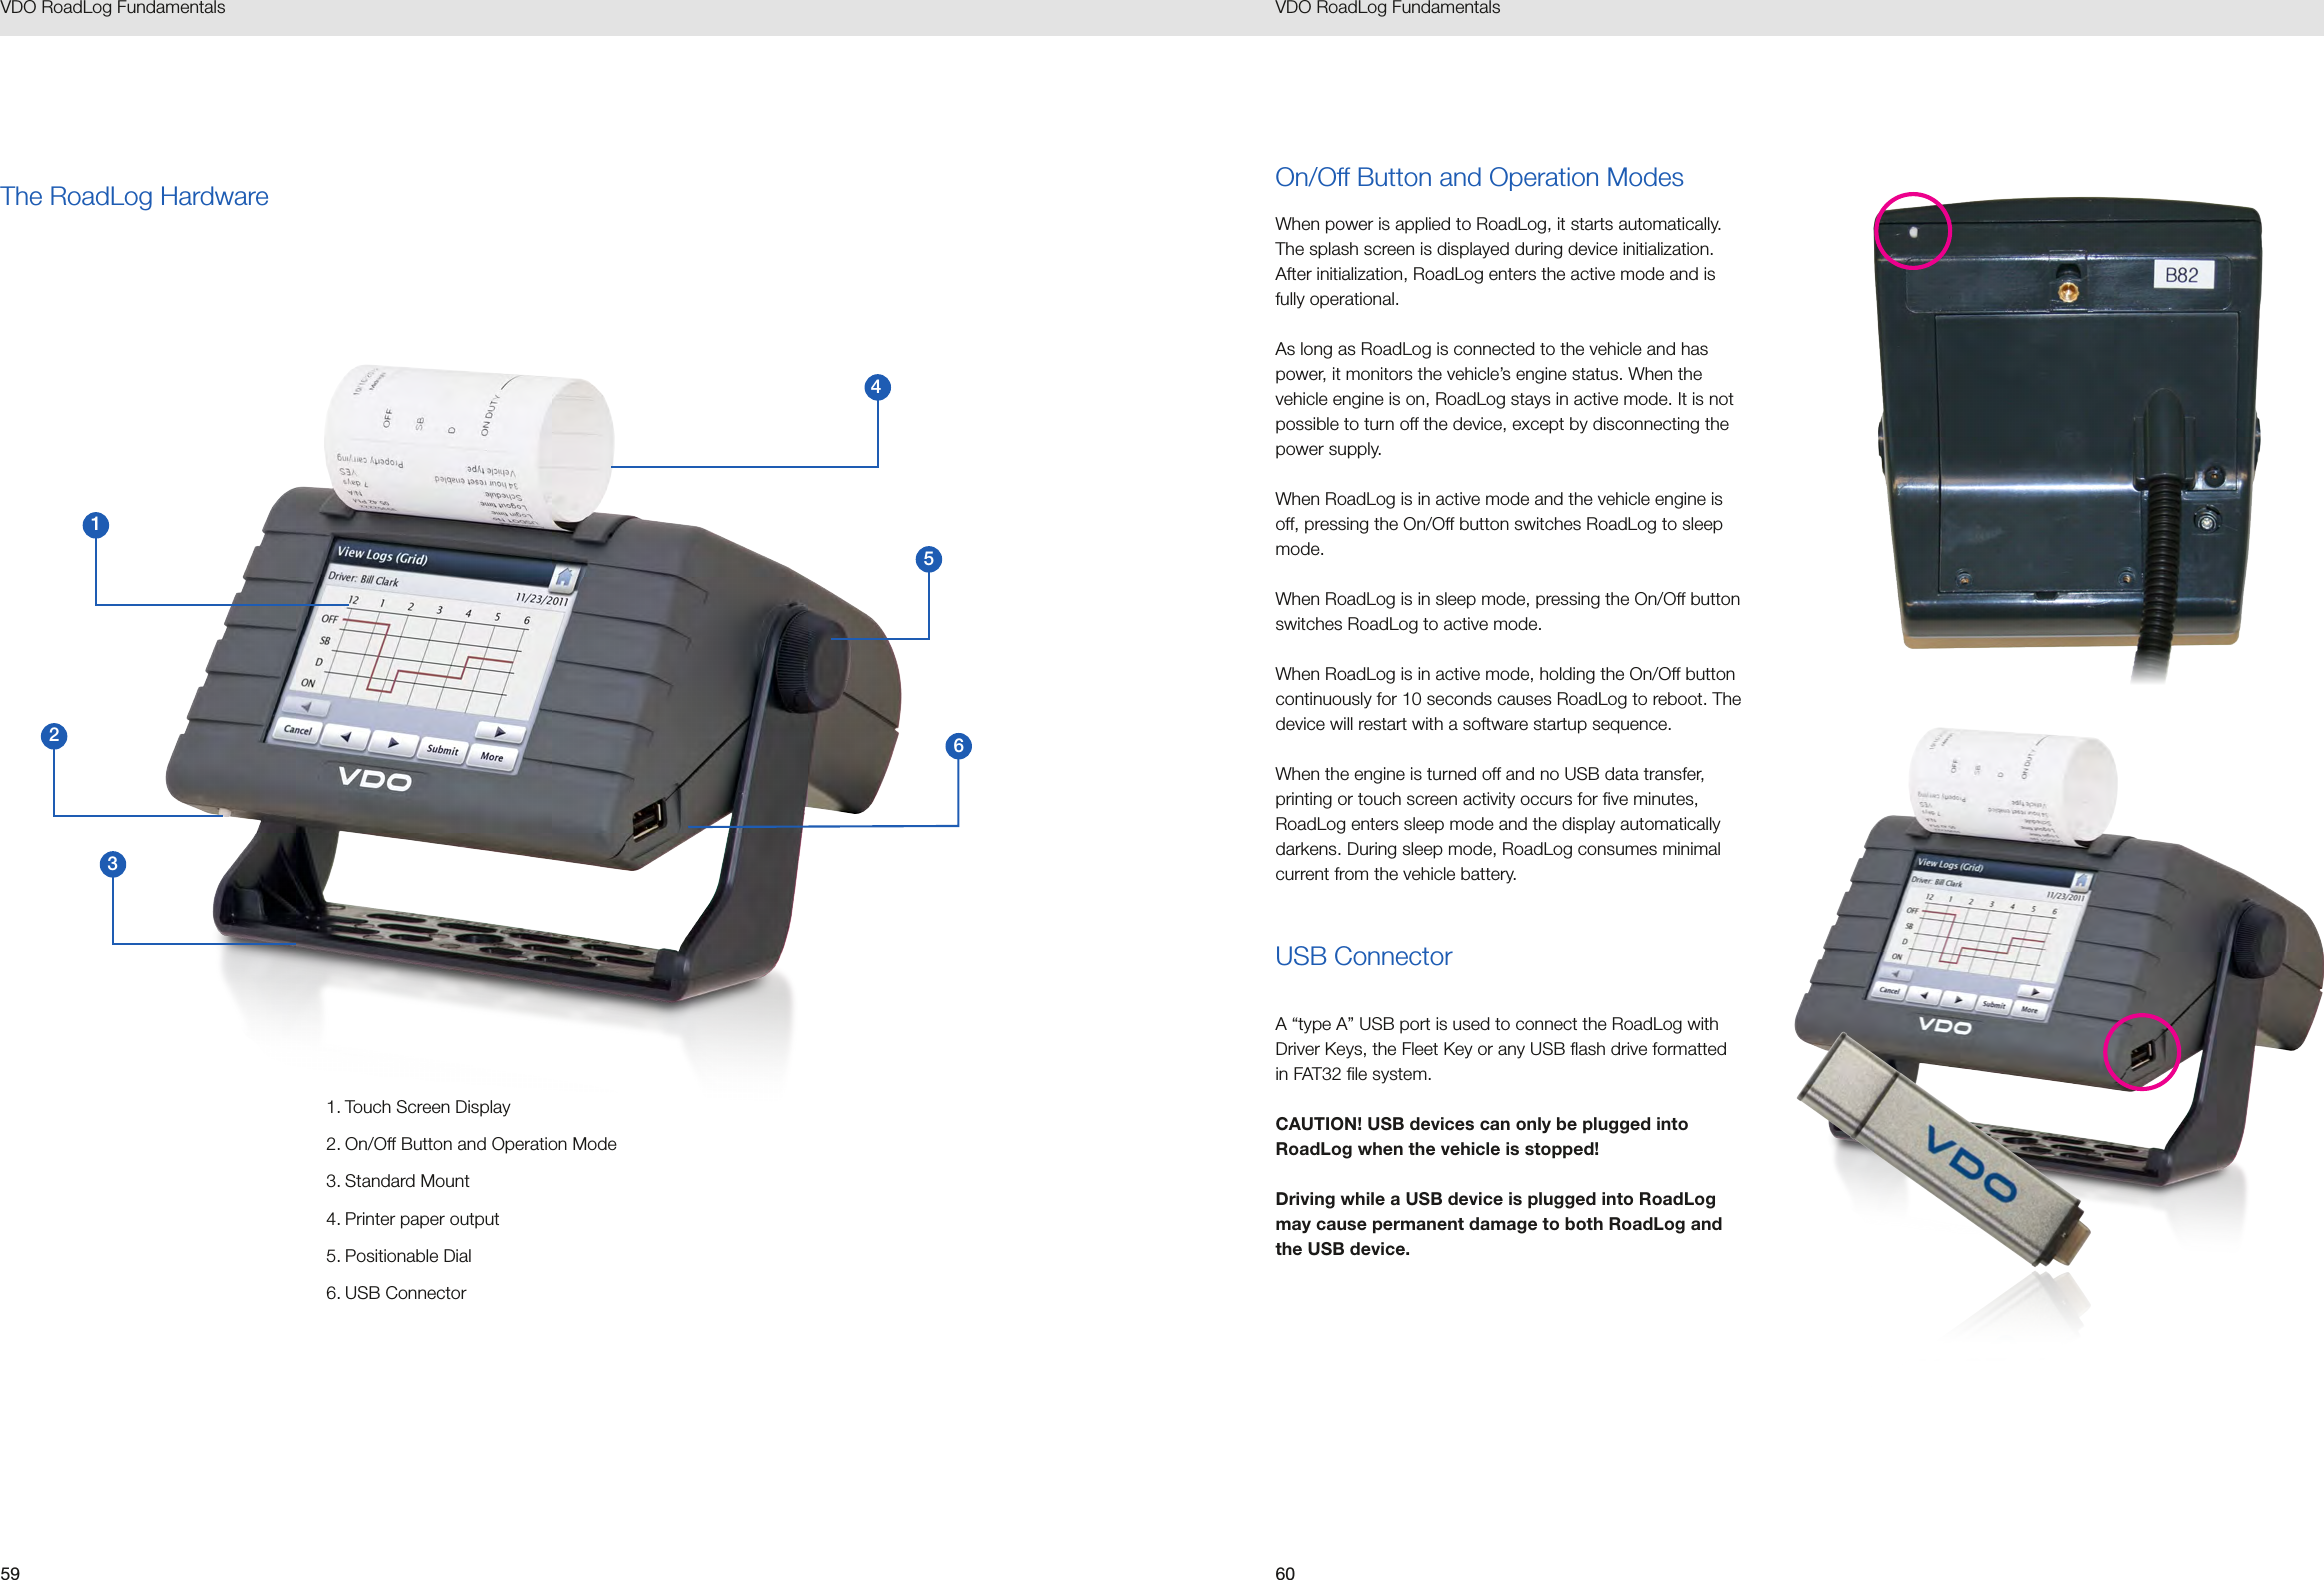
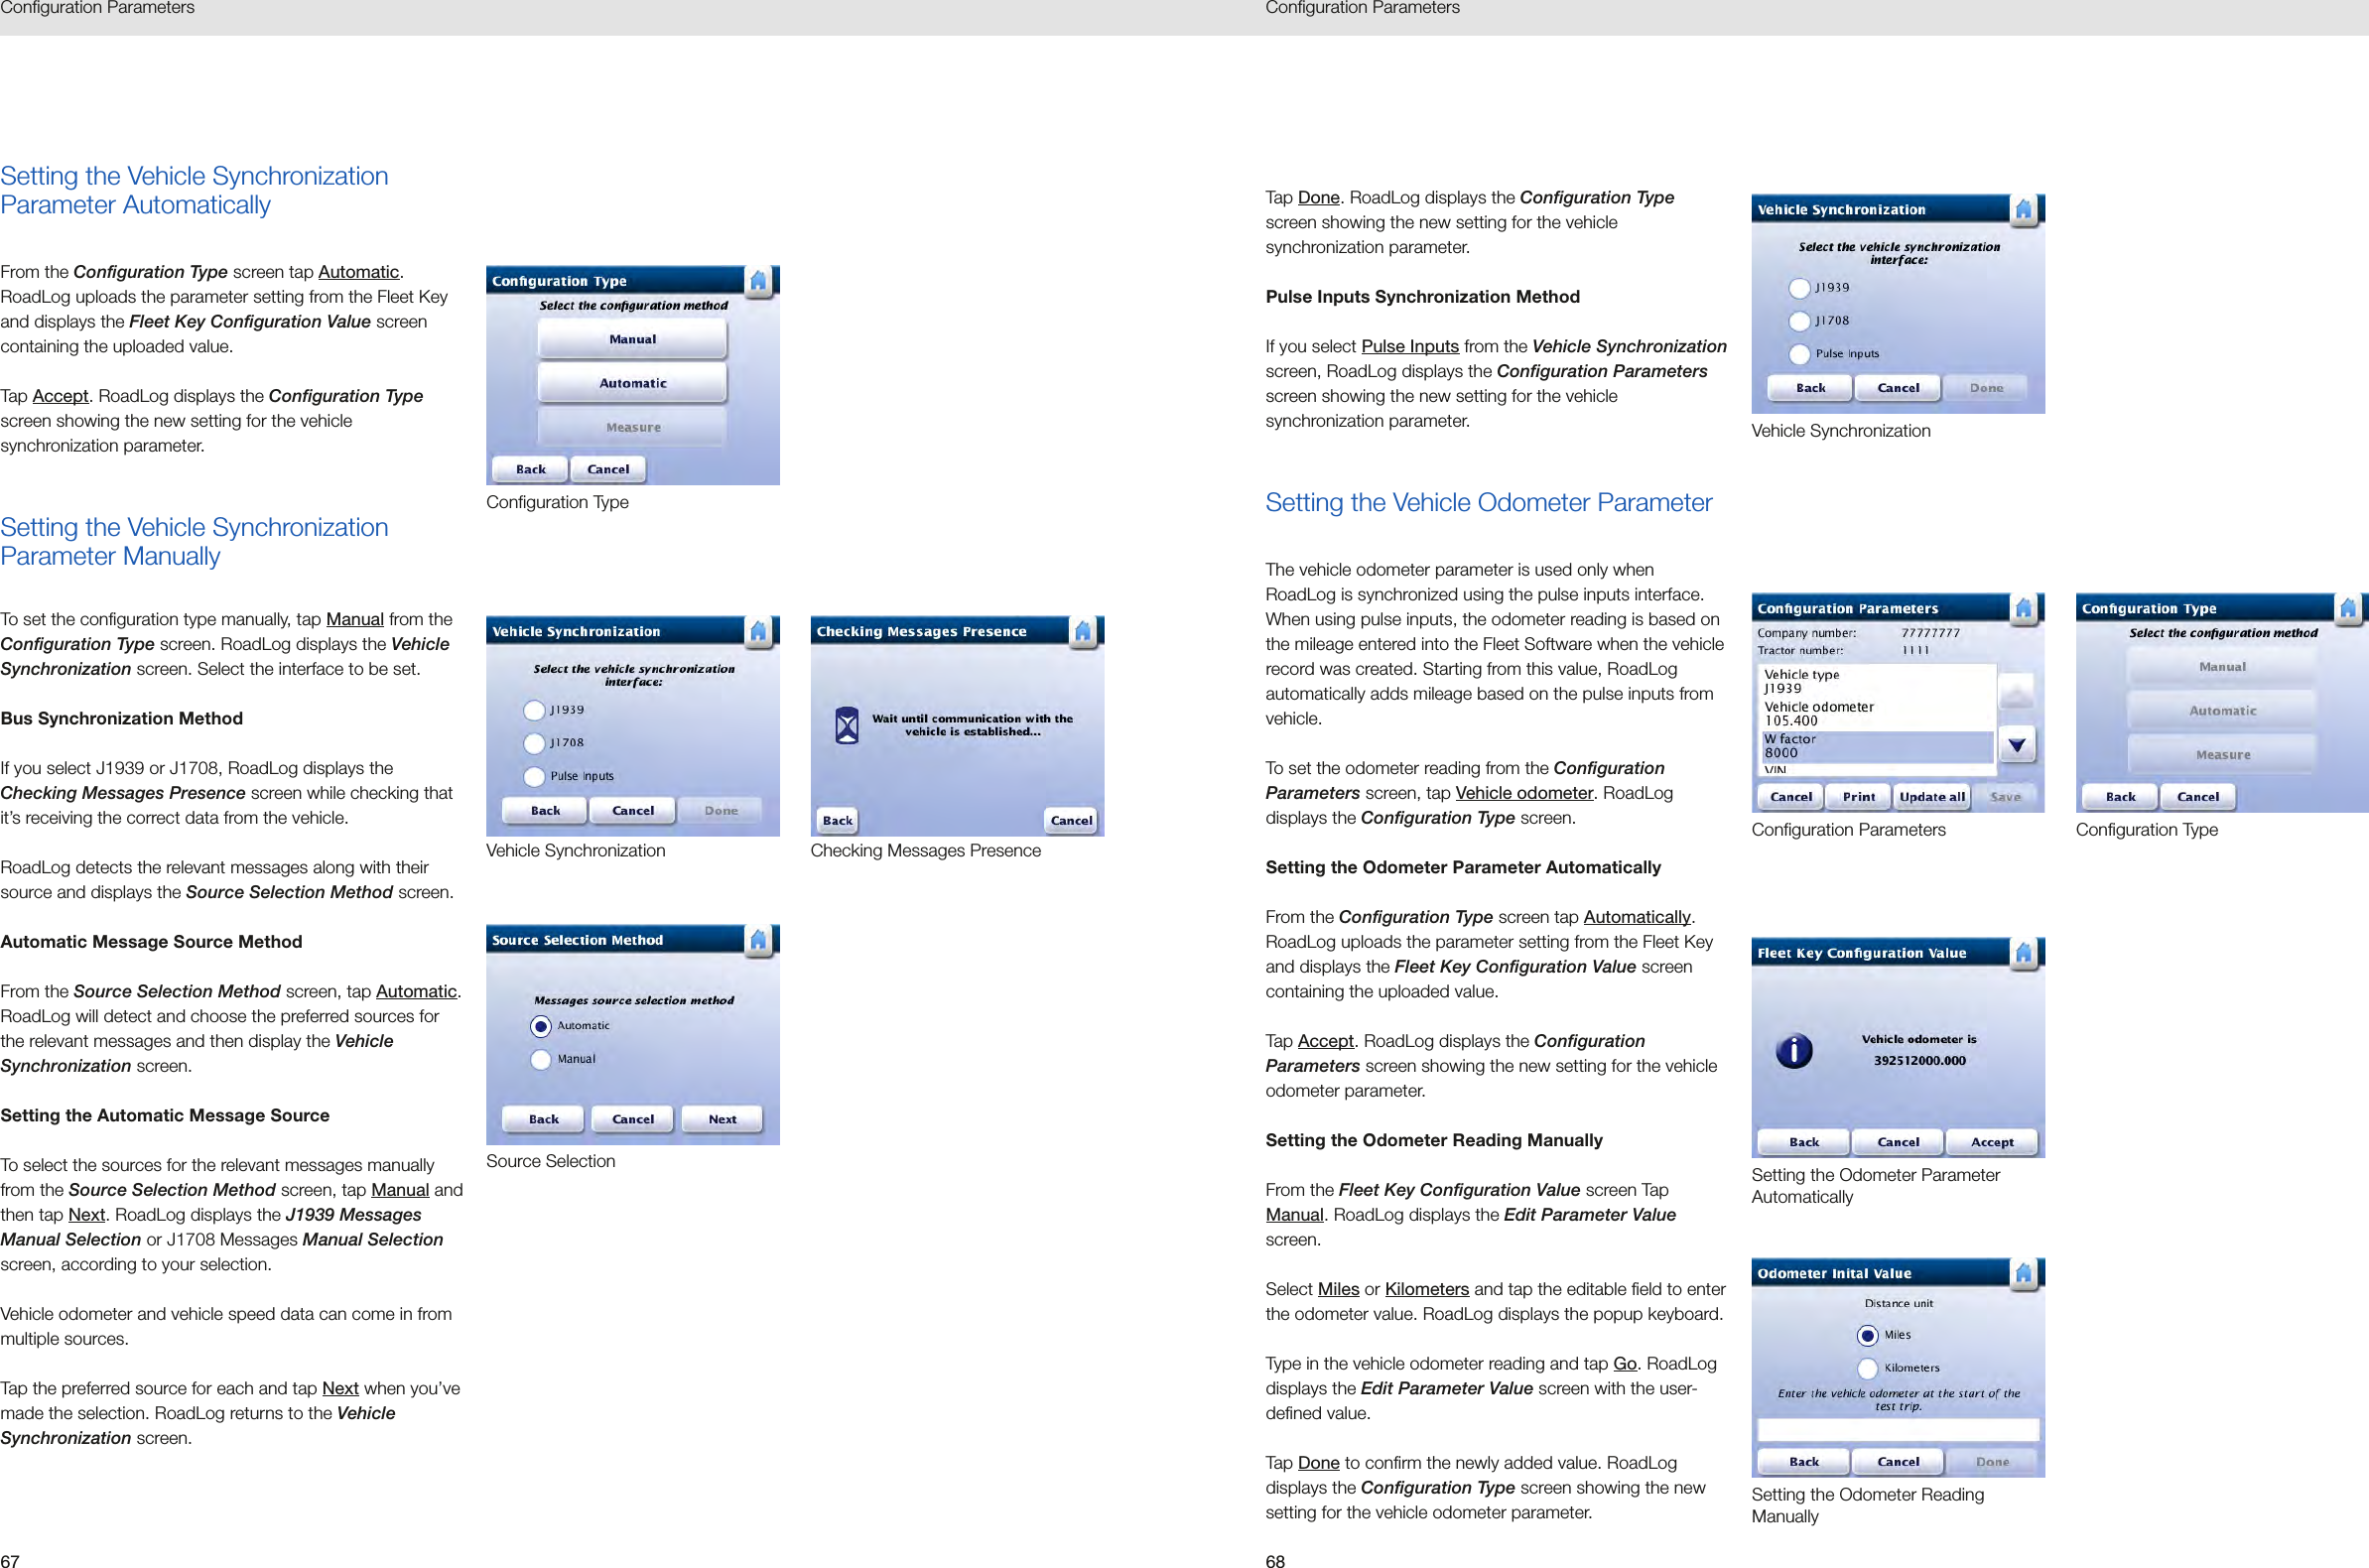
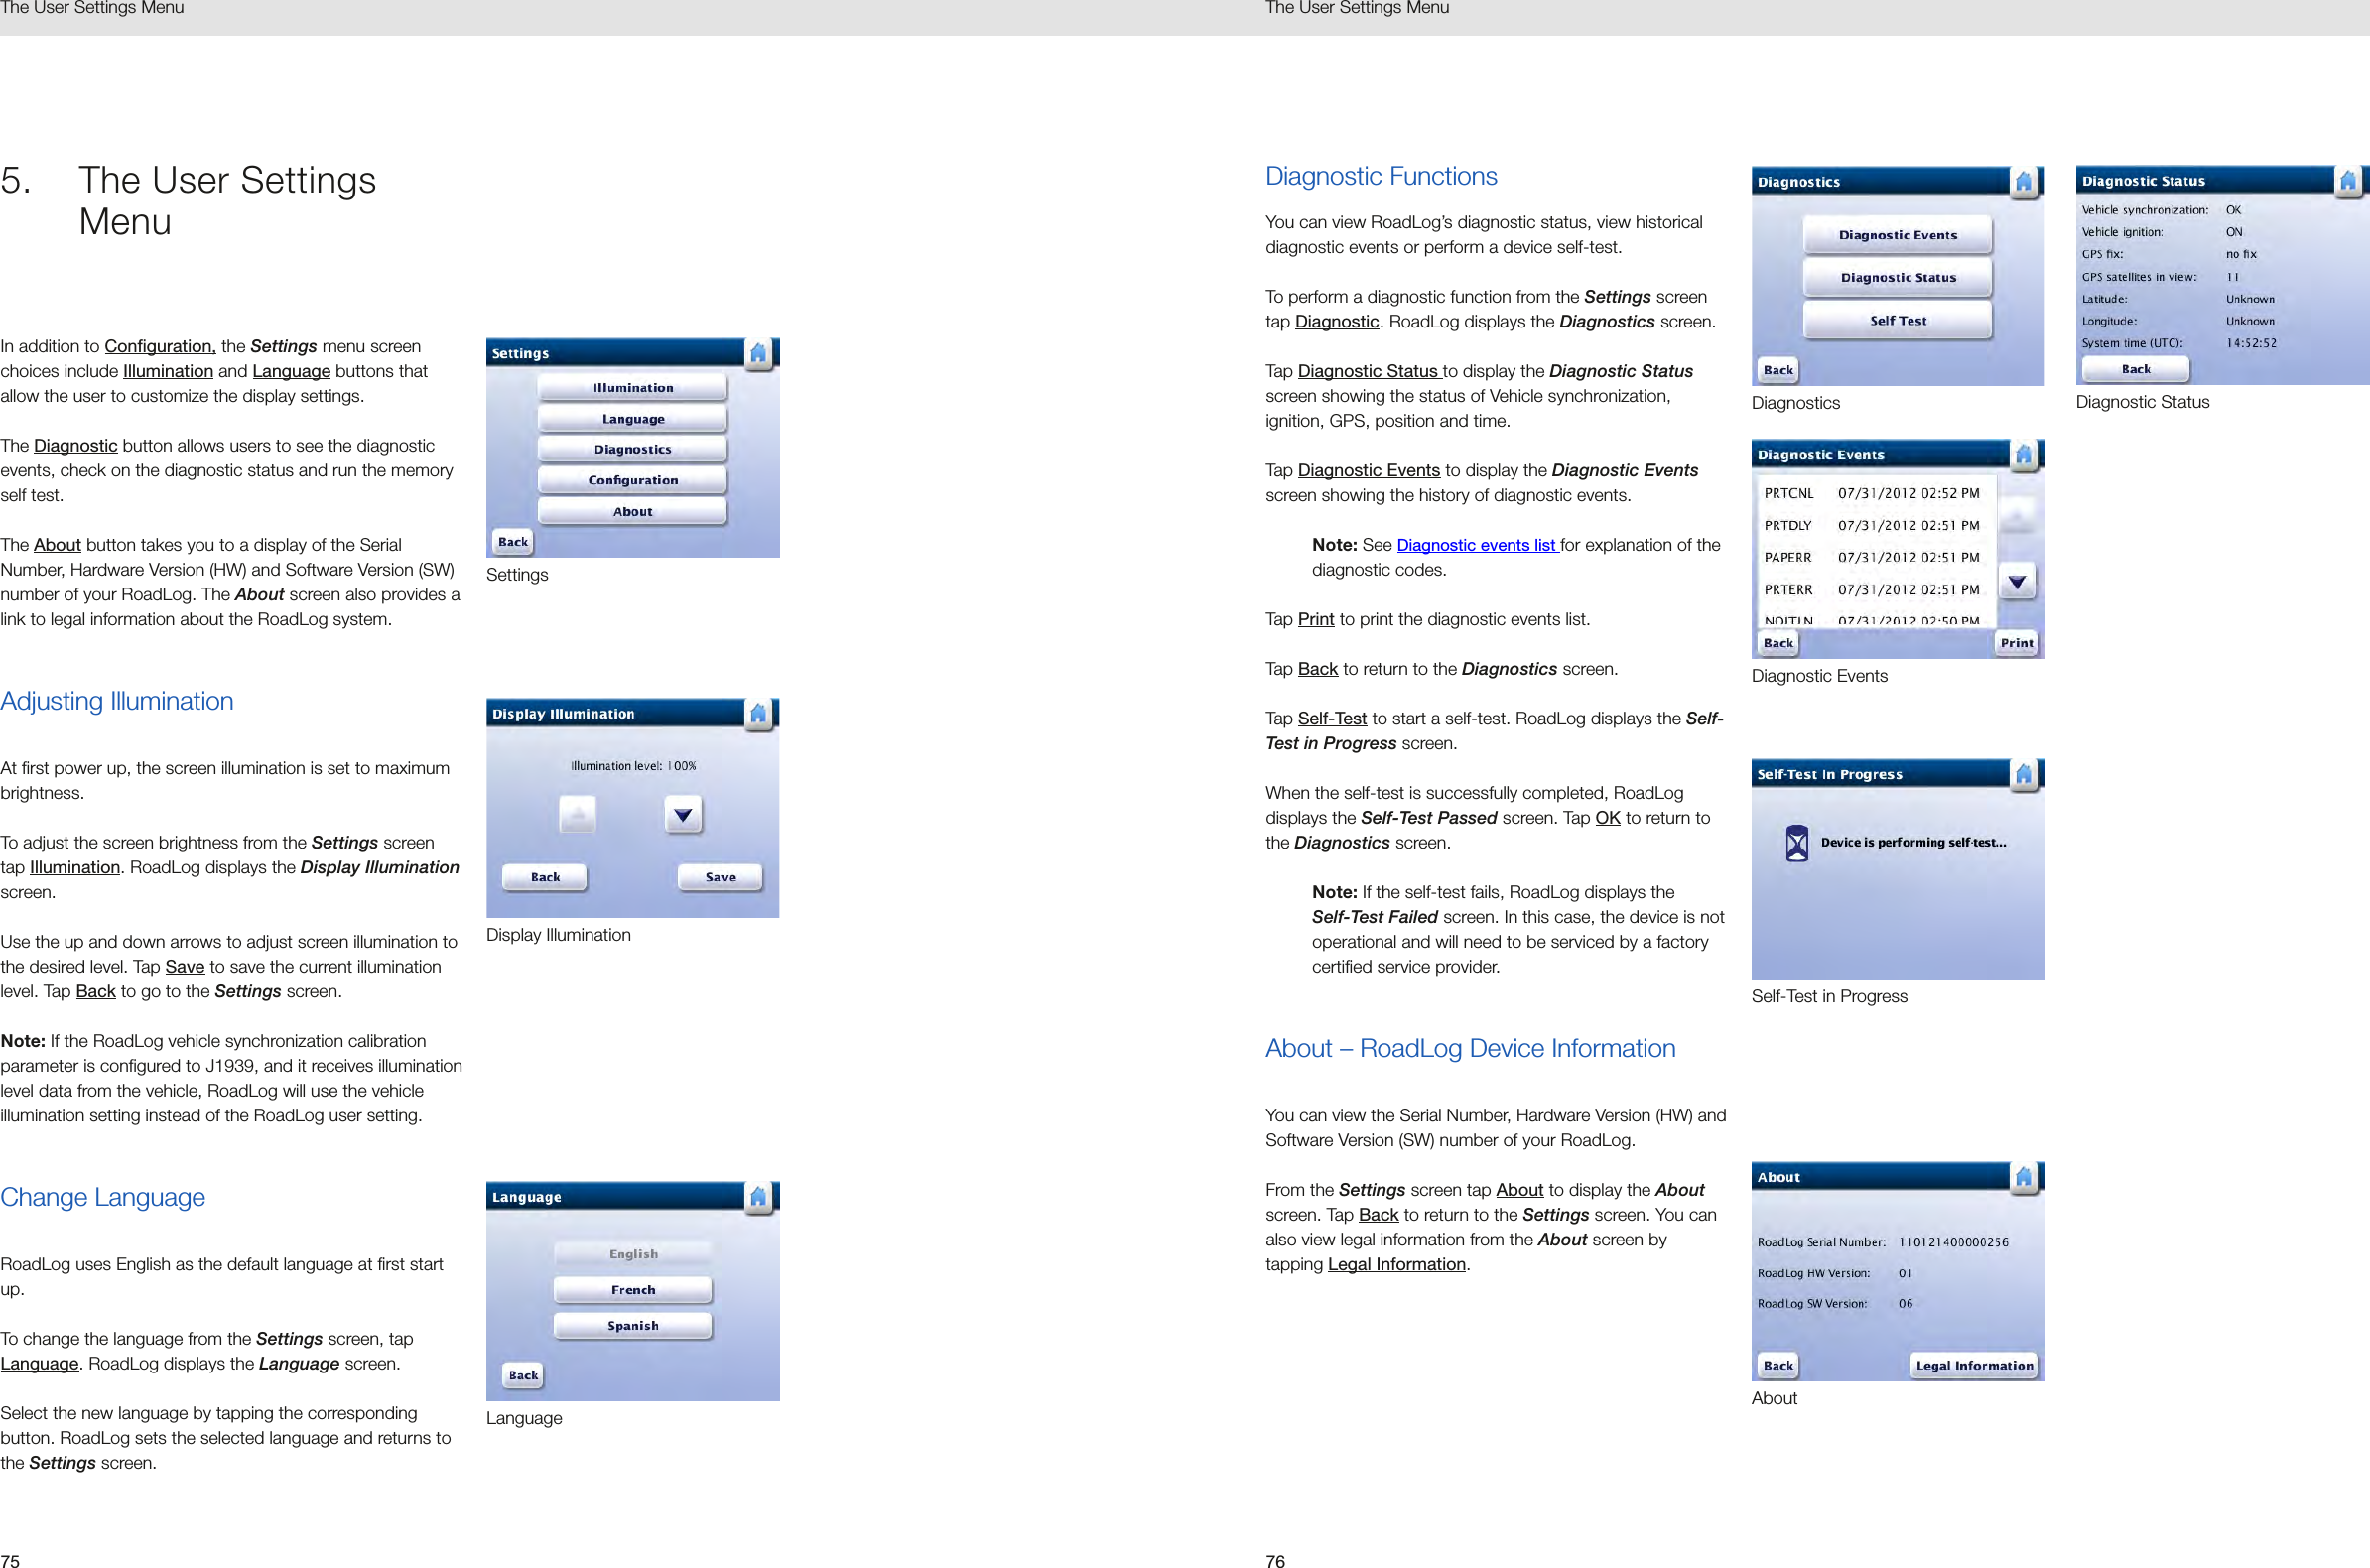
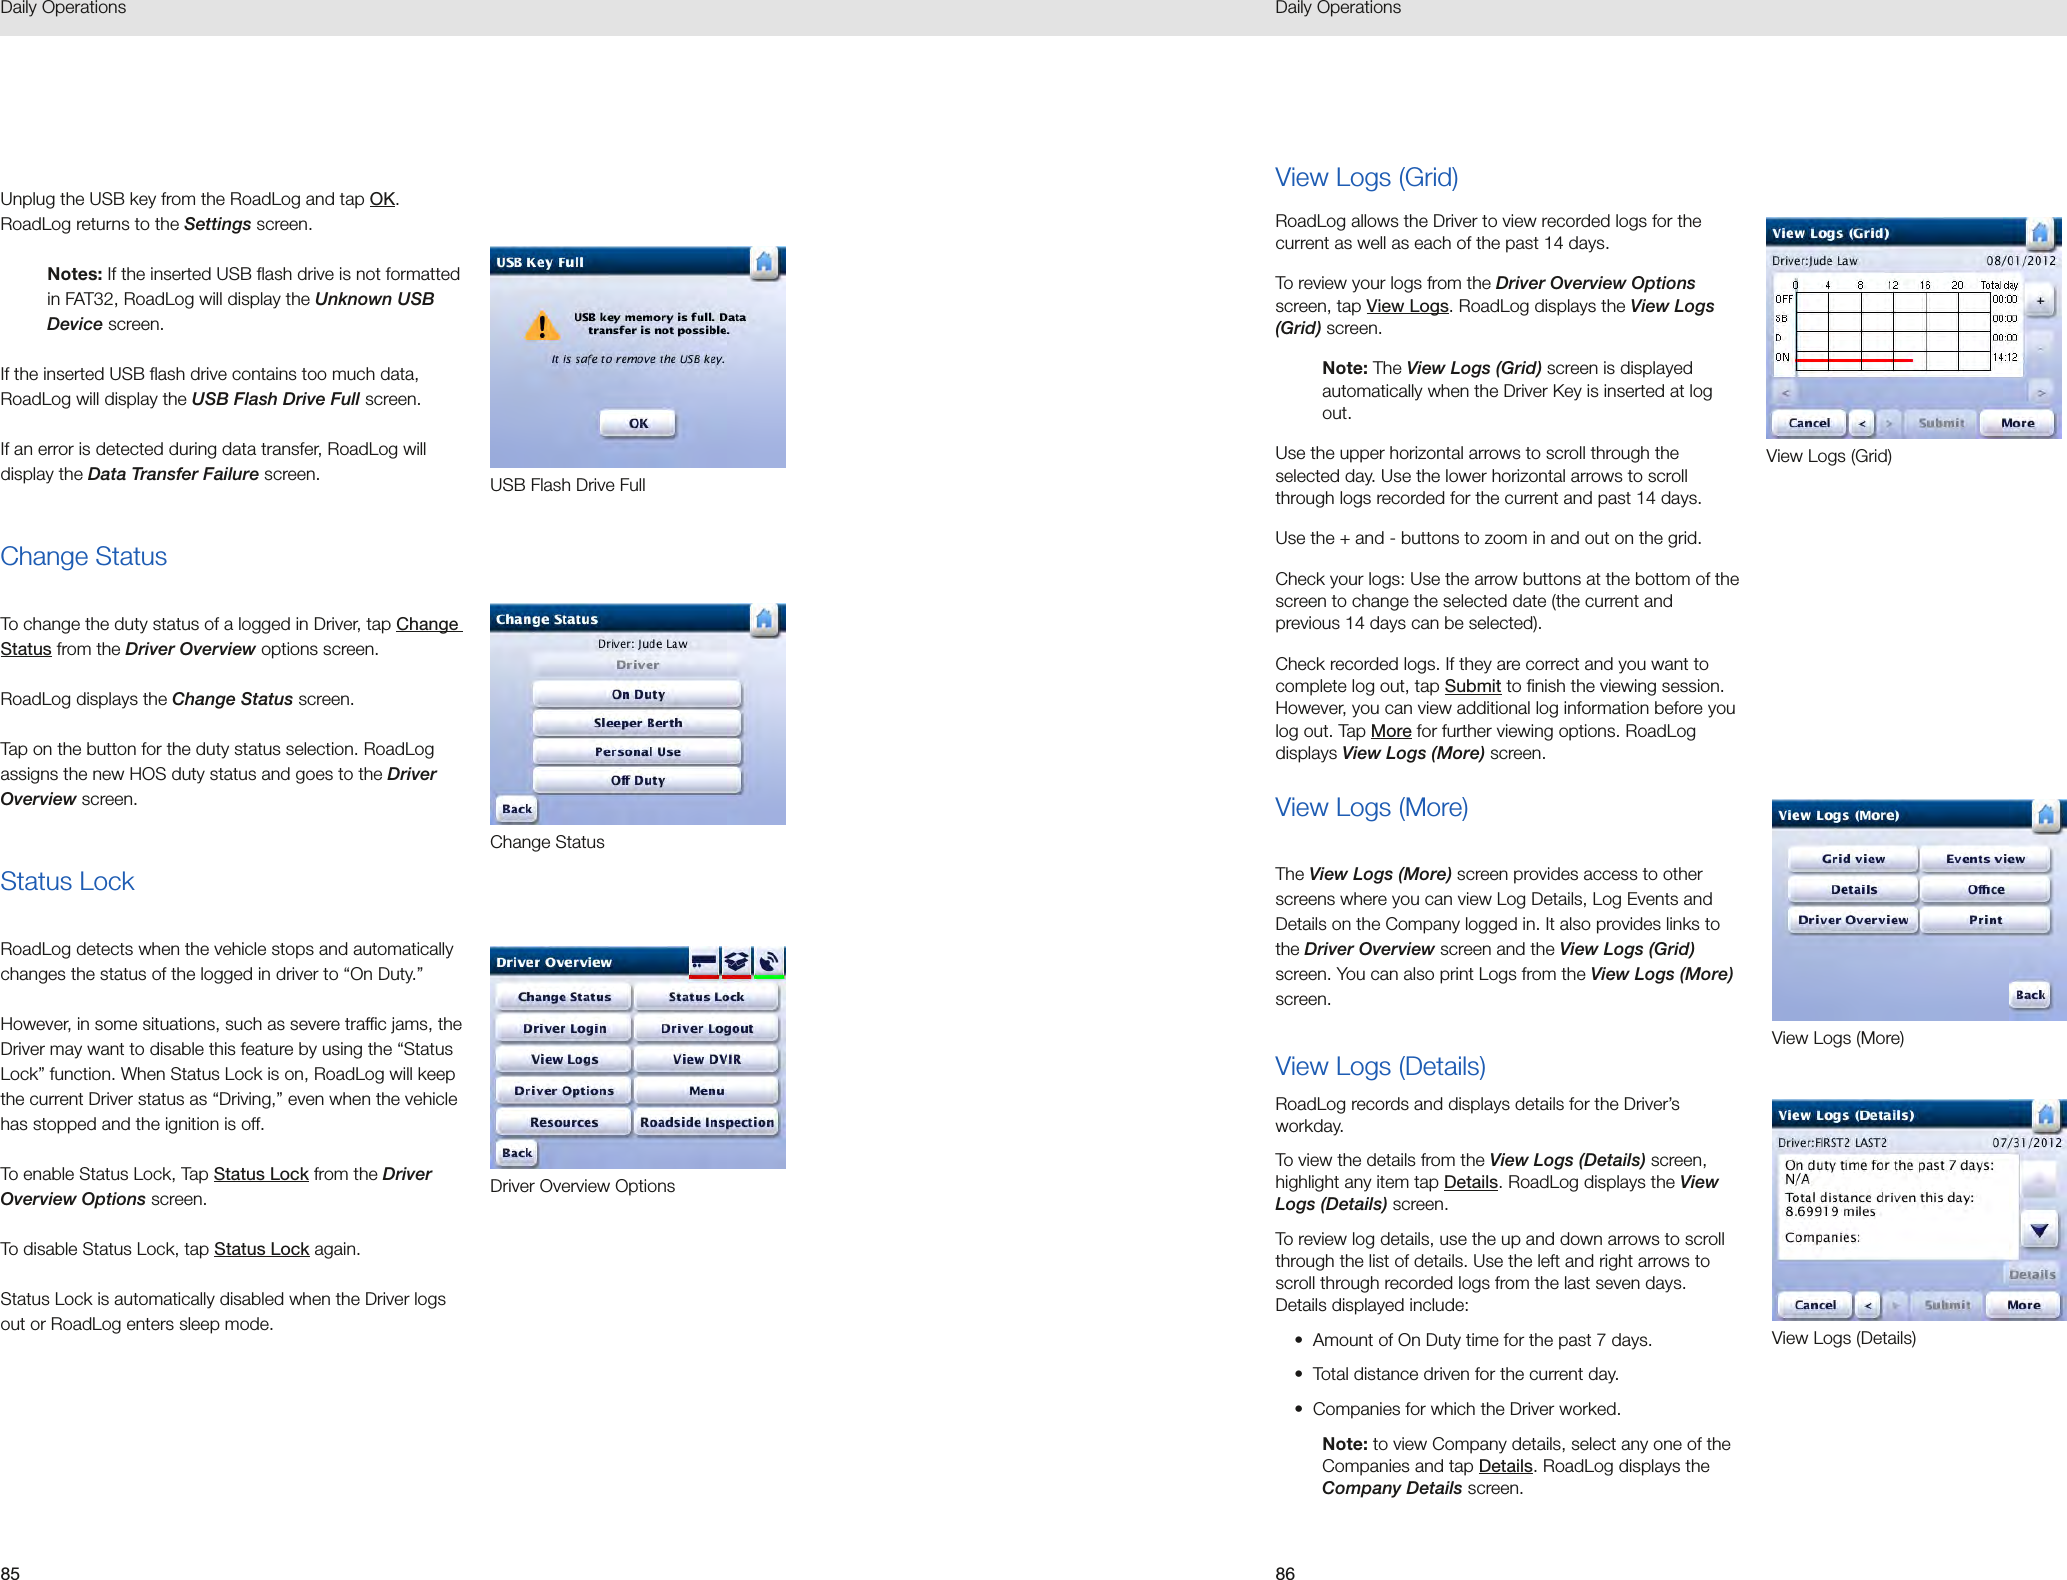
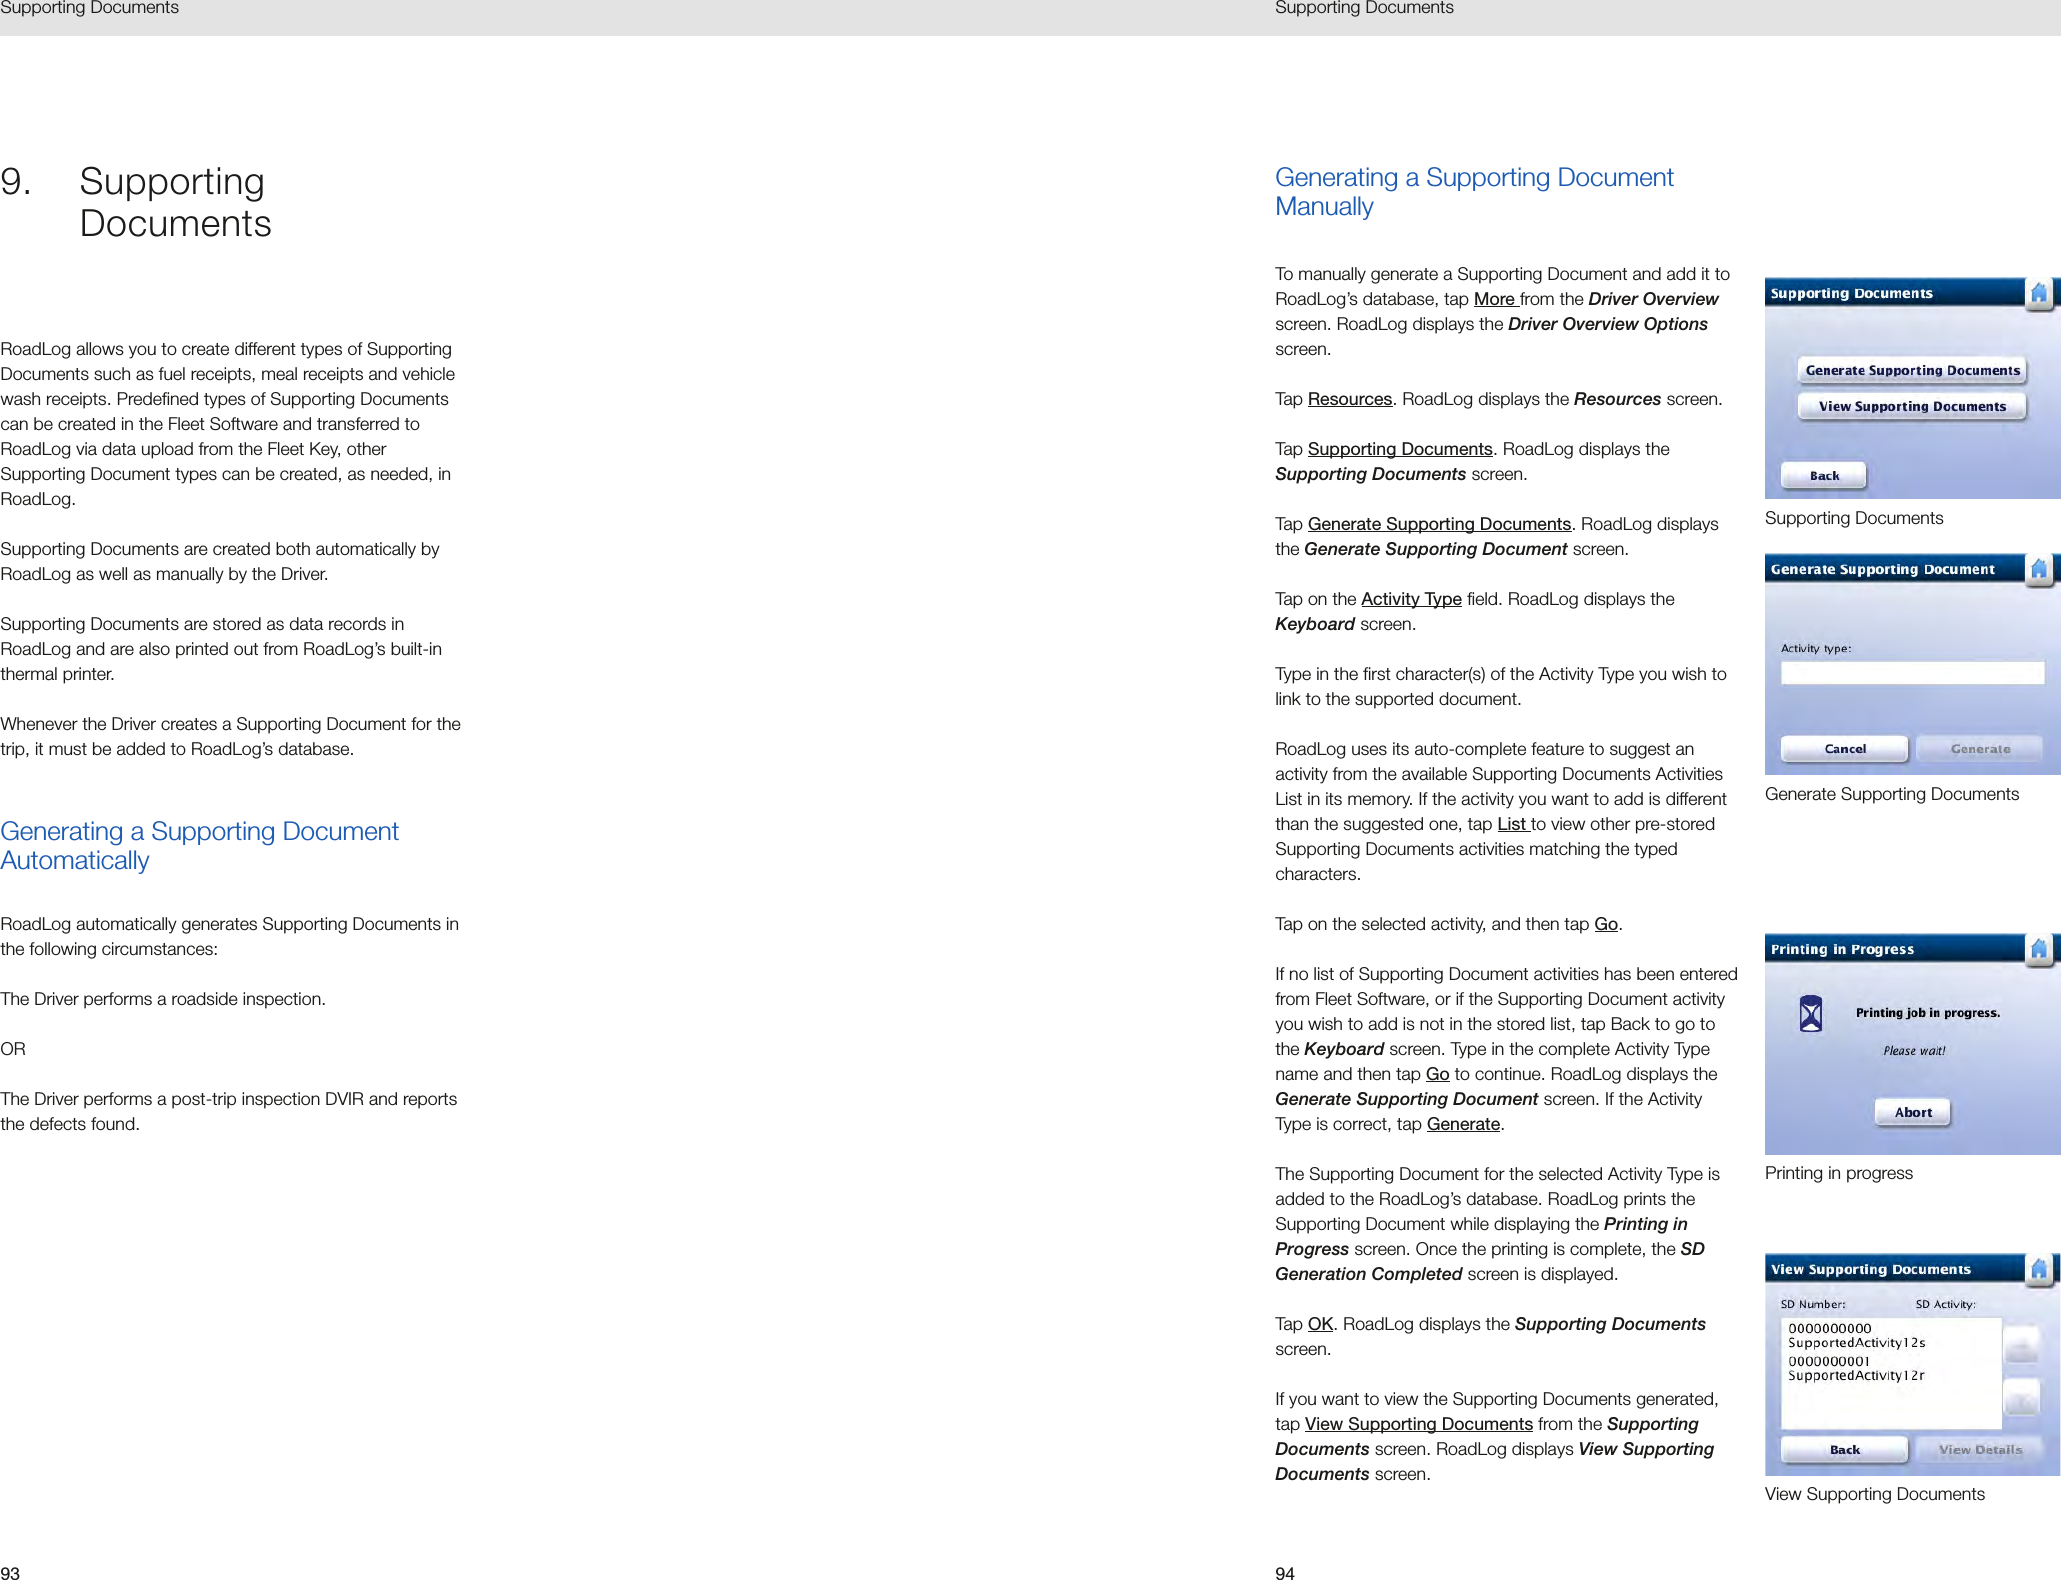
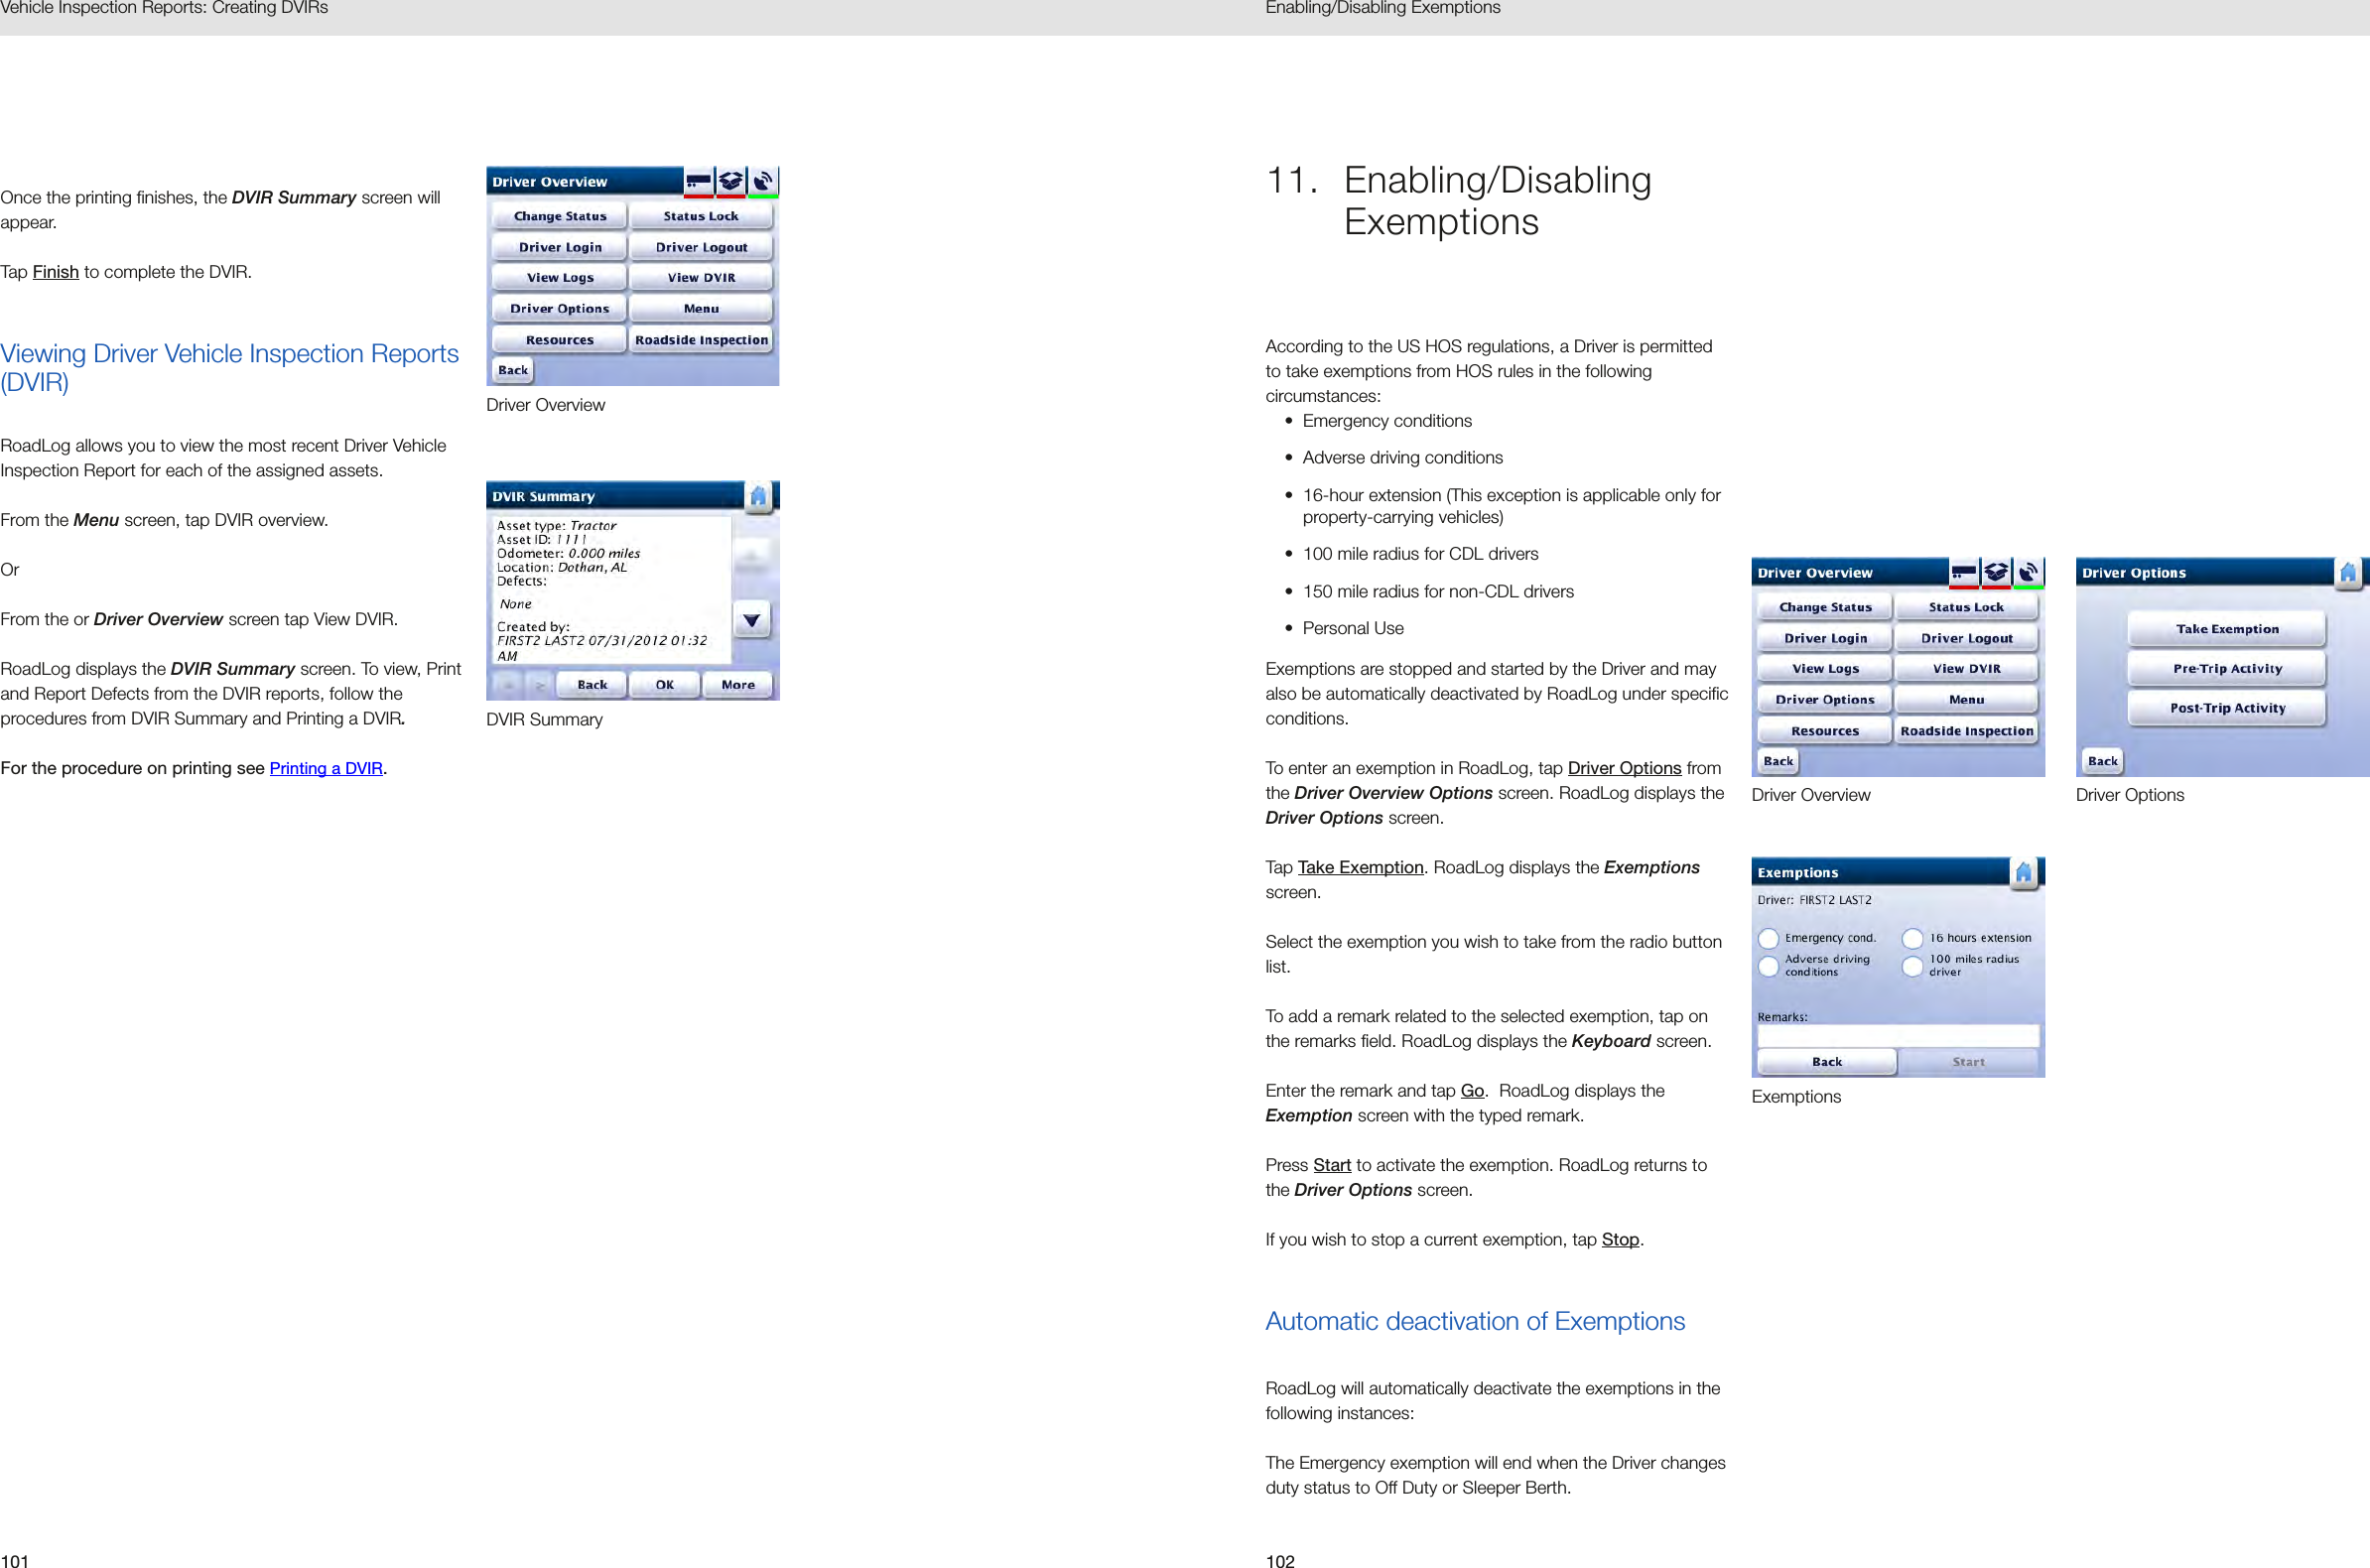
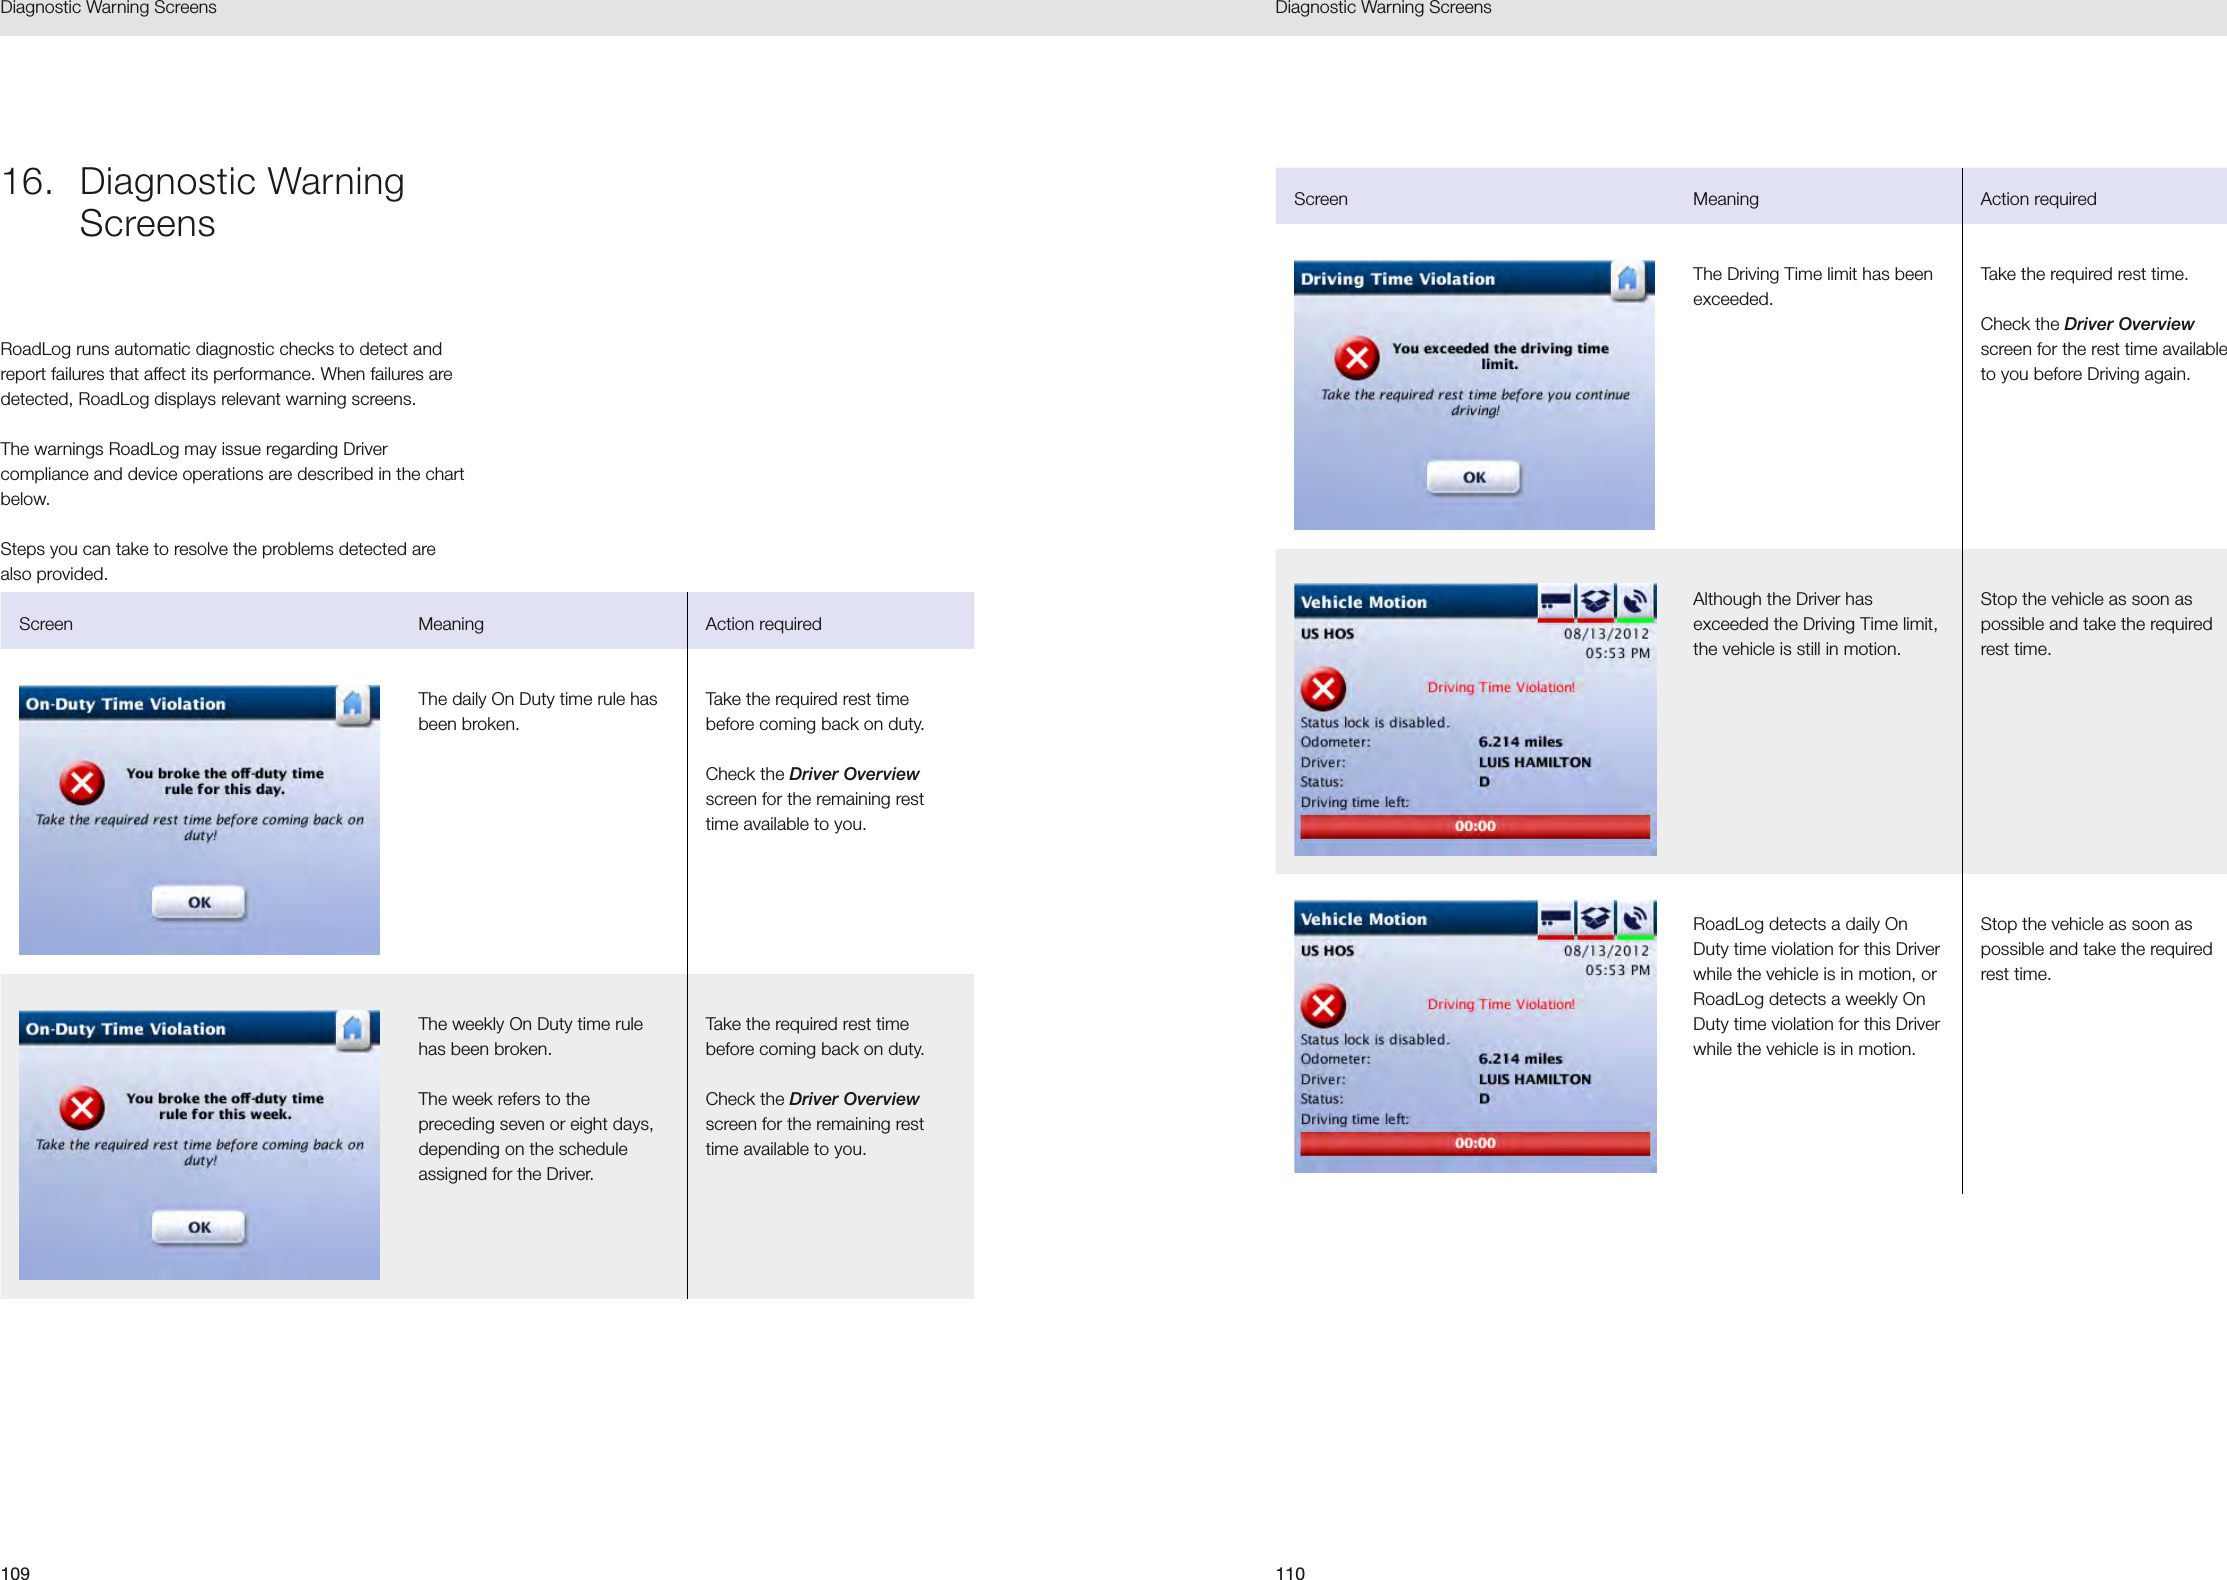
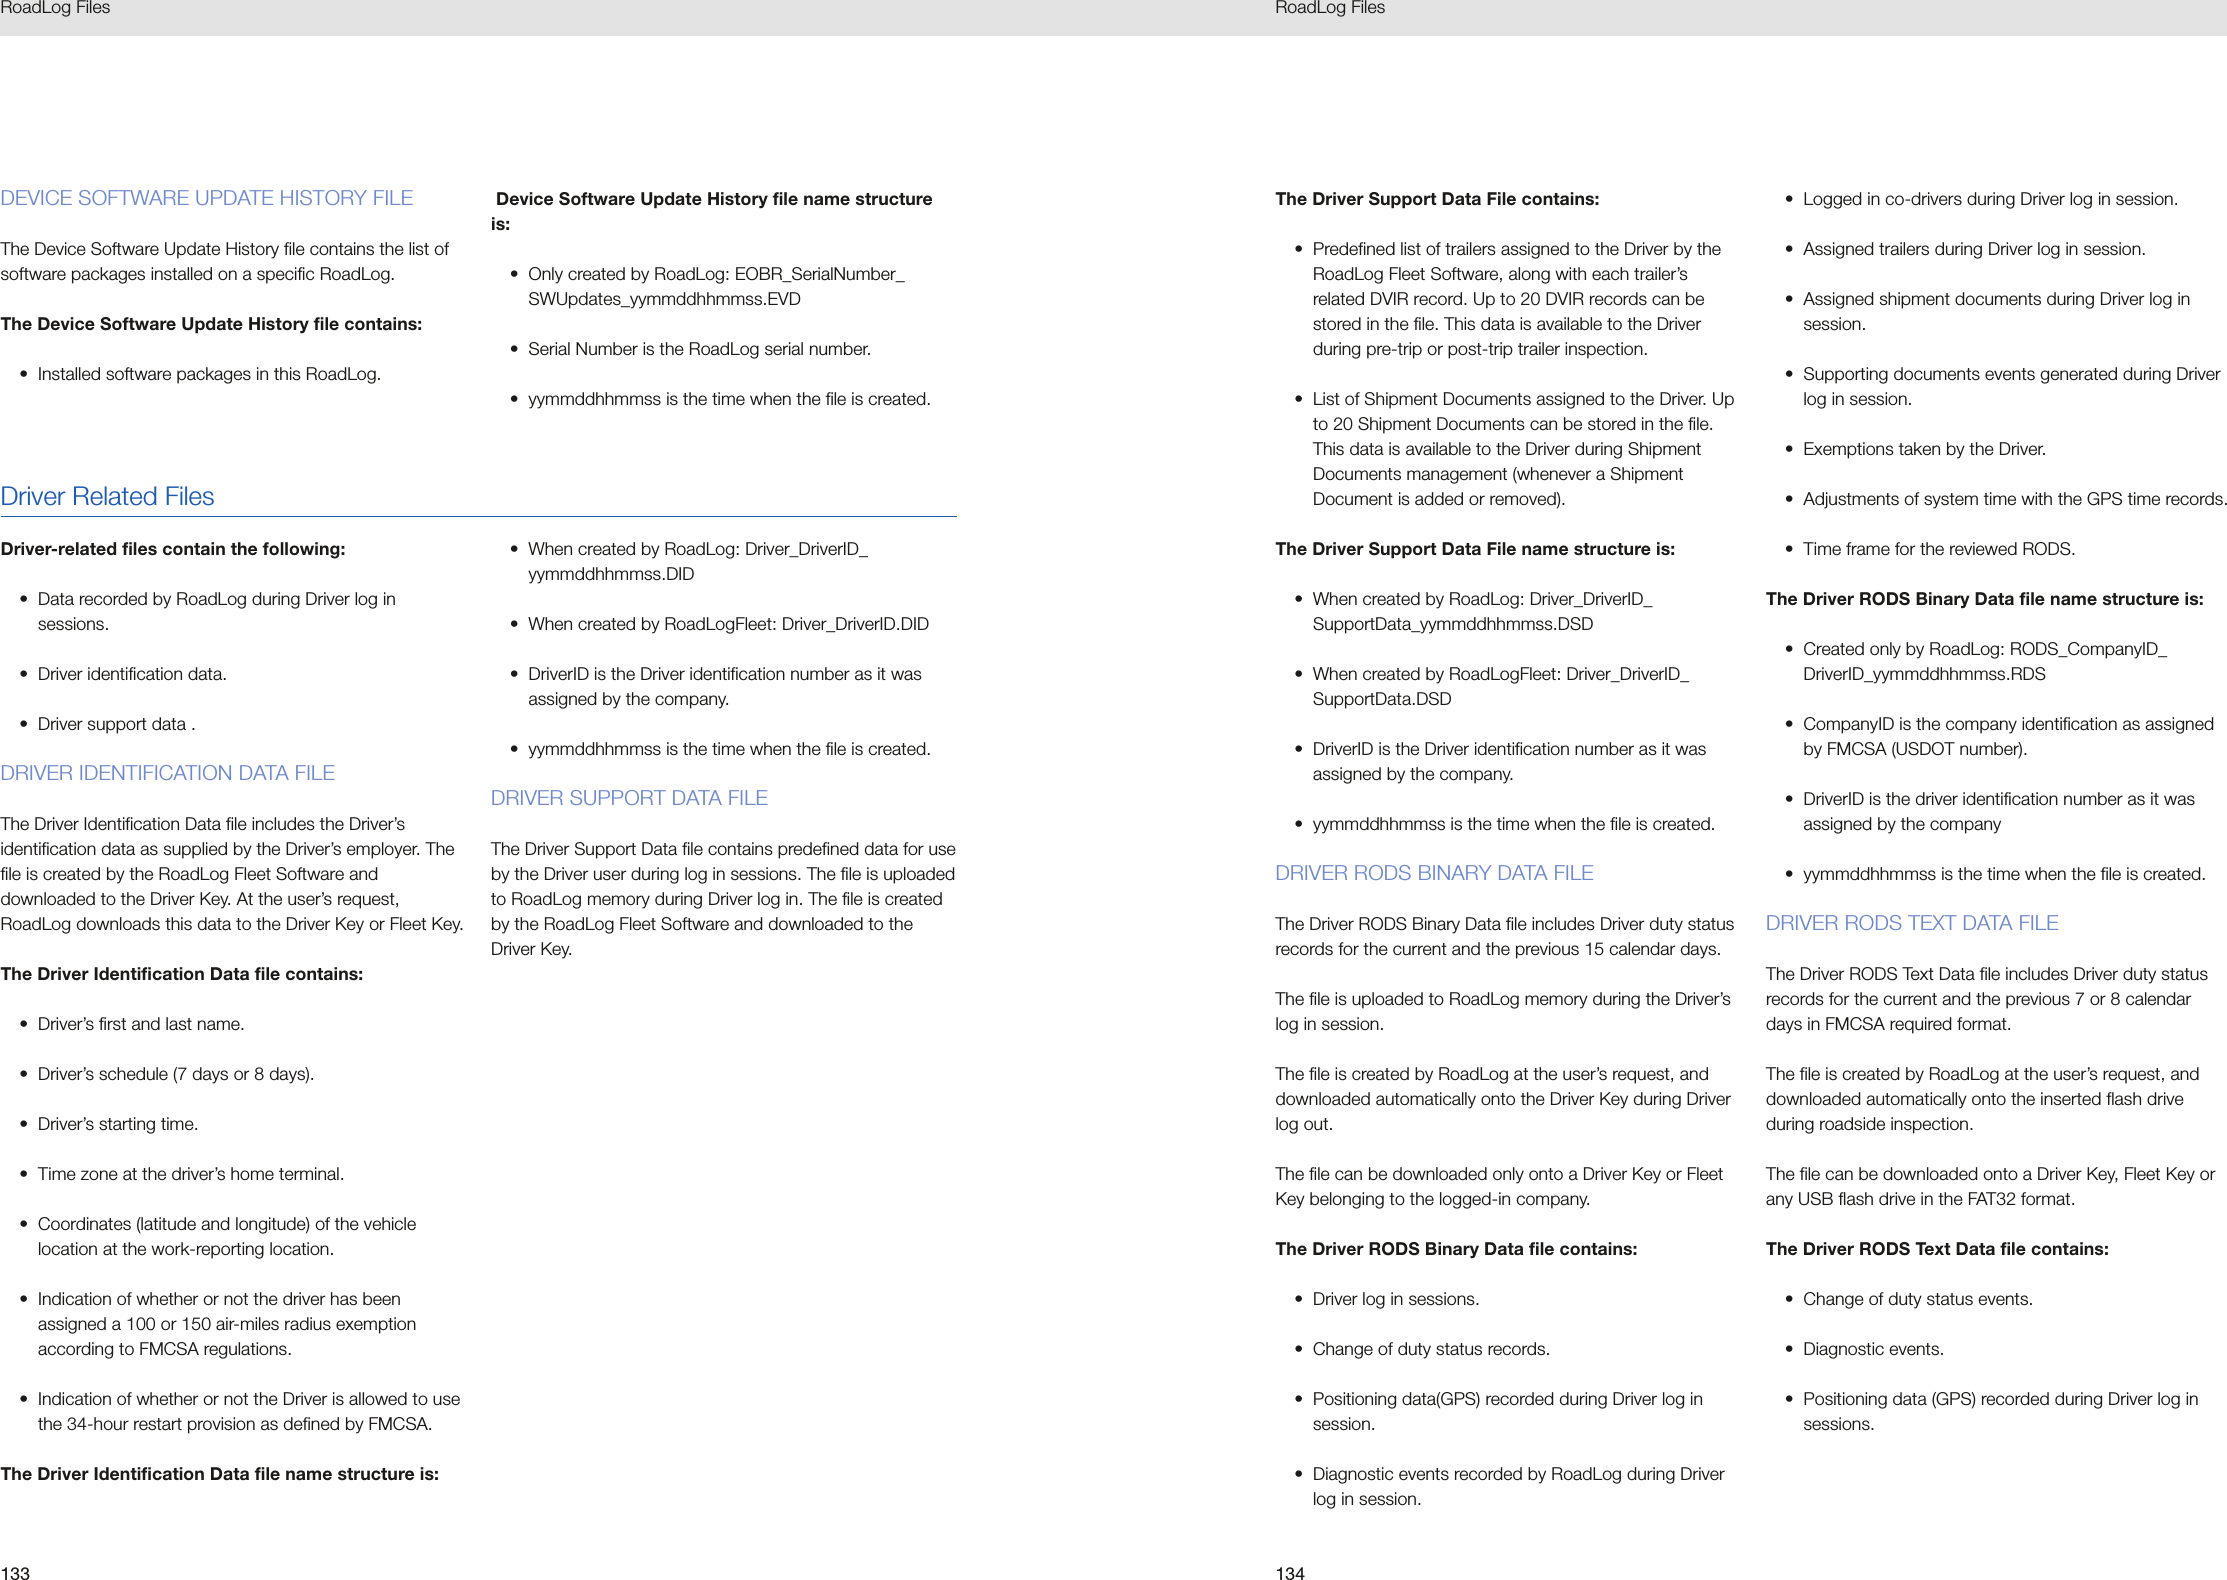
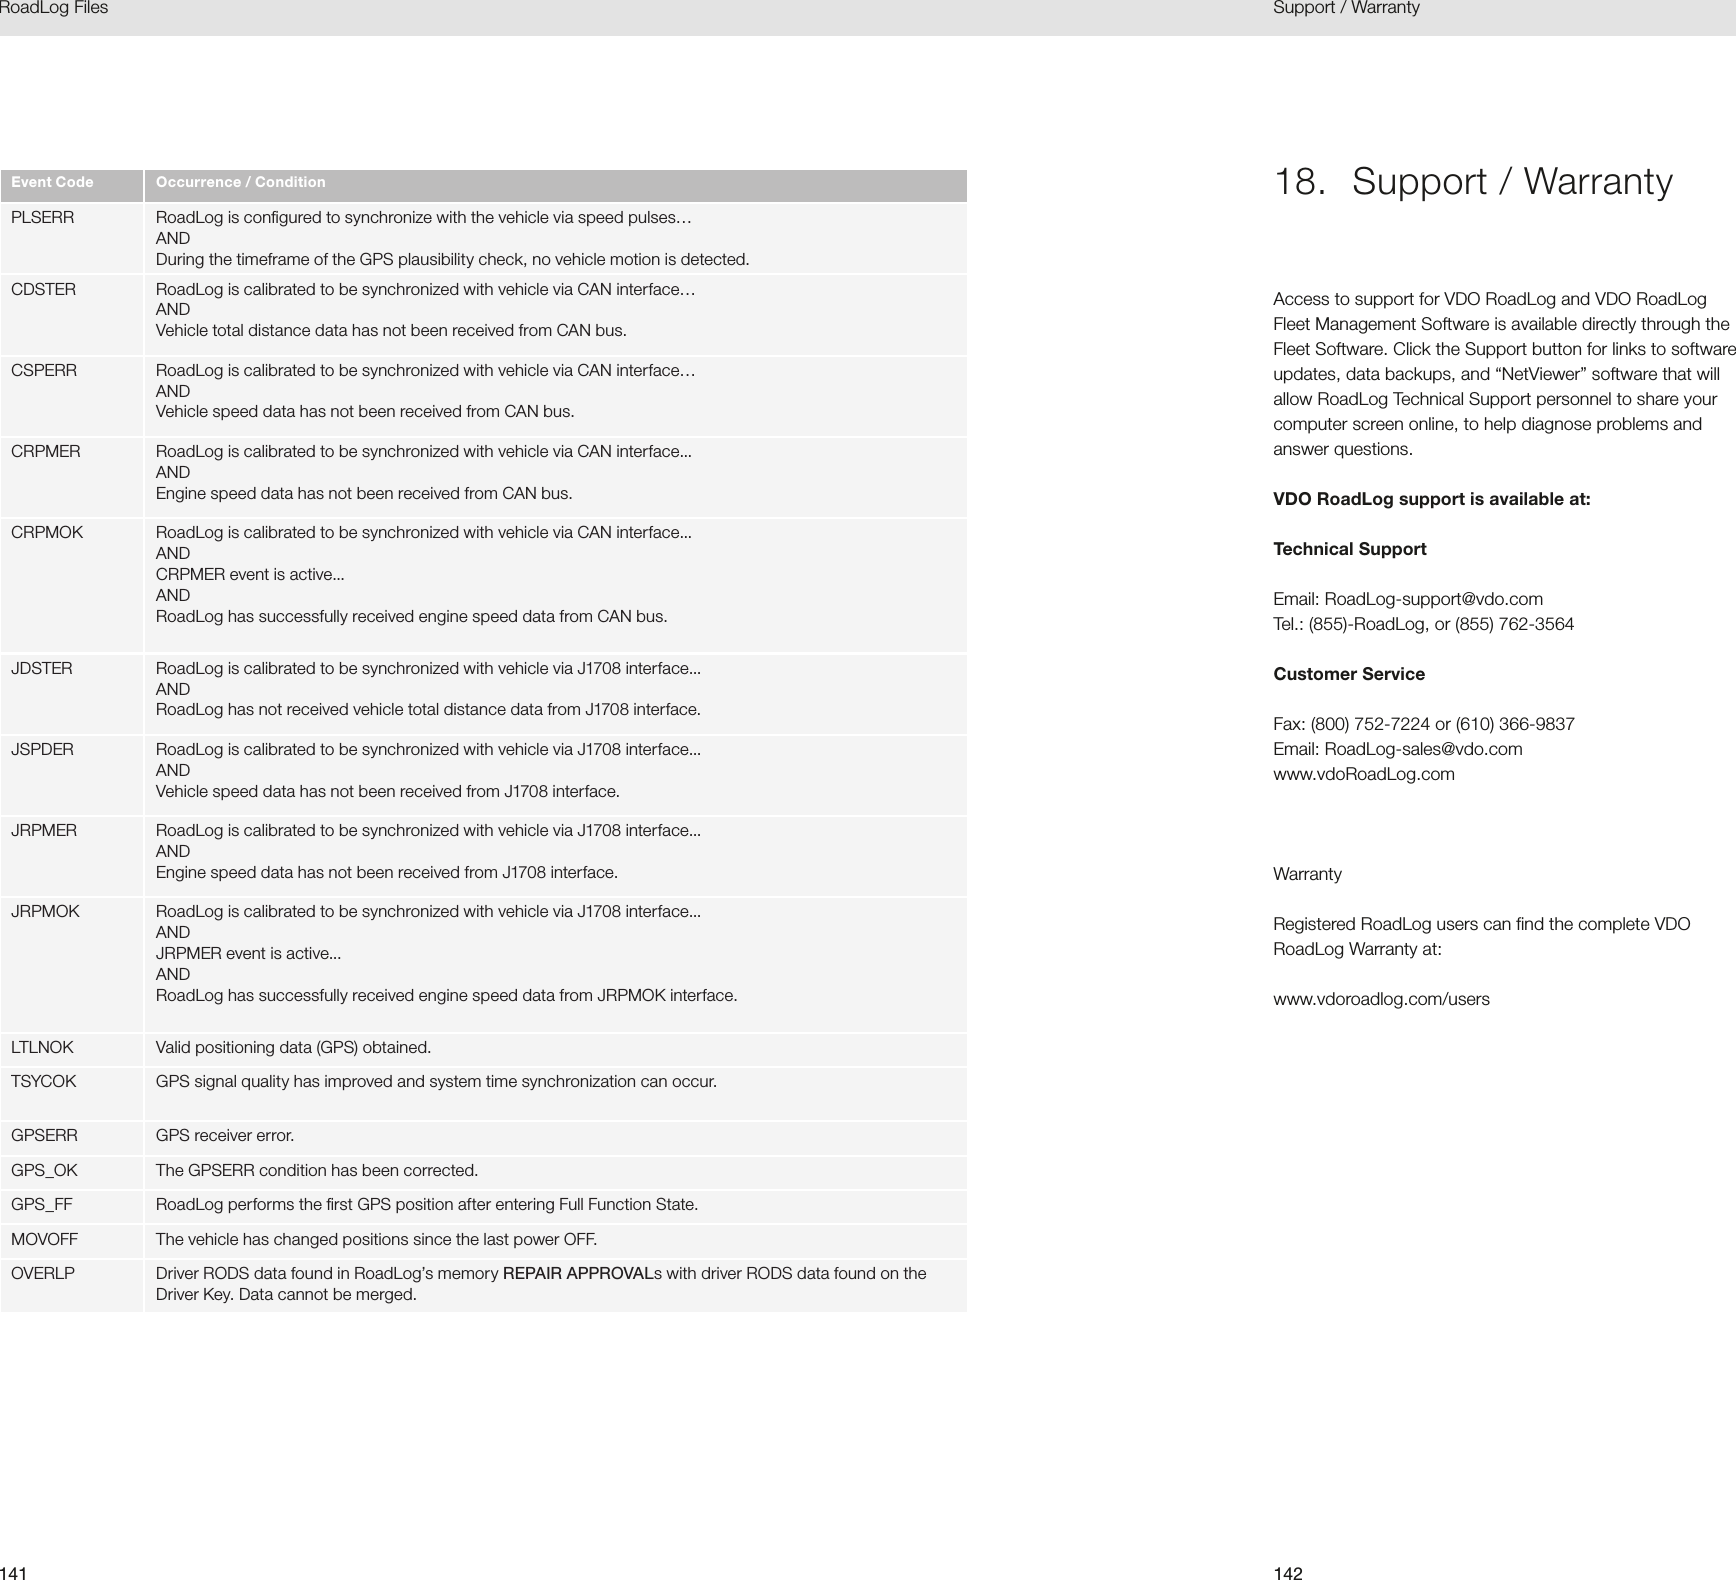
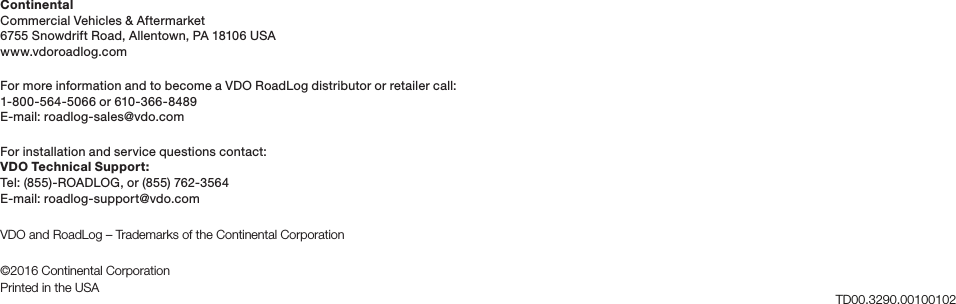
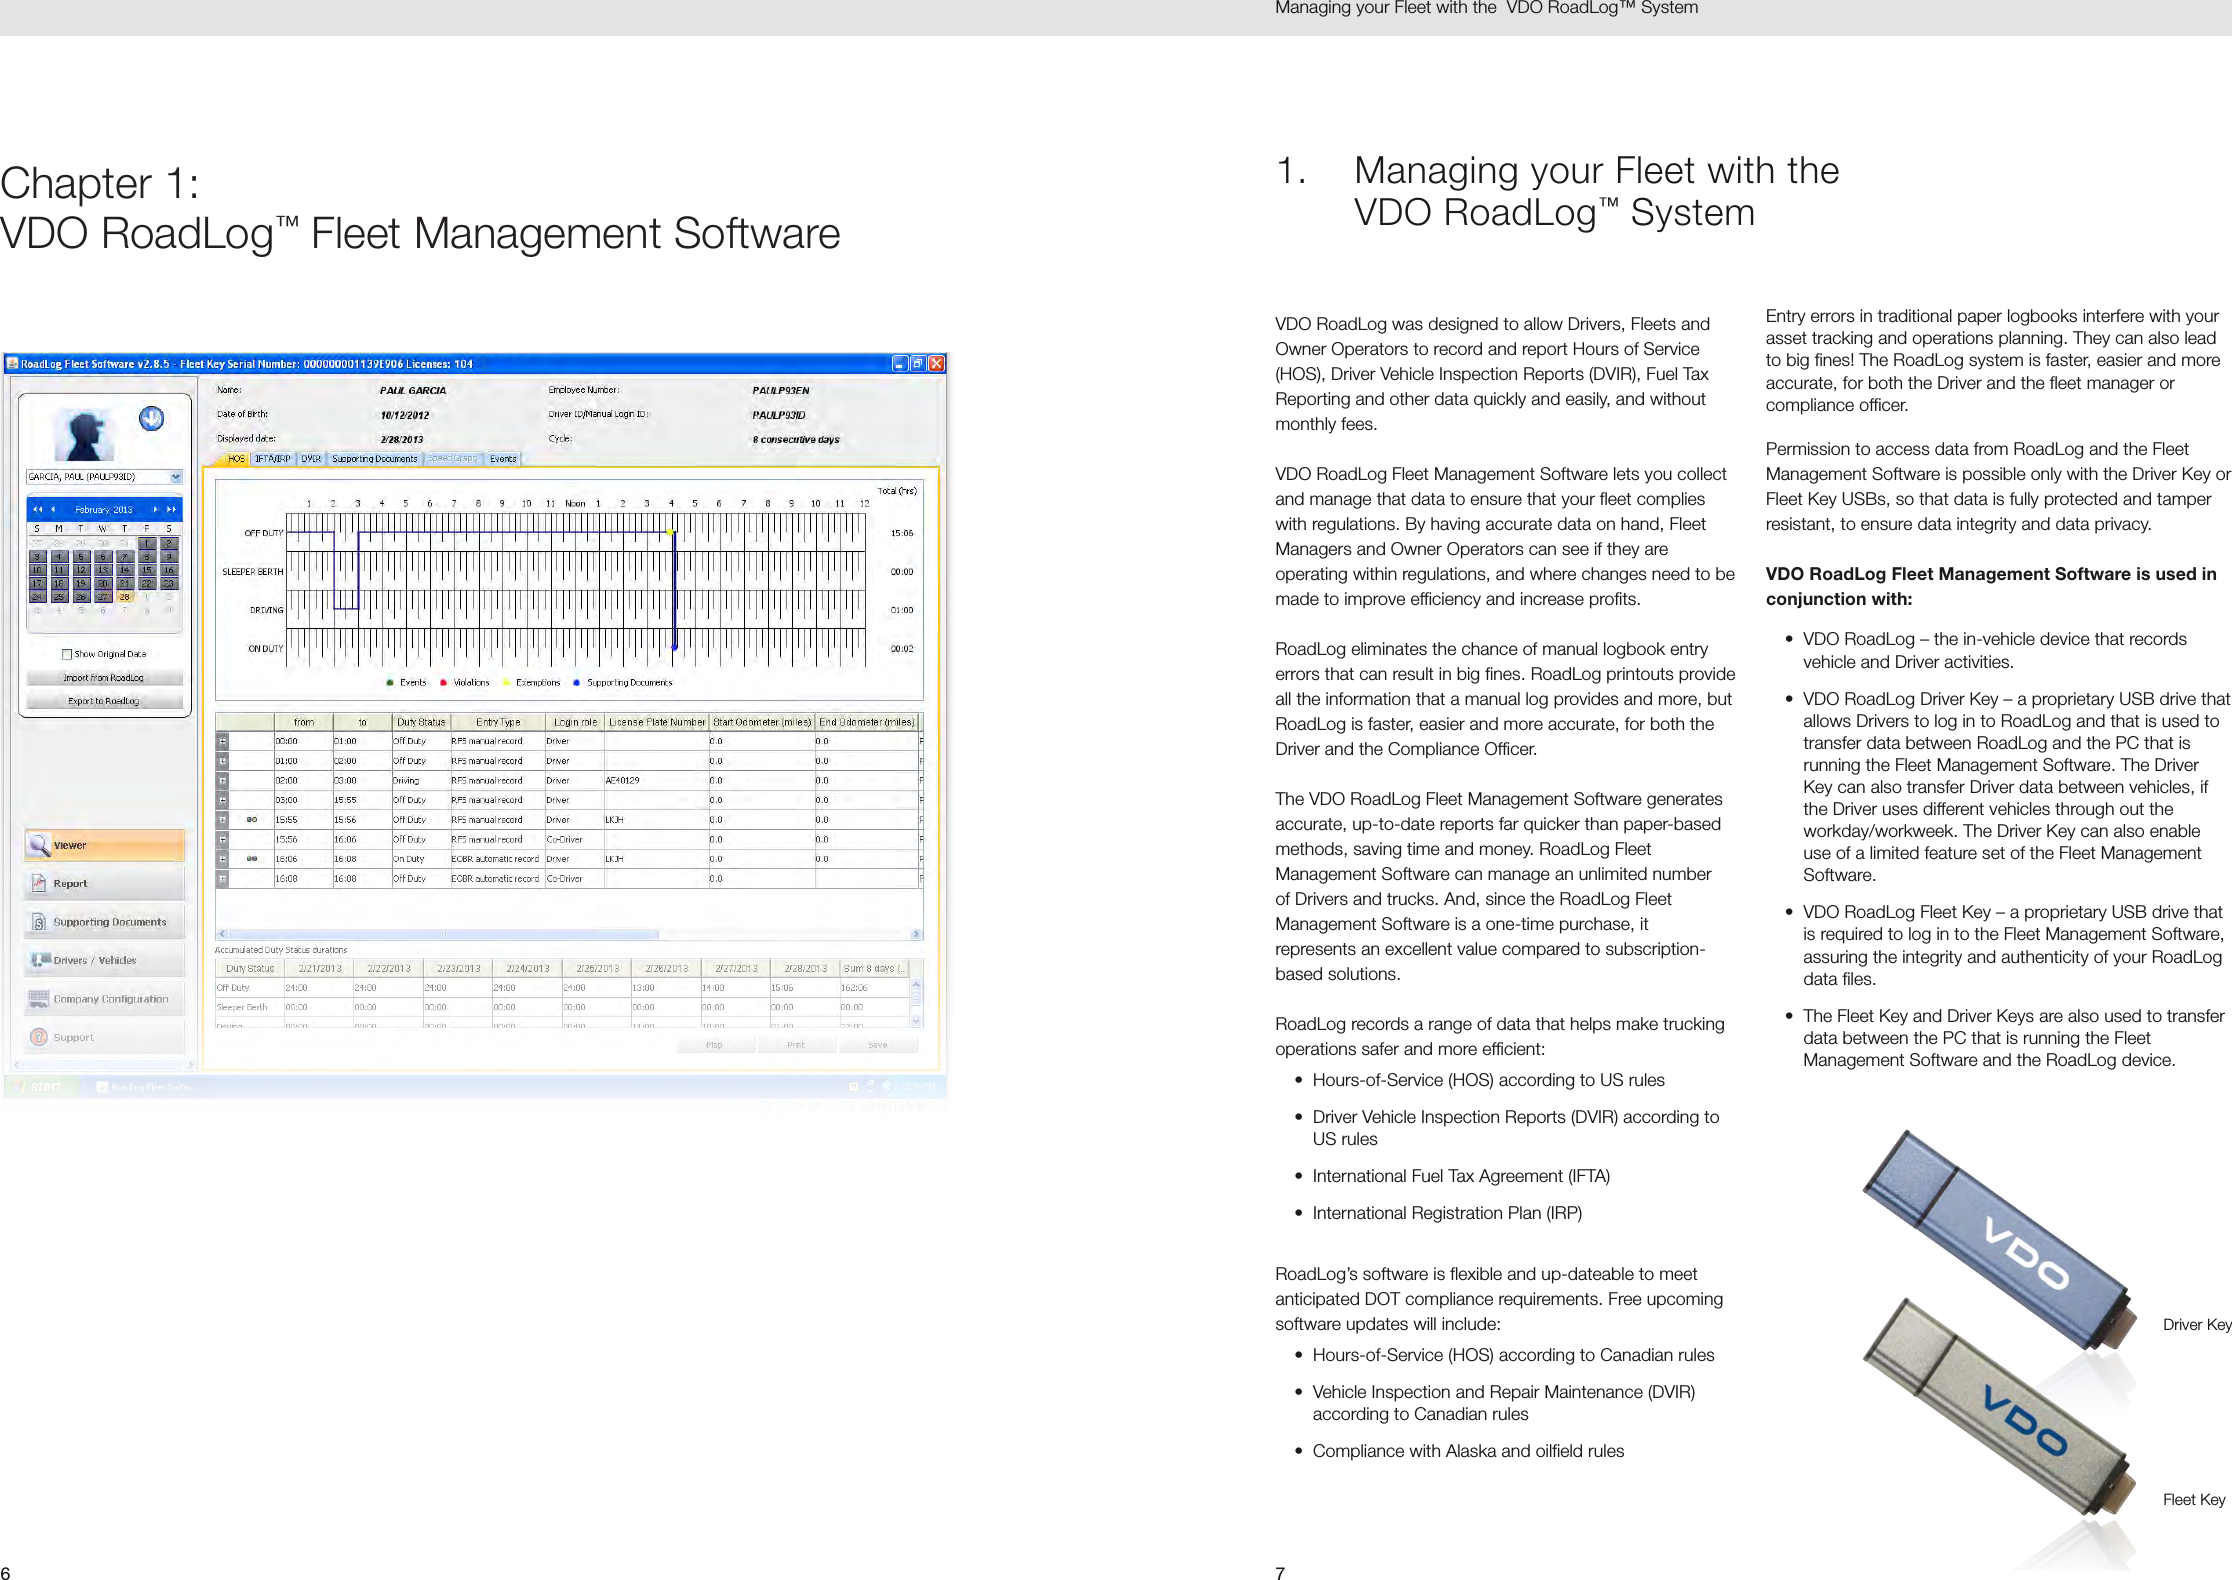
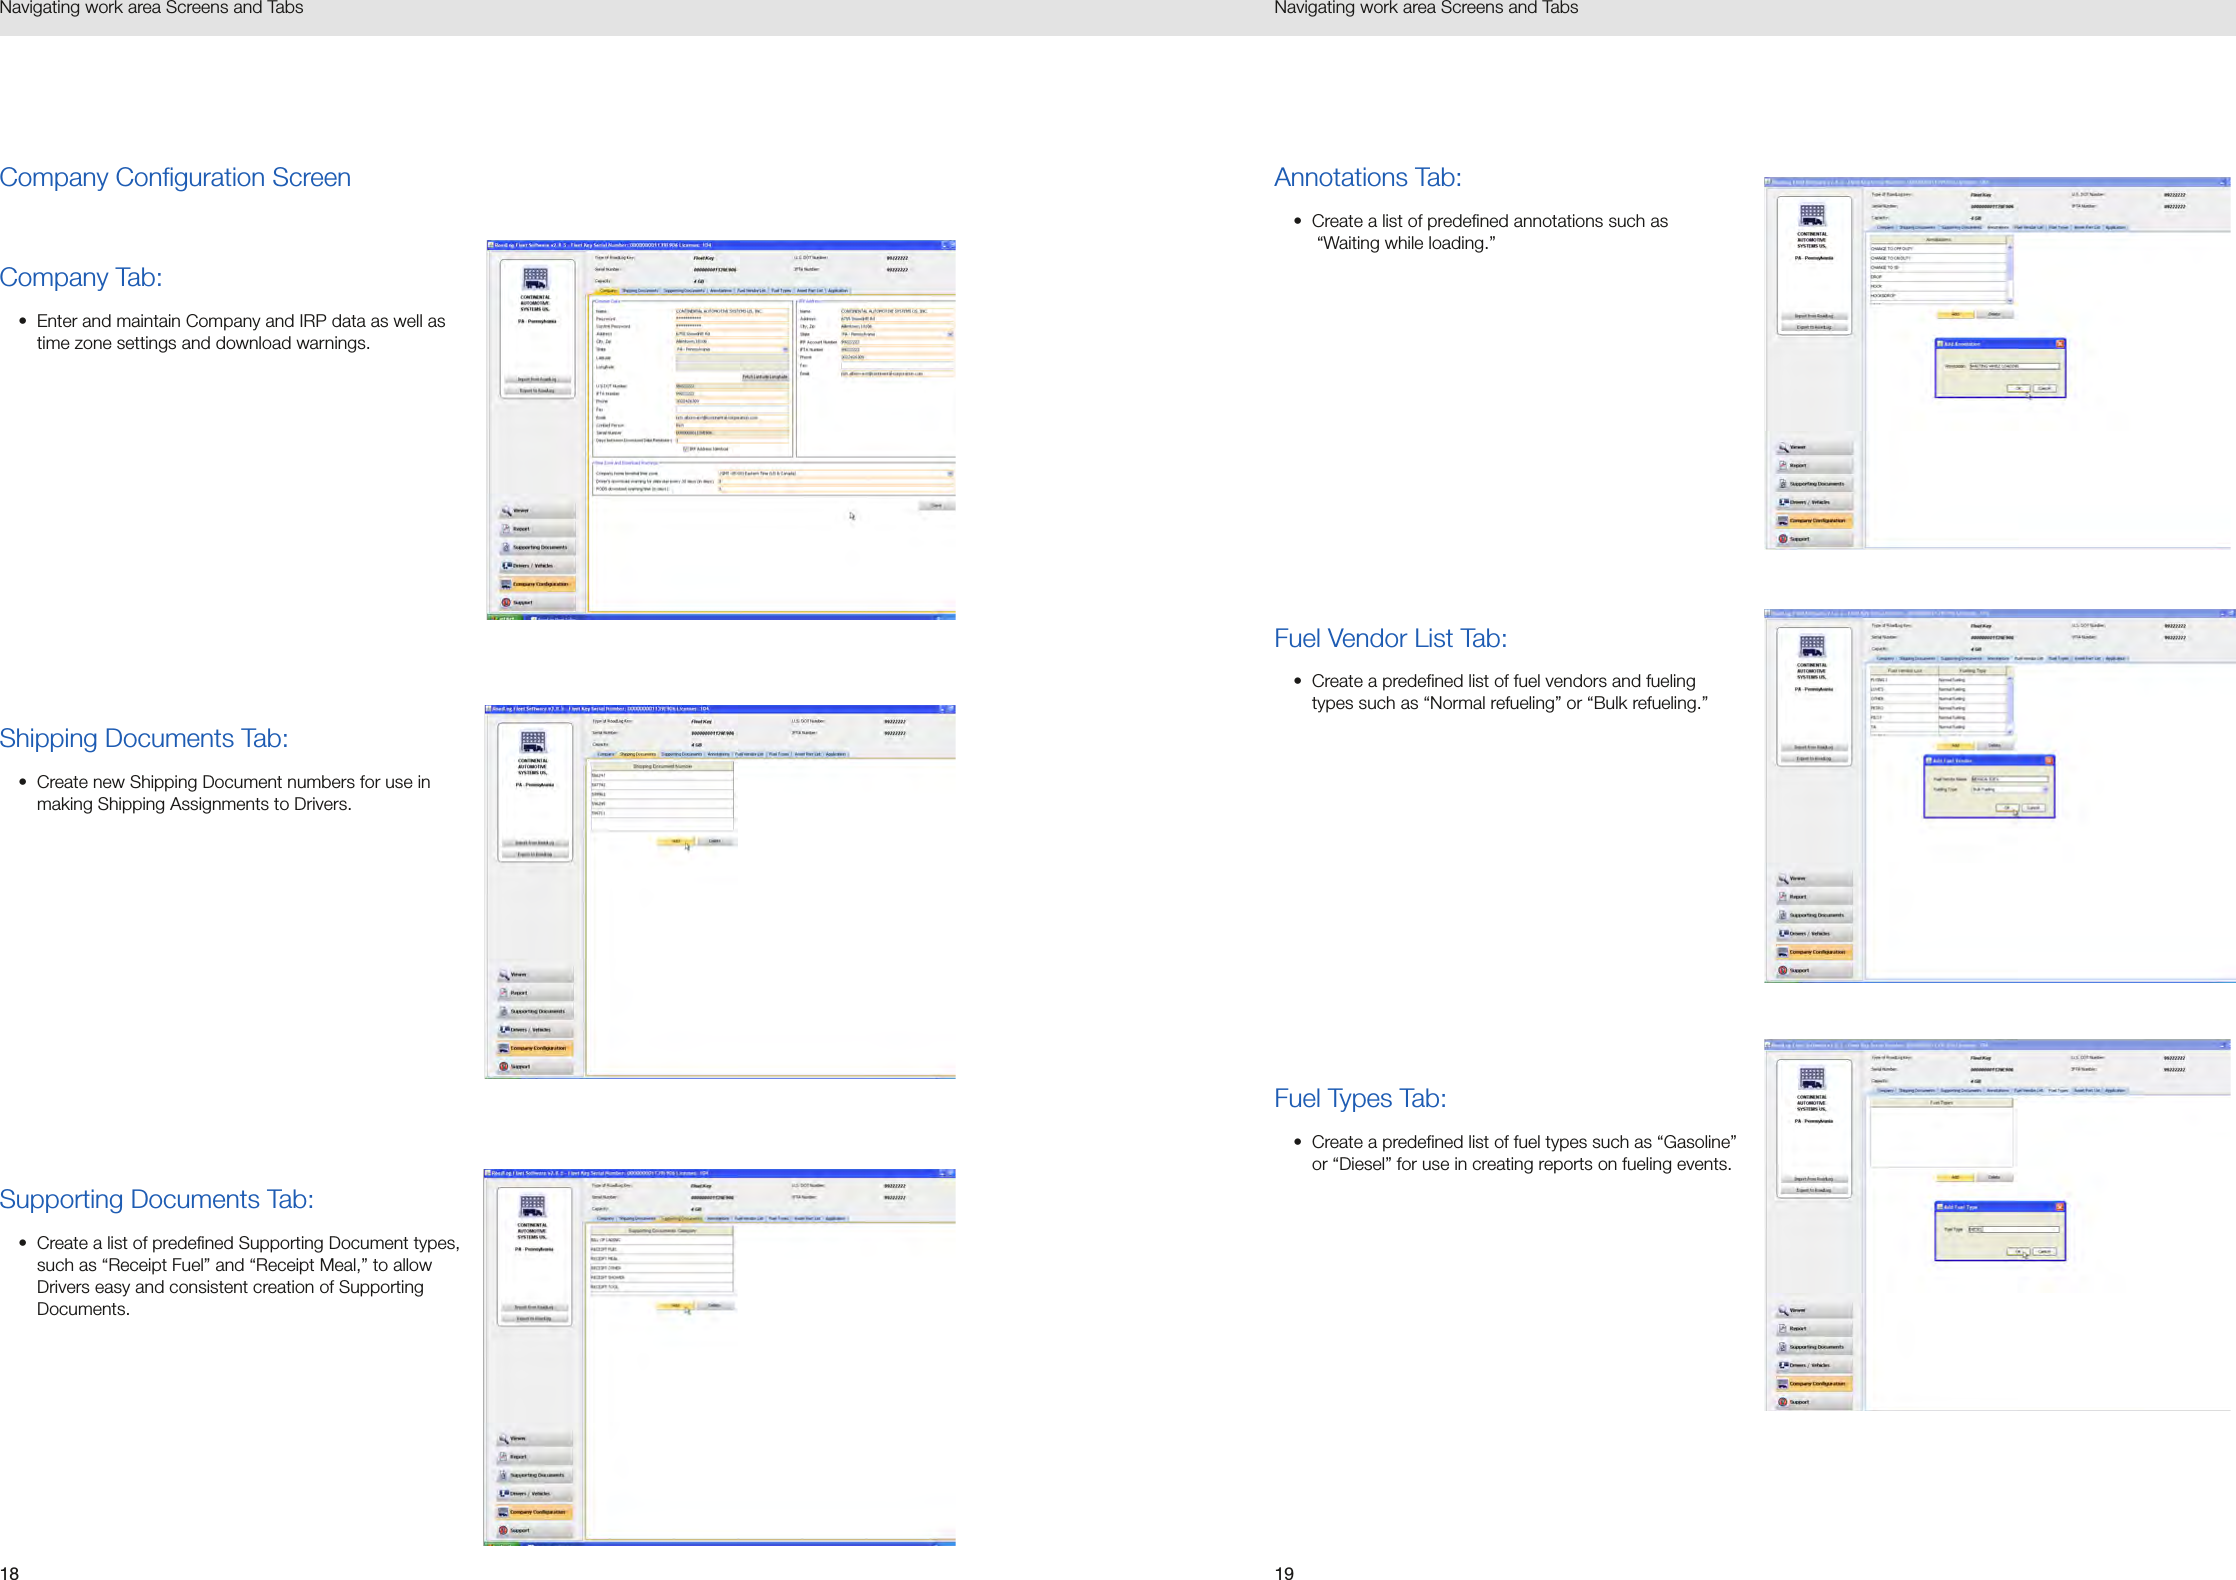
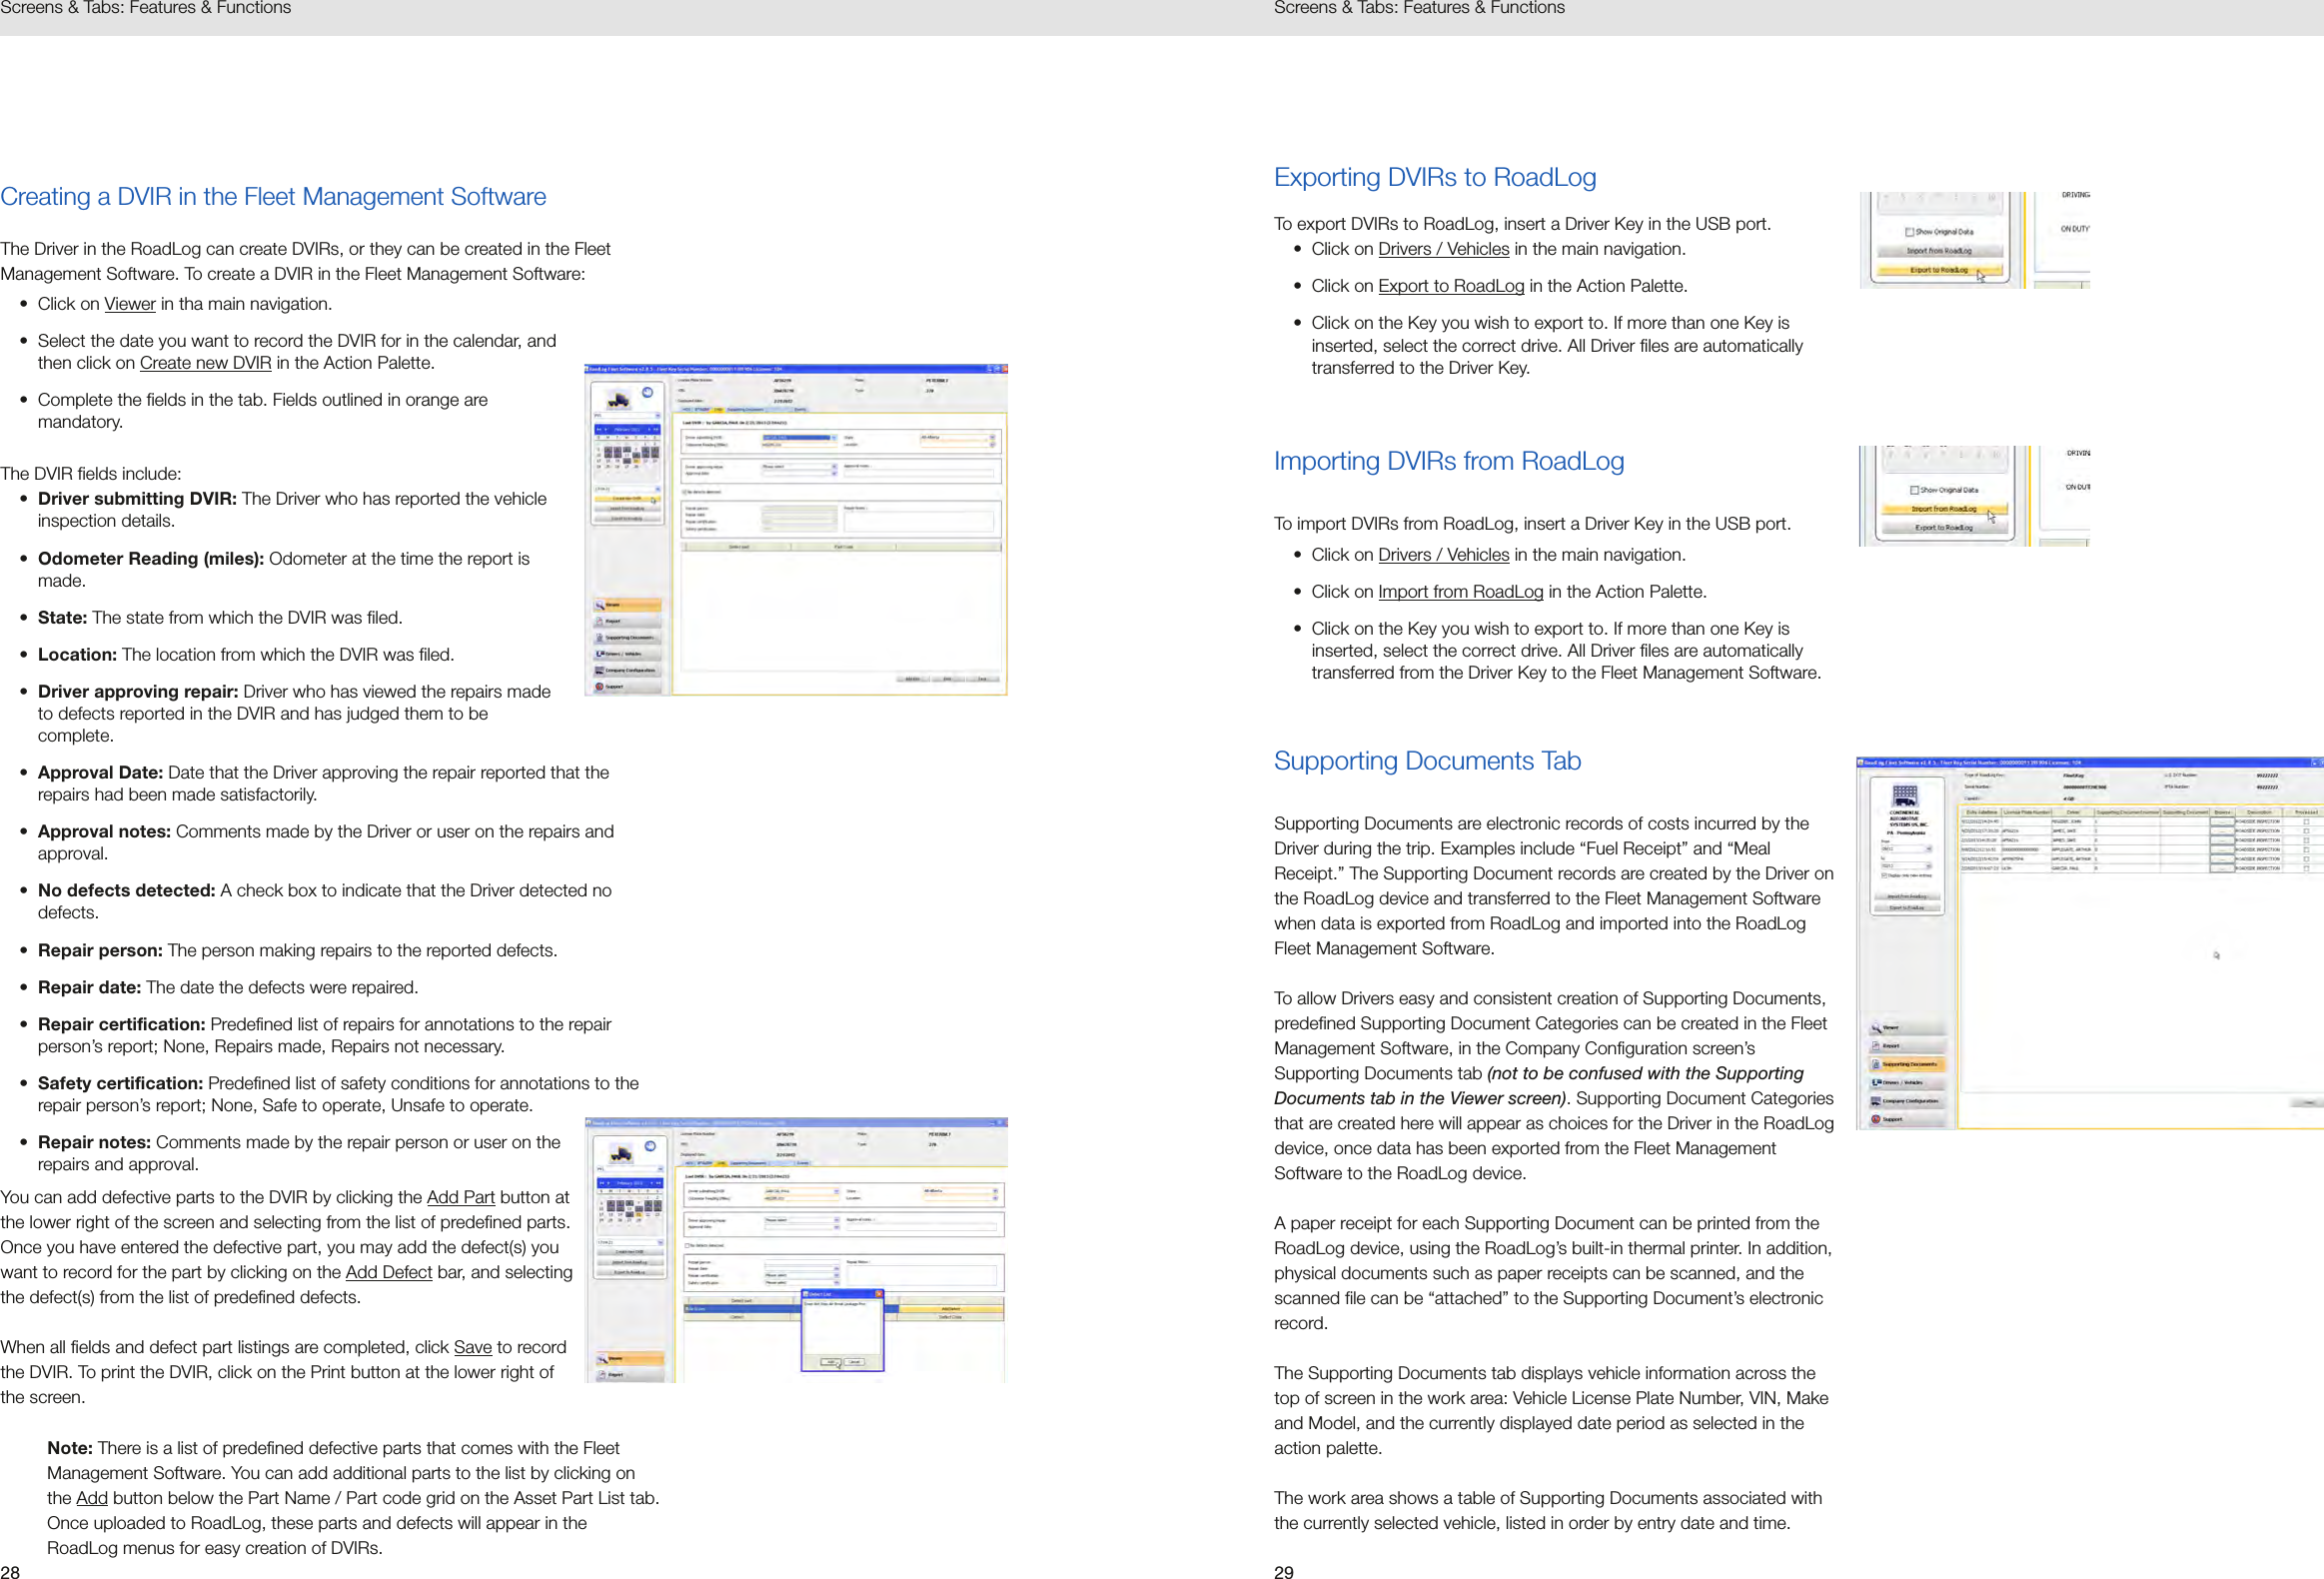
![1716Navigating work area Screens and Tabs Navigating work area Screens and TabsSpeed Graph Tab:• [This feature will be implemented in a free upcoming release]Events Tab:• View a complete list of all events recorded automatically by RoadLog, including vehicle status changes and Driver actions.Report ScreenCreate, view, save and print reports for:• DVIR status.• HOS download reminders.• IRP driven miles [This feature will be implemented in a free upcoming release]. • IRP vehicles list. [This feature will be implemented in a free upcoming release].• Vehicle trips. Supporting Documents Screen• View Supporting Documents records such as fuel and meal receipts.• Add scanned documents to the Supporting Documents records. Drivers / VehiclesDriver Profile Tab:• Create RoadLog identities for Drivers.• Choose from existing profiles for Drivers and vehicles (using the icon in the actions palette).Trailer Assignments Tab:• Assign trailers to the currently selected Driver.• Un-assign trailers from the currently selected Driver.Shipping Assignments Tab:• Assign Shipping Documents to the currently selected Driver. • Un-assign Shipping Documents from the currently selected Driver.](https://usermanual.wiki/Continental-Automotive-Systems/3290X/User-Guide-3041349-Page-9.png)
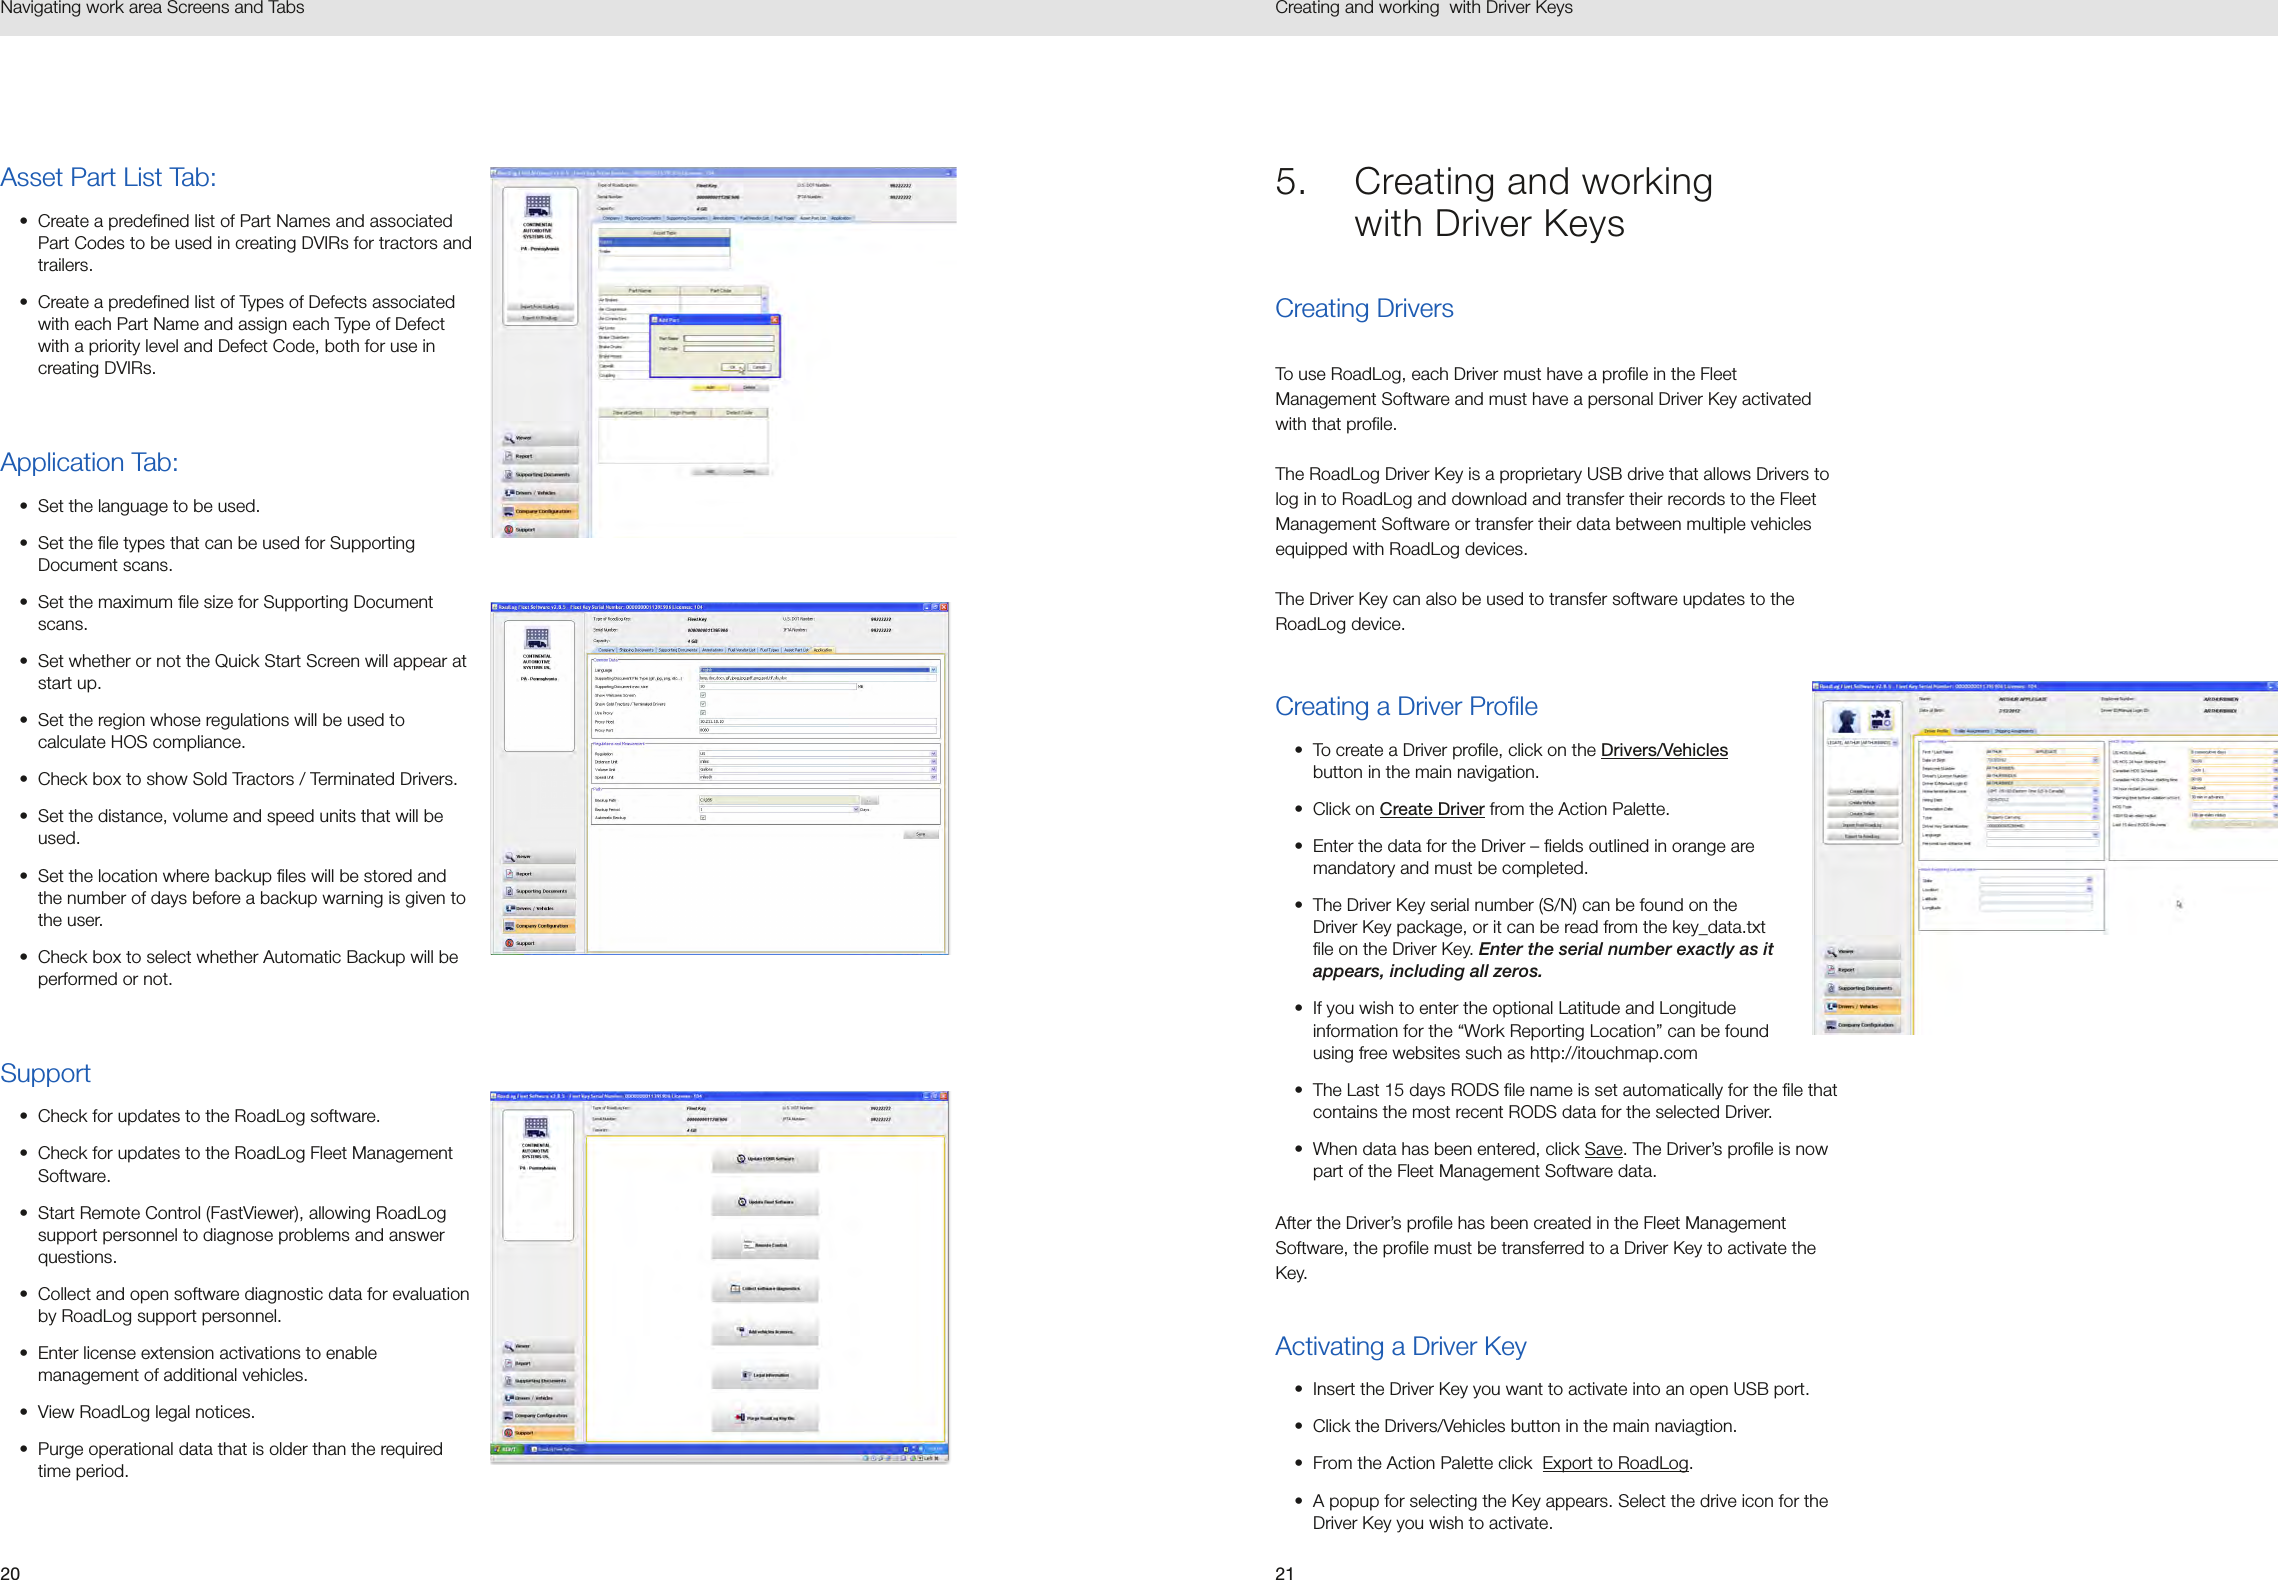
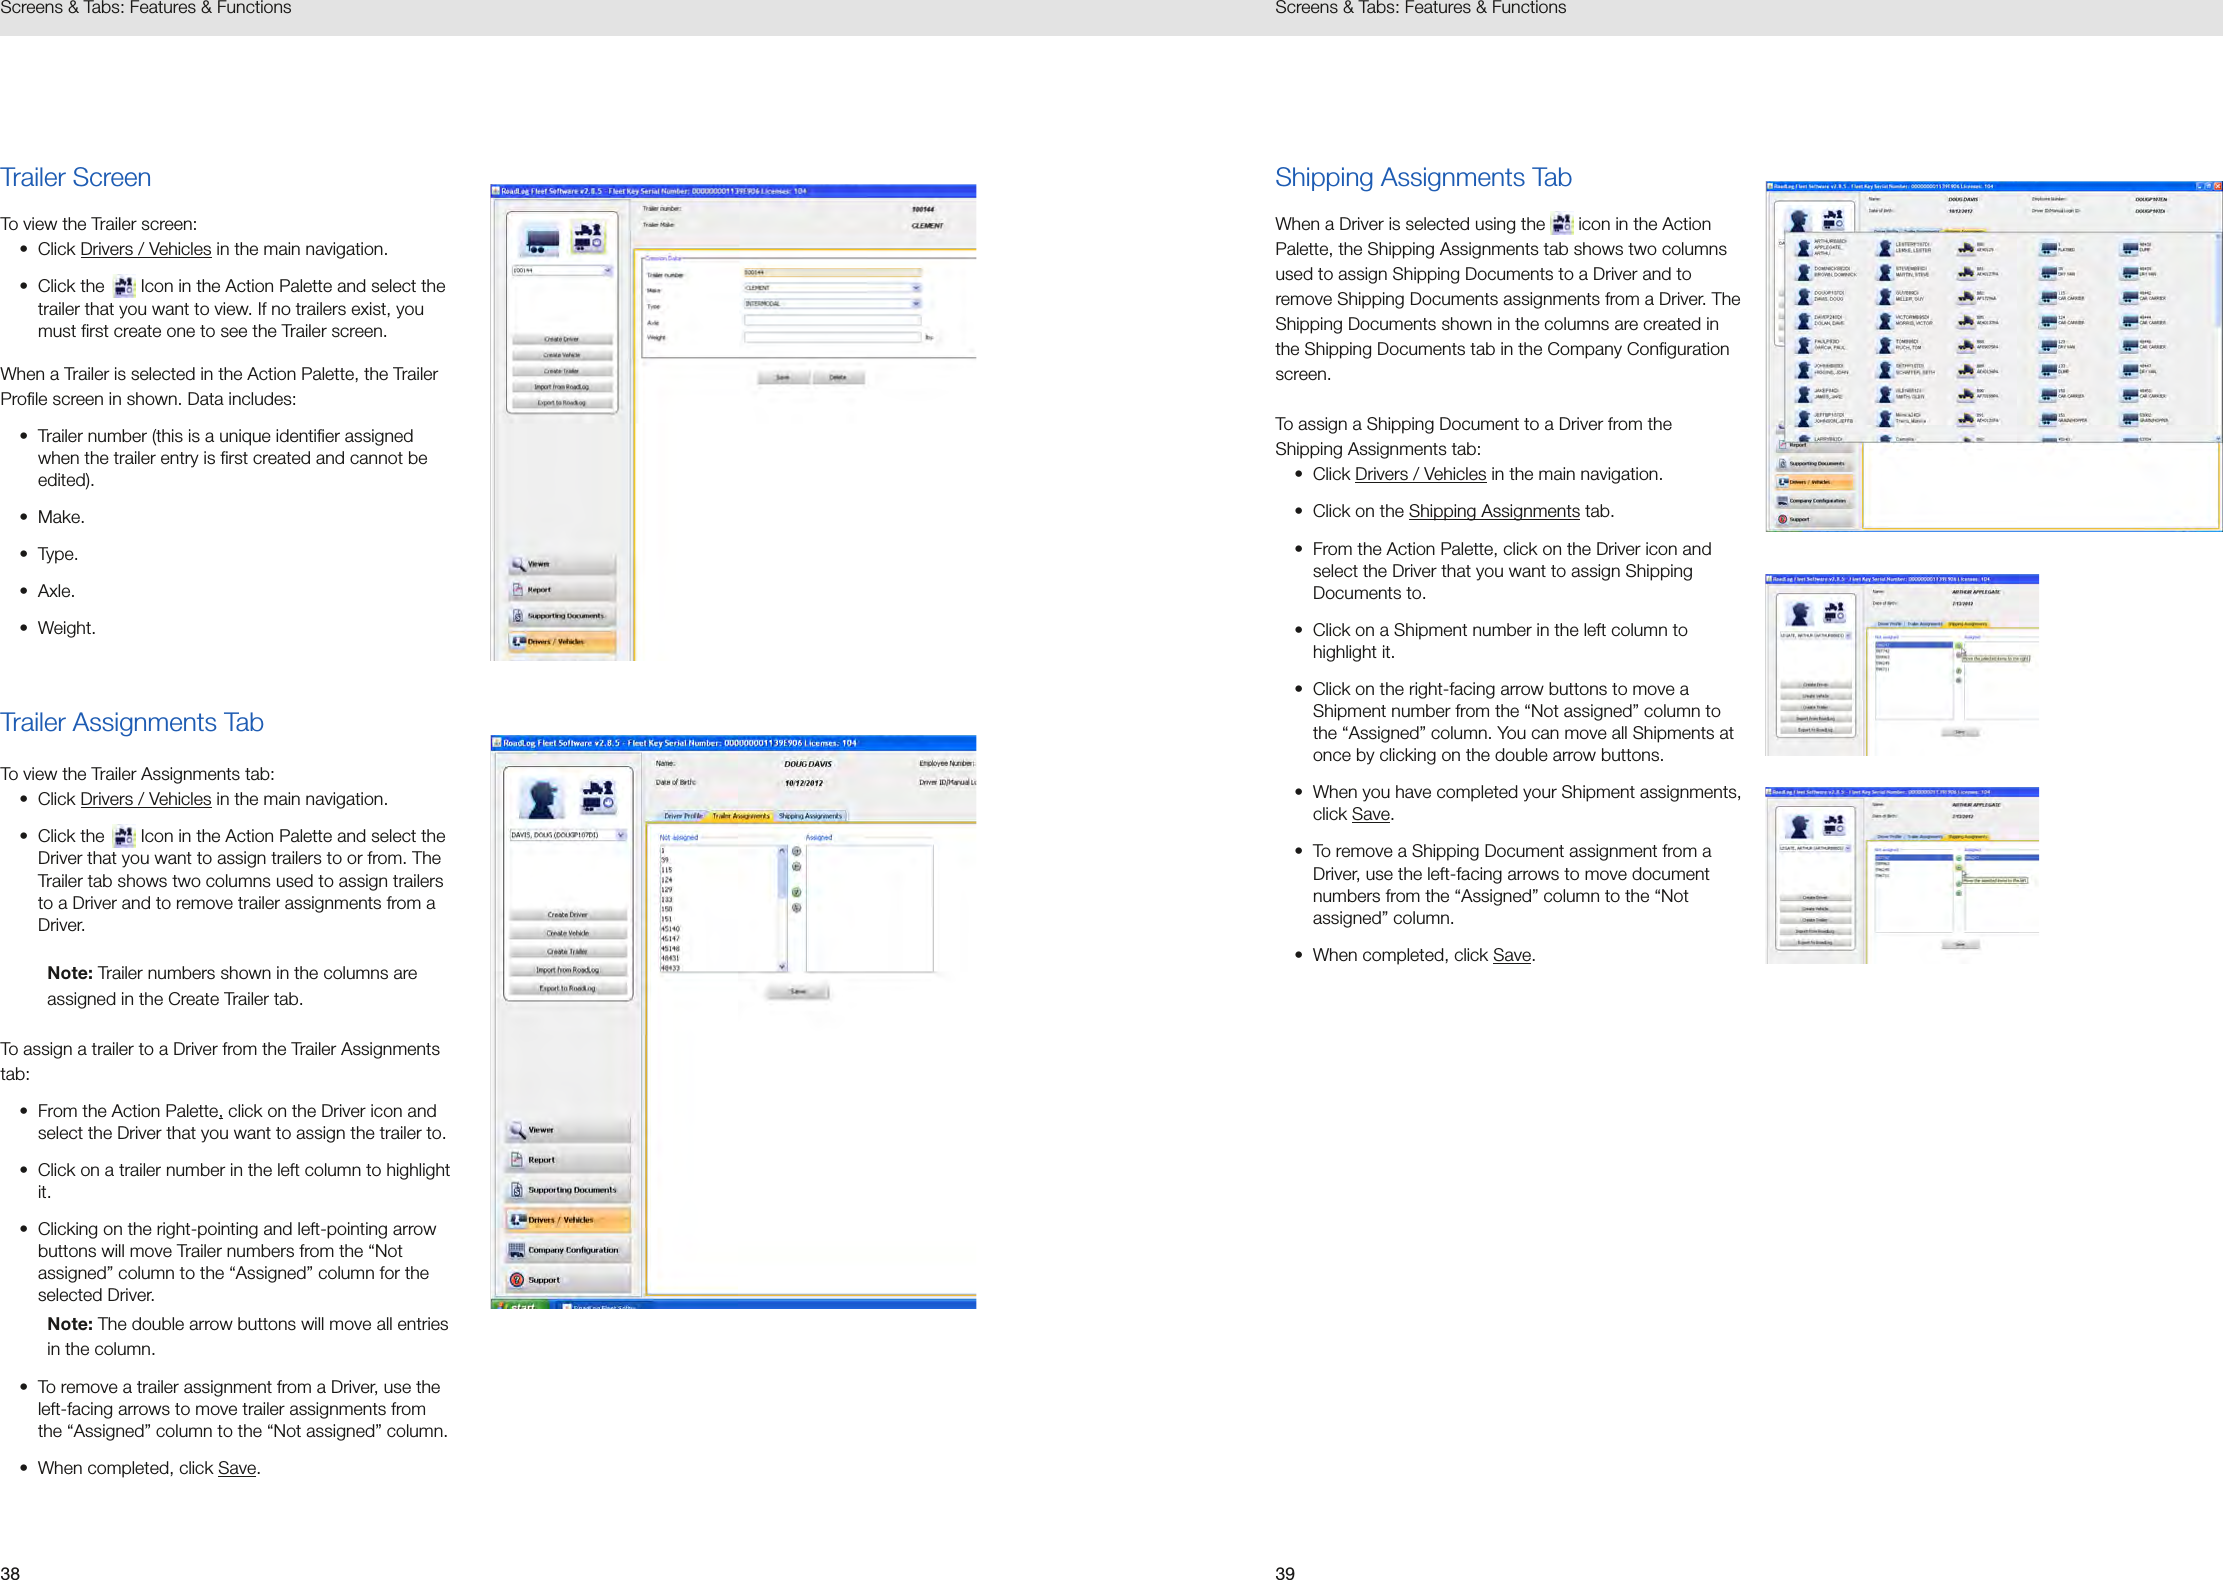
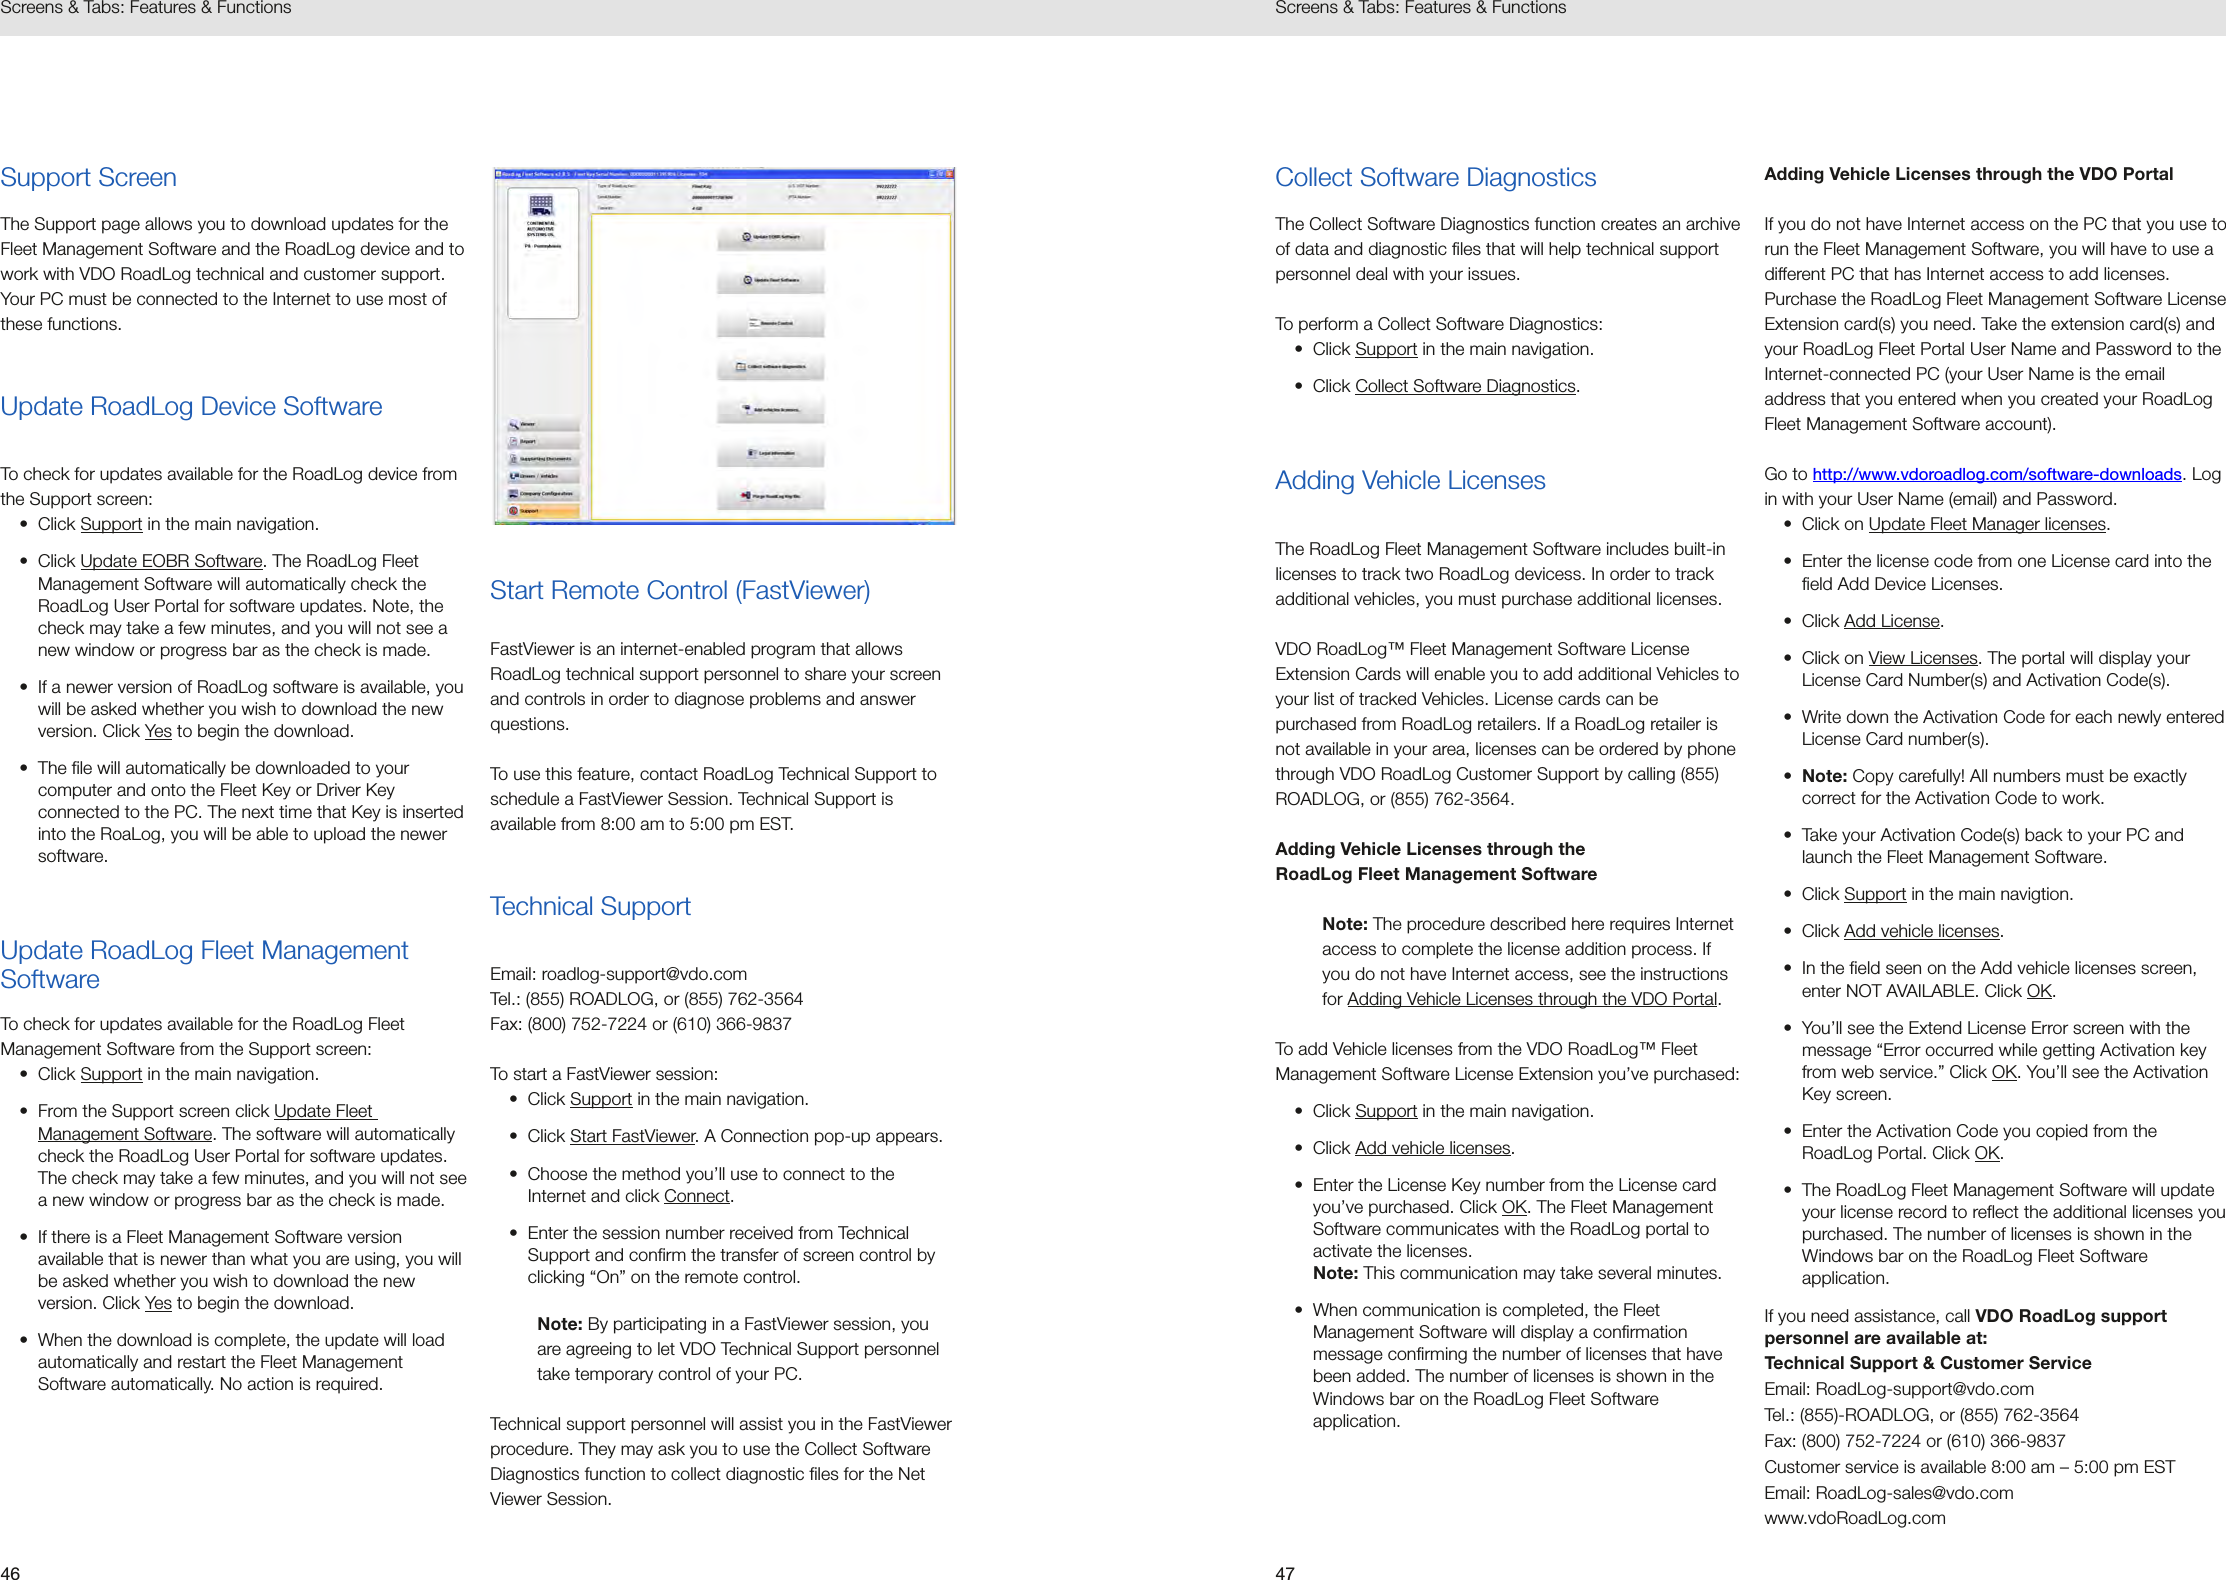
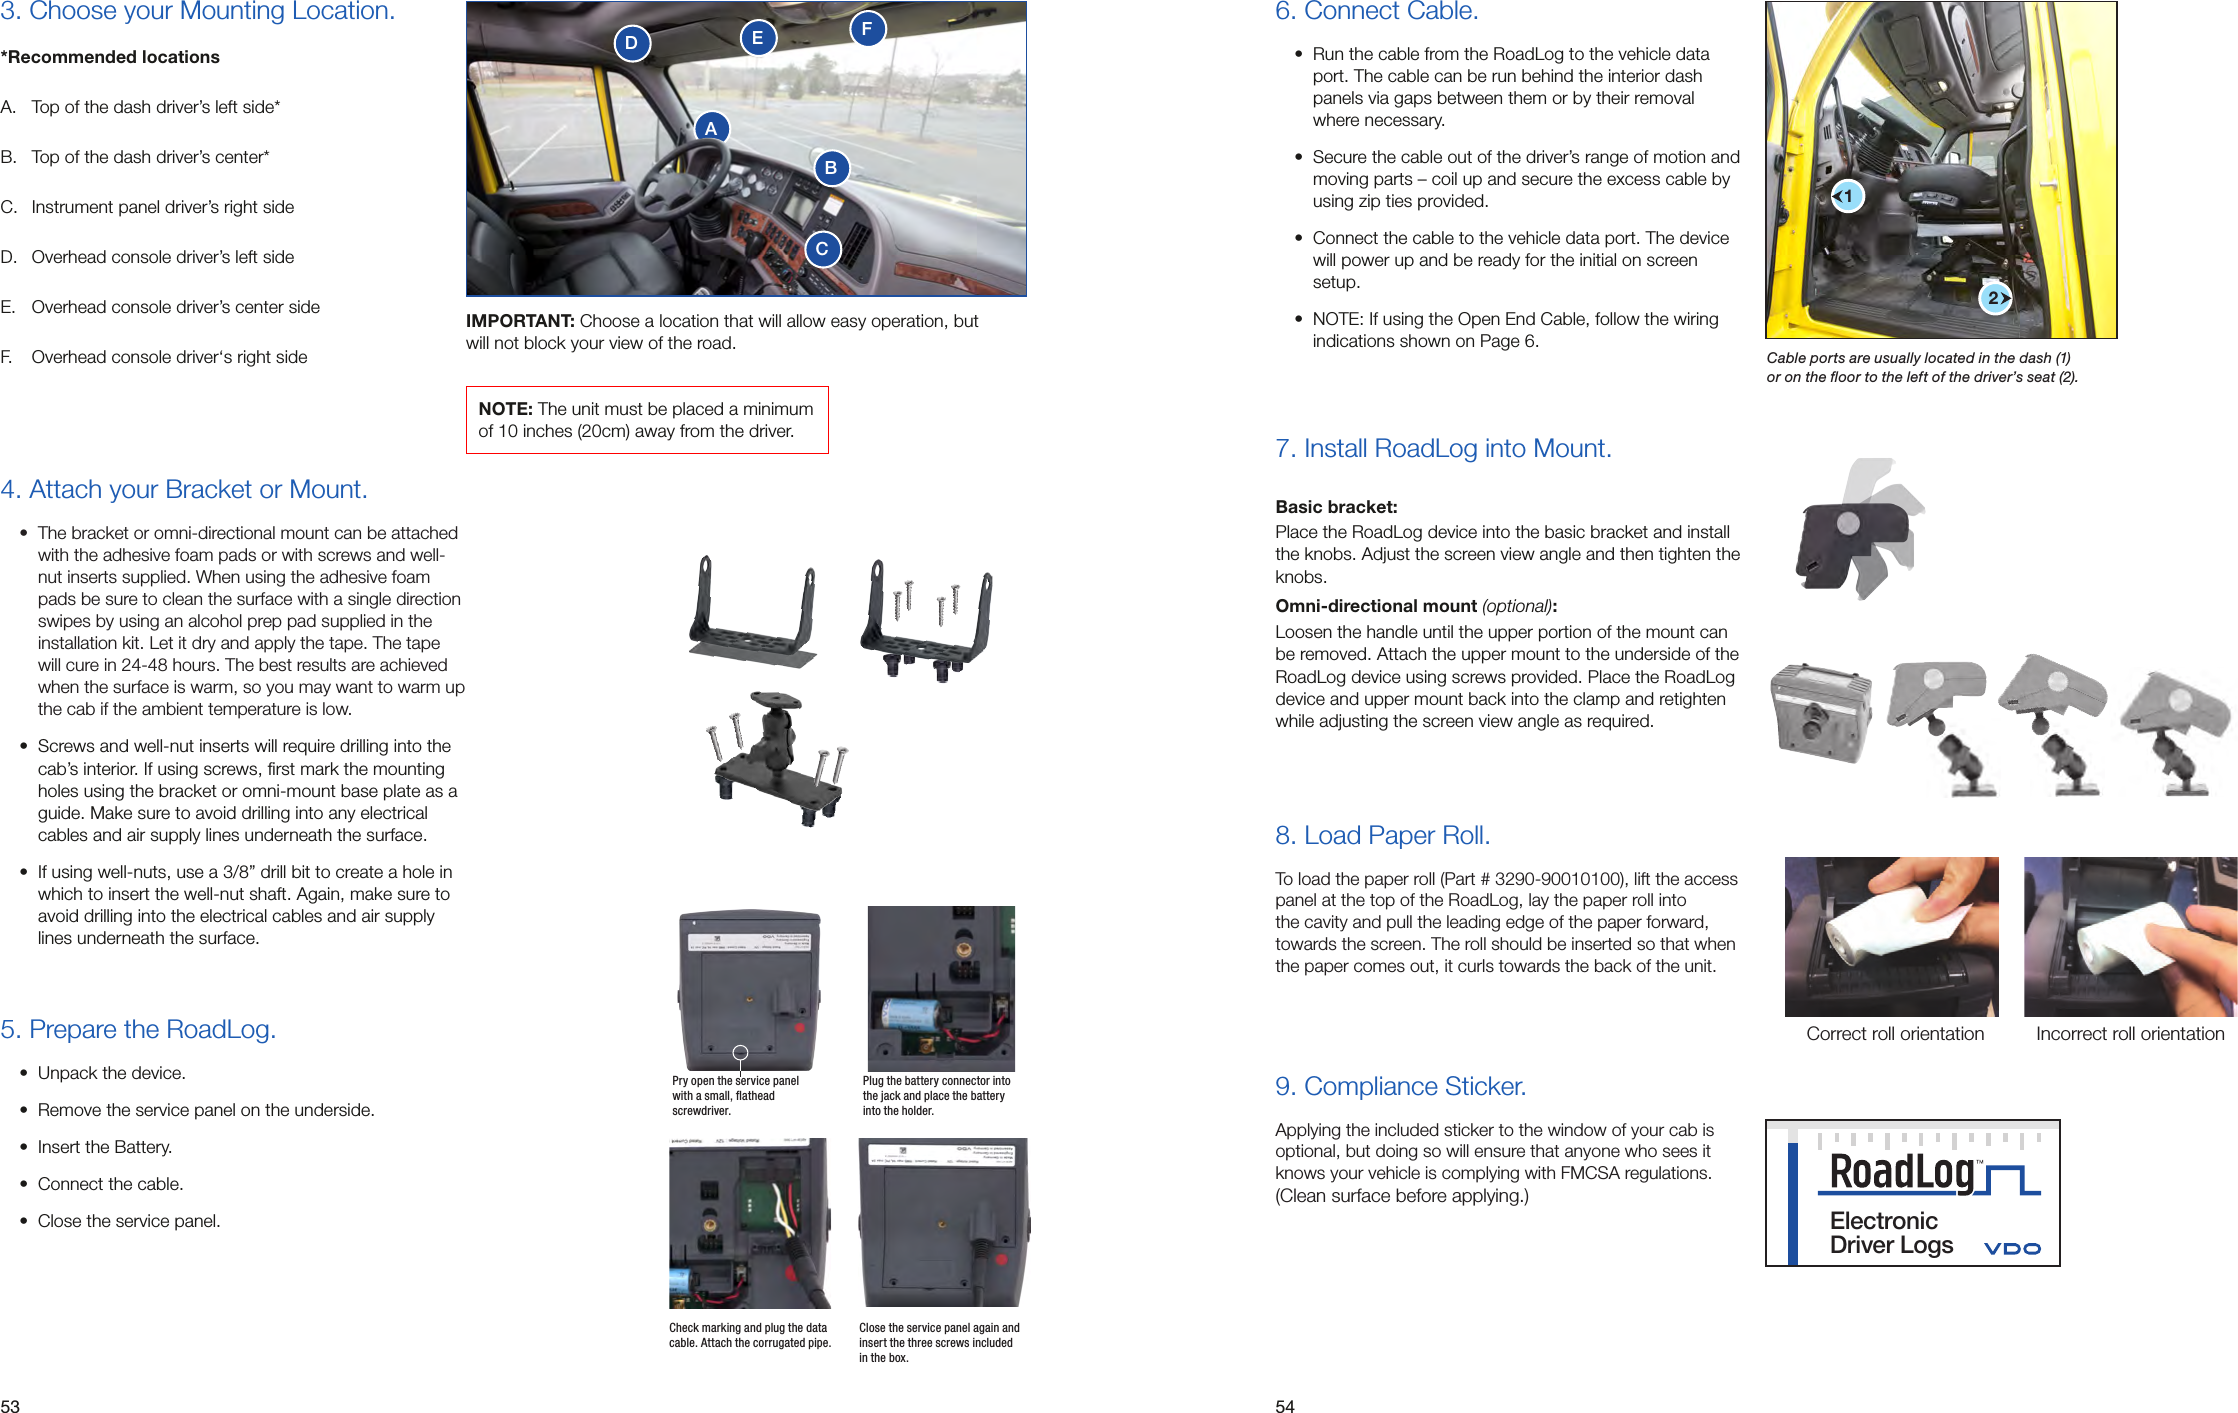
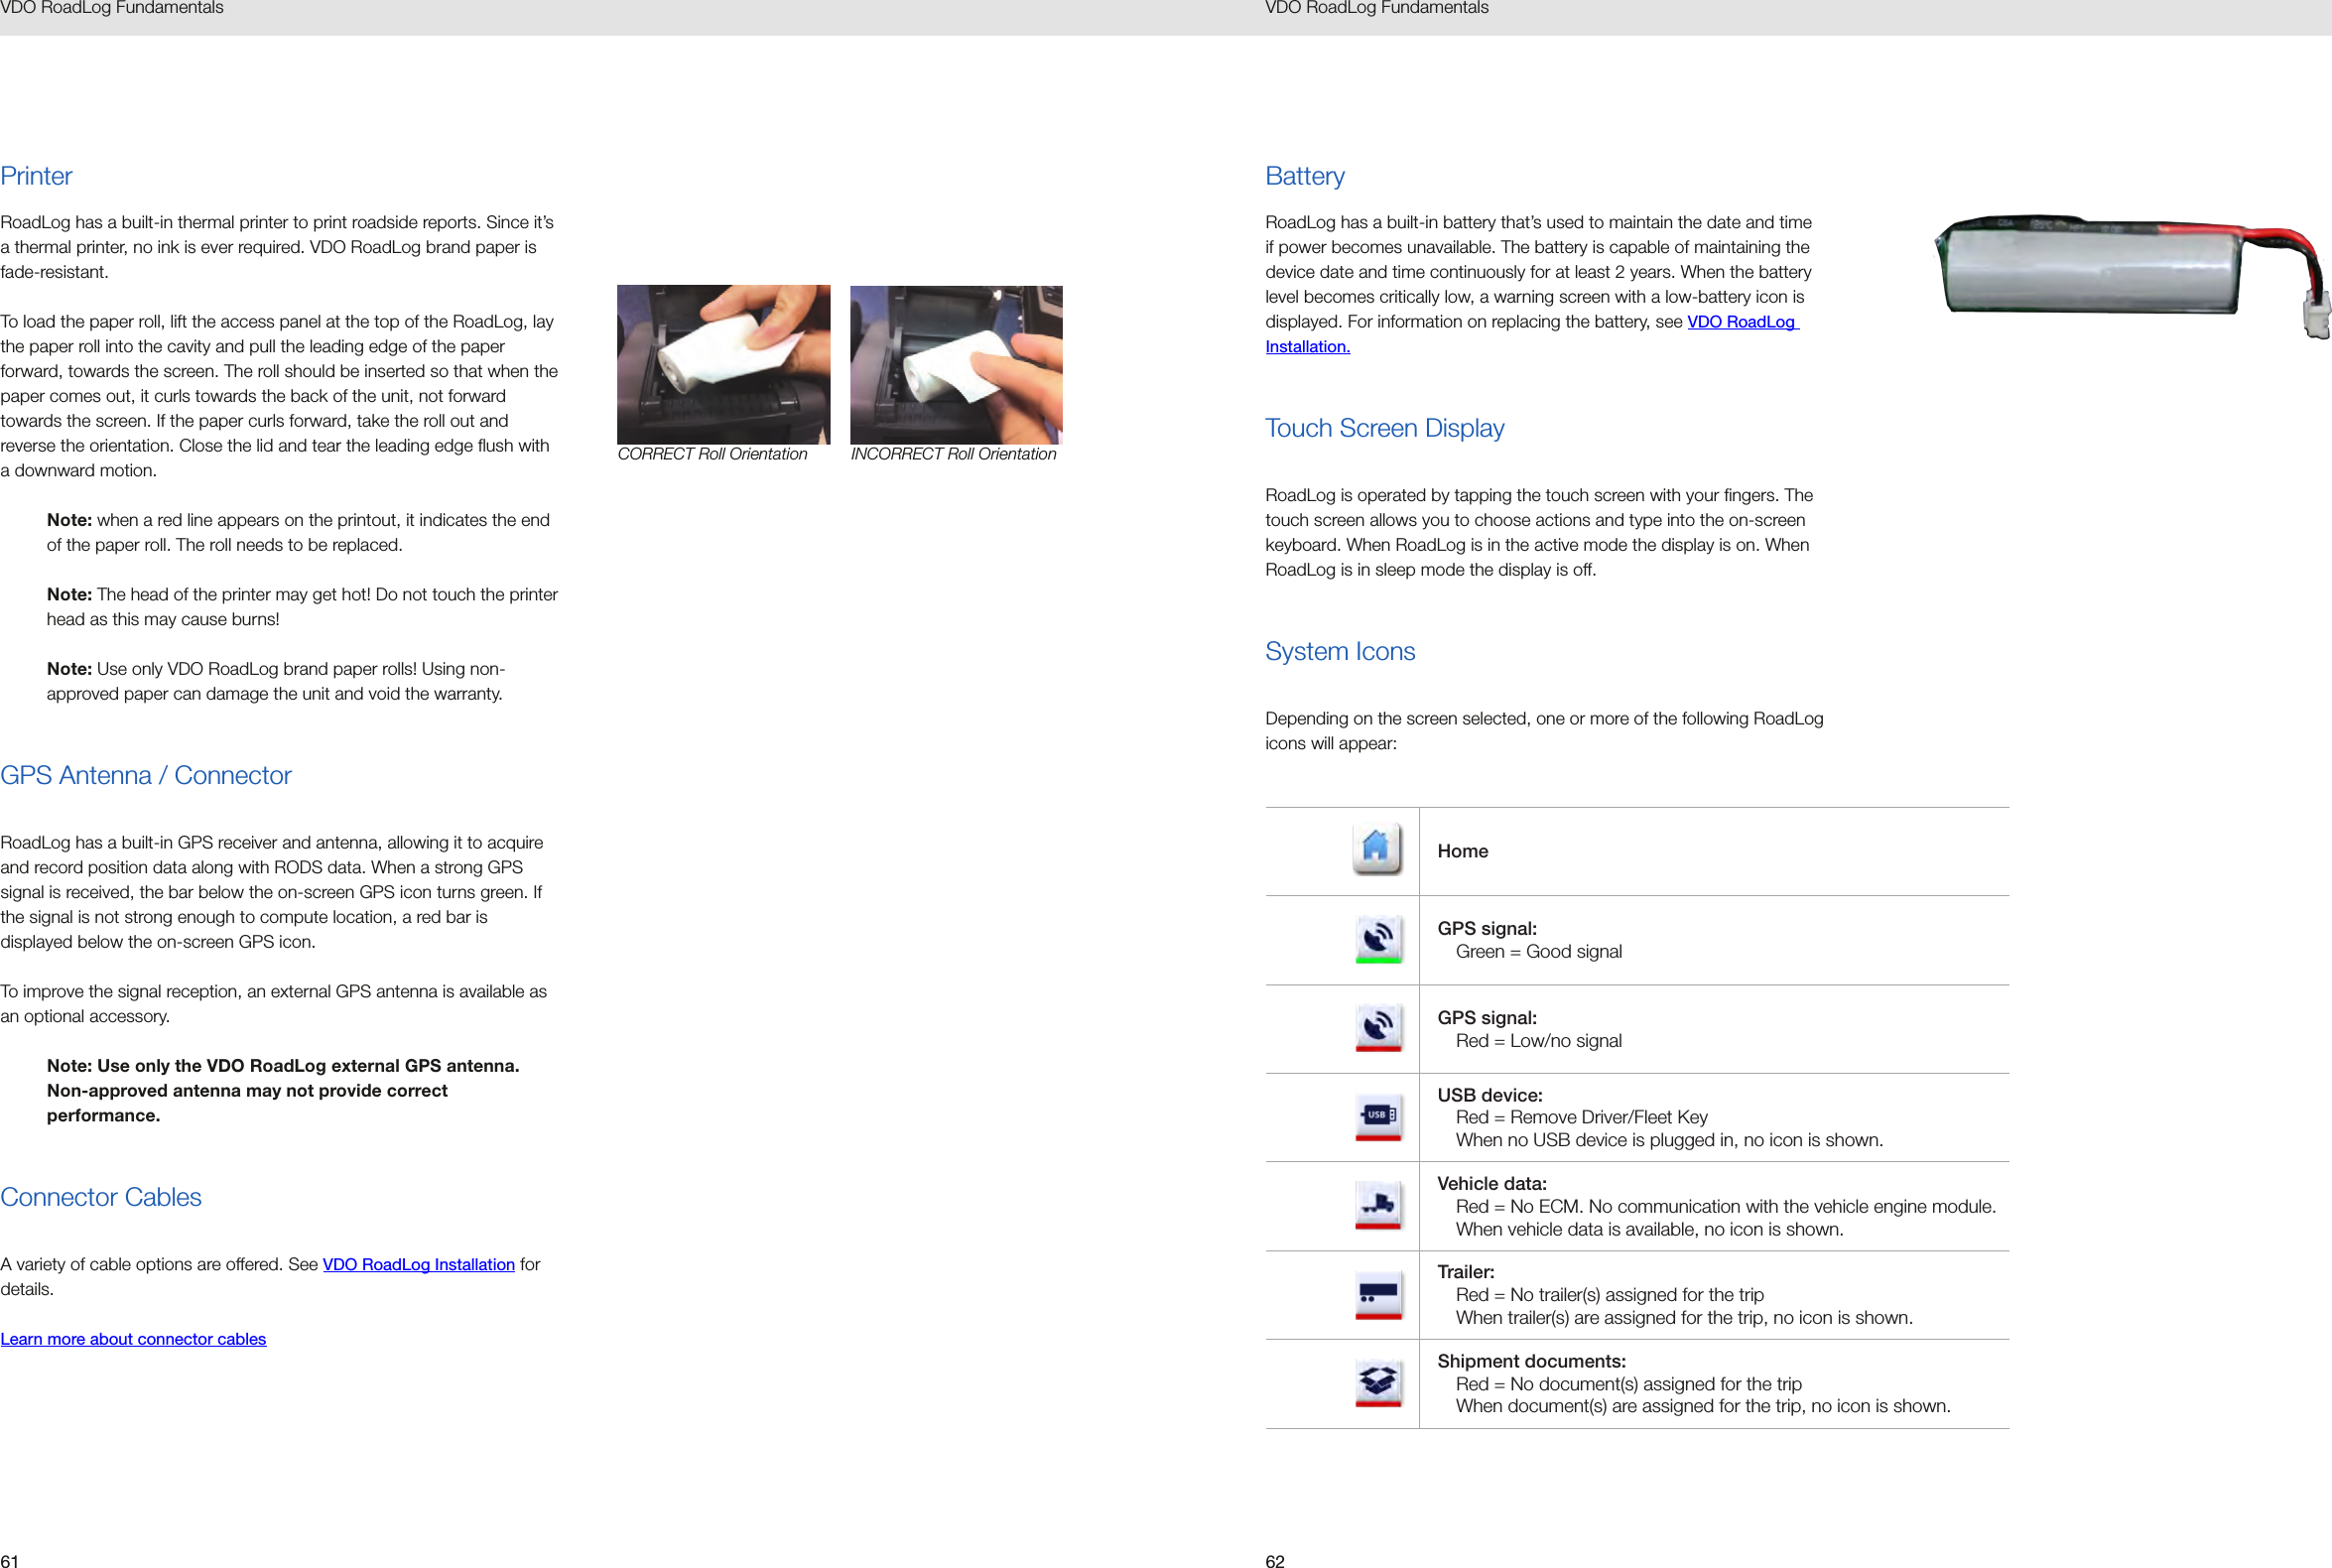
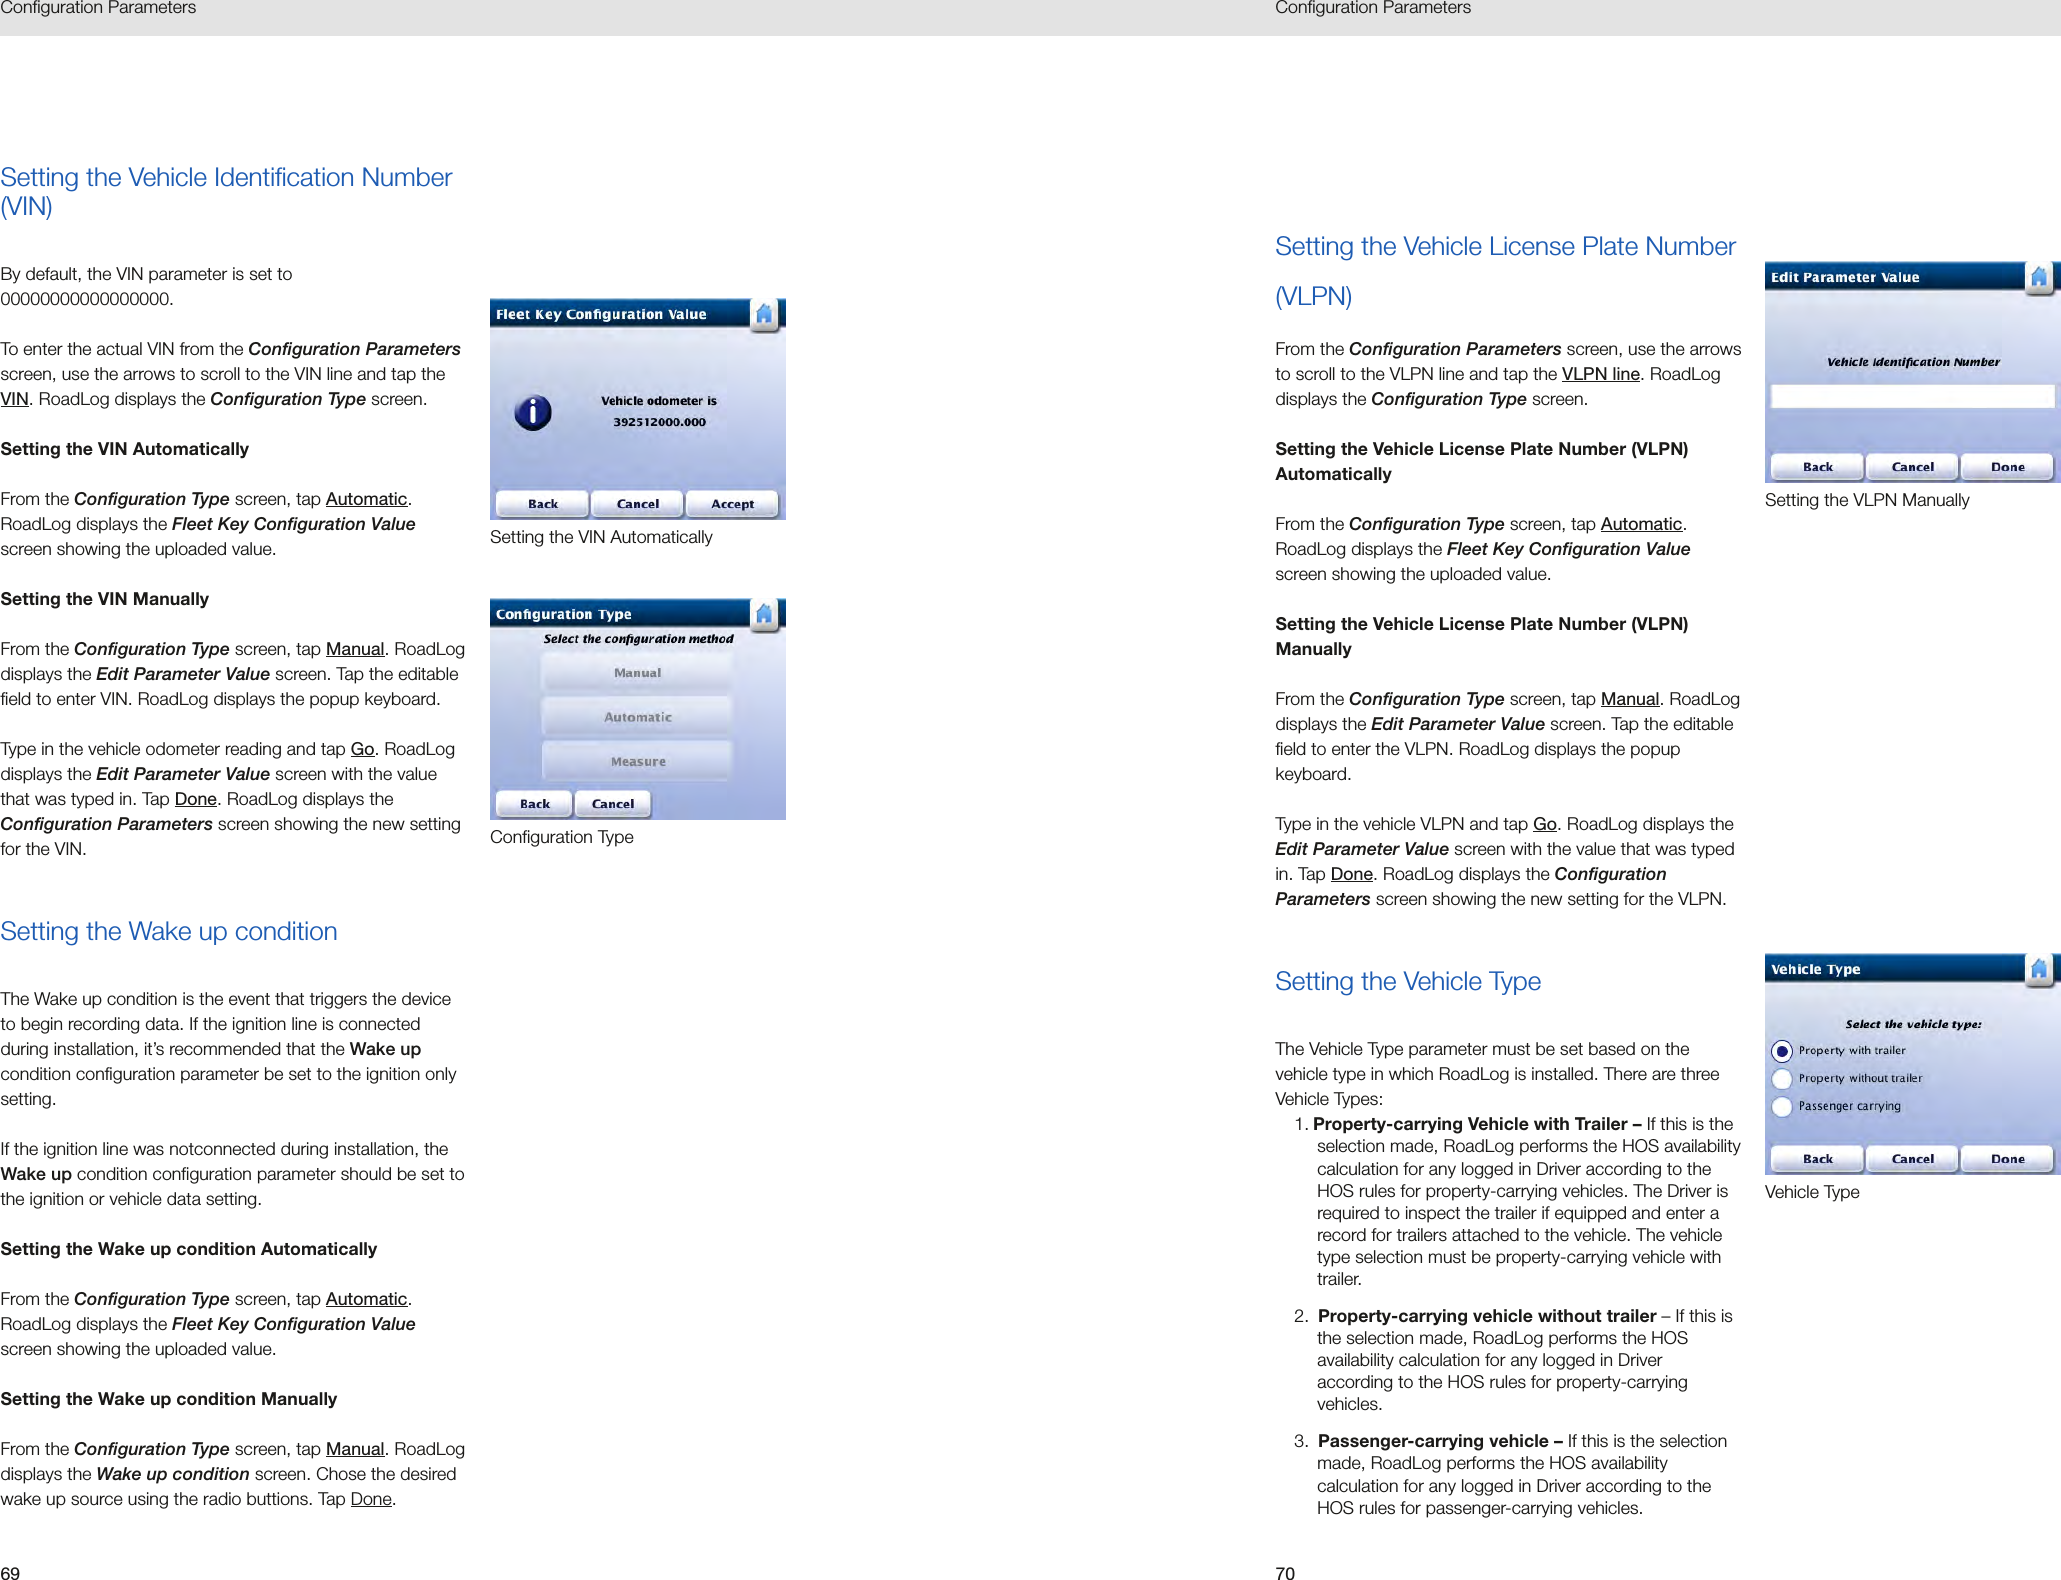
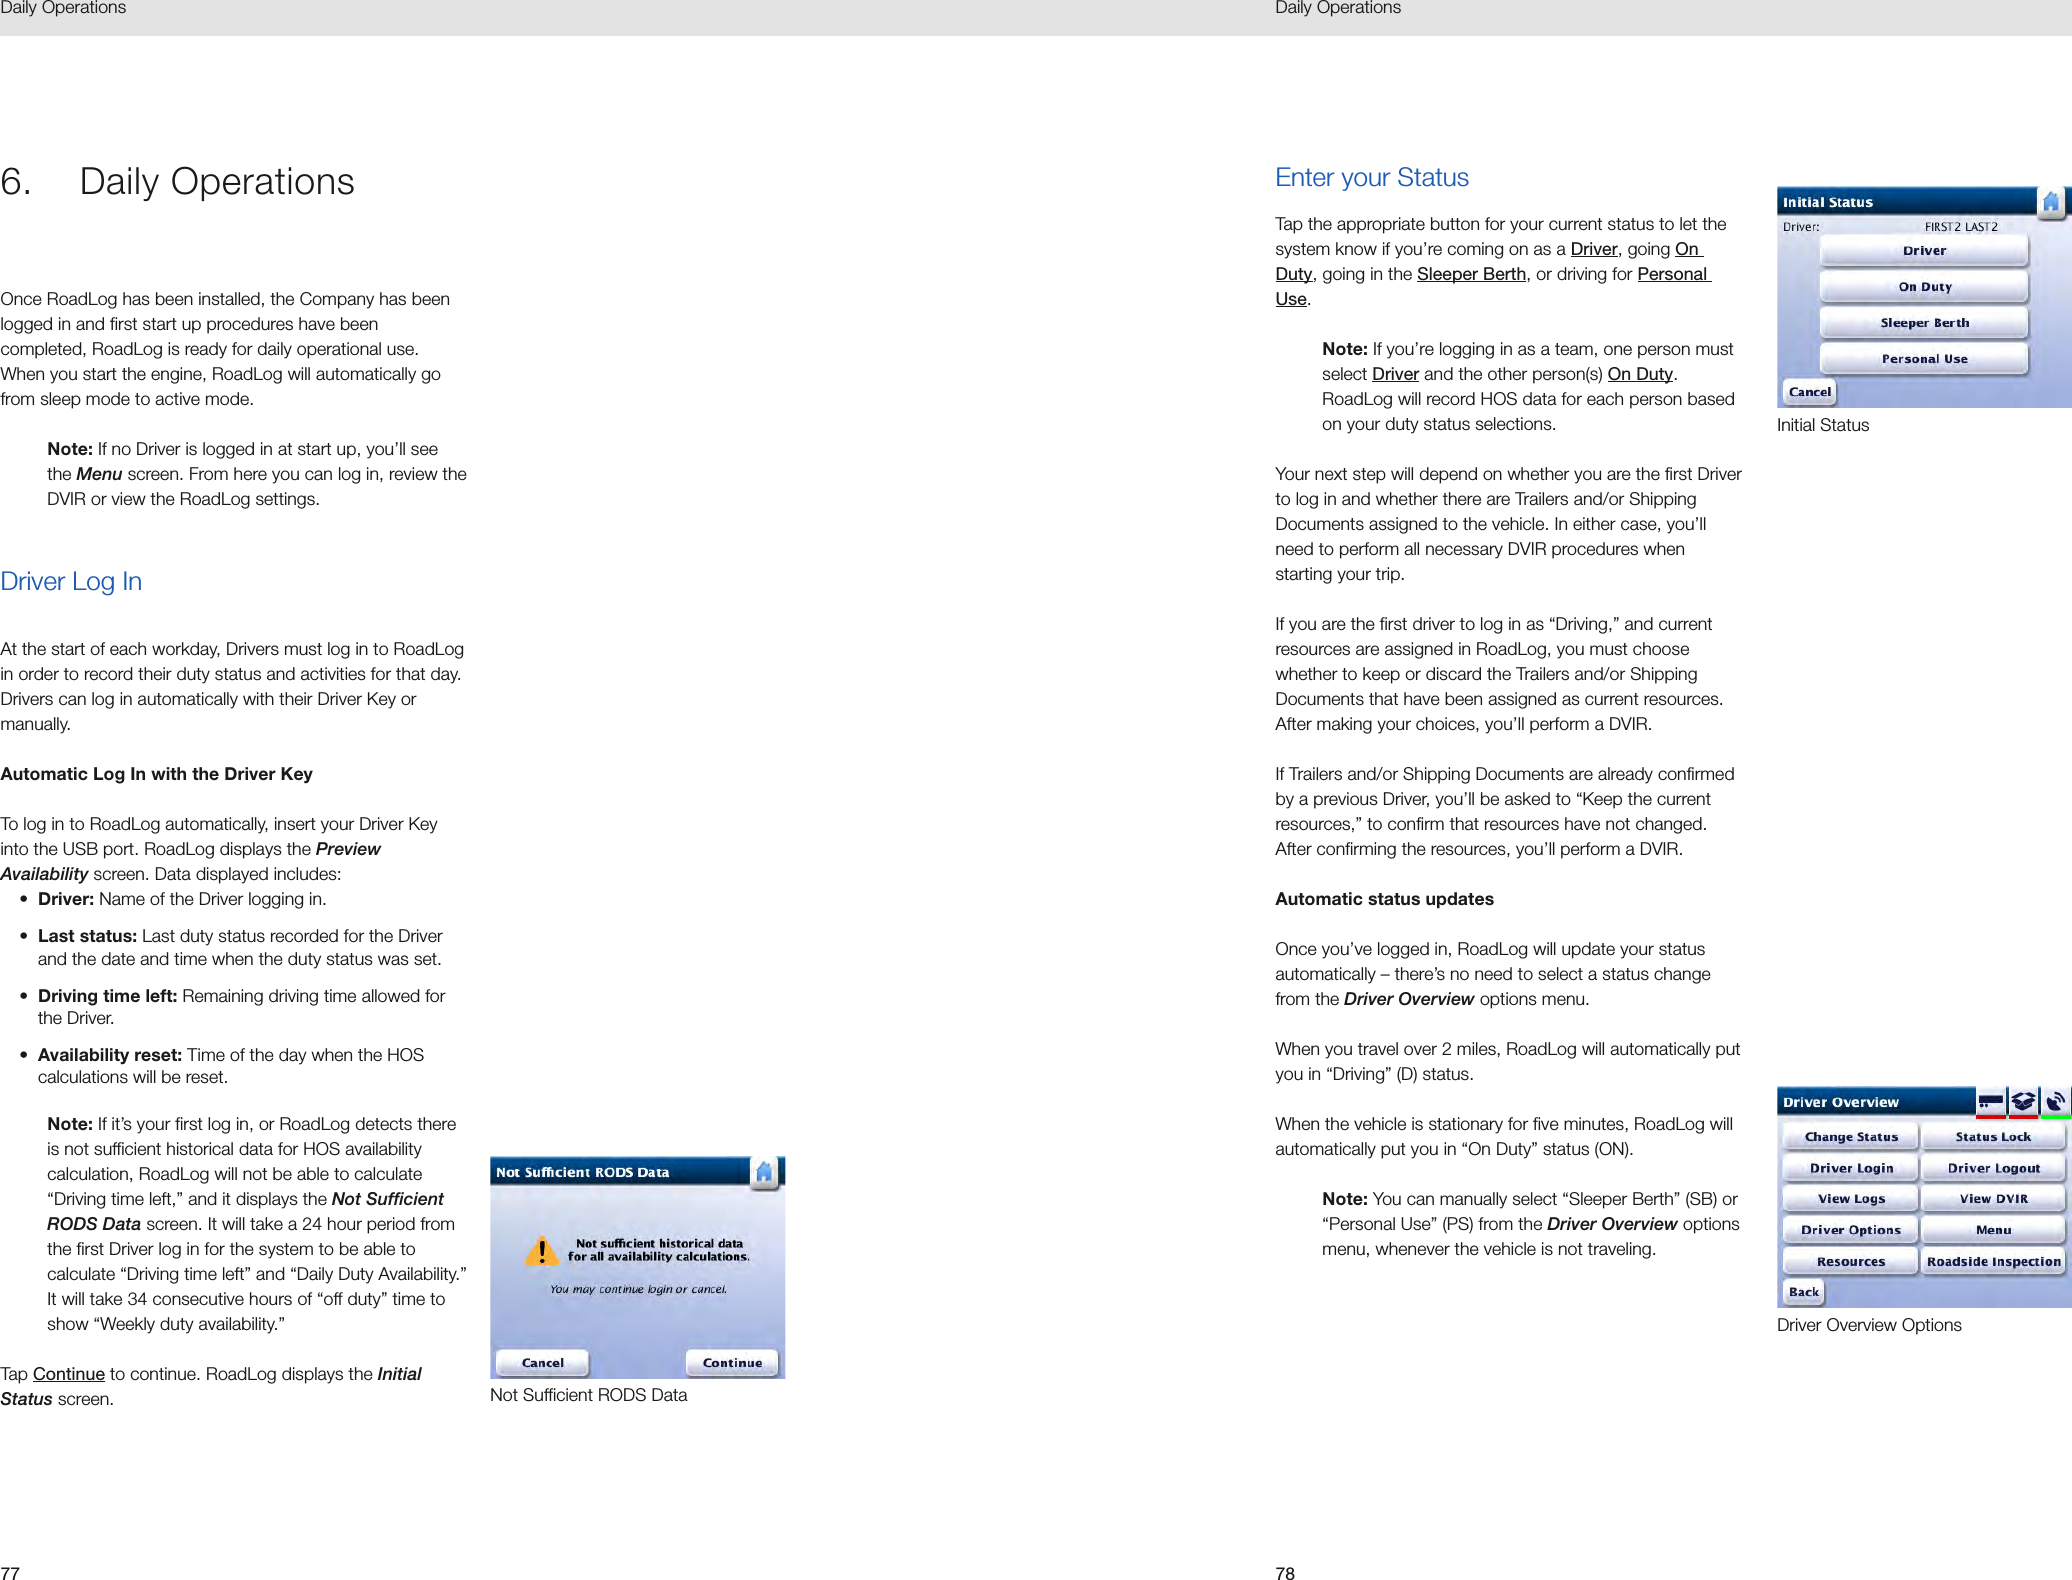
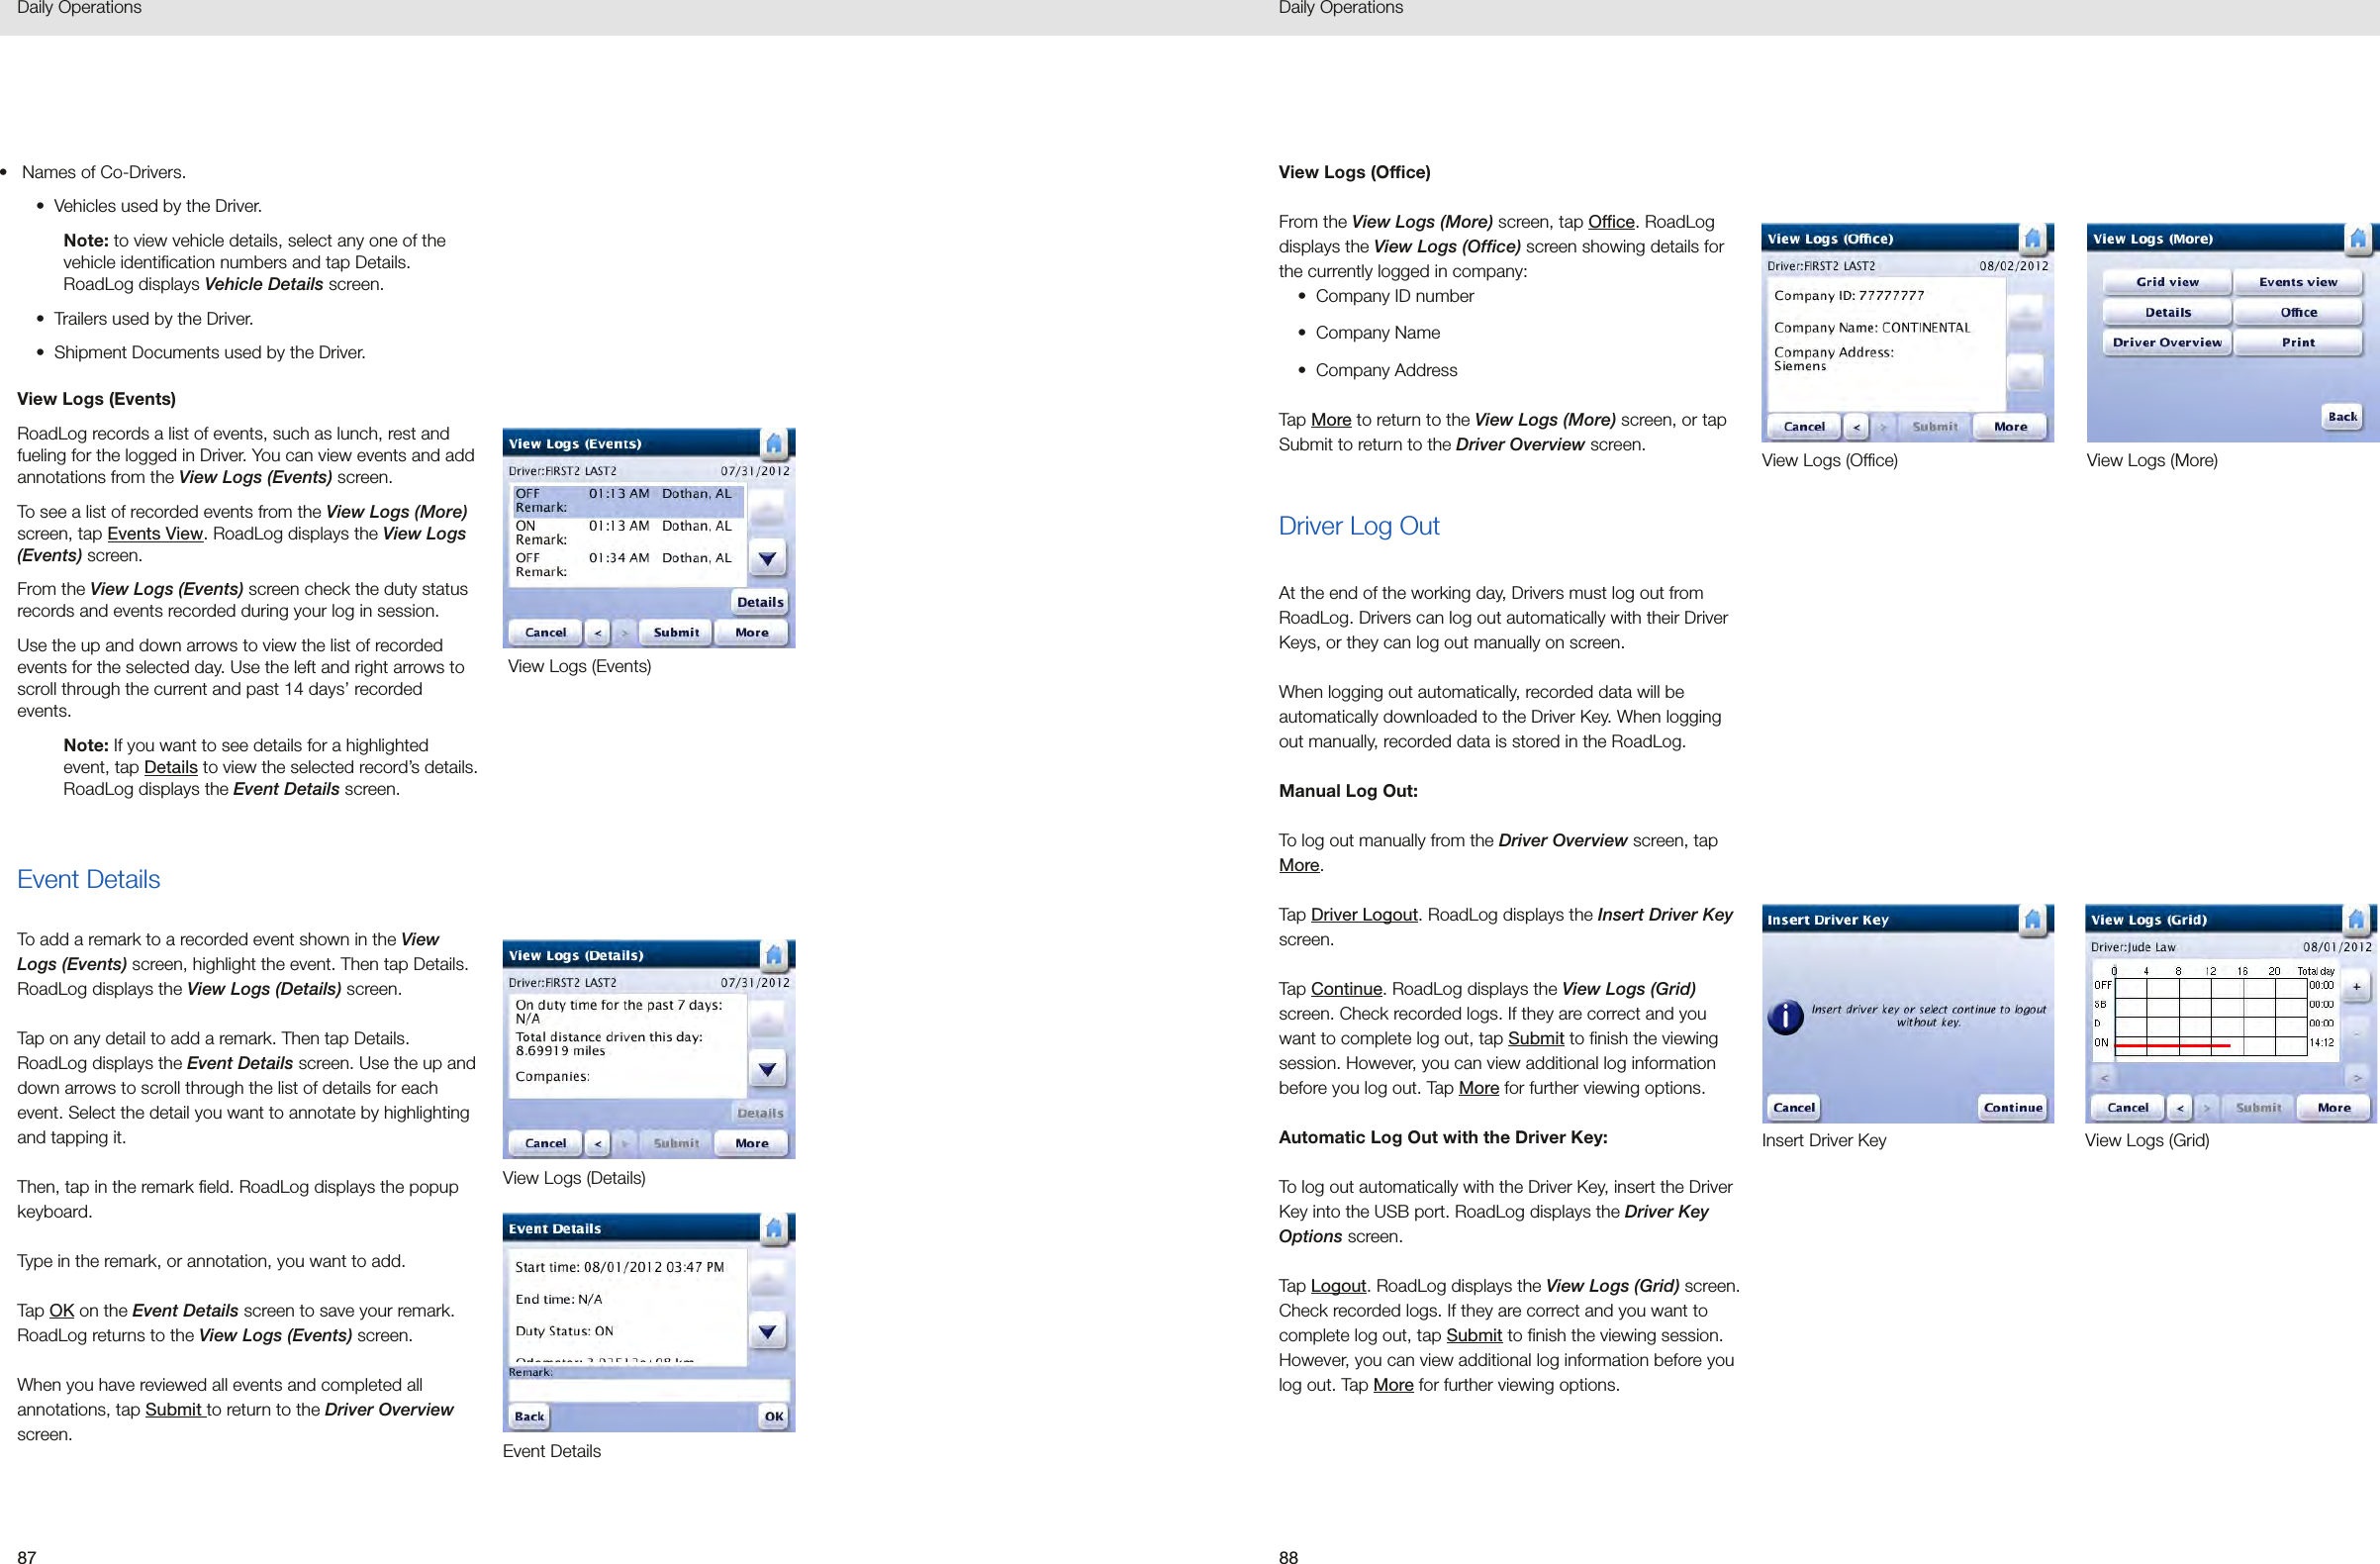
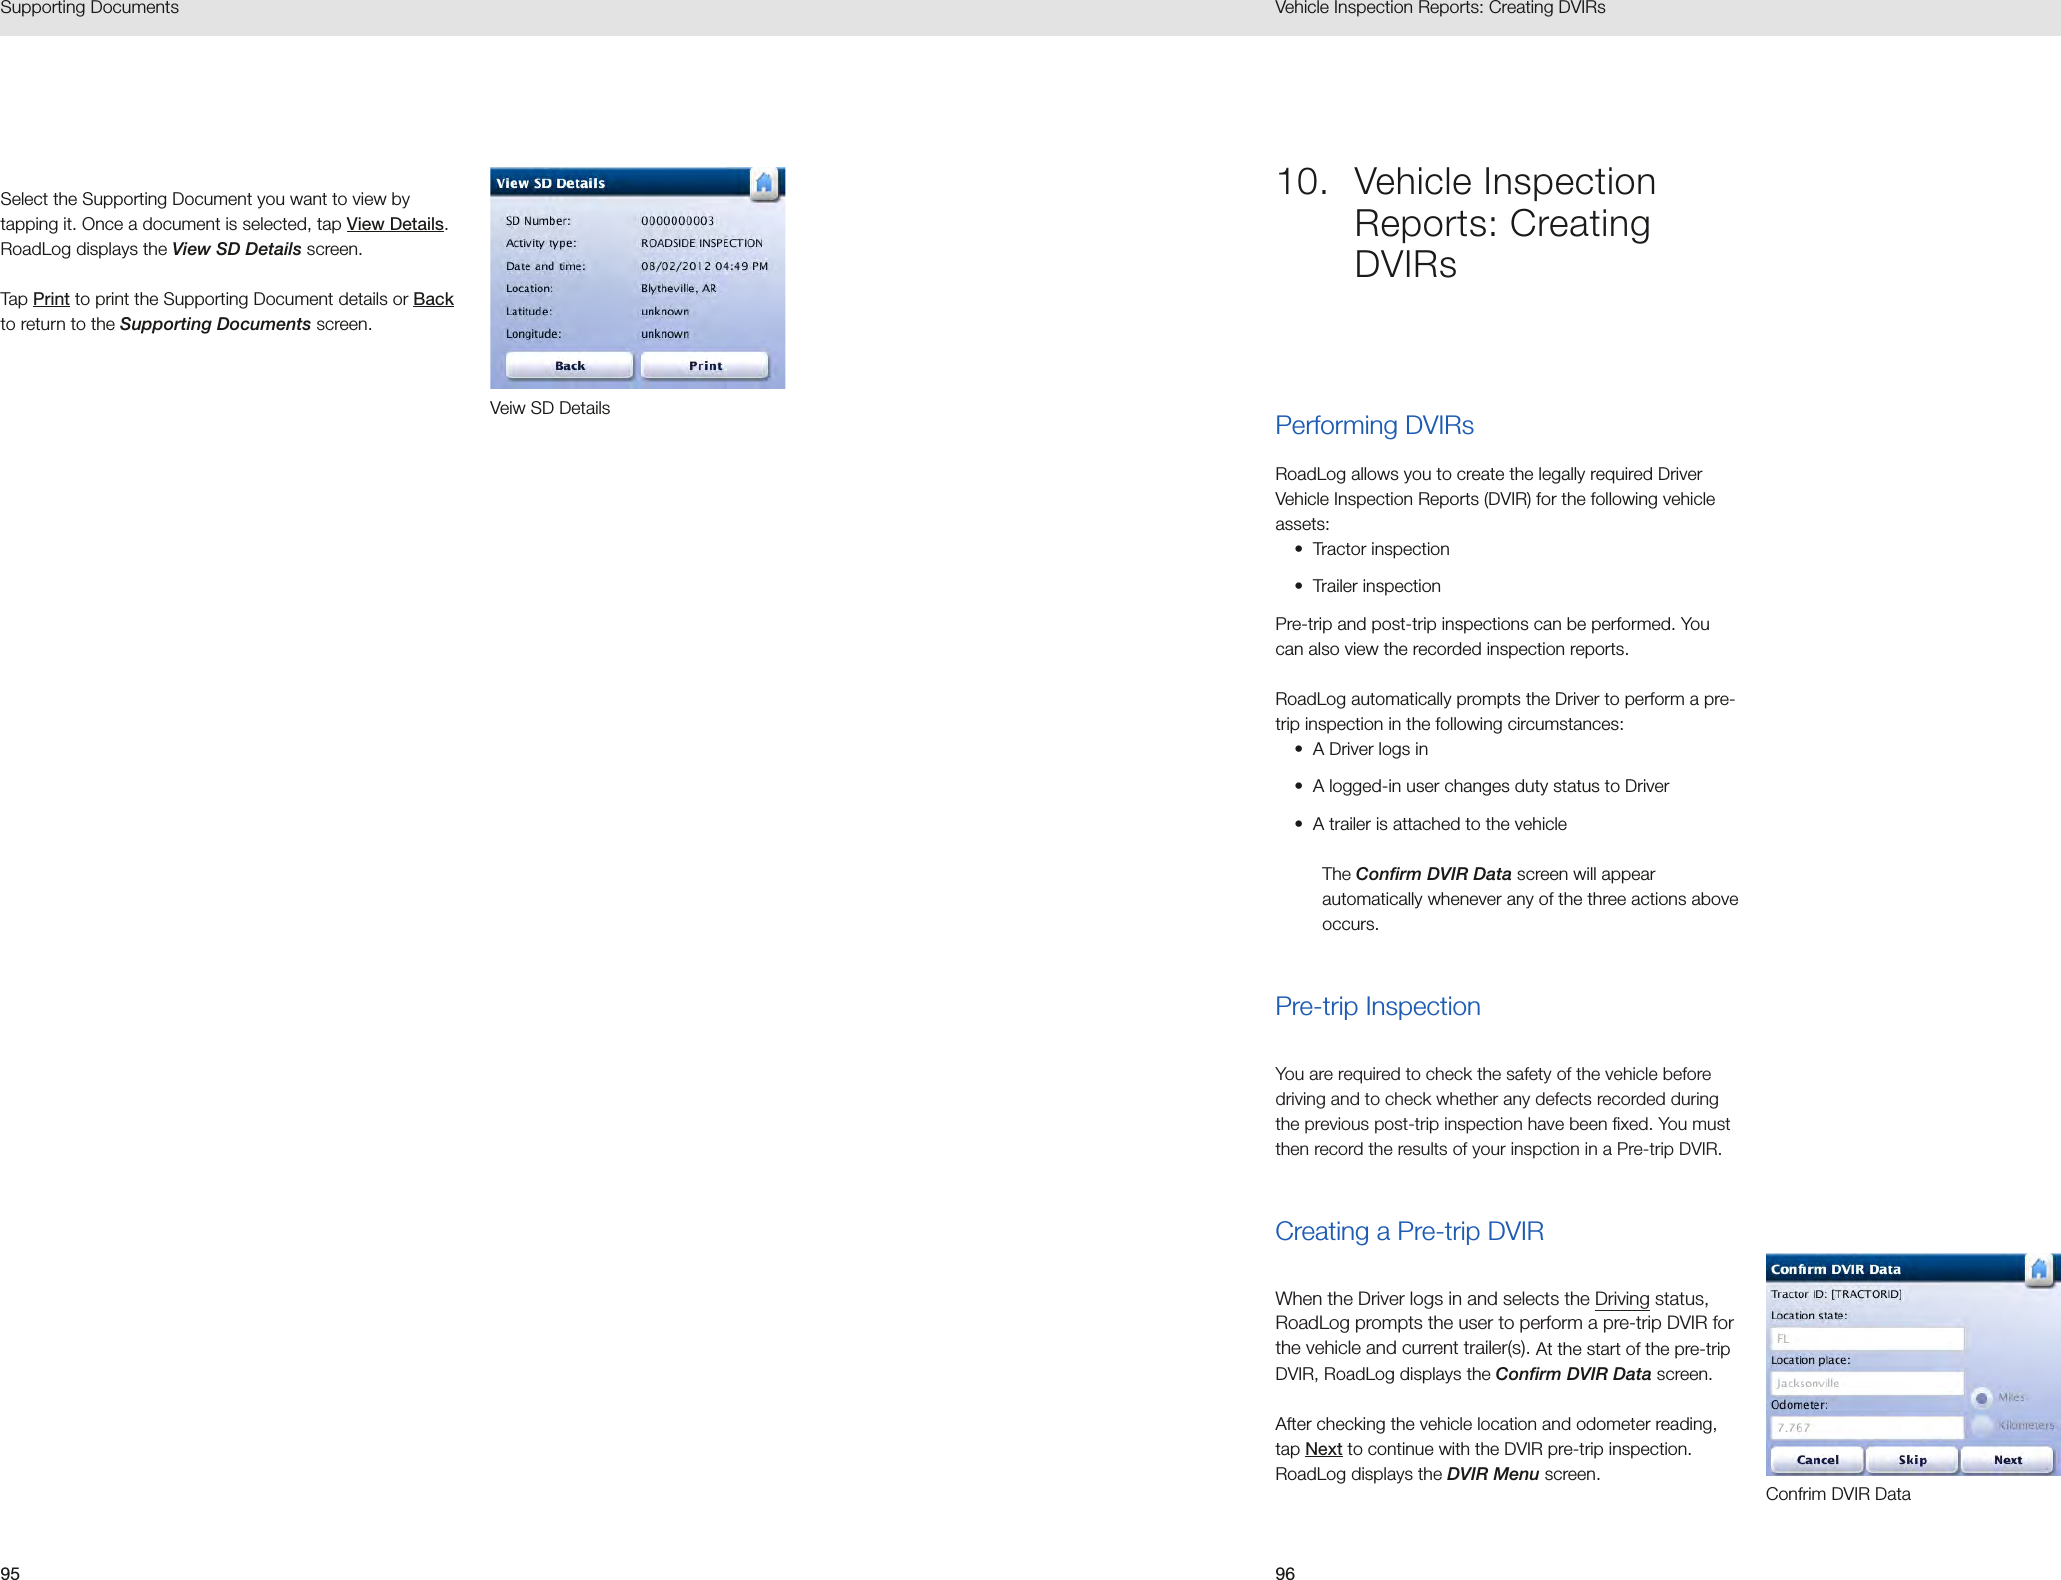
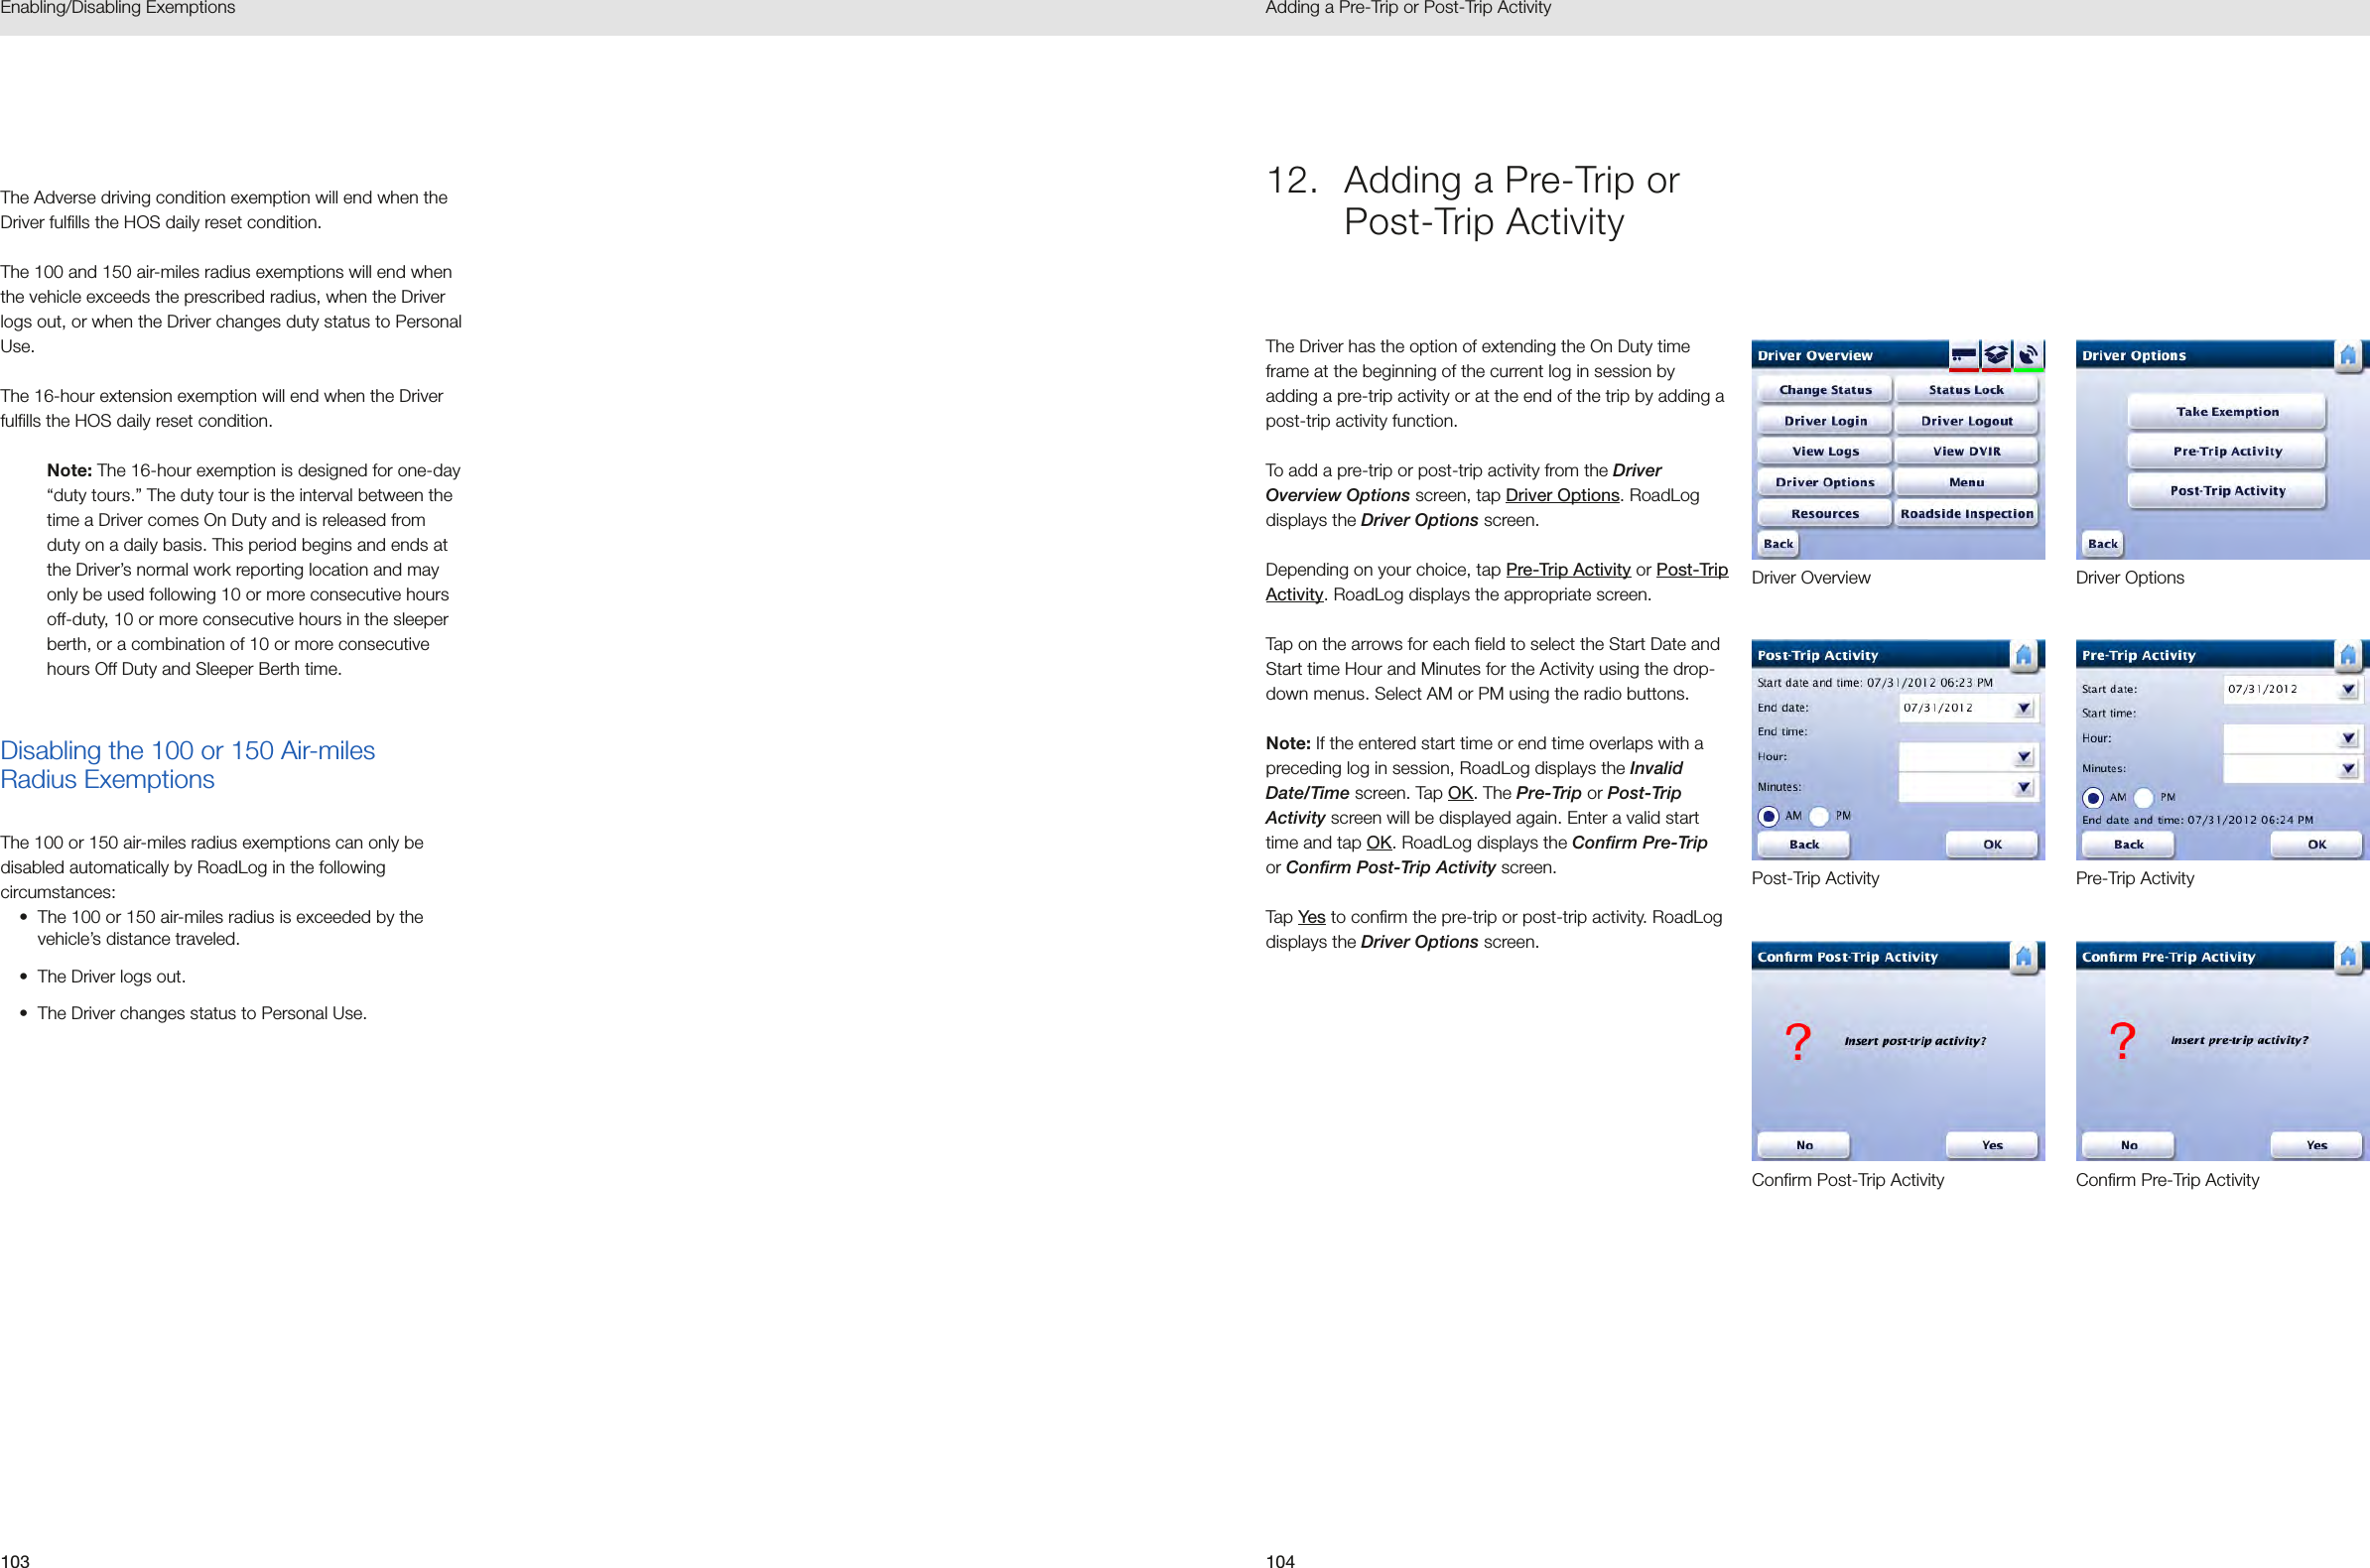
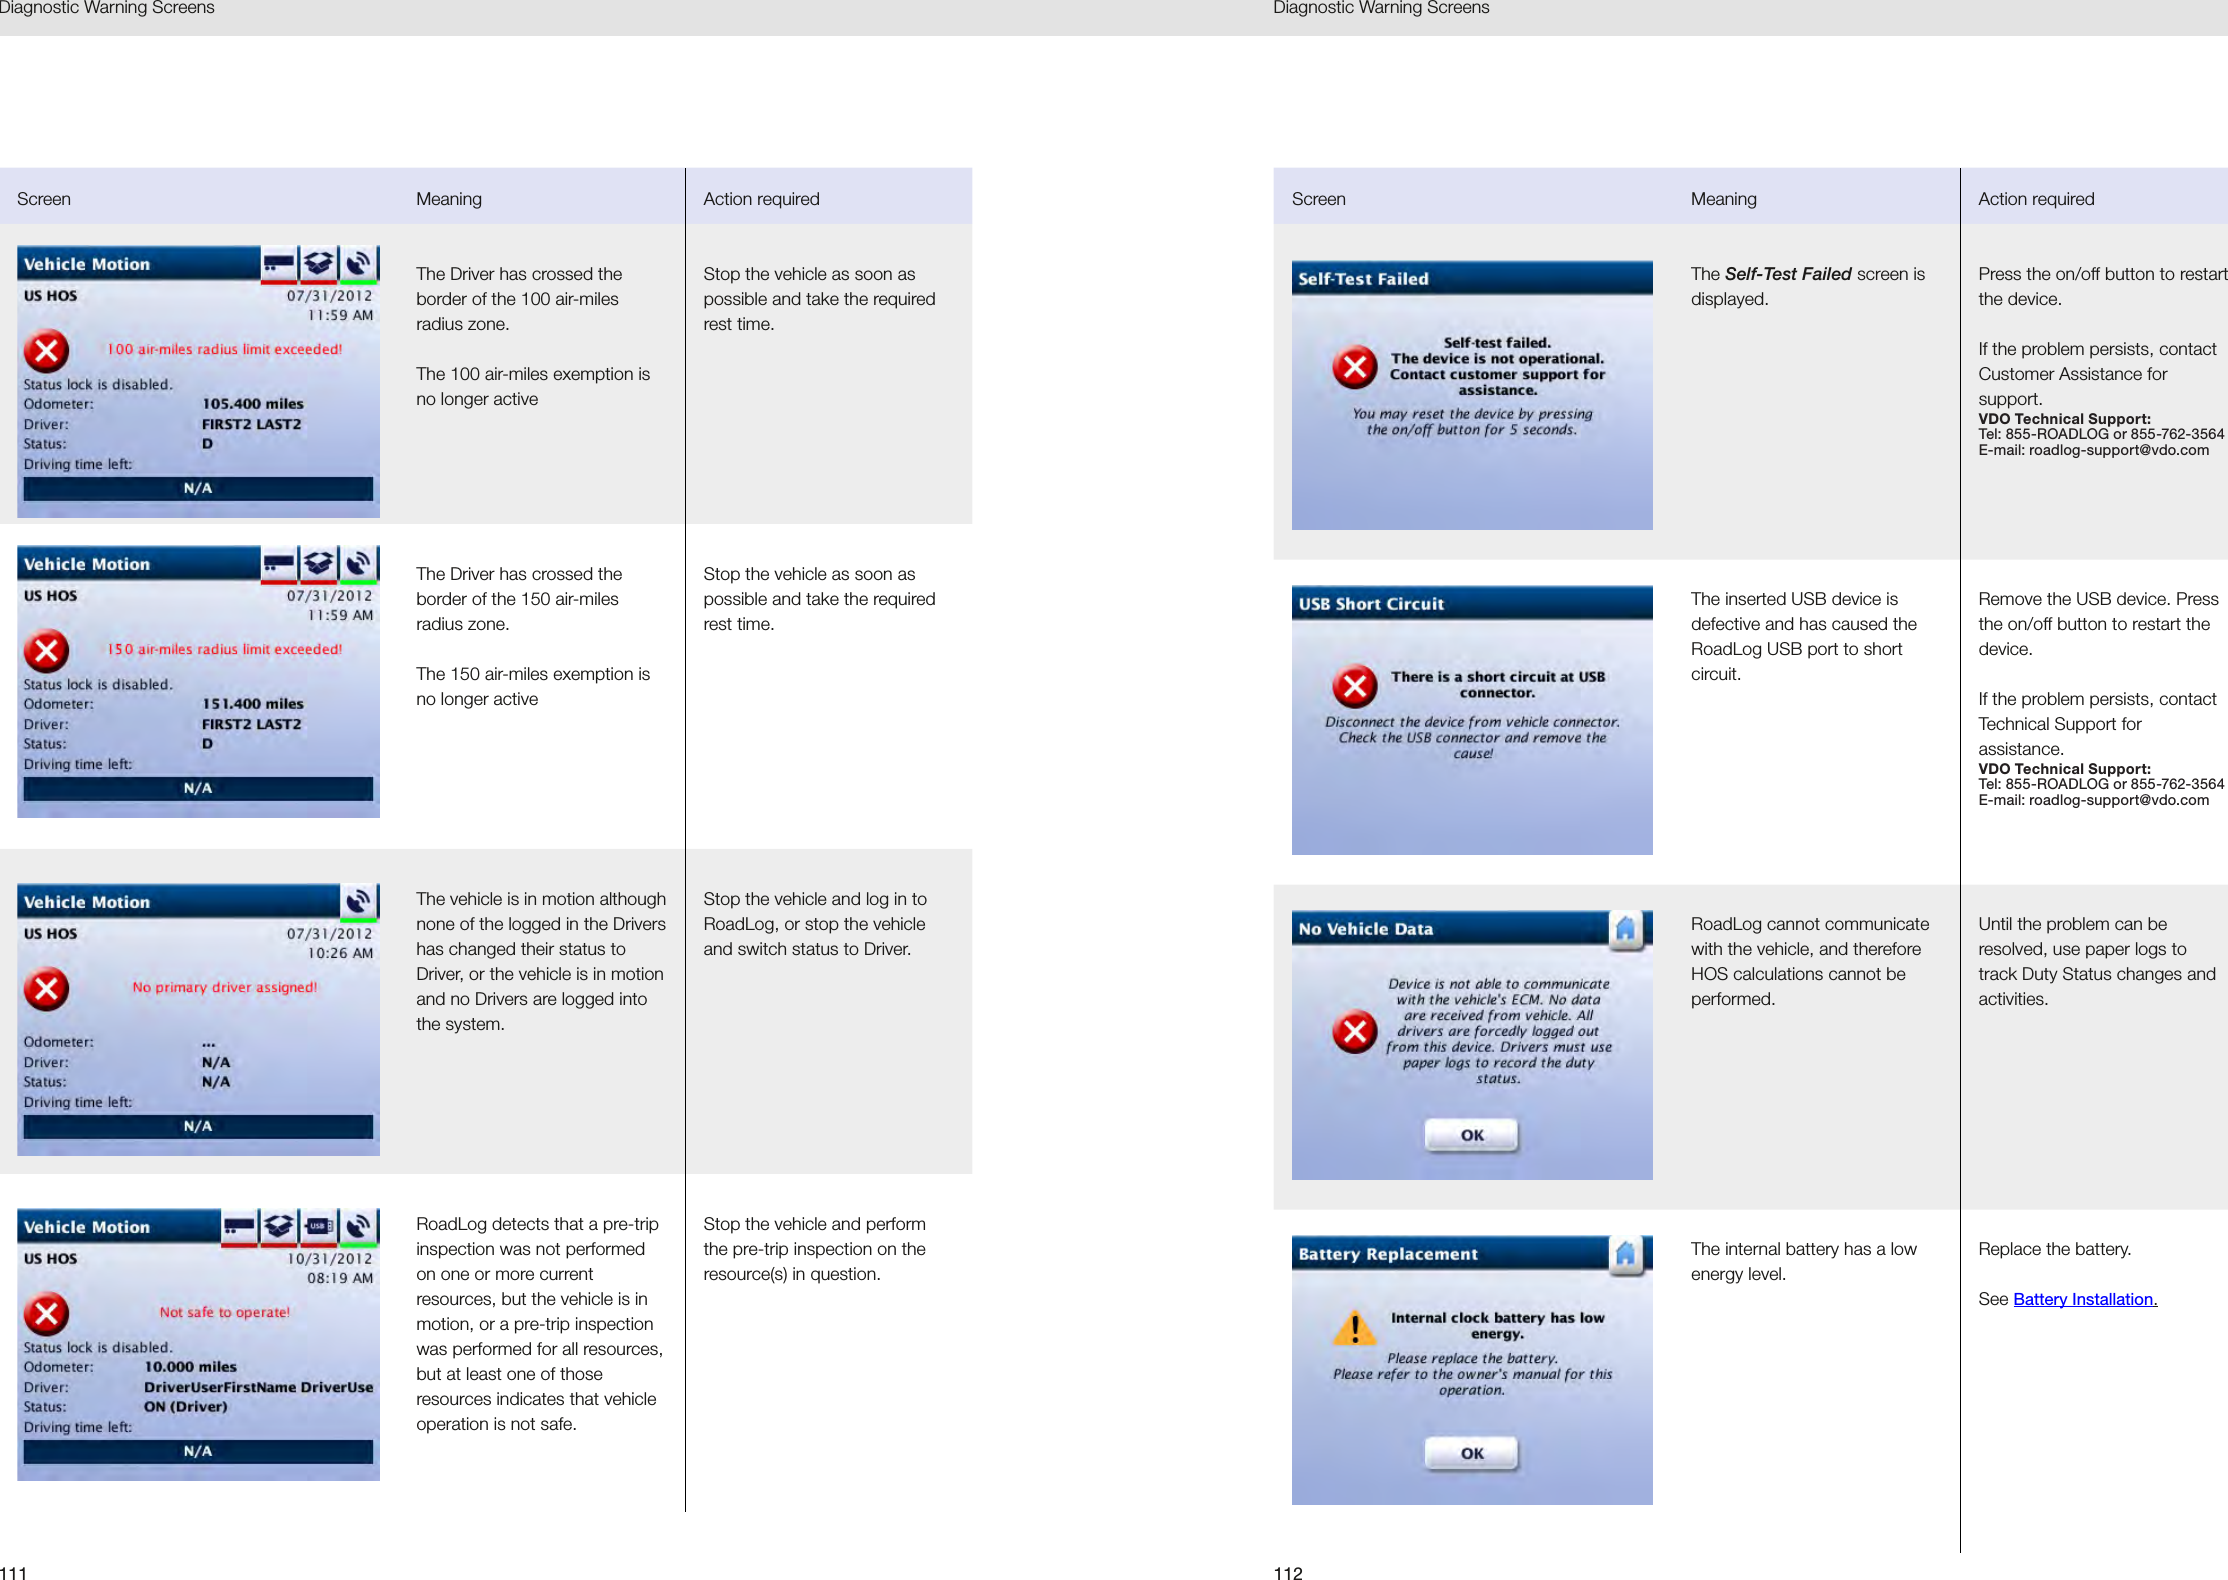
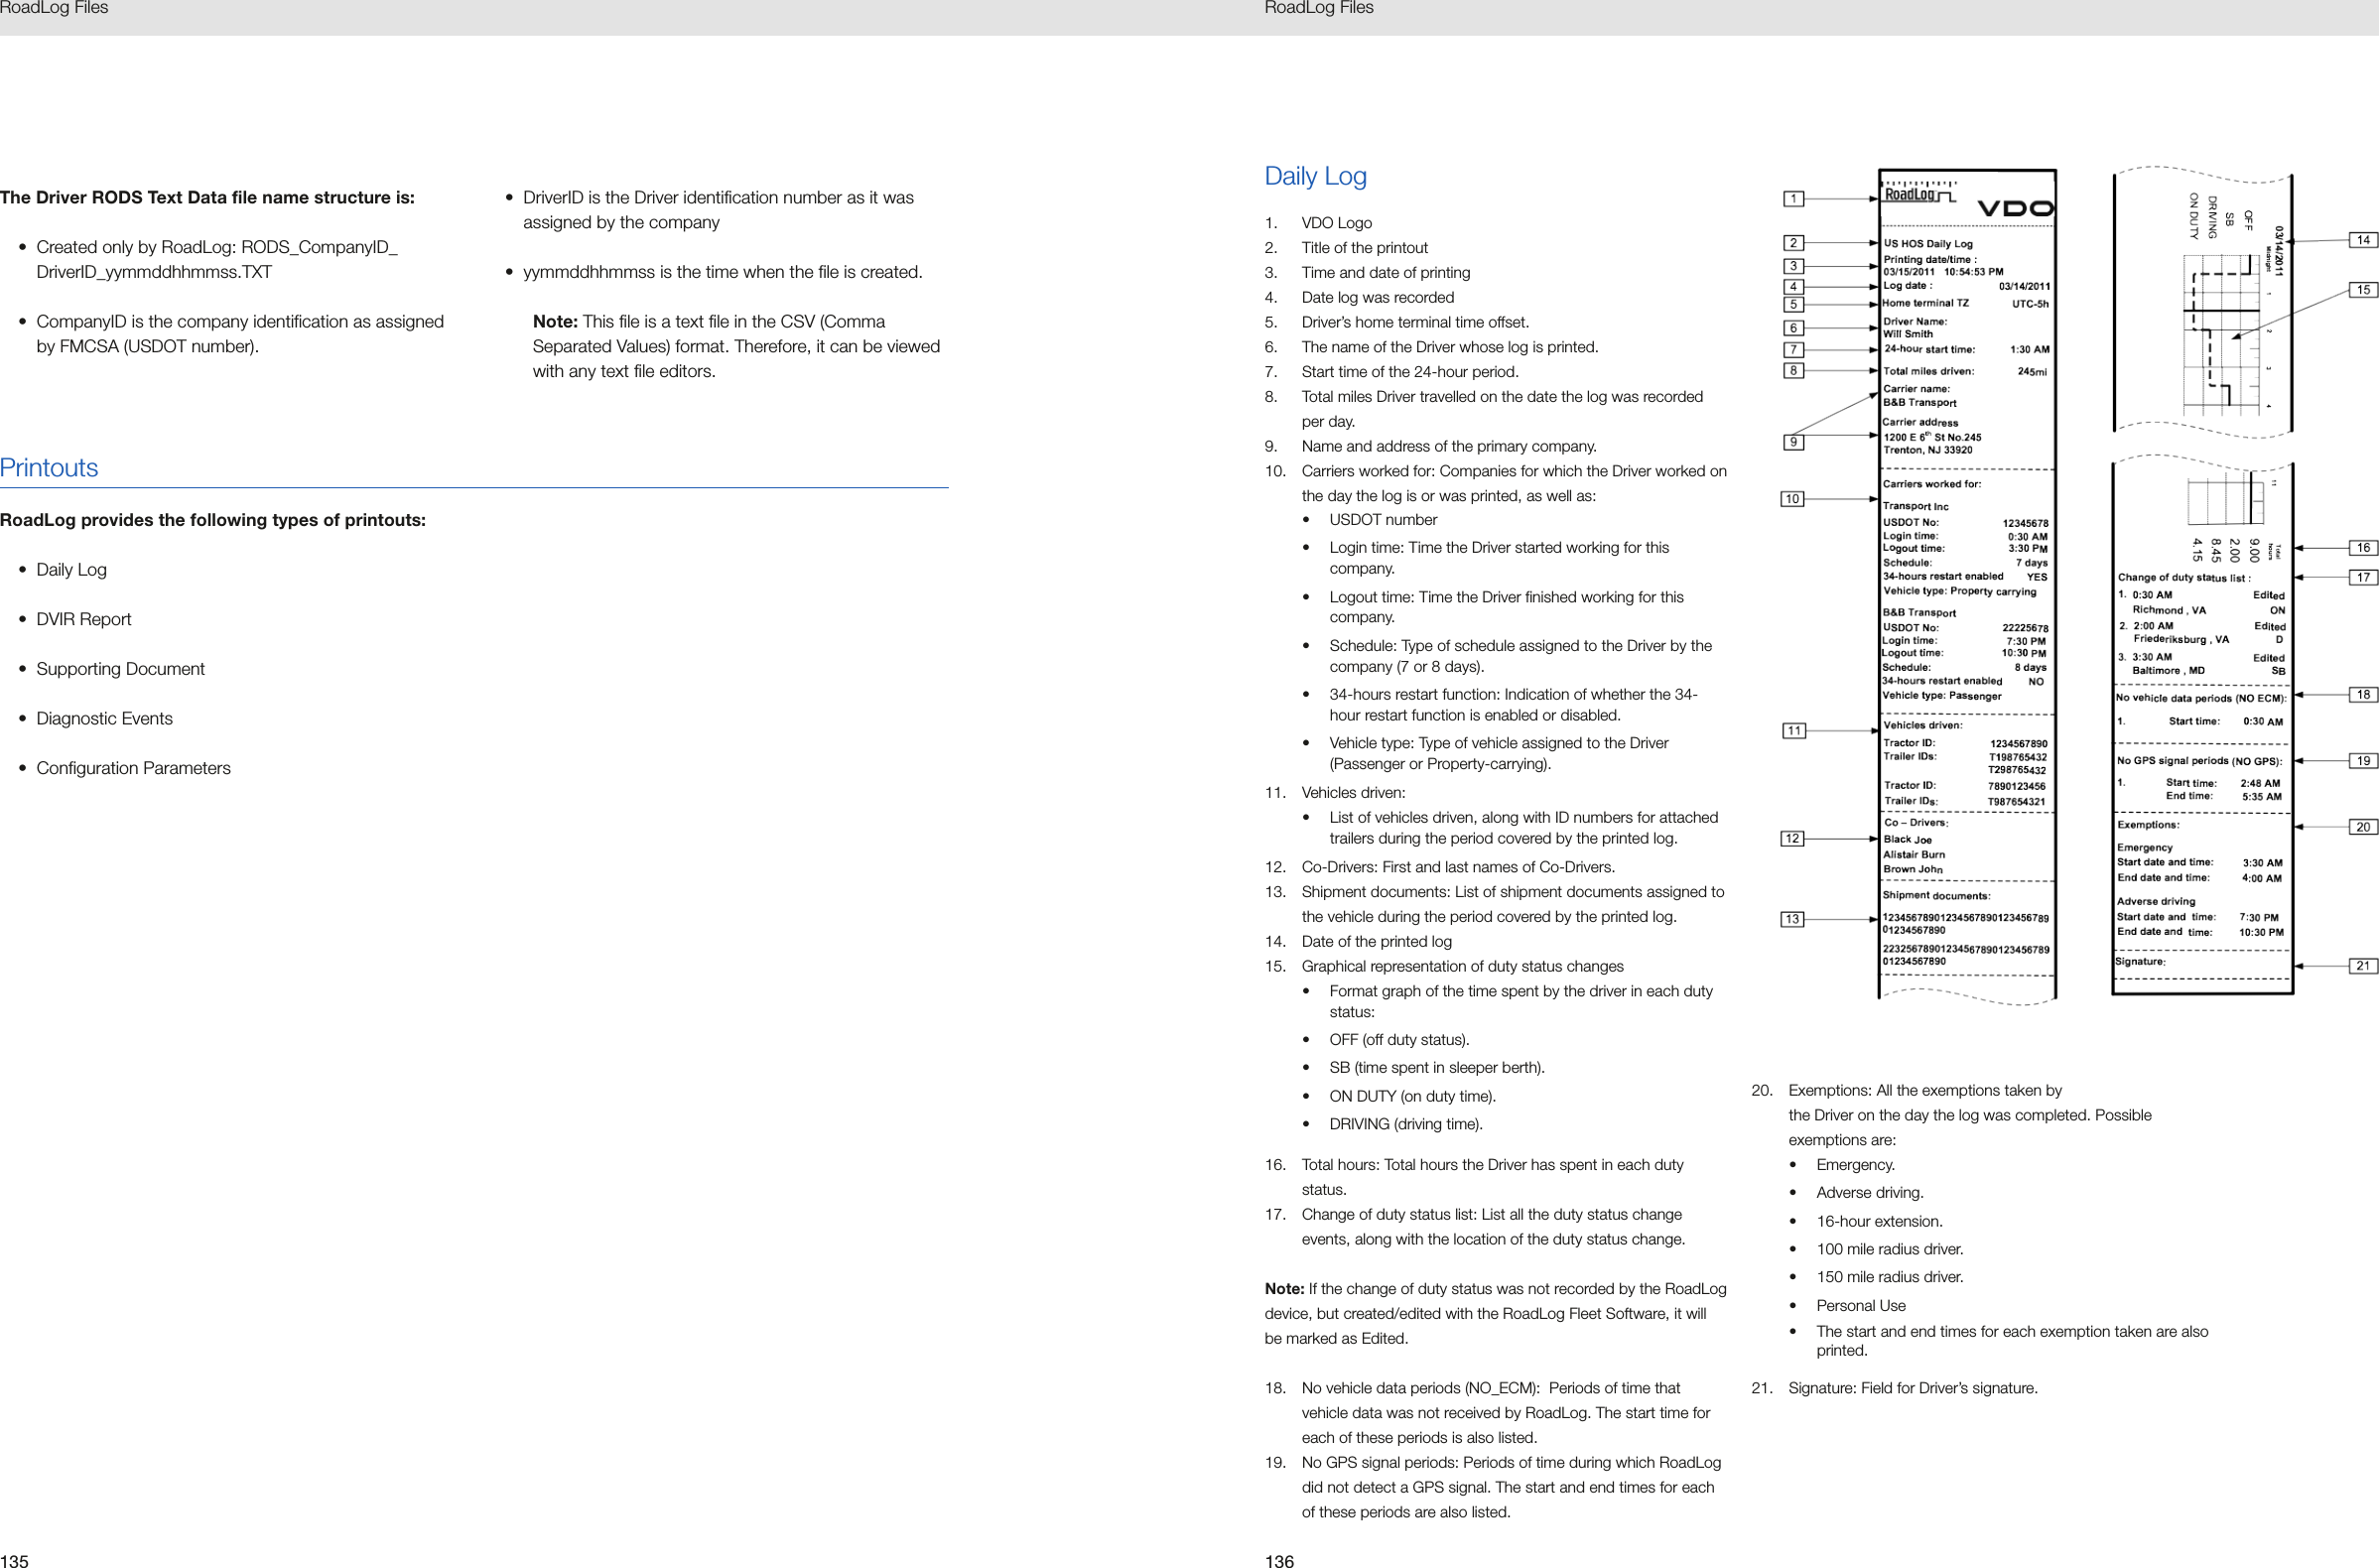
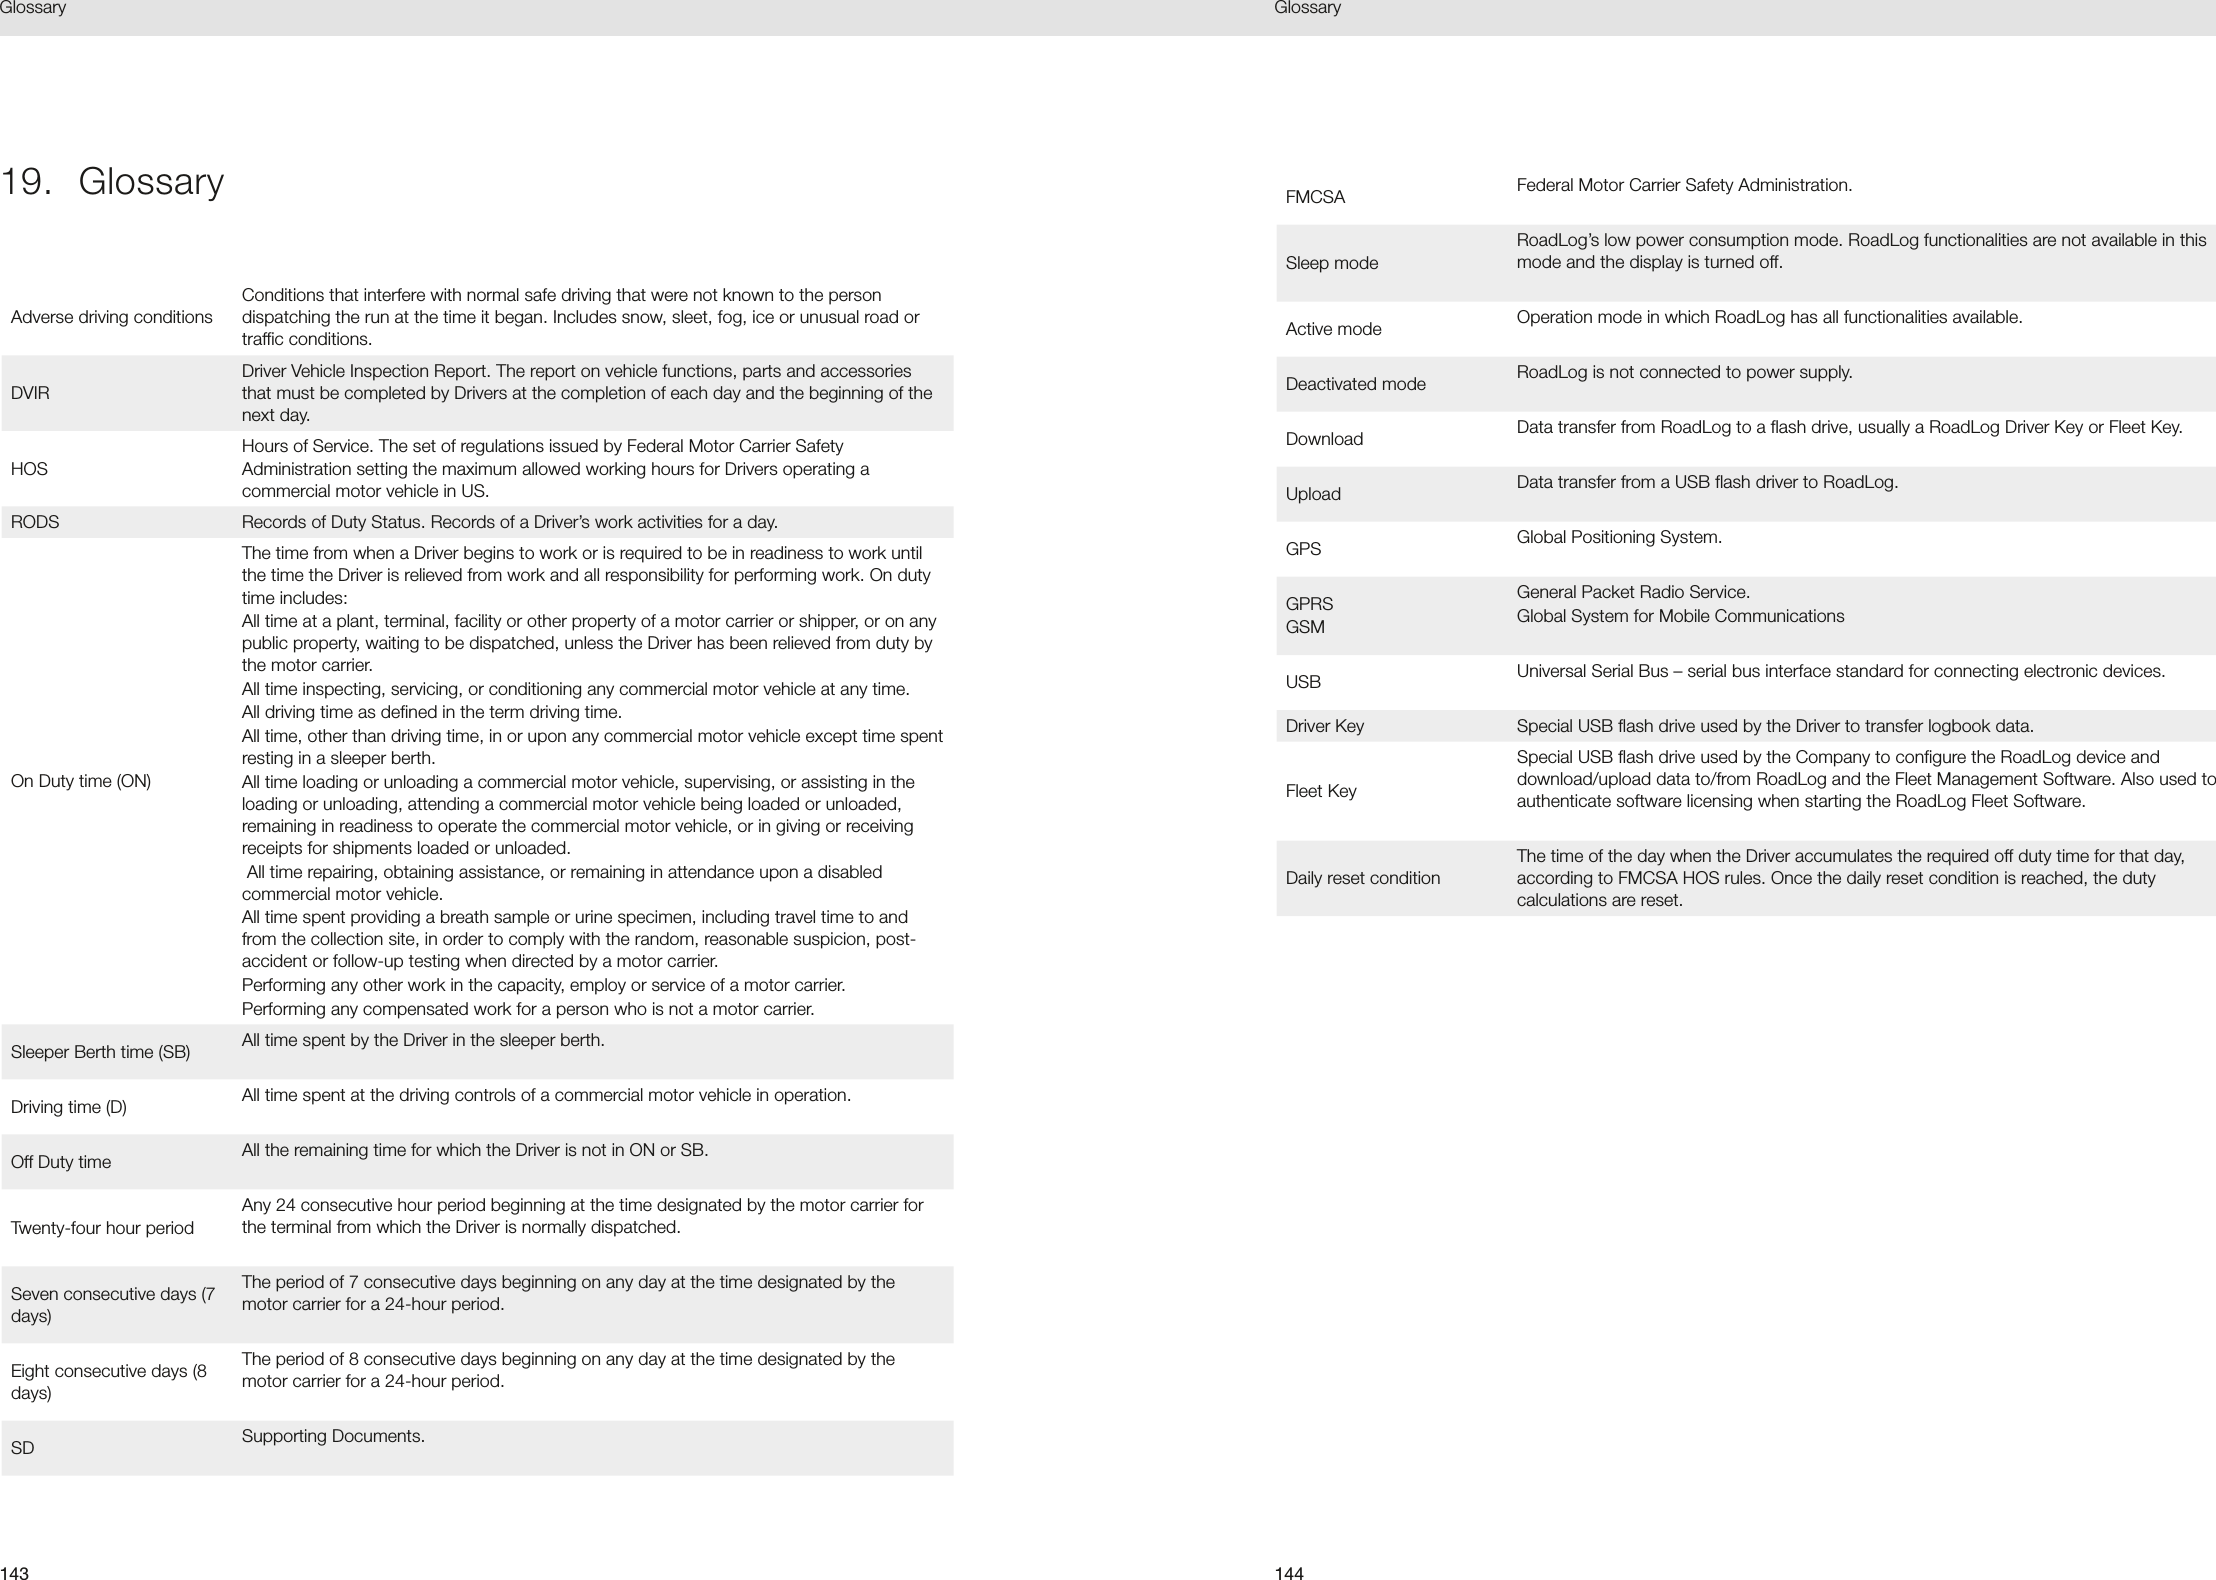
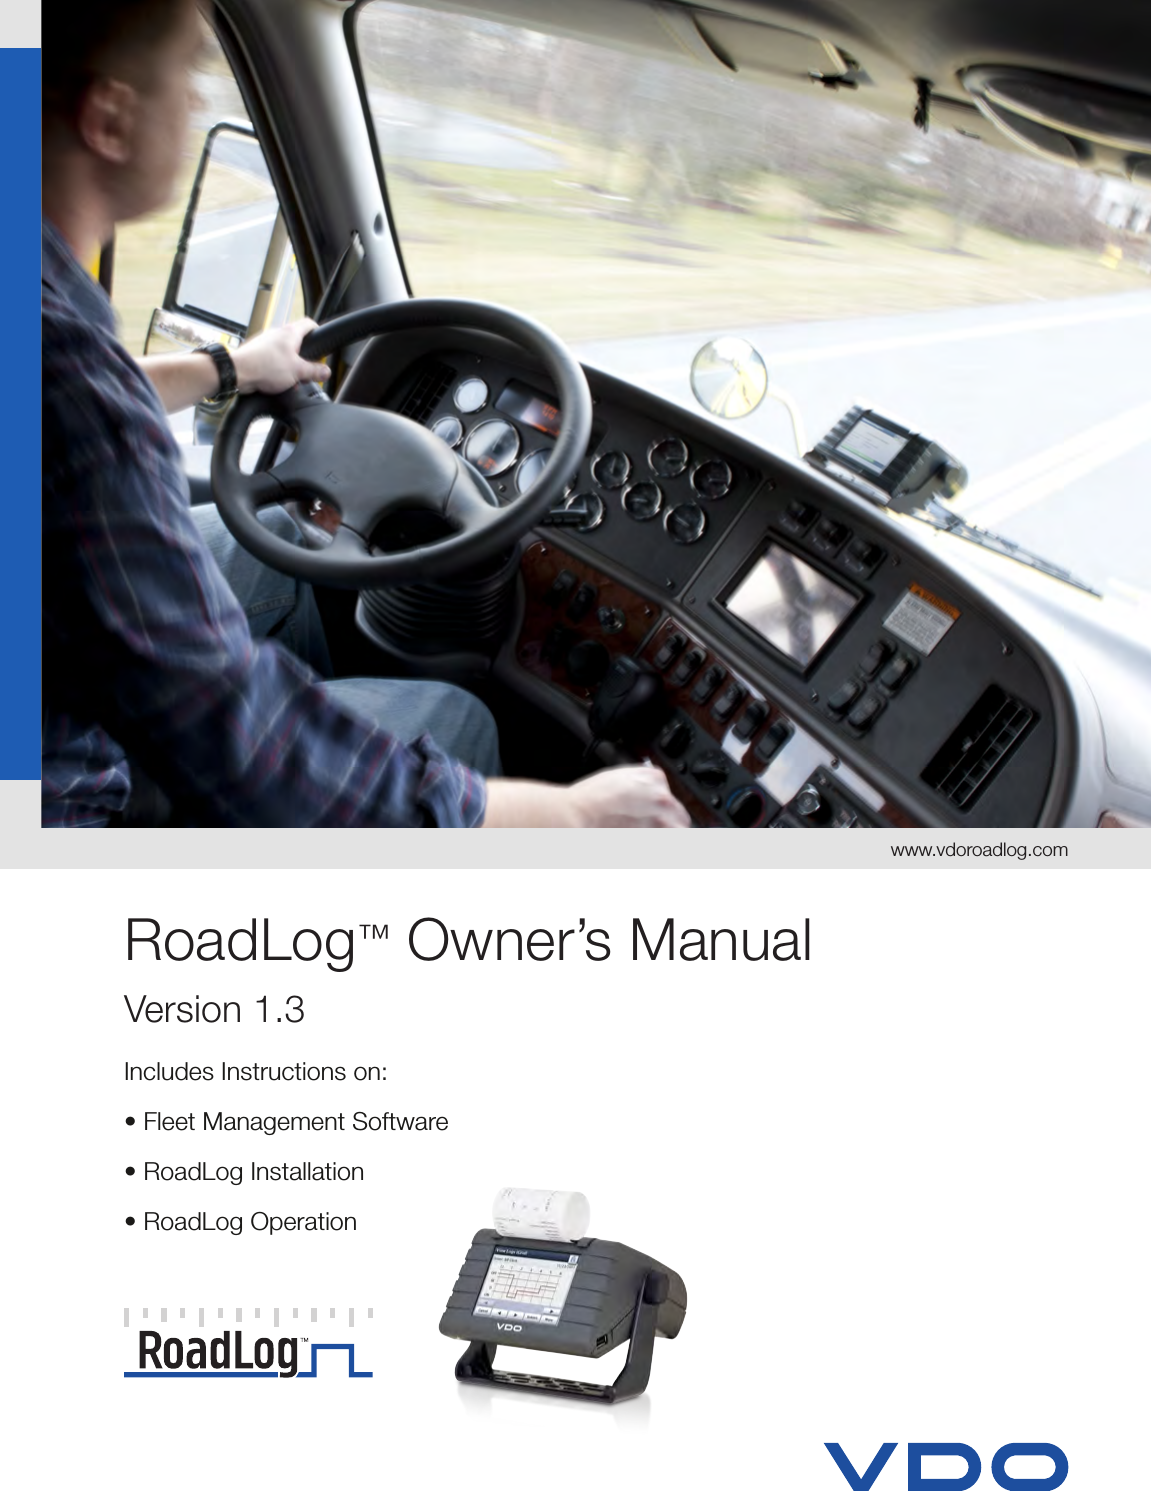
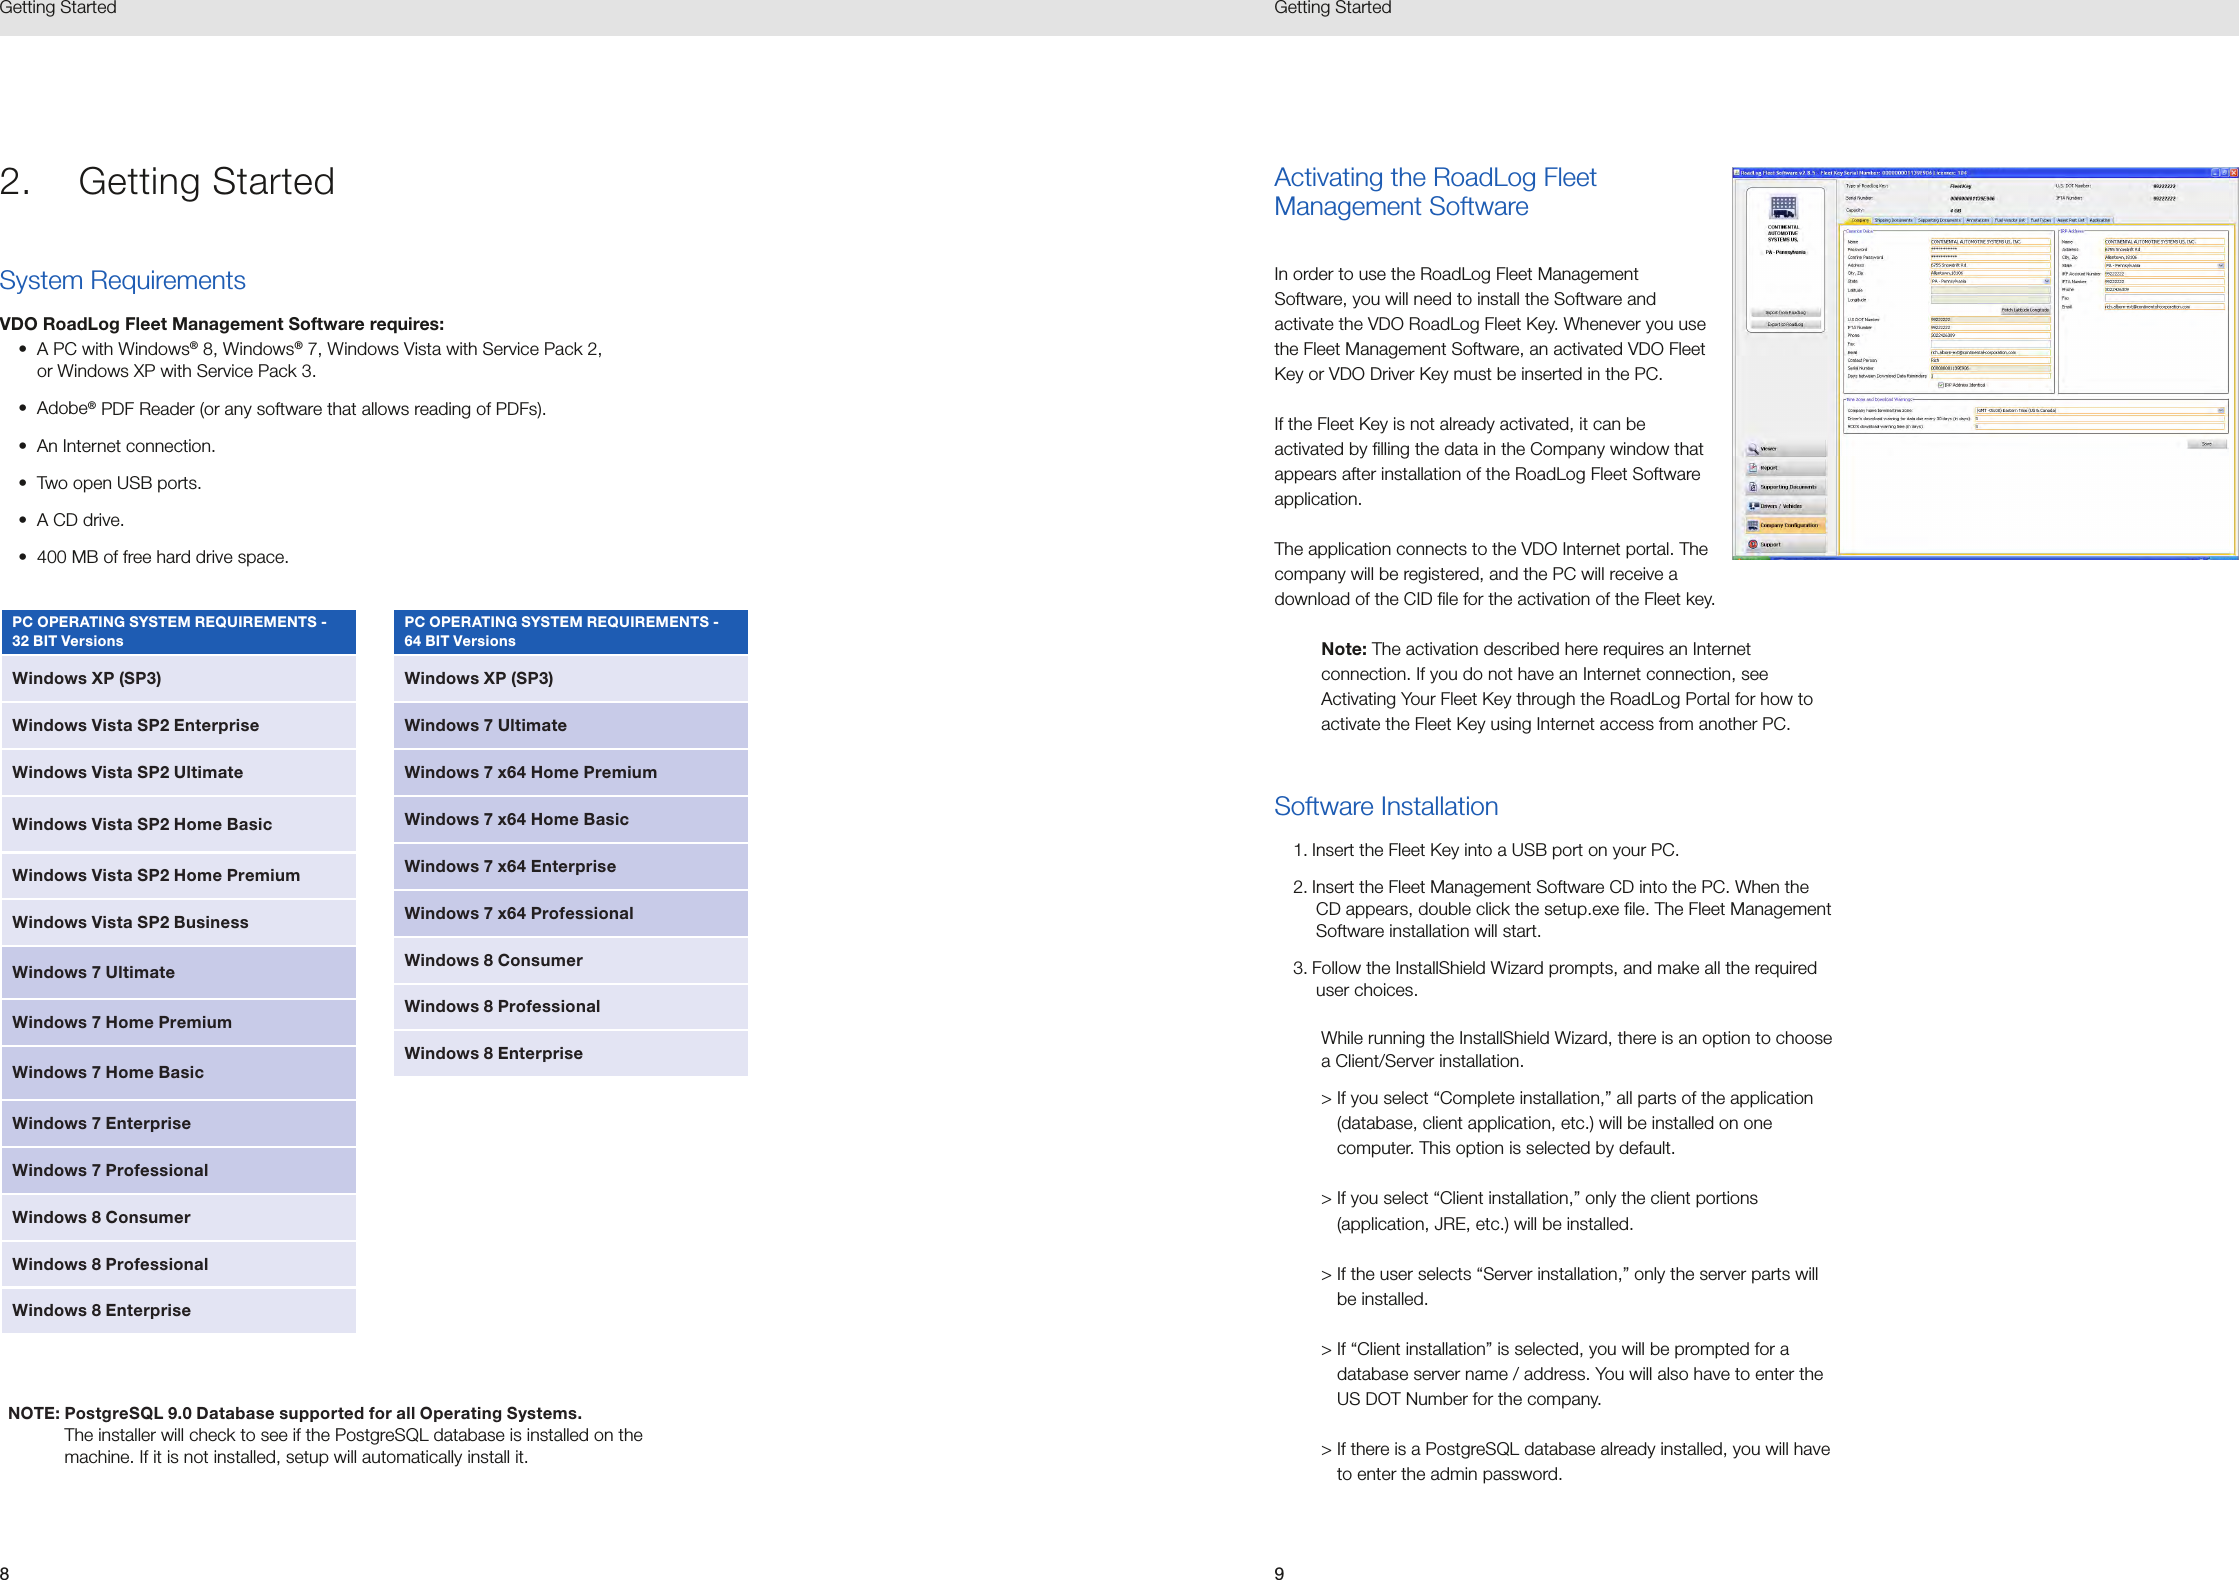
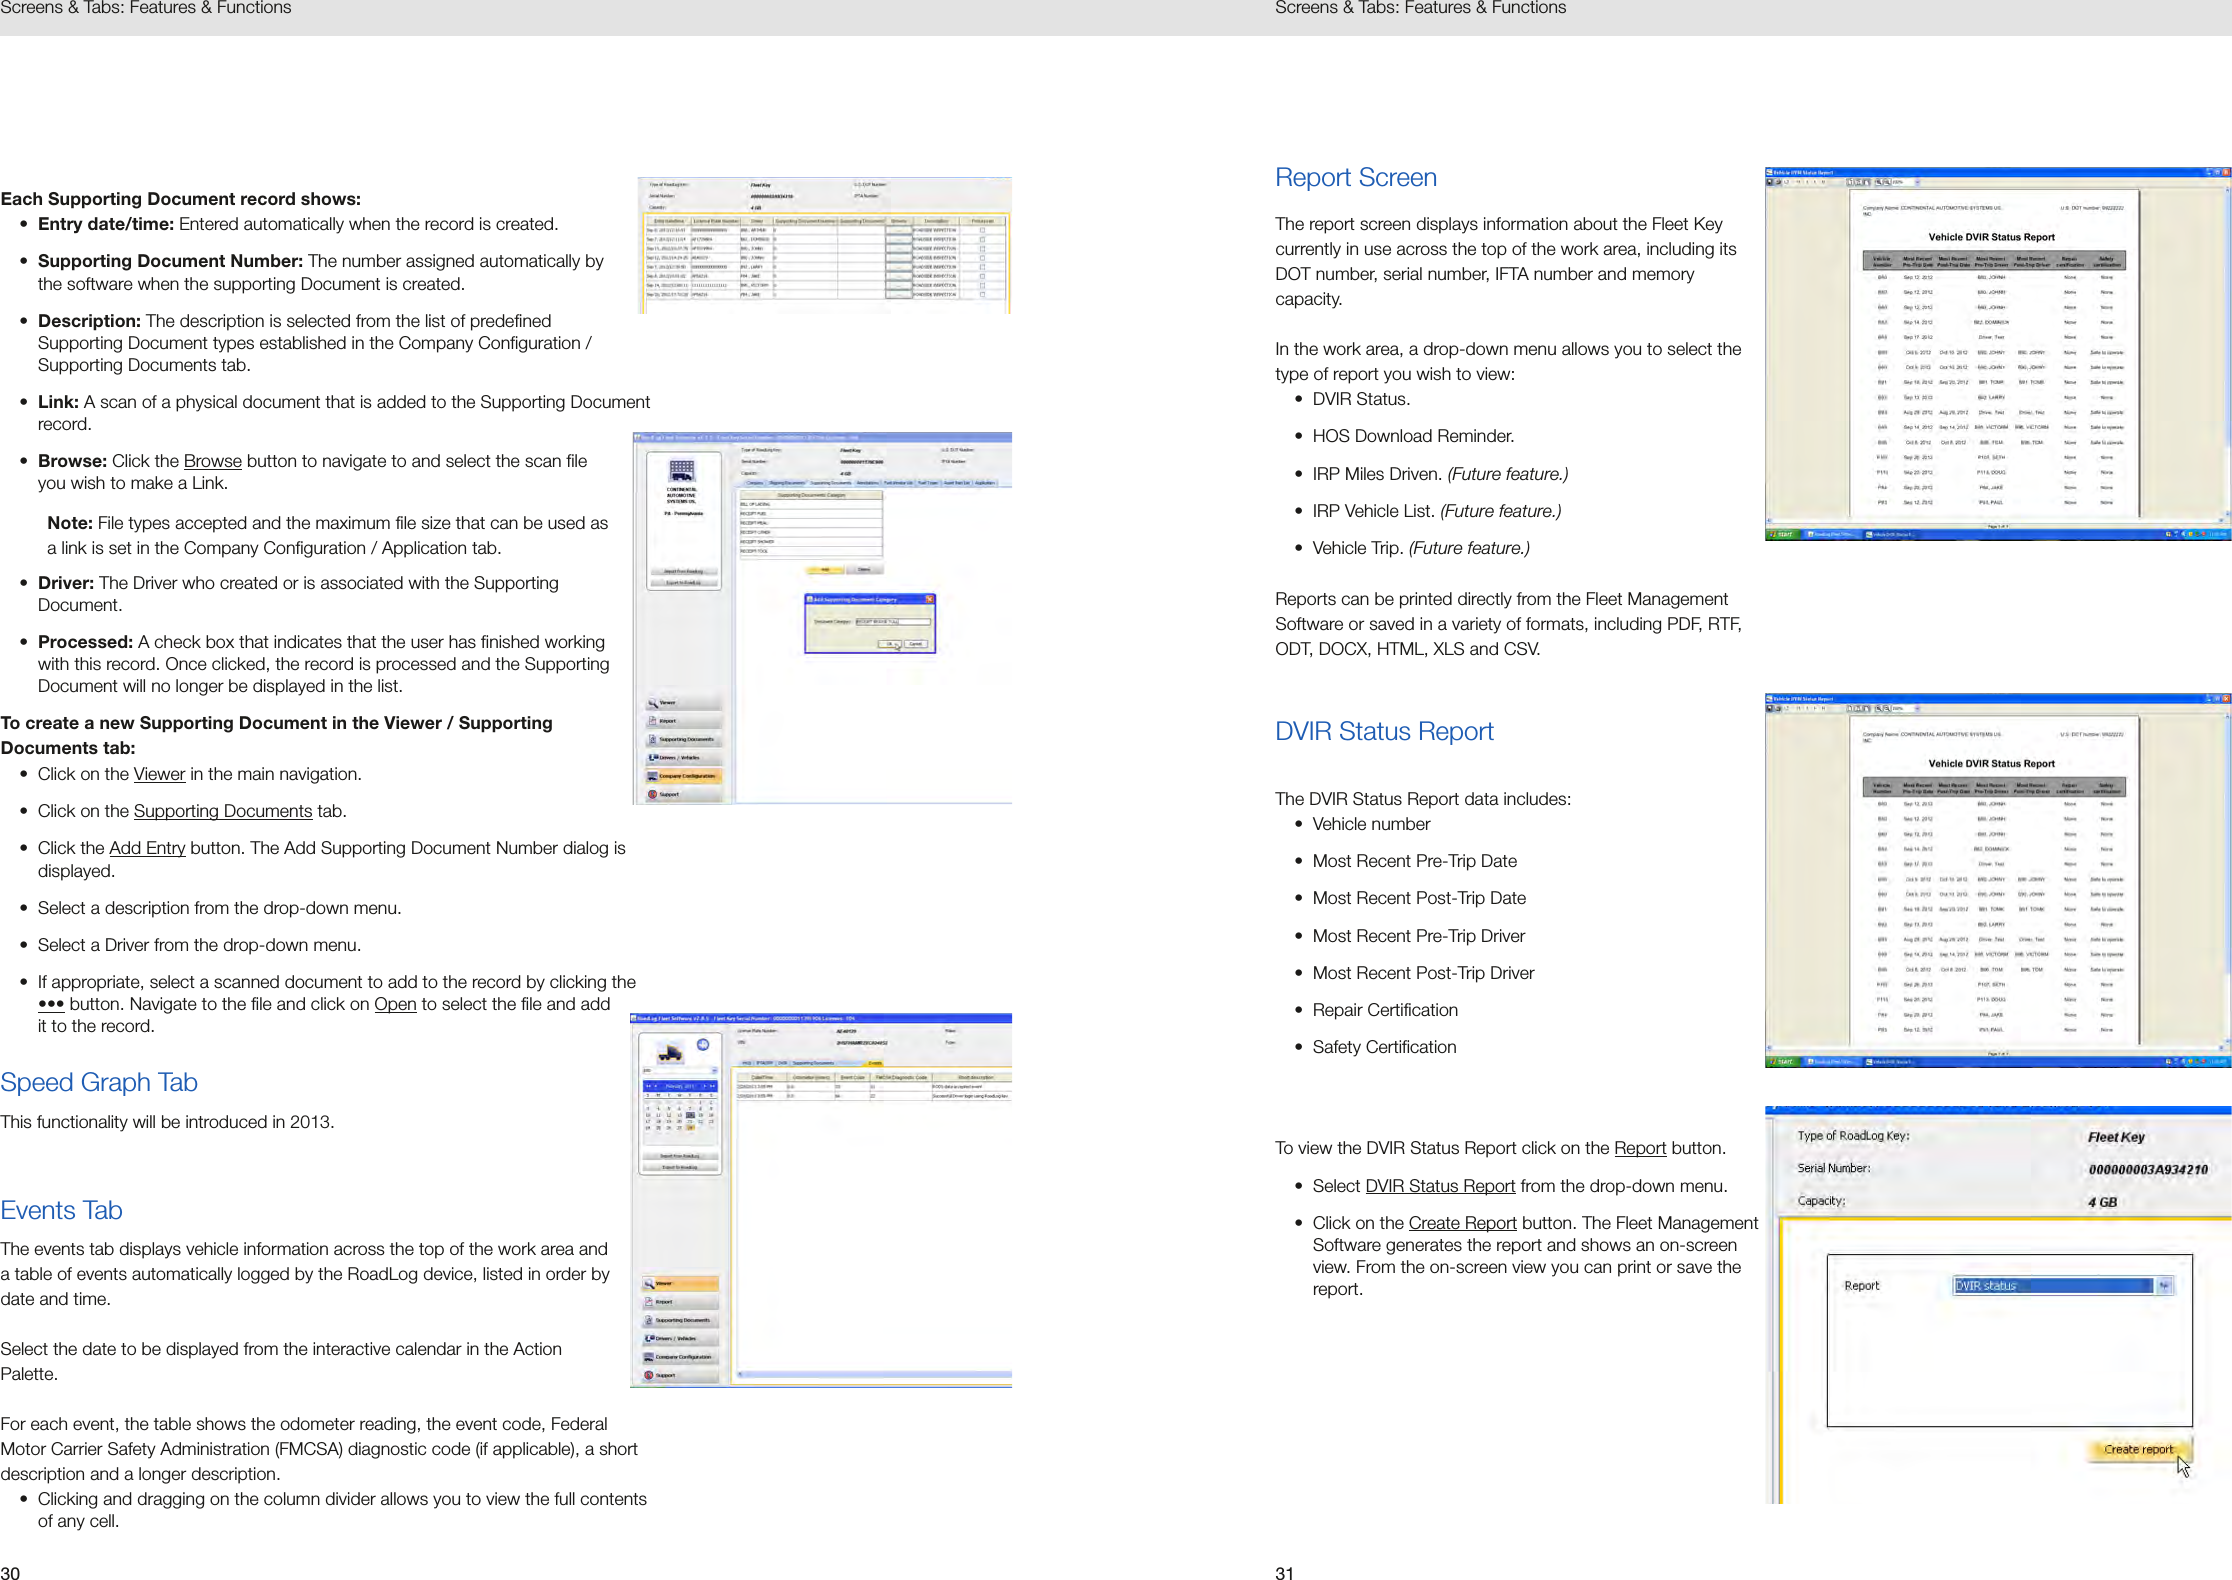
![2726Screens & Tabs: Features & Functions Screens & Tabs: Features & FunctionsNote about Odometer readings: The RoadLog device is typically calibrated to observe the odometer reading from the engine’s computer. The engine computer’s odometer reading can vary significantly from the odometer reading displayed on the dashboard. These conflicting odometer readings both come from different message sources within the vehicle. Therefore, odometer readings from this device may not match the odometer reading displayed on the dashboard. • State: The state traveled during the segment (the State can be edited by clicking in the cell and choosing another state from the drop-down menu).• Location: The nearest populated area to the area traveled during the segment.• Distance to nearest populated location: Distance to the nearest populated area as recorded by the US census.• Bearing Data: Your current location relative to the closest most populated place – for example, “7 miles West of Allentown, PA.”• Description: Remarks recorded by the Driver regarding changes of duty status.Additional Events Grid dataClicking on some of the other cells in a segment row in the events grid opens an additional grid view showing additional details for the segment including: Events• Date/Time: Exact recording time for an Event.• Odometer: ECM Odometer reading at the time of the event (may not match the instrument cluster odometer).• Event Code: Predefined codes for diagnostic events recorded by the RoadLog device, including FMCSA type events and events related specifically to the RoadLog device.• FMSCA Diagnostic Code: FMCSA codes for events that are detected and recorded in order to maintain compliance with US HOS regulation.• Abbreviation: FMCSA abbreviations for events that are detected and recorded in order to maintain compliance with US HOS regulation. Examples include “ENG_ON” (Engine On) and “BATLOW” (Battery Low).• Short Description: Predefined descriptions for predefined events. An example would be “Successful Driver log in using Driver Key.”• Description: A longer text version of the activity described in the “Short Description.”Violations / ExemptionsViolations are instances where the Driver’s record of duty status has violated FMCSA regulations. Violations are highlighted by red dots on the Logbook Timeline and by red dots in the Events Grid. Clicking on the red dot in the Events Grid reveals a second grid showing details of the Violation including Date / Time, Odometer, Event Code, Type, Short Description and Description.Exemptions are instances where the Driver has encountered circumstances that affected HOS compliance. Exemptions are predefined in the RoadLog device and include Emergency Conditions, Adverse driving conditions, 16 hours extension, 100- or 150-mile radius Driver, and Personal Use. Accumulated Duty Status Durations GridBelow the events grid view, the accumulated Duty Status view shows daily and weekly cumulative totals of each Duty Status, based on the values seen in the logbook and events grid displays.Map View and IFTA / IRP Tabs[These features will be implemented in a free upcoming release]DVIR TabThe DVIR Tab displays Driver Vehicle Inspection Reports recorded by the Driver in the RoadLog device and imported into the Fleet Management Software as well as DVIRs created in the Fleet Management Software. To select the vehicle that you wish to view o r create a DVIR for:• Click on Viewer form the main navigation.• Click on the icon at the top of the Action Palette. Select the vehicle from those shown. • Select the date that you wish to view or create a DVIR for from the interactive calendar in the Action Palette.The drop down menu field below the calendar is self-populated with the times for all the DVIRs created on the selected date. If there is more than one DVIR for a selected date, choose the time from the drop down menu for the DVIR you want to view.At the top of the screen, the work area data displayed reflects the vehicle and the date selected including License Plate Number, VIN, Displayed date, and Make and Model of the vehicle.](https://usermanual.wiki/Continental-Automotive-Systems/3290X/User-Guide-3041349-Page-14.png)
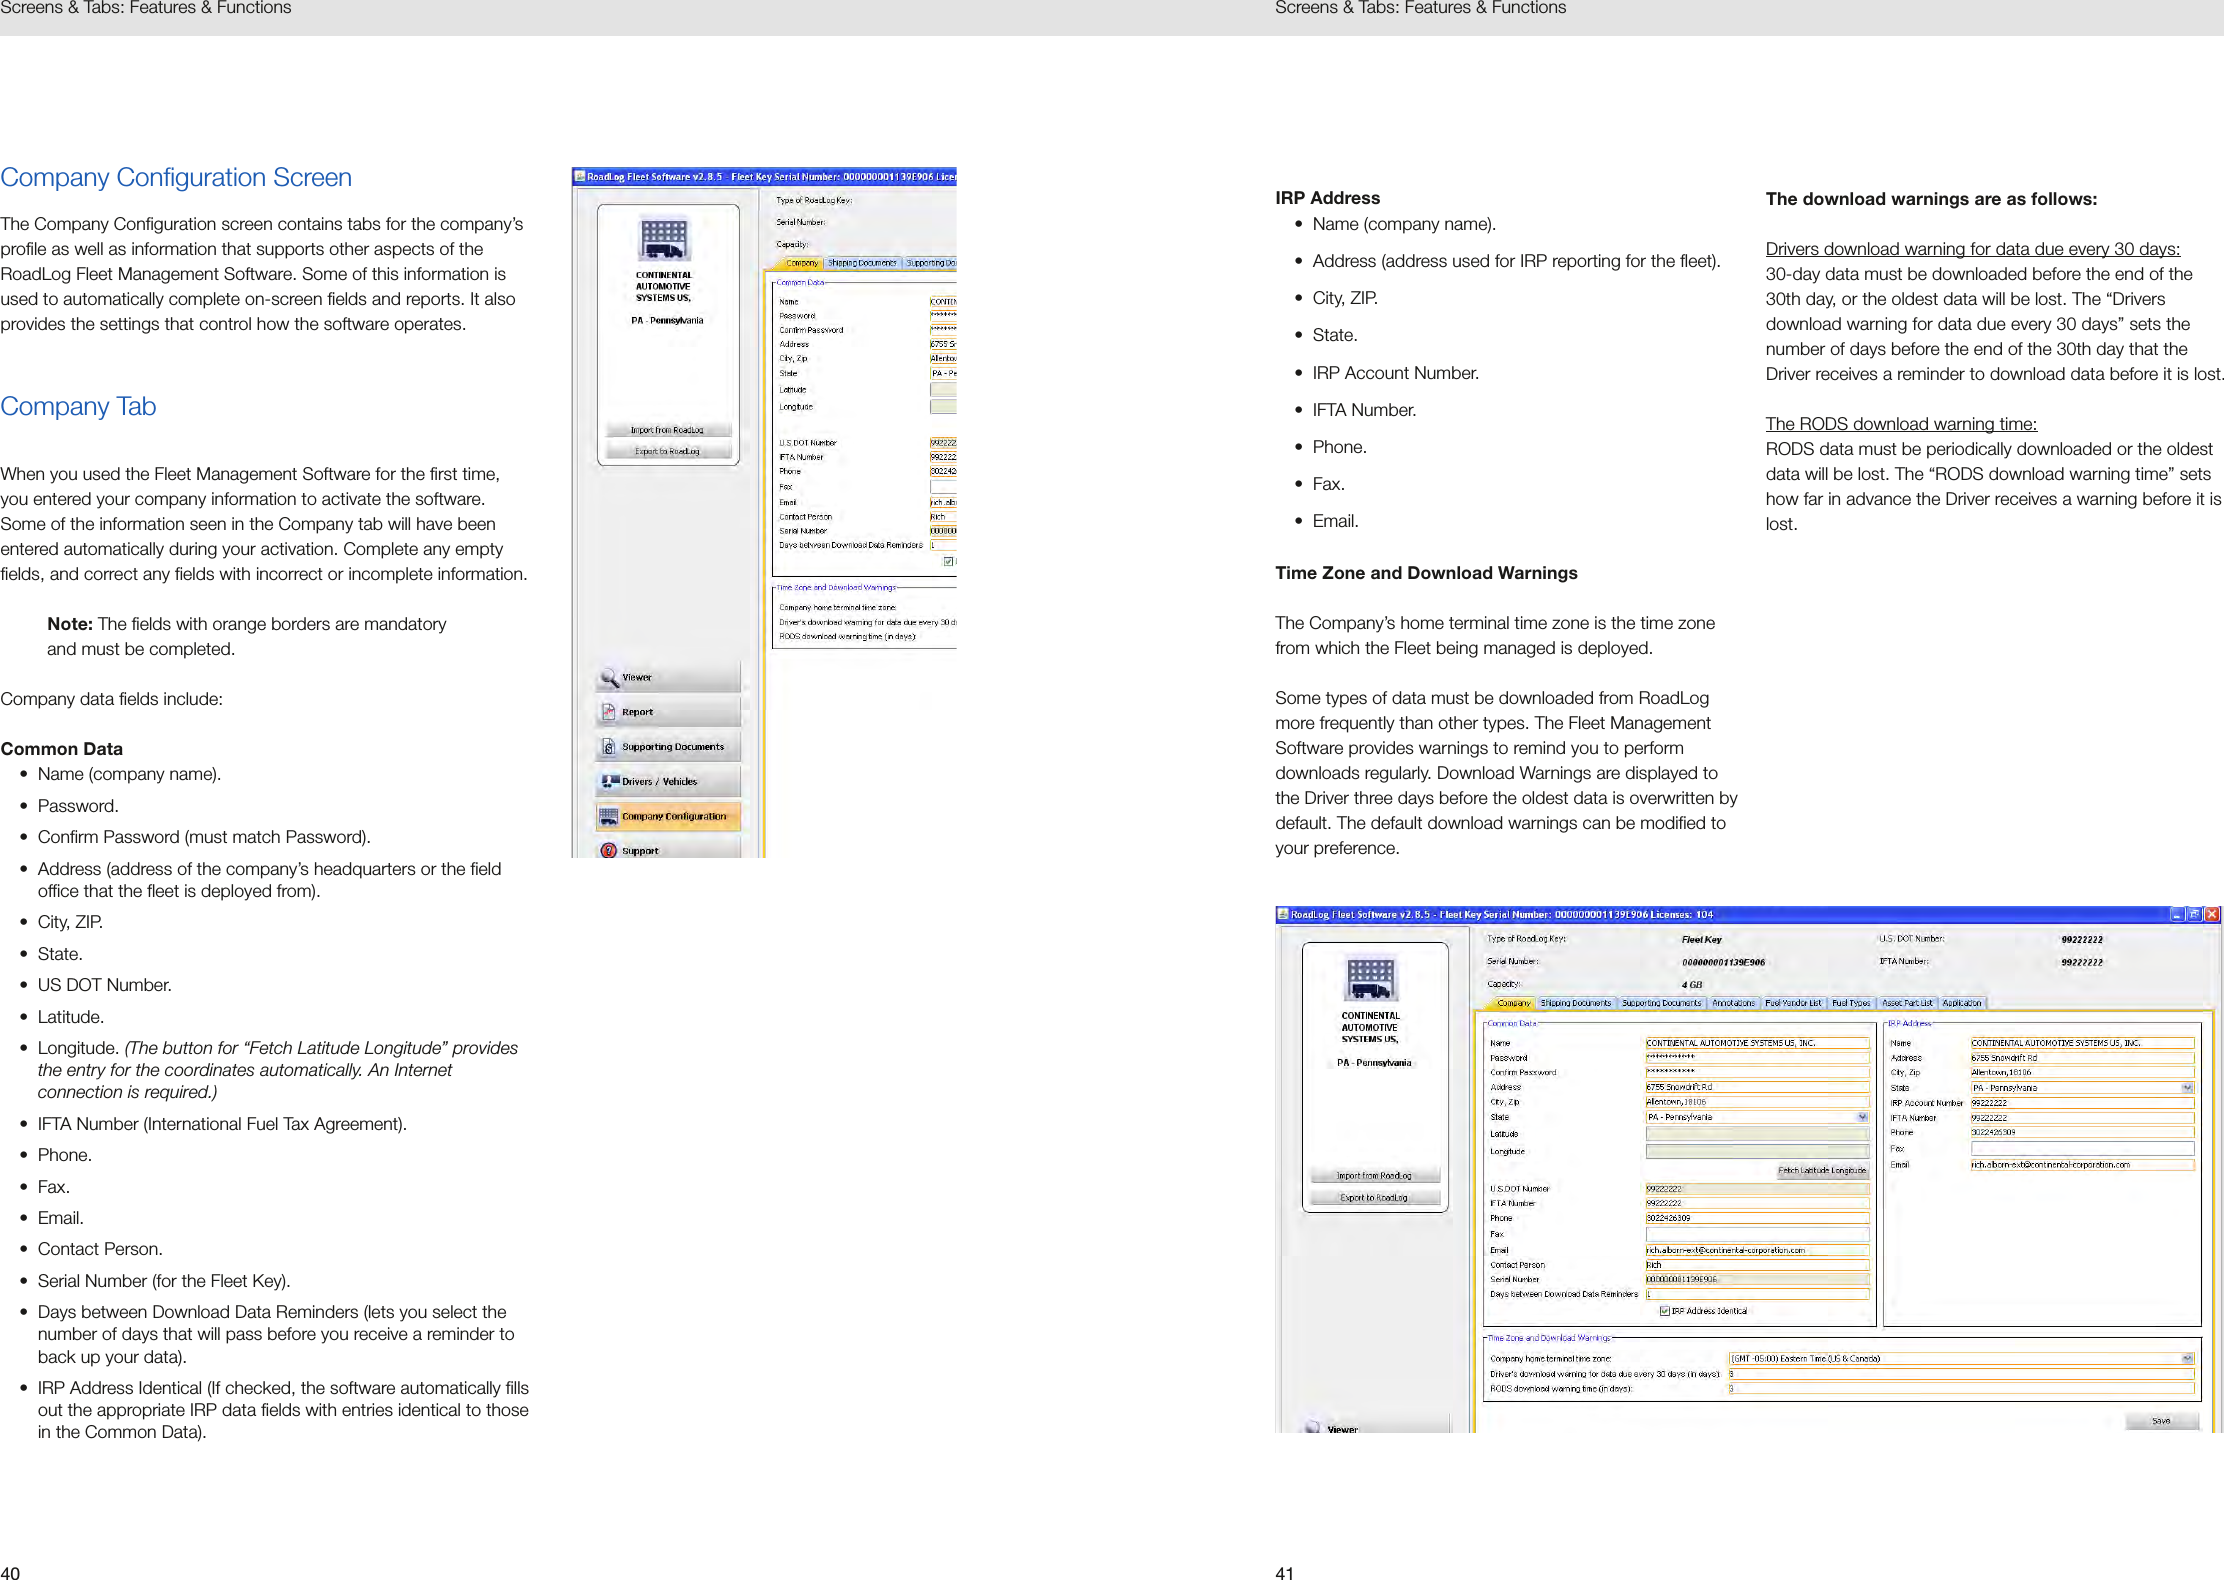
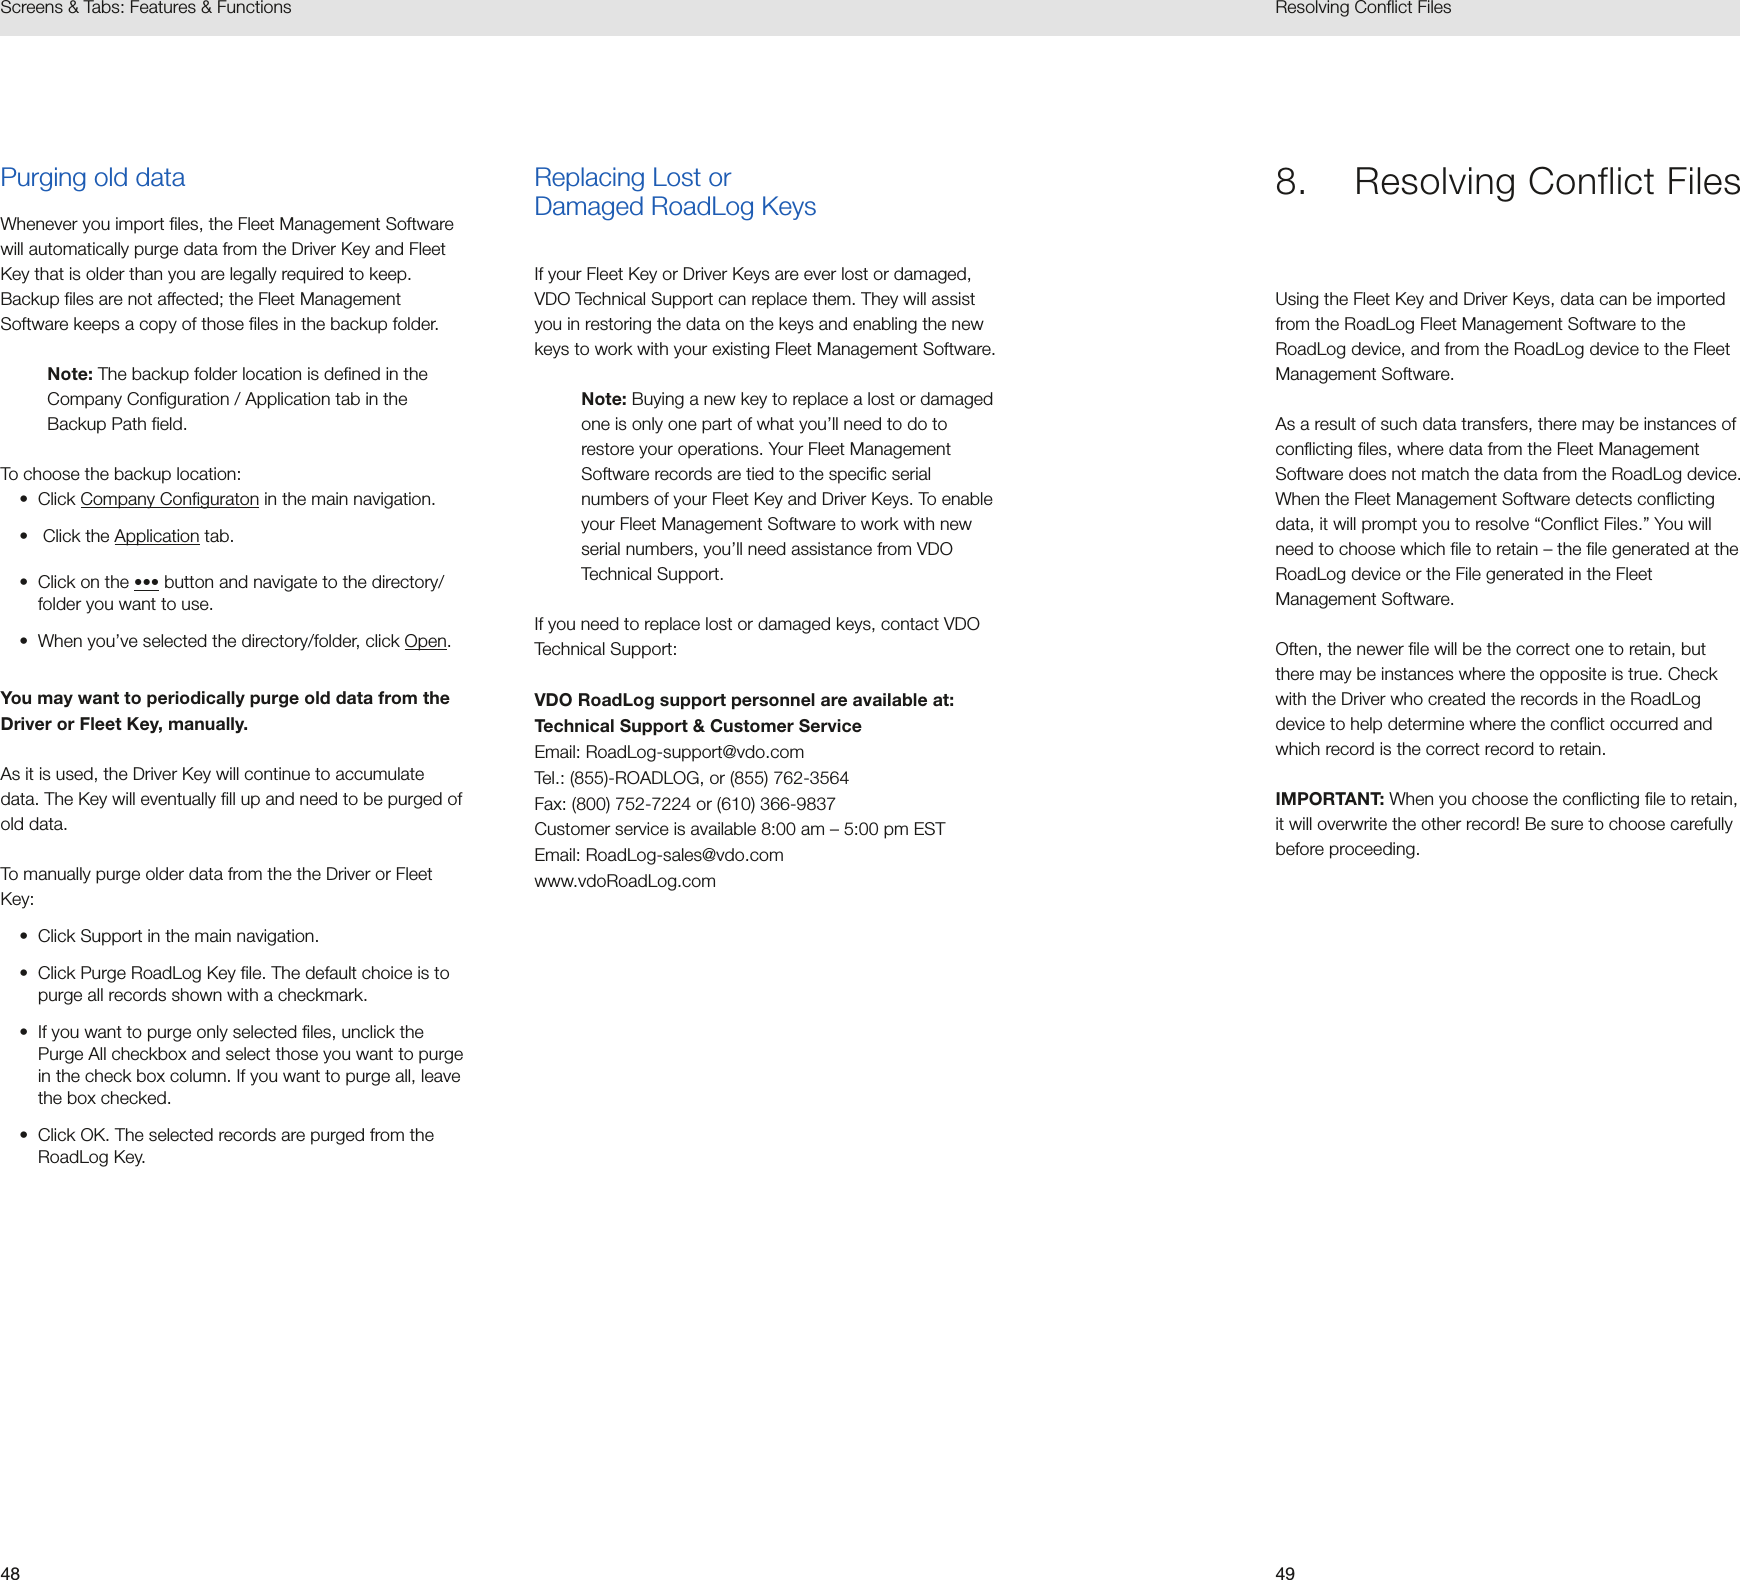
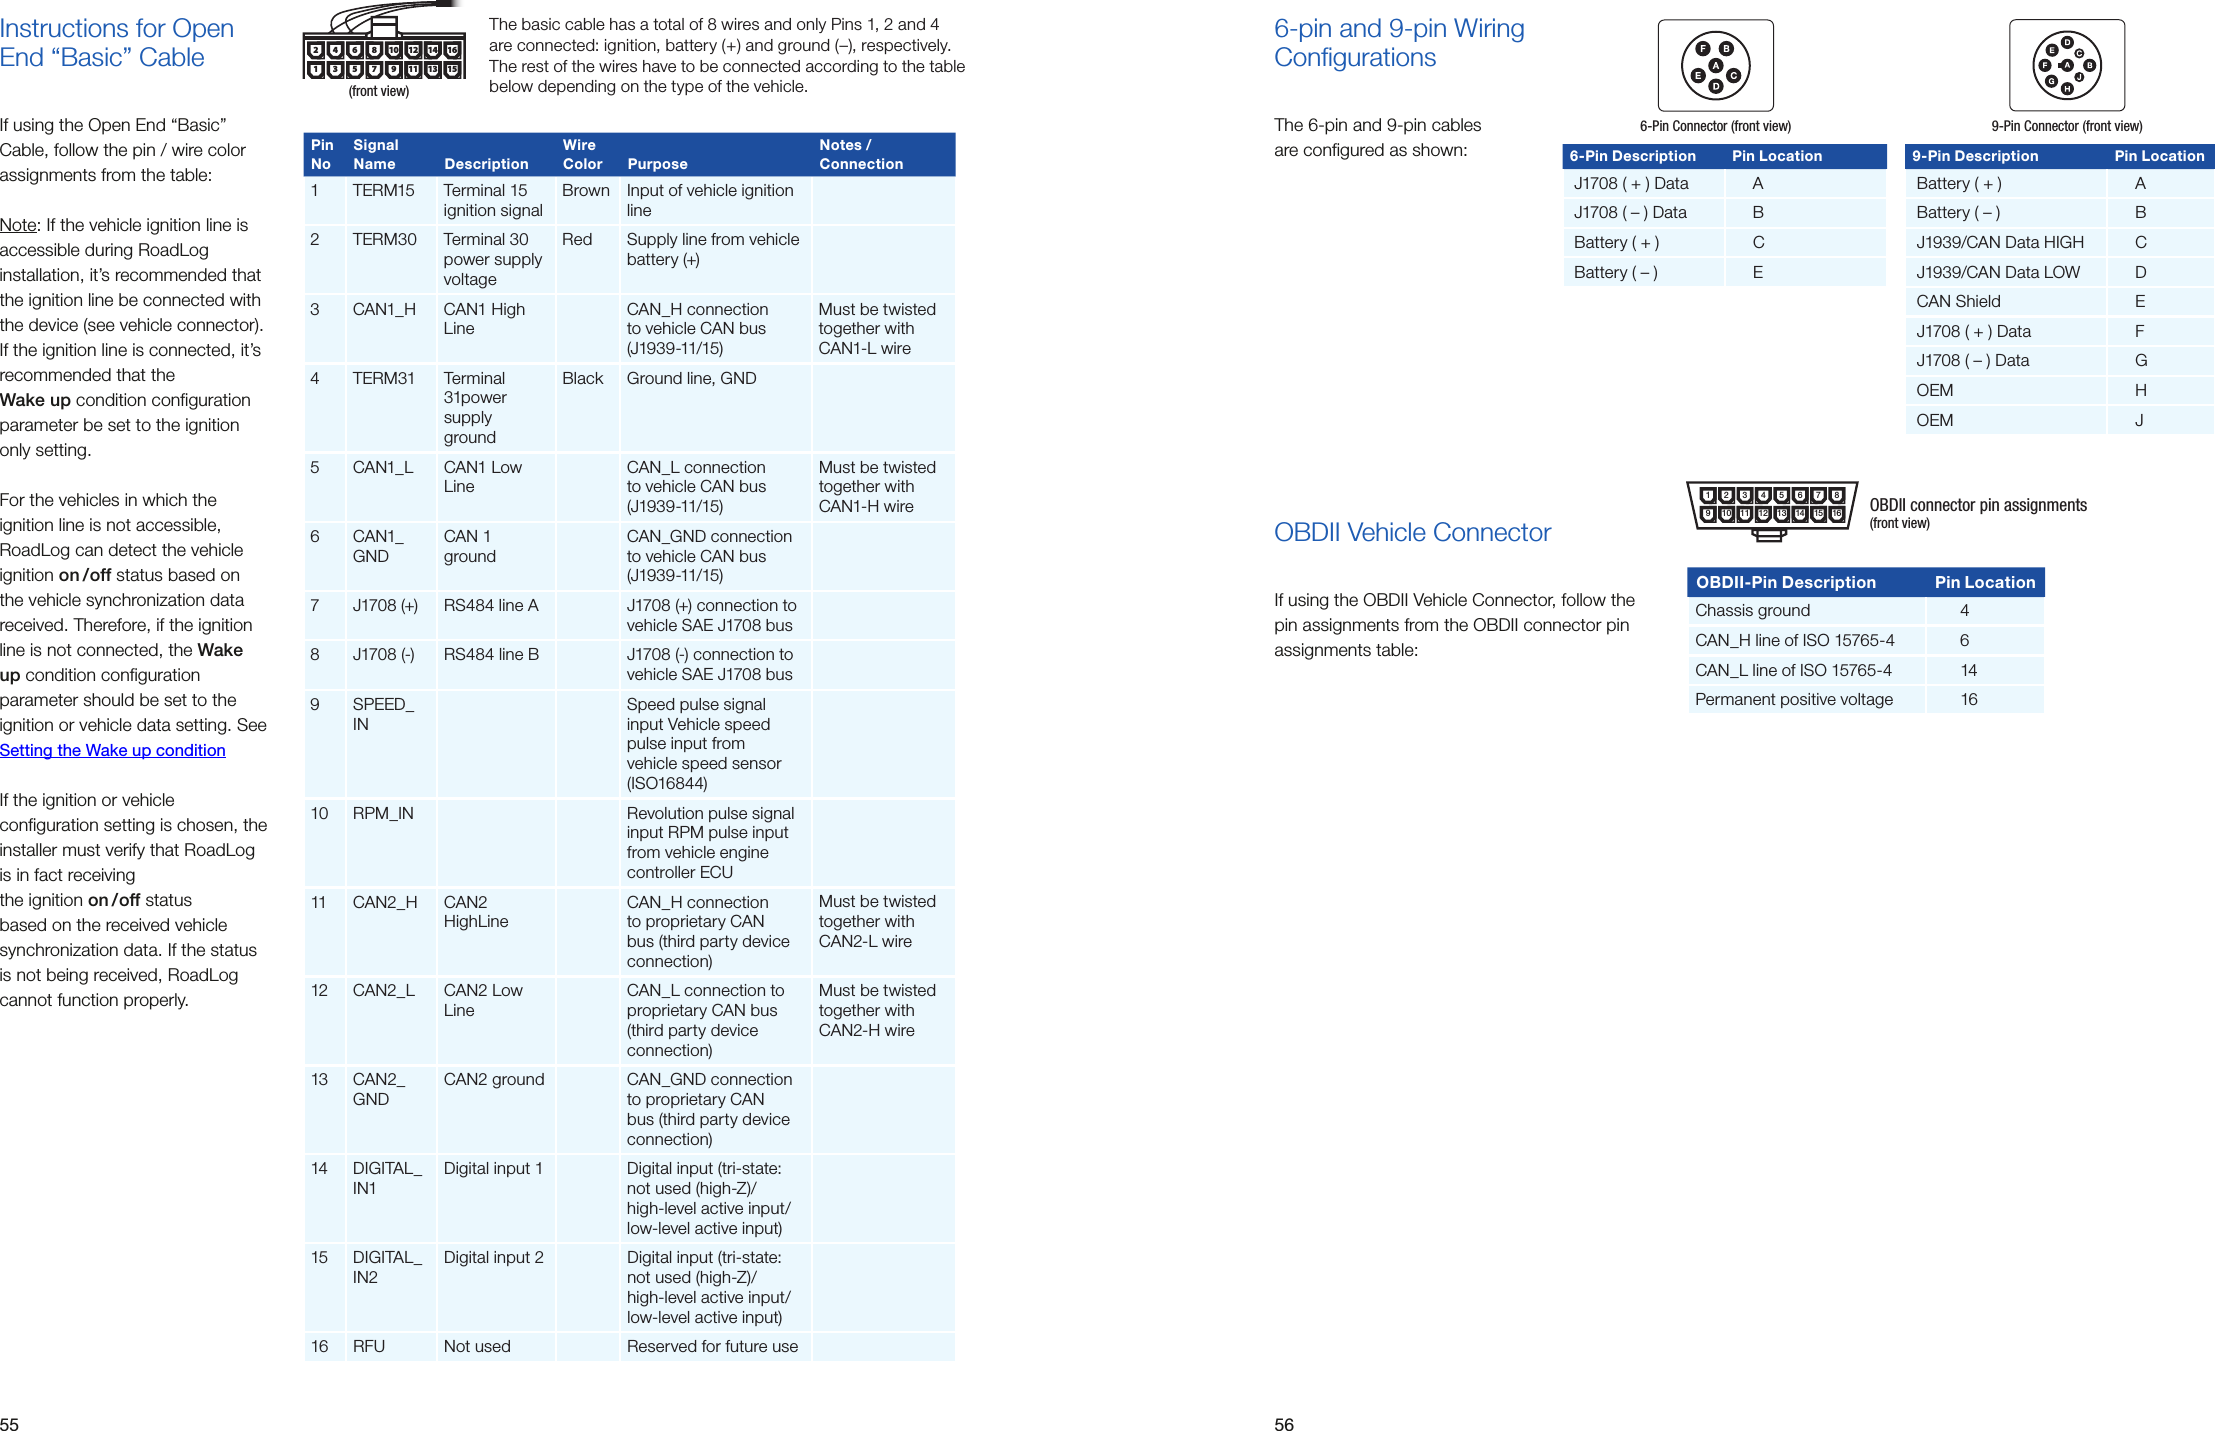
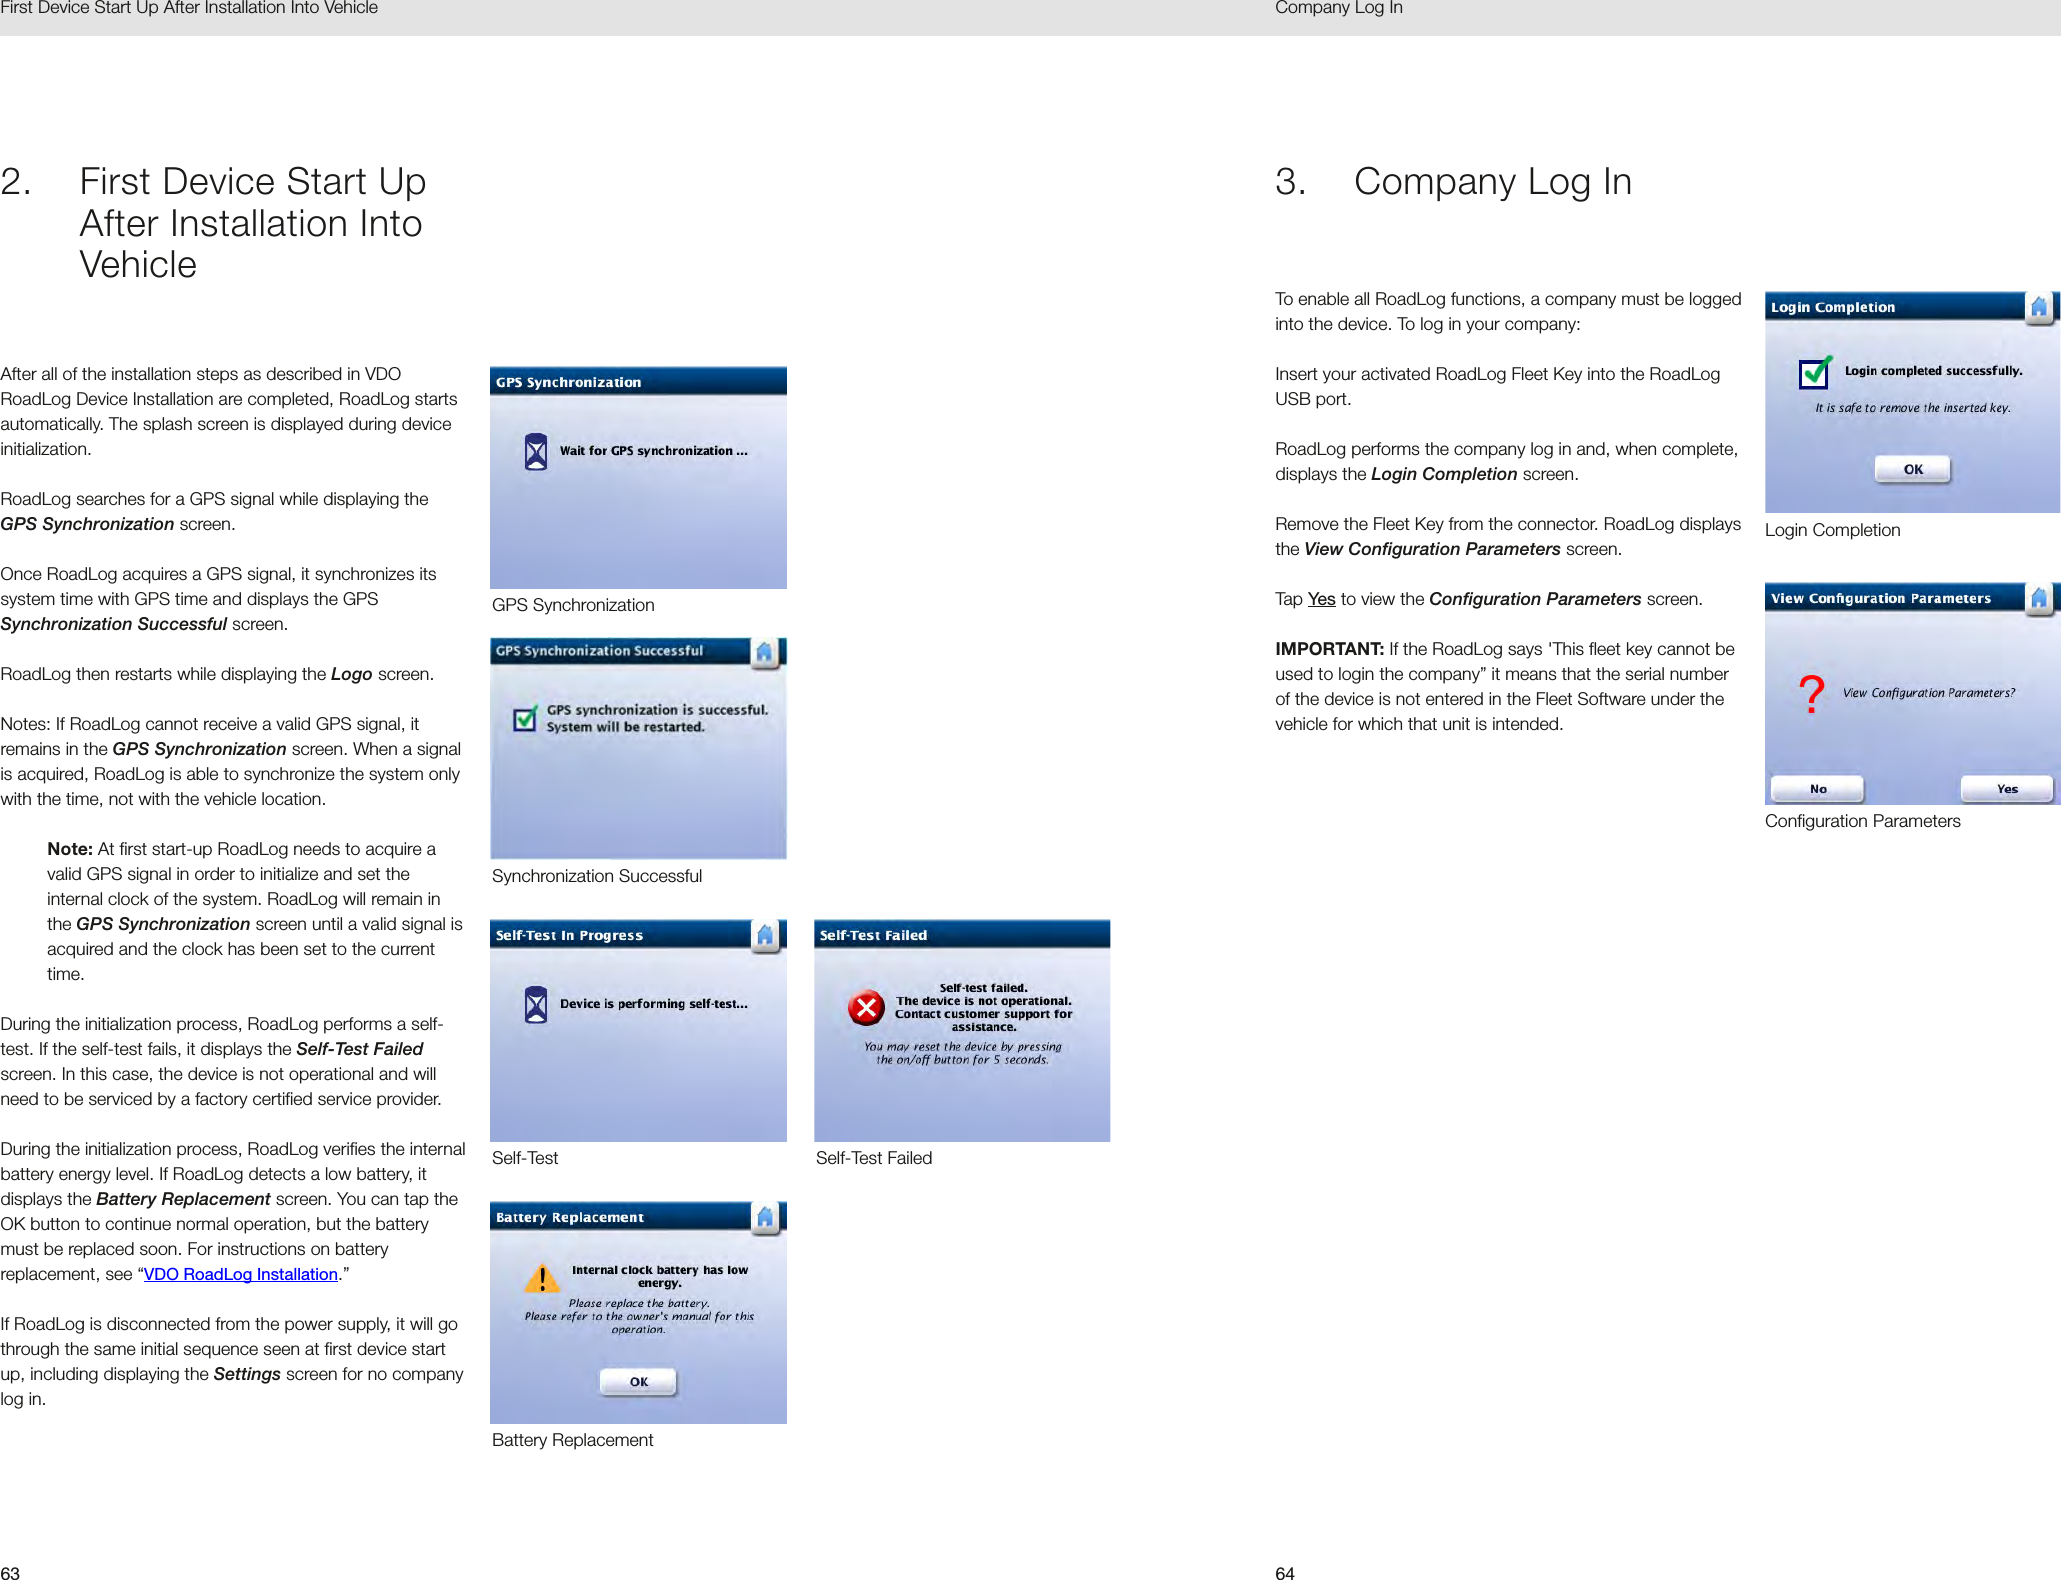
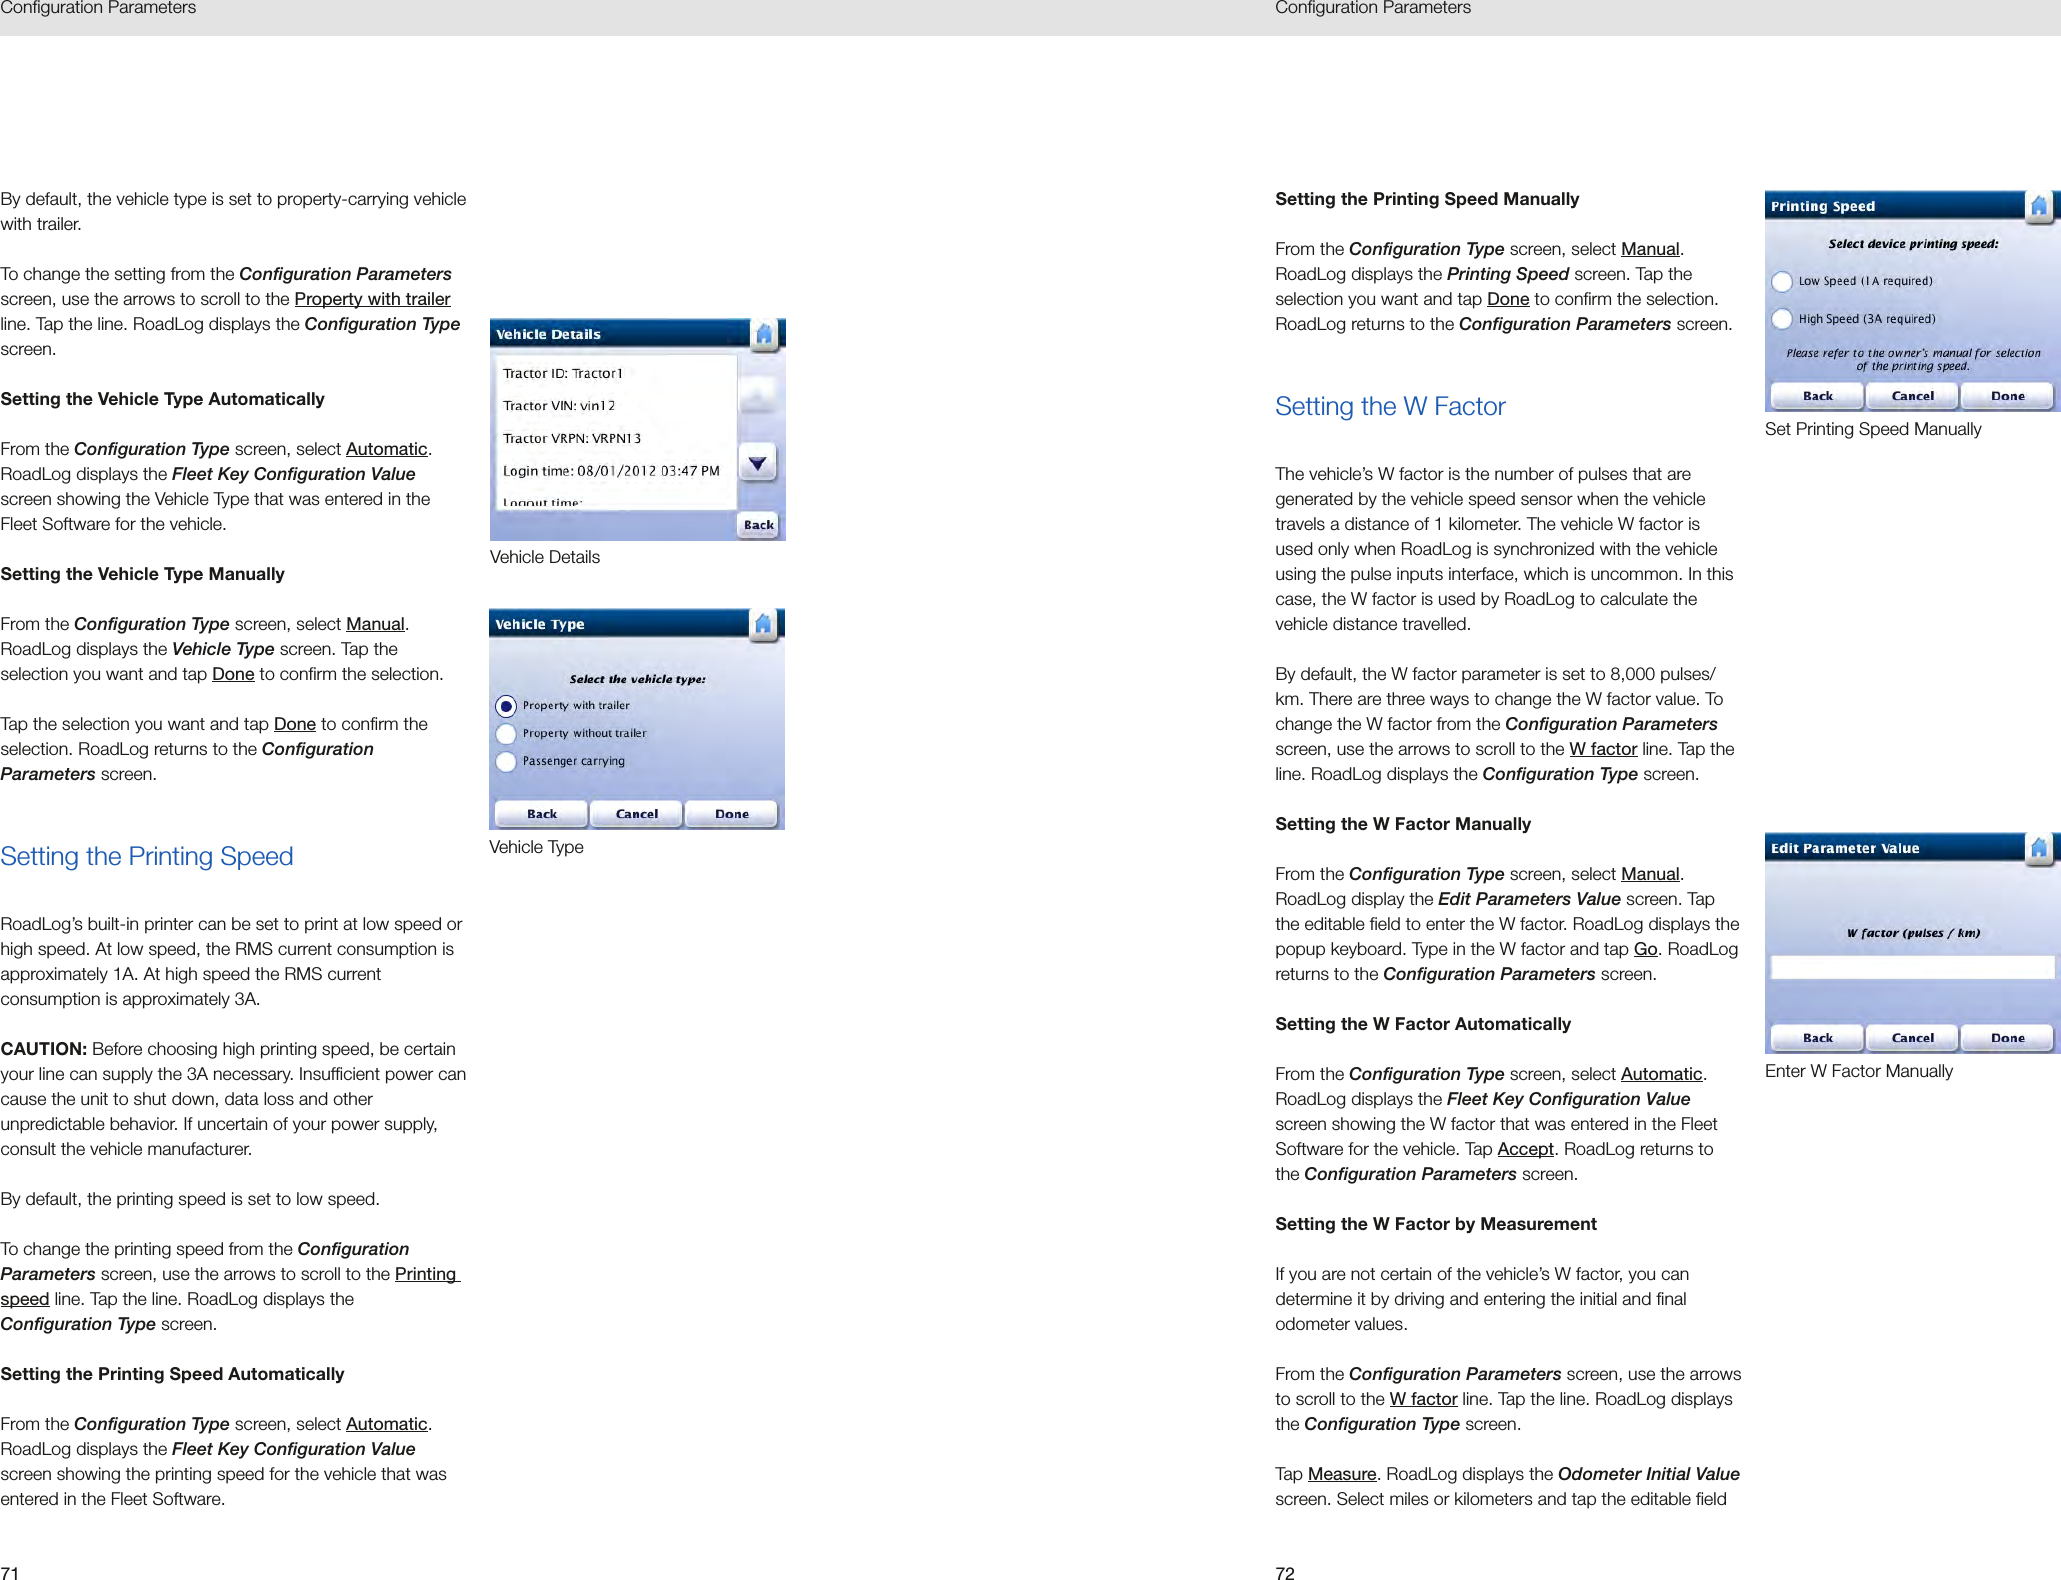
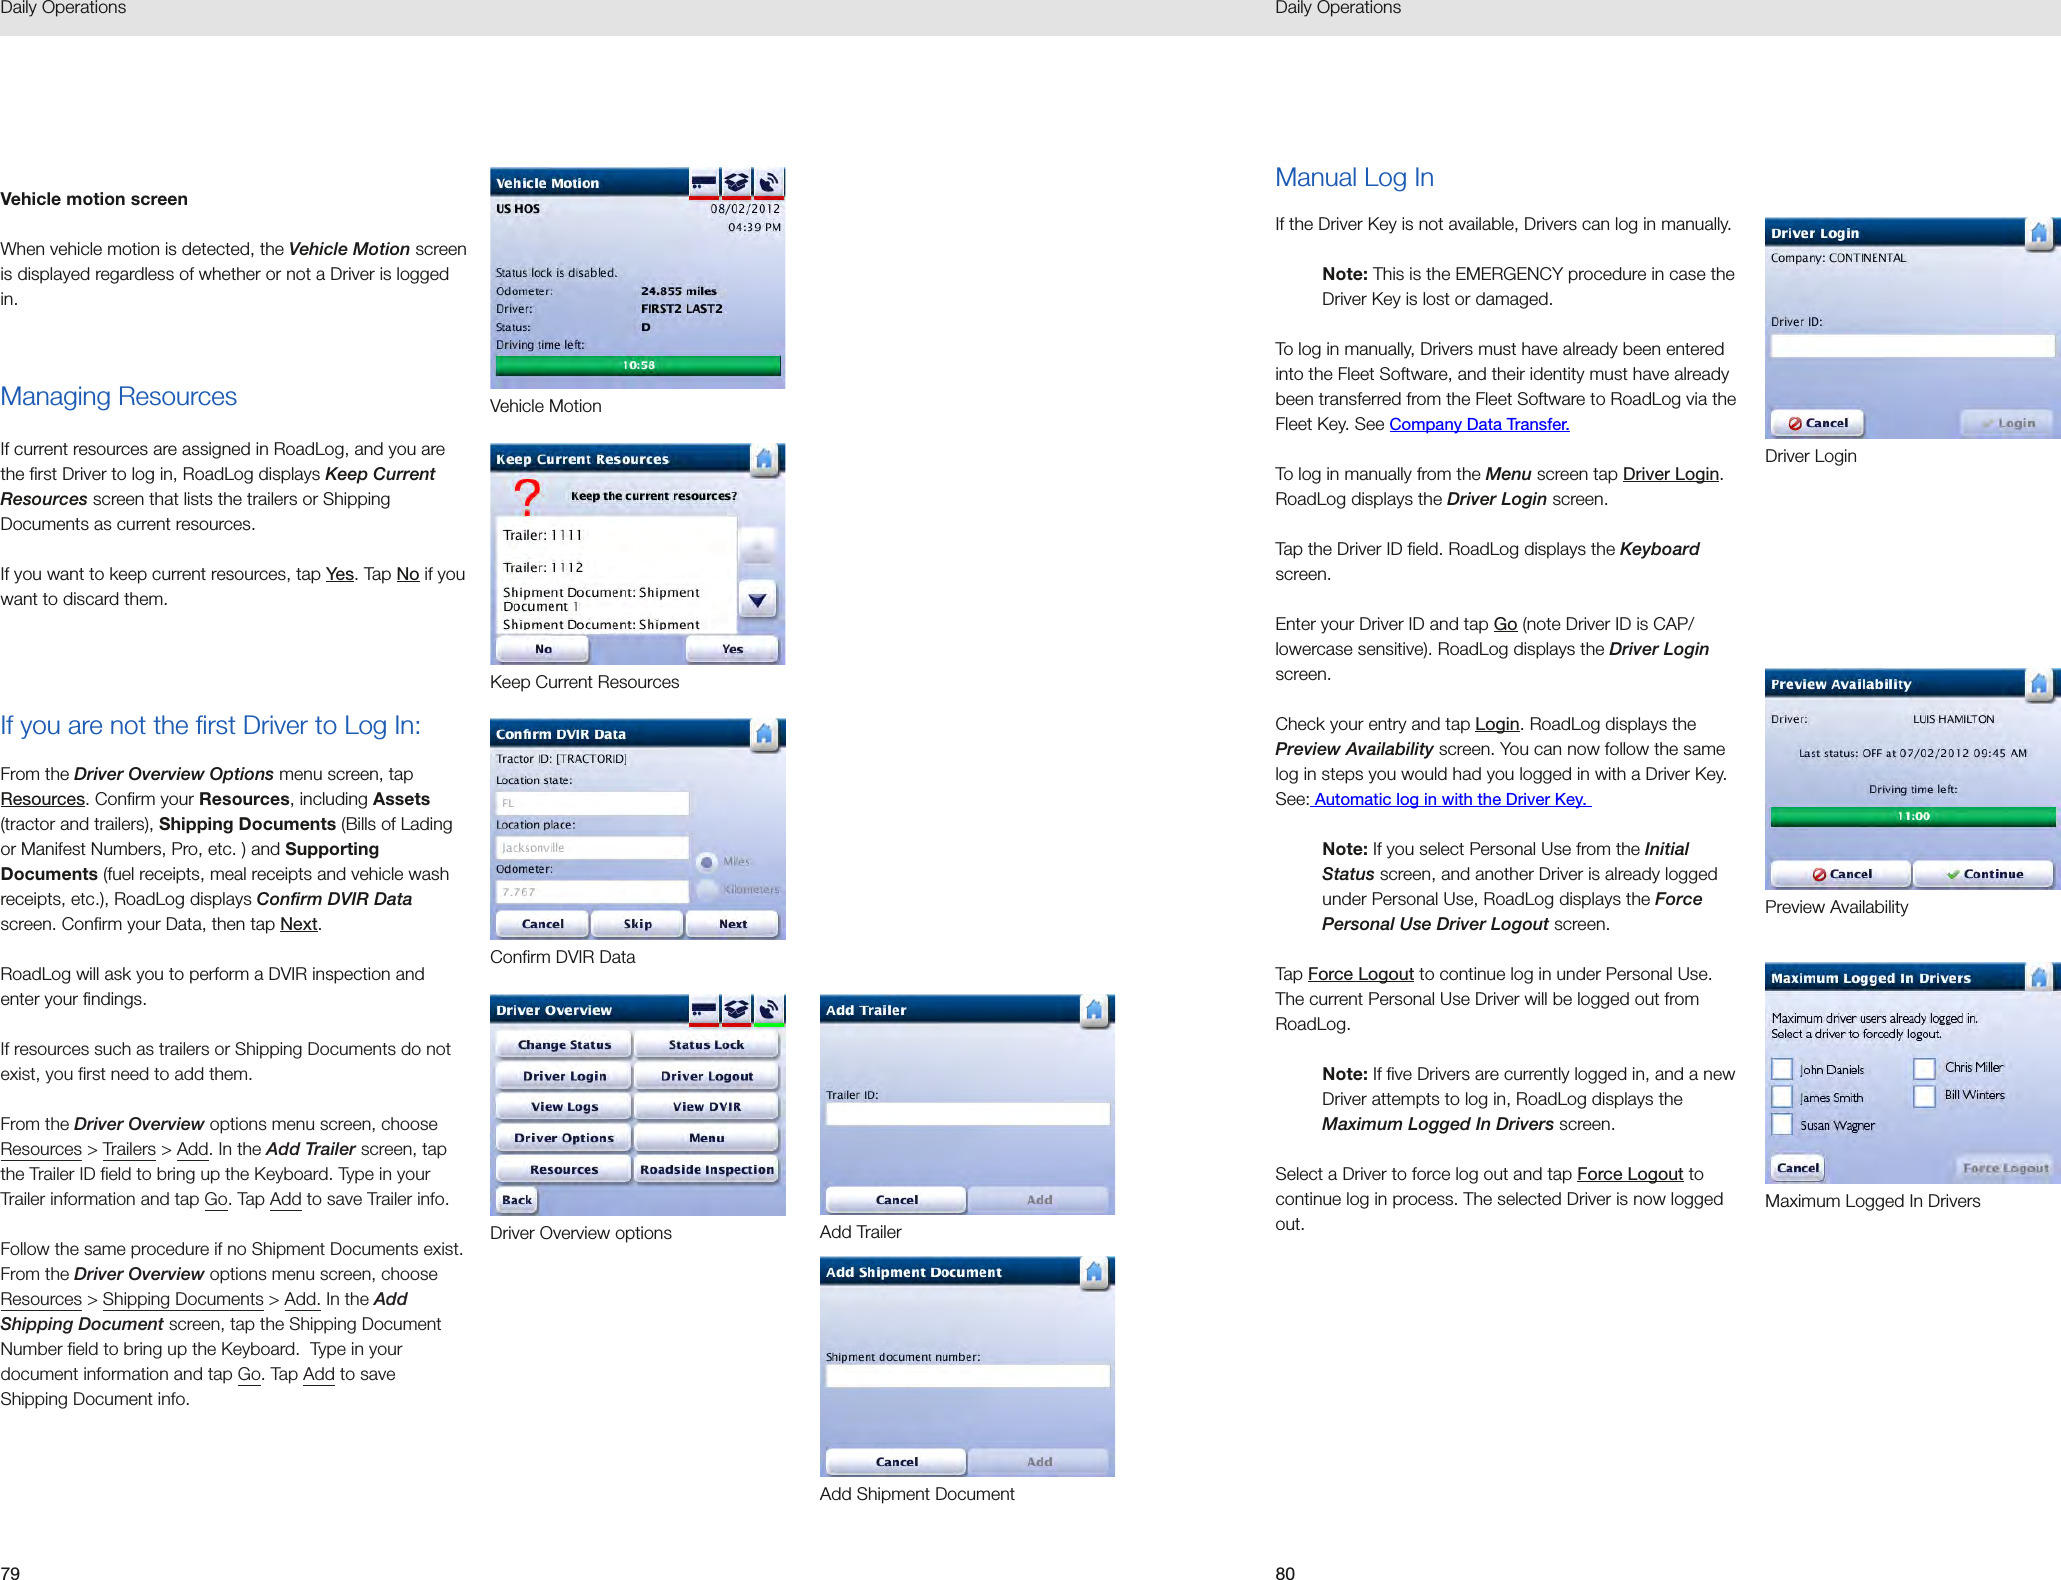
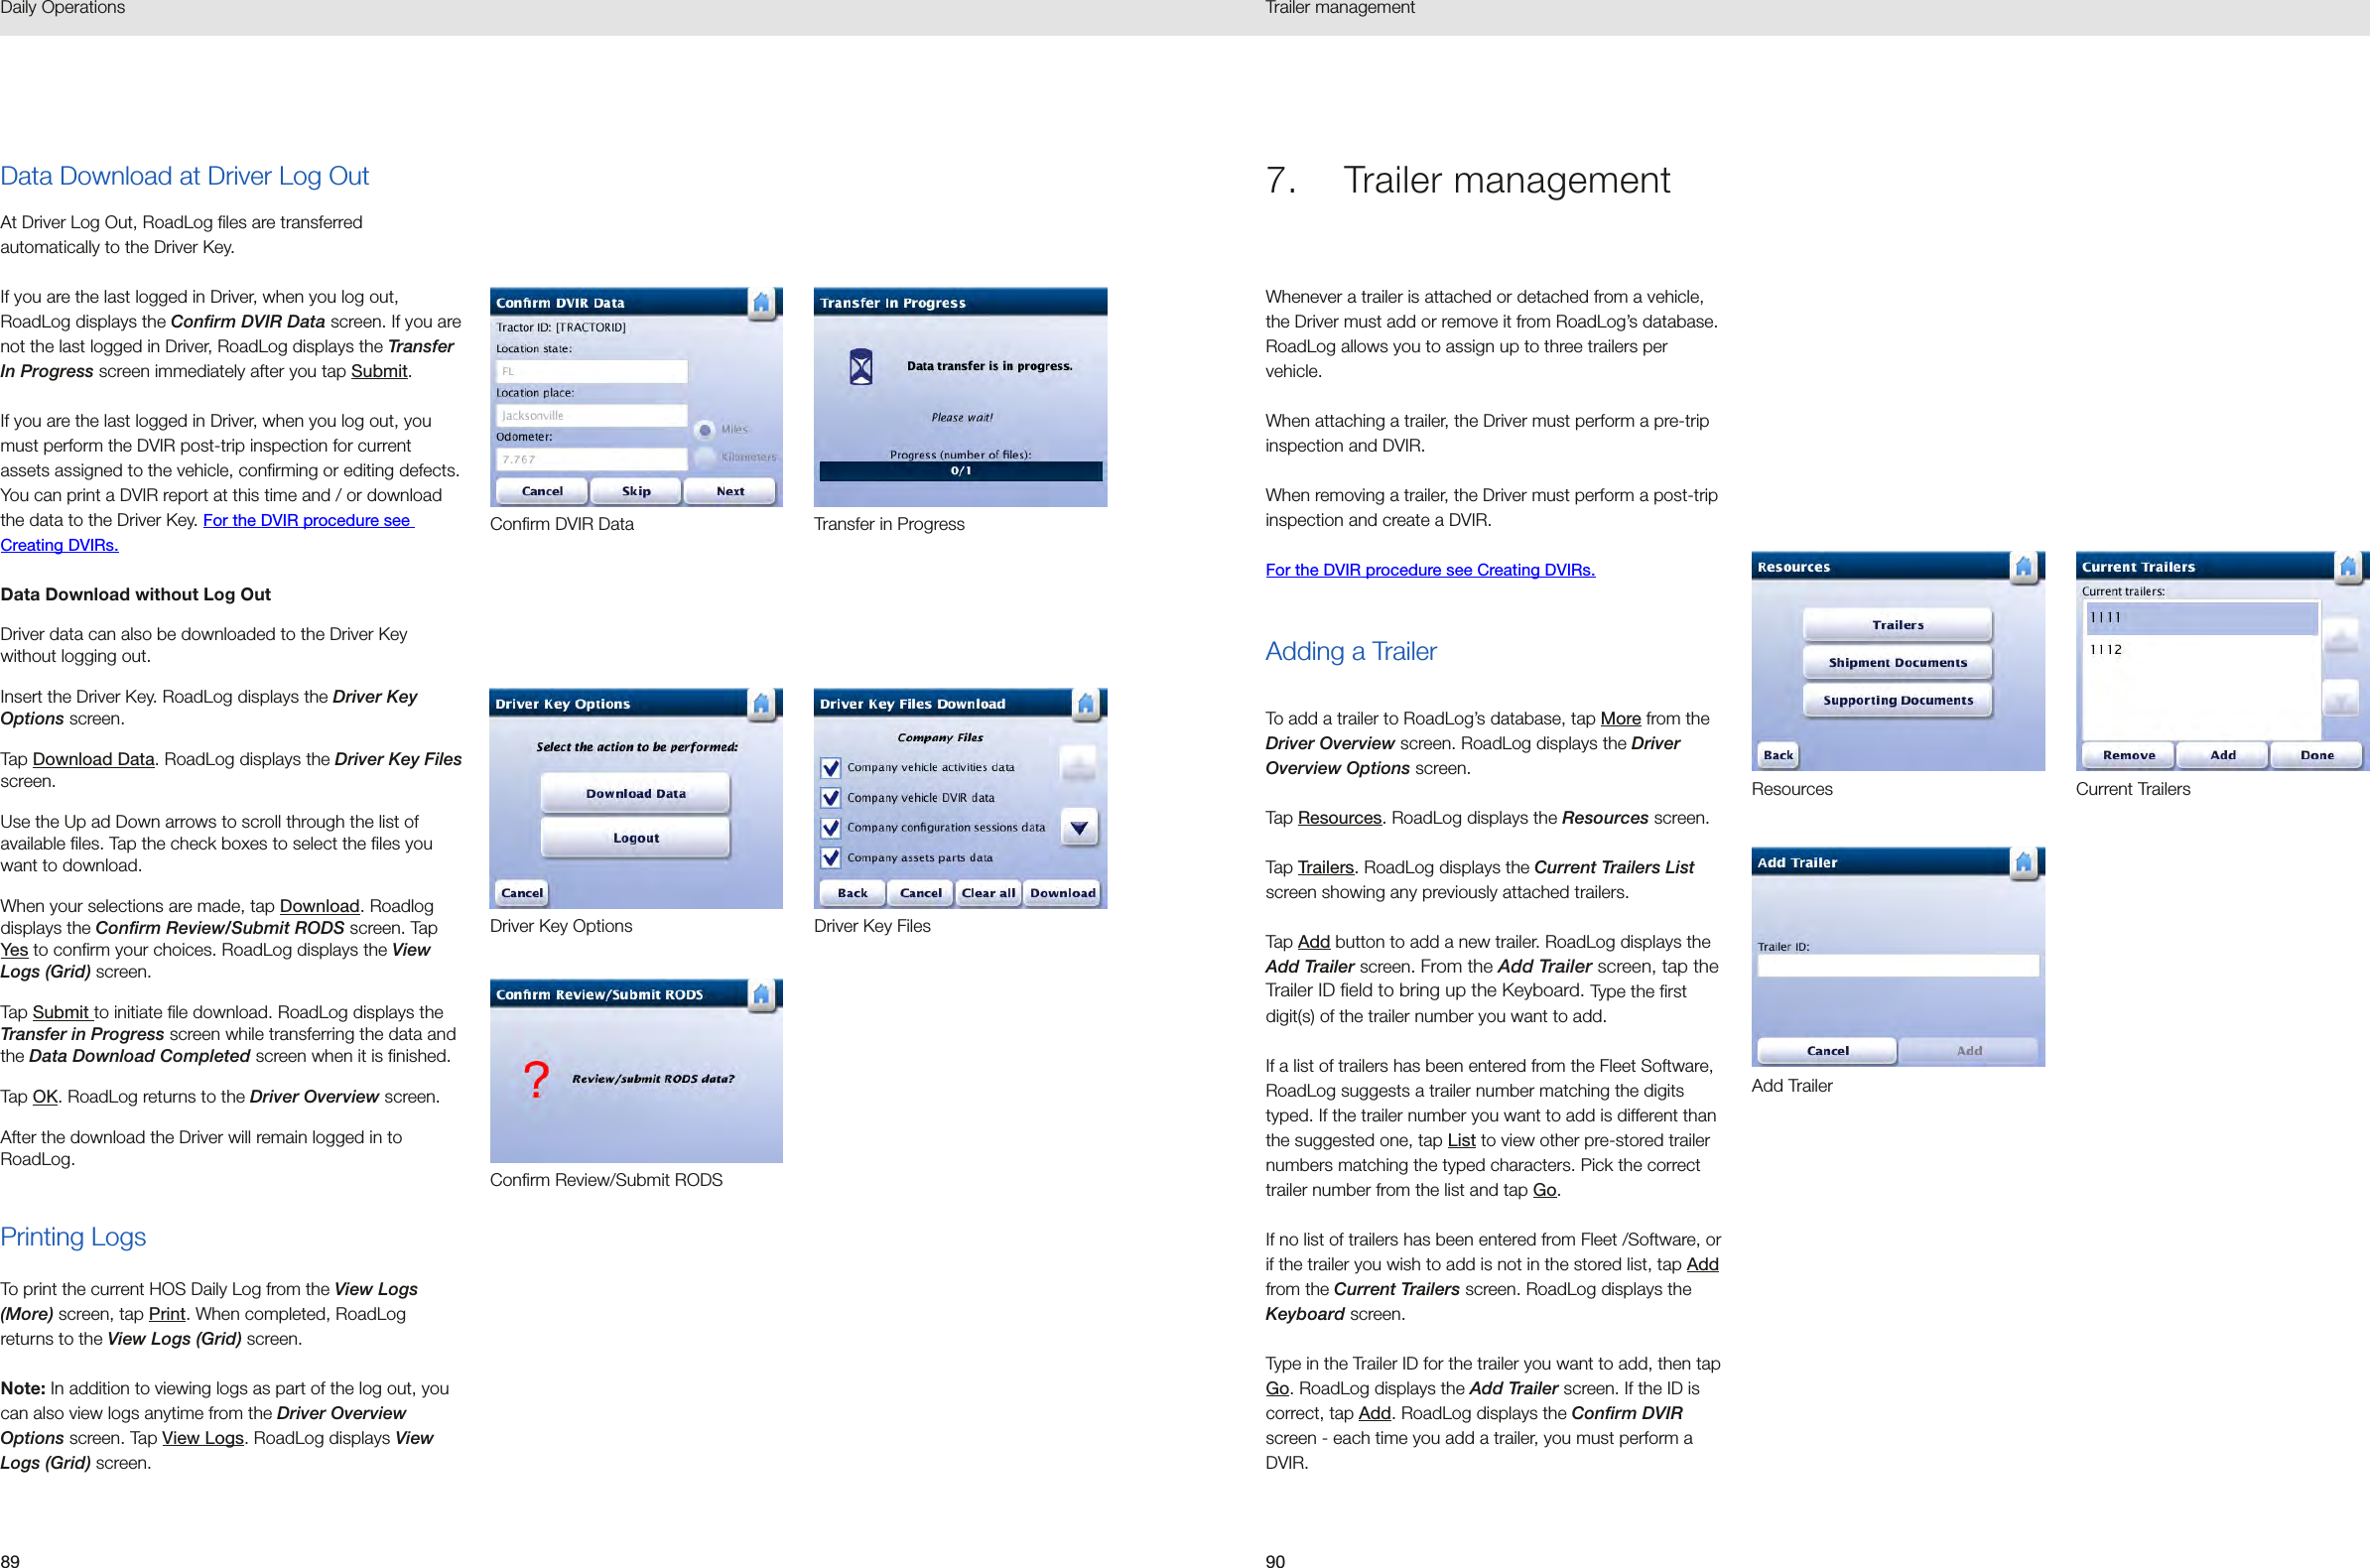
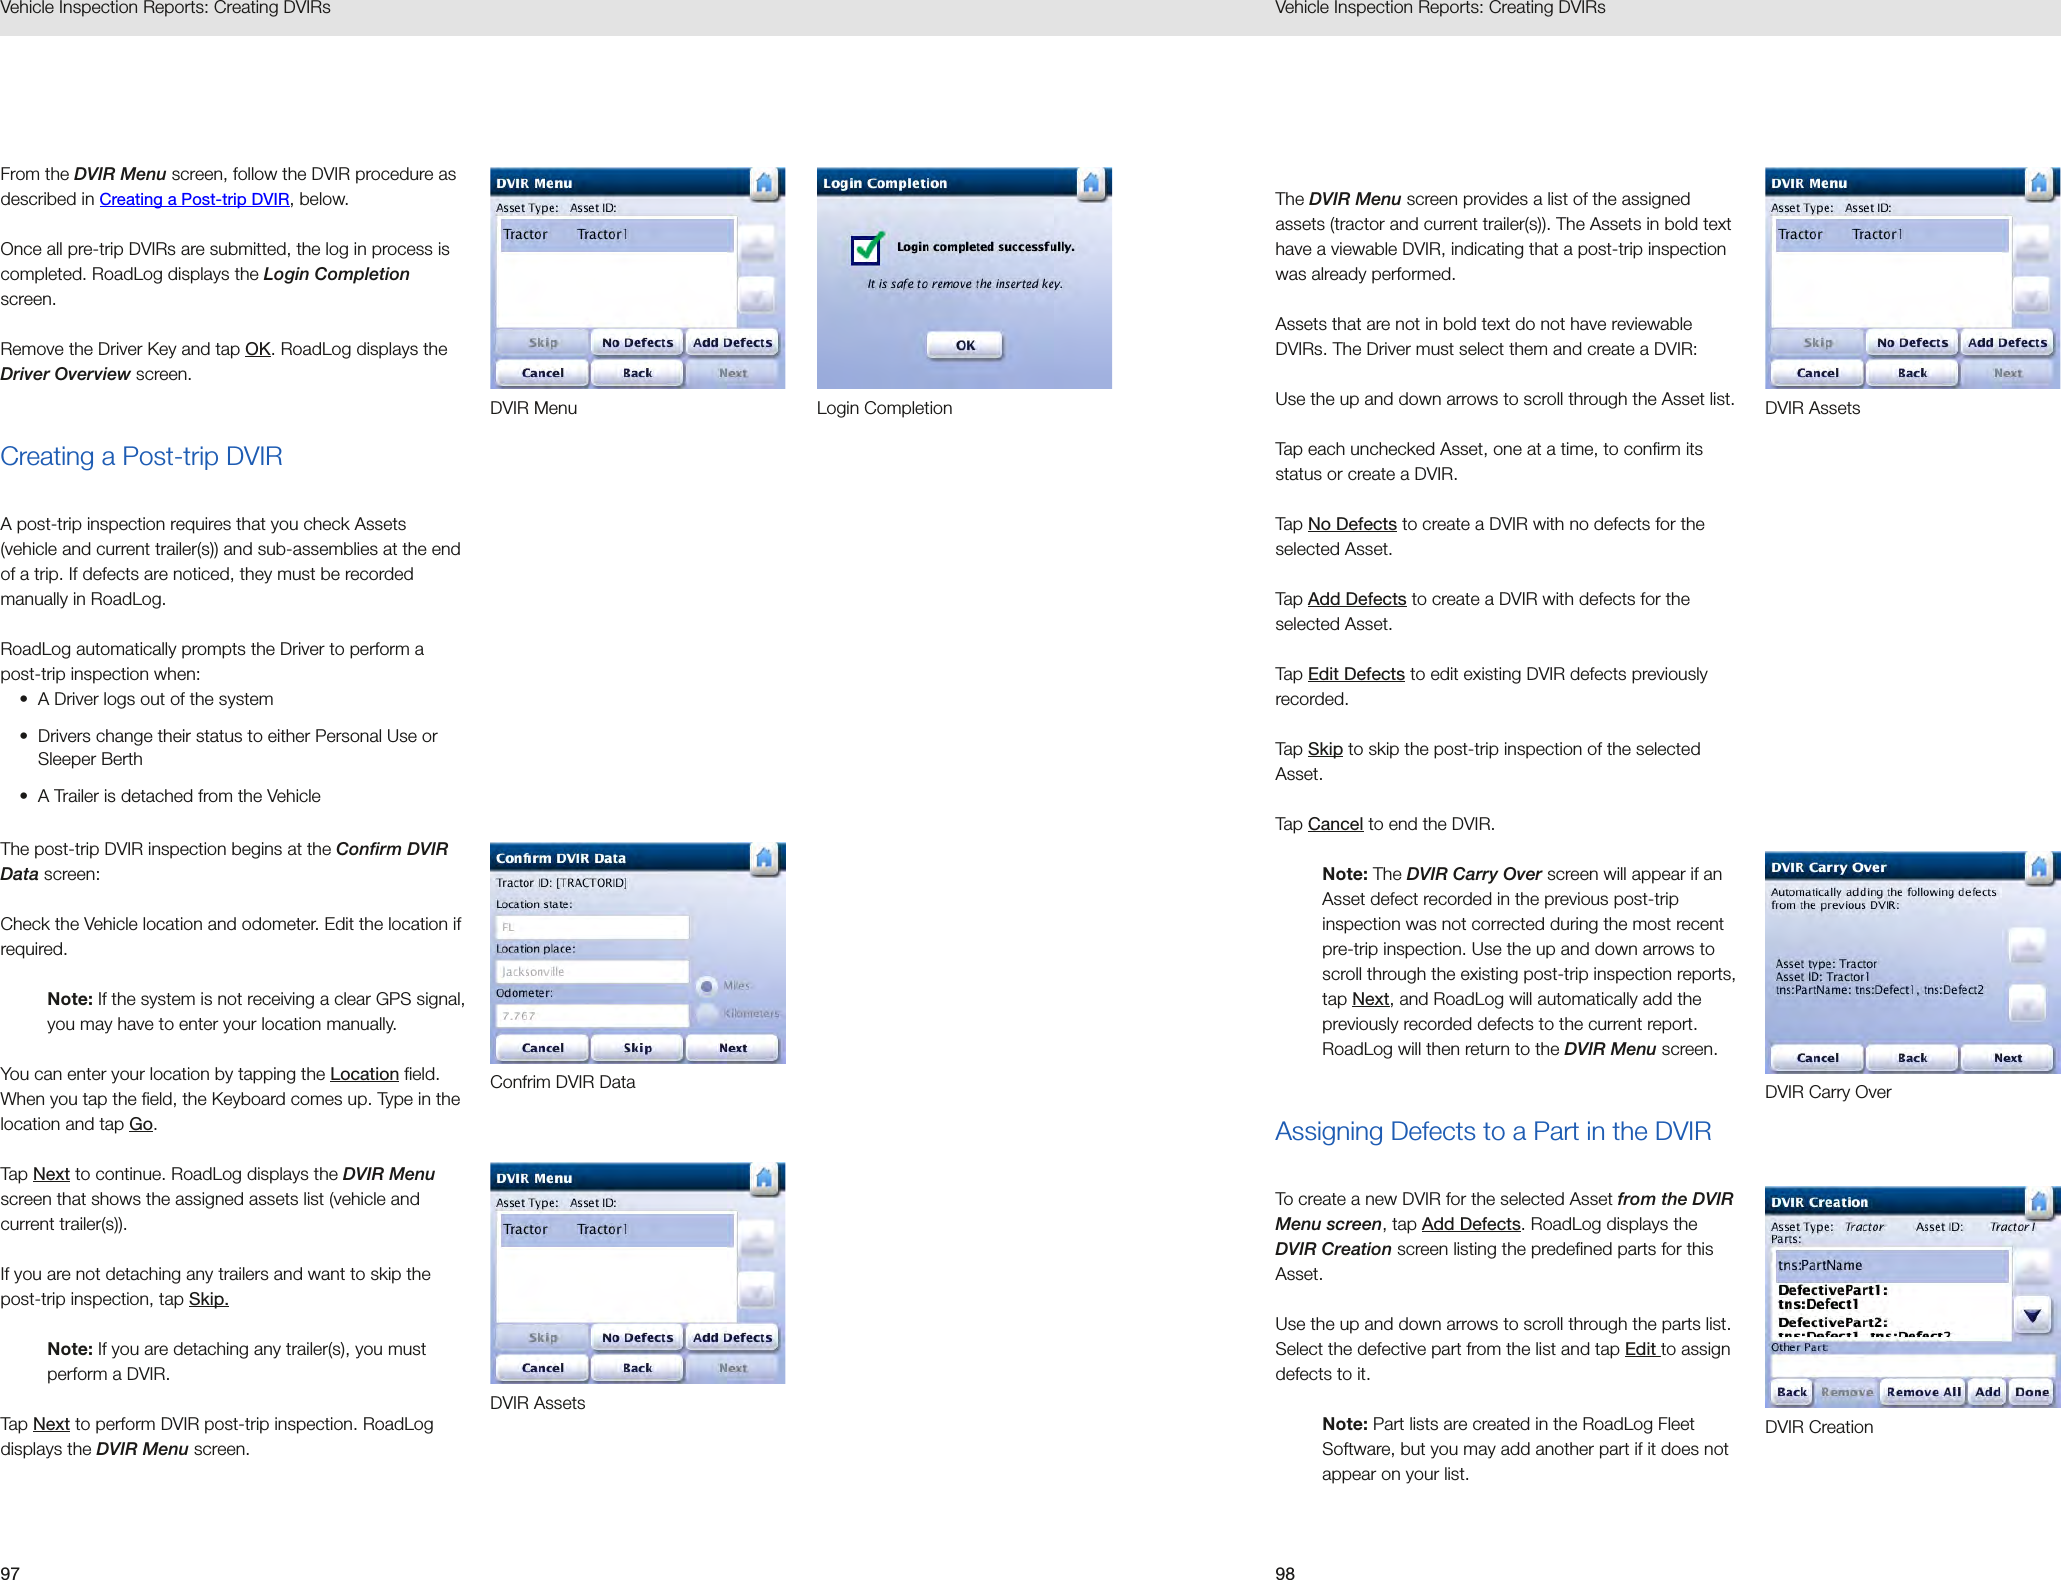
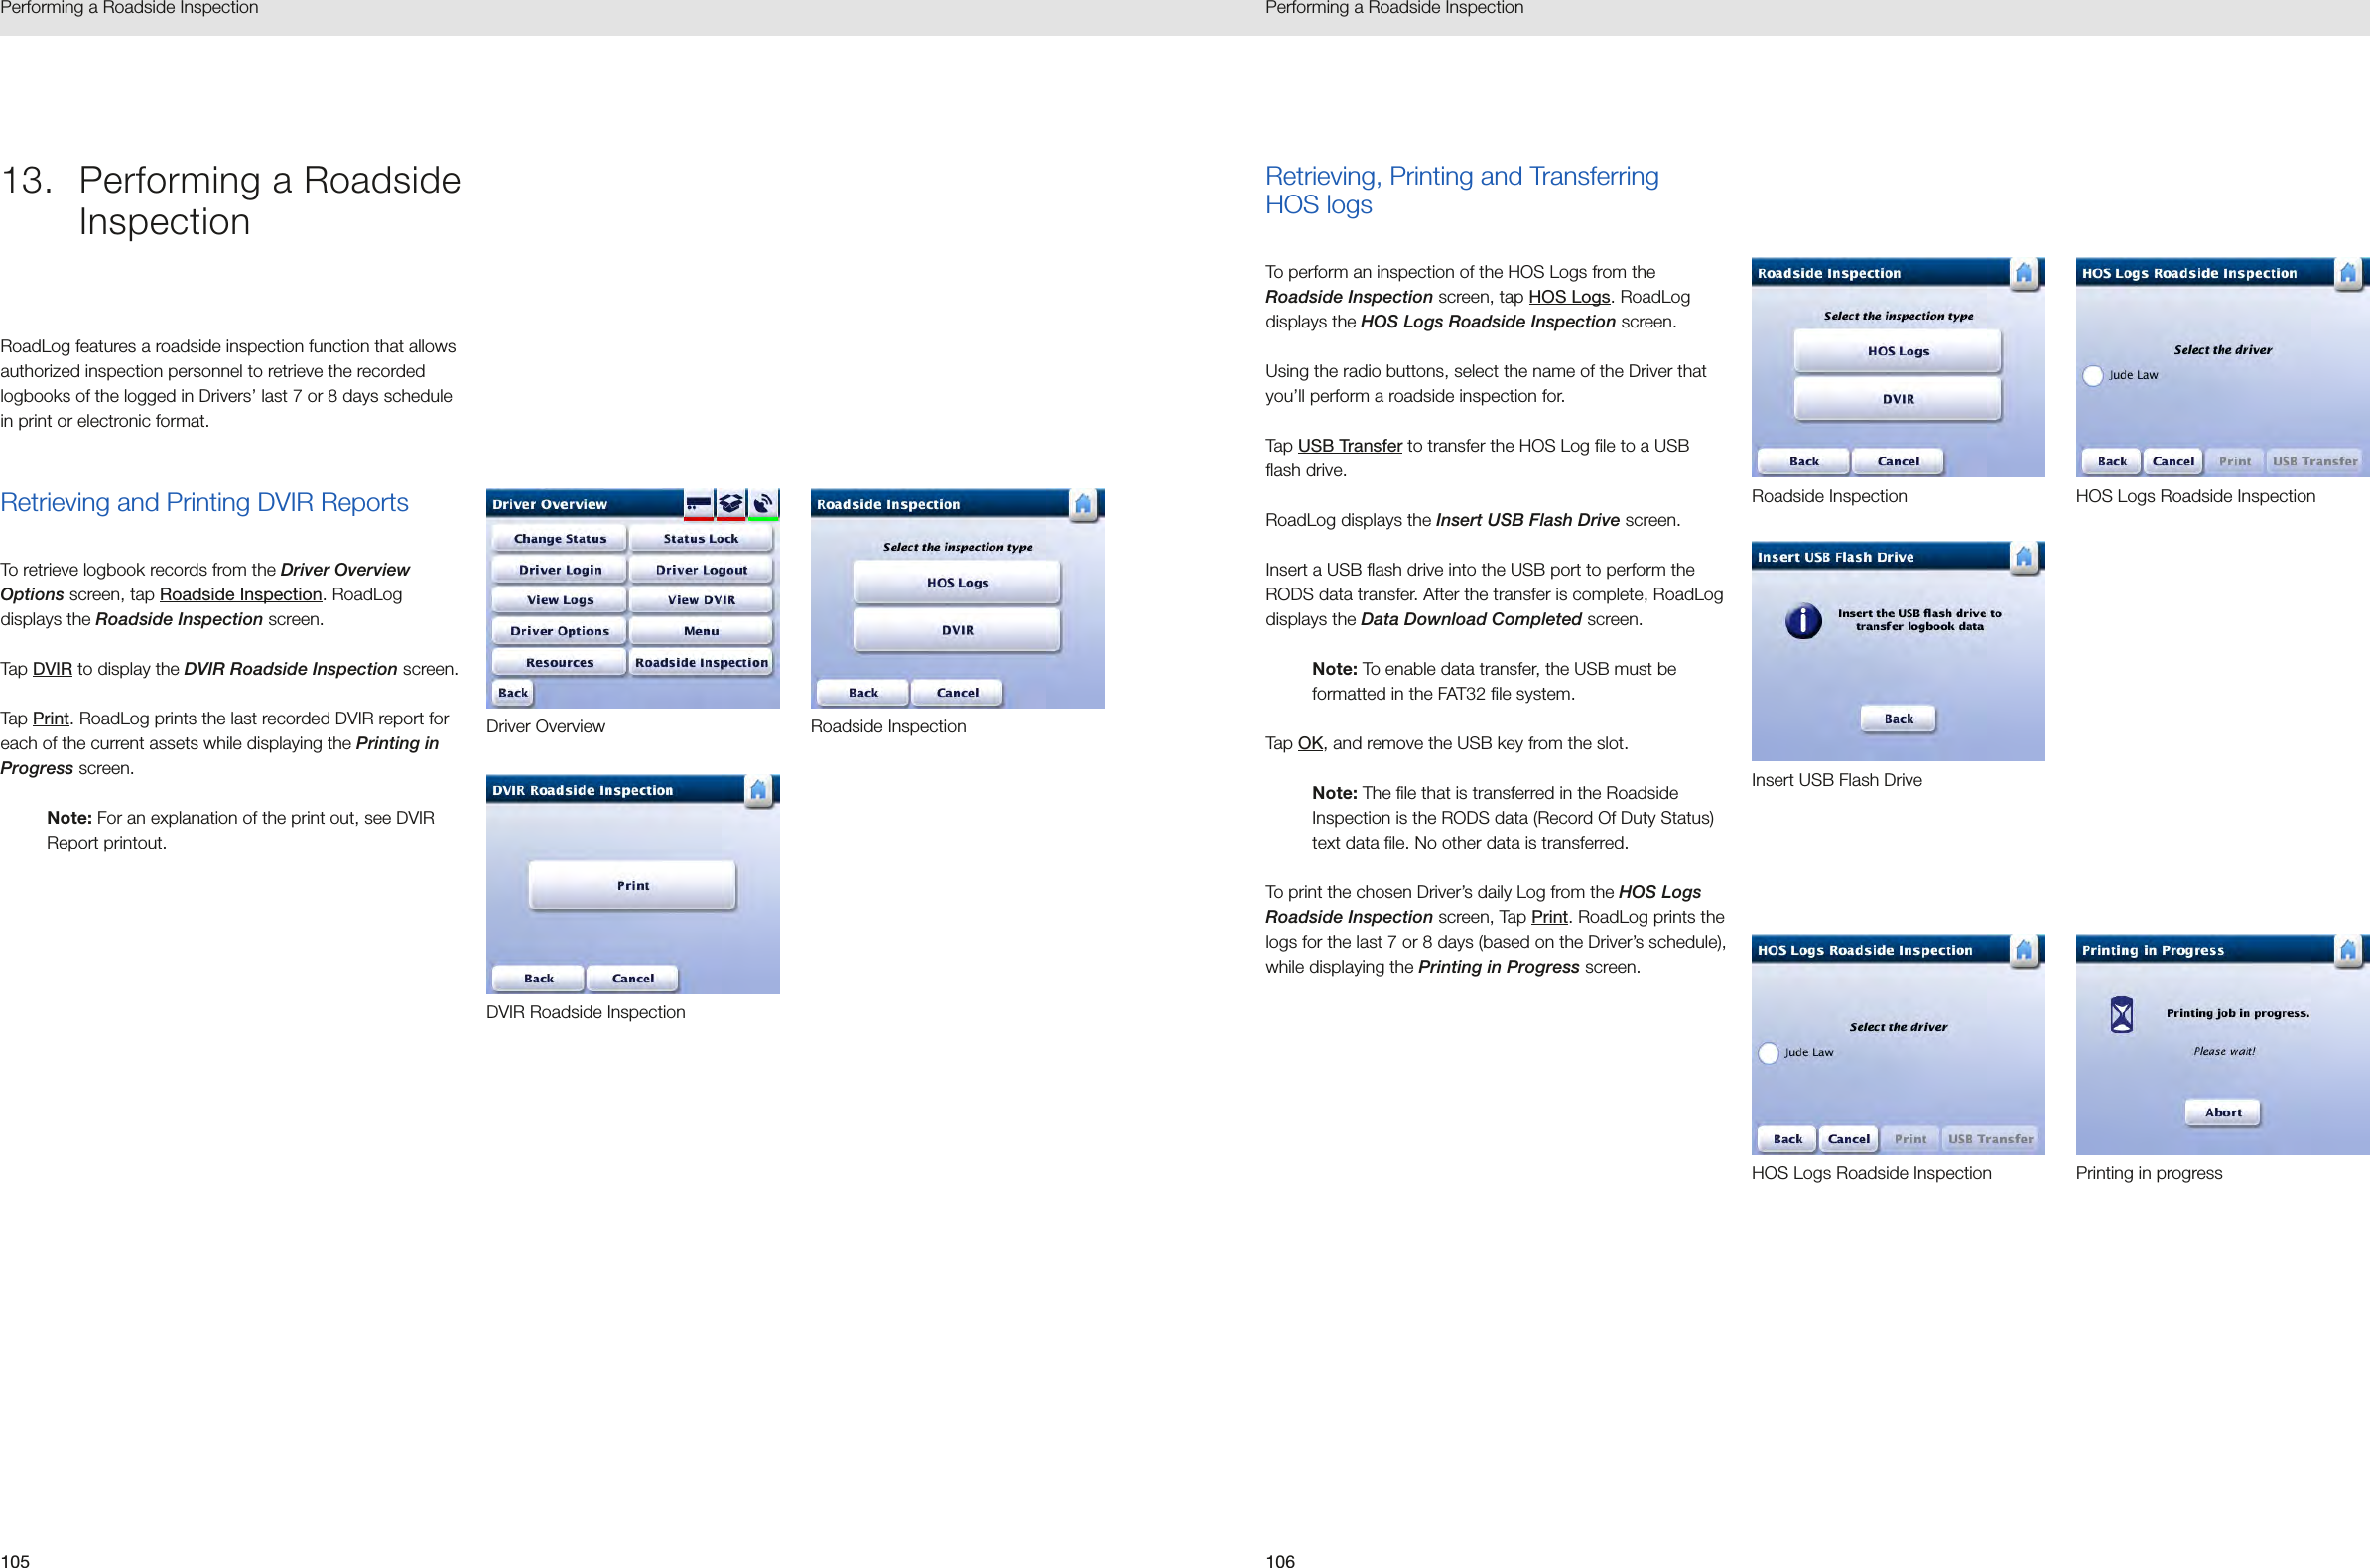
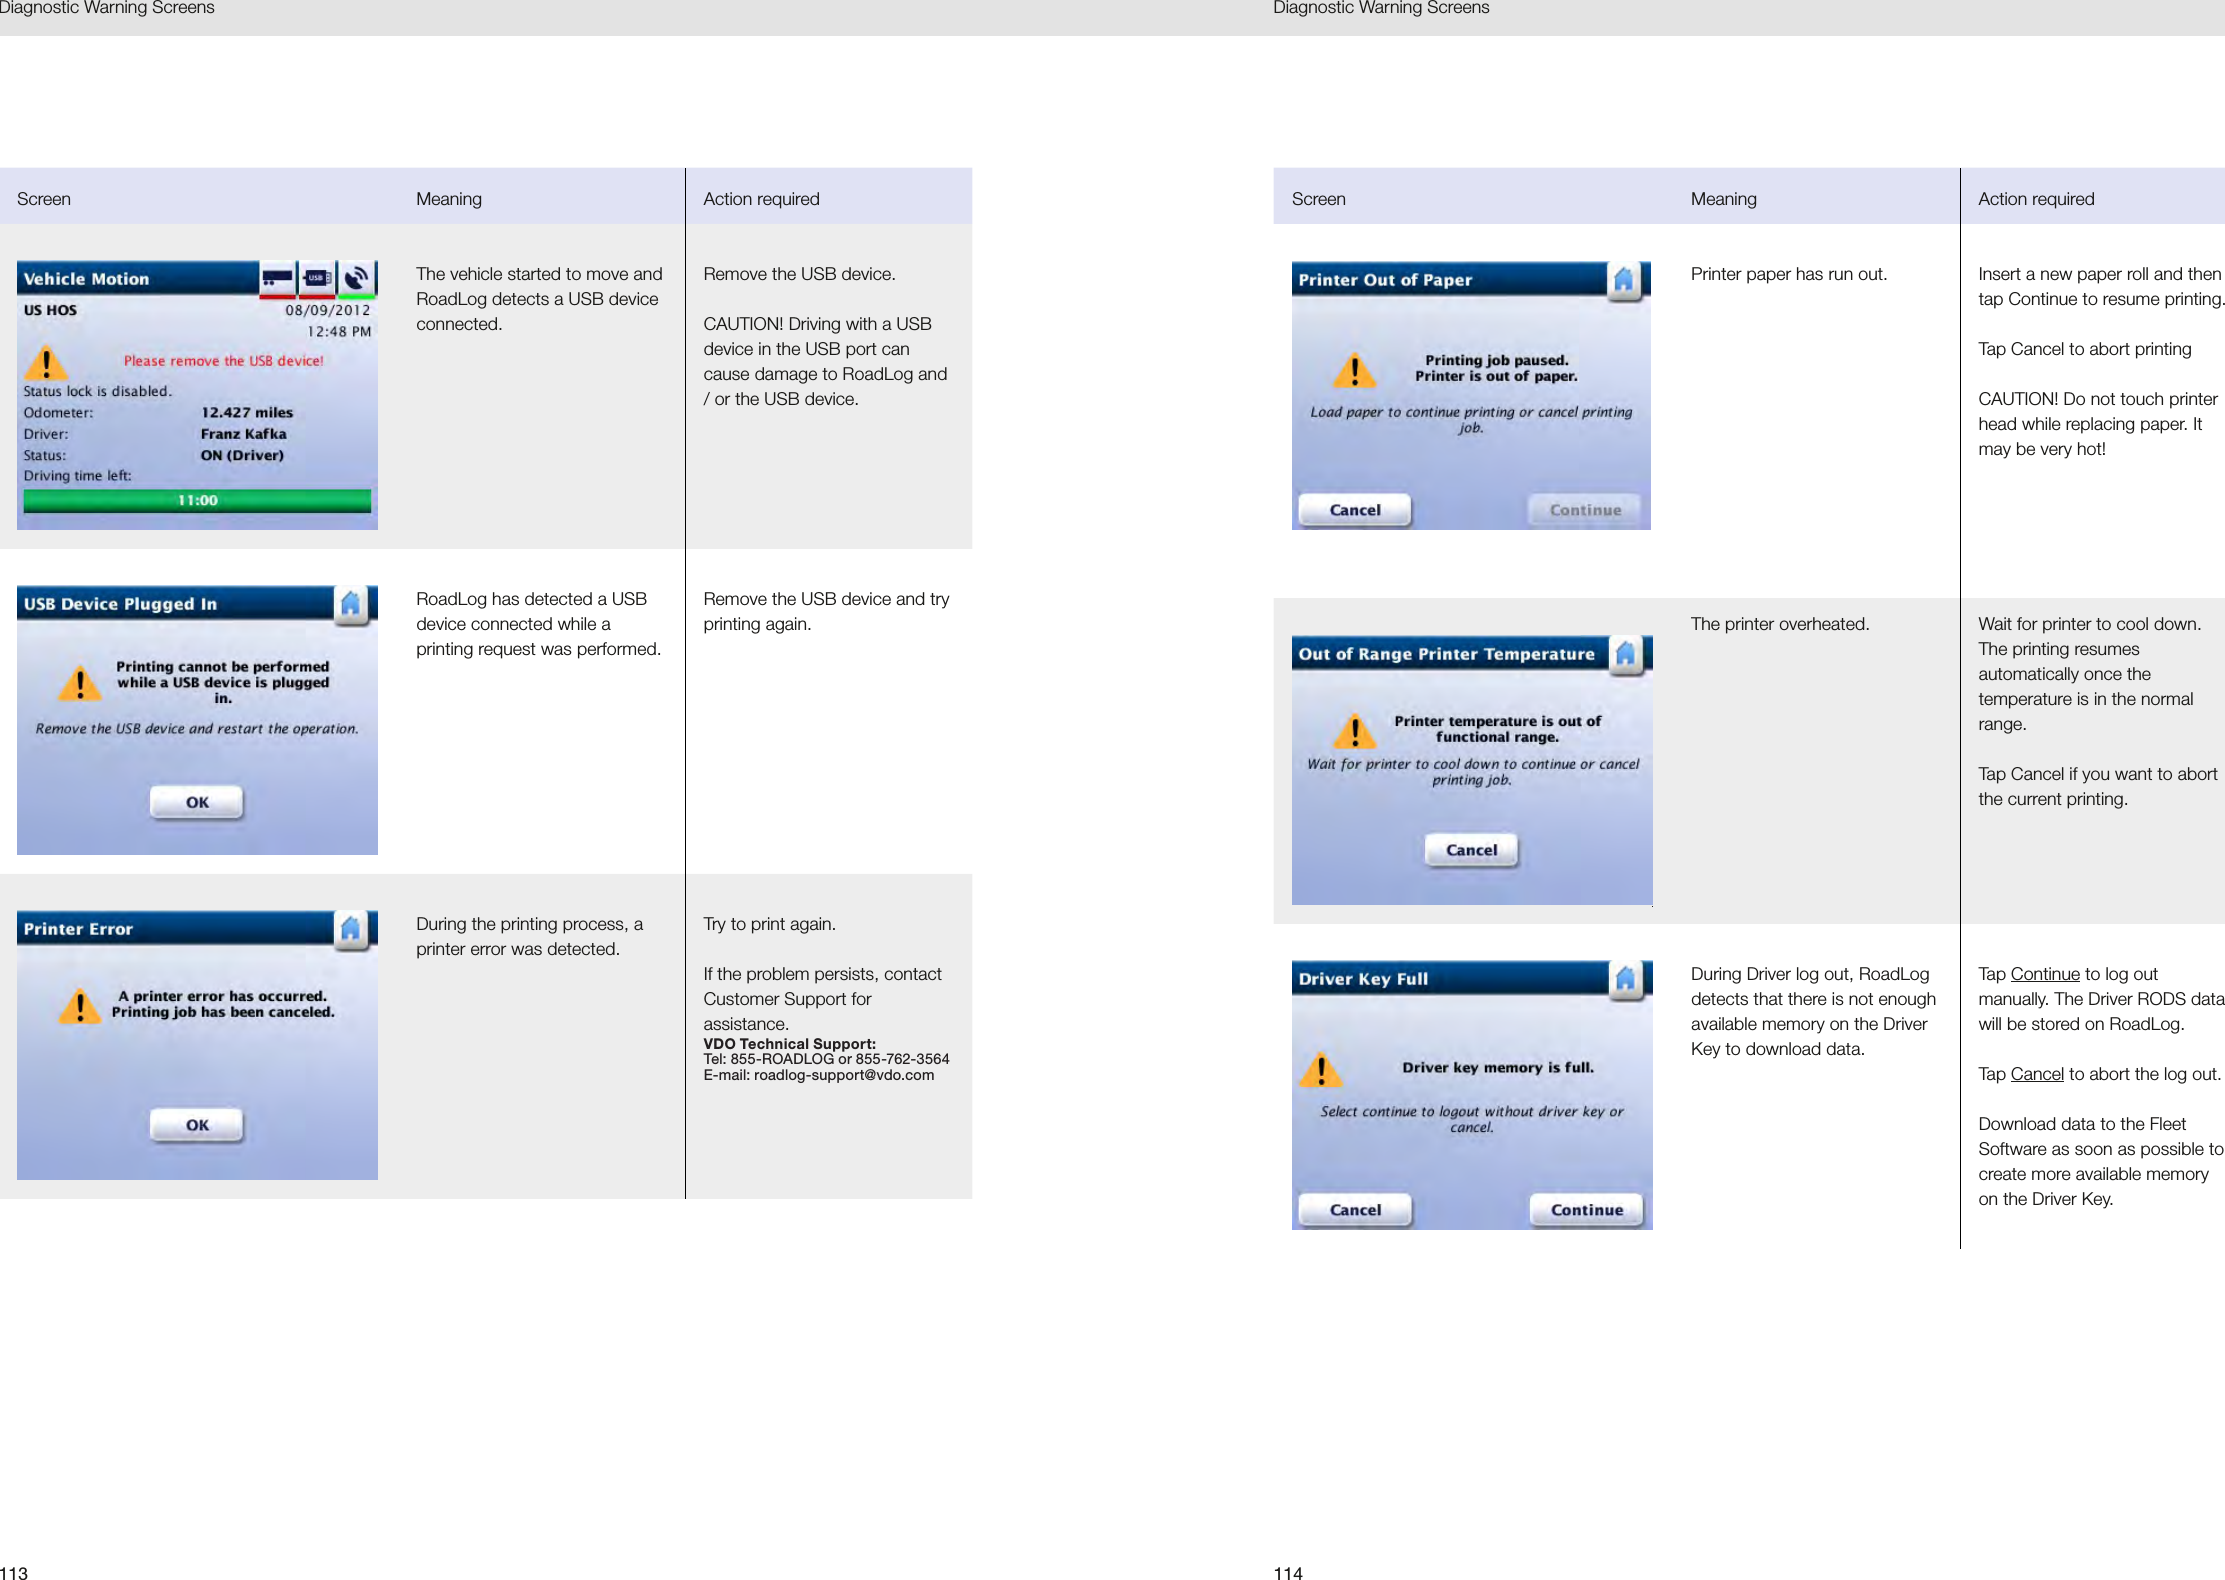
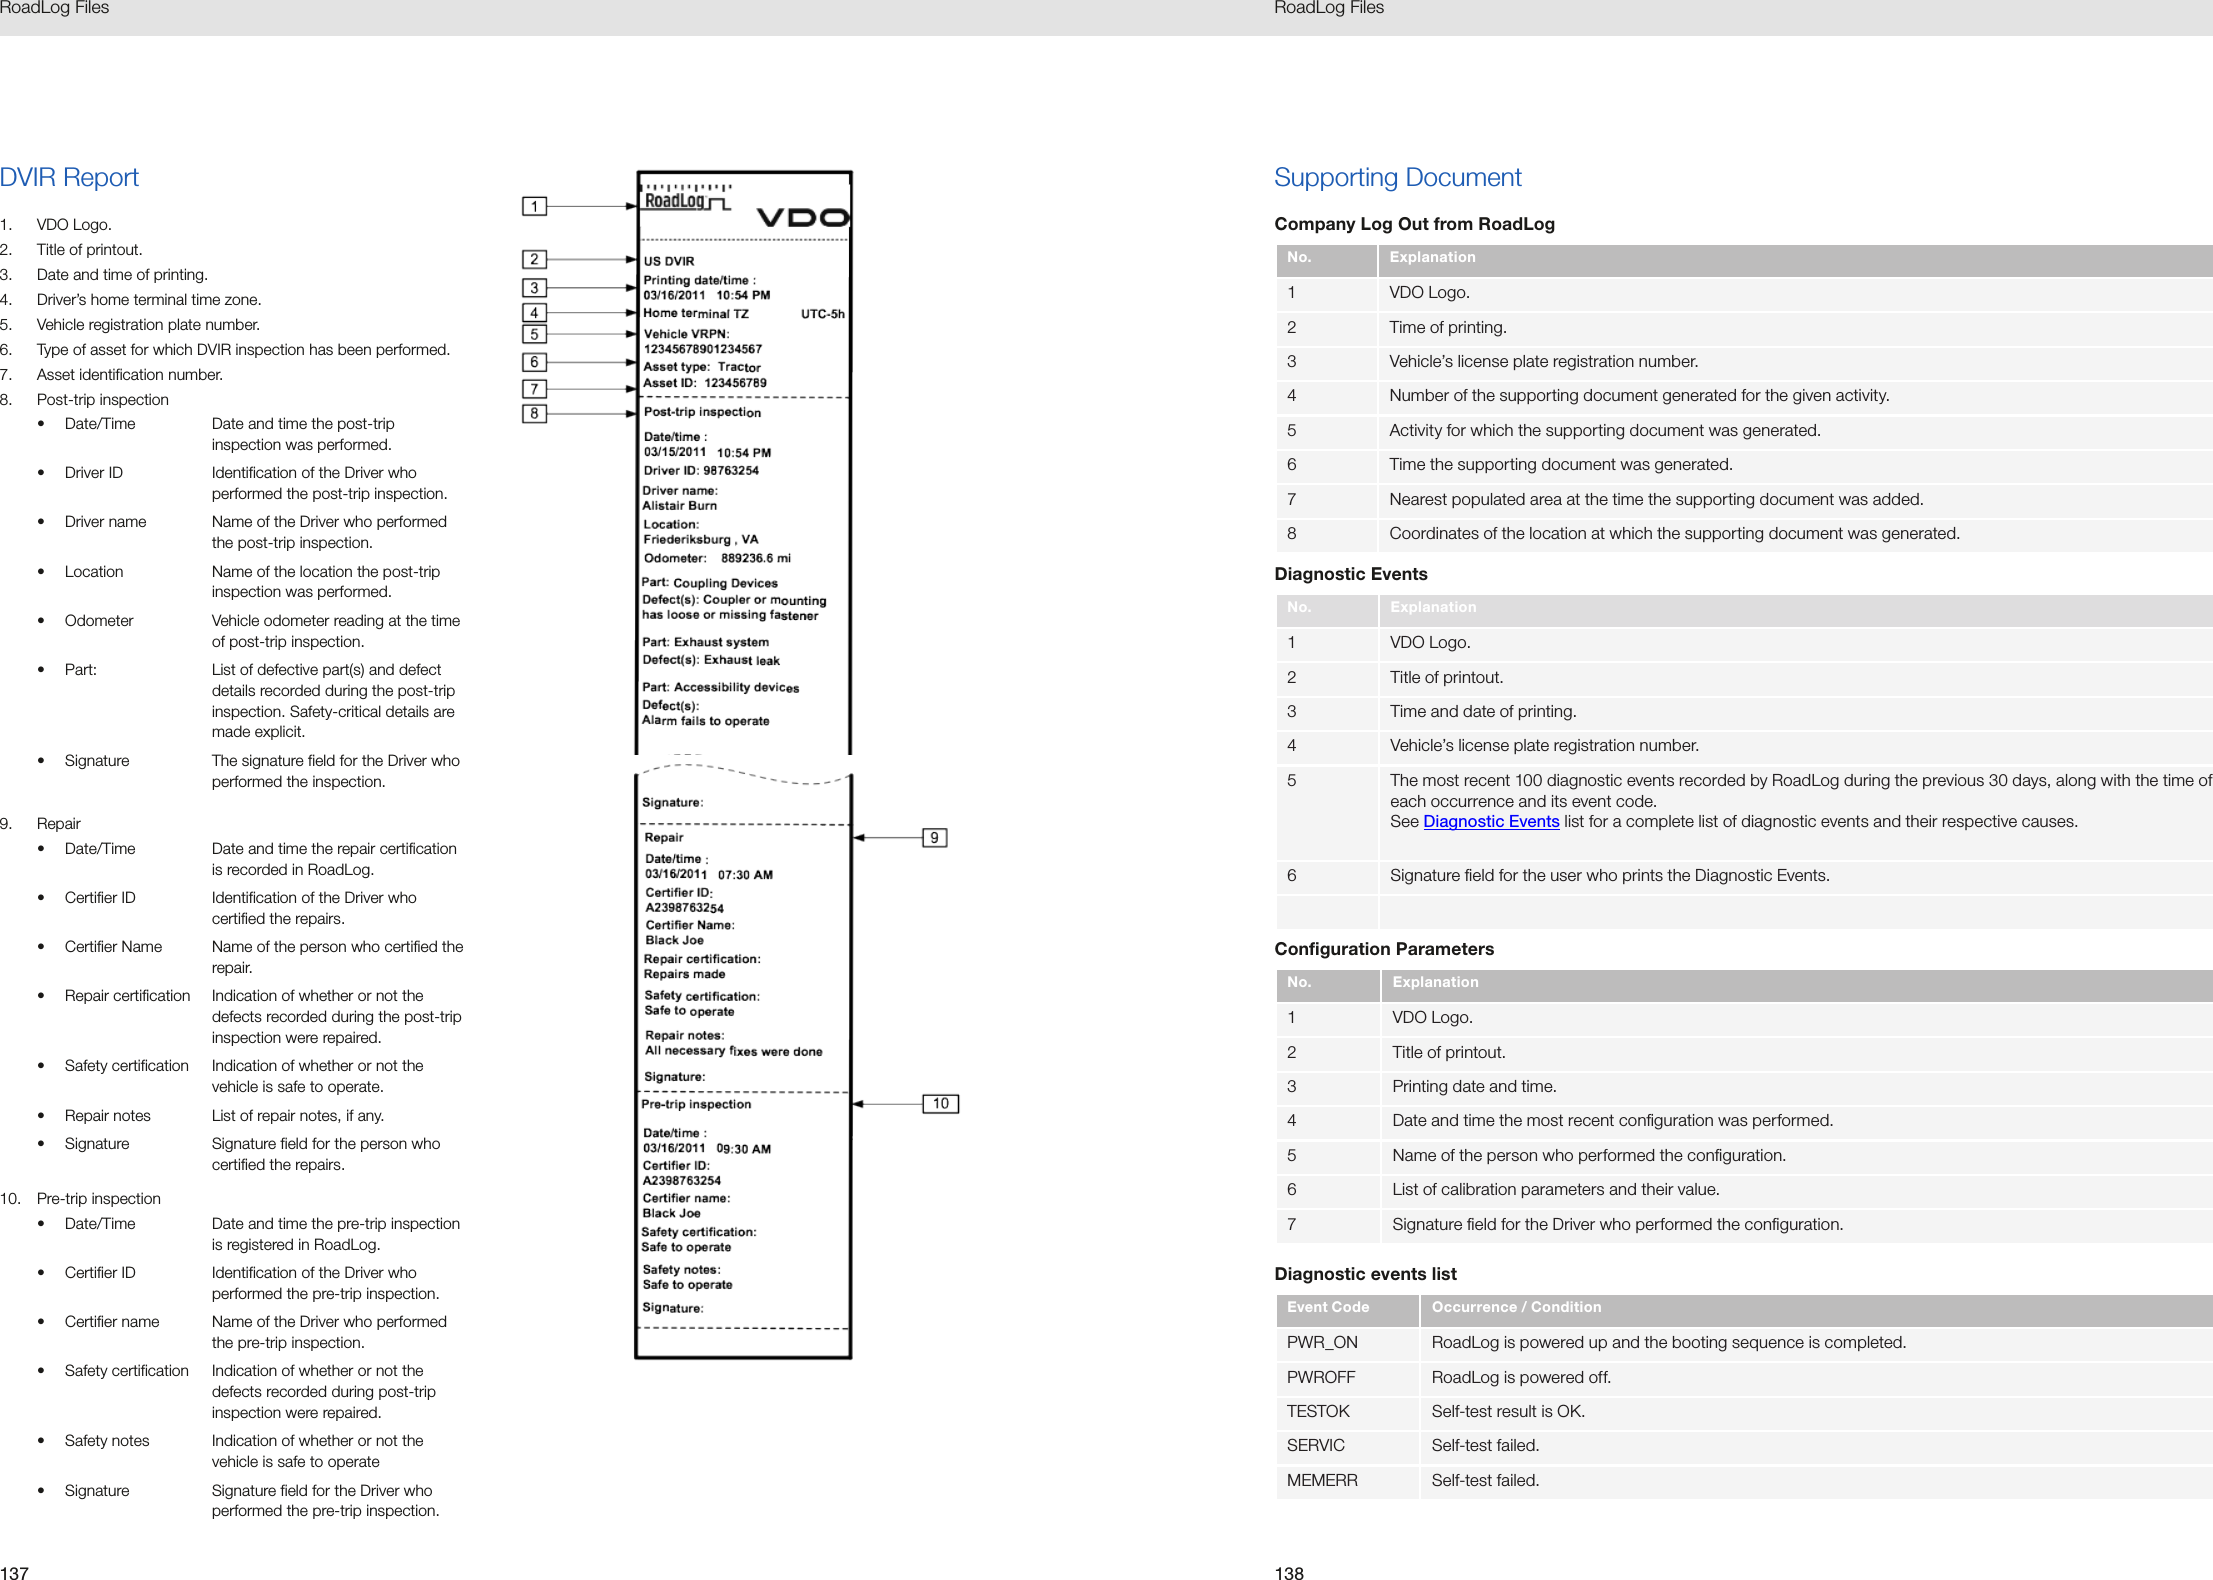
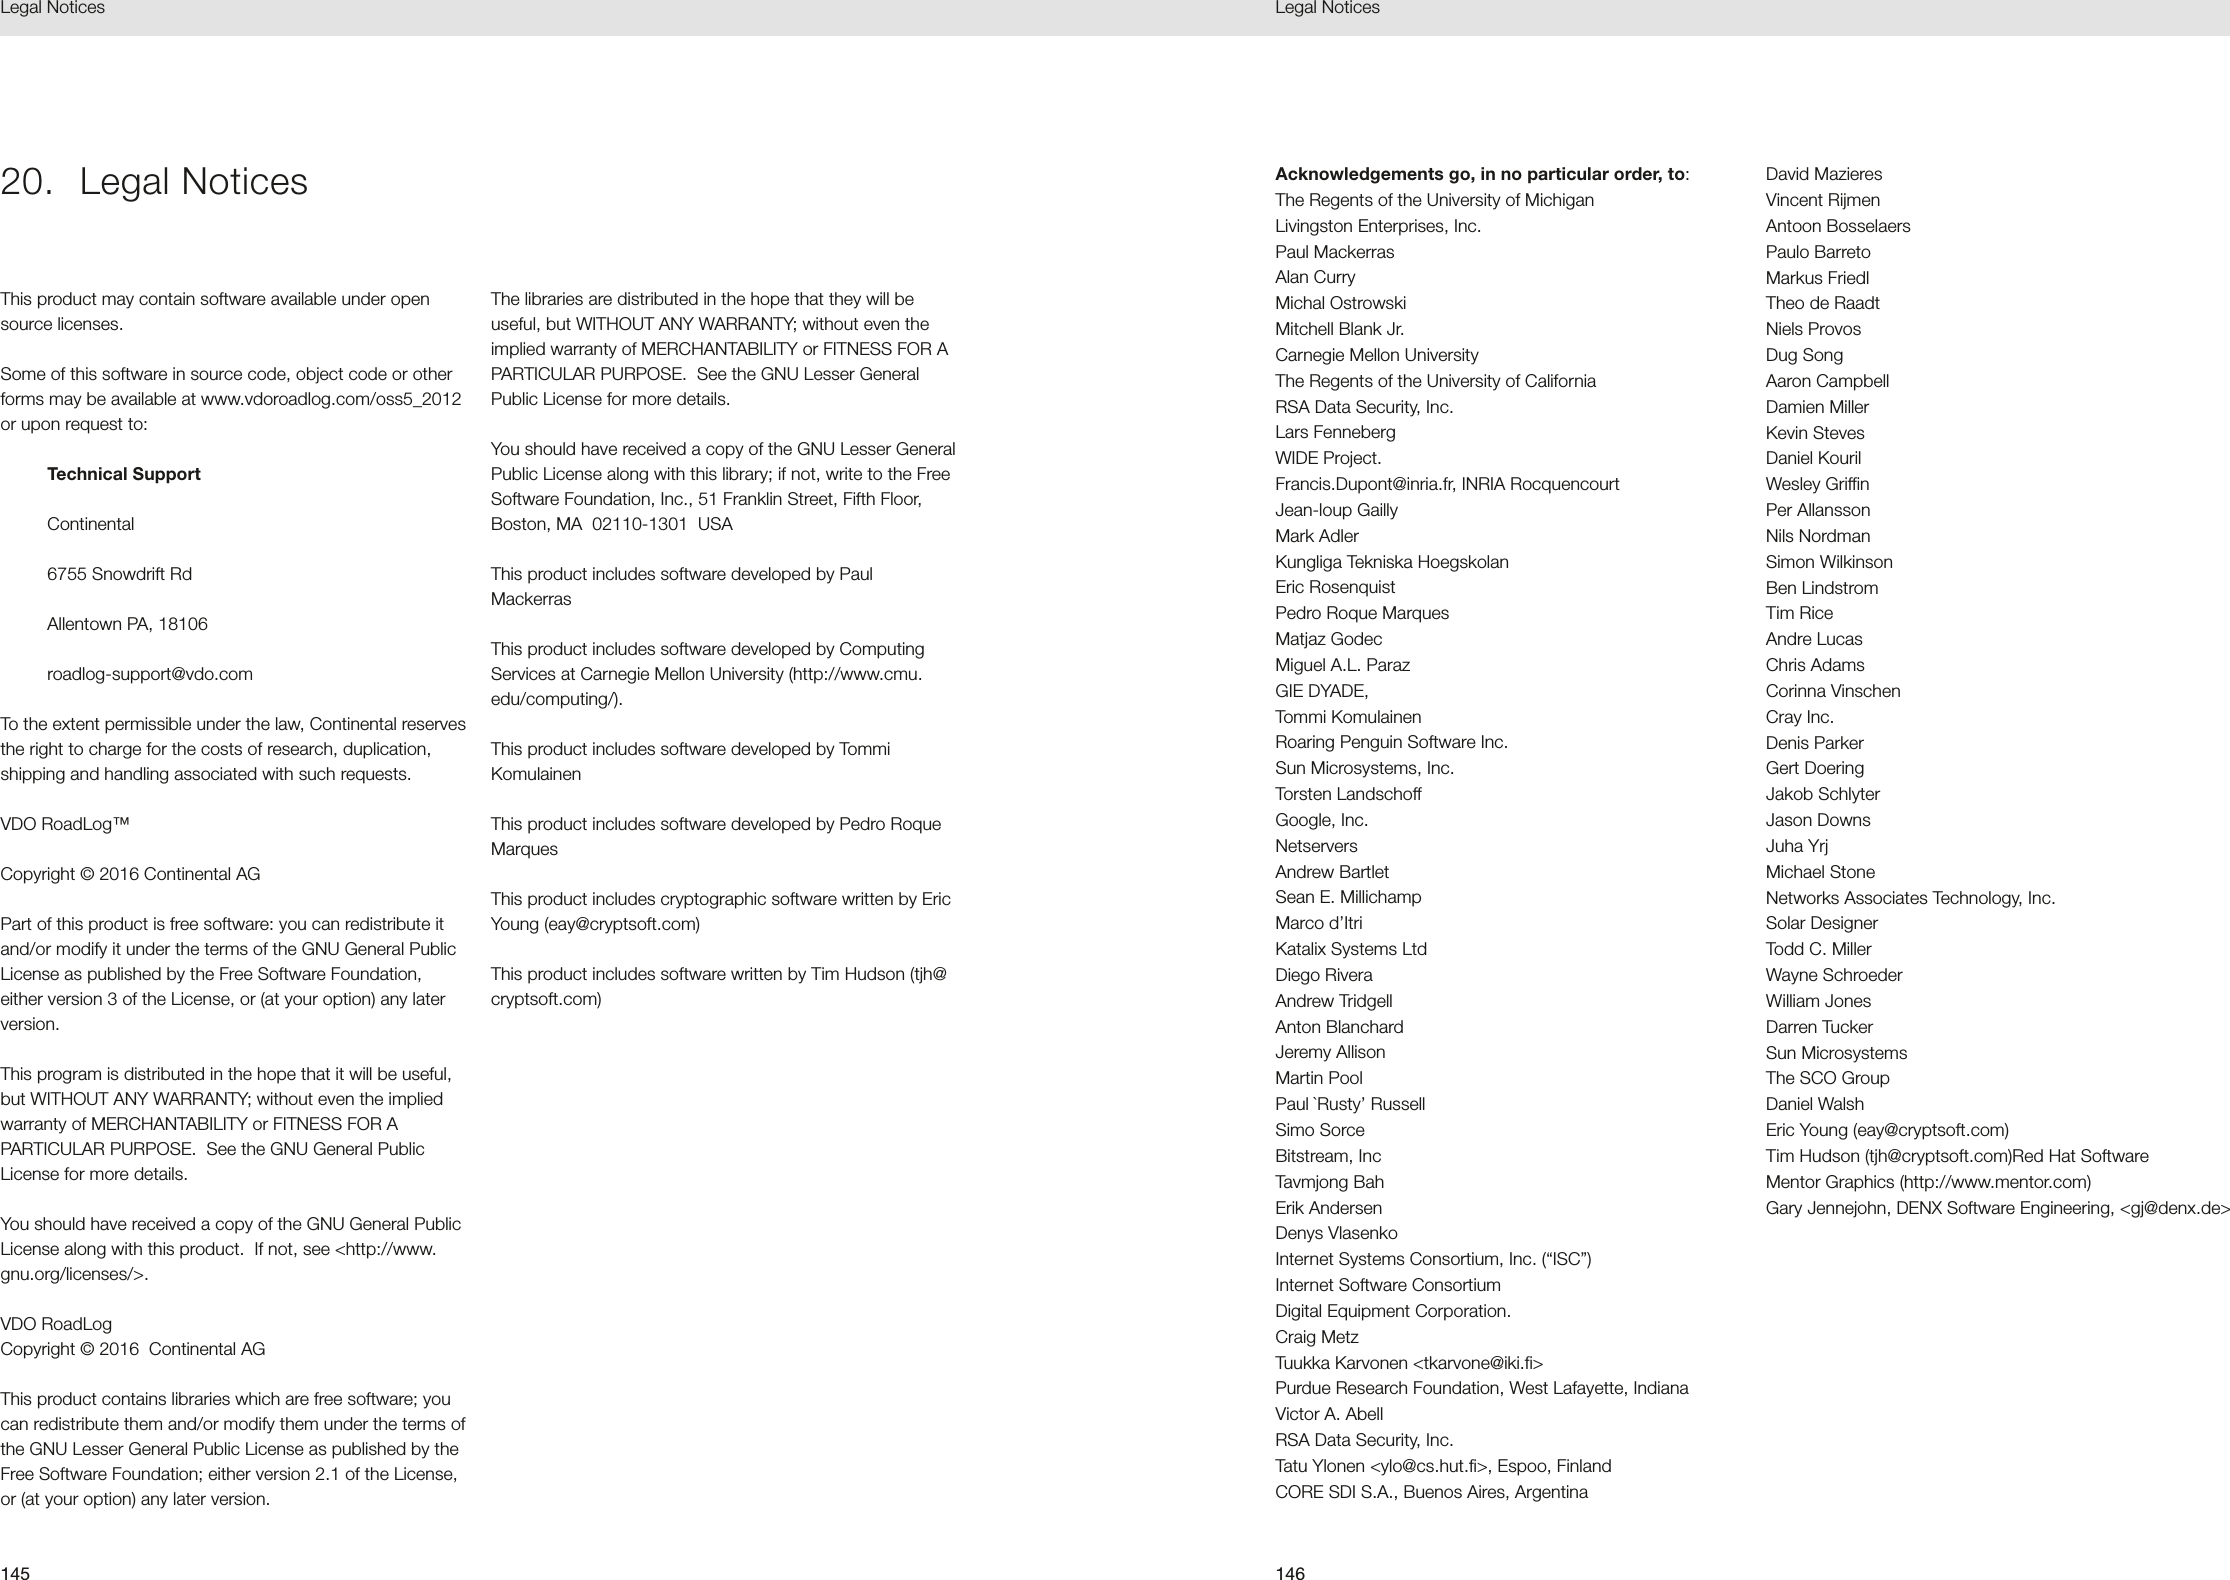
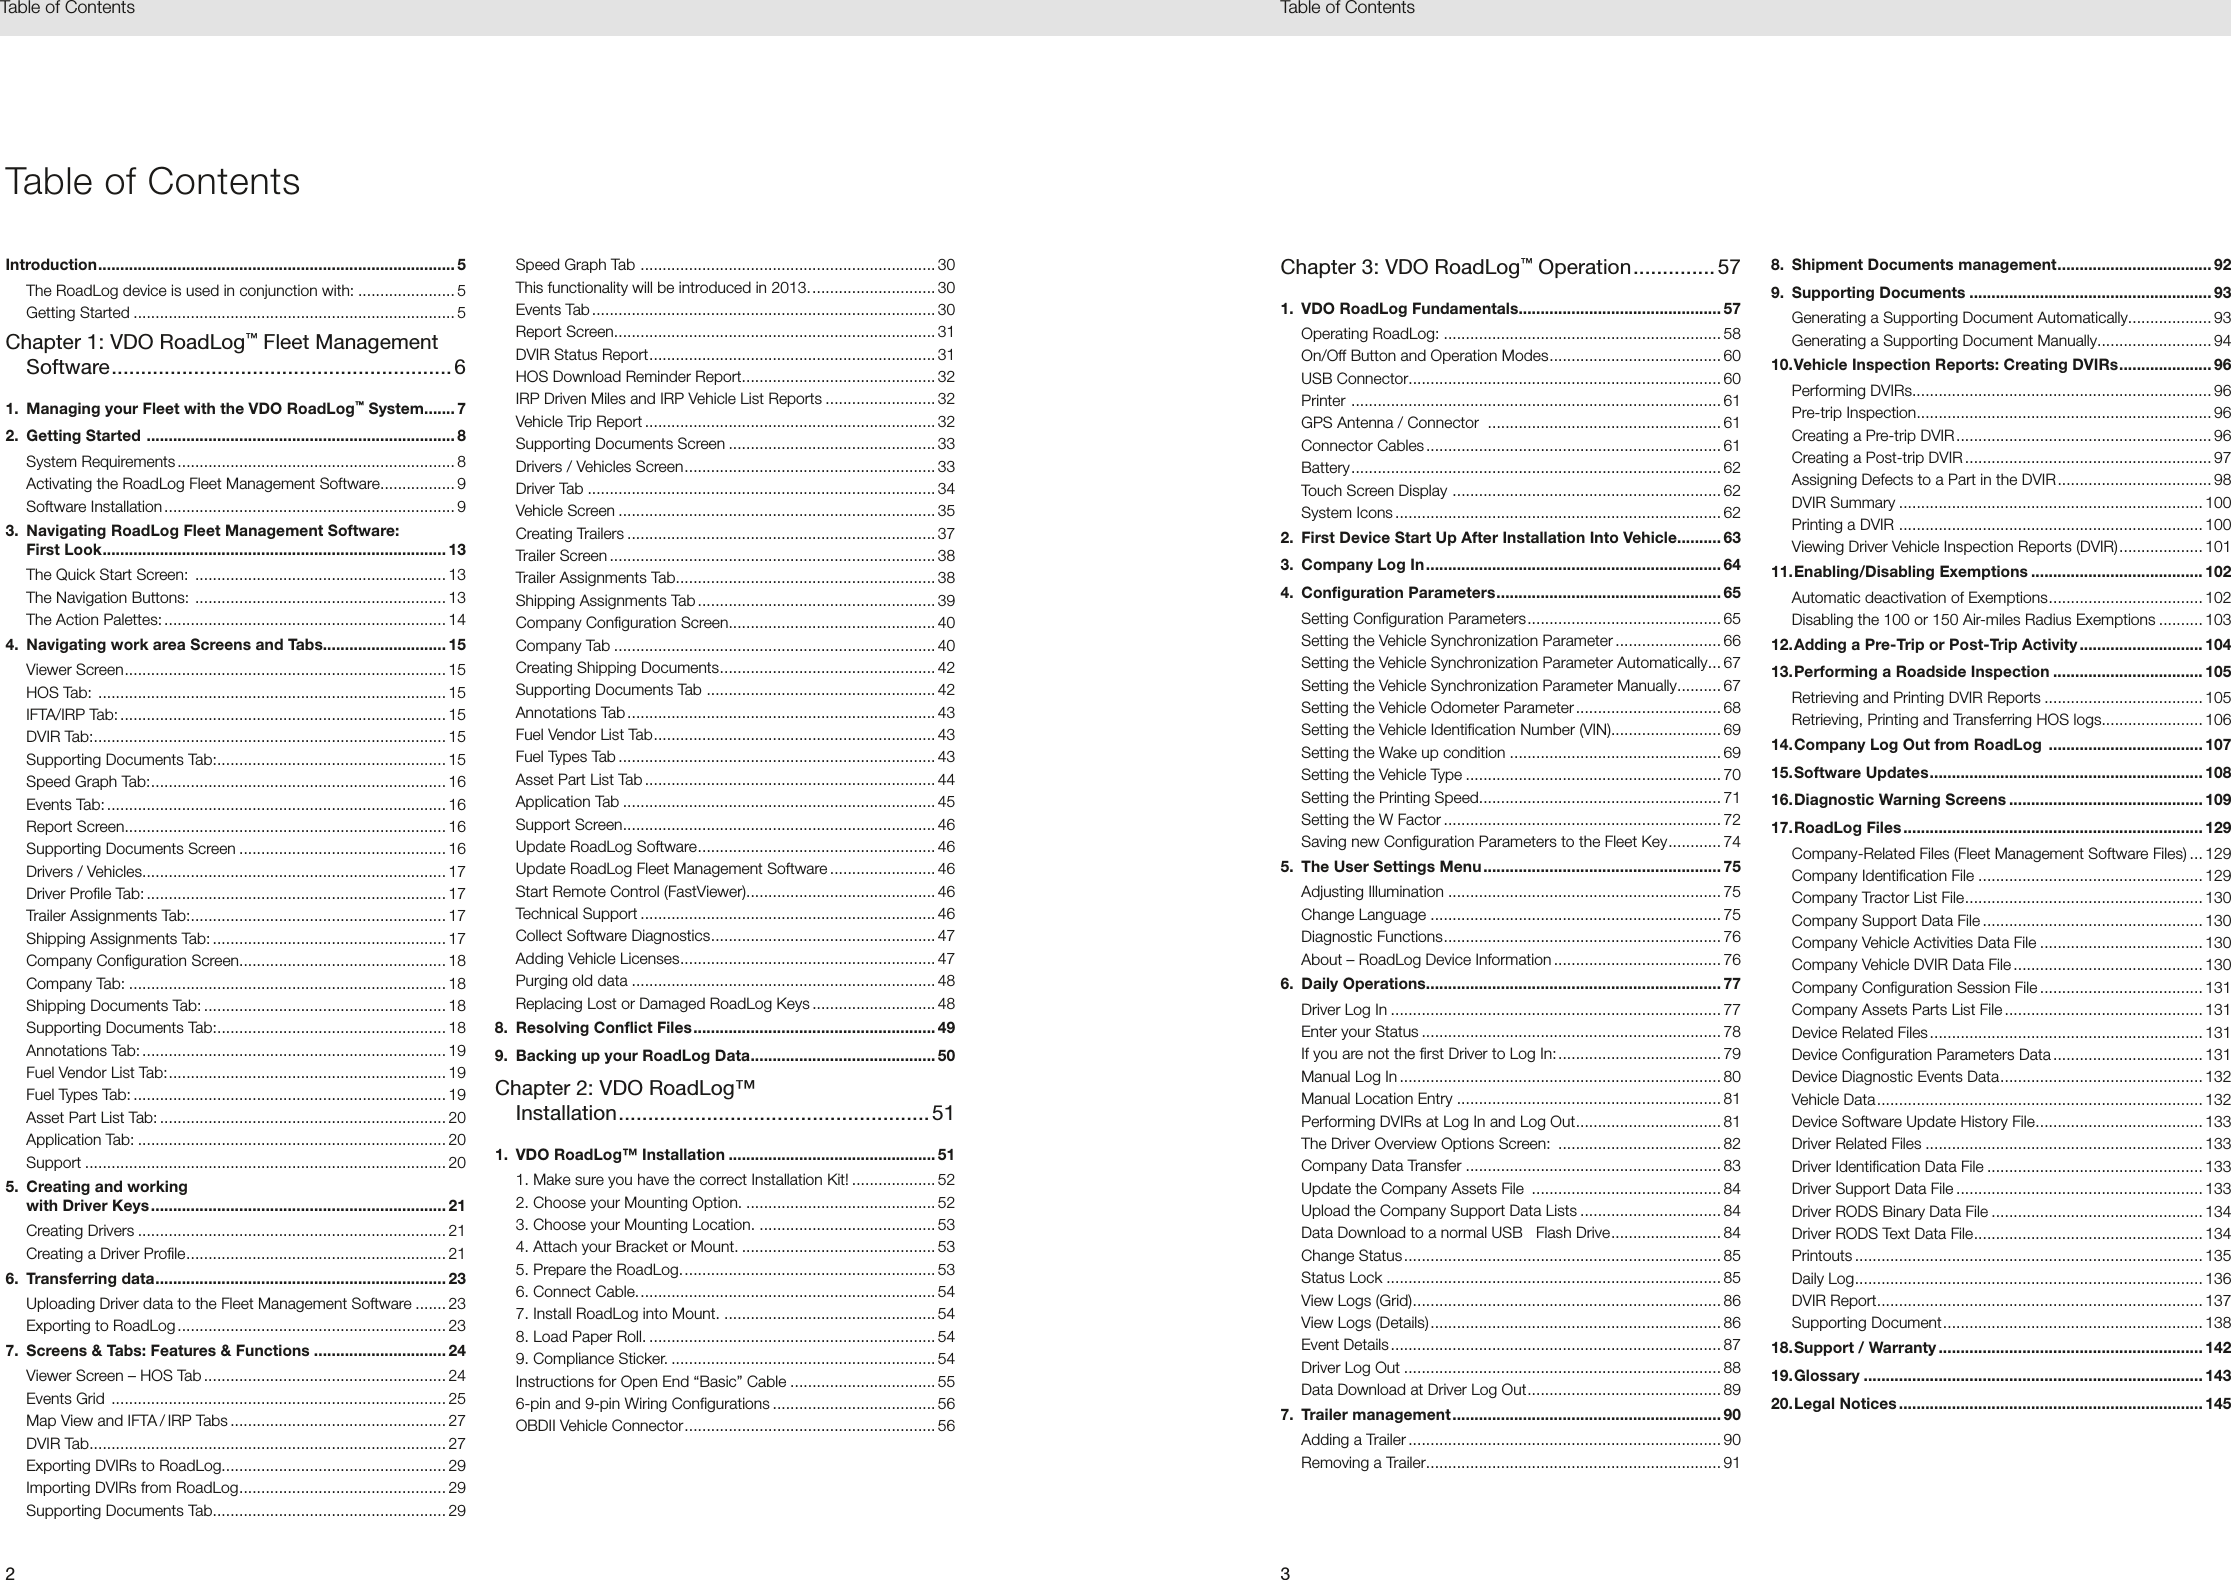
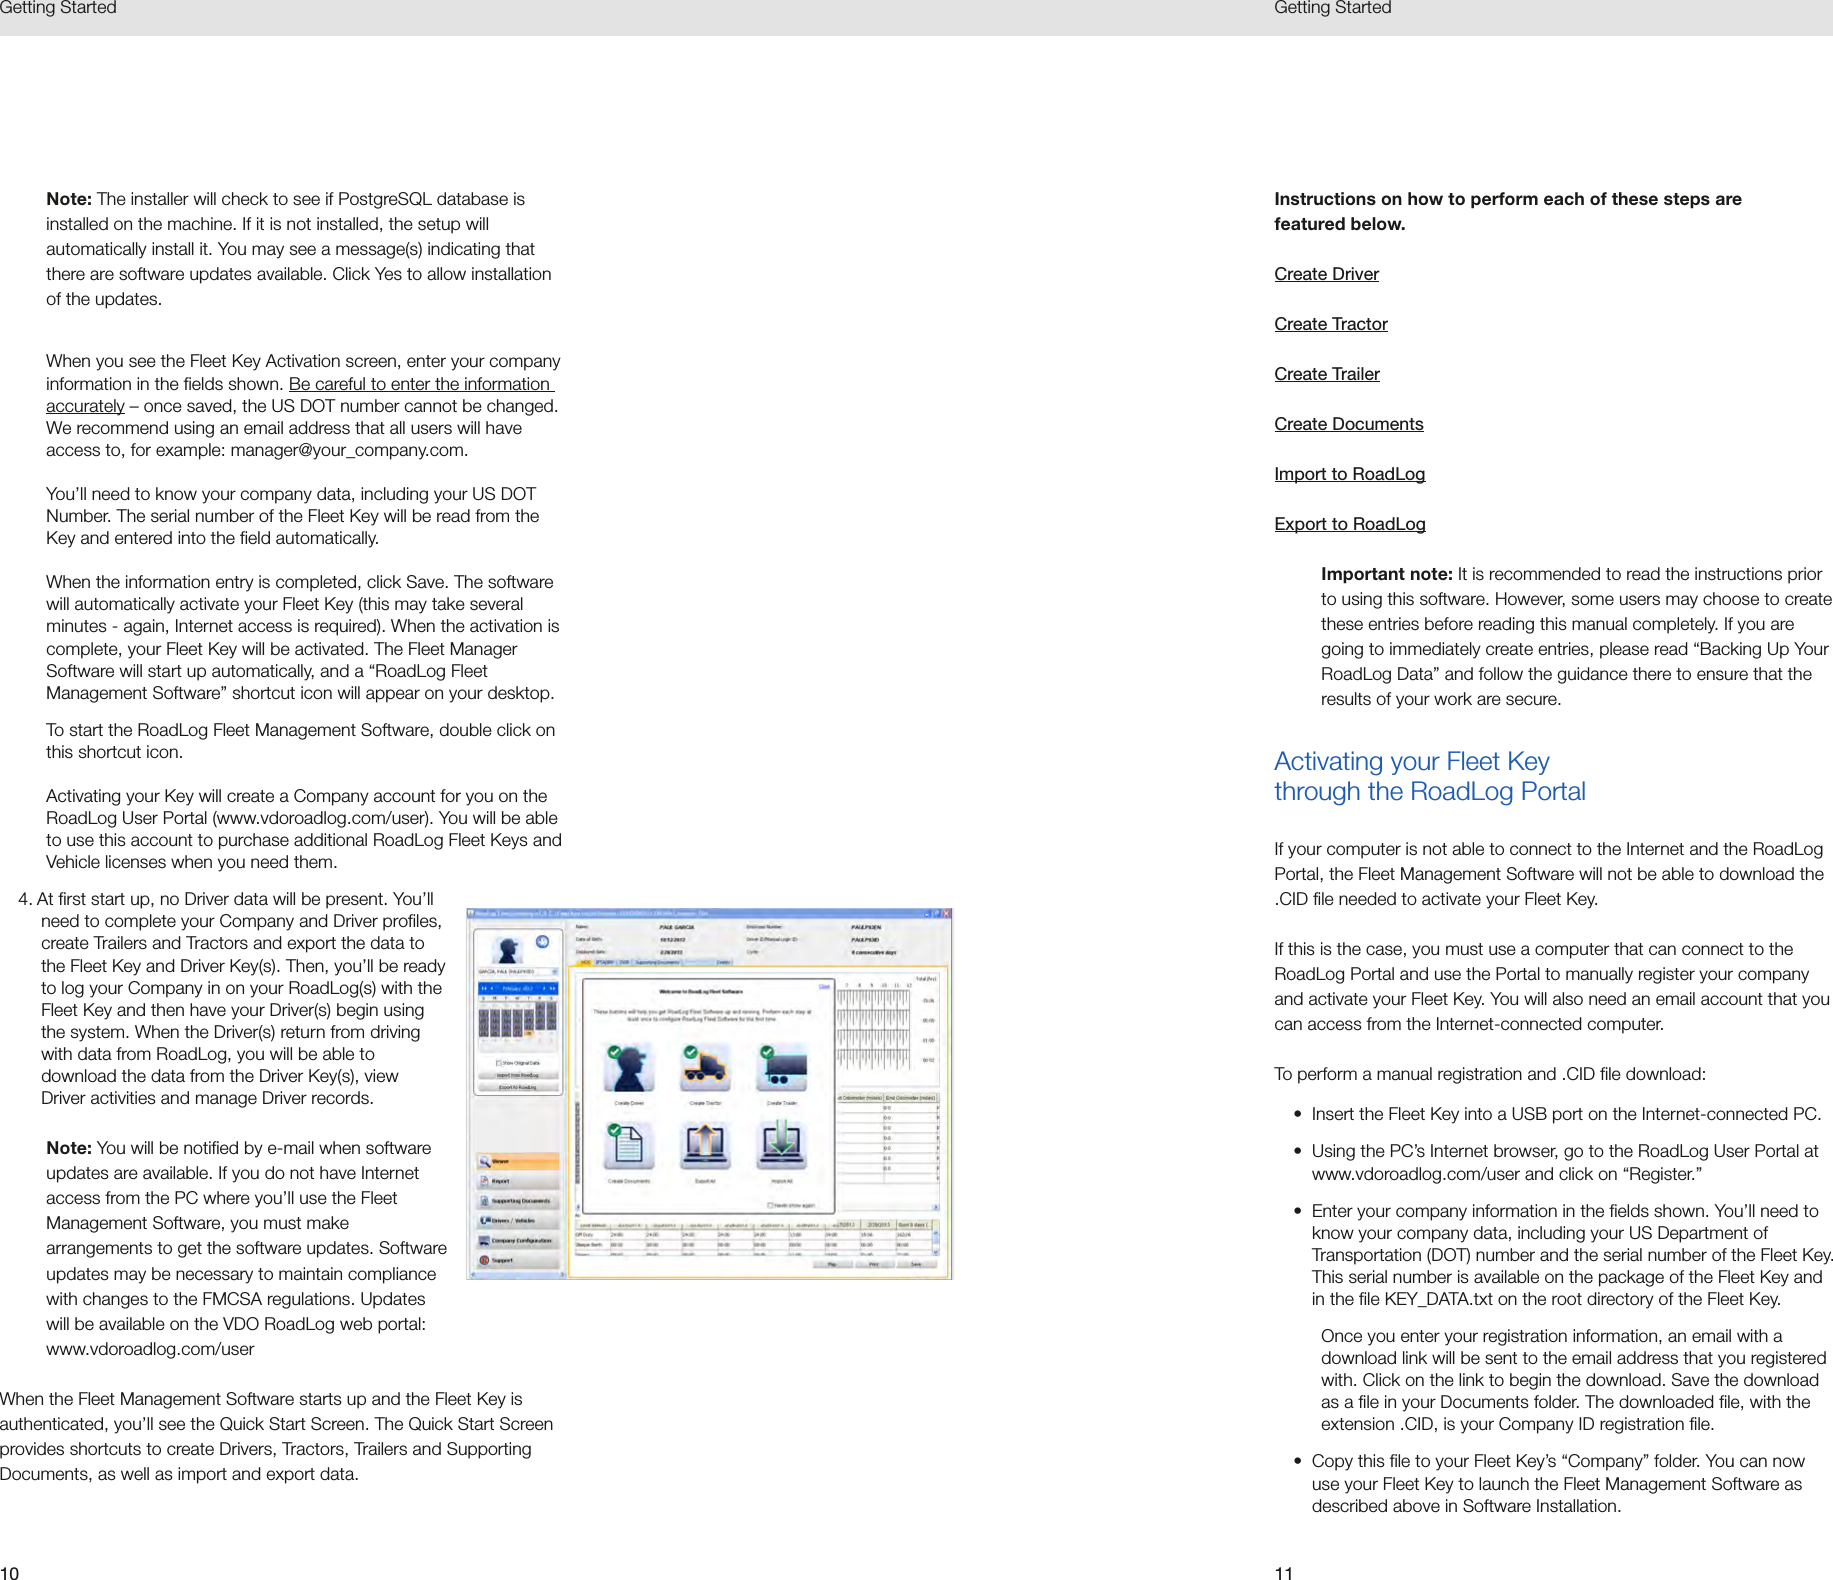
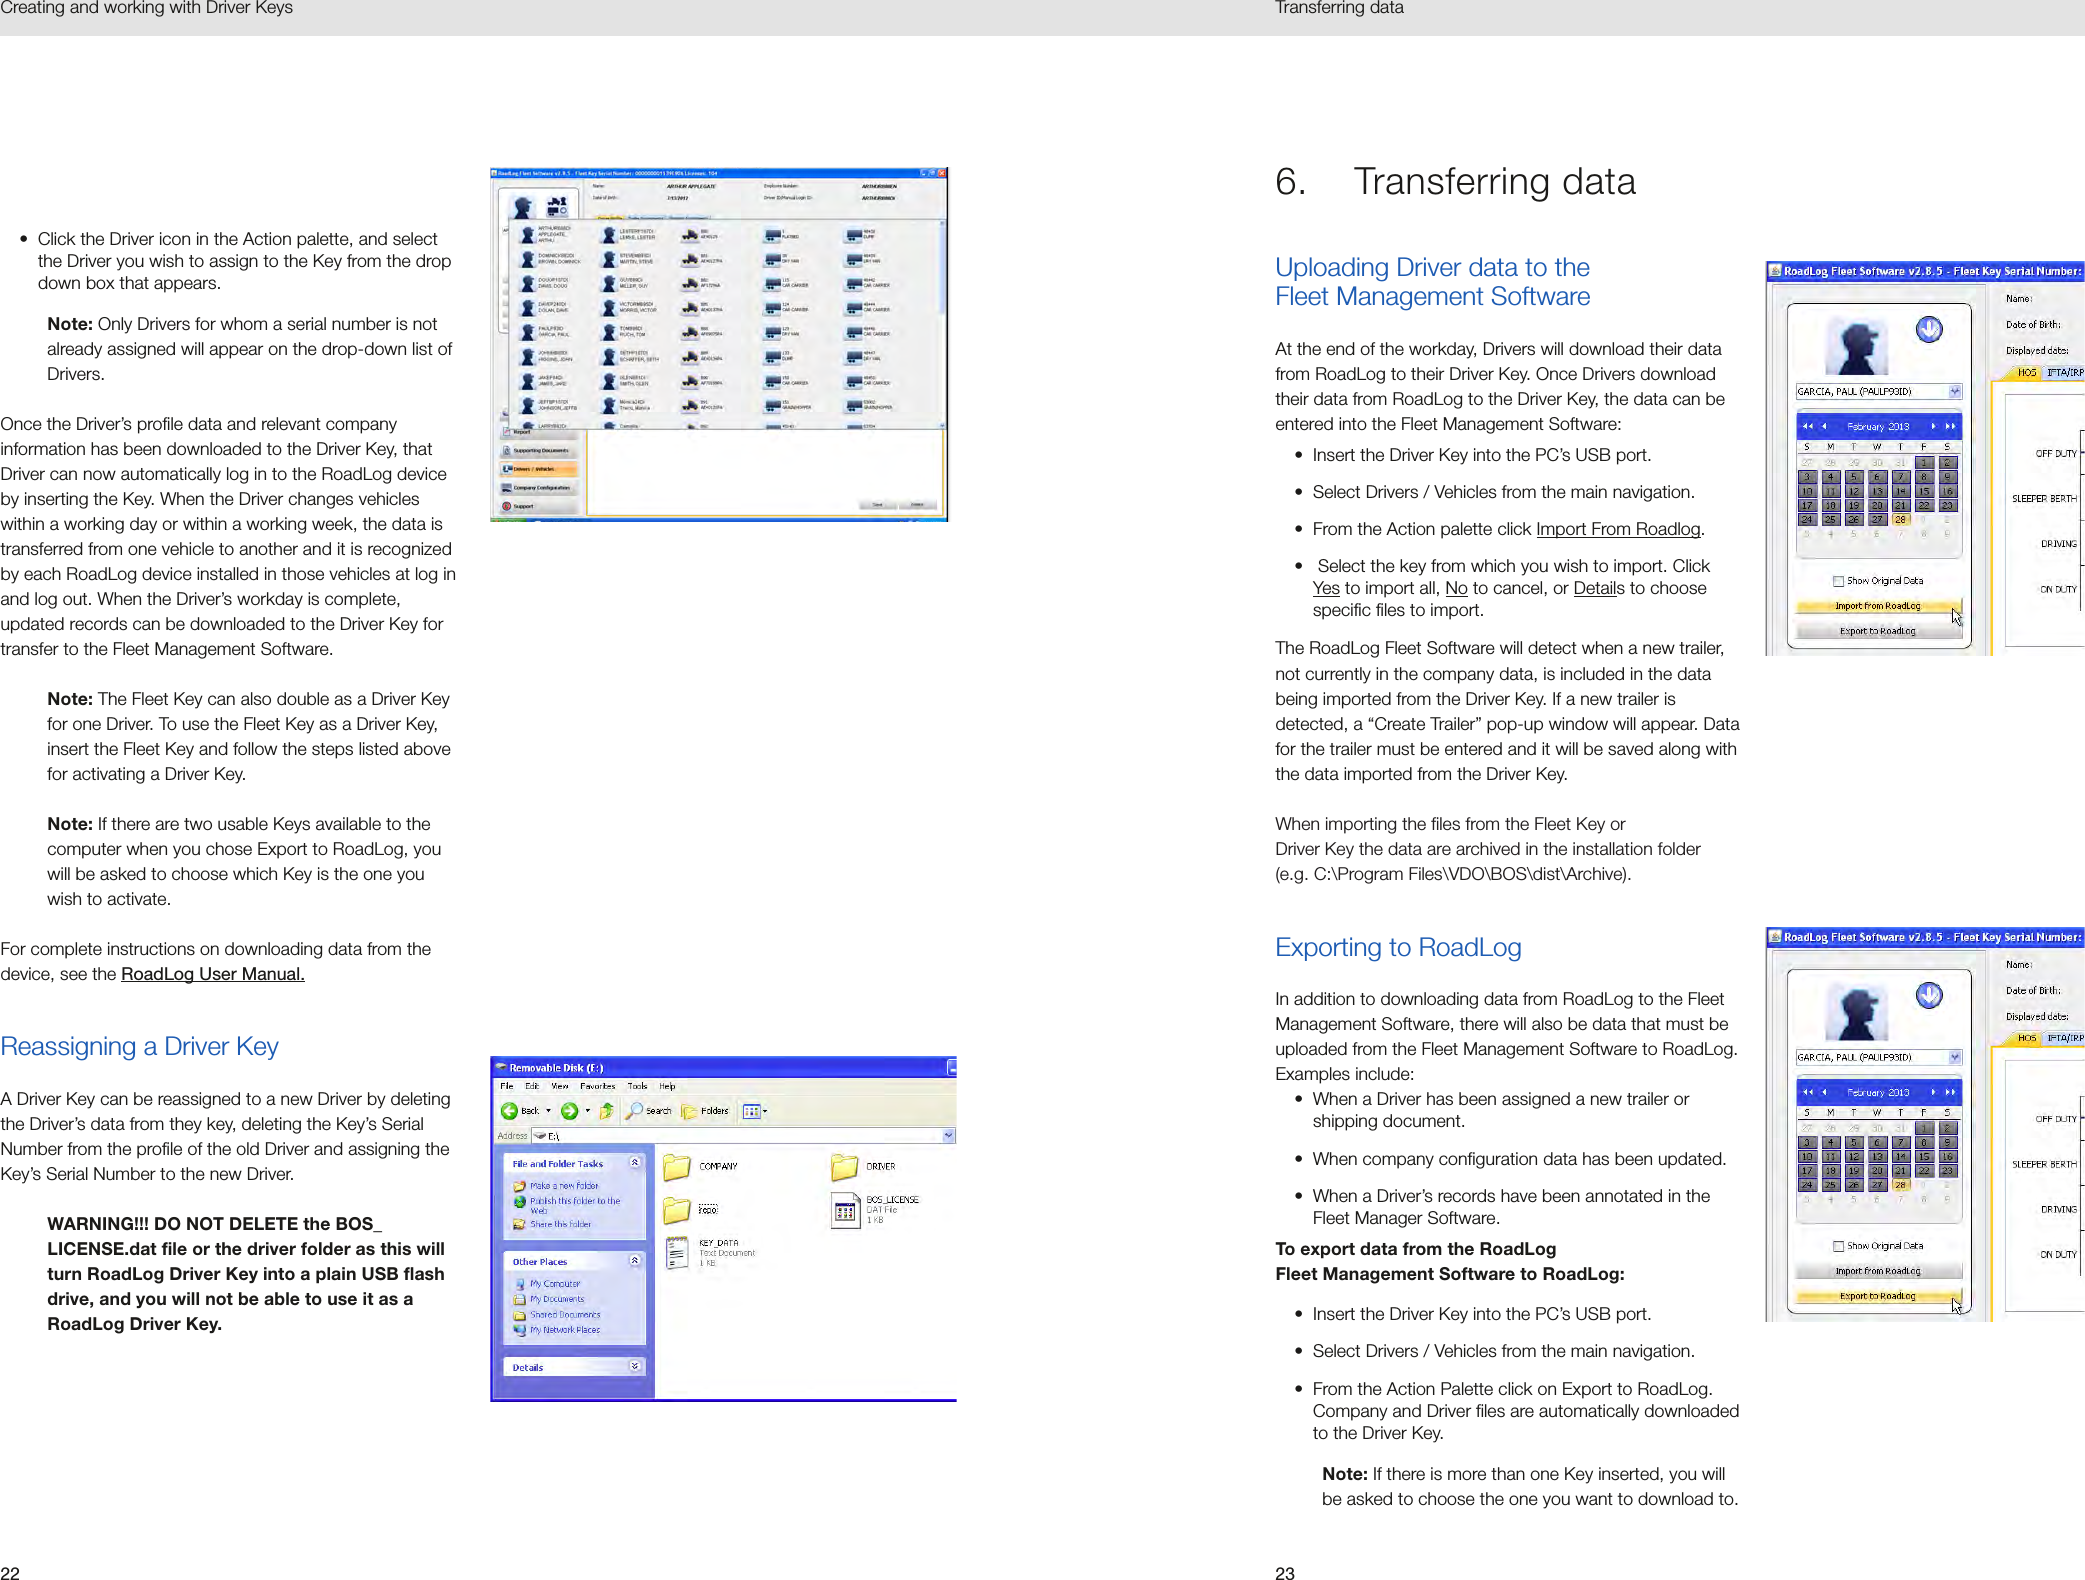
![3332Screens & Tabs: Features & Functions Screens & Tabs: Features & FunctionsHOS Download Reminder ReportThe HOS Download Reminder Report shows a list of Drivers and their IDs along with:• Last Downloaded Date• Next Download Due Date• Days until Next DownloadTo view the HOS Download Reminder Report, click on the Report button.• Select HOS Download Reminder Report from the drop-down menu.• Click on the Create Report button. The Fleet Management Software generates the report and shows an on-screen view. From the on-screen view you can print or save the report.IRP Driven Miles and IRP Vehicle List Reports[These features will be implemented in a free upcoming release]Vehicle Trip ReportThe Vehicle Trip Report shows the selected vehicle’s trip data, including state traveled, route used, odometer reading at border crossing(s), distance driven in each state, date of the trip/segment, fuel type used, gallons refueled and fuel price per gallon.• To view the Vehicle Trip Report, click on the Report button.• Select Vehicle Trip Report from the drop-down menu.• Select the vehicle you wish to view from the drop-down menu.• Select a start date and end date from the interactive calendar.• Click in the date field to display the interactive calendar.• Use the double arrows to select the year.• Use the single arrows to select the month.• On the interactive calendar, select your desired date.Note: The Today button provides a shortcut to enter today’s date.• Click on the Create Report button. The Fleet Management Software generates the report and shows an on-screen view. From the on-screen view you can print or save the report.Supporting Documents ScreenThe work area shows a table of Supporting Documents by entry date and time. The range of entry dates shown is selected with the interactive calendar in the action palette. This Supporting Document Screen also displays the company’s Fleet Key information across the top of the work area.The table shows the Entry date / time, Vehicle License Plate Number, Driver, Supporting Document number, Supporting Document (linked scan file), a Browse button to locate and open scanned document files, a document Description and a checkbox indicating whether the document has been processed.• To add a scanned file to a Supporting Document record, click the Browse button to find and select the file.Note: File types accepted and the maximum file size that can be used as a link is set in the Company Configuration / Application tab.Drivers / Vehicles ScreenThe Drivers / Vehicles screen shows the Driver Profile tab as well as tabs for Trailer Assignments and Shipping Document Assignments. When the Drivers / Vehicles screen is chosen, the icon in the Action Palette allows you to view and make selections from the lists of existing Drivers, vehicles and trailers. When Drivers / Vehicles is seleted from the main naviagtion, the Action Palette will also allow you to:• Create new Driver.• Create new vehicle.• Create new trailer.• Import data from a RoadLog device via a Fleet or Driver Key.• Export data to a RoadLog device via a Fleet or Driver Key.](https://usermanual.wiki/Continental-Automotive-Systems/3290X/User-Guide-3041349-Page-17.png)