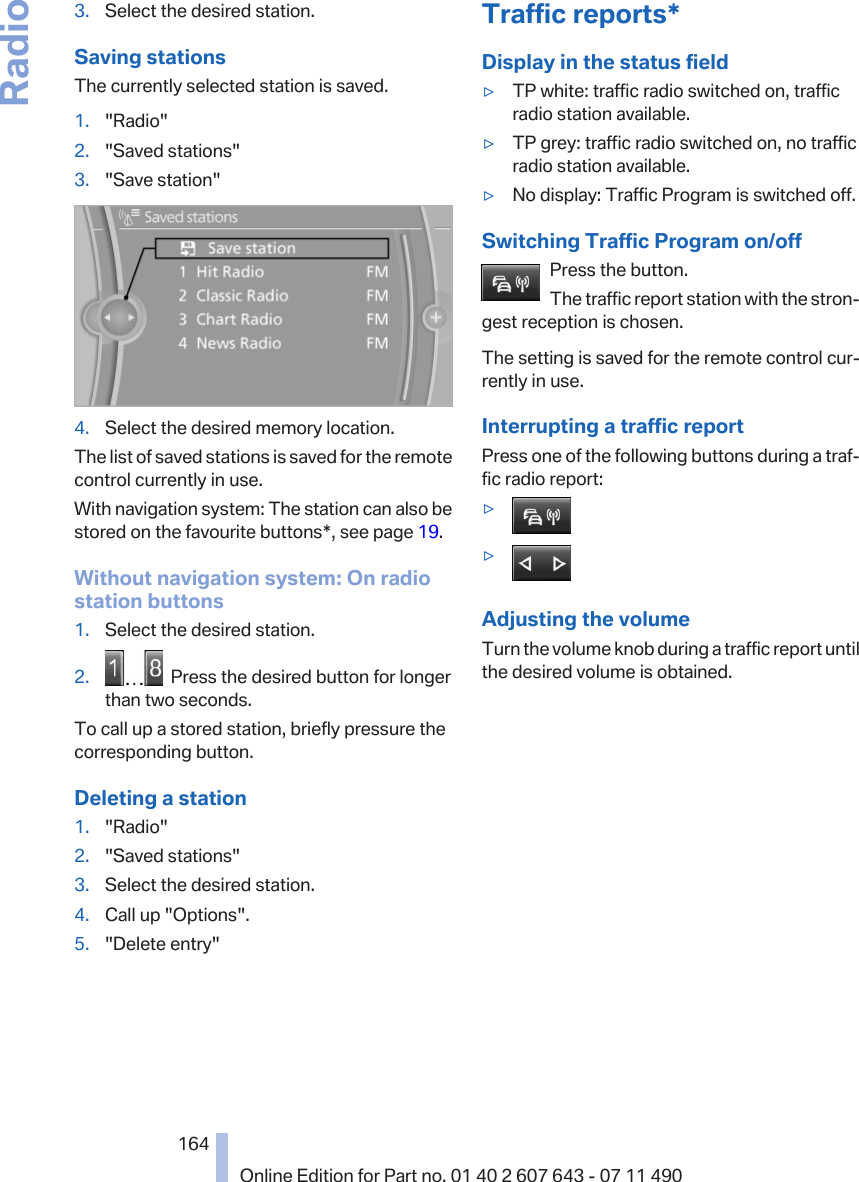
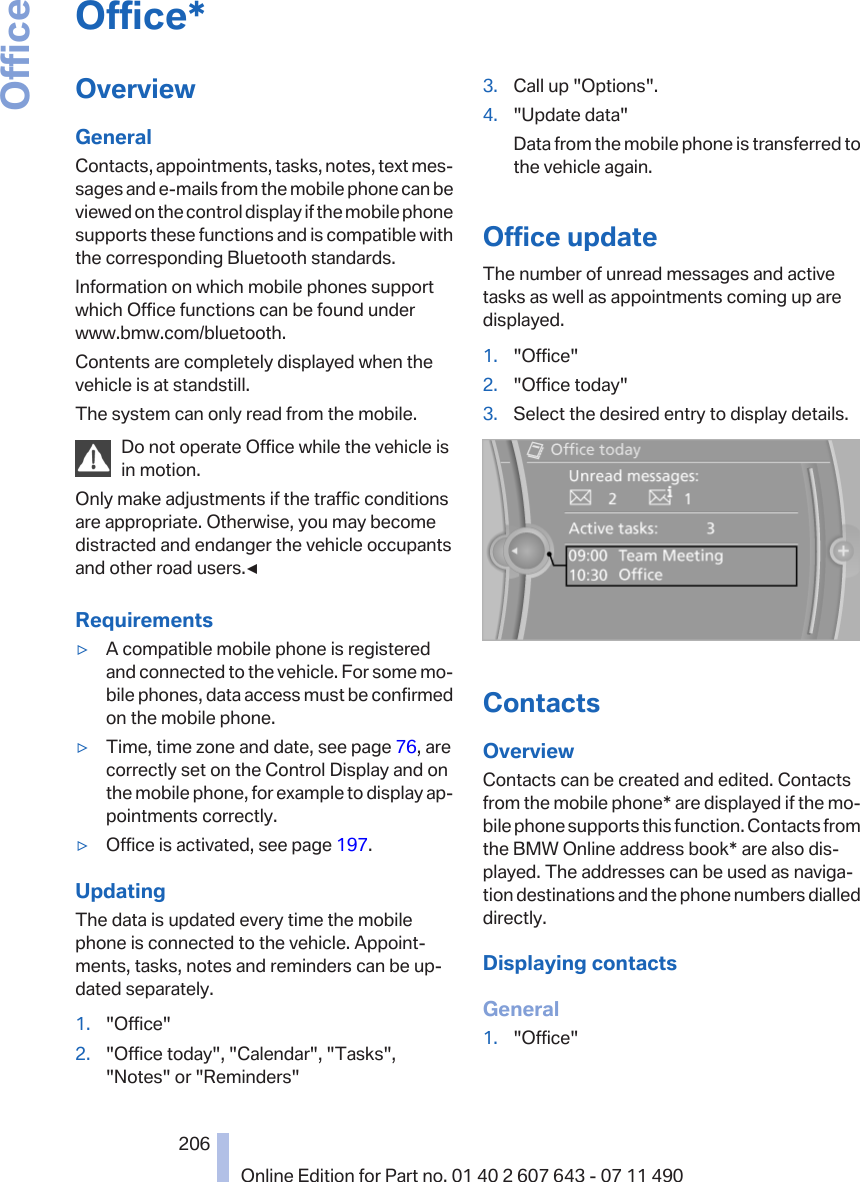
Continental Automotive L7ENTRY Card Radio with BT transceiver User Manual
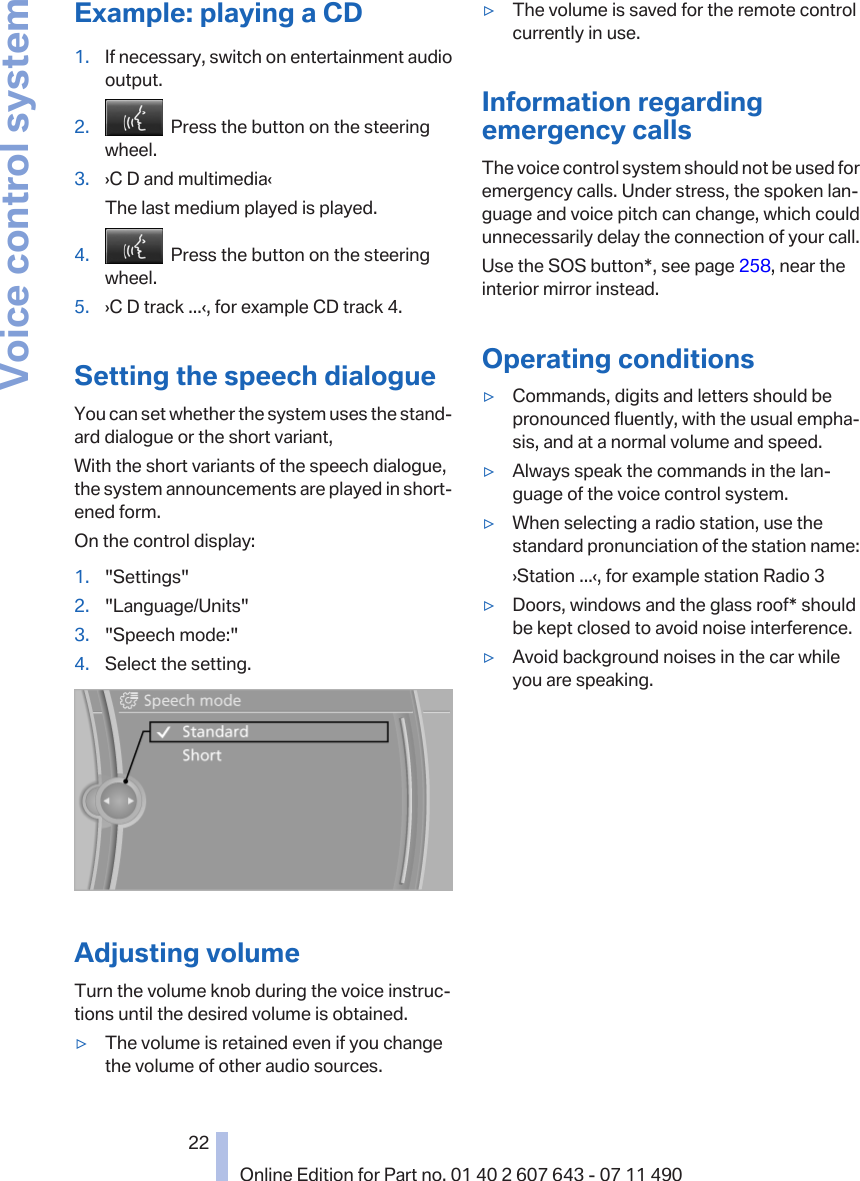
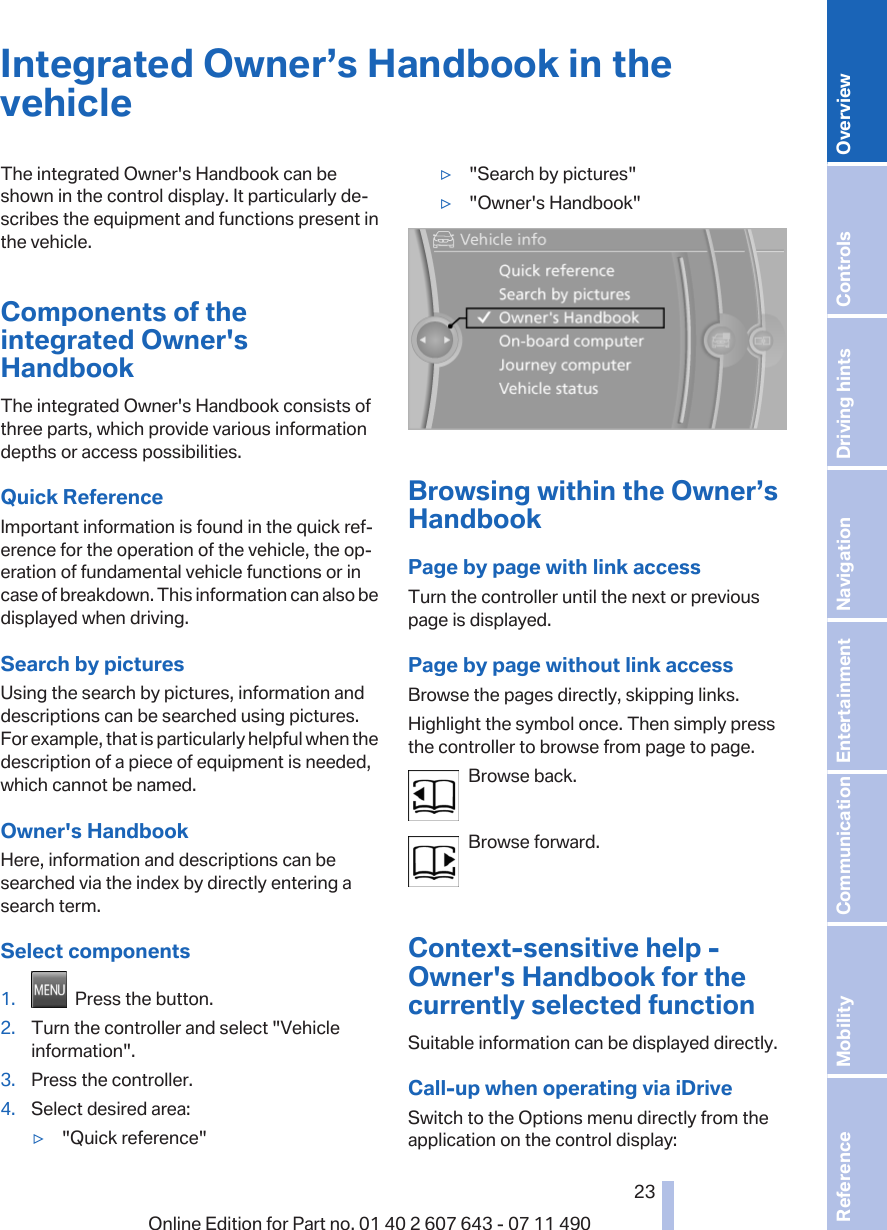
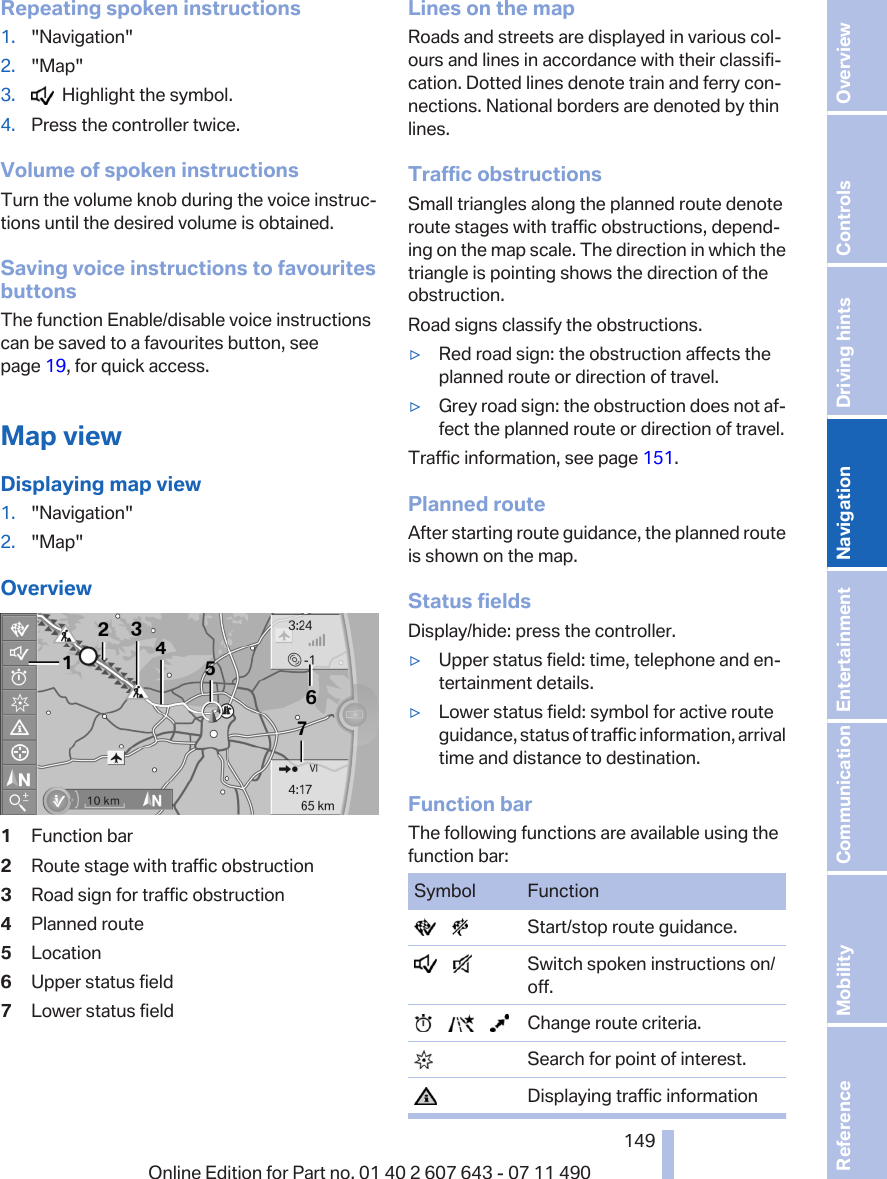
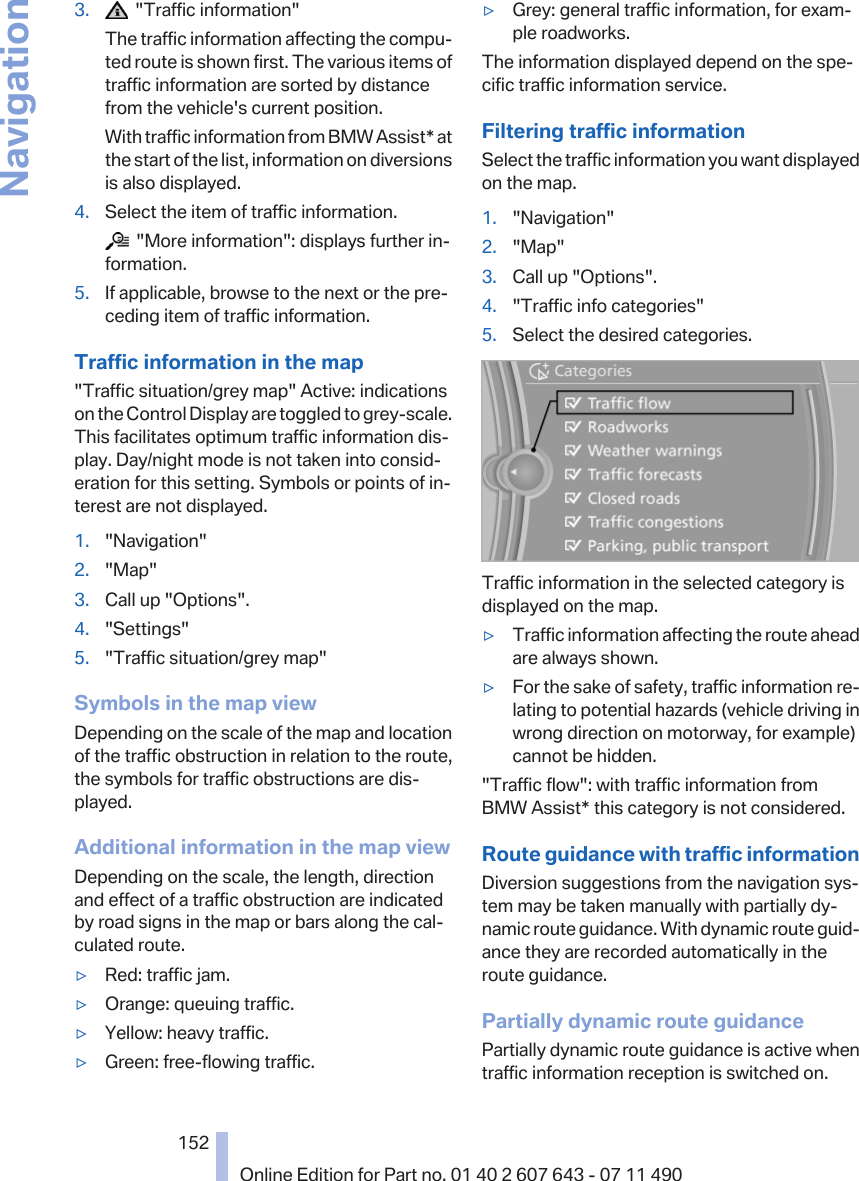
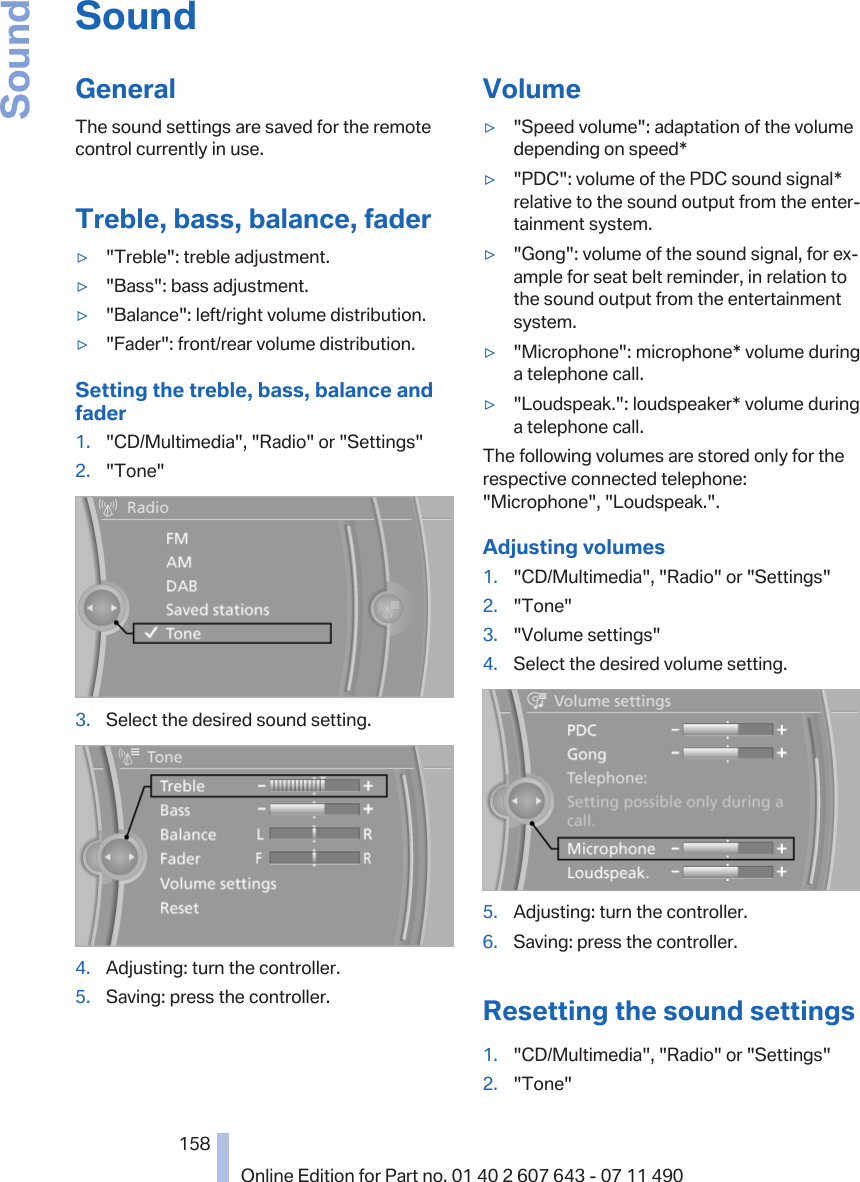
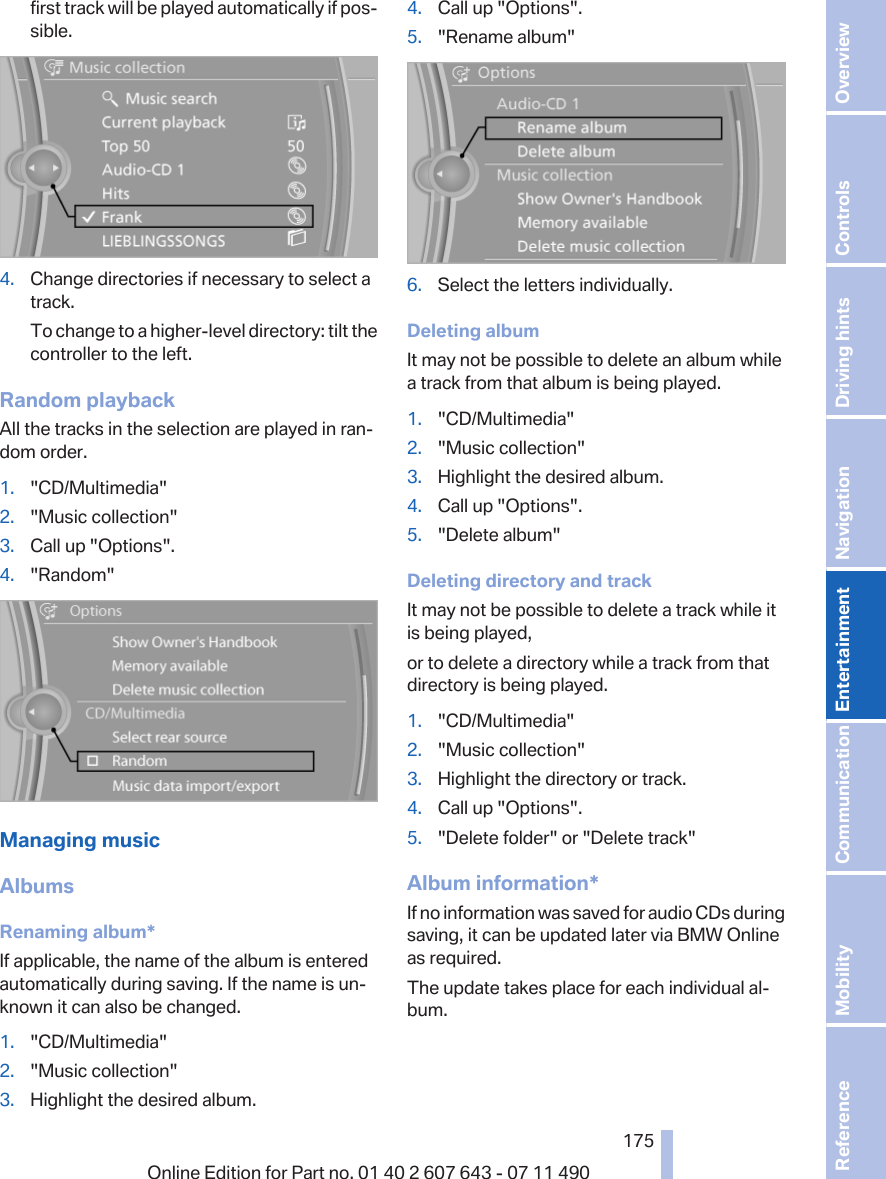
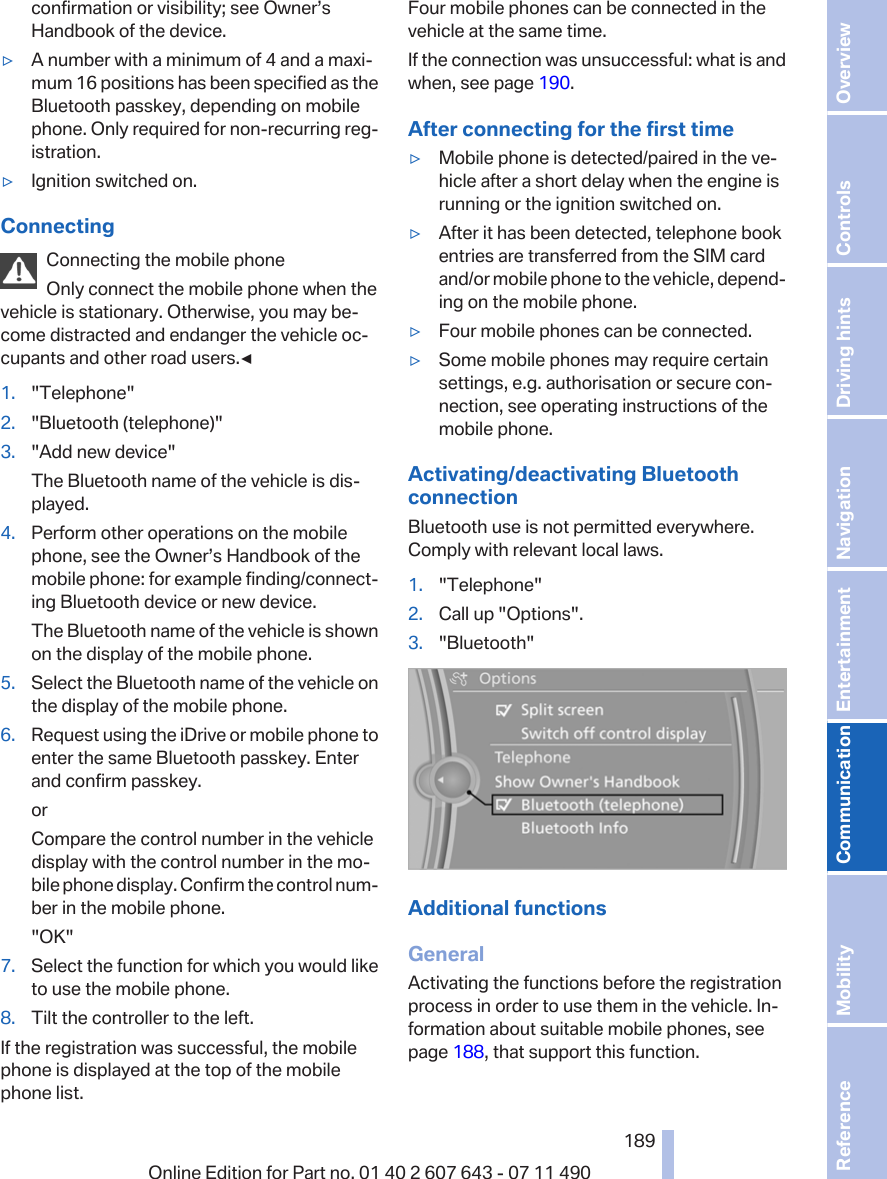
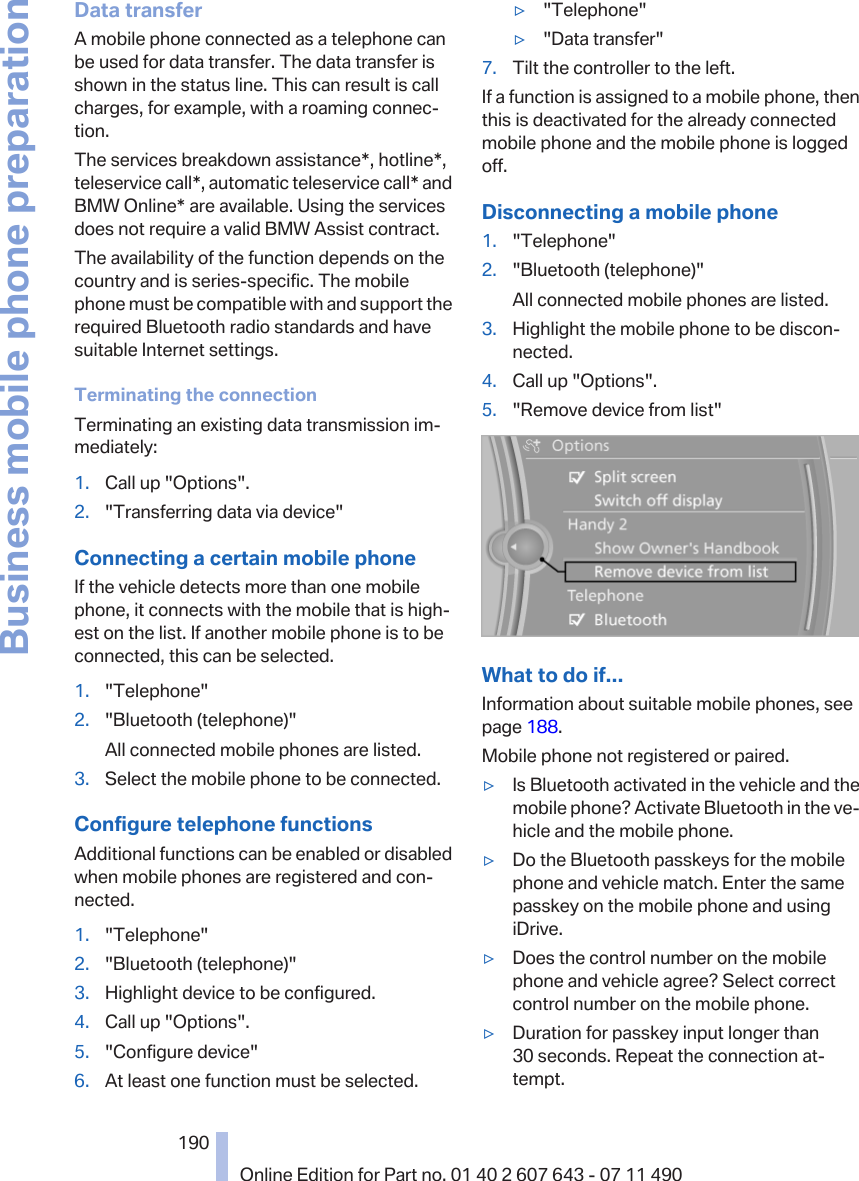
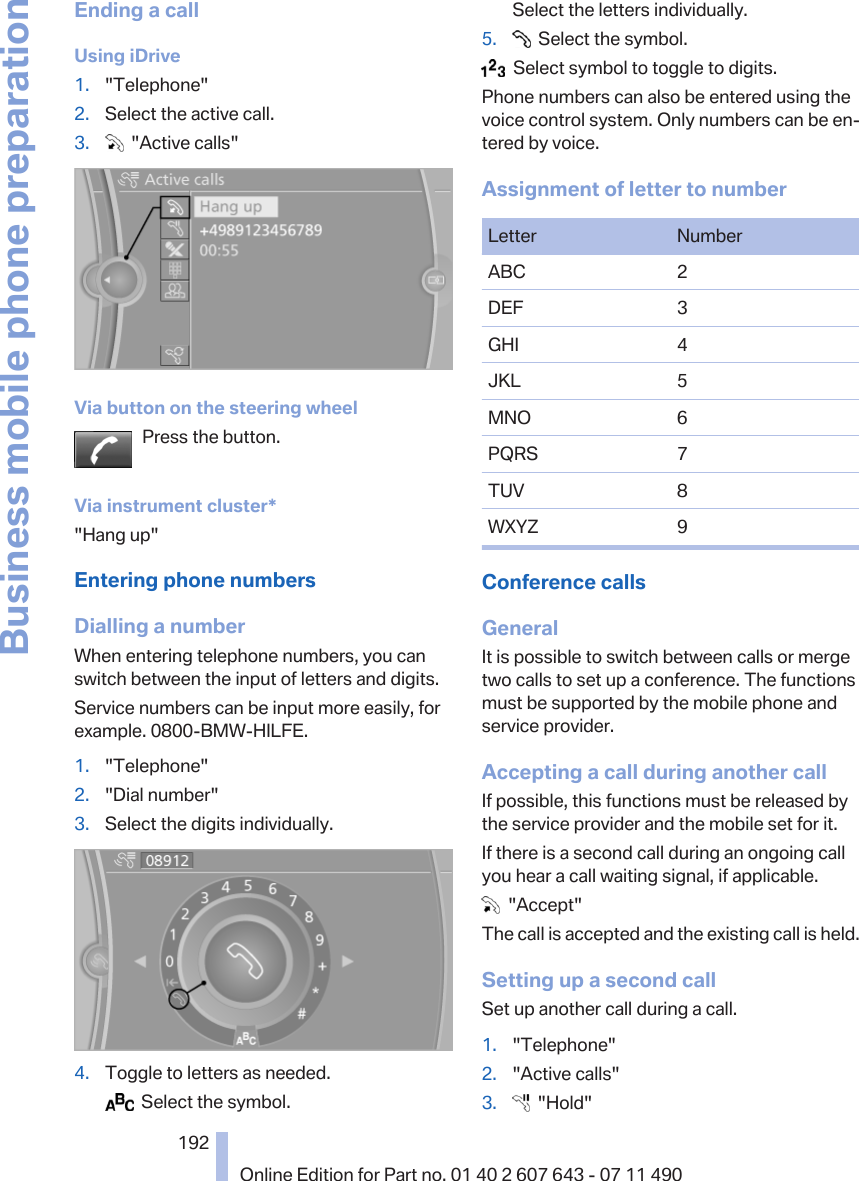
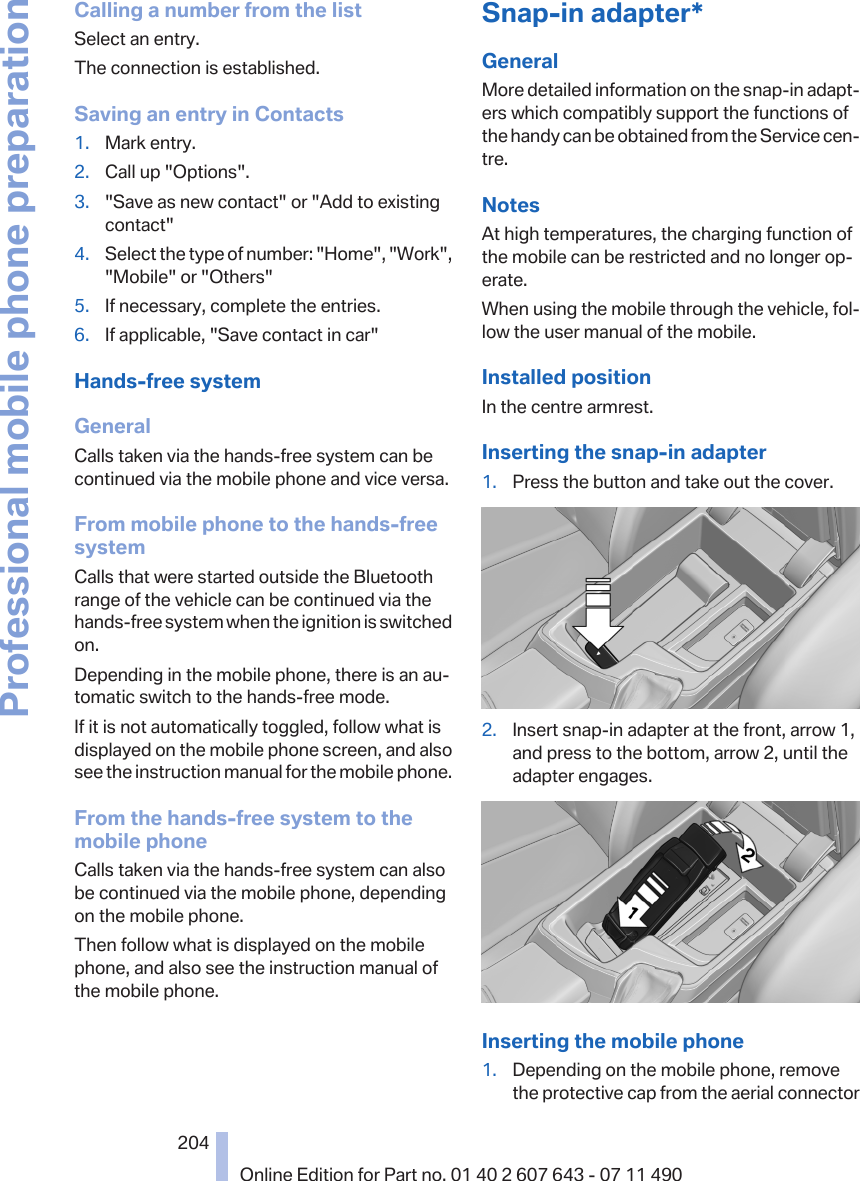
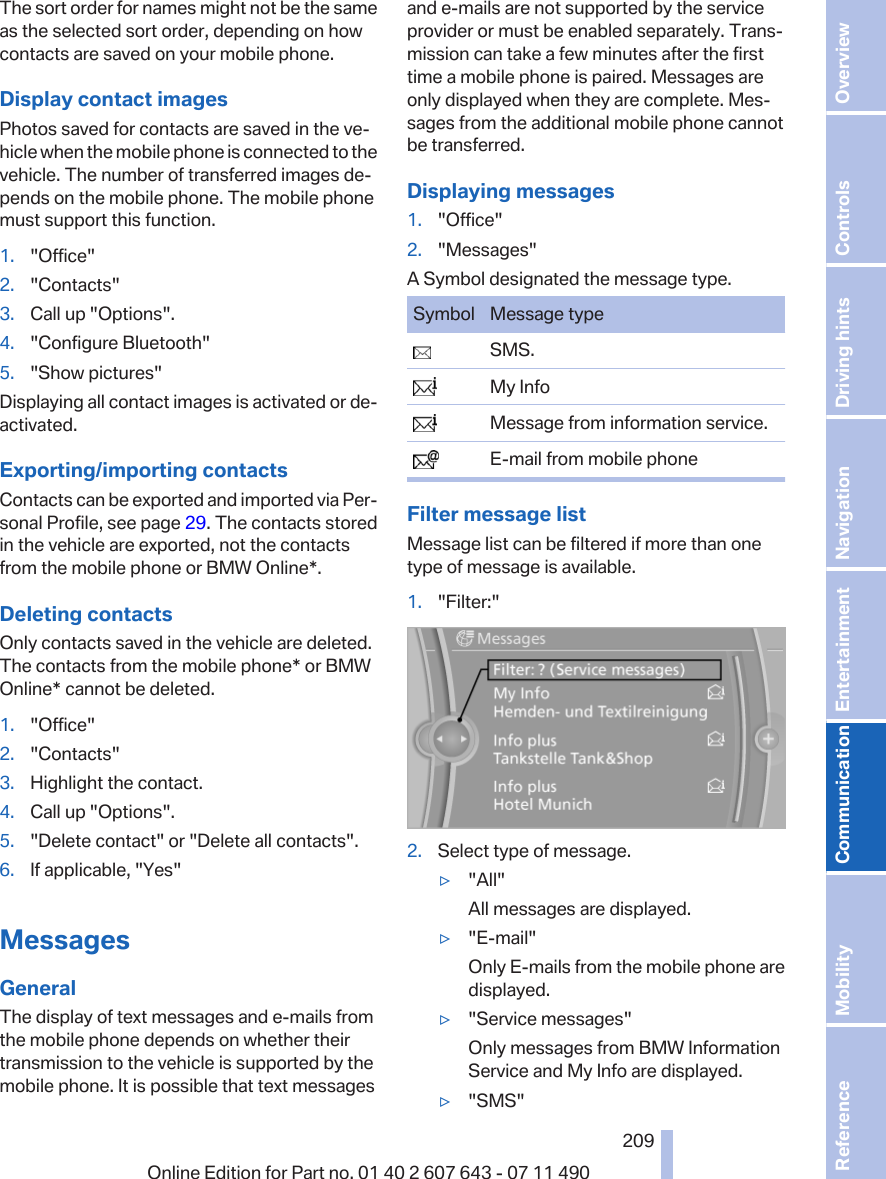
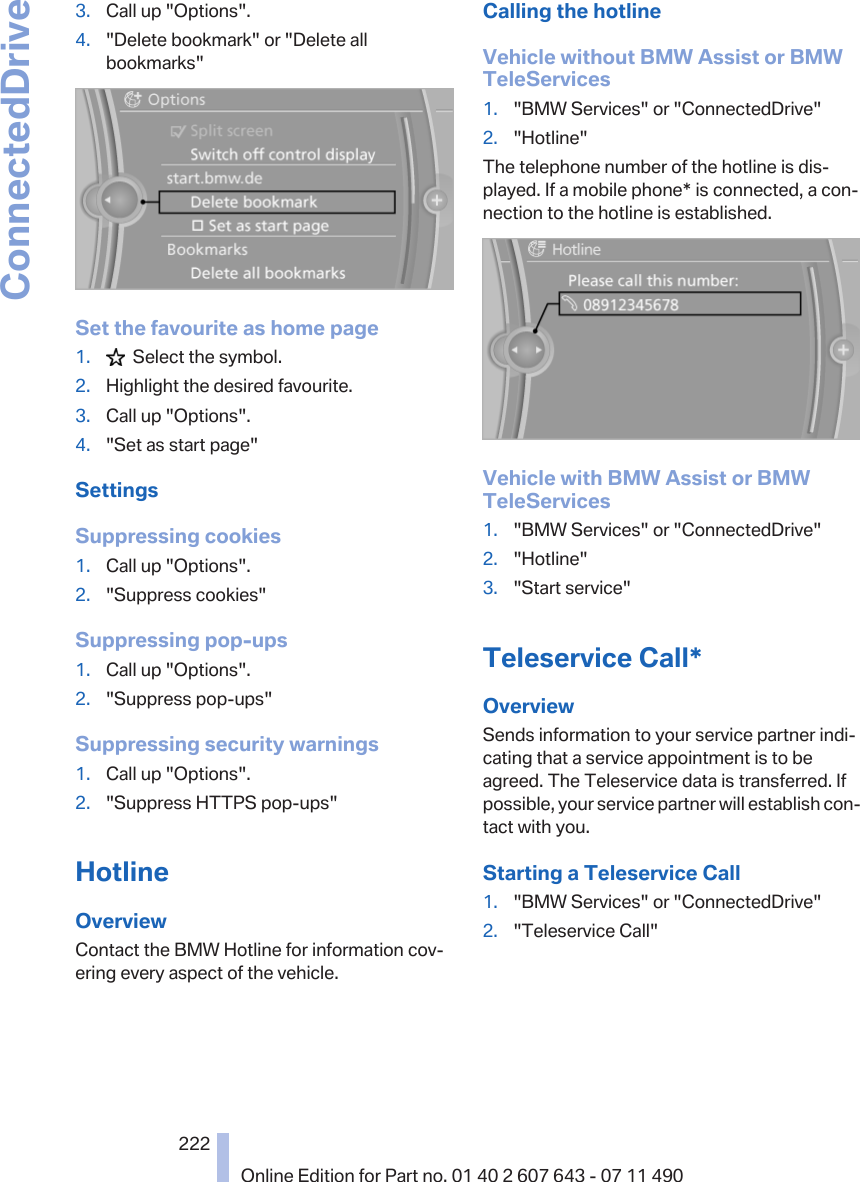
Continental Automotive GmbH Card Radio with BT transceiver
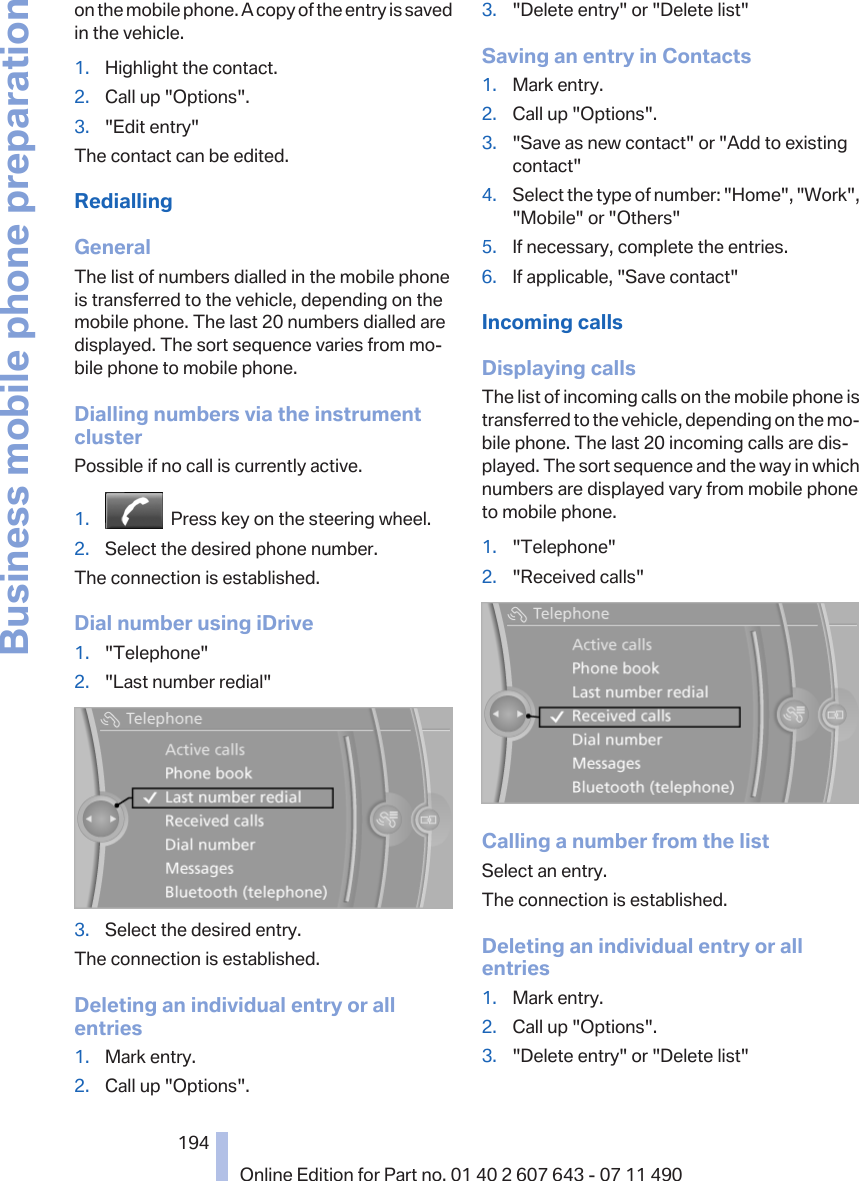
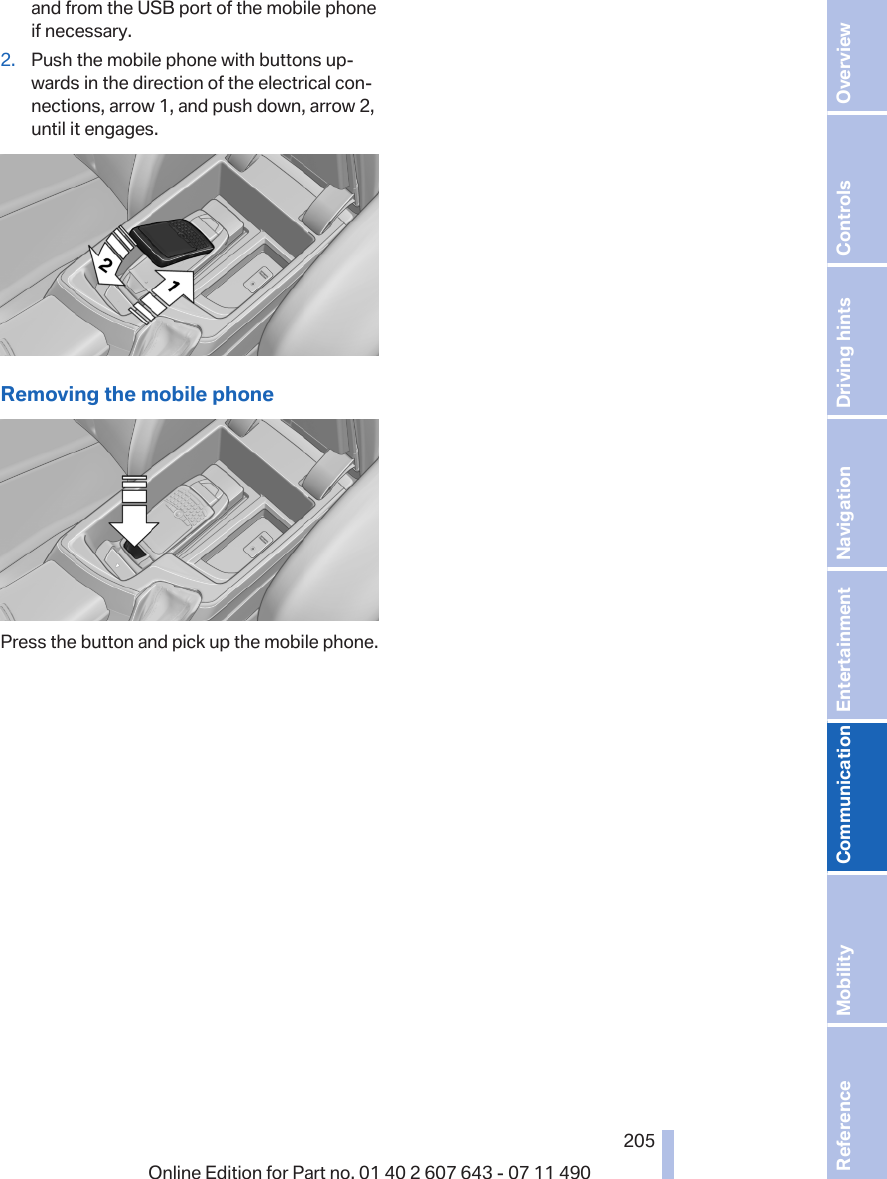
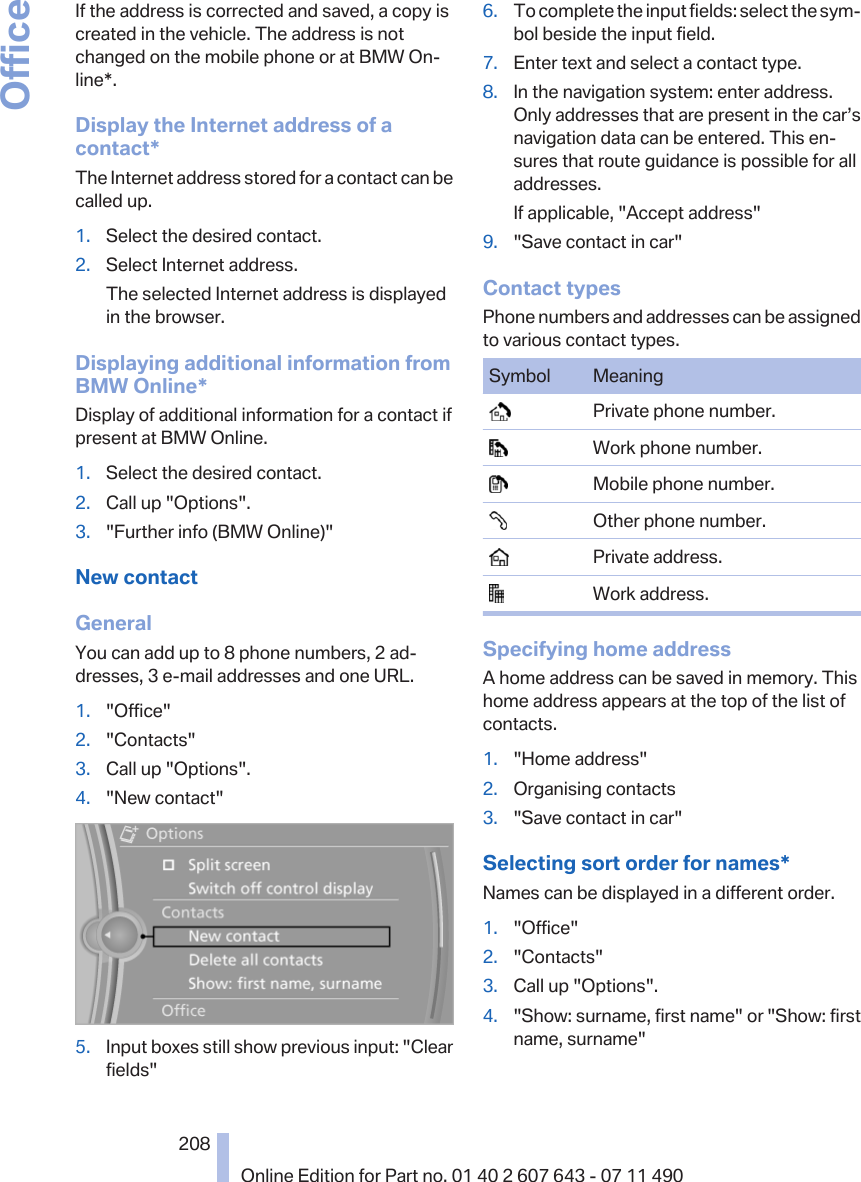
UserManual.wiki
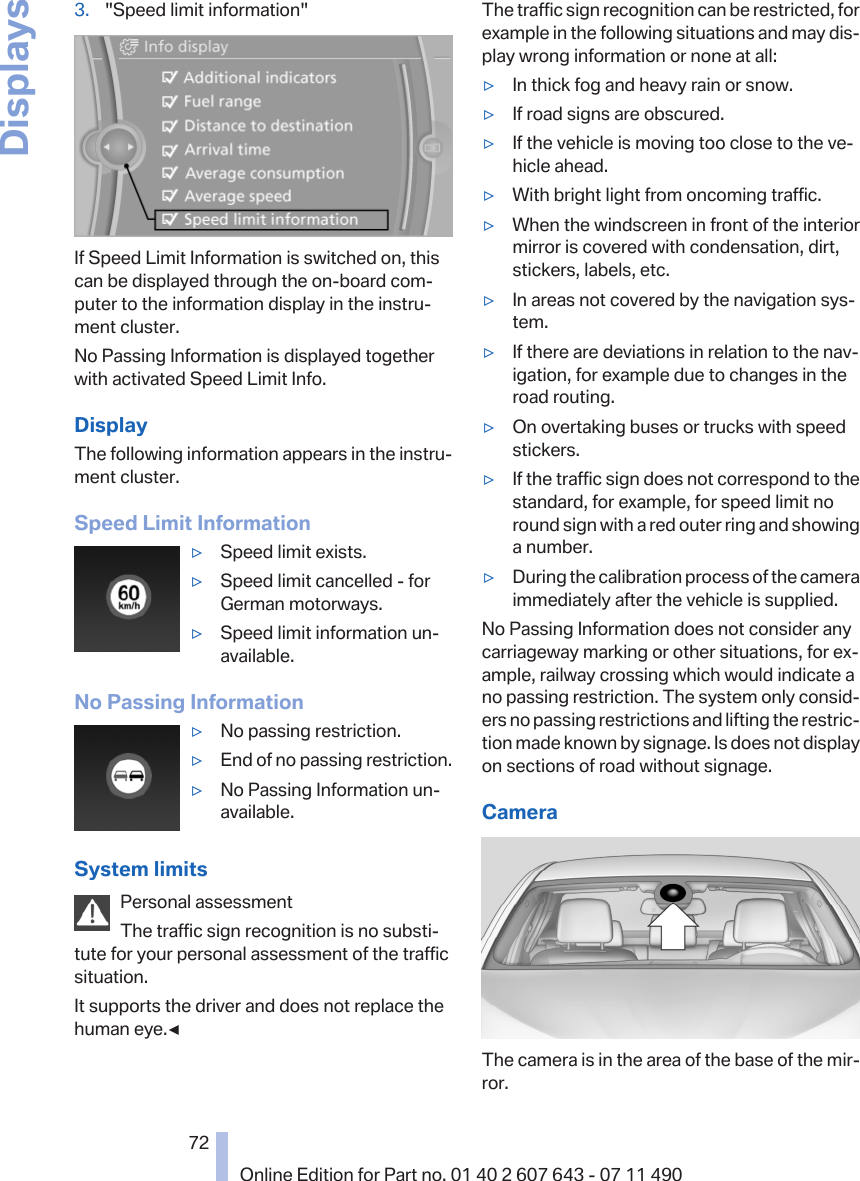
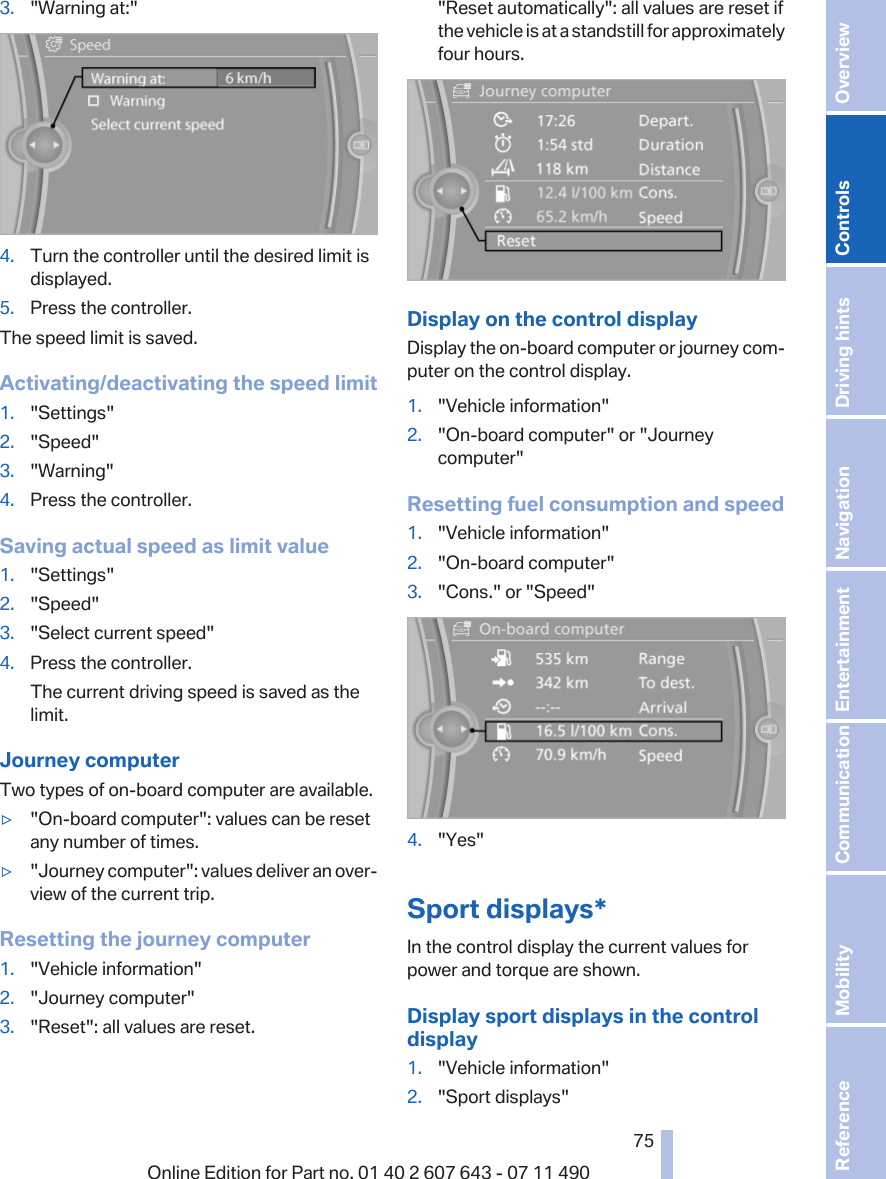
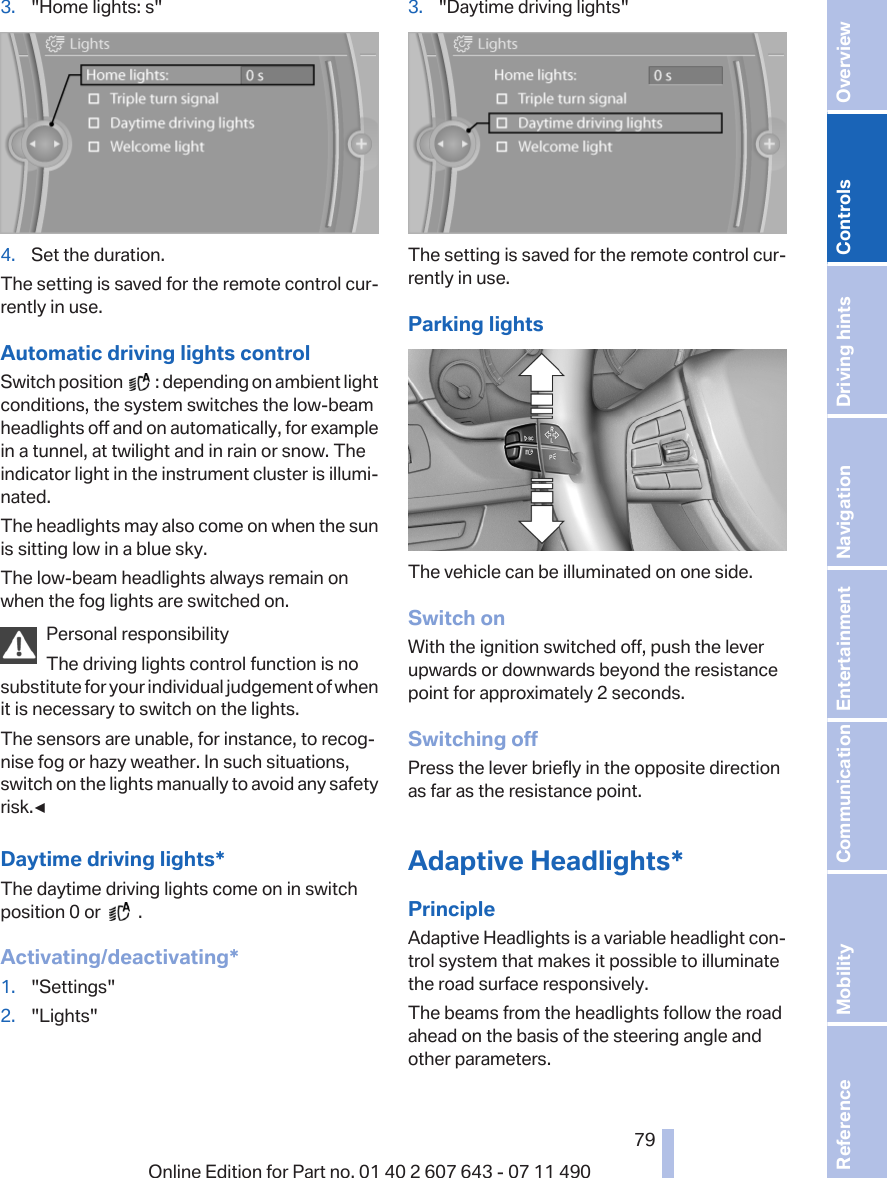
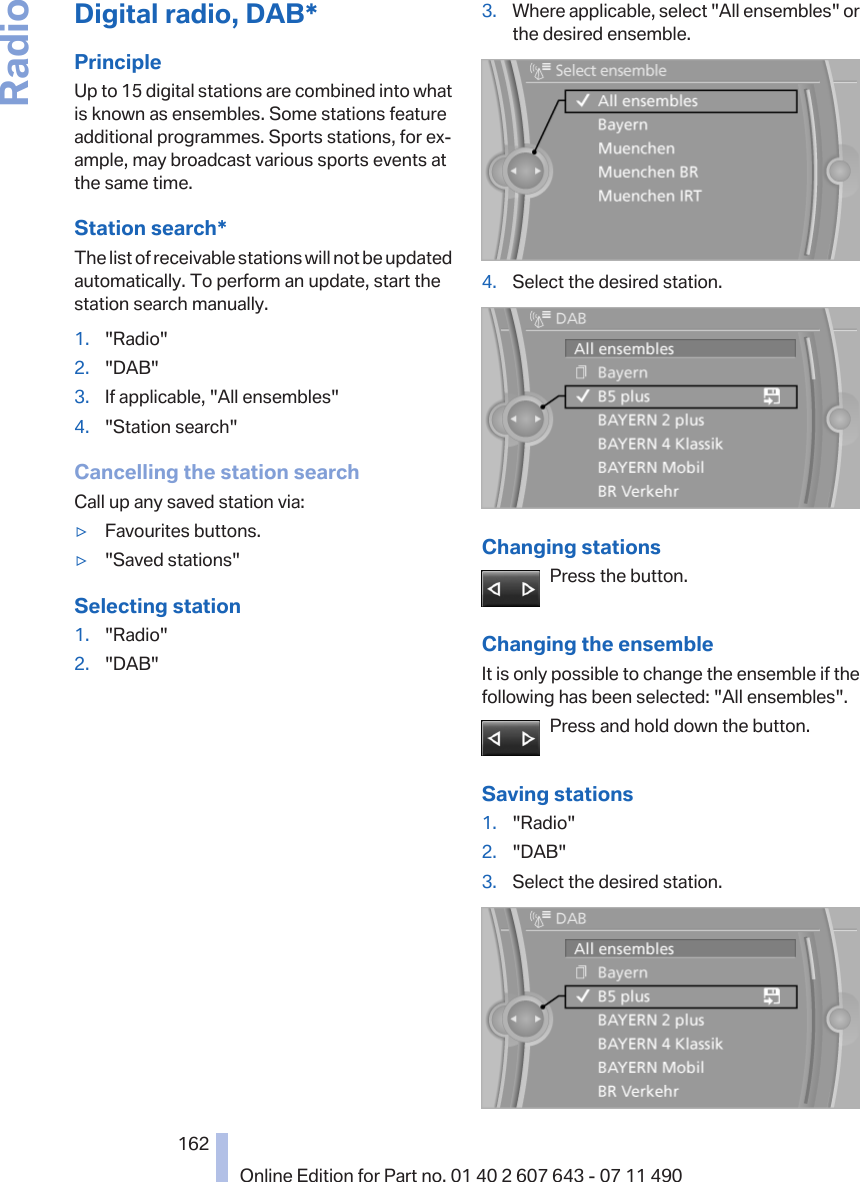
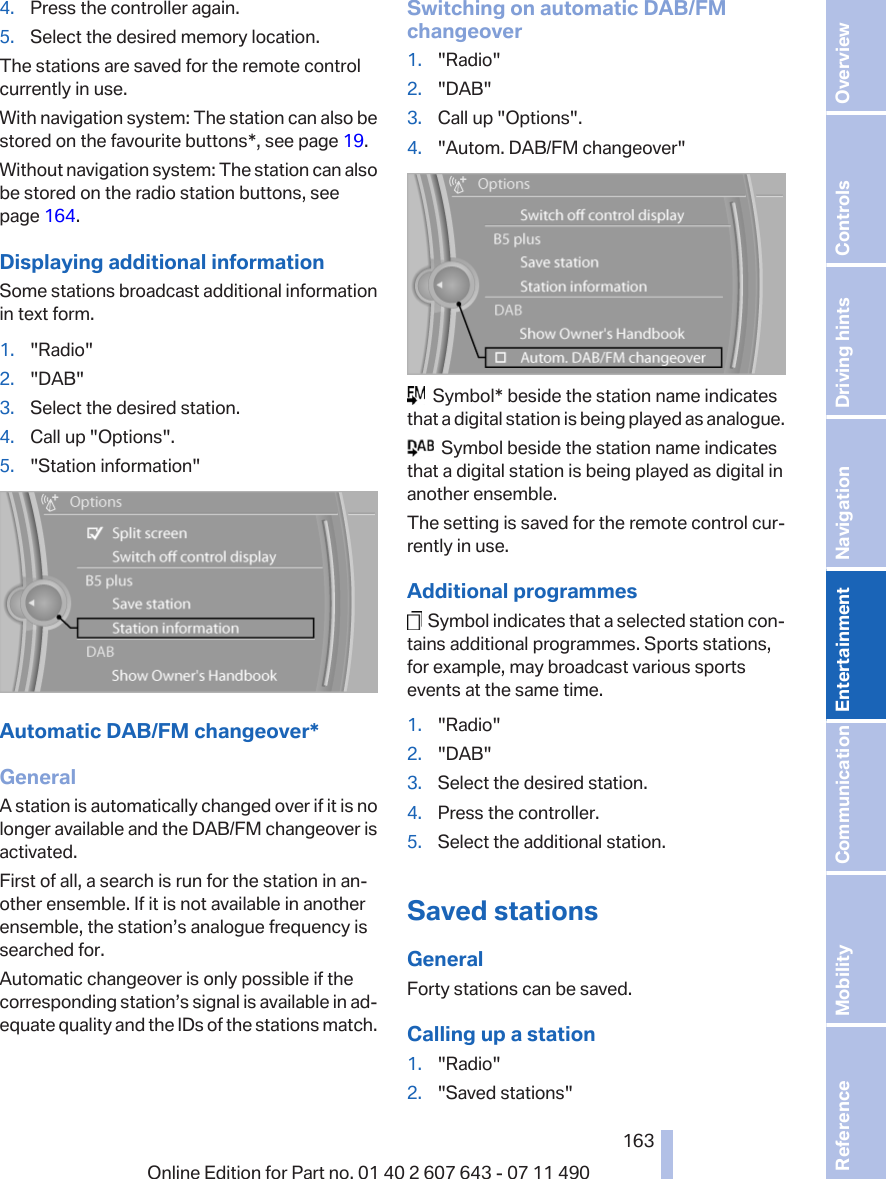
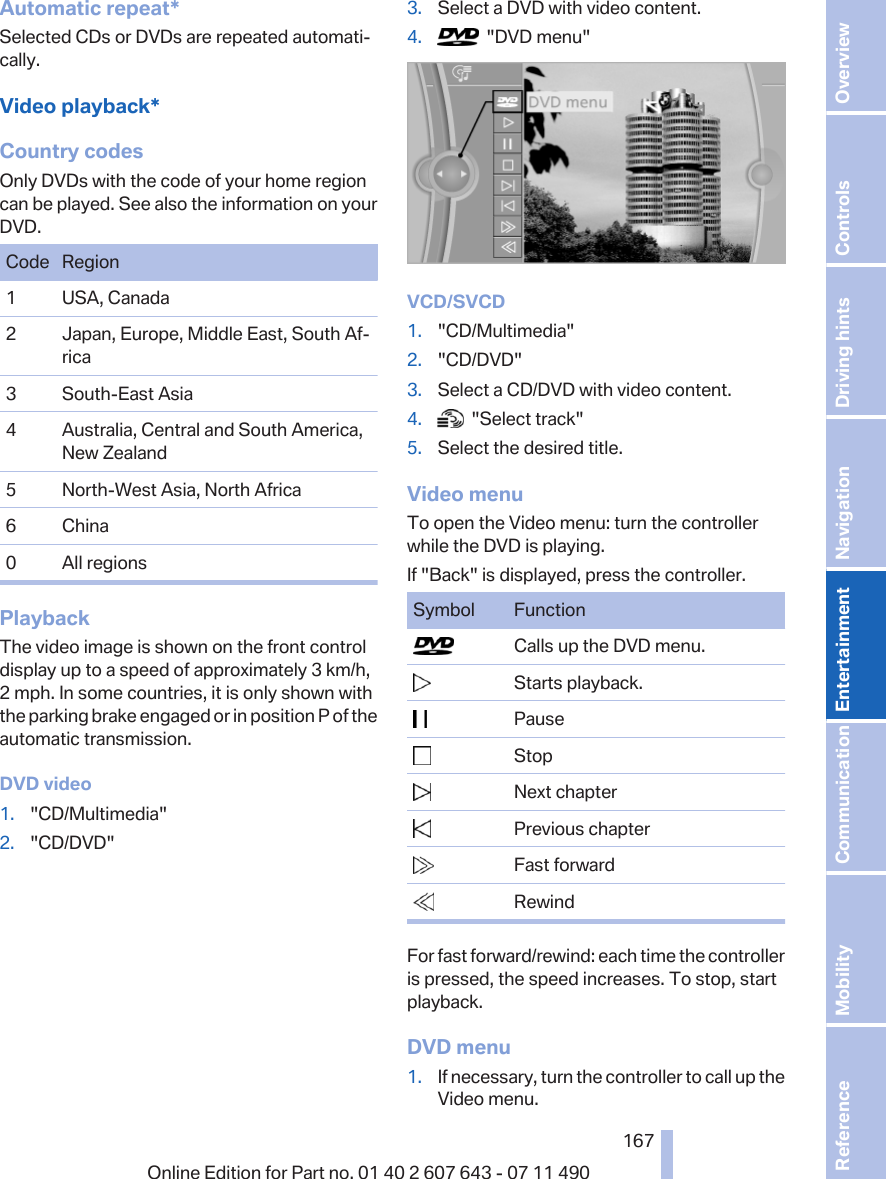
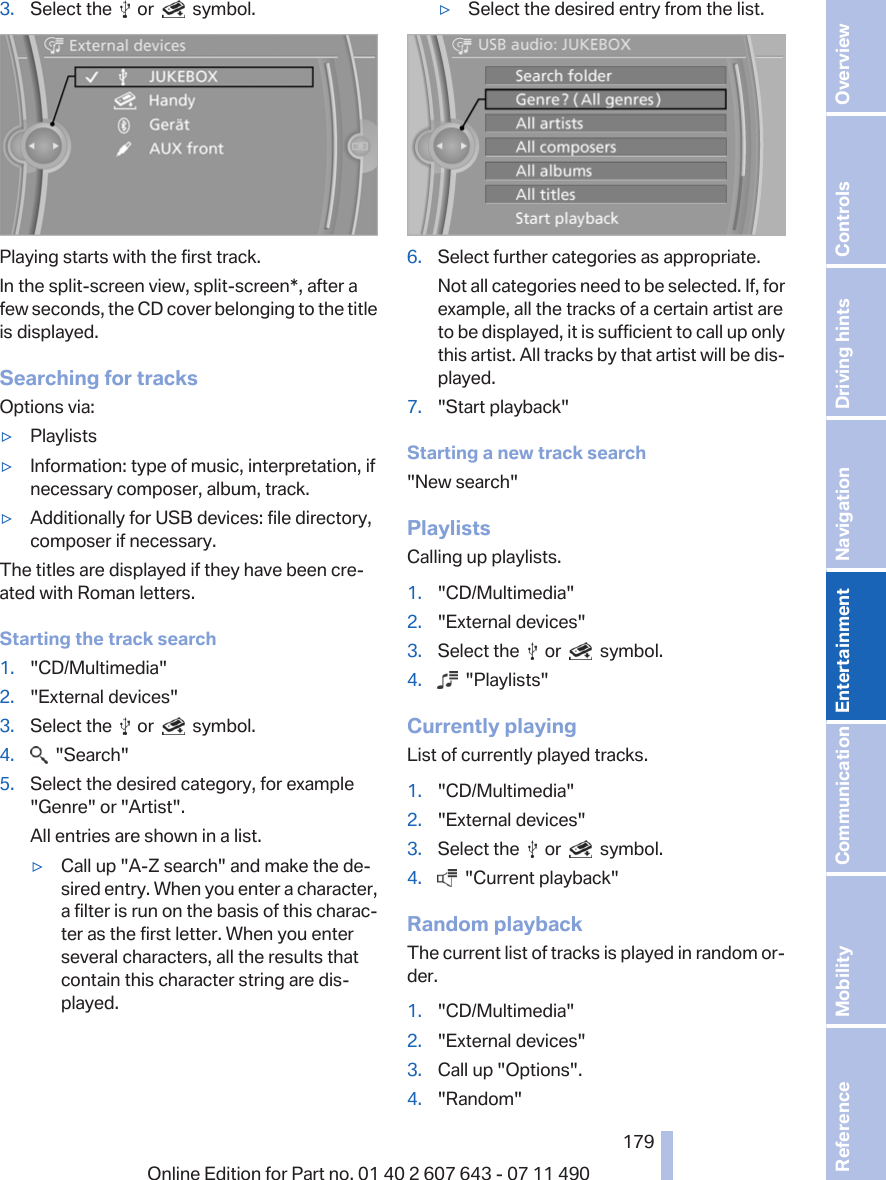
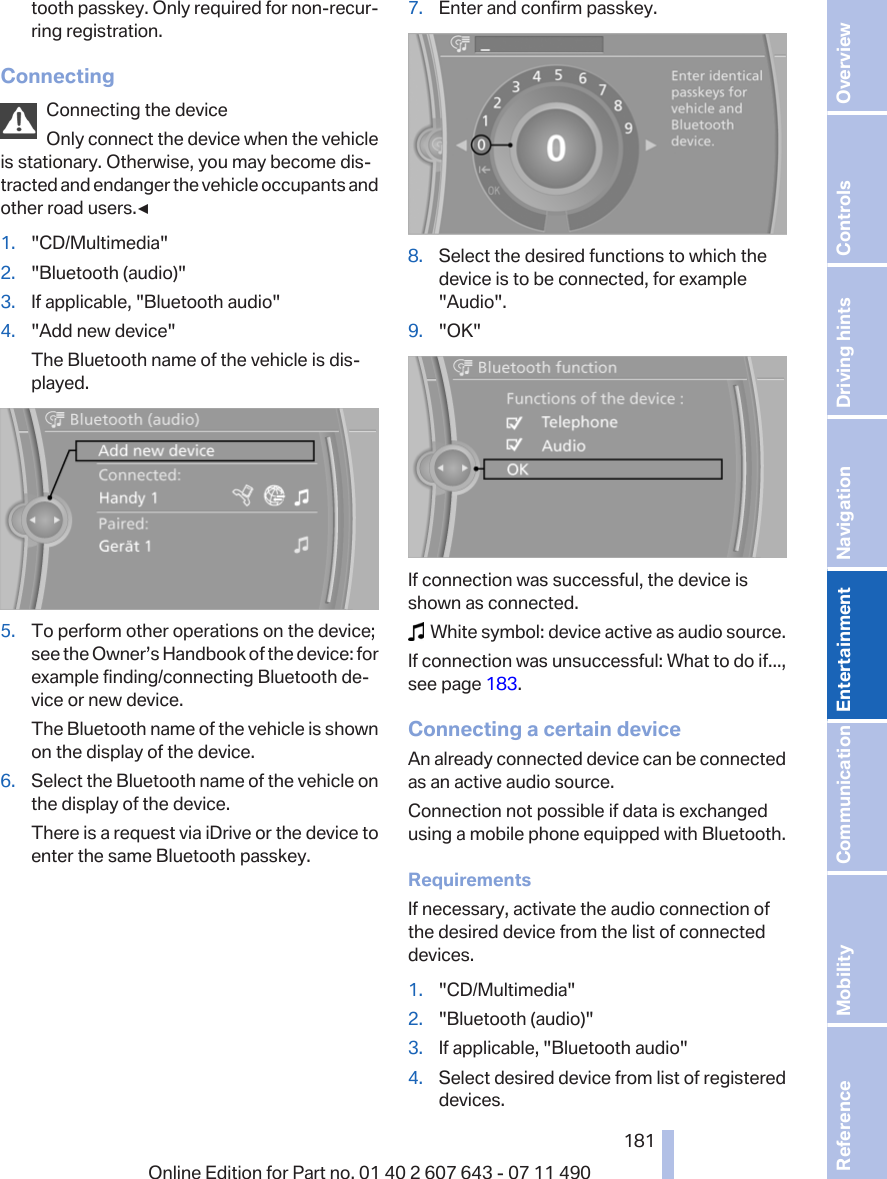
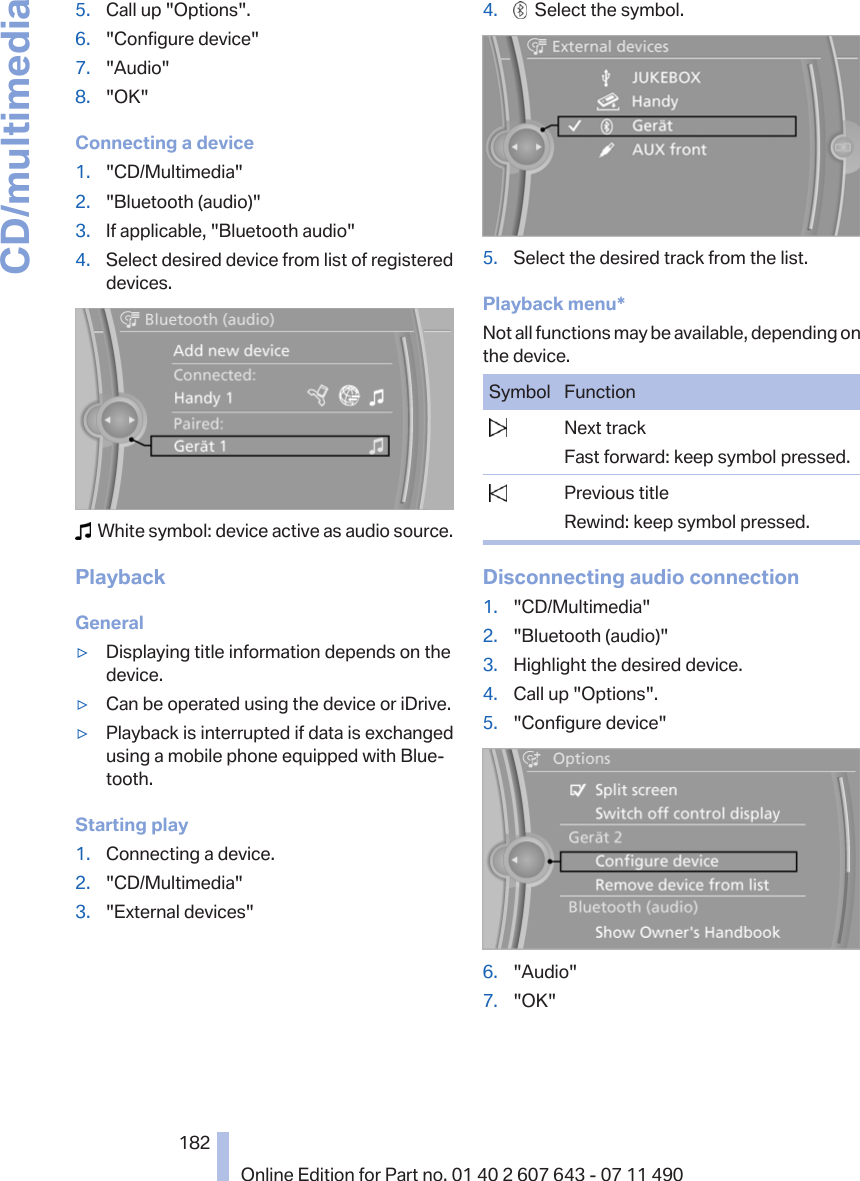
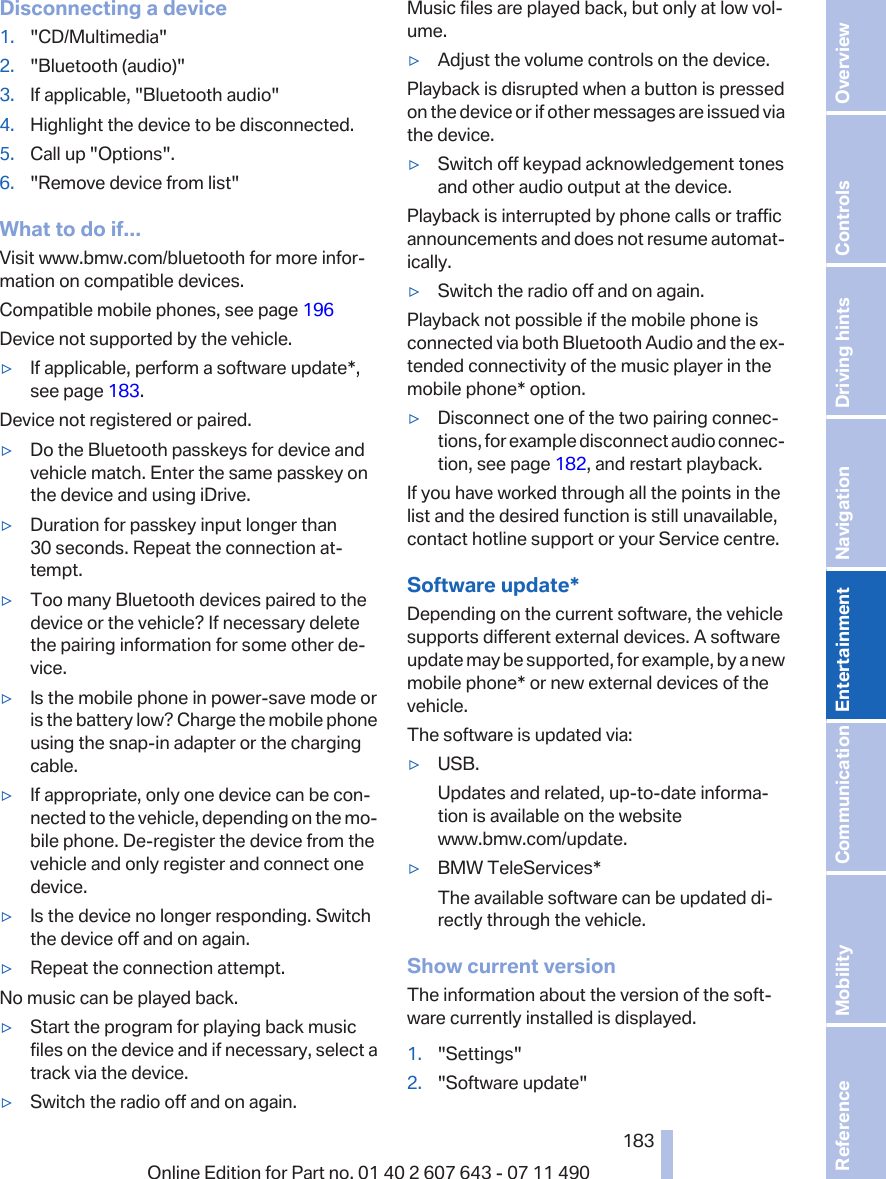
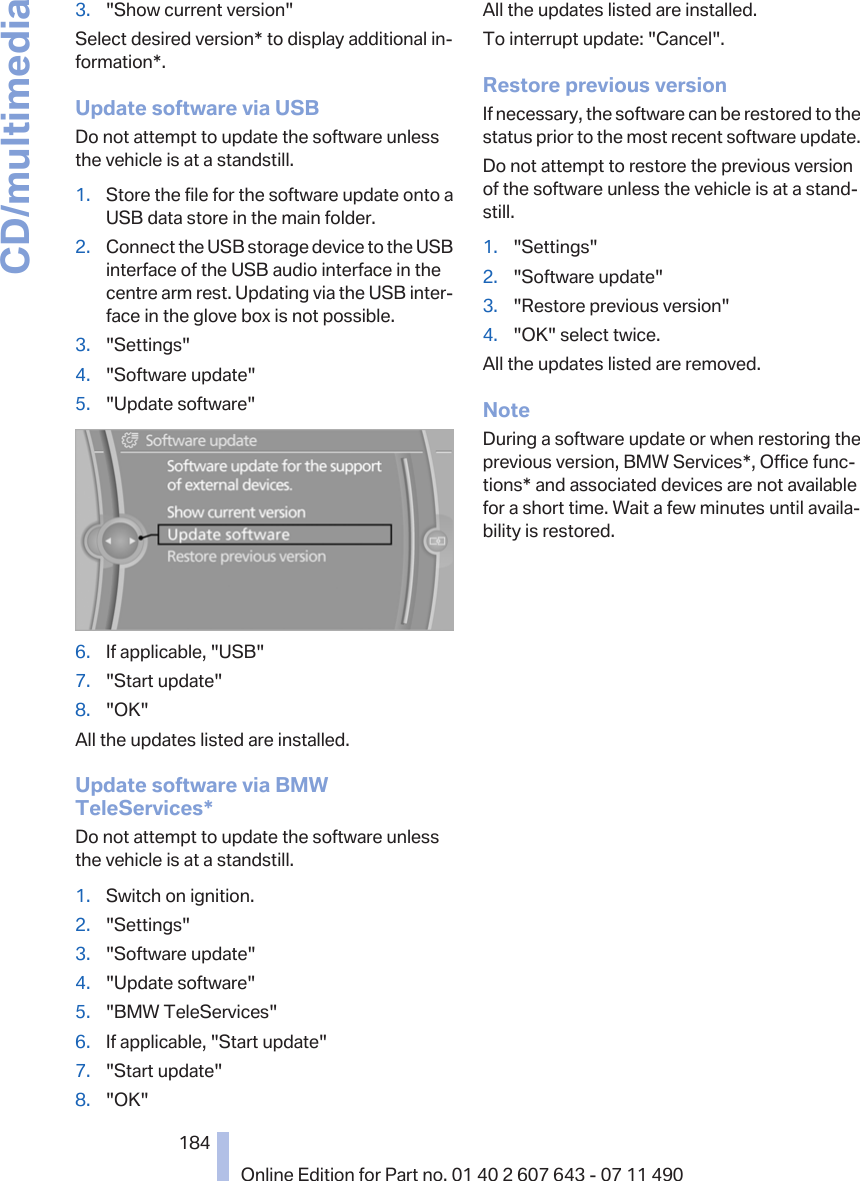
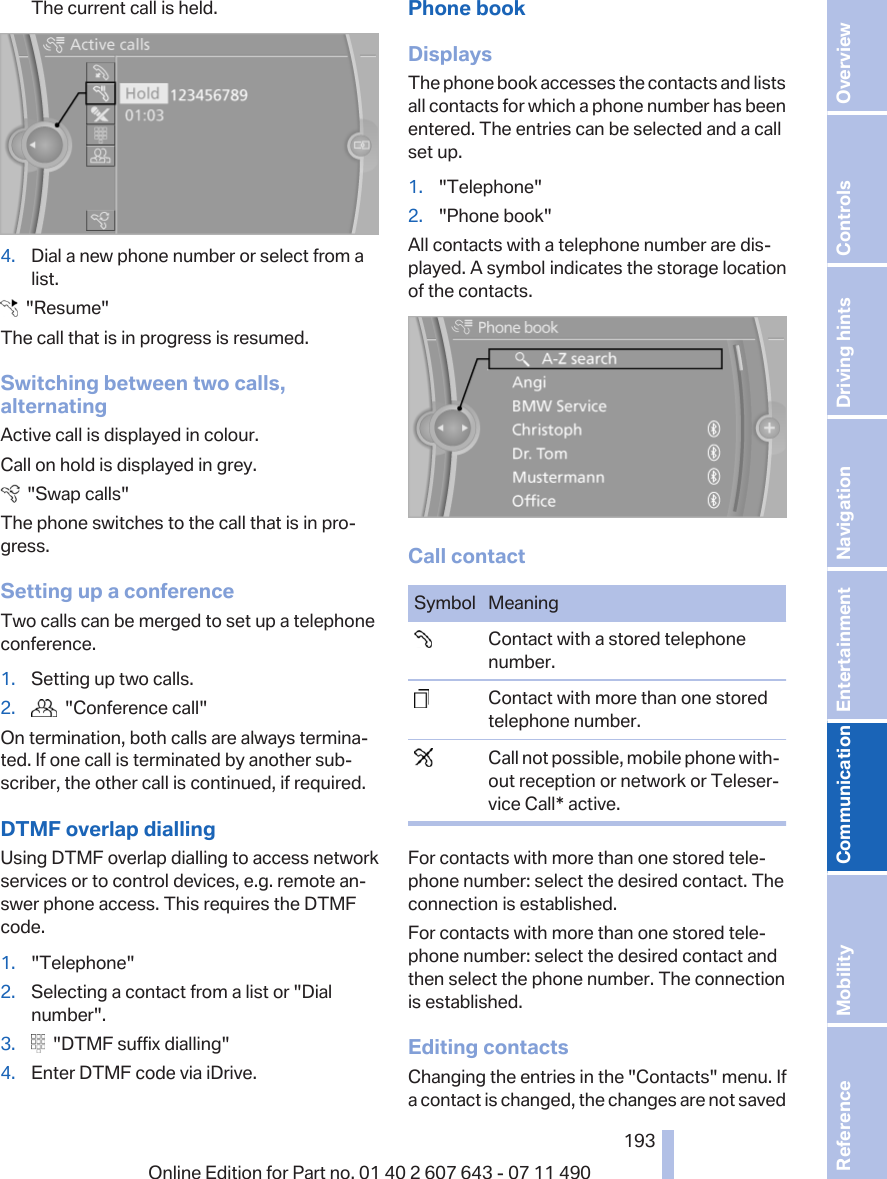
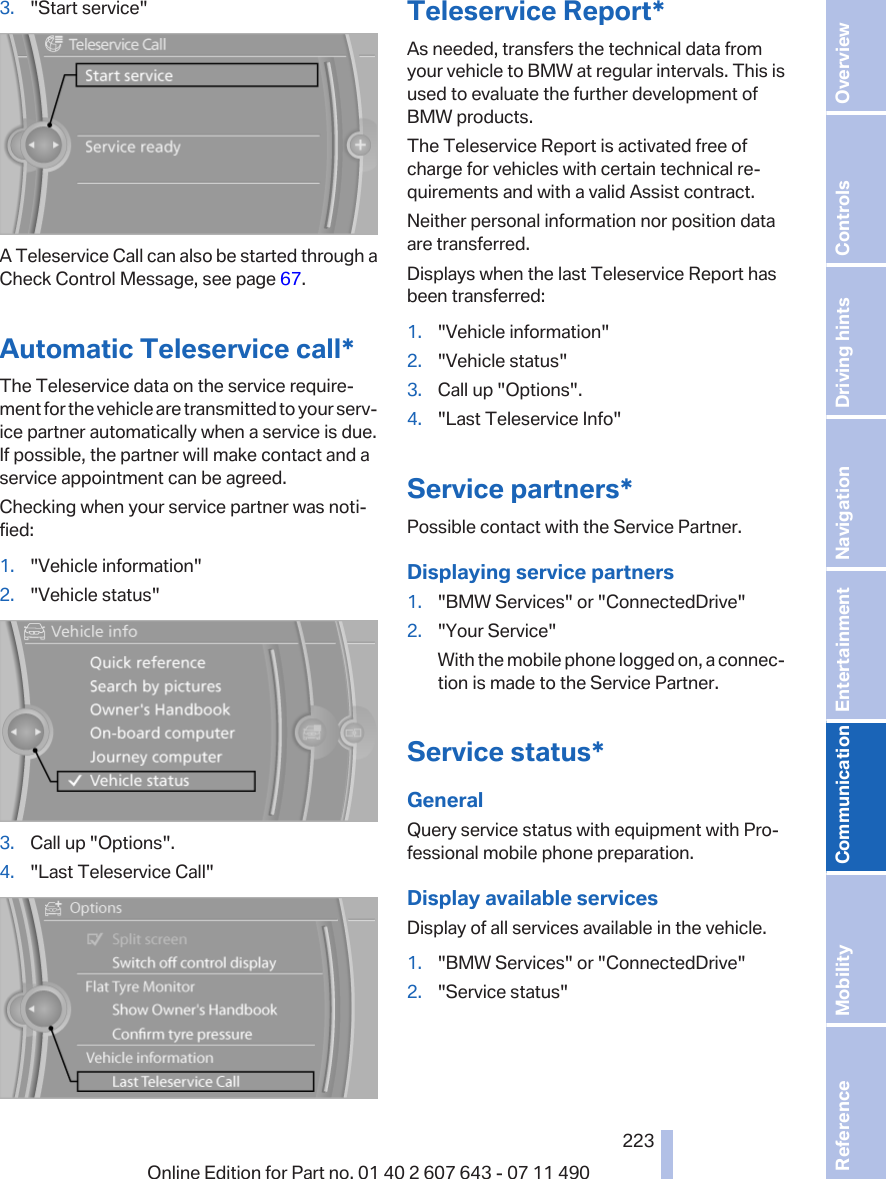
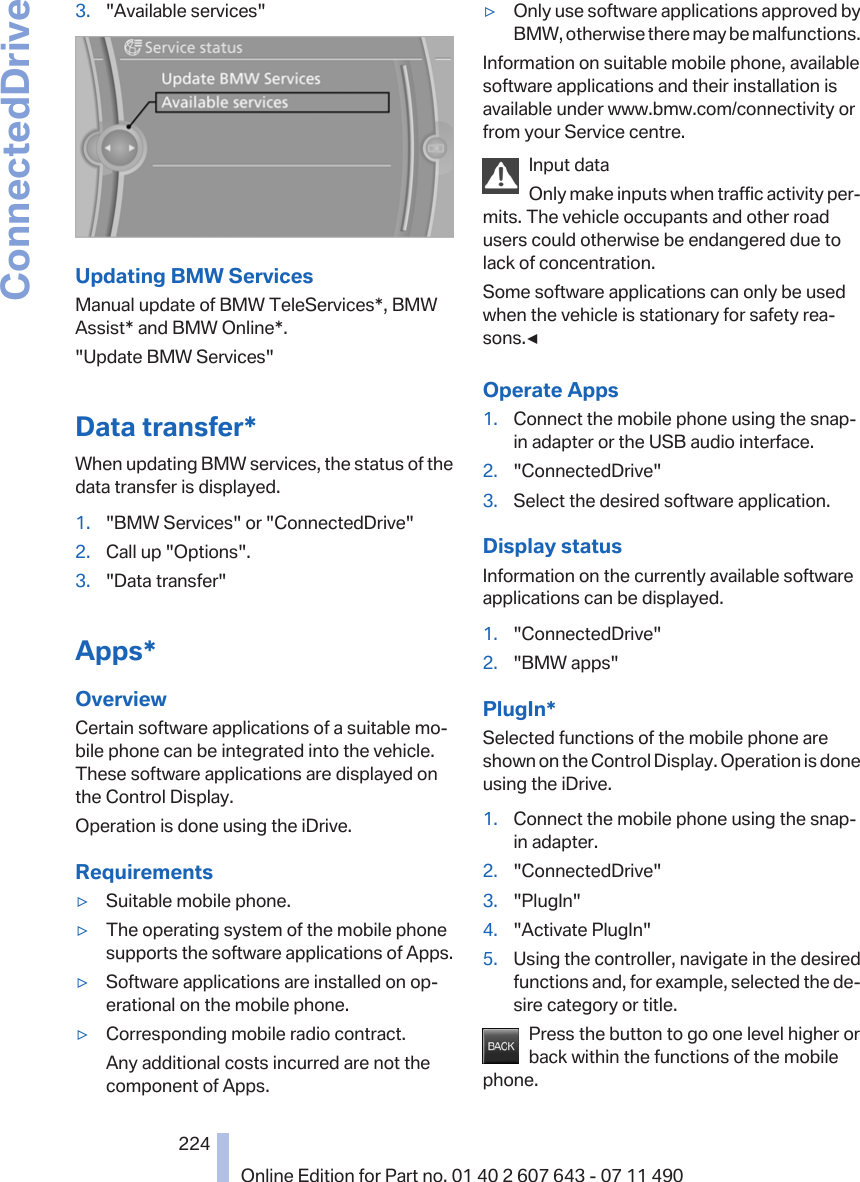
>
Continental Automotive
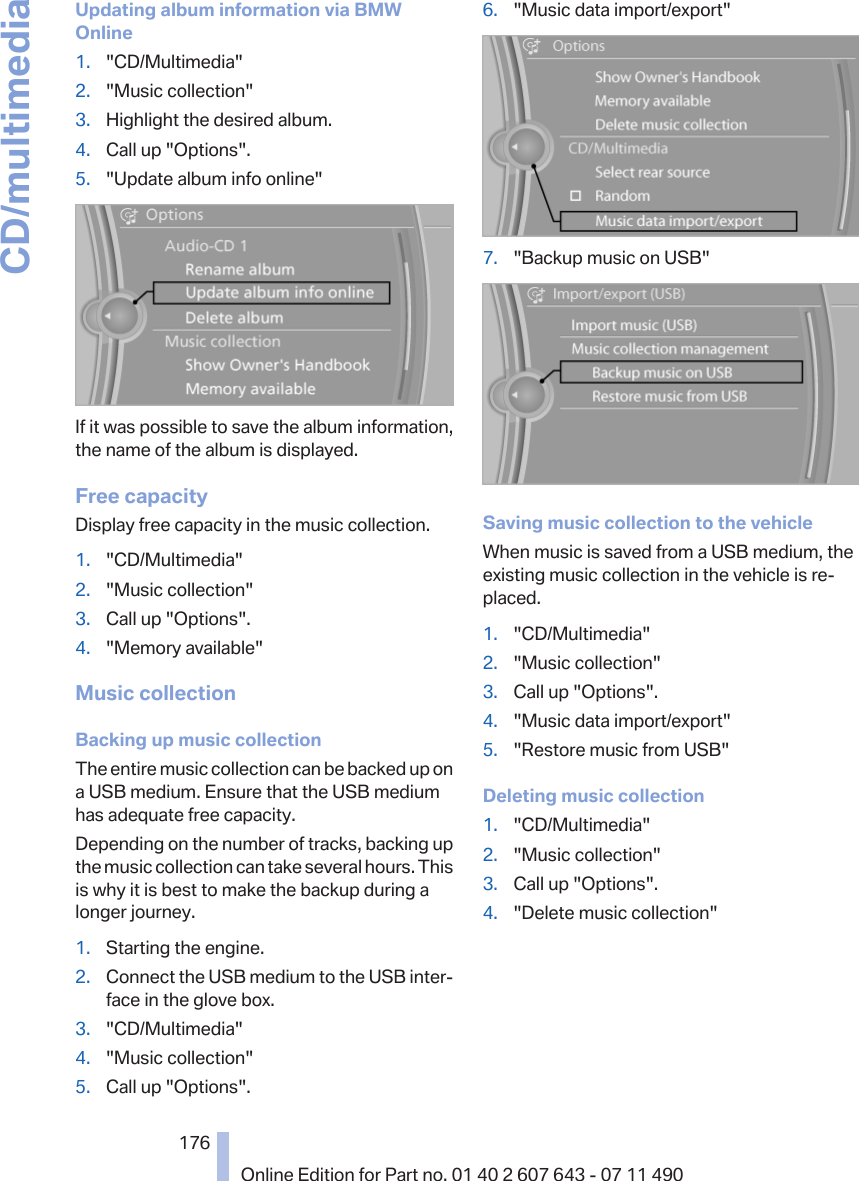
>
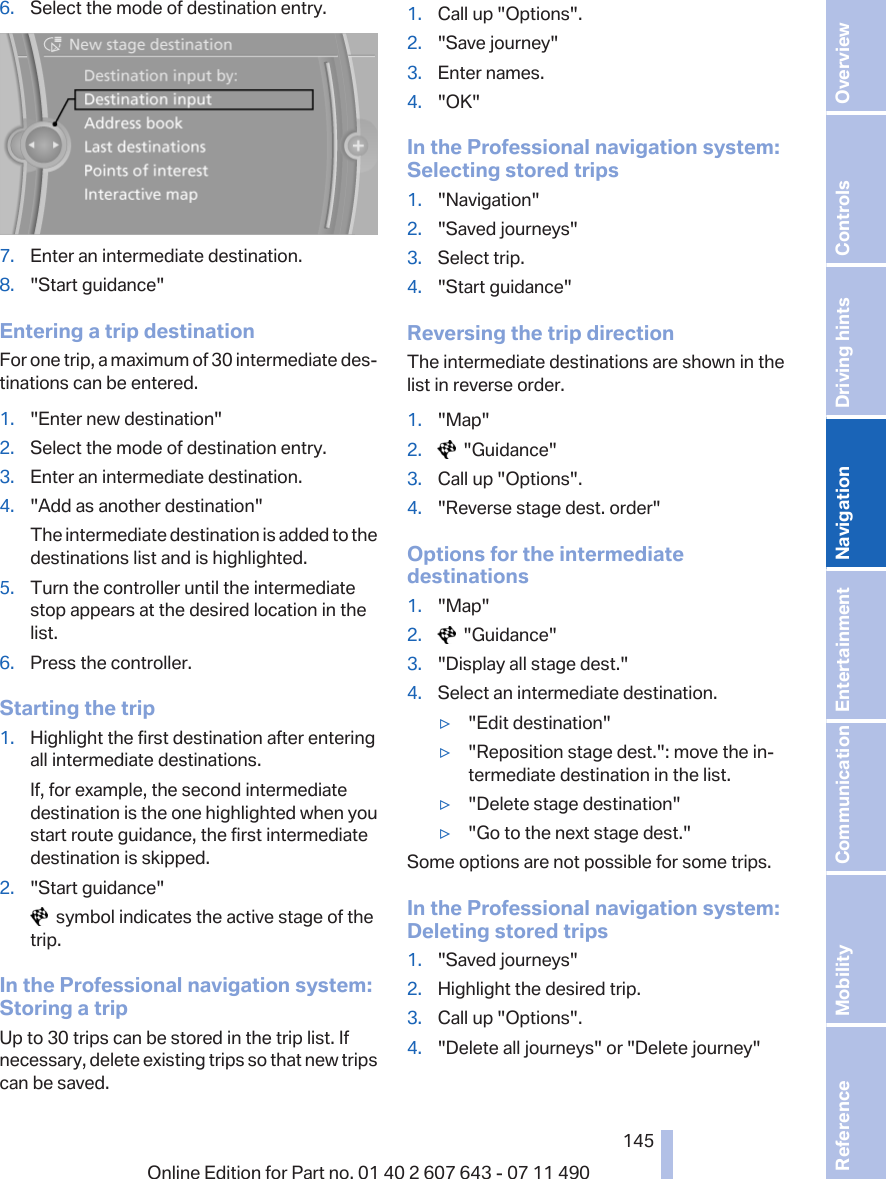
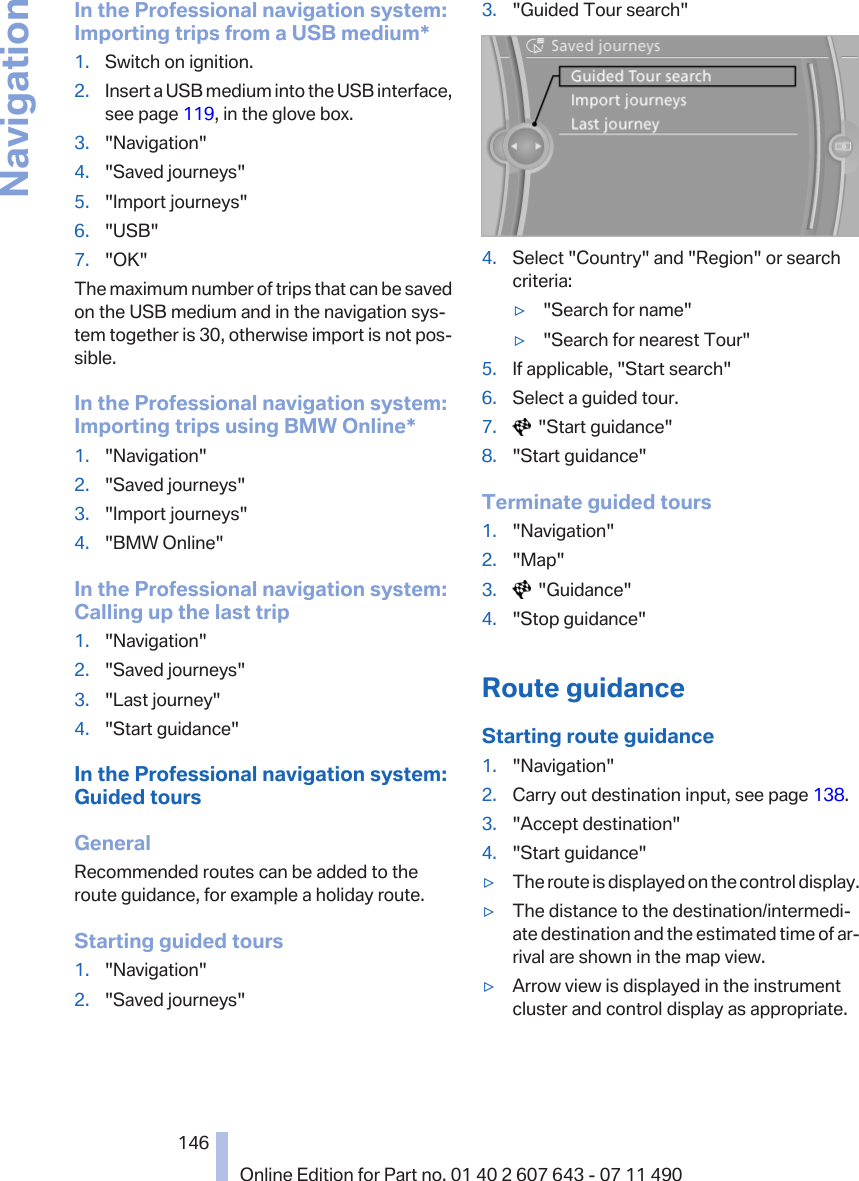
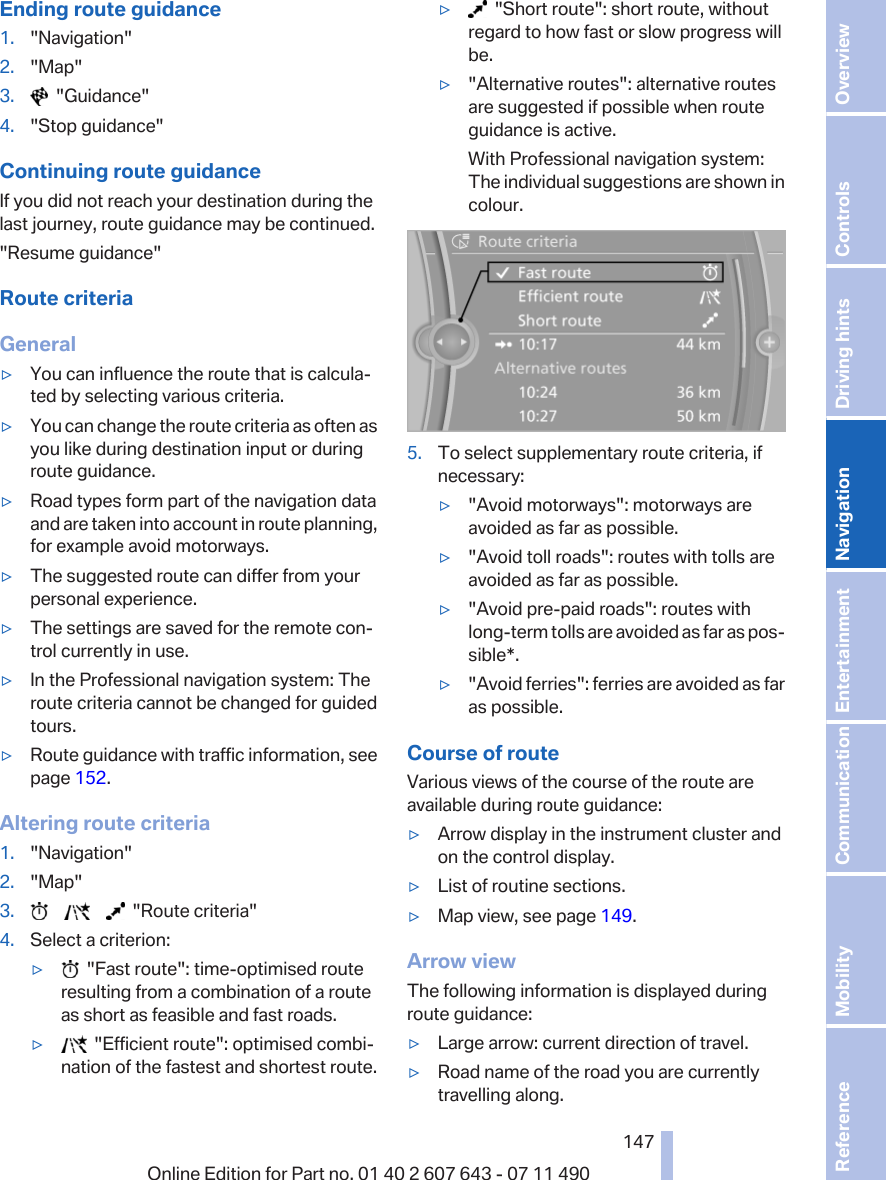
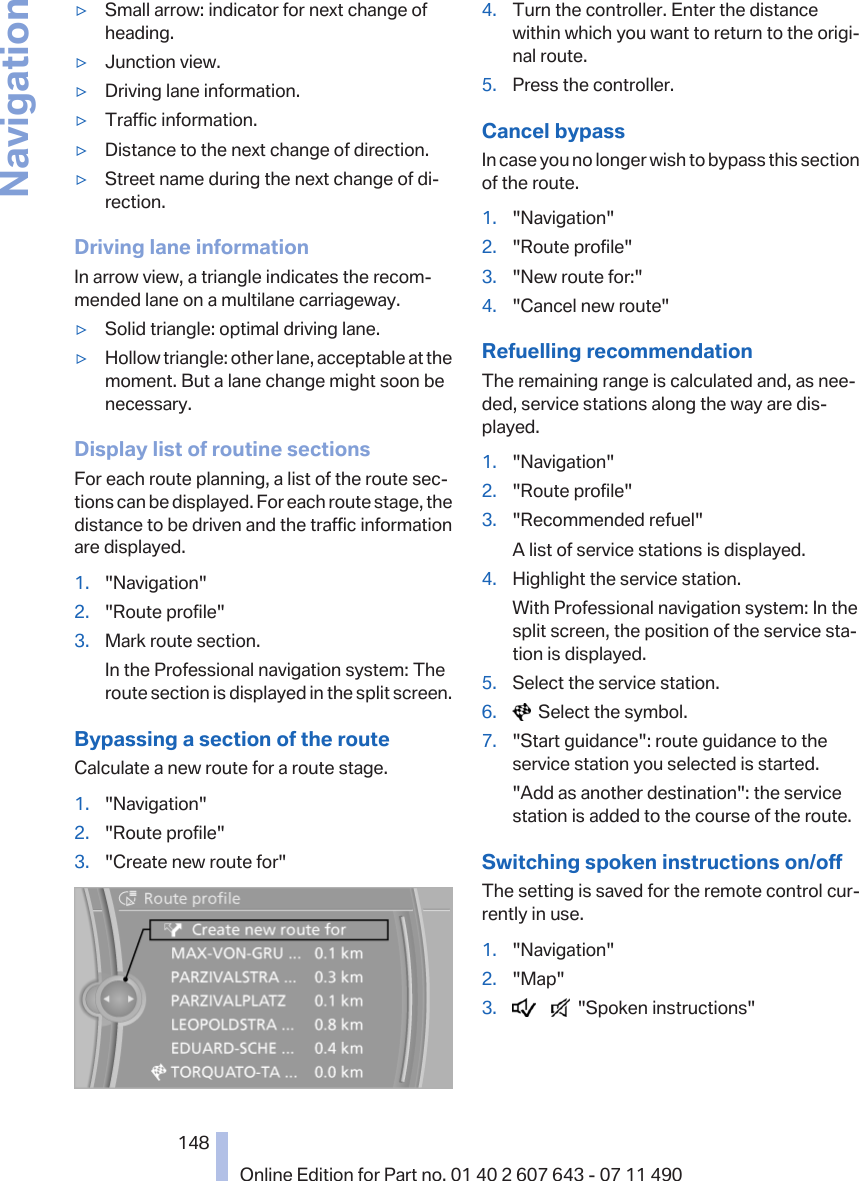
L7ENTRY User Manual
>
User Manual
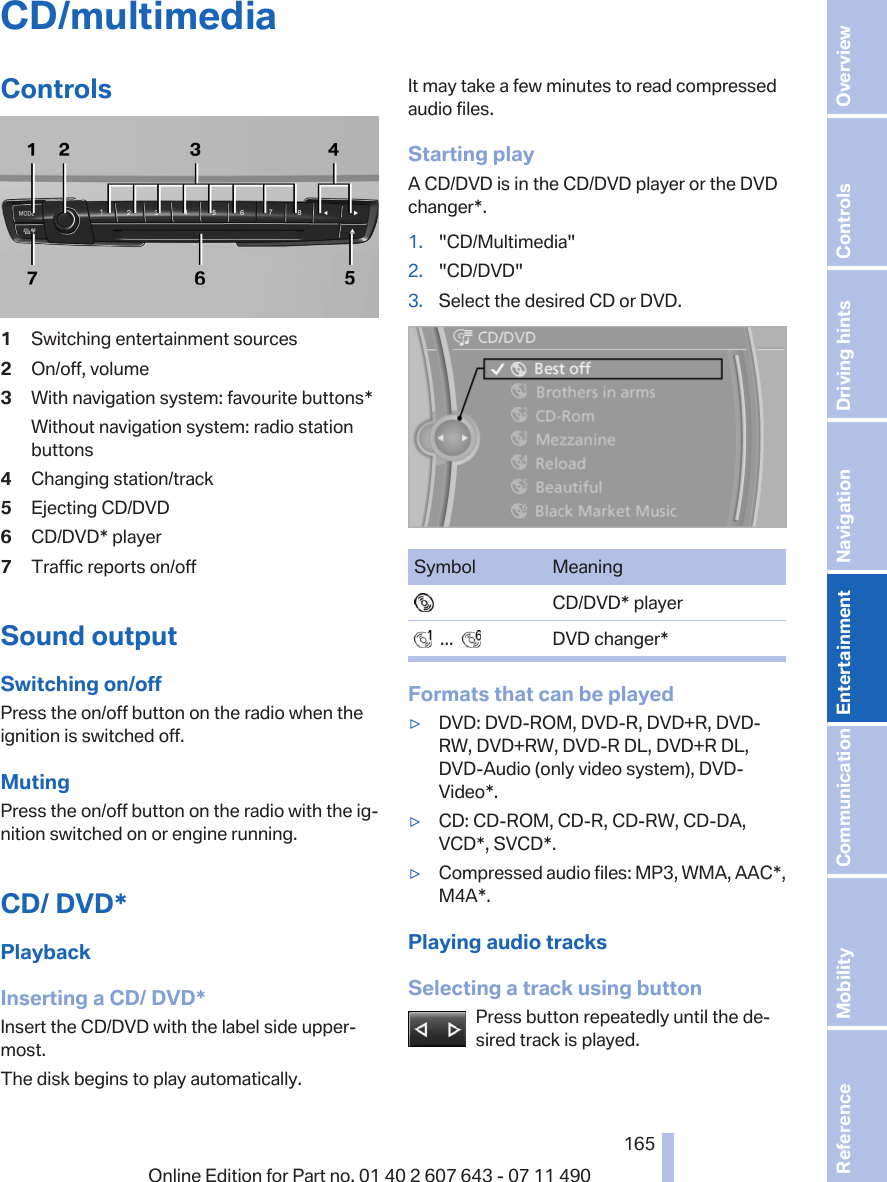
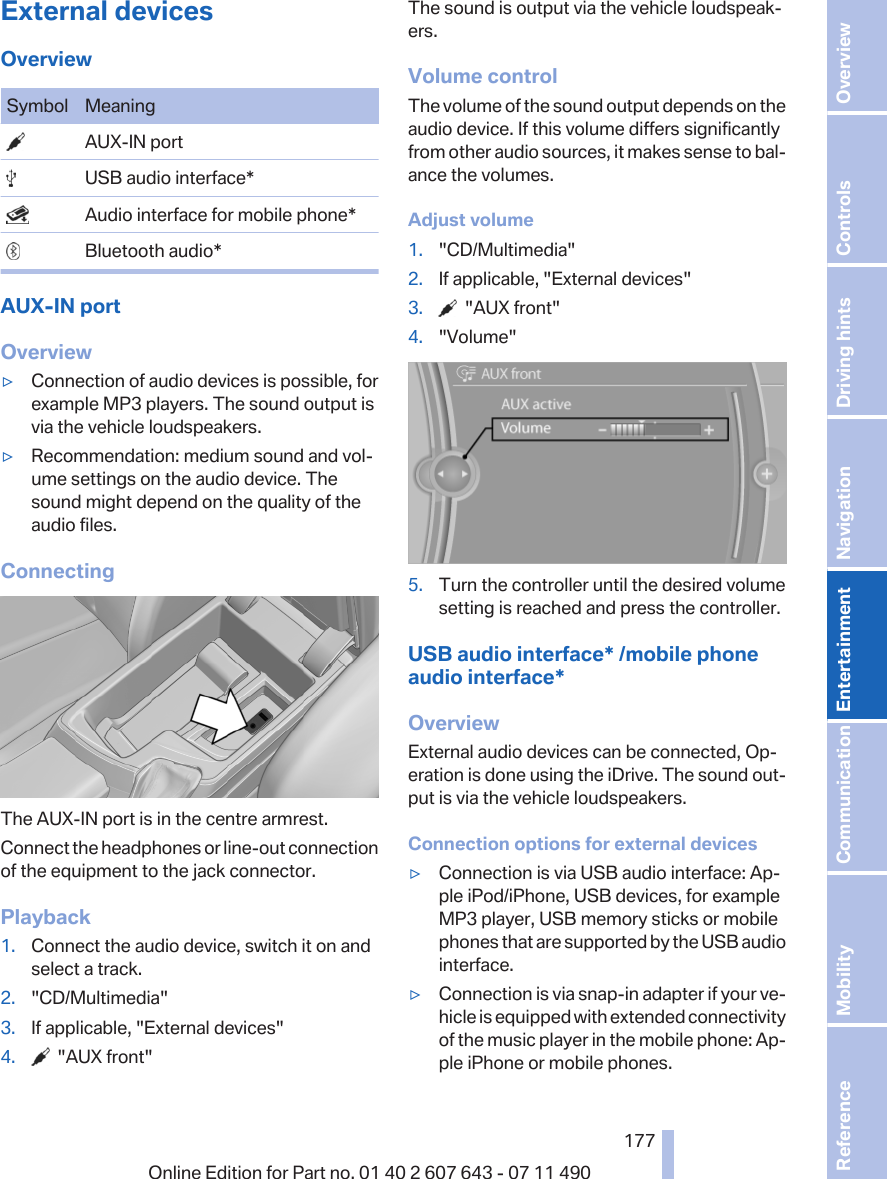
Contents
1.
User Manual
2.
Annex to User Manual
User Manual
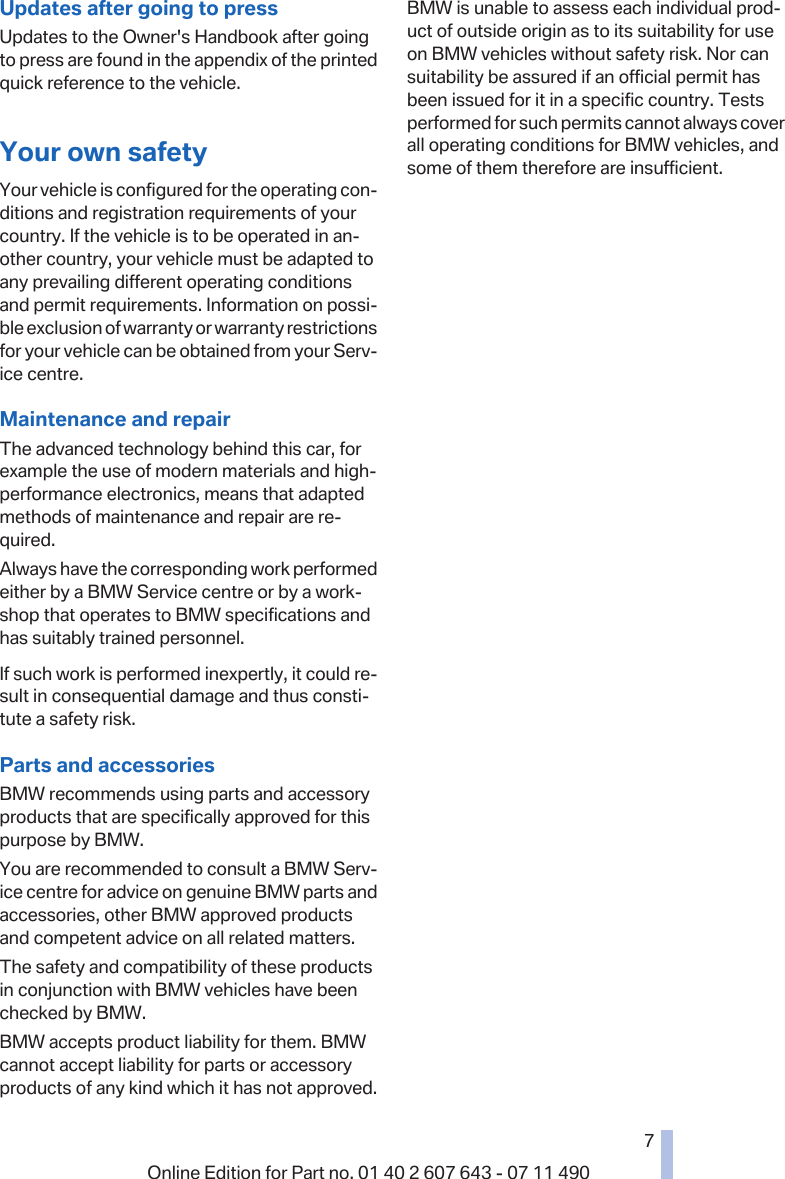
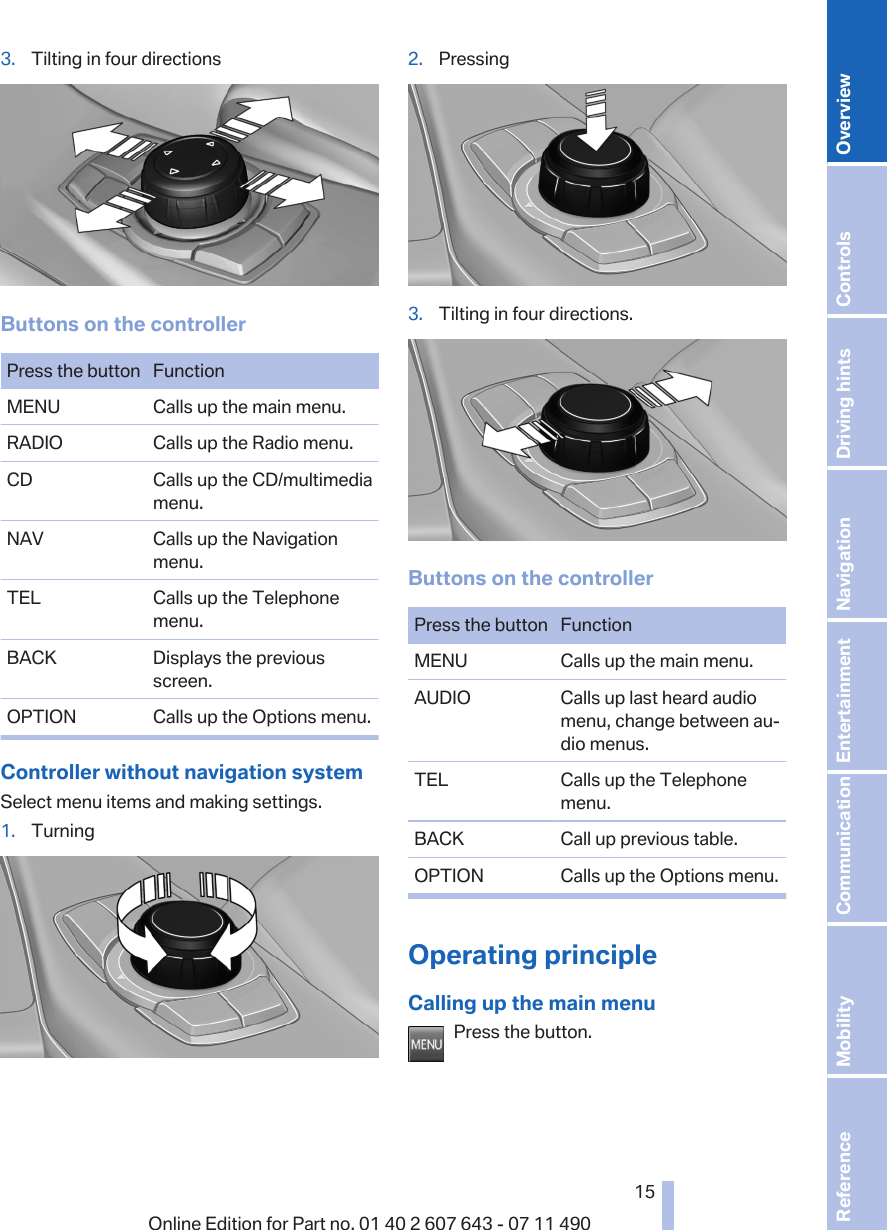
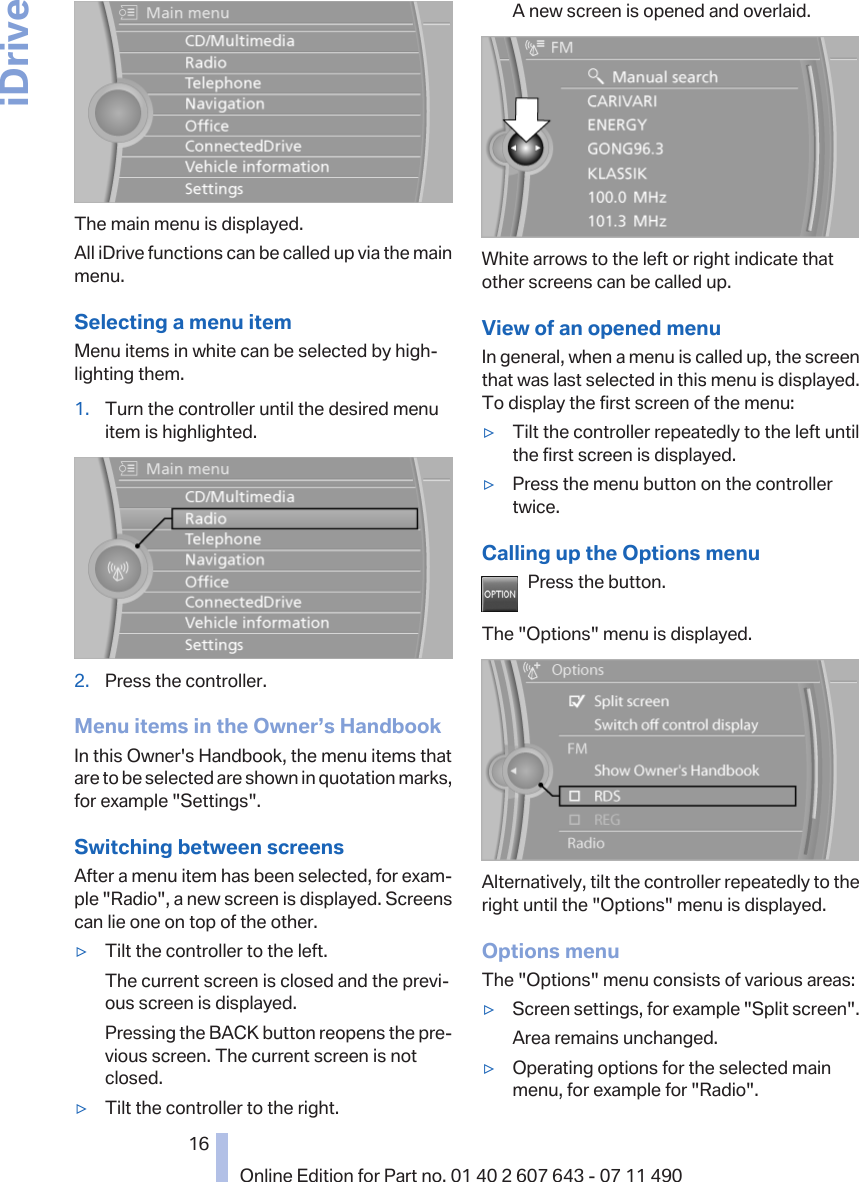
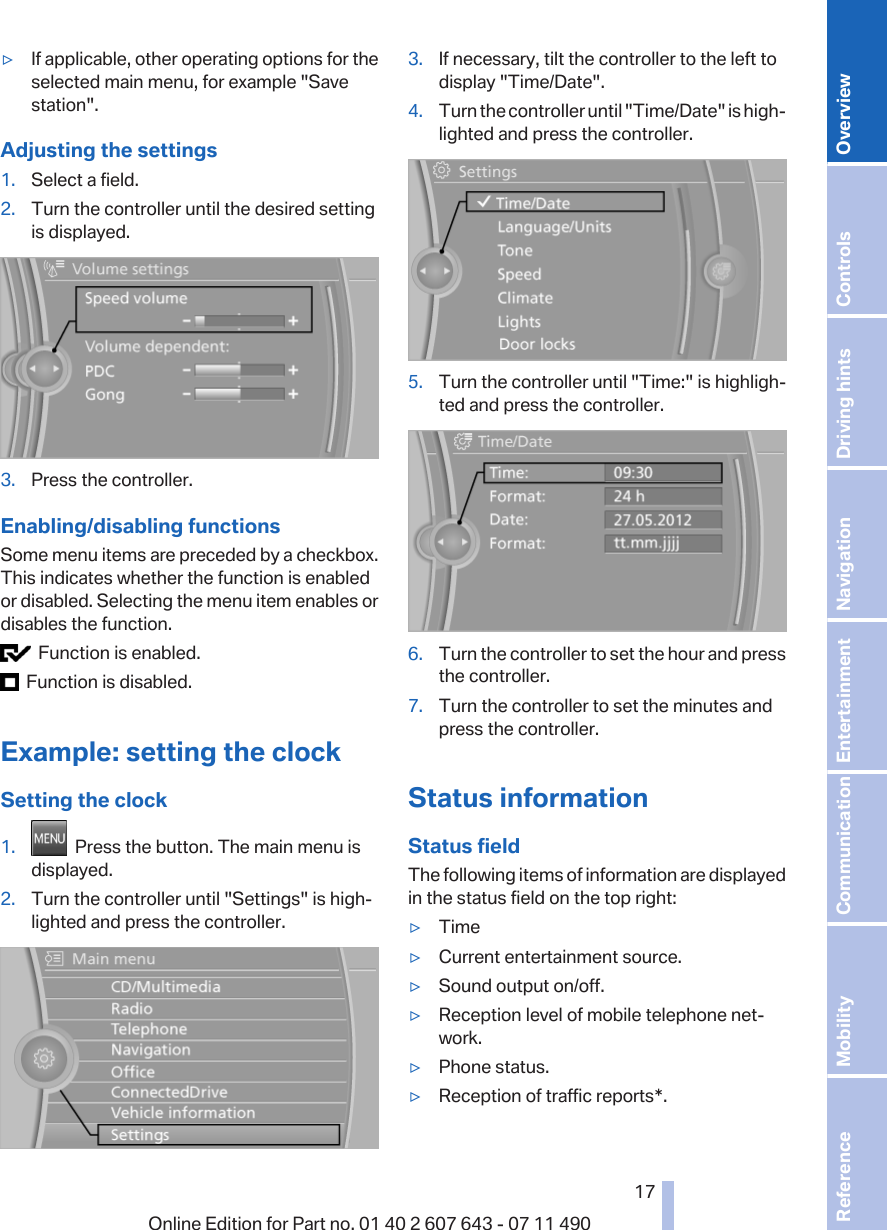
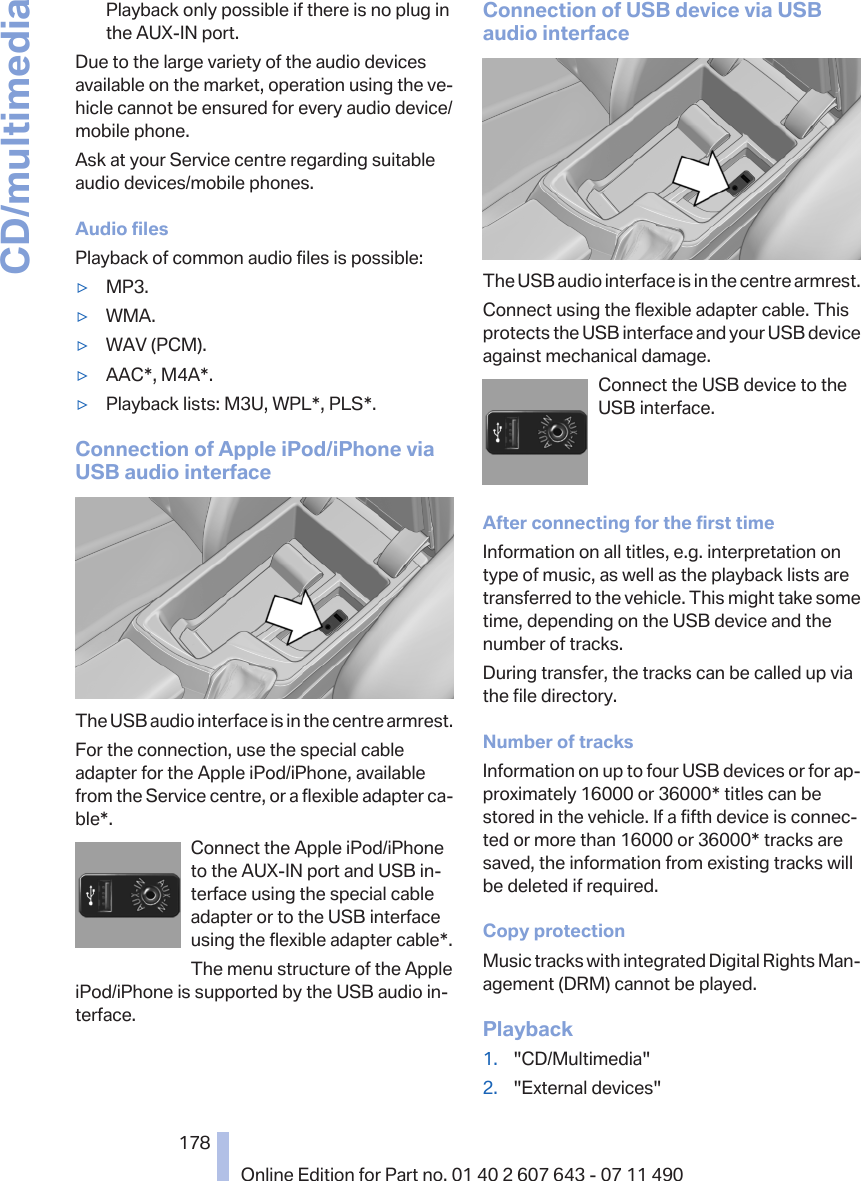
Navigation menu
Upload a User Manual
Namespaces
Wiki Guide
HTML
PDF
Info
Views
User Manual
Discussion / Help
Navigation