Continental Conair HUM1200 GMRS Radio User Manual users manual
Continental Conair Limited GMRS Radio users manual
users manual
22 Channel With CTCSS GMRS
Radio
with 10 NOAA
Weather Channels
Model # HUM1200
Before operating your HUM1200,
please read this instruction manual
completely.
HUM1200 2/11/04 8:27 PM Page 1

HUM1200 2/11/04 8:27 PM Page 2

CAUTIONS
GMRS LICENSE
USE OF THIS RADIO WITHIN THE UNITED STATES REQUIRES AN
FCC GMRS LICENSE. AN INDIVIDUAL 18 YEARS OF AGE OR
OLDER, WHO IS NOT A REPRESENTATIVE OF A FOREIGN
GOVERNMENT IS ELIGIBLE TO APPLY FOR A GMRS SYSTEM
LICENSE. YOU WILL NEED TWO FORMS FROM THE FCC:
FCC FORM 159 AND FCC FORM 605 MAIN FORM AND
SCHEDULE F. YOU CAN FIND THE FORMS ONLINE AT
HTTP://WWW.FCC.GOV/FORMPAGE.HTML, OR CALL 1-800-418-3676.
NEVER HOLD THE TRANSCEIVER SO THAT THE
ANTENNA IS VERY CLOSE TO, OR TOUCHING EXPOSED
PARTS OF THE BODY WHILE TRANSMITTING. THE
TRANSCEIVER WILL PERFORM BEST IF THE MICRO
PHONE IS 2.5-5CM (1 to 2 INCHES) AWAY FROM THE
MOUTH AND THE TRANSCEIVER IS VERTICAL.
This handheld radio has been tested and meets the FCC RF
exposure guidelines when used with the TTI or authorized OEM
dealer’s accessories supplied or designated for this product. Use
of other accessories may not comply with FCC RF exposure
guideline.
DO NOT push the PTT button when not actually trying to transmit.
WARNING:
Changes and Modifications not expressly approved by
Conair Consumer Electronics could void user’s authority to operate the
equipment.
NOTE:
Please keep all packaging material for at least 90 days, in case
you need to return this product to your place of purchase or to Conair
Corporation. If metal from antenna becomes exposed, do not use unit.
Contact with exposed metal antenna can cause burns.
3
HUM1200 2/11/04 8:27 PM Page 3

Safety Training Information
Your radio generates RF electromagnetic energy during transmit mode.
This radio is designed for and classified as “Occupational Use Only”,
meaning it must be used only during the course of employment by indi-
viduals aware of the hazards, and ways to minimize such hazards.
This radio is NOT intended for use by the “General Population” in an
uncontrolled environment.
This radio has been tested and complies with the FCC RF exposure limits for
“Occupational Use Only”. In addition, the radio complies with the following
Standards and Guidelines with regard to RF energy and electromagnetic
energy levels and evaluation of such levels for exposure to humans:
FCC OET Bulletin 65 Edition 97-01 Supplement C, Evaluating
Compliance with FCC Guidelines for Human Exposure to Radio
Frequency Electromagnetic Fields.
American National Standards Institute (C95.1-1992), IEEE Standard
for Safety Levels with Respect to Human Exposure to Radio
Frequency Electromagnetic Fields, 3KHz to 300 GHz.
American National Standards Institute (C95.3-1992), IEEE
Recommended Practice for the Measurement of Potentially
Hazardous Electromagnetic Fields-RF and Microwave.
To ensure that your exposure to RF electromagnetic energy is
within the FCC allowable limits for occupational use, always
adhere to the following guidelines:
DO NOT operate the radio without a proper antenna attached, as
this may damage the radio and may also cause you to exceed
FCC RF exposure limits. A proper antenna is the antenna supplied
with this radio by the manufacturer or an antenna specifically
authorized by the manufacturer for use with this radio.
DO NOT transmit for more than 50% of total radio use time
(“50% duty cycle”). Transmitting more than 50% of the time can
cause FCC RF exposure compliance requirements to be exceeded.
The radio is transmitting when the “TX indicator” lights red. You
can cause the radio to transmit by pressing “PTT” switch.
ALWAYS use authorized accessories (antennas, batteries, belt
clips, speaker/mic, etc). Use of unauthorized accessories can
4
HUM1200 2/11/04 8:27 PM Page 4

cause FCC RF exposure compliance requirements to be exceeded.
ALWAYS keep the antenna at least 2.5cm (1inch) away from the
body when transmitting, and only use the belt-clips when attaching
the radio to your belt, etc., to ensure FCC RF exposure compliance
requirements are not exceeded. To provide the recipients of your
transmission the best sound quality, hold the antenna at least 5cm
(2 inches) from mouth, slightly away from mouth, and slightly off to
one side.
The information listed above provides the user with the information
needed to make him or her aware of RF exposure, and what to do to
assure that this radio operates within the FCC RF exposure limits.
Electromagnetic Interference/Compatibility
During transmissions, your radio generates RF energy that can possibly
cause interference with other devices or systems. To avoid such interfer-
ence, turn off the radio in areas where signs are posted to do so. DO NOT
operate the transmitter in areas that are sensitive to electromagnetic radia-
tion, such as hospitals, aircraft, and blasting sites.
5
HUM1200 2/11/04 8:27 PM Page 5

Contents
FCC NOTICE............................................................................................ 8
FEATURES ............................................................................................... 9
CONTROLS AND INDICATORS...........................................................11
LCD Display Indicators ...........................................................................13
OPERATION............................................................................................14
Turning On Your Unit ..............................................................................15
Adjusting The Volume..............................................................................15
Talking To Another Party .........................................................................15
Compass Button .......................................................................................16
Menu Button.............................................................................................17
Selecting Main Channels (1-22)...............................................................18
Selecting Tone Code (CTCSS Sub-Channel)...........................................18
Power Hi/Low ..........................................................................................20
Weather Band Operation ..........................................................................21
Weather Alert............................................................................................22
Clock.........................................................................................................23
VOX Mode ...............................................................................................24
Dual Watch Mode.....................................................................................25
Main Channel Scan ..................................................................................26
Vibration Alert..........................................................................................27
6
HUM1200 2/11/04 8:27 PM Page 6

Selecting Call Tones.................................................................................27
Roger Beep Tone ......................................................................................28
Key Tone Setting ......................................................................................30
Key Lock ...............................................................................................31
Calling Another Party...............................................................................32
Monitor.....................................................................................................32
LCD Back-Lighting Lamp .......................................................................32
TX Indicator LED Lamp..........................................................................32
Auto Power Saver.....................................................................................33
Low Battery Indicator ..............................................................................33
External Microphone/Speaker..................................................................33
Notes for Better Communication .............................................................33
Special Warning........................................................................................34
Specifications ...........................................................................................35
Service ......................................................................................................37
FOR OUT-OF-WARRANTY SERVICE..................................................37
Limited One Year Warranty......................................................................38
7
HUM1200 2/11/04 8:27 PM Page 7

FCC NOTICE
The FCC requires that you be advised of certain requirements involving
the use of this device. This device has been tested and found to comply
with the limits for a Class B digital device, pursuant to Part 15 of the
FCC Rules. These limits are designed to provide reasonable protection
against harmful interference in a residential installation. This equipment
uses and can generate radio frequency energy. If not installed and used in
accordance with the instructions, it may cause harmful interference to
radio communications. However, there is no guarantee that the interfer-
ence will not occur in a particular installation. If this equipment does
cause harmful interference to radio or television reception (which can be
determined by turning the equipment off and on), the user is encouraged
to correct the interference by one or more of the following measures:
Reorient or relocate the receiving antenna.
Increase the separation between the equipment and receiver.
Connect the equipment to an outlet on a circuit different from that
to which the receiver is connected.
Consult the manufacturer for technical assistance.
FCC INFORMATION: This device complies with Part 15 of the FCC
Rules. Operation is subject to the following two conditions:(1) This
device may not cause harmful interference, and (2) this device must
accept any interference received, including interference that may cause
undesired operation. Privacy of communications may not be ensured
when using this equipment.
8
HUM1200 2/11/04 8:27 PM Page 8

FEATURES
22 Channel and 38 CTCSS
Channel Scan & Dual Watch
VOX
10NOAA Weather Channels
Weather Alert
Vibration Alert
Received Signal Strength Indicator
Selectable Call Signal
Key Tone On/Off
Battery Save
Monitor
LCD Back Lighting (With 4 yellow-green LED)
Low Battery Indicator
Roger Beep Tone
Keypad Lock
TX LED Indicator
Power Hi/Low
Compass
Clock
9
HUM1200 2/11/04 8:27 PM Page 9
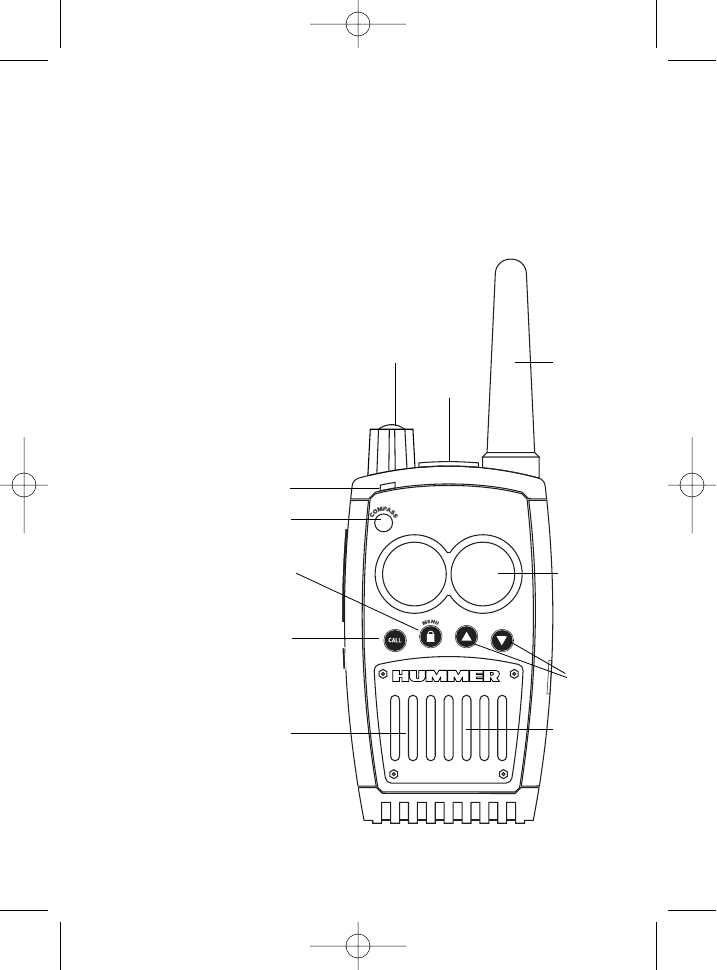
CONTROLS AND INDICATORS
1. External Speaker and Mic Jack
2. Power On/ Off and Volume Control
3. Up Channel /Down Channel
4. Menu/Lock Button
5. CALL Button
6. Compass Button
7. Built-In Speaker
8. Antenna (Fixed Antenna)
9. Transmit LED Indicator
10. Built-In Microphone
11. LCD Screen
10
3
10
7
5
4
6
9
2
1
8
11
HUM1200 2/11/04 8:27 PM Page 10
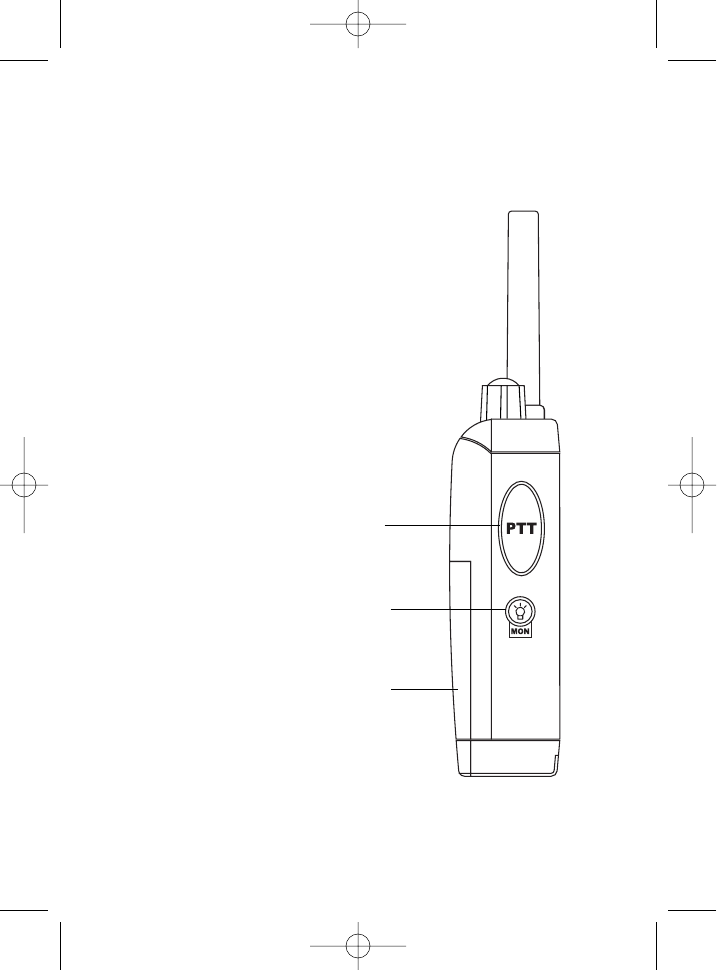
12. Push-to-Talk (PTT) Button
13. Monitor Button
14. Battery Door
11
12
13
14
HUM1200 2/11/04 8:27 PM Page 11
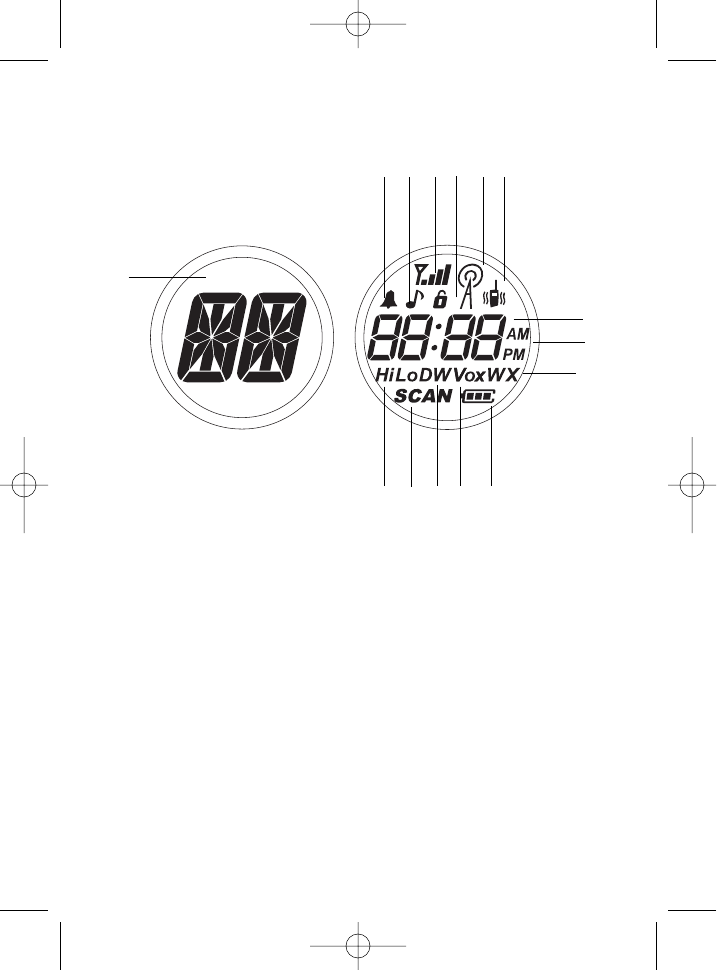
LCD Display Indicators
1. Main Channel and Compass Indicator 9. AM/PM Indicator
2. Roger Beep Indicator 10. Weather Radio
3. Call Tone Indicator 11. Battery Level Indicator
4. Signal Strength Indicator 12. VOX Indicator
5. Key Lock Indicator 13. Dual Watch Mode Indicator
6. NOAA -Alert 14. Scan Indicator
7. Vibration -Alert 15. TX Power Hi/Lo Indicator
8. CTCSS Sub-Channel and Clock Indicator
Note: The Battery icon at the bottom right of the display will indicate the
battery power left in the installed batteries, or rechargeable battery pack.
Replace the batteries, or charge the rechargeable battery pack when the
Battery icon is low.
12
2 3 4 5 6 7
15 14 13 12 11
1
8
9
10
HUM1200 2/11/04 8:27 PM Page 12

OPERATION
Installing The Batteries
Remove the Battery Clip (if installed)
1. Pull down locking tab located at the bottom of the battery compartment,
and lift the door up to remove the battery cover.
2. Insert 4 ‘AA’ size batteries or rechargeable batteries (charge up separately).
Position batteries according to polarity markings.
13
HUM1200 2/11/04 8:27 PM Page 13
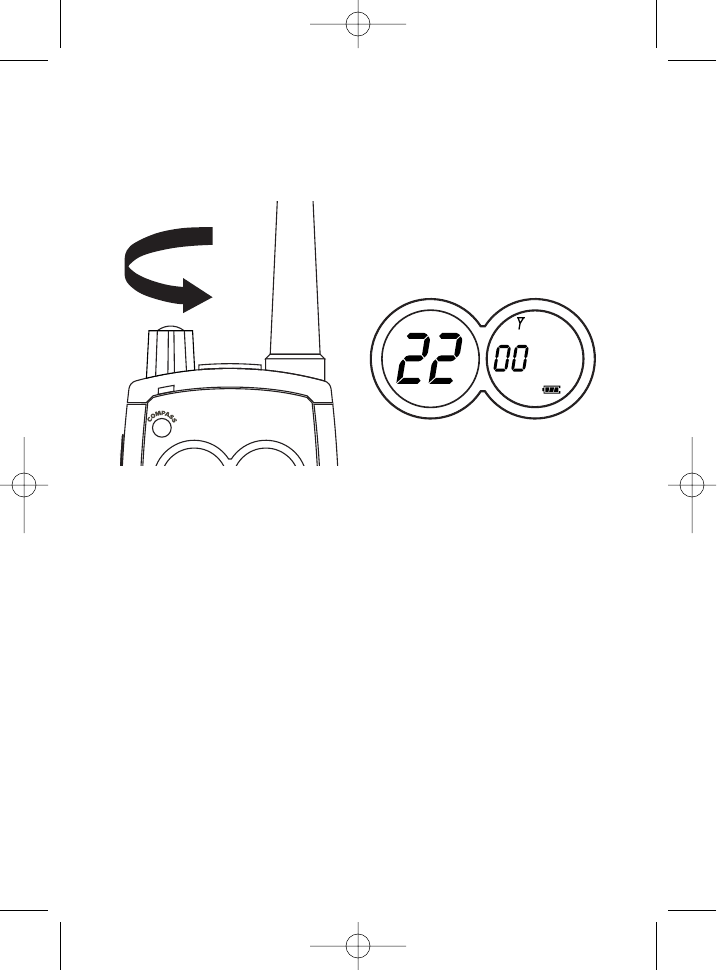
Turning On Your Unit
Rotate On/Off Volume knob “counterclockwise”. An audible tone will
indicate that the unit is on and the LCD will go to operation mode.
Adjusting The Volume
Rotate the Power On/Off Volume control knob “clockwise” or “counter-
clockwise” to adjust the volume level.
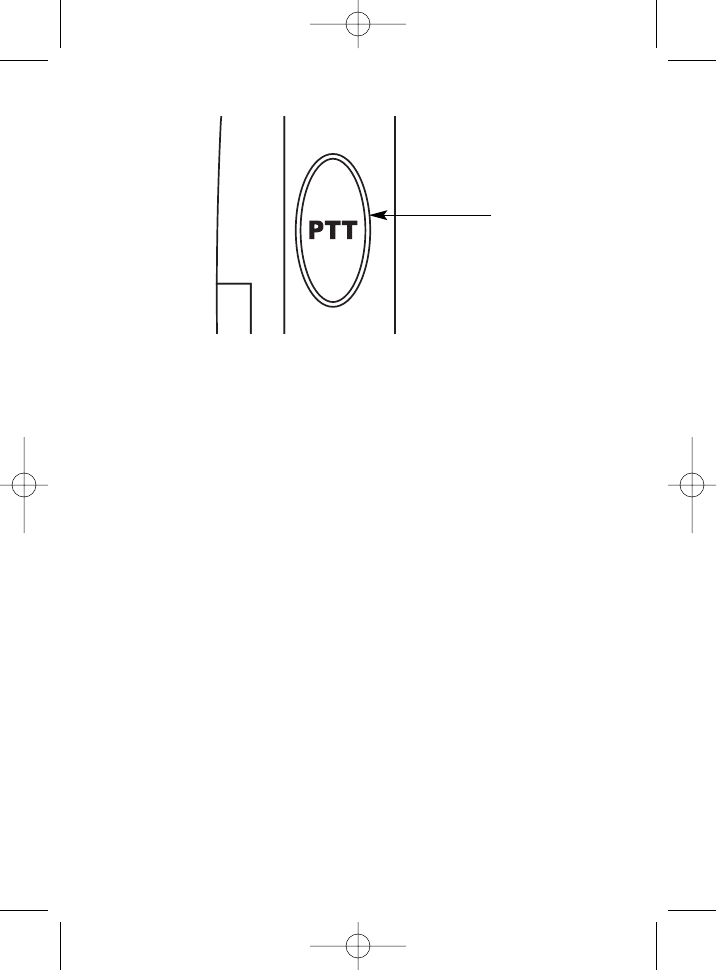
Talking To Another Party
To verbally communicate with another party;
1. Press and hold the PTT button to transmit your communication.
2. Release the PTT button when you complete your communication.
3. While the PTT button is pressed, you cannot receive incoming communications.
14
Hi
HUM1200 2/11/04 8:27 PM Page 14
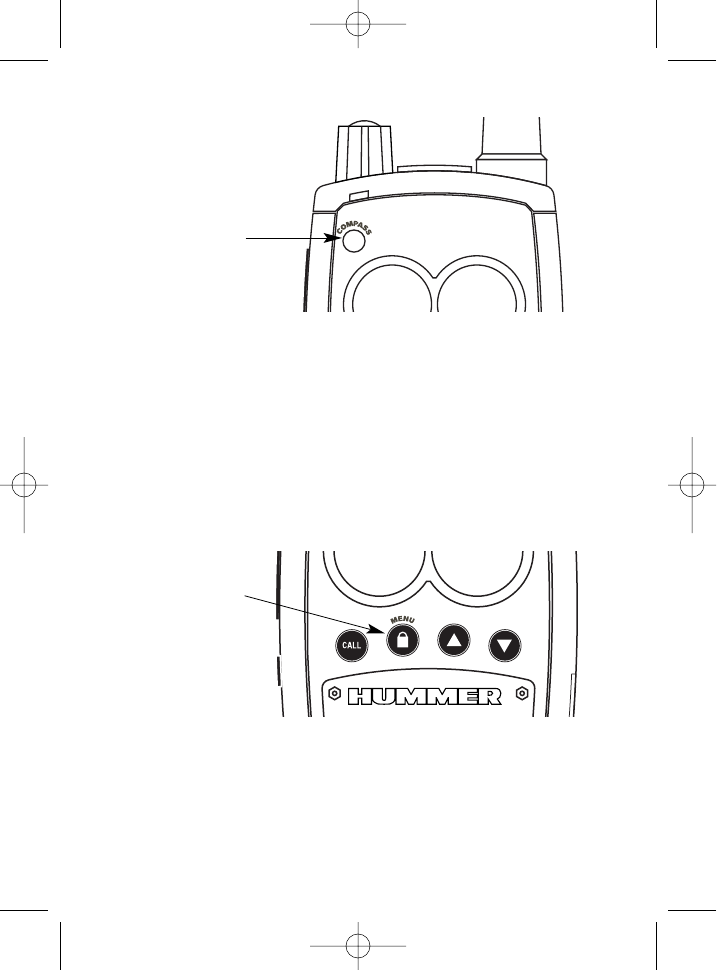
Compass Button
Your HUM1200 radio features an 8-point digital compass.
To Calibrate the Compass:
1. Press and hold the COMPASS Button for 2 seconds. The compass icon
“CALlbr” will appear in the display.
2. Hold the radio in front of you, parallel to the ground, and turn around
in a circle at least two (2) times (or you may place the radio on the
palm of one of your hands, parallel to the ground, and turn it in a
circle at least two (2) times with your hand).
3. Press the COMPASS button again.
4. a. If compass calibration was successful, “SUCCESS” will appear on
the display for one (1) second, then the radio will automatically return
to Compass Mode.
b. If “FAIL” appears in the LCD, repeat steps 1 through 3. (If you
receive “FAIL” messages, change locations and repeat step 1).
15
Push to talk
HUM1200 2/11/04 8:27 PM Page 15
To Use Your Compass:
1. After proper calibration, press and release the Compass Button. Your
current direction will be displayed on the left-hand side of the LCD
display and the real time clock will be displayed on the right-hand
side of the LCD display.
2. To exit Compass Mode and return to Standby Mode, press and release
the Compass button.
Menu Button
This button is used to select various feature settings in your HUM1200 radio.
Note: After the Menu button has been pressed, the Up (
) or Down (
)
button must be pressed within 15 seconds, otherwise the unit will revert
back to Normal mode.
16
Compass Button
Menu Button
HUM1200 2/11/04 8:27 PM Page 16
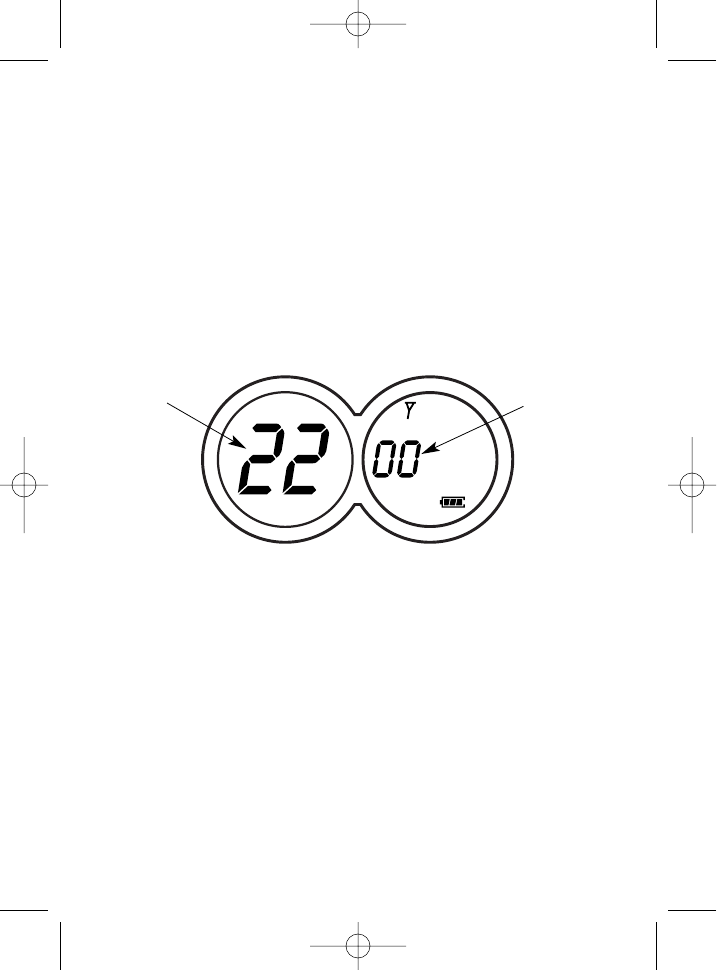
Selecting Main Channels (1-22)
Your HUM1200 radio is equipped with 22 main channels.
Channels 1-7 are on GMRS/FRS frequencies, 8-14 are on FRS frequencies
and 15-22 are on GMRS frequencies.
Note: Your HUM1200 radio can be used with any other FRS and GMRS
Radio.
To select the channel:
Press the Up (
) or Down (
) button to select the desired channel.
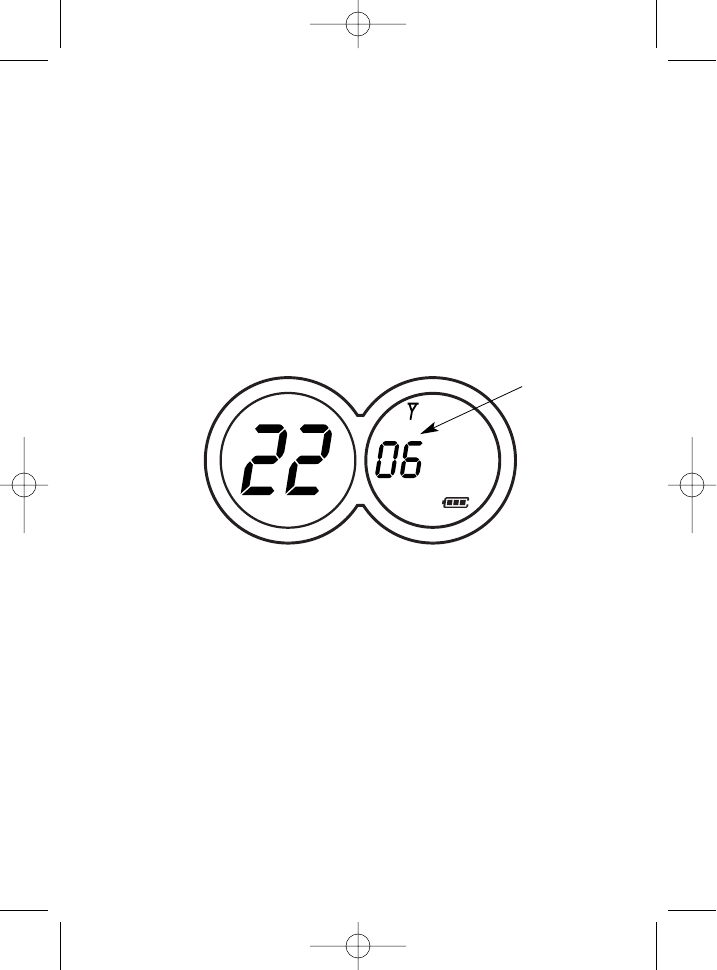
Selecting Tone Code (CTCSS Sub-Channel)
This feature allows you to utilize the coded squelch tones (1-38) within
one of the 22 main channels. This enables you to communicate with
another party in the same main channel using the same sub-channel. You
will only hear users on the same sub-channel.
17
Hi
Main Channel CTCSS
Sub-Channel
HUM1200 2/11/04 8:27 PM Page 17
To Select the CTCSS sub-channels:
1. While in the normal mode, press the Menu button once.
2. A sub-channel number will be displayed on the LCD screen.
3. Press the Up (
) or Down (
) button to select the desired sub-channel.
4. Press the Menu button to proceed to the next item setting.
OR Press the PTT button once to set the sub channel, and exit from
the CTCSS selection mode.
OR Press the Compass button to exit the program mode and enter the
compass mode.
18
Hi
CTCSS
Sub-Channel
HUM1200 2/11/04 8:27 PM Page 18

Power Hi/Low
Your HUM1200 Radio permits selection of the transmitting power on
High (3W) or Low (0.5W).
1. Press the Menu button twice and the Power ( Po) icon and level will
appear on the LCD screen. Using low power, the unit will have a
lower transmit range but battery life will be increased.
2. Select Hi or Low by pressing the Up (
) or Down (
) button.
3. Press the Menu button to proceed to next item setting.
OR Press the PTT button once to set the Transmit Power Level, and
exit from the Transmit Power selection mode.
OR Press the Compass button once to exit the program mode and
enter the compass mode.
Note: On FRS frequencies (8-14CH), the power goes into 0.5W
(low power setting) automatically. The FCC requires that the trans-
mitting power for FRS channels (8-14CH) must be 0.5W or less.
19
Hi
Flashing
HUM1200 2/11/04 8:27 PM Page 19
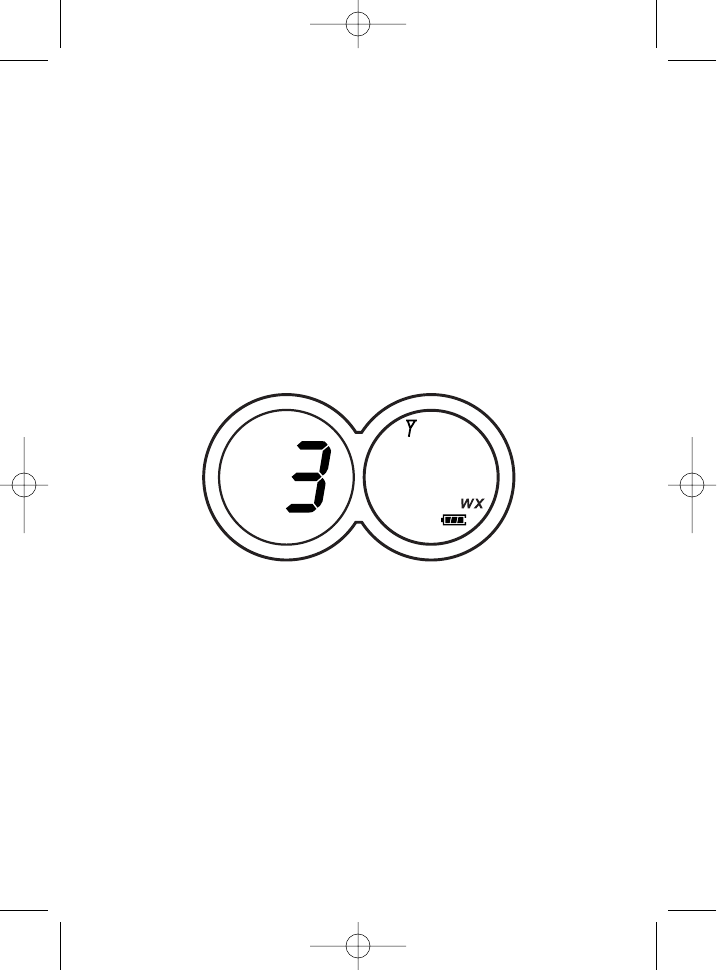
Weather Band Operation
This feature provides access to 10 weather channels (10 NOAA chan-
nels). To select a weather channel, the unit must be in the weather chan-
nel mode.
Press the Menu button until icon (WX ) is flashing to enter the selection
mode.
To change the channel:
1. Press and release the Up (
) or Down (
) button to move to higher or
lower main weather channel number.
Note: When you are in weather channel band, you cannot receive GMRS signals.
20
HUM1200 2/11/04 8:27 PM Page 20

Weather Alert
This weather alert mode notifies the user of unusual or emergency
weather situations.
To activate the weather alert:
1. Press and release the MENU button until ( ) is flashing on the LCD screen.
2. Press the Up (
) or Down (
)button to turn Alert on or off.
3. Press the PTT Button once for confirmation of your choice
OR press the MENU button to proceed next item setting.
OR Press the Compass button to exit the program mode and enter the
compass mode.
21
HUM1200 2/11/04 8:27 PM Page 21

Clock
To activate the clock:
1. Press the MENU button 5 times or press and release the MENU
button until the following display is shown in the LCD.
2. Press the Up (
) or Down (
)button to set the hour.
3. Press MENU for confirmation of the hour setting
4. Press the Up (
) or Down (
) button to set the minutes.
5. Press MENU for confirmation of the minutes setting.
6. Press the Up (
) or Down (
)button to set the AM/PM.
7. Press MENU for confirmation of the AM/PM setting.
8. To proceed to next item, press menu again.
OR Press PTT to exit the program mode.
OR Press the Compass button once to exit the program mode and
enter the compass mode.
22
HUM1200 2/11/04 8:27 PM Page 22
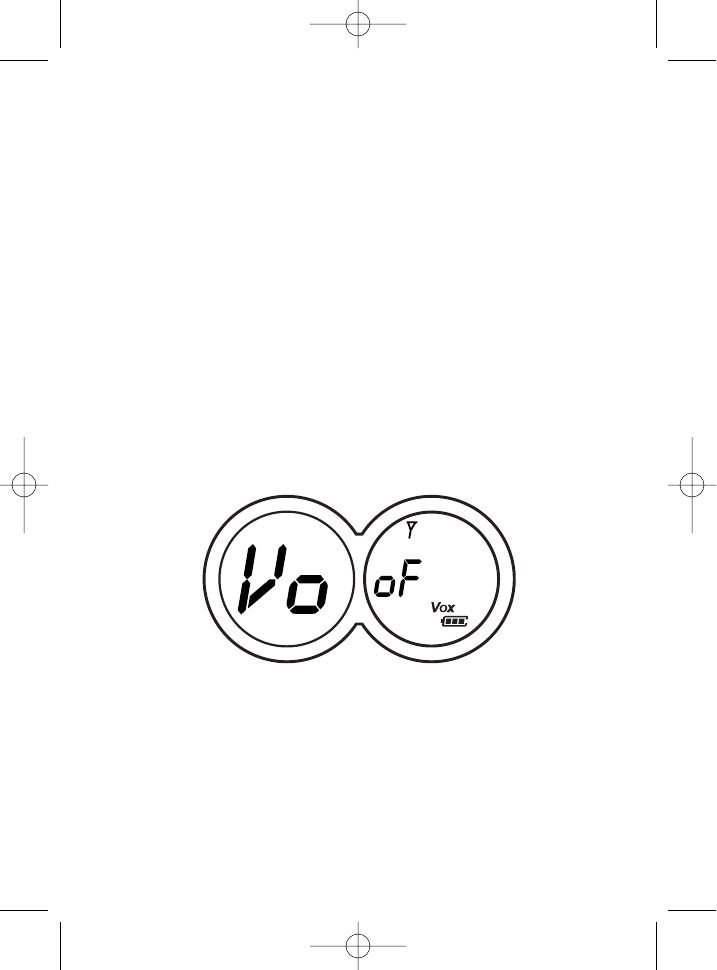
VOX Mode
This feature enables you to have hands-free conversation. Your voice or
nearby sound is detected and the radio transmits without the need to
press the PTT button.
To set the radio for VOX operation:
1. Press and release the Menu button until the (VOX ) icon is flashing on
the LCD screen.
2. Press the Up (
) or Down (
)button to select VOX off or from 1 to 5
to select VOX level sensitivity. The higher the number, the higher the
sensitivity.
3. To exit the VOX selection mode, press the Menu button to proceed to
other items on the menu.
OR simply press the PTT button.
OR Press the Compass button once to exit the program mode and
enter the compass mode.
23
HUM1200 2/11/04 8:27 PM Page 23
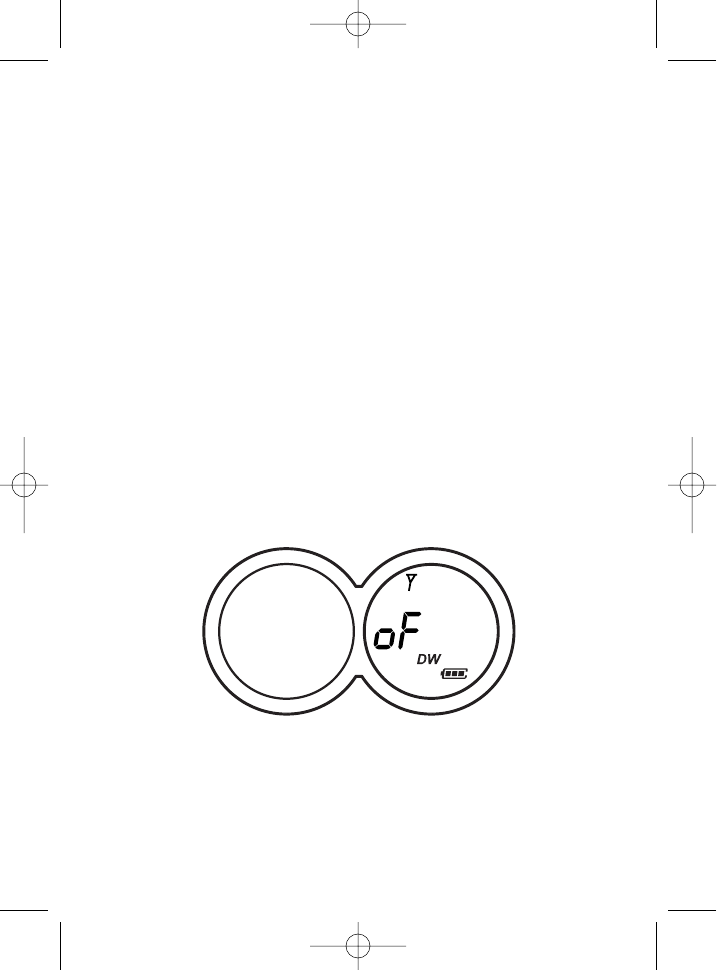
Dual Watch Mode
This feature allows you to monitor two channels at the same time. While
in dual watch mode, the unit will continuously monitor both the primary
and secondary channels. When an active signal is found, the conversa-
tion will be heard. 5 seconds after the communication has been complet-
ed, the unit will resume scanning two channels.
Pressing the PTT button while receiving transmission will set the unit to
transmit on the same channel. Pressing the PTT button when no signal is
being received will set the unit to transmit on the primary channel.
To set the Dual Watch Mode:
1. Press the Menu key until the (DW ) icon is flashing.
2. Select the desired channel by pressing the Up (
) or Down (
)button.
3. Press the PTT button once to confirm the selection and exit the
selection mode.
OR Press the MENU button to proceed to the other menu item and
save the preset DW channel.
OR Press the Compass button once to exit the program mode and
enter the compass mode.
24
HUM1200 2/11/04 8:27 PM Page 24
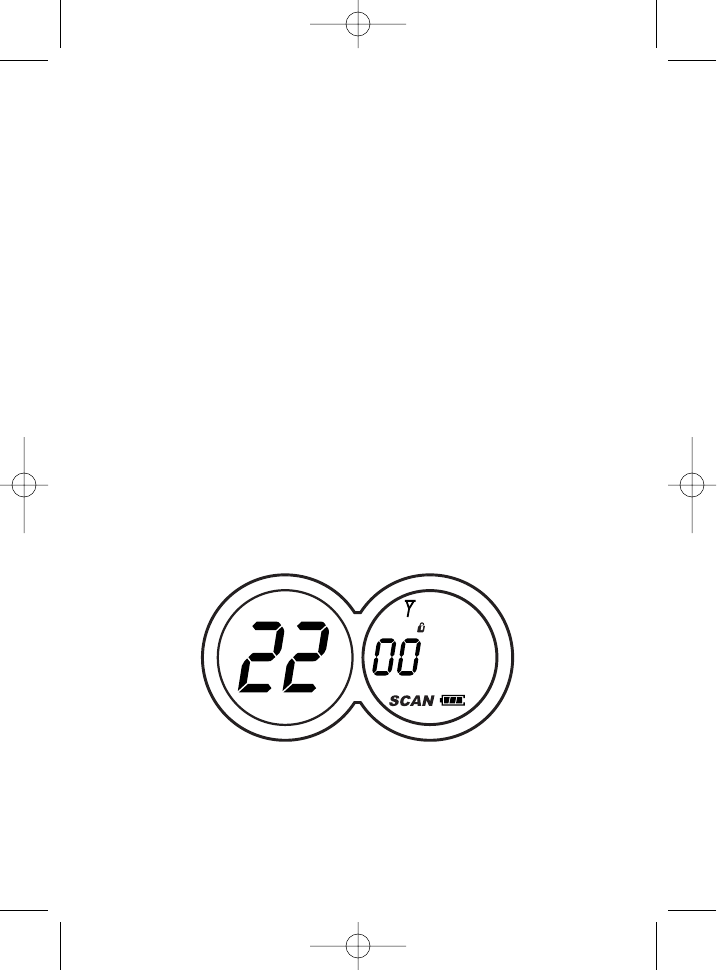
Main Channel Scan
This feature allows you to monitor all channels automatically for valid
signals. While scanning, you can transmit and receive. When a signal is
received, scan will be interrupted and you will hear conversation. When
conversation ends, scan will be resumed automatically in 5 seconds.
1. To start Scan mode, press the menu until the SCAN icon flashes on the LCD.
2. Press the Up (
) or Down (
)button to start the channel scan. The unit
will scan through the 22 channels to find the active channel. When an
active channel is found, conversation will be heard. If the unit does
not locate an active signal and you would like to transmit, press the
PTT button to return to home channel operation.
3. When an active signal is detected but another channel is desired, press
the Up (
) or Down (
)button to bypass the current channel and con-
tinue to search for another active channel.
4. To exit the Scan mode, press the PTT button once.
OR press the MENU button again to stop scanning and return to standby mode.
OR Press the Compass button once to exit the program mode and enter the
compass mode.
25
HUM1200 2/11/04 8:27 PM Page 25
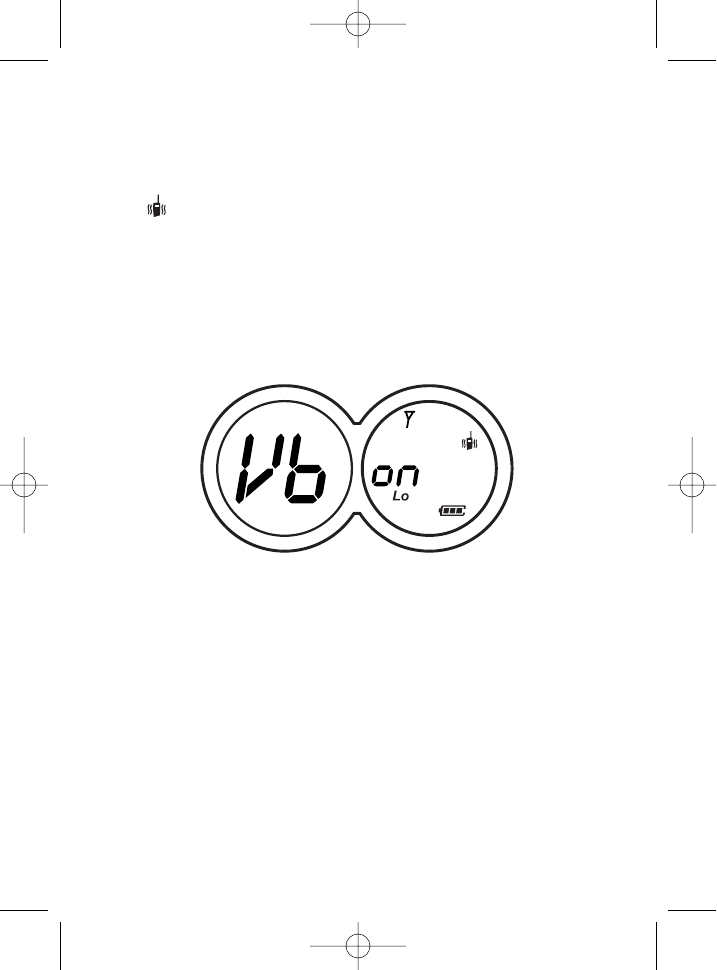
Vibration Alert
Your HUM1200 radio features vibration alerts to notify you of an incoming call.
To set vibration mode:
1. Press the MENU button until Vb , On or OF and the vibration icons
( ) are flashing.
2. Press the Up (
) or Down (
) button to select vibration on or off.
3. Press the PTT button to exit the vibration alert mode.
OR Press the menu button to proceed to the next menu item.
OR Press the Compass button once to exit the program mode and
enter the compass mode.
Note: When receiving an incoming call, the selected alert function will
be activated for about 2 seconds and then stop for 30 seconds.
Any incoming call received during the 30 seconds will not trigger the
alert device. The radio will automatically resume and will be ready for
another alert after 30 seconds.
26
HUM1200 2/11/04 8:27 PM Page 26

Selecting Call Tones
Your HUM1200 radio provides 5 user-selectable call tones.
To select your desirable call tones:
1. Press the MENU button until “CA” appears on the LCD screen.
2. Press the Up (
) or Down (
)button to select your desired call tone.
3. Press the MENU button to proceed to the next item in the menu.
OR press PTT button once to exit the program mode.
OR Press the Compass button once to exit the program mode and
enter the compass mode.
27
HUM1200 2/11/04 8:27 PM Page 27
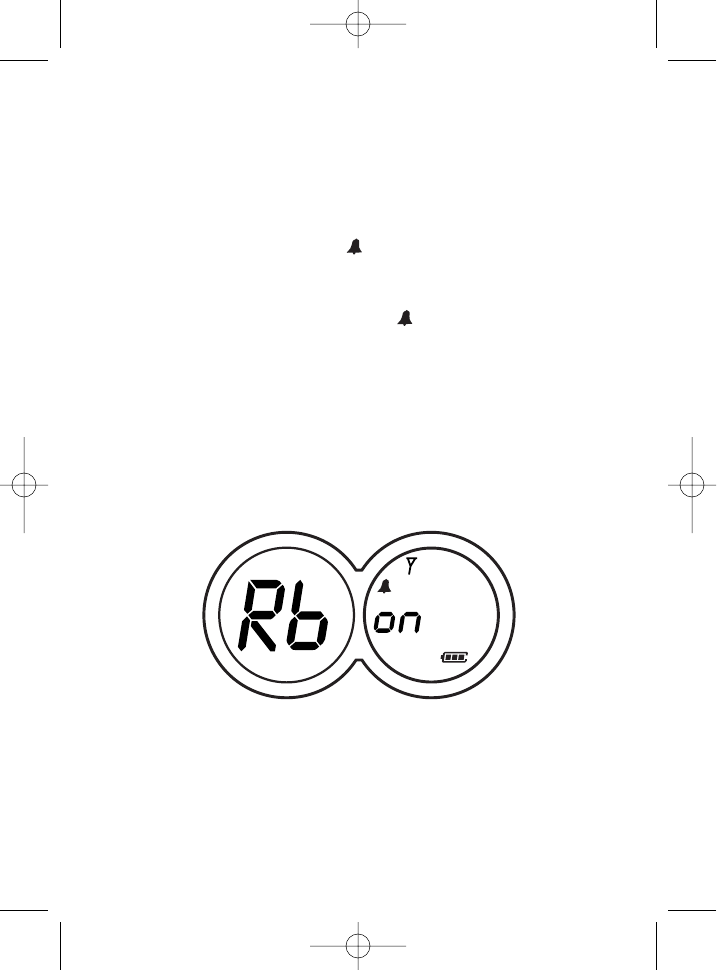
Roger Beep Tone
The Roger Beep is a tone which is automatically transmitted whenever
the PTT button is released. This lets the other person know that you are
finished transmitting your message.
To enable or disable the Roger Beep Tone:
1. Press the MENU button until the ( ) icon is flashing on the LCD screen.
2. Press the Up (
) or Down (
)button to enable (“On ” will appear on
the LCD) or disable (“OF ” will appear on the LCD screen) the Roger
Beep Tone feature. When enabled, the ( ) icon will appear on the
LCD screen.
3. To exit the Roger Beep Tone feature, press the PTT button once.
OR press the MENU button to proceed to other menu items.
OR Press the Compass button once to exit the program mode and
enter the compass mode.
Remark: The Roger Beep Tone will synchronize with the tone emitted on
the receiver side.
28
HUM1200 2/11/04 8:27 PM Page 28
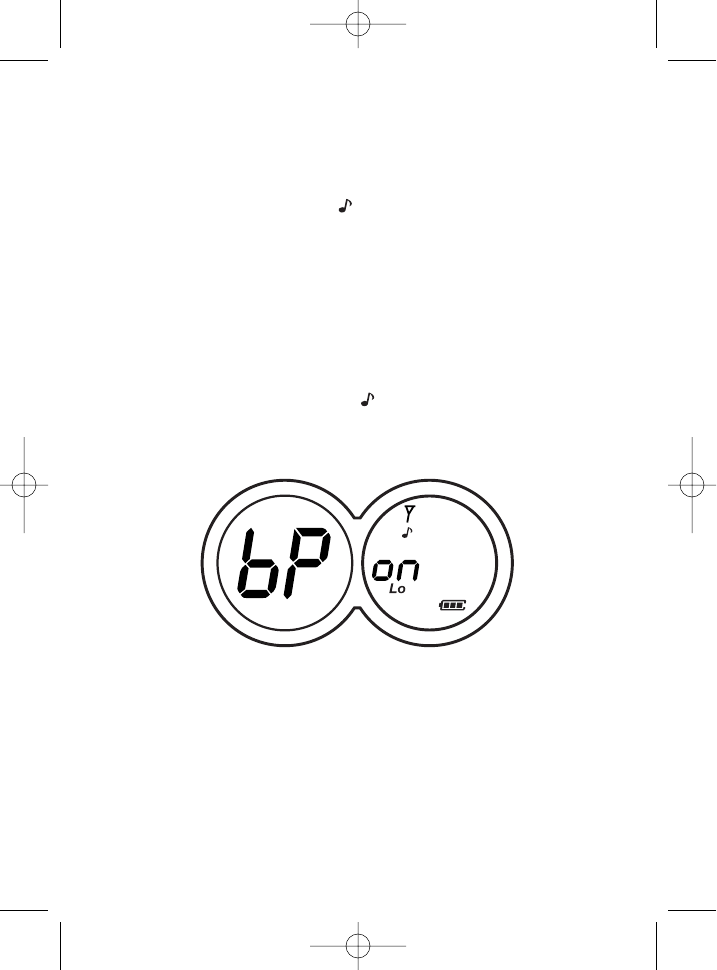
Key Tone Setting
This feature allows the radio to sound a confirmation beep tone whenev-
er keys are pressed.
To turn the key tone on or off:
1. Press the MENU button until ( ) icon is flashing on the LCD screen.
2. Press the Up (
) or Down (
)button to enable (“ON ” will appear on
the LCD) or disable (“OF ” will appear on the LCD screen) the key tone
feature.
3. To exit the selection mode, press the MENU button to Normal mode
OR press PTT to exit the selection mode.
OR Press the Compass button once to exit the program mode and enter
the compass mode.
Note: When the key tone is on, the ( ) icon will be displayed on the
LCD screen.
29
HUM1200 2/11/04 8:27 PM Page 29
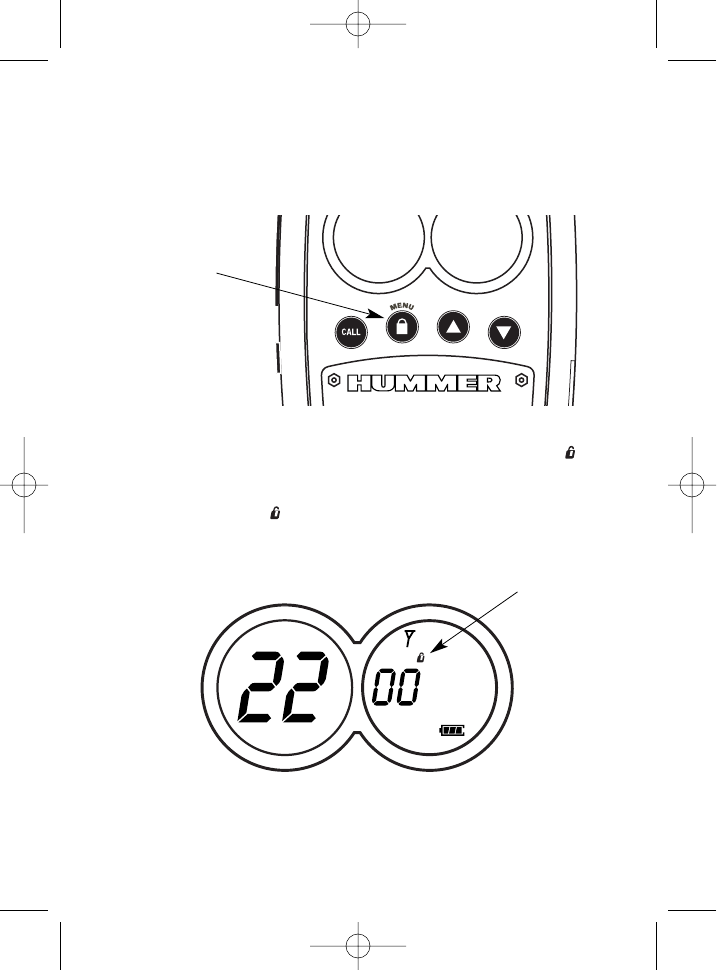
Key Lock
This feature prevents accidental changing of the unit settings. The Key
Lock function will temporarily disable the Channel Up/Down, CALL,
COMPASS, and MENU button.
To activate Key Lock:
1. Press and hold the MENU button for 2 seconds. The key Lock icon ( )
will appear on the LCD screen and the Key Lock will be activated.
2. To unlock the Key Lock function, press and hold the MENU button
for 2 seconds. The ( ) icon will disappear and normal operation will
resume.
30
Hi
Key Lock
Key Lock
Icon
HUM1200 2/11/04 8:27 PM Page 30
Calling Another Party
To alert another party that you wish to communicate with them:
1. Select a desired channel by pressing the Up (
) or Down (
)button.
2. Press the Call button.
3. Wait for the party’s response or proceed to talk with other party.
Note: Both the calling and receiving units must be on the same main
channel and sub-channel for the call function to work.
When the Call button is pressed, the TX LED indicator will turn on.
Monitor
Your HUM1200 radio has a feature that checks for a weak signal in the
current channel.
1. Press the Monitor ( ) button momentarily; LCD backlight will turn
on.
2. To return to normal operation, release the Monitor ( ) button.
3. Press and hold Monitor ( ) button; the speaker will turn on and you
can listen to another party communicate.
4. To return to normal operation, press the Monitor ( ) button once.
LCD Back-Lighting Lamp
This lamp is used to illuminate the LCD screen. It turns on automatically
when you press the MON ( ) button.
TX Indicator LED Lamp
When the PTT button is pressed, the red (TX ) LED will light to confirm
transmitting signal.
31
HUM1200 2/11/04 8:27 PM Page 31

Auto Power Saver
Your HUM1200 unit has a unique circuit designed to extend battery life.
If nothing is transmitted or received within 10 seconds, the unit will
automatically switch to Battery Save Mode.
Low Battery Indicator
When the batteries are low and need to be replaced or recharged, the
low battery icon ( ) will display and transmission will be disabled.
If using standard batteries, replace them. If using rechargeable batteries,
recharge them.
Note: When you install the batteries, be sure to follow the polarity dia-
gram inside battery compartment.
External Microphone/Speaker
Your HUM1200 radio has an external microphone jack that enables you to
connect an external microphone in order to free your hands for other tasks.
Simply raise the rubber flap and insert the microphone plug into the
microphone jack on the top of the radio.
Notes for Better Communication
1. Your HUM1200 radio has been designed to maximize performance
and improve transmission range in the field. To avoid interference, it
is recommended that you do not use the unit closer than 5 feet from
another unit.
2. For better transmission results, keep your mouth about 2-3 inches
from the microphone and speak slowly in a normal voice.
32
HUM1200 2/11/04 8:27 PM Page 32

3. If you wear the radio on your body, ensure that the Antenna is at least
one inch (2.5cm) from your body when transmitting.
4. Reverse polarity (+/-) may cause serious damage to the unit. Do not
reverse the polarity (+/-) of the batteries in the battery compartment.
Special Warning
1. Do not operate the transceiver unless you are licensed to do so.
2. Avoid exposing the transceiver to water or extreme temperatures.
3. Do not attempt to modify or in any way increase the output of this
transceiver. Its output is designed to meet the legal limits set by the FCC.
4. Do not use this device or change the batteries in a potentially explosive
atmosphere, since sparks in such areas could result in an explosion.
5. Turn your transceiver off whenever posted notices restrict the use of
radios or cellular phones. Facilities such as hospitals may use equip-
ment that is sensitive to RF energy.
6. Remove the batteries from the transceiver if you do not expect to use
the batteries for long periods. This will eliminate the possibility of
chemicals leaking from the batteries and corroding the transceiver.
33
HUM1200 2/11/04 8:27 PM Page 33

Specifications
Main Channel Frequencies
Channel Frequency (MHz) Channel Frequency (MHz)
1462.5625 12 467.6625
2462.5875 13 467.6875
3462.6125 14 467.7125
4462.6375 15 462.5500
5462.6625 16 462.5750
6462.6875 17 462.6000
7462.7125 18 462.6250
8467.5625 19 462.6500
9467.5875 20 462.6750
10 467.6125 21 462.7000
11 467.6375 22 462.7250
NOTE: GMRS channels (1-7, 15-22) and FRS channels (8-14)
Weather Channel Frequencies
Channel Frequencies (MHz) Channel Frequencies(MHz)
1162.550 6 162.500
2162.400 7 162.525
3162.475 8 161.650
4162.425 9 161.775
5162.450 10 163.275
34
HUM1200 2/11/04 8:27 PM Page 34

CTCSS (Continuous Tone Code Squelch System) Tone frequencies (in Hz)
CTCSS Freq. Hz CTCSS Freq. Hz
167.0 20 131.8
271.9 21 136.5
374.4 22 141.3
477.0 23 146.2
579.7 24 151.4
682.5 25 156.7
785.4 26 162.2
888.5 27 167.9
991.5 28 173.8
10 94.8 29 179.9
11 97.4 30 186.2
12 100.0 31 192.8
13 103.5 32 203.5
14 107.2 33 210.7
15 110.9 34 218.1
16 114.8 35 225.7
17 118.8 36 233.6
18 123.0 37 241.8
19 127.3 38 250.3
35
HUM1200 2/11/04 8:27 PM Page 35

Service
According to FCC regulations, this equipment, which has been certified
and registered by the FCC, may only be repaired by authorized persons.
If repairs or adjustments are made by an authorized person, the FCC cer-
tification may be voided, Should you encounter any problems, please
call the Conair Consumer Electronics toll-free Customer Help Line for
assistance.
FOR IN-WARRANTY SERVICE
Package your units (including all accessories) and ship the units postage
prepaid and insured (for your protection) to:
CONAIR CONSUMER ELECTRONICS
7475 N.Glen Harbor Blvd., Glendale, AZ85307
Be sure to include your return address, proof of purchase, a daytime
phone number, $10.00 for postage and handling, and a brief explanation
of your difficulties.
*NOTE: California residents need only provide proof of purchase and
should call 1-888-875-8658 for shipping instructions.
FOR OUT-OF-WARRANTY SERVICE
You may call the Customer Service Help Line for the price of a replace-
ment before returning your unit, Please follow all instructions for In-
Warranty service (above) to return your unit, and mark the package:
DEPT: Out-of-Warranty
If you have called and know the cost of your replacement, please include
this information with your return for prompt service.
36
HUM1200 2/11/04 8:27 PM Page 36

Limited One Year Warranty
Conair Consumer Electronics warrants to the original purchaser that this product is
free from defects in materials and workmanship under normal installation, use, and
service for a period of one (1) year from the original date of purchase as shown on
the purchaser’s receipt. The obligation of Conair Consumer Electronics under this
warranty shall be limited to repair or replacement (at our option) during the war-
ranty period of any part which proves defective in material or workmanship under
normal installation, use, and service, provided the product is returned to Conair
Consumer Electronics TRANSPORTATION CHARGES PREPAID (California
residents call 1-888-875-8658 for shipping instructions). If we choose to replace
your Conair Consumer Electronics product, the replacement will be warranted for
either (a) 90 days or (b) the remainder of the original one year warranty period,
whichever is longer. A copy of the original purchase receipt must accompany
products returned to us. In the absence of such purchase receipt, the warranty peri-
od shall be one (1) year from the date of manufacture. To obtain warranty service,
return the defective product to the following address:
Conair Consumer Electronics
7475 N. Glen Harbor Blvd.
Glendale, AZ 85307
together with your sales slip and $10 for postage and handling (California residents
need only provide proof of purchase). Please be sure to include a return address
description of the product defect, product serial number and any other information
pertinent to the product’s return. Please pay by check or money order.
NOTE: For added protection and secure handling of any Conair Consumer
Electronics product that is being returned, we recommend you use a traceable,
insured delivery service. Conair Consumer Electronics cannot be held responsible
for in-transit damage or for packages that are not delivered to us. Lost and/or dam-
aged products are not covered under warranty.
This warranty shall be invalid if the product is damaged as a result of defacement,
misuse, abuse, neglect, accident, destruction, or alteration of the serial number,
improper electrical voltages or currents, repair alteration or maintenance by any
person or party other than our own service facility, or any violation of instructions
furnished by us. This warranty is also rendered invalid if this product is removed
37
HUM1200 2/11/04 8:27 PM Page 37

from the country in which it was purchased, if it is used in a country for which it
was not designed. Conair Consumer Electronics assumes no responsibility for
damages or penalties incurred resulting from the use of this product in a manner or
location other than that from which it is intended. This one-year limited warranty
is in lieu of all other express warranties, obligations, or liabilities. This warranty
excludes all incidental or consequential damages. ANY IMPLIED WAR-
RANTIES, OBLIGATIONS, OR LIABILITIES, INCLUDING BUT NOT LIM-
ITED TO THE IMPLIED WARRANTIES OF MERCHANTABILITY AND
FITNESS FOR A PARTICULAR PURPOSE, SHALL BE LIMITED IN
DURATION TO THE ONE-YEAR DURATION OF THIS WRITTEN LIMIT-
ED WARRANTY. SOME STATES DO NOT ALLOW LIMITATIONS ON
INCIDENTAL OR CONSEQUENTIAL DAMAGES OR HOW LONG AN
IMPLIED WARRANTY LASTS, SO THESE LIMITATIONS MAY NOT
APPLY TO YOU.
CALIFORNIA RESIDENTS ONLY
California law provides that for In-Warranty Service, California residents have the
option of returning a nonconforming product (A) to the store where it was pur-
chased or (B) to another retail store which sells Conair Consumer Electronics prod-
ucts of the same type. The retail store shall then decide to either repair the product,
refer the consumer to an independent repair facility, replace the product, or refund
the purchase price less the amount directly attributable to the consumer’s prior
usage of the product. If either of the above two options does not result in the
appropriate relief to the consumer, the consumer may then take the product to an
independent repair facility if service or repair can be economically accomplished.
Conair Consumer Electronics and not the consumer will be responsible for the rea-
sonable cost of such service, repair, replacement, or refund for nonconforming
products under warranty.
California residents may also, according to their preference, return nonconforming
products directly to Conair Consumer Electronics for repair or, if necessary,
replacement, by calling our Consumer Service Center toll-free at 1-888-875-8658.
Conair Consumer Electronics will be responsible for the cost of the repair, replace-
ment, and shipping and handling of such nonconforming products under Warranty.
38
HUM1200 2/11/04 8:27 PM Page 38

HUM1200 2/11/04 8:27 PM Page 39

STOP…DON’T TAKE ME BACK TO THE STORE.
LOOK…FOR THE TOLL-FREEHELPTELEPHONE NUMBER.
LISTEN…AS THE EXPERTS TALK YOU THROUGH THE PROBLEM.
For immediate answers to your questions regarding operation,
Missing parts or installation, call the
CONAIR CONSUMER ELECTRONICS
RETAIL SALES HELP LINE AT:
1-888-875-8658
Monday-Friday 8:30a.m.-9:00p.m.EST
Saturday 8:30a.m.-12:30p.m.EST
CONAIR CONSUMER ELECTRONICS
7475 N.Glen Harbor Blvd., Glendale, AZ85307
HUM1200 IB-5131 Printed in China
HUM1200 2/11/04 8:27 PM Page 40