Setup Guide Odyssey FS700 5.10.100
2015-03-17
: Convergent-Design Setup-Guide-Odyssey-Fs700-5.10.100 Setup-Guide-Odyssey-FS700-5.10.100 5.10.100 Docs
Open the PDF directly: View PDF ![]() .
.
Page Count: 19
Updated February 23, 2015 | Firmware Release v5.10.100
ProRes 422 (HQ)
ProRes 422
ProRes 422 (LT)
4K RAW up to 60p
4K RAW burst up to 120p
4K RAW to 4K Apple ProRes up to 30p
4K RAW to UHD Apple ProRes up to 30p
2K RAW up to 240p
4K RAW to 2K Apple ProRes up to 60p
4K RAW to HD Apple ProRes up to 60p
1080p video to Apple ProRes up to 60p
SONY FS700
Odyssey7Q
Odyssey7Q+
SETUP GUIDE
RECORDING CAPABILITIES
RECORD TIMES & FORMATS
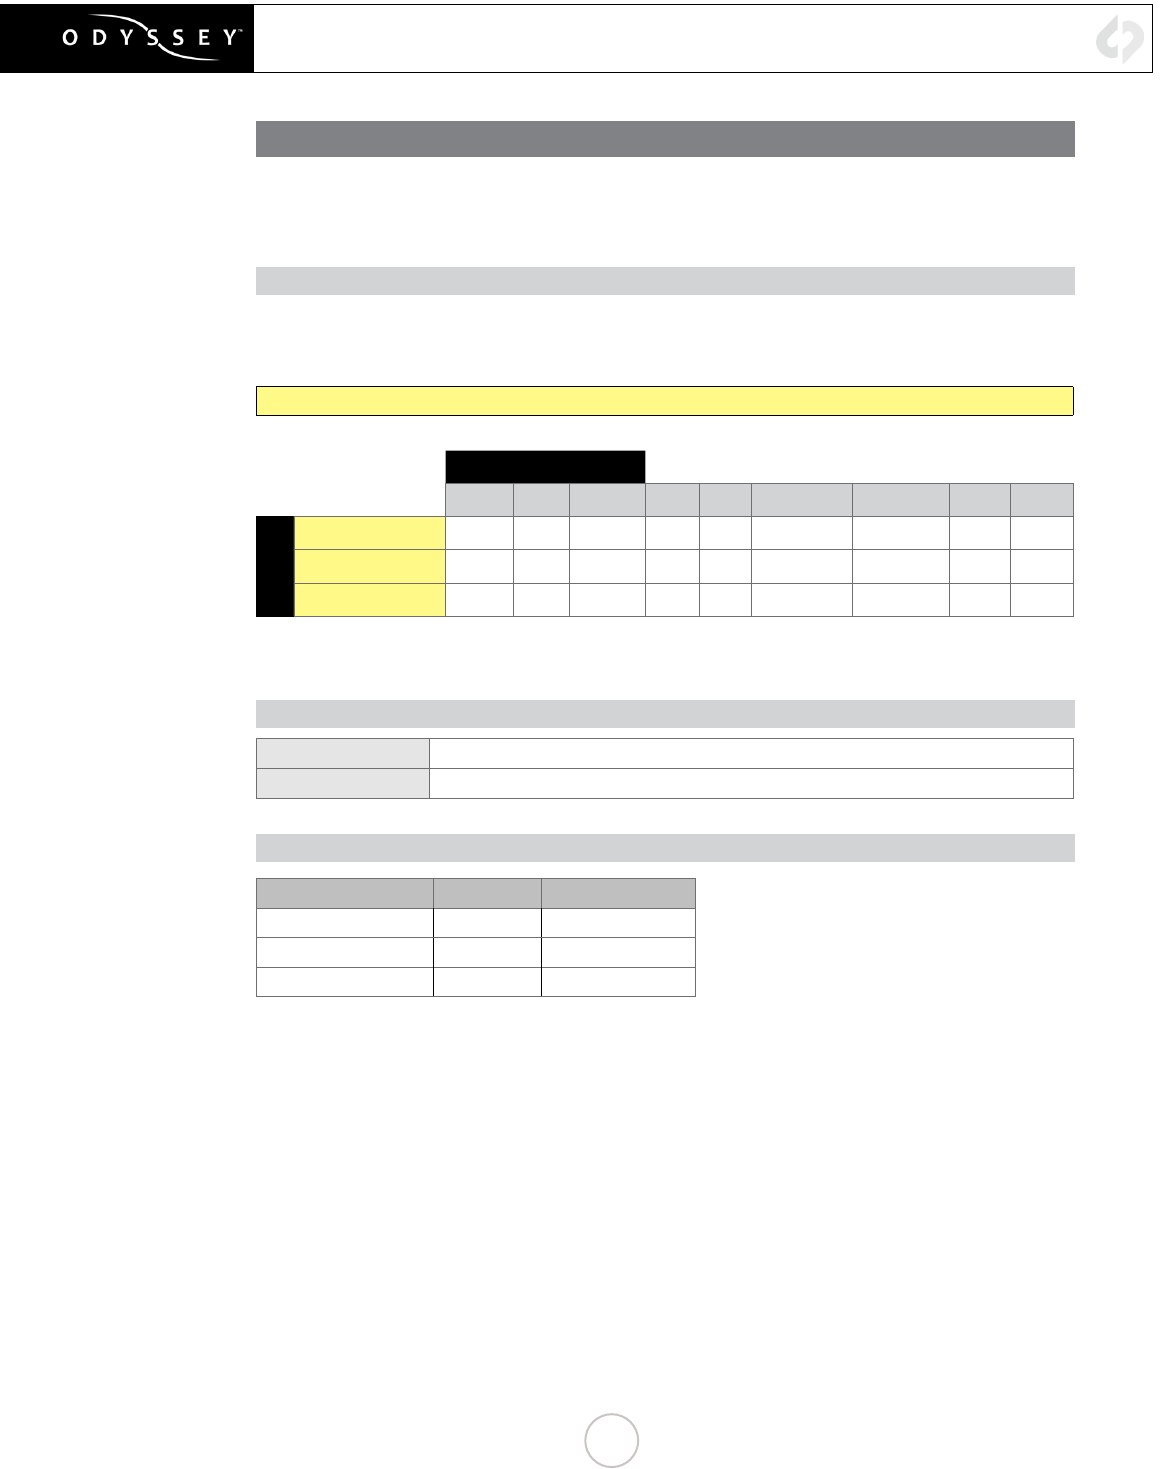
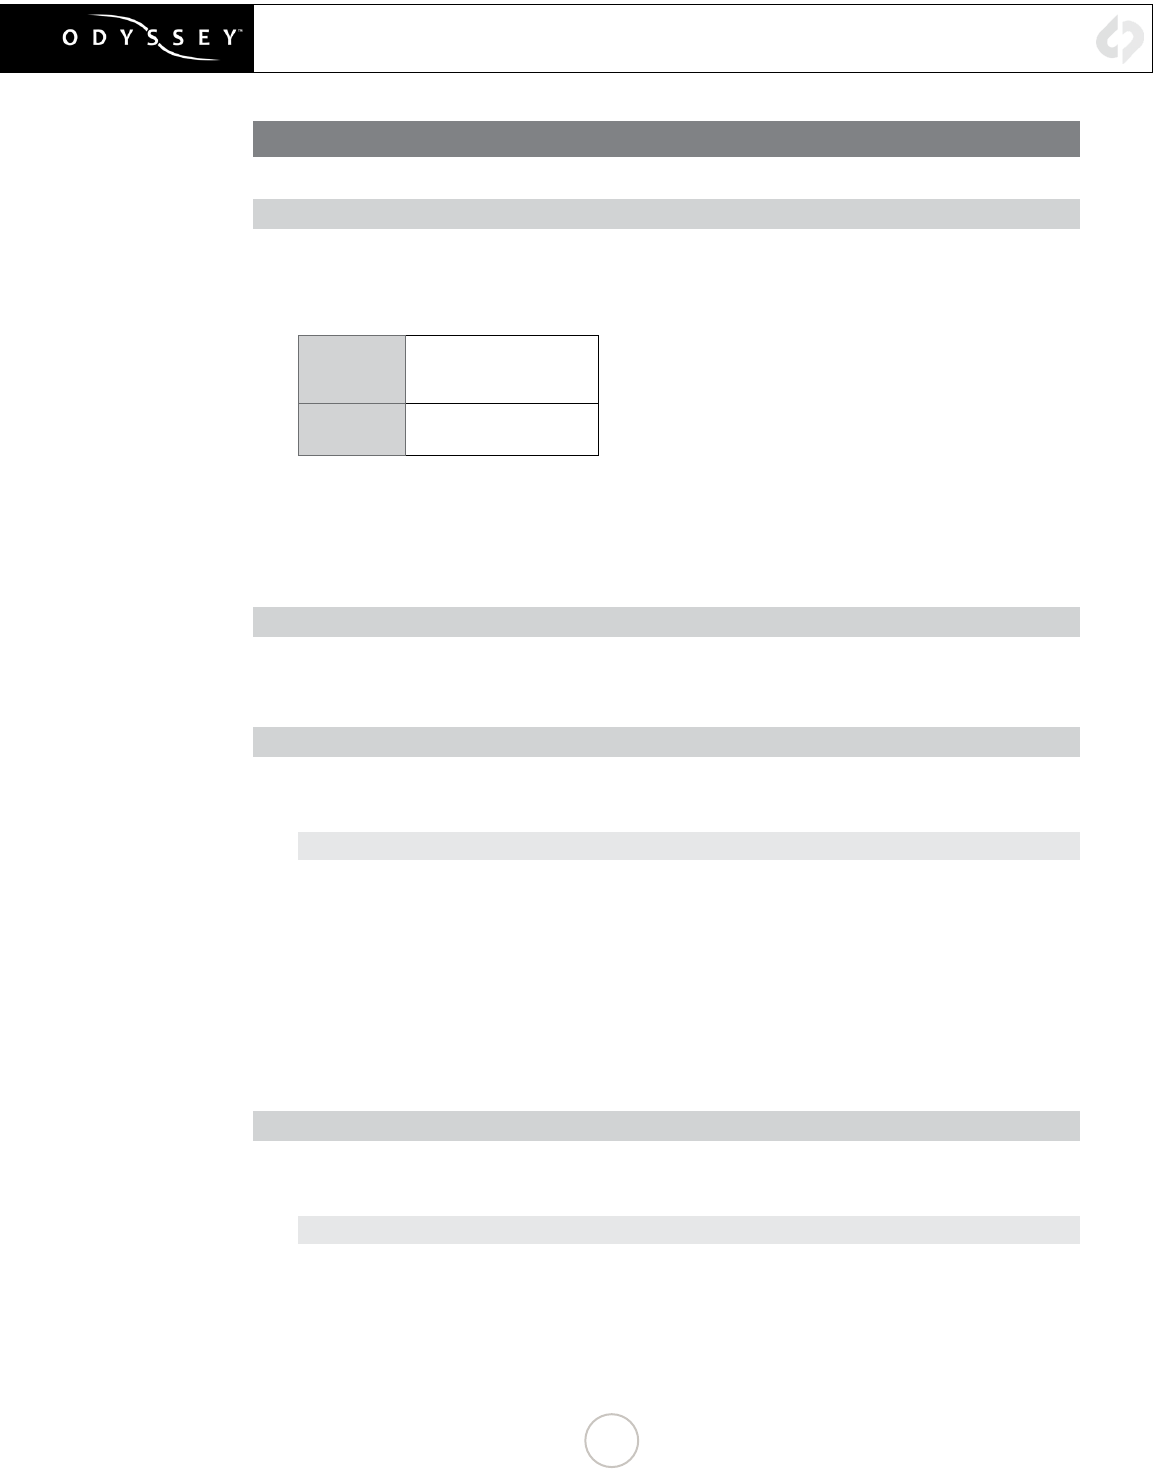
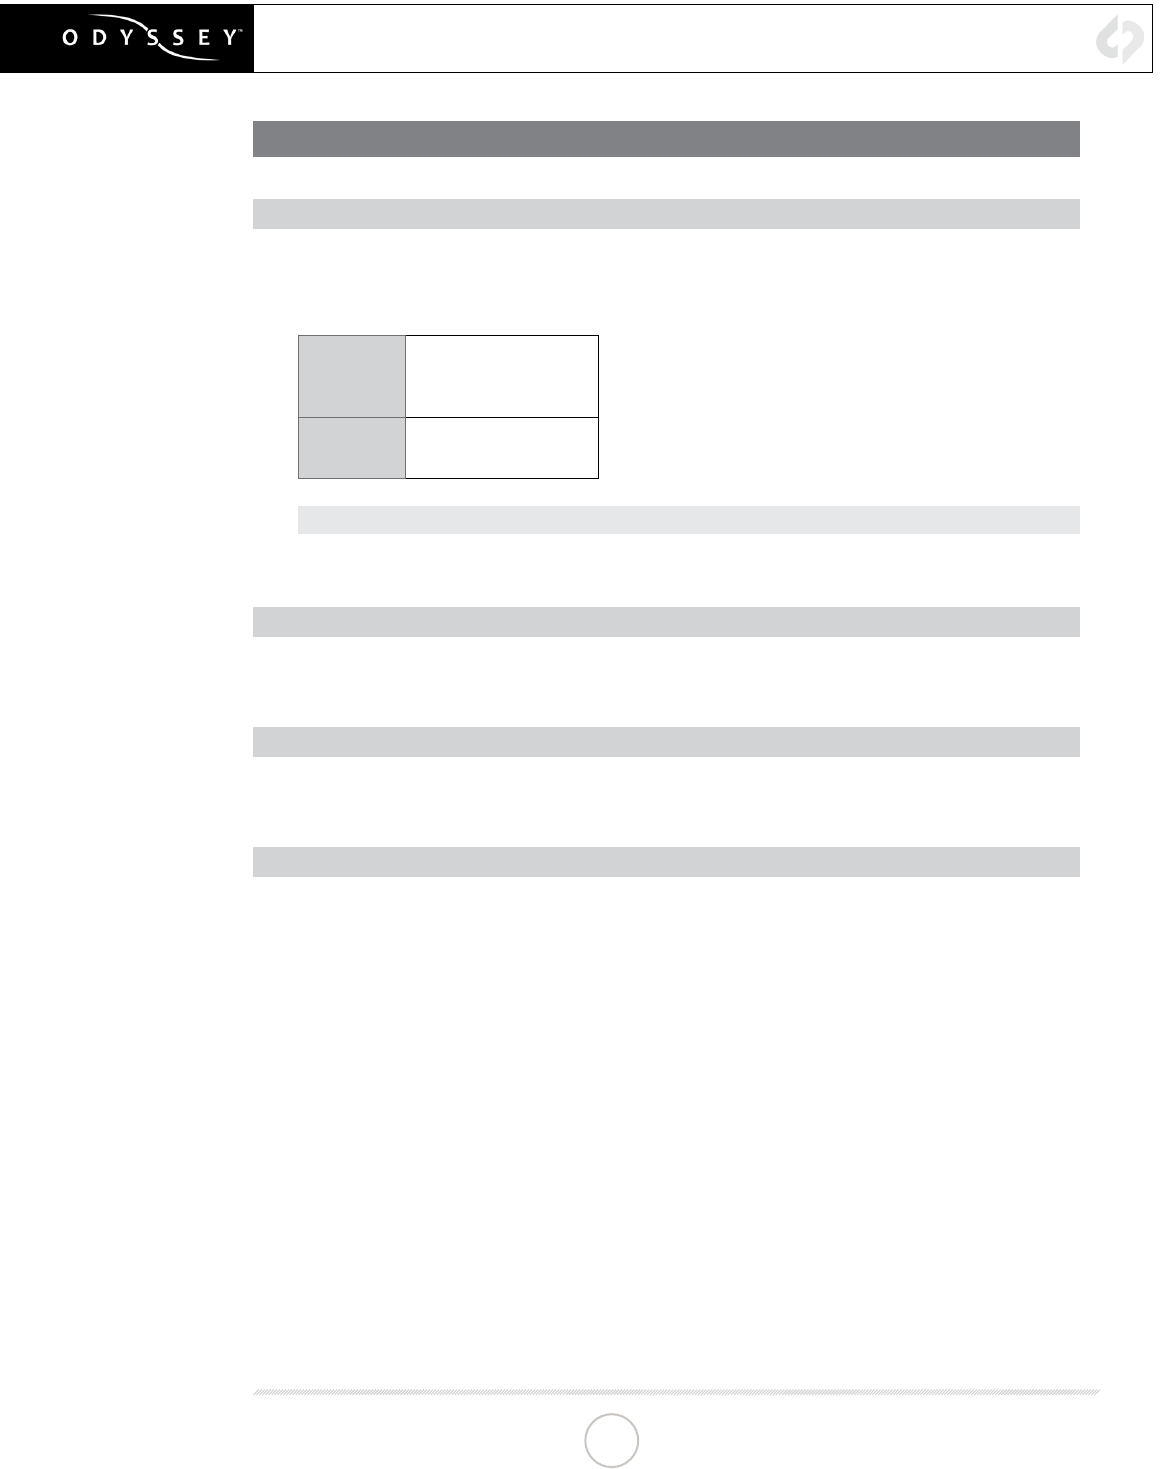
The following are approximate maximum record time in minutes, based on recording two 512G SSDs
(1TB). Record times may vary slightly.
RAW RECORDING
Odyssey7Q and Odyssey7Q+ are capable of recording the RAW signal ouput from the FS7 or FS700
if the Sony FS Recording Option Upgrade license has been purchased through our website and the
license key has been entered in the unit.
The Sony FS700 Recording Option Upgrade is required for recording 4K, RAW and HFR
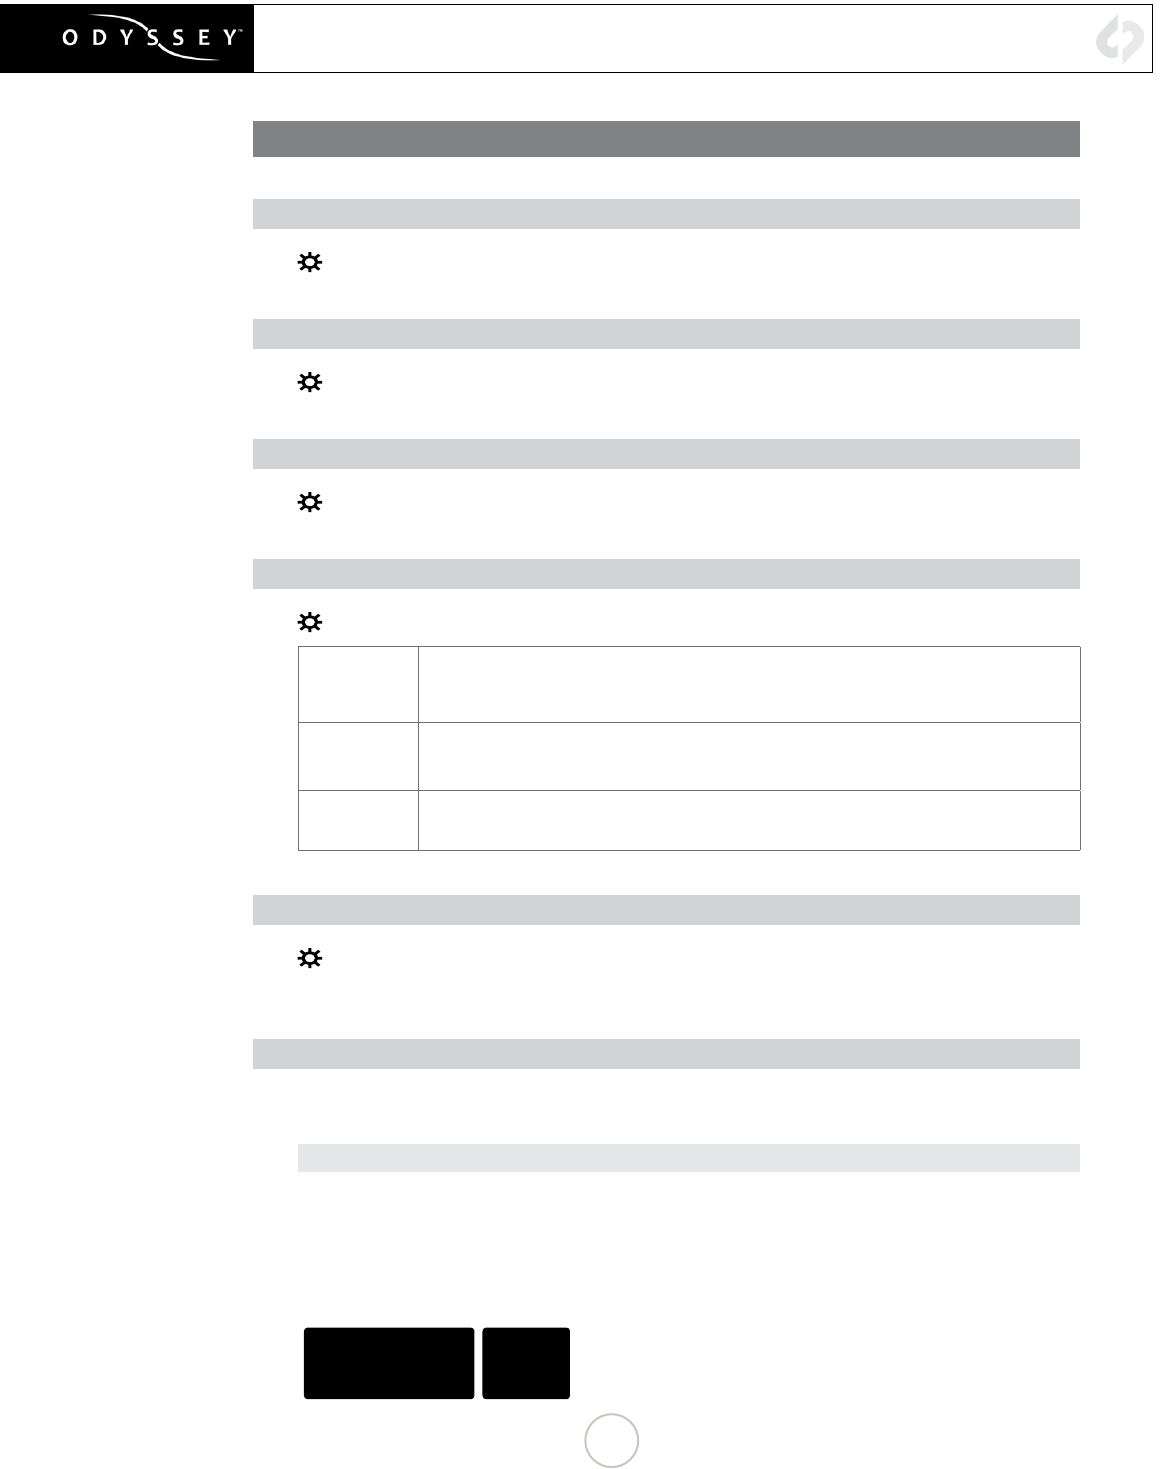
FRAMES PER SECOND
24 25 30 50 60 100 120 200 240
RAW
4K RAW 50 48 40 24* 20*
4K RAW (Burst) 155 Takes* 155 Takes*
2K RAW 200 192 160 96 80 48 40 24* 20*
* Two SSDs are required to capture
NOTE: When recording RAW, S-LOG2 Picture Prole must be used.
RAW FORMAT DETAILS
4K RAW 4096x2160, 12-bit linear data, recorded as Uncompressed .DNG
2K RAW 2048x1080, 12-bit linear data, recorded as Uncompressed .DNG
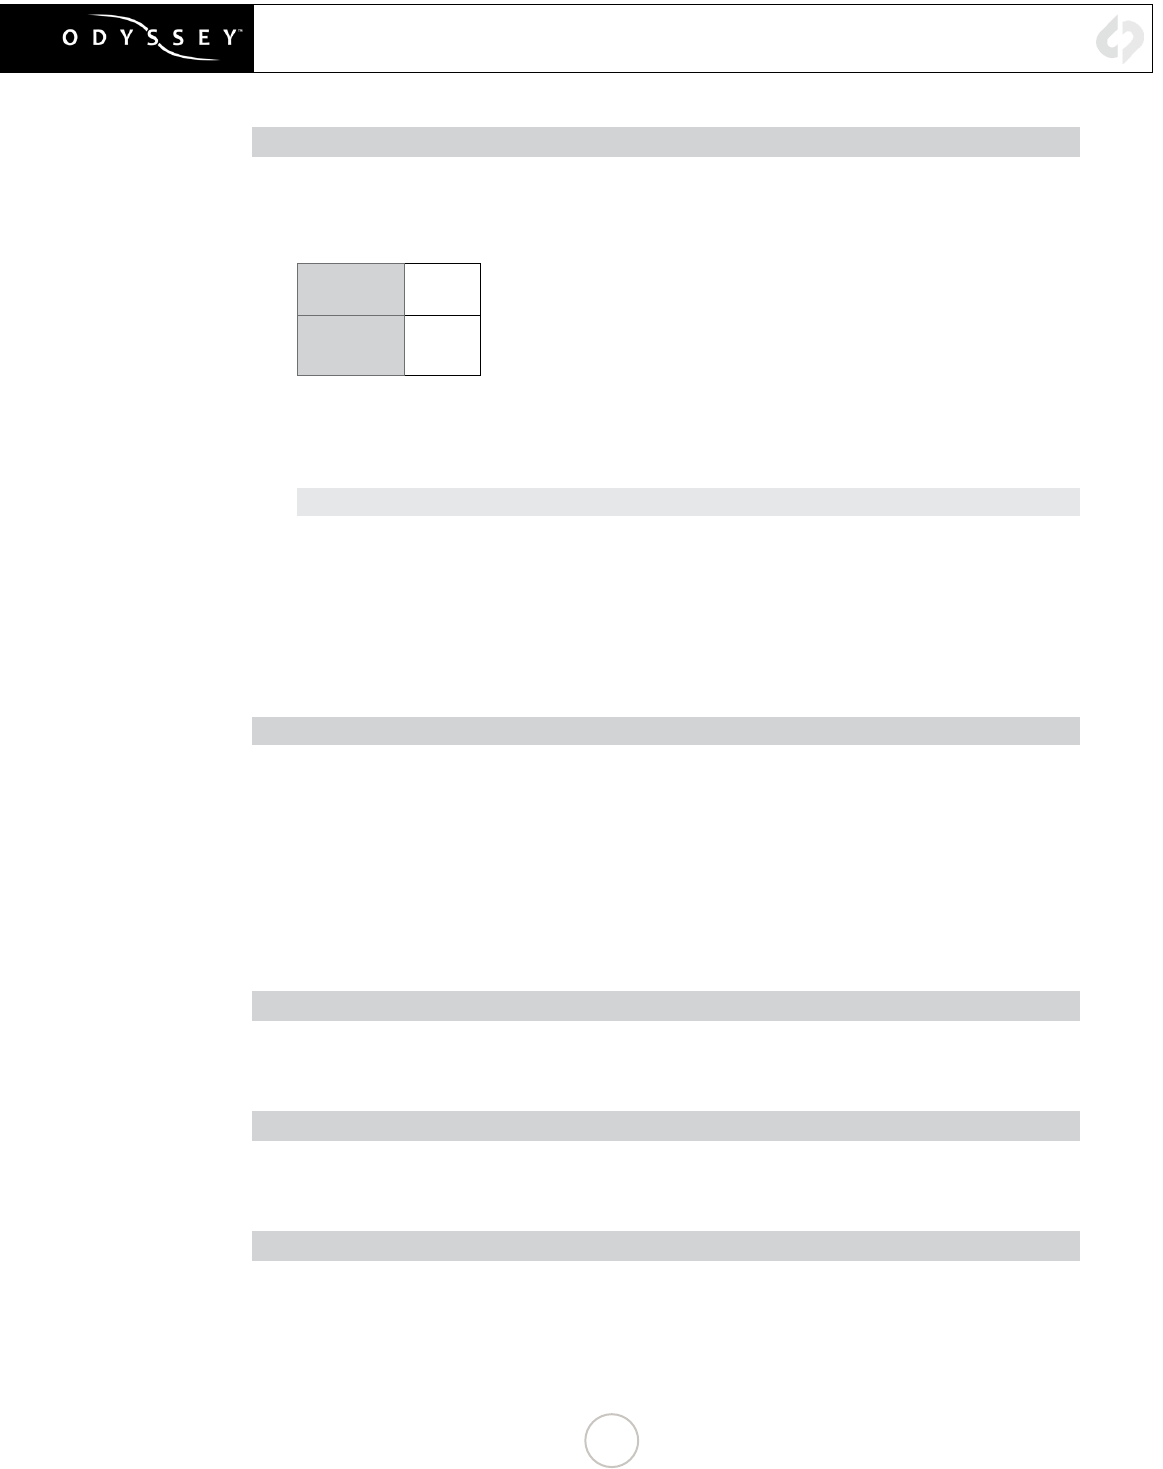
TYPICAL DOWNLOAD TIME IN MINUTES
Media USB3.0 Thunderbolt
256G SSD 20 10
512G SSD 40 20
1TB SSD 80 40
Actual transfer rates are dependent on computer system and capture media.
USB 3.0 or Thunderbolt connecons are recommended by Convergent Design for ecient data rates.
1
RECORDING CAPABILITIES
APPLE PRORES RECORDING
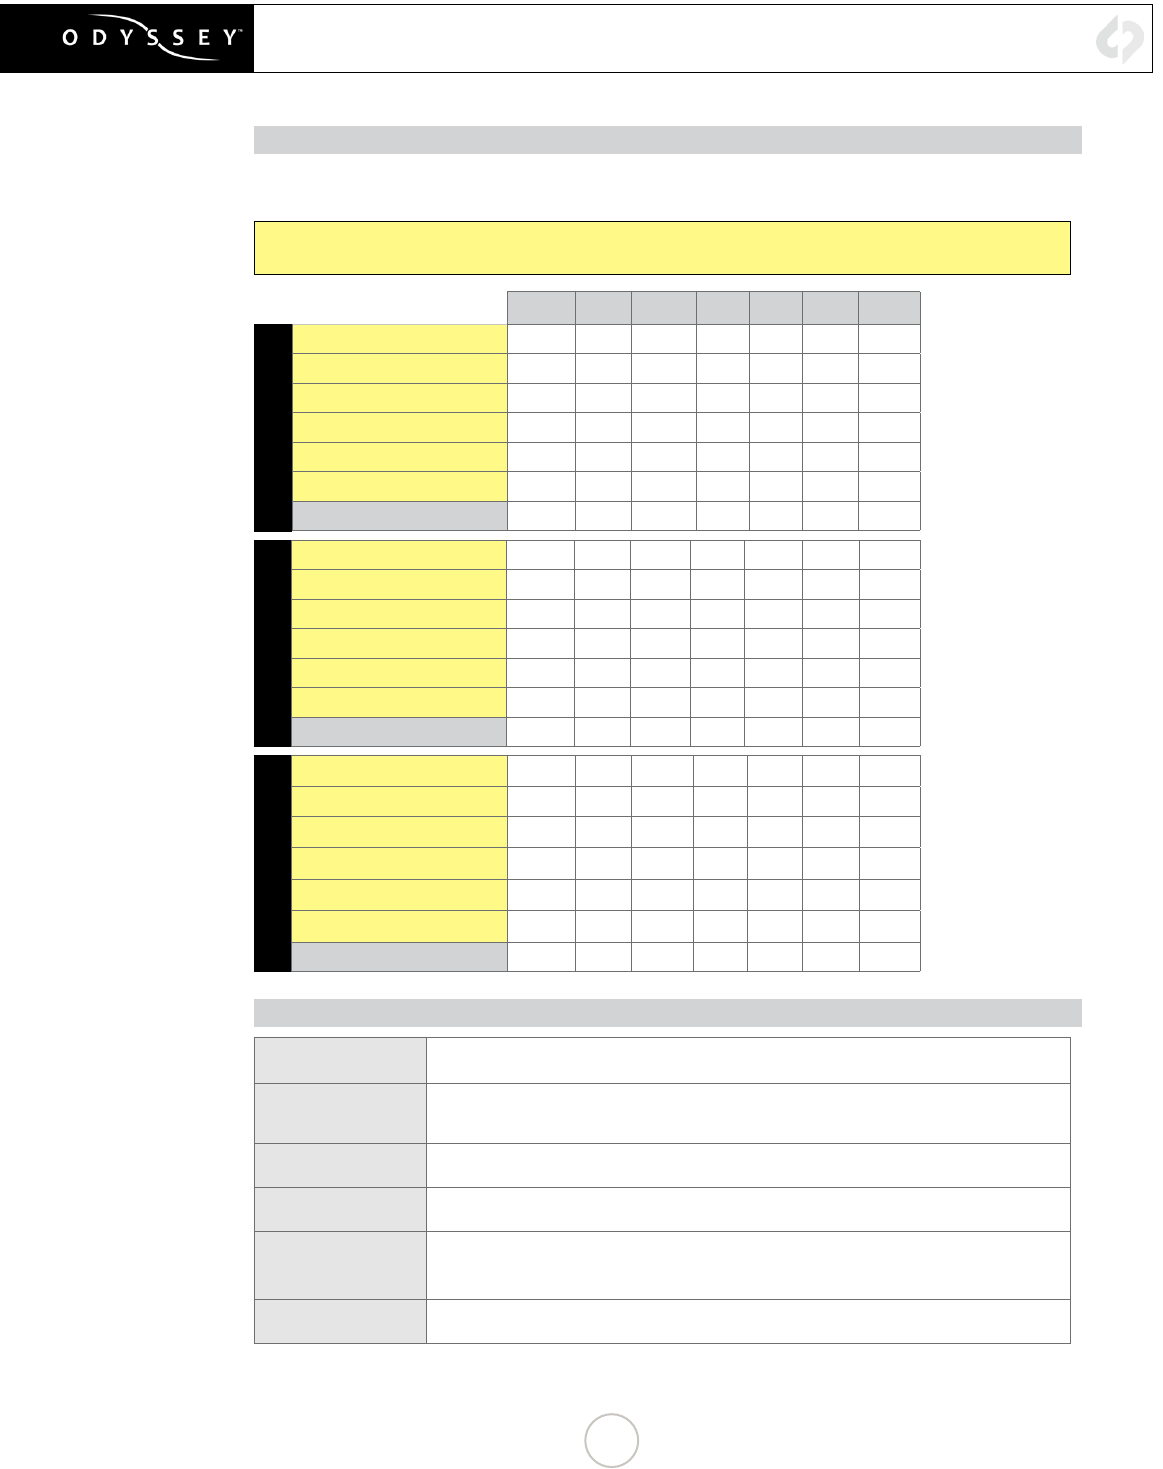
Odyssey now supports recording Apple ProRes 422 (HQ), Apple ProRes 422 and Apple ProRes 422 (LT).
Files are saved in .MOV format.
The Sony FS700 Recording Option Upgrade is required for recording 4K to Apple ProRes.
The Sony FS700 outputs 4K as a RAW signal, which is processed and coverted by Odyssey.
24 25 30 50 60 100 120
ProRes 422 (HQ)
4K to 4K ProRes 168 161 134
4K to UHD ProRes 194 186 155
4K to 2K ProRes 629 603 503 301 251
4K (Burst) to 2K ProRes 148 124
4K to HD ProRes 670 643 536 322 268
4K (Burst) to HD ProRes 156 132
HD ProRes 670 643 536 322 268
ProRes 422
4K to 4K ProRes 220 221 176
4K to UHD ProRes 264 252 212
4K to 2K ProRes 964 924 772 460 384
4K (Burst) to 2K ProRes 228 192
4K to HD ProRes 1060 1016 848 508 424
4K (Burst) to HD ProRes 252 212
HD ProRes 1060 1016 848 508 424
ProRes 422 (LT)
4K to 4K ProRes 168 161 134
4K to UHD ProRes 194 186 155
4K to 2K ProRes 629 603 503 301 251
4K (Burst) to 2K ProRes 316 264
4K to HD ProRes 1516 1456 1212 728 604
4K (Burst) to HD ProRes 364 300
HD ProRes 1516 1456 1212 728 604
FORMAT DETAILS
4K to 4K ProRes 4096x2160 10-bit log video, originated from 4K RAW 12-bit camera signal, transformed and
recorded as Apple ProRes compressed 4K video
4K to UHD ProRes
3840x2160 10-bit log video, originated from 4K RAW 12-bit camera signal, transformed and
recorded as Apple ProRes compressed UHD video. recorded as 3840x2160 center crop from the
RAW.
4K to 2K ProRes 2048x1080 10-bit log video, originated from 4K RAW 12-bit camera signal, transformed and
recorded as Apple ProRes compressed 2K video
4K to HD ProRes ** 1920x1080, 10-bit log video, originated from 4K RAW 12-bit camera signal, transformed and
recorded as Apple ProRes compressed HD video
HD DPX*
1920x1080, 12-bit log video, originated from HD 8-bit camera signal, recorded as Uncompressed
.DPX. HD DPX les at 60p are “packed” on SSDs due to high data rate. Use free CD Data
Unpacker ulity soware to unpack les aer transfer.
HD ProRes 1920x1080, 10-bit log video, originated from HD 8-bit camera signal, recorded as Apple ProRes
compressed HD video
** NOTE: In 4K RAW to 4K Apple ProRes and 4K RAW to HD Apple ProRes, picture proles SLOG-2, Rec709 and Rec709 800% are
supported.
2
CONTINUED »
FS700 CONFIGURATION
1. SET UP THE FS700 FOR RAW RECORDING
MENU » REC/OUT SET » REC SET » RAW SET
Select any of the following frames rates that you wish to record on the Odyssey:
NTSC
4096x2160/24p
4096x2160/30p
4096x2160/60p
2048x1080/24p
2048x1080/30p
2048x1080/60p
PAL
4096x2160/25p
4096x2160/50p
2048x1080/25p
2048x1080/50p
Once the selection is made you will need to press EXEC on the camera, to return to live
record.
2. SET GAMMA (REQUIRED FOR RAW RECORDING)
PICTURE PROFILE » PP7 » SETTING » GAMMA » S-Log2
PP7 is the default prole for S-Log2, Note that only S-Log2 is supported when recording
RAW.
Once the camera is set to the desired frame rate, then connect to the Odyssey.
3. SET THE S&Q BUTTON FOR RAW HIGH SPEED
MENU » OTHERS » RAW S&Q BUTTON SET » 4K/2K SUPER SLOW
(BACK) » REC Command » ON
NOTE: In 4K Super Slow the camera only outputs a maximum of 4K 60p, thus this mode
will use internal buffering, and then will need to playback the footage to an Odyssey. In 4
Super Slow, the Odyssey Trigger must be set to Camera.
MENU » RECORD » TRIGGER » CAMERA
NOTE: For 2K up to 240fps sustained, or 4K up to 60p sustained, but 4K 100/120 3-4
second burst.
4K/2K RAW RECORDING
3
4K/2K RAW RECORDING
4. SETUP FS700 HIGH FRAME RATE
MENU » CAMERA SET » SLOW AND QUICK » RAW 2K SUPER SLOW » EXECUTE
Select your desired frame rate*:
NTSC 120
240
PAL 100
200
TIME SAVER TIP: A quicker way of doing this is once the S&Q is set to RAW HIGH
SPEED, you can press and hold the S&Q button, then once the RAW Super Slow frame
is highlighted, you can now switch from 120 to 240. (or 100 to 200 in record.)
ACCESS HIGH FRAME RATES
Press the S&Q button » Select 120fps or 240fps
The Odyssey also has the ability of recording the buffered 4K 100/120 p from the
FS700. If you wish to record this set the camera to 4K RAW, and enable S&Q. Then the
Odyssey will record 4K100/120, for up to a 4 second burst.
4K 100/120 burst is now supported in 4K to 2K/HD ProRes.
RAW 4K SUPER SLOW 120FPS AND 100 FPS
Start Trigger - > 440 Frames
End Trigger -> 440 Frames
End Half Trigger -> 220 Frames
Start Trigger Processes 440 frames from when RECord button is pressed.
End Trigger Sends a buffer of the 440 frames prior to hitting the REC button.
End Half Trigger sends a buffer of the 220 frames prior to hitting the REC button.
120fps is 3.7 seconds record time - (440 frames) - 60fps playback
100fps is 4.4 seconds - (440 frames) - 50fps playback
5. PAL: 25P, 50P, 100P AND 200P
MENU » OTHERS » 60i/50i SEL » YES
6. SETUP RECORD TRIGGER (FS700 REC BUTTON)
MENU » REC/OUT SET » VIDEO OUT » SDI/HDMI CONTROL » ON
7. DUAL RECORD: FS700 INTERNAL + ODYSSEY
MENU » REC/OUT SET » RAW REC CONTROL » RAW+HD
(BACK) » REC/OUT SET » HD SIMULTANEOUS REC » ON
Note: The clip name from the FS700 is not sent over the SDI to the Odyssey, thus if you
wish to use the internal media as an ofine, you will need to rename the internal media to
match the RAW les.
4
CONTINUED »
ODYSSEY RAW RECORDING
ODYSSEY CONFIGURATION
1. SET ODYSSEY TO FS700 MODE
☼
» SETUP » CAMERA » SONY FS7/FS700 » FS RAW-->RAW (.DNG)
The unit will restart
NOTE
When selected for the rst time (or after an update) it may take up to 3 minutes to load.
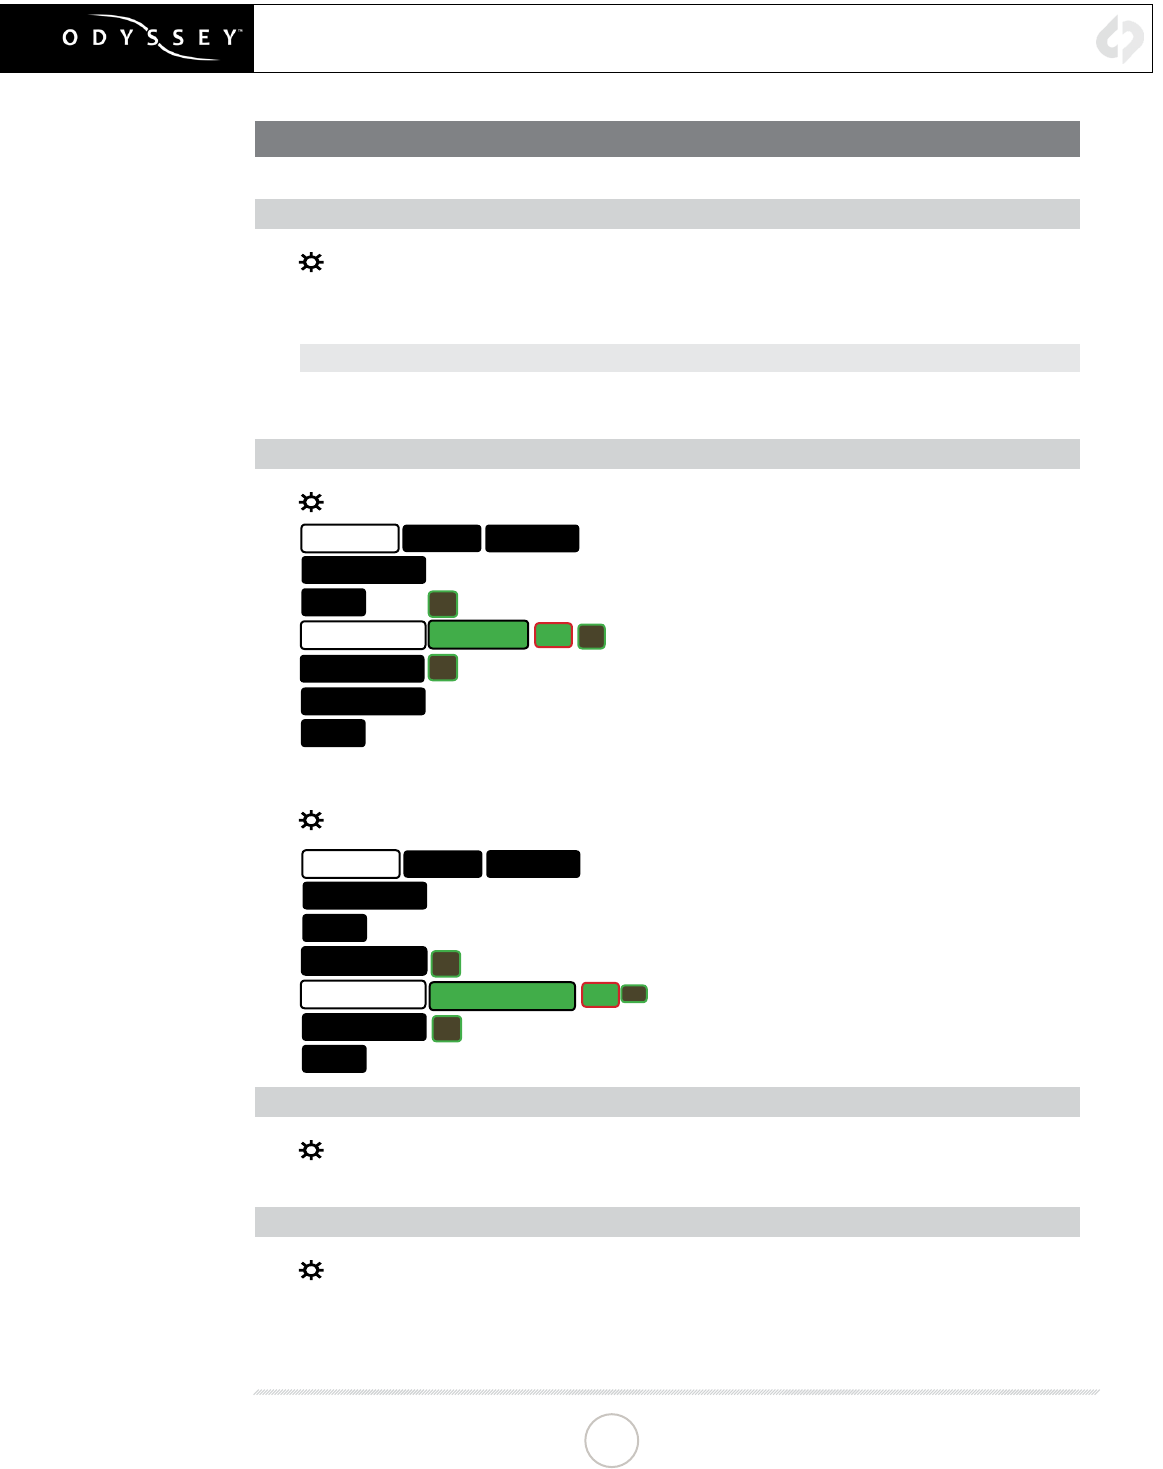
2. SET DATE & TIME TO MATCH FS700
☼
» ODYSSEY » SET » TIME
ODYSSEY
ACTIVATION
TIME 07:30:11
▲
▼
OK X
DATE
RESET
SSD’S
ABOUT
SETUP OUTPUTS
☼
» ODYSSEY » SET » DATE
ODYSSEY
ACTIVATION
TIME
2015 FEB 23
▲
▼
OK X
DATE
RESET
SSD’S
ABOUT
SETUP OUTPUTS
3. MAKE FS700 THE RECORD TRIGGER
☼
» SETUP » RECORD TRIGGER » CAMERA
4. SET TIMECODE SOURCE
☼
» SETUP » TIMECODE SOURCE » SDI/HDMI
5
CONTINUED »
ODYSSEY RAW RECORDING
5. FORMAT SSDs
☼
» ODYSSEY » SSD’S » FORMAT BOTH (OR FORMAT SSD1 IF YOU DO NOT HAVE
A SECOND SSD DRIVE INSTALLED.)
6. CONNECT TO CAMERA AND VERIFY STATUS INPUT
Connect FS700 3G-SDI output to Odyssey SDIA input
Note: Use only 3G-SDI rated cables from FS700 to Odyssey. Using a 1.5G SDI cable in
not recommended and may cause issues.
The status on your Odyssey will display your camera’s output.
Example: 4K 29.97 FS700
RAW
NOTE
The recorded le will be RAW (.DNG) 2K or 4K. 2K up to 240fps, 4K up to 60fps (sustained)
and 4K 100/120 (3-4 second bursts).
6
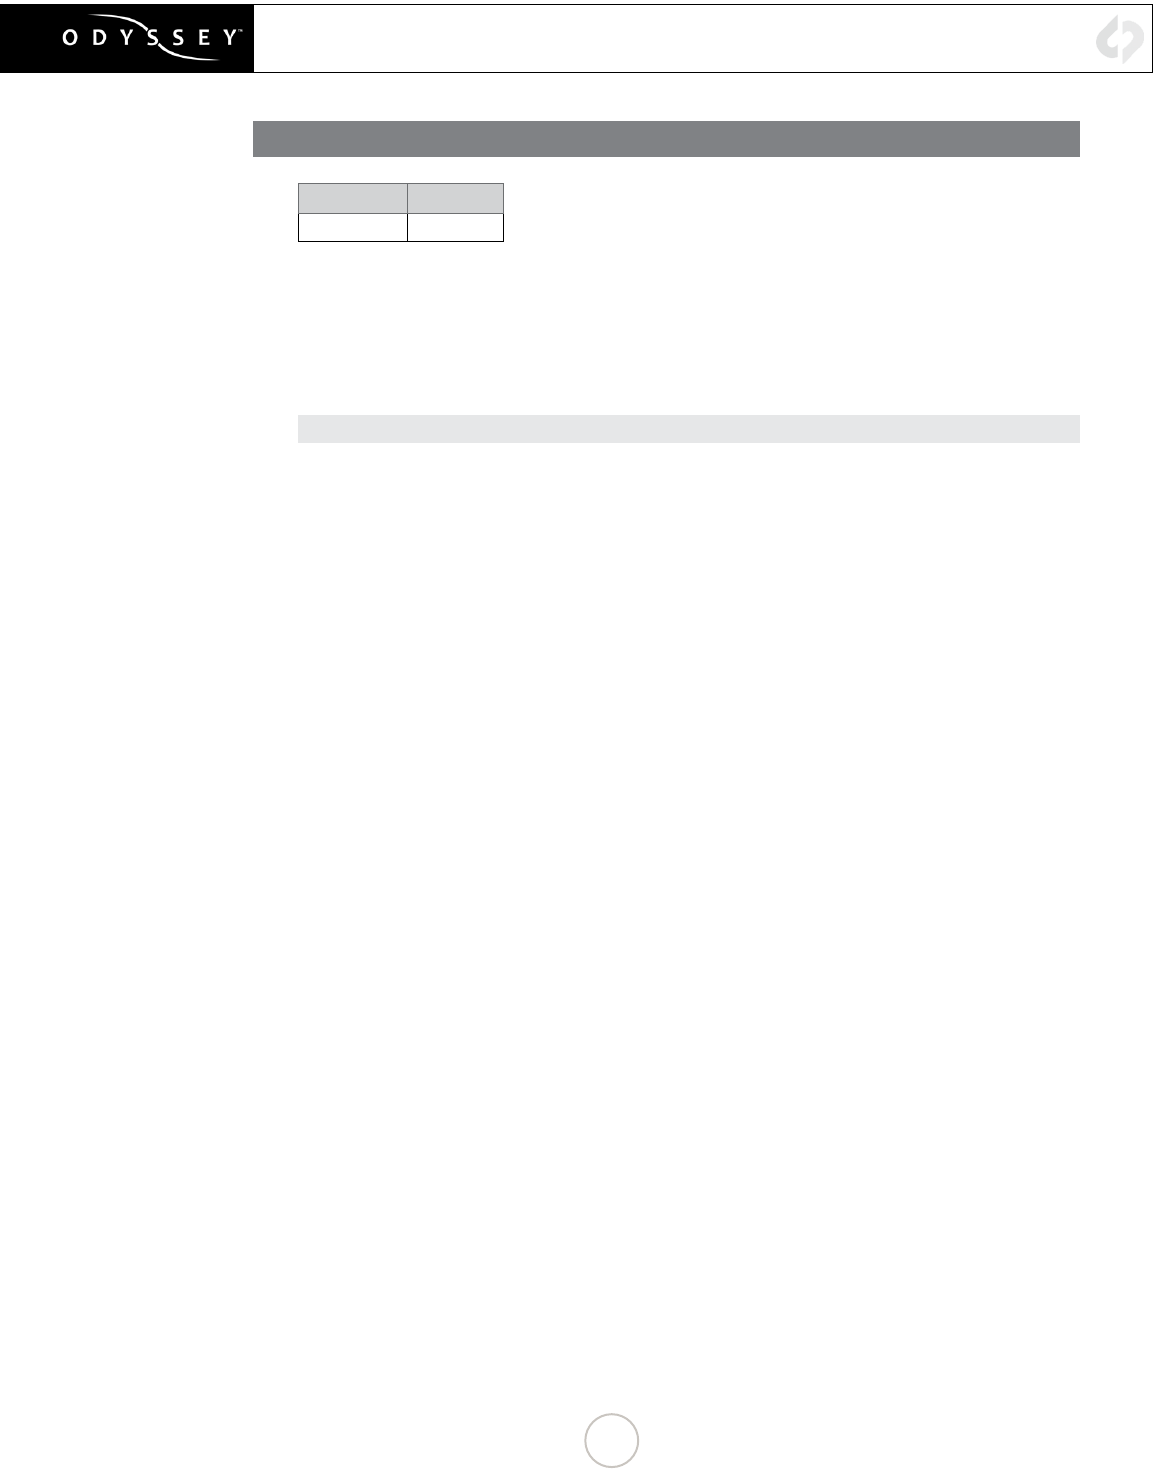
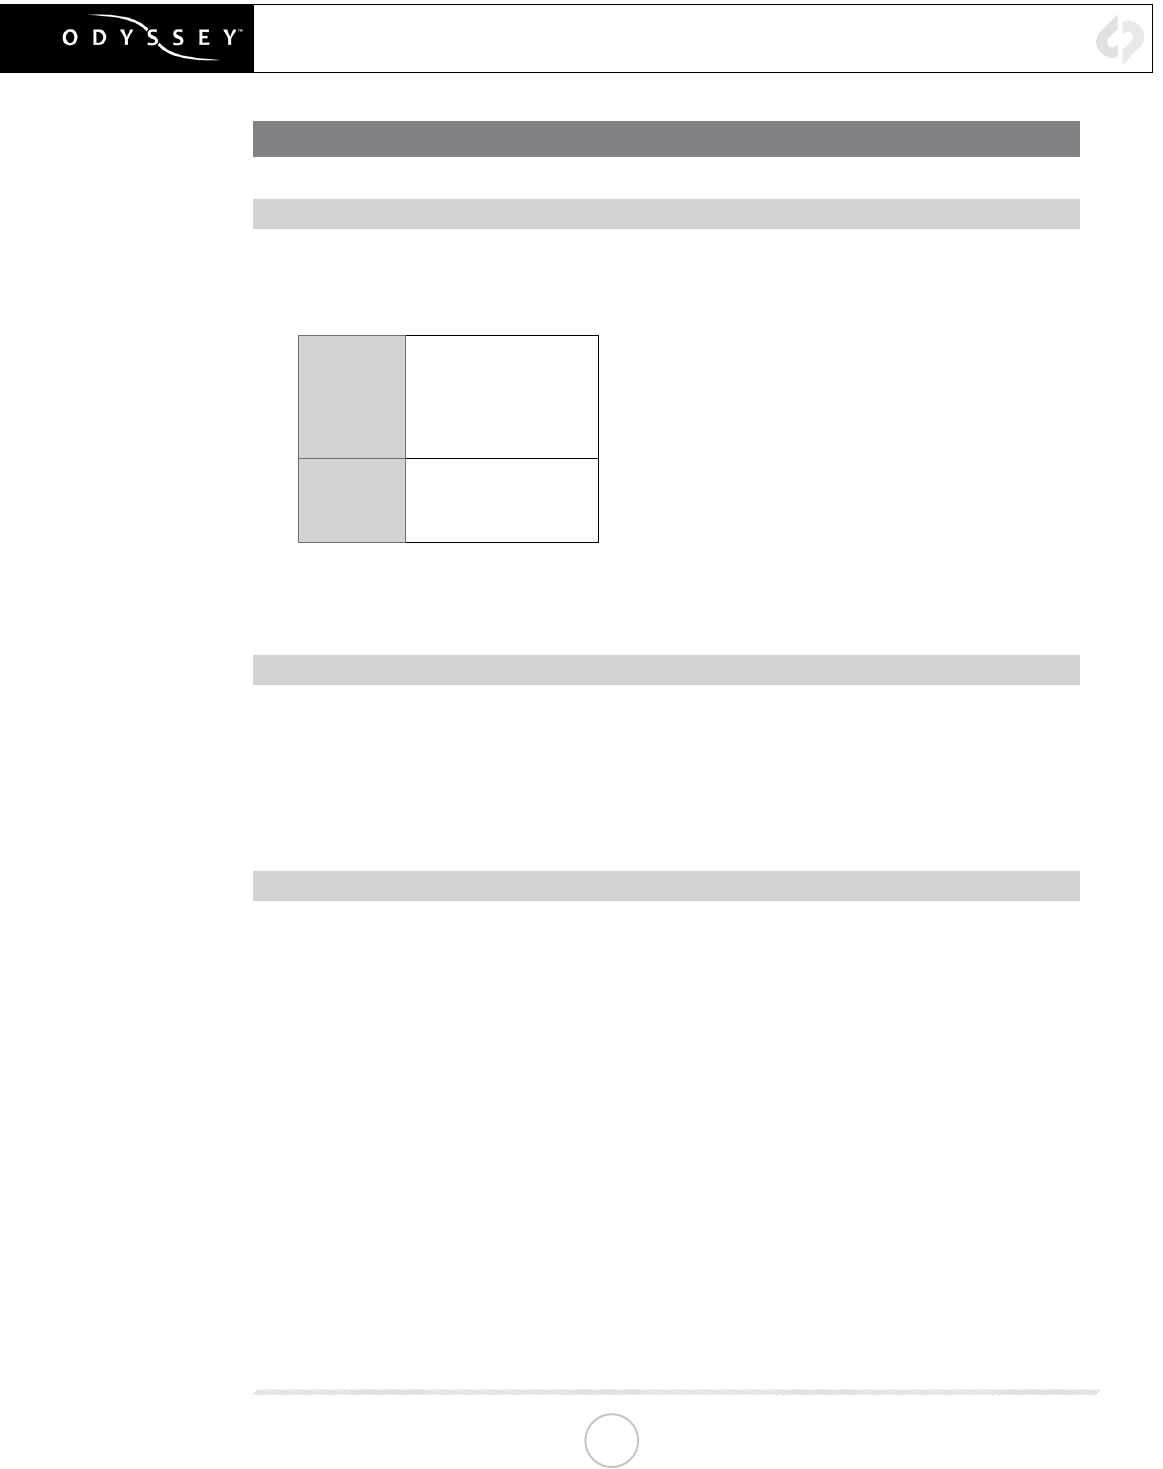
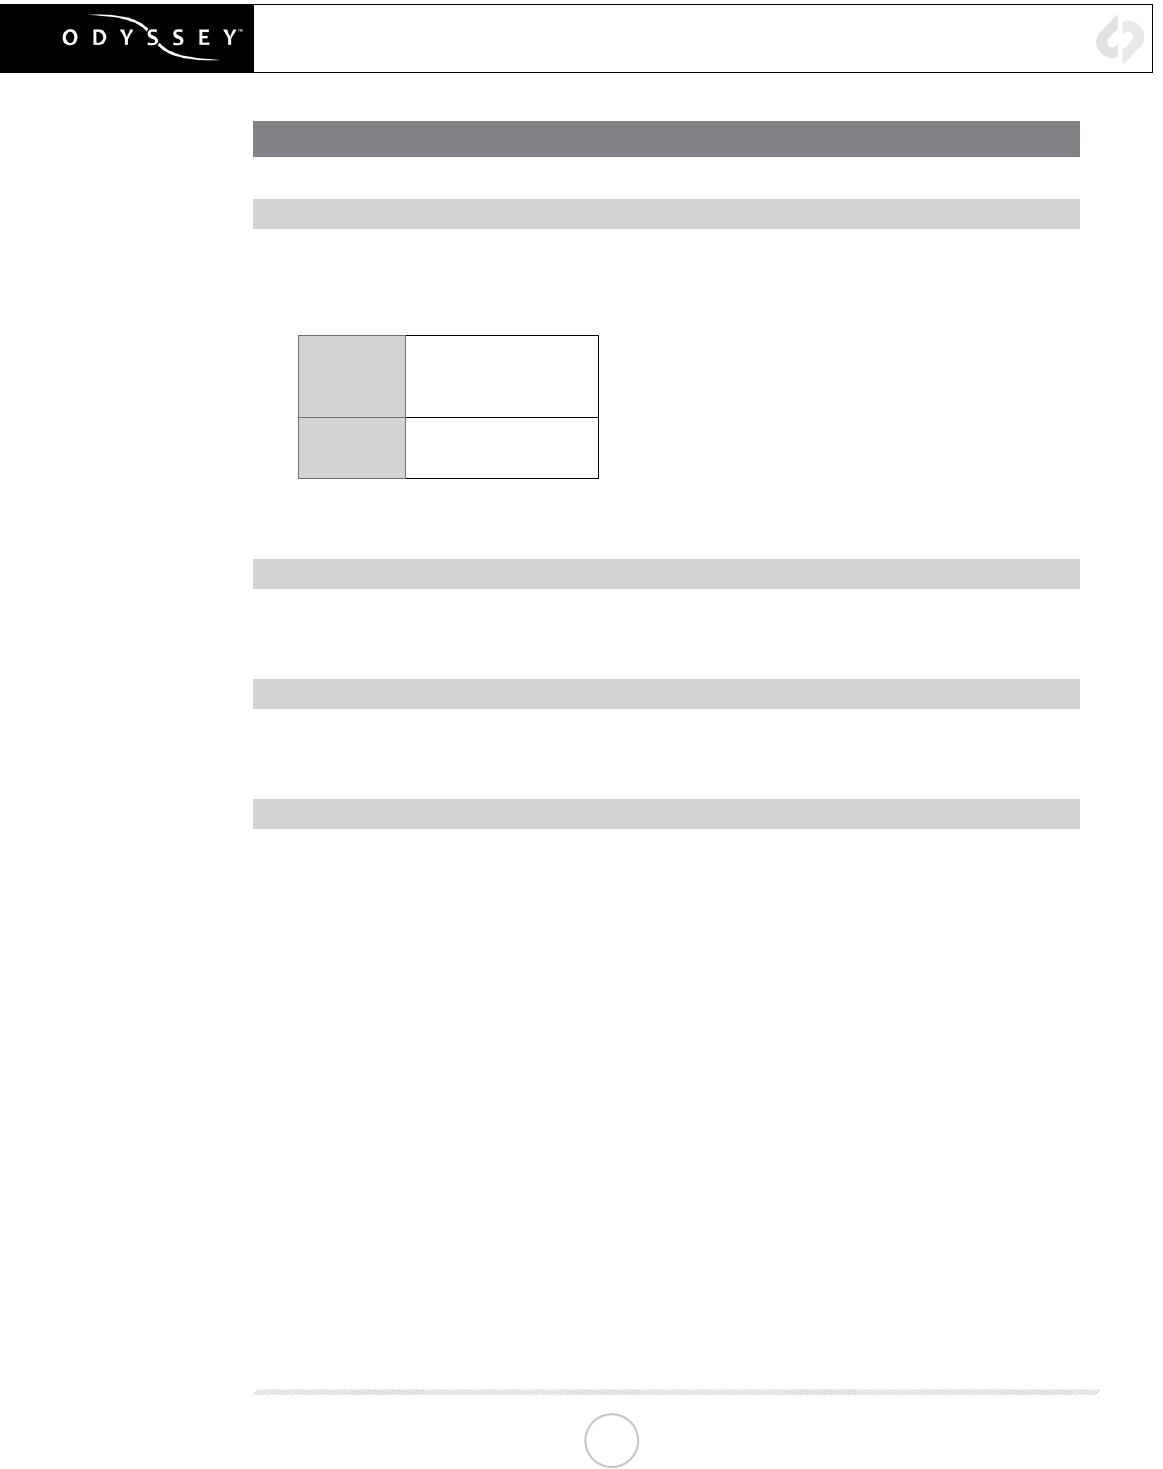
RECORDING ACROSS TWO SSDS
SSD1 SSD2
1, 3, 5, 7… 0, 2, 4, 6…
4K 23.98p to 30p rates = Single Drive
2K 23.98p to 120p rates = Single Drive
4K 50/59p = RAID (two drives)
2K 200/240p = RAID (two drives)
RAID is set up automatically upon detecting the input signal - no setup is required.
NOTE
You can use any Convergent Design media; they need not be matching (ie, one 256GB
card and one 512GB card).
SSD RAID CONFIGURATION
7
FS700 CONFIGURATION
1. SET UP THE FS700 FOR 4K TO 4K/UHD/2K/HD RECORDING
MENU » REC/OUT SET » REC SET » RAW SET
Select any of the following frames rates that you wish to record on the Odyssey:
NTSC
4096x2096/24p
4096x2096/30p
4096x2096/60p*
PAL 4096x2160/25p
4096x2160/50p*
*4K to 2K/HD Only
Once the selection is made you will need to press EXEC on the camera, to return to live
/ record.
2. SETUP RECORD TRIGGER (FS700 REC BUTTON)
MENU » REC/OUT SET » VIDEO OUT » SDI/HDMI COMMAND » ON
3. SET GAMMA (REQUIRED FOR 4K/UHD/2K/HD RECORDING)
PICTURE PROFILE » PP7 » SETTING » GAMMA » S-LOG2
NOTES:
• Picture Proles S-Log2, Rec709, Rec709 800% are all supported in this mode.*
• Custom Proles or adjustments to the factory S-LOG2, Rec709, Rec709 800% are not
supported at this time.
• Be sure to set the white balance correctly before shooting. Also note that if you wish to
trigger the Odyssey via the camera’s record trigger please set the following on the FS700
• With 4K to 4K/HD what you see on the monitor is what will be recorded.
• Adjusting settings within each picture prole will not be reected in the recording since
the Odyssey can only detect which prole is set, not the individual attributes.
4. CONNECT FS700 TO THE ODYSSEY
Connect FS700 3G-SDI output to the Odyssey SDIA input
NOTE:
Use only 3G-SDI rated cables from FS700 to Odyssey. Using a 1.5G SDI cable in not
recommended and may cause issues.
4K RAW TO 4K/UHD/2K/HD PRORES
8
ODYSSEY CONFIGURATION
1. SET MODE TO 4K RAW TO APPLE PRORES
HD RECORDING
☼
» SETUP » CAMERA » SONY FS7/FS700 » 4K RAW ->HD PRORES
2K RECORDING
☼
» SETUP » CAMERA » SONY FS7/FS700 » 4K RAW ->2K PRORES
UHD RECORDING
☼
» SETUP » CAMERA » SONY FS7/FS700 » 4K RAW ->UHD PRORES
4K RECORDING
☼
» SETUP » CAMERA » SONY FS7/FS700 » 4K RAW ->4K PRORES
2. MAKE FS700 THE RECORD TRIGGER
☼
» SETUP » RECORD TRIGGER » CAMERA
3. SET TIMECODE SOURCE
☼
» SETUP » TIMECODE SOURCE » SDI/HDMI
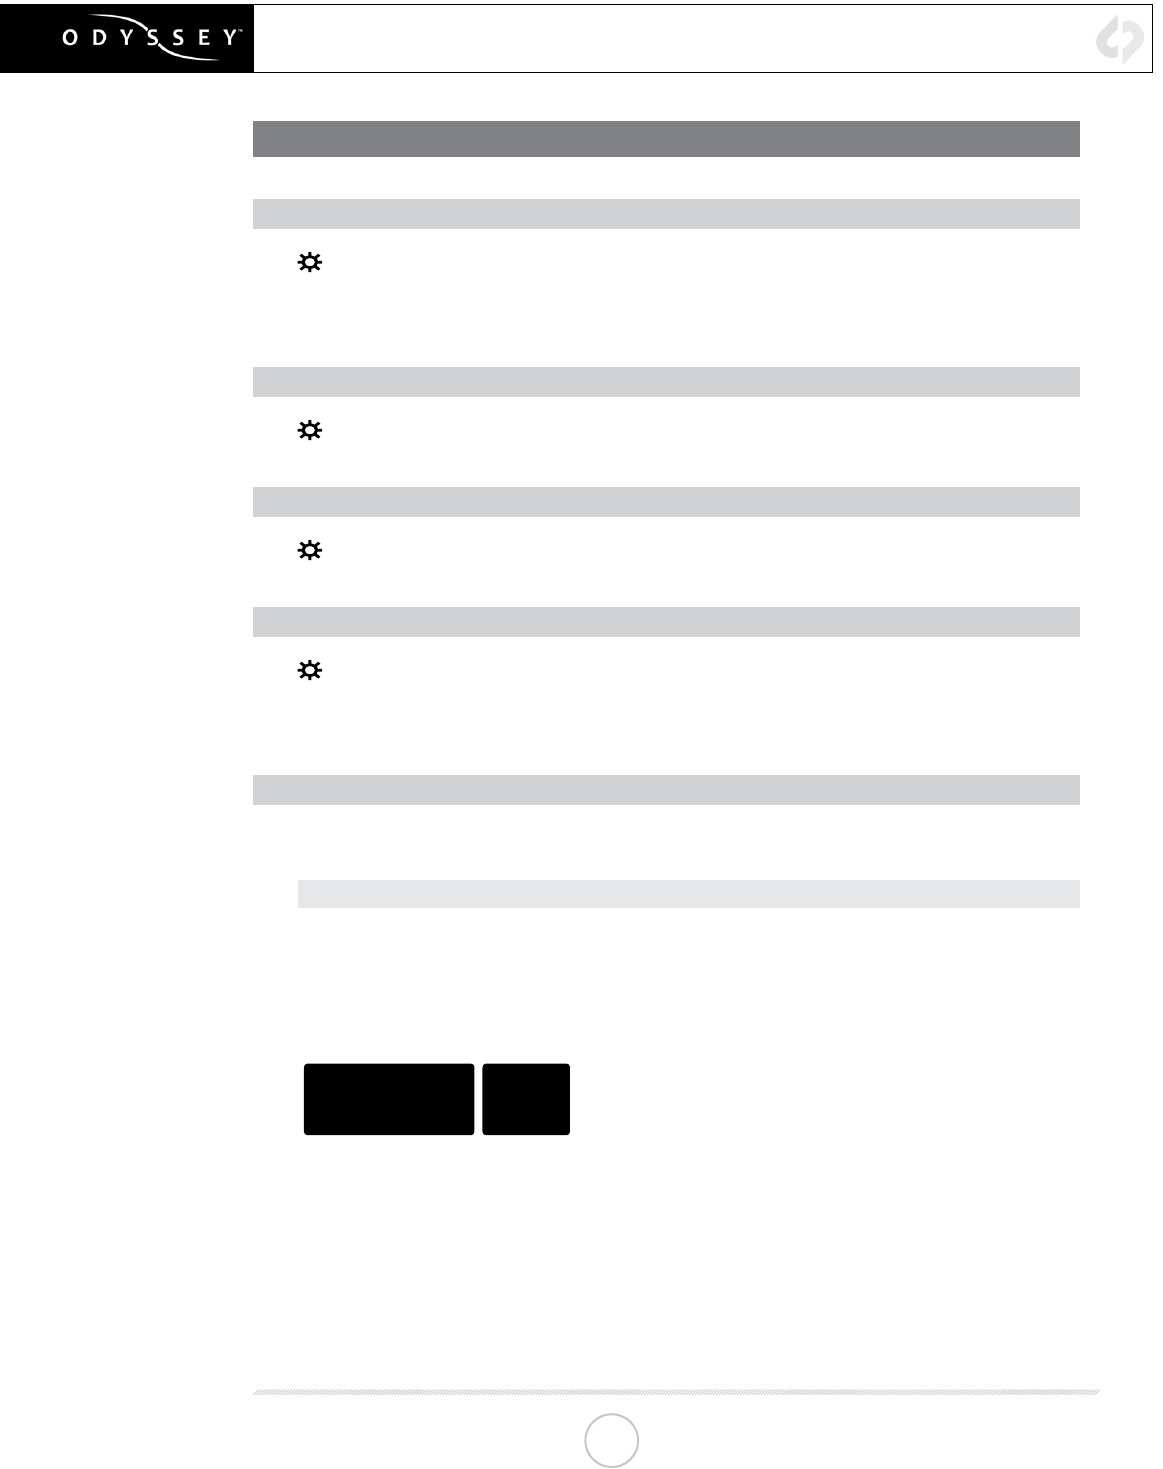
4. SET PRORES BITRATE
☼
» SETUP » VIDEO CODEC » (SELECT)
PRORES HQ The Apple ProRes 422 (HQ) codec oers the utmost possible quality for 4:2:2 or 4:2:0 sources
(without an alpha channel) and provides the following:
• Target data rate of approximately 220 Mbps (1920 x 1080 at 60i)
• Higher quality than Apple ProRes 422
PRORES 422 The Apple ProRes 422 codec provides the following:
• Target data rate of approximately 145 Mbps (1920 x 1080 at 60i)
• Higher quality than Apple ProRes 422 (LT)
PRORES LT The Apple ProRes 422 (LT) codec provides the following:
• Roughly 70 percent of the data rate of Apple ProRes 422 (smaller le sizes than ProRes 422)
• Higher quality than Apple ProRes 422 (Proxy)
4K RAW TO APPLE PRORES
CONTINUED »
9
4K RAW TO APPLE PRORES
5. FORMAT SSDs
☼
» ODYSSEY » SSD’S » FORMAT BOTH
(or FORMAT SSD1 if you do not have a second SSD drive installed.)
6. CONNECT TO CAMERA AND VERIFY STATUS INPUT
Connect FS700 3G-SDI output to Odyssey SDIA input
NOTE
Use only 3G-SDI rated cables from FS700 to Odyssey. Using a 1.5G SDI cable in not
recommended and may cause issues.
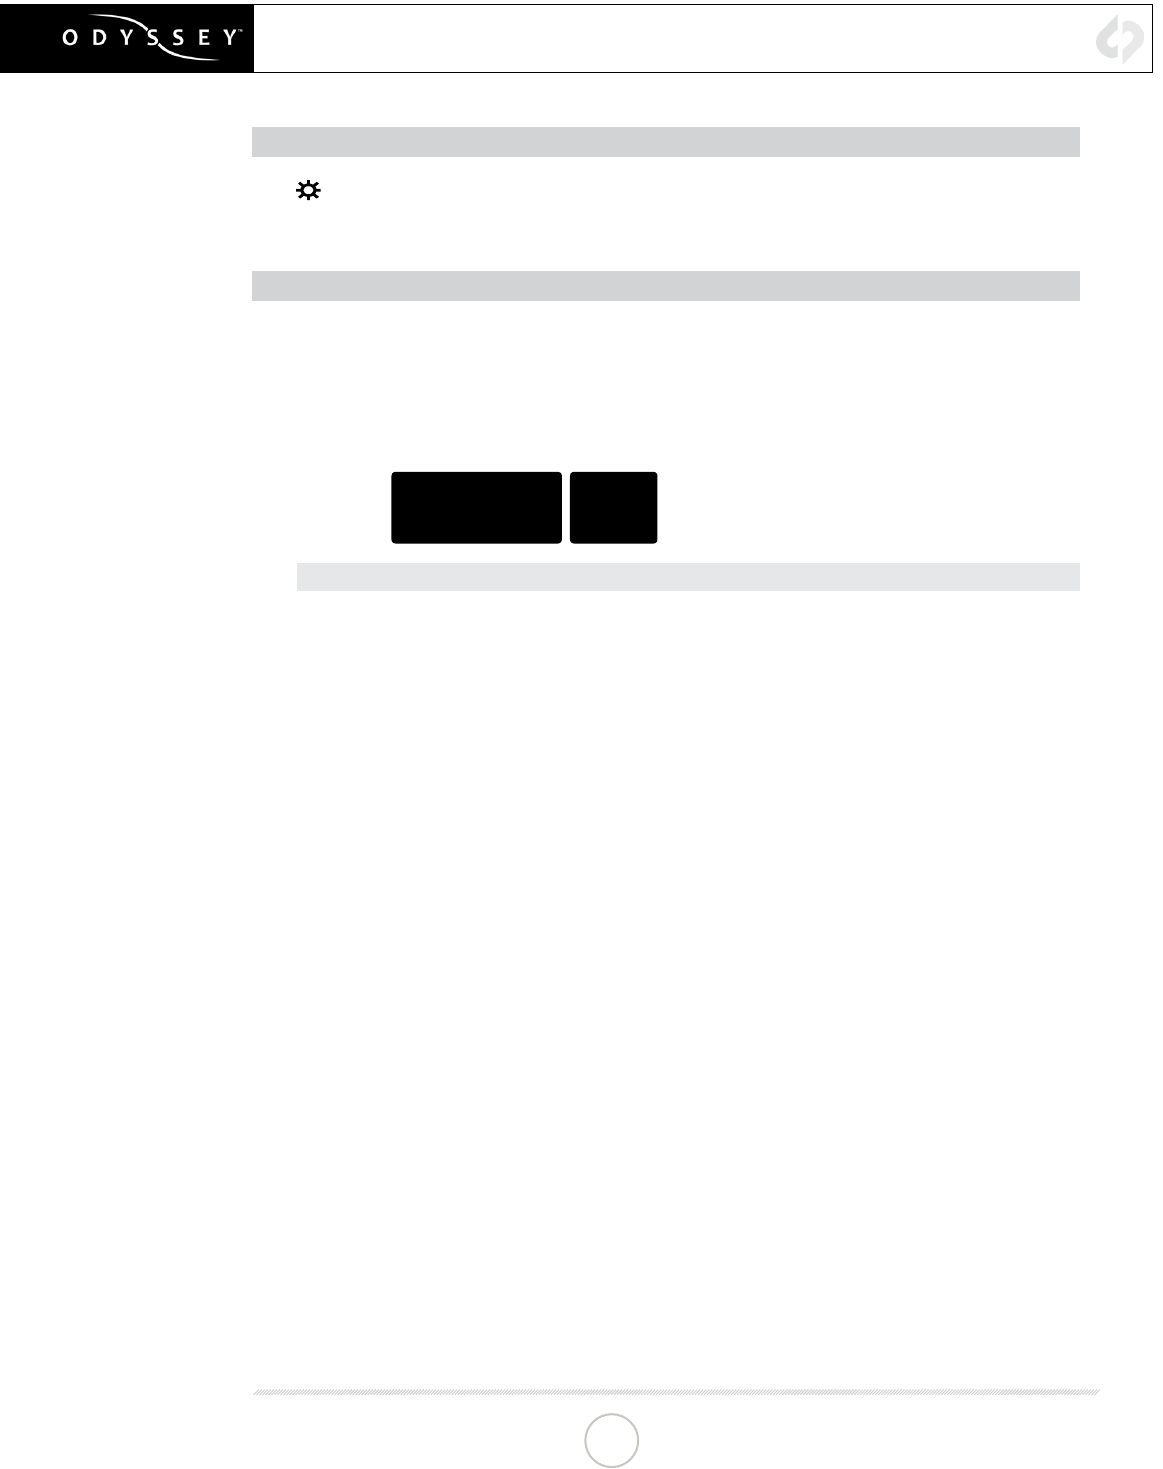
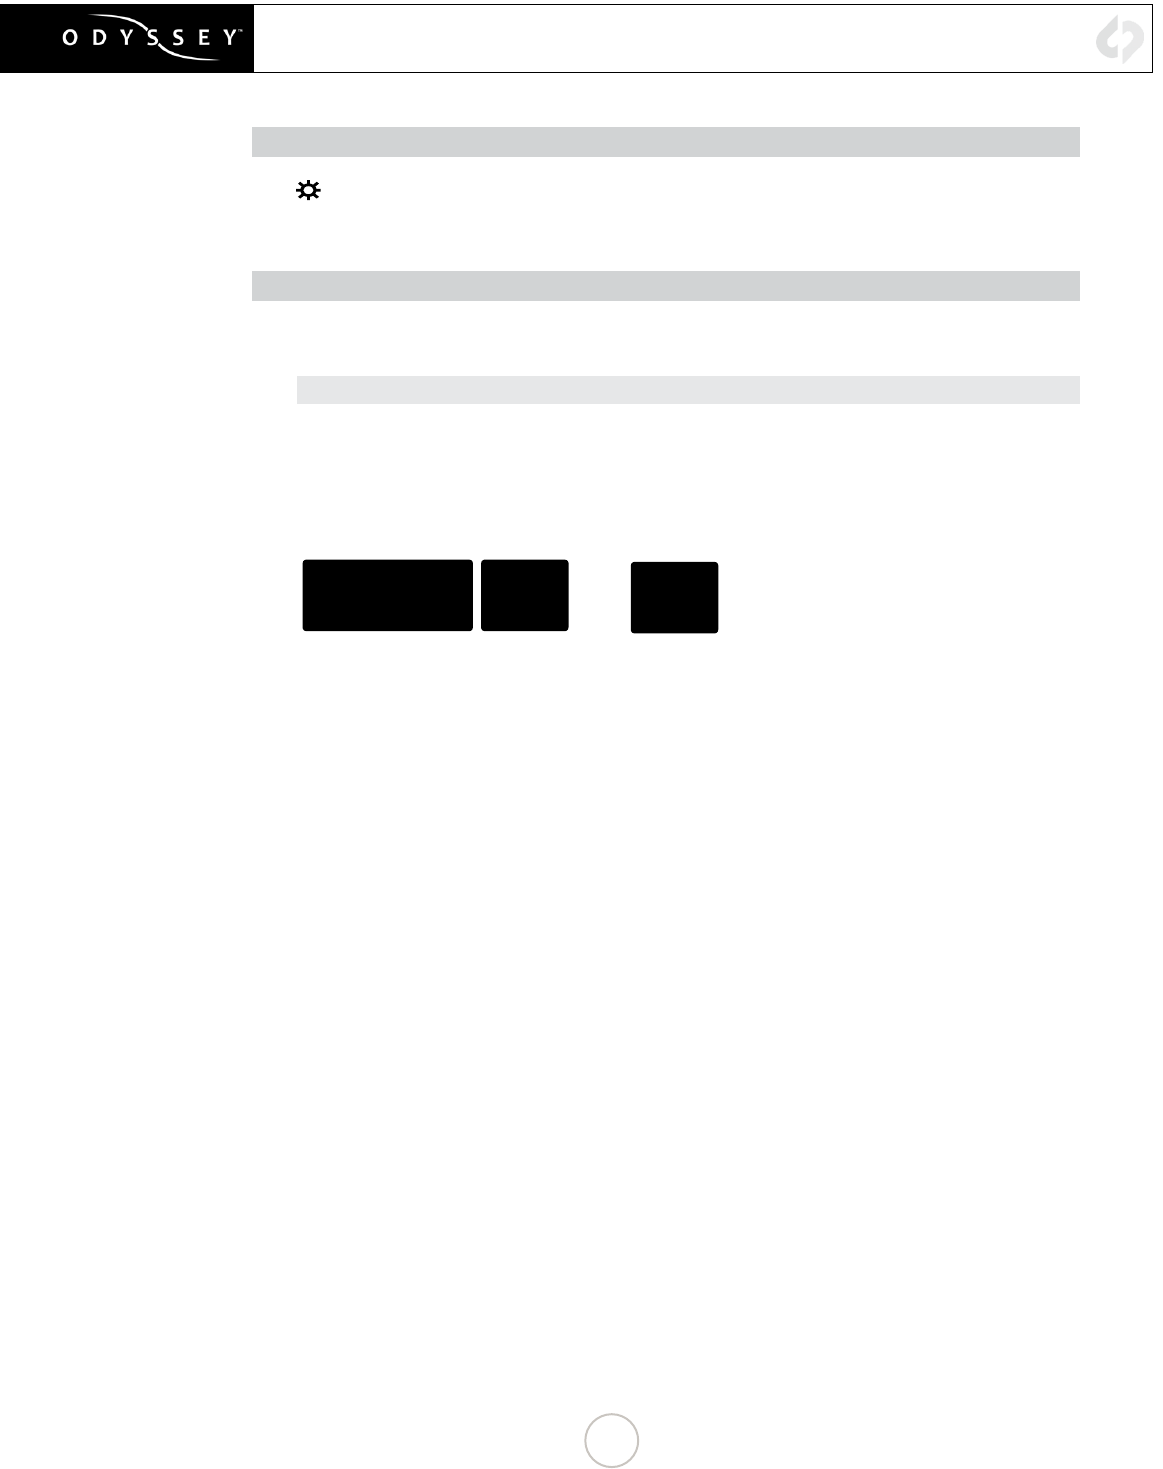
The status on your Odyssey will display your camera’s output.
Example:
4K 29.97 FS700
4K->UHD
or FS700
4K->HD
10
CONTINUED »
FS700 422 TO Apple ProRes
FS700 CONFIGURATION
1. SET UP THE FS700 FOR RECORDING
MENU » REC/OUT SET » REC SET » HD
Select any of the following frames rates that you wish to record on the Odyssey:
NTSC
1080/24p
1080/30p
1080/60p
PAL 1080/25p
1080/50p
NOTE
1080/100p, 1080/120p are not supported.
2. SET UP RECORD TRIGGER (FS700 REC BUTTON)
MENU » REC/OUT SET » VIDEO OUT » SDI/HDMI COMMAND » ON
3. SET UP FS700 OUTPUT RESOLUTION
MENU » REC/OUT SET » VIDEO OUT » SDI/HDMI/COMPONENT » 1080P/480P
4. SET UP FS700 OUTPUT FRAME RATE
MENU » REC/OUT SET » VIDEO OUT » 24/30P OUTPUT » 24P/30P
11
FS700 422 TO APPLE PRORES
ODYSSEY CONFIGURATION
1. SET ODYSSEY TO HD->HD APPLE PRORES 422 MODE
☼
» SETUP » CAMERA » SONY FS7/FS700 » HD->HD PRORES(.MOV)
2. MAKE FS700 THE RECORD TRIGGER
☼
» SETUP » RECORD TRIGGER » CAMERA
3. SET TIMECODE SOURCE
☼
» SETUP » TIMECODE SOURCE » SDI/HDMI
4. SET PRORES BITRATE
☼
» SETUP » VIDEO CODEC » (SELECT)
PRORES HQ The Apple ProRes 422 (HQ) codec oers the utmost possible quality for 4:2:2 or 4:2:0 sources
(without an alpha channel) and provides the following:
• Target data rate of approximately 220 Mbps (1920 x 1080 at 60i)
• Higher quality than Apple ProRes 422
PRORES 422 The Apple ProRes 422 codec provides the following:
• Target data rate of approximately 145 Mbps (1920 x 1080 at 60i)
• Higher quality than Apple ProRes 422 (LT)
PRORES LT The Apple ProRes 422 (LT) codec provides the following:
• Roughly 70 percent of the data rate of Apple ProRes 422 (smaller le sizes than ProRes 422)
• Higher quality than Apple ProRes 422 (Proxy)
5. FORMAT SSDs
☼
» ODYSSEY » SSD’S » FORMAT BOTH
(or FORMAT SSD1 if you do not have a second SSD drive installed.)
6. CONNECT TO CAMERA AND VERIFY STATUS INPUT
Connect FS700 3G-SDI output to Odyssey SDIA input
SDI CABLES
Use only 3G-SDI rated cables from FS700 to Odyssey. Using a 1.5G SDI cable in not
recommended and may cause issues.
The status on your Odyssey will display your camera’s output.
Example:
1920x1080
29.97
HD
PRORES
12
CONTINUED »
FS700 CONFIGURATION
1. SET UP THE FS700 FOR RECORDING
MENU » REC/OUT SET » REC SET » HD
Select any of the following frames rates that you wish to record on the Odyssey:
NTSC
1080/24p
1080/30p
1080/60p
PAL 1080/25p
1080/50p
Note: 1080/100p, 1080/120p are not supported.
2. SET UP RECORD TRIGGER (FS700 REC BUTTON)
MENU » REC/OUT SET » VIDEO OUT » SDI/HDMI COMMAND » ON
3. SET UP FS700 OUTPUT RESOLUTION
MENU » REC/OUT SET » VIDEO OUT » SDI/HDMI/COMPONENT » 1080p/480p
4. SET UP FS700 OUTPUT FRAME RATE
MENU » REC/OUT SET » VIDEO OUT » 24/30p Output » 24p/30p
RECORDING TO UNCOMPRESSED DPX
13
CONTINUED »
RECORDING TO UNCOMPRESSED DPX
ODYSSEY CONFIGURATION
1. SET ODYSSEY TO FS700 TO UNCOMPRESSED DPX MODE
☼
» SETUP » CAMERA --> SONY FS7/FS700 » HD->4:4:4 (.DPX)
Click OK - The unit will restart.
2. MAKE FS700 THE RECORD TRIGGER
☼
» SETUP » RECORD TRIGGER » CAMERA
3. SET TIMECODE SOURCE
☼
» SETUP » TIMECODE SOURCE » SDI/HDMI
4. FORMAT SSDs
☼
» ODYSSEY » SSD’S » FORMAT BOTH
(or FORMAT SSD1 if you do not have a second SSD drive installed.)
5. CONNECT TO CAMERA AND VERIFY STATUS INPUT
Connect FS700 3G-SDI output to Odyssey SDIA input
SDI CABLES
Use only 3G-SDI rated cables from FS700 to Odyssey. Using a 1.5G SDI cable in not
recommended and may cause issues.
The status on your Odyssey will display your camera’s output.
Example:
1920x1080
29.97
DPX
4:4:4
14
CONTINUED »
OFF-LOADING DATA
COPYING FILES TO YOUR COMPUTER
1. CONNECT SSD DRIVE TO ADAPTER
Connect the Convergent Design 2.5” Premium SSD Media to any off-the-shelf 2.5” SATA
adaptor (example: Seagate GoFlex Thunderbolt Adaptor or USB 3.0 Adaptor)
2. CONNECT ADAPTER TO COMPUTER
The SSD will mount within 10-20 Seconds. (You will see this mount on the desktop or
within nder on MAC, or within My Computer on Windows machines).
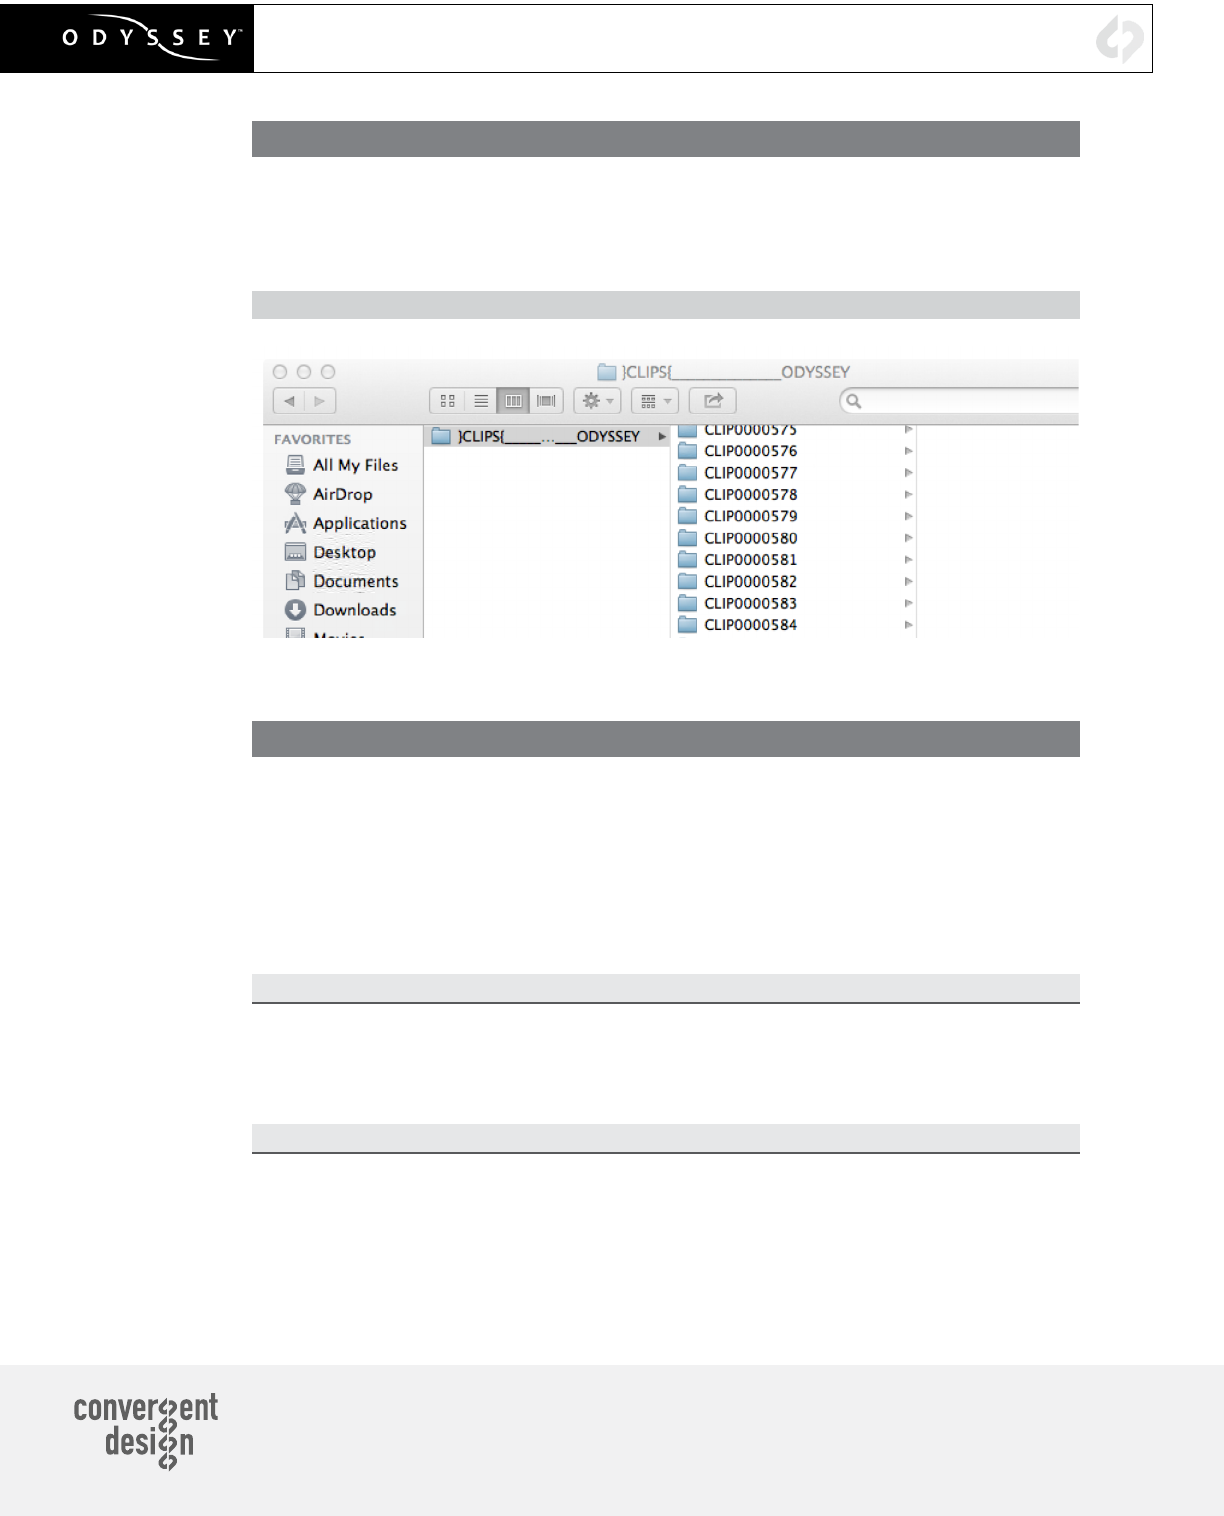
3. COPY FILES FOR PLAYBACK/EDITING
All Clips or Takes are located within the “Clips” directory, navigate to this and copy all of
your les to a local or external drive or RAID for playback and/or editing.
SOFTWARE UTILITIES (FREE DOWNLOAD FROM WEBSITE)
CD CLIP MERGER (RAW/DPX)
Use the Clip Merger for any Raided Record (ie if your recorded clip required more than
one SSD).
CD APPLE PRORESS TRANSFER TOOL (FREE DOWNLOAD FROM WEBSITE)
Use to combine clips into a single le
Use to copy all les to a single directory without folder structure.
Required in order to transfer markers to your NLE.
CD DATA UNPACKER (DPX)
Use CD Data Unpacker to convert “packed” les to “unpacked” data.
ALL UTILITIES CAN BE DOWNLOADED FROM THE FIRMWARE/DOWNLOADS
AREA OF OUR WEBSITE: Convergent-Design.com/support/rmware-downloads.html
ATTENTION MAC OSX USERS
Before installing Convergent Design Software on Mac OSX You must rst change the
following settings.
1) Navigate to Applications » Utilities » System Preferences
2) Select Security and privacy
3) Under General » Allow applications downloaded from: Select Anywhere.
You will now be able to run the installer for installing any Convergent Design Applications.
15
CONTINUED »
Apple ProRes
The Odyssey can record in Apple ProRes 422 (HQ), Apple ProRes 422 and Apple ProRes 422 (LT)
compressed codecs. This allows for high quality recording while avoiding high data rates of working with
uncompressed video.
NATIVE APPLE PRORES SUPPORT
Adobe CC 2014
Apple FCP X, Aperture
Cineform Studio
Final Cut Pro 7
Black Magic DaVinci Resolve
The Foundry Nuke
Autodesk Smoke
Sony Vegas
FS700 RAW SUPPORT (DNG SEQUENCES)
All FS700 RAW recording on the Odyssey is recorded as a 12-bit linear CinemaDNG le. With DNG les,
timecode and clip metadata is stored in every frame, as well as in the XML le within each clip. All audio
is recorded 48Hz 16 bit Uncompressed WAV audio.
It is important to correctly set the white balance of the camera, as this is baked into the RAW
le.
NATIVE CINEMADNG SUPPORT
Adobe CC 2014*
Apple FCP X, Aperture
Assimilate Scratch Lab (future update)
Black Magic DaVinci Resolve
*Pending next Adobe CC update.
FS700 RAW: DEALING WITH RAW FILES
Note that FS700 RAW les are Linear, thus the les need a Gamma 2.2 correction in order to look correct.
You may notice when you rst import your les that they appear very dark before correction.
FS700 DAVINCI RESOLVE IMPORT SETTINGS
1. Right click on the le and select “Edit CinemaDNG Codec Settings”
2. Then under the CAMERA RAW select be sure CinemaDNG is selected from the drop
down menu.
3. Set the Decode using method to CinemaDNG Default* (Also be sure your project is
setup correctly)
4. Set the White Balance to As Shot
5. Set the Color Space to Rec709
6. Set the Gamma to Rec709
7. Leave Highlight Recovery off
8. Click Apply
The Media Pool Camera RAW settings are the same as the ones in the color page and these are designed
for individual clip adjustment so its better to rst set the ‘Project Settings’, ‘Camera RAW’ as you need for
the whole project.
Select ‘Project Settings’, ‘Camera RAW’, ‘CinemaDNG’ and make sure the ‘Decode using’ is set to either
‘CinemaDNG Default’ or “Camera Metadata’
POST PRODUCTION
16
CONTINUED »
POST PRODUCTION
The “Camera Metadata’ is the default and the best place to start if you need to change an individual clip
with camera RAW.
The Media Pool settings are helpful if you have a mix of different clip types, you can sort by codec, select
a group and adjust.
For your convenience, Convergent Design has generated several example LUTs that can be applied to
your RAW footage. Keep in mind these LUTs are an approximation, and may need adjustment depending
on your application.
These LUTs are available in the Firmware/Downloads section of the Convergent Design website.
*Also note that using camera metadata or CinemaDNG default is also supported.
TO LOAD 3D LUTS INTO DAVINCI RESOLVE
1. Select the Project Settings wheel, and navigate to Look Up Tables
2. Select Open LUT Folder, and copy the included example LUTs into this folder.
3. Now Select Update Lists
4. Now in the Media Browser you can right click on your RAW le and select 3D LUT and
select the LUT you wish to apply from the list.
Note the following about each CD example LUT, and you should adjust the LUT based on your
application.
FS700_1.11.100_SLOG.cube (Same LUT is recommended with firmware v2.10.141/3.10.100)
This LUT can be applied to view a simulated S-Log2 look based on the RAW recording with the S-Log2
picture prole, also note the image should closely match the internal media.
FS700 FCP X IMPORT SETTINGS
Once you have created a new project be sure to check the following Settings:
1. Under Final Cut Pro select Preferences
2. Be sure the Still Images editing duration is set to 0.0.1 Seconds
3. Select navigate to File and select Import Media
4. Navigate to the Clips directory, and select the Clip Folder contain your FS700 RAW les.
5. At this point you can start correcting the les to a 2.2 Gamma using the Color Board.
* Note if you are recording the internal media you can import the matching S-Log2 le, and
select Match Color for a close approximation of S-Log2, but will most likely need additional
tweaking.
17
POST PRODUCTION
WORKING WITH RECORDED FILES
There are numerous post systems and NLEs that can read natively the various le formats recorded by
the Odyssey. Some NLEs may require plug-ins in order to read certain le formats. Blackmagic Design
Resolve software is available for free and can read all formats recorded by the Odyssey.
FILE STRUCTURE
UNCOMPRESSED SUPPORT (DPX SEQUENCE)
All Uncompressed recording on the Odyssey is recorded as 10 bit RGB 4:4:4 DPX, this is for all sources
regardless if the source is 8 bit, 10 bit, 4:2:2, 4:4:4. With 12 bit camera’s the les are recorded as a 16 bit
DPX, for more universal compatibility. Also note that with DPX les timecode, and Clip Metadata is stored
in every frame, as well as in the XML le within each clip. All audio is recorded 48Hz 16 bit Uncompressed
WAV audio.
Also Note 1080p59.94/60p, 1080p119/120 and 12 bit les are recorded as Packed, so our CD unpacker
utility will need to be used before the les can be used in any editor.
NATIVE 10-BIT / 16-BIT DPX SUPPORT
Adobe CS6 / Adobe CSCC/2014
Apple Color
AutoDesk Smoke
Assimilate Scratch Lab
Avid DS
Black Magic DaVinci Resolve
Cineform Studio
ColorFront OnSet Dailies
DJViewer
Eyeon Fusion
Grass Valley Eduis (Does not support 16-Bit)
The Foundry Nuke
Xnview(Does not support 16-Bit)
PLUGINS FOR DPX SUPPORT
Glue Tools
Apple FCP Pro
Apple FCP Pro X
Meta Fuse
Avid Media Composer
☎ ++(720)221-3861
✉ CDSupport@convergent-design.com
☁ Convergent-Design.com
© 2015 Convergent Design, Inc. - All Rights Reserved. All copyrights and trademarks remain the property of their respective owners. Updated February 23, 2015
