Corning Optical Communication GXSPA-40 GX HIGH POWER DAS REMOTE UNIT (BOOSTER) User Manual Tri DAS System
Corning Optical Communication Wireless GX HIGH POWER DAS REMOTE UNIT (BOOSTER) Tri DAS System
UserManual.wiki
>
Corning Optical Communication
>
GXSPA 40 User Manual
User Manual
Navigation menu
Upload a User Manual
Namespaces
Wiki Guide
HTML
PDF
Info
Views
User Manual
Discussion / Help
Navigation


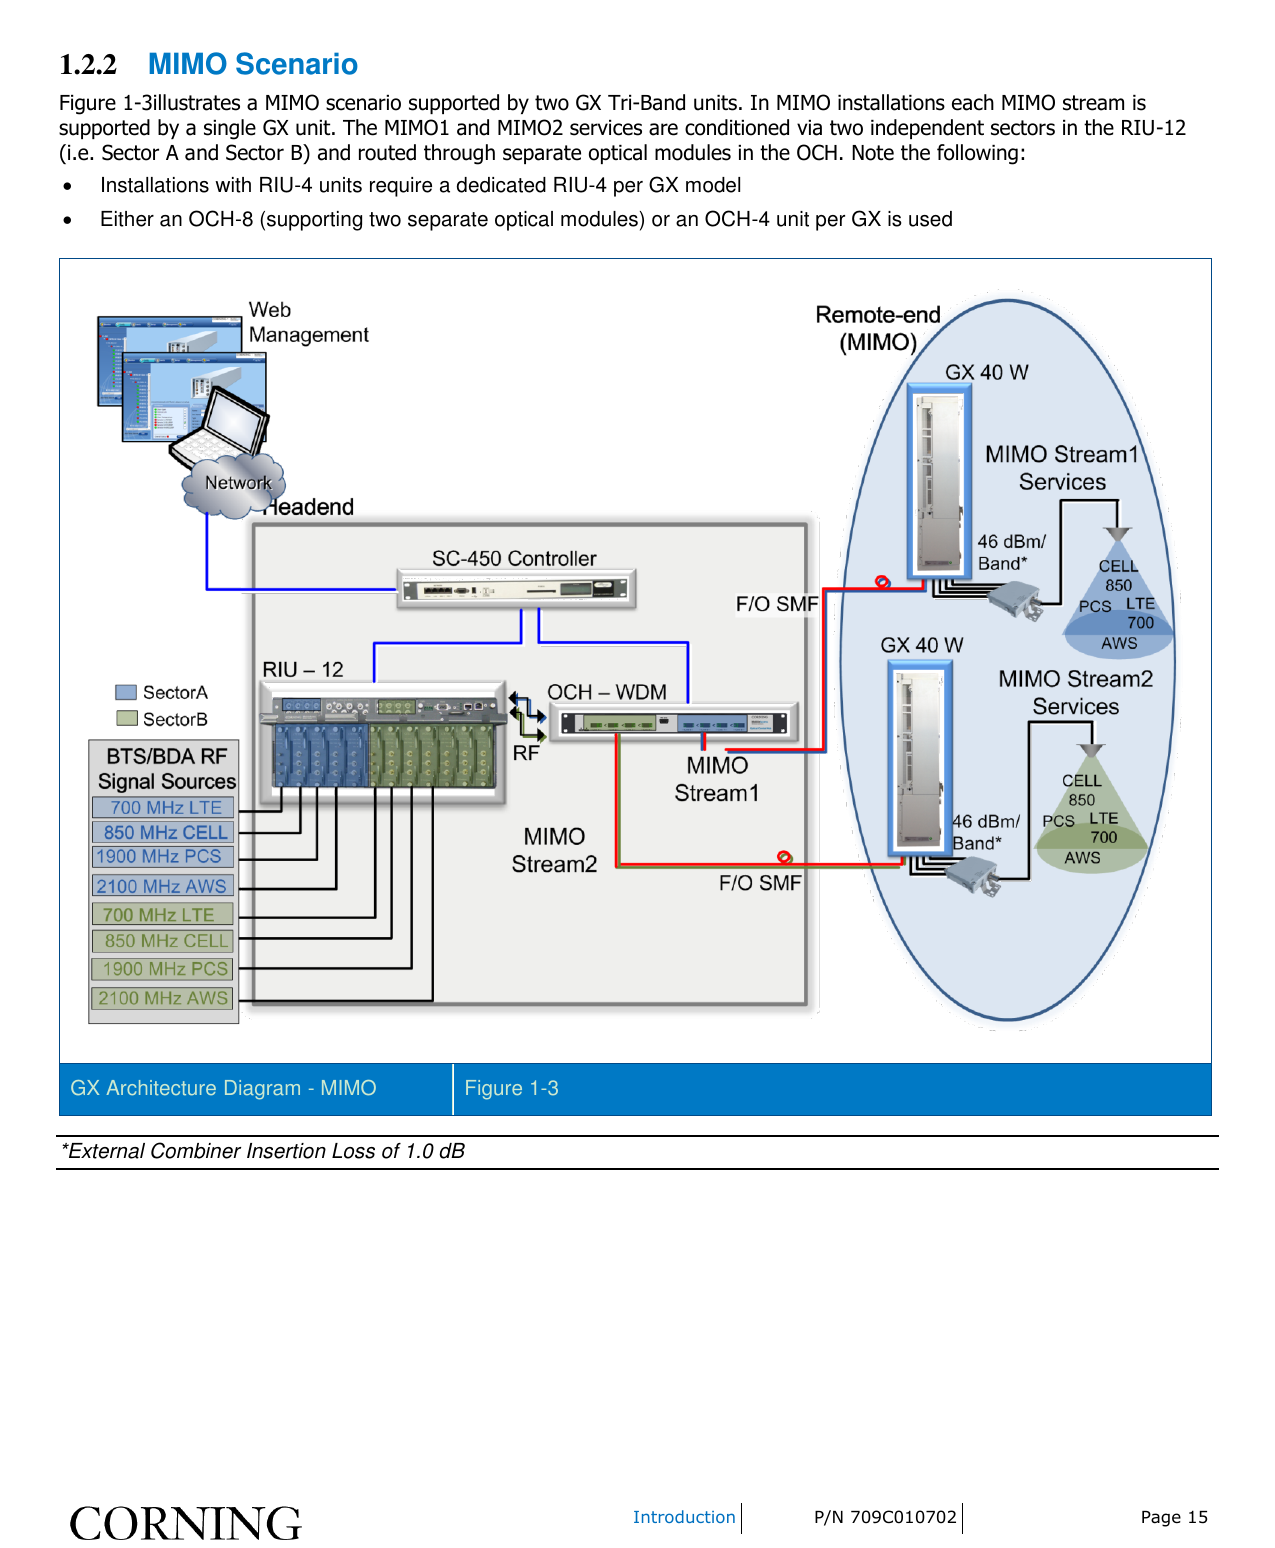
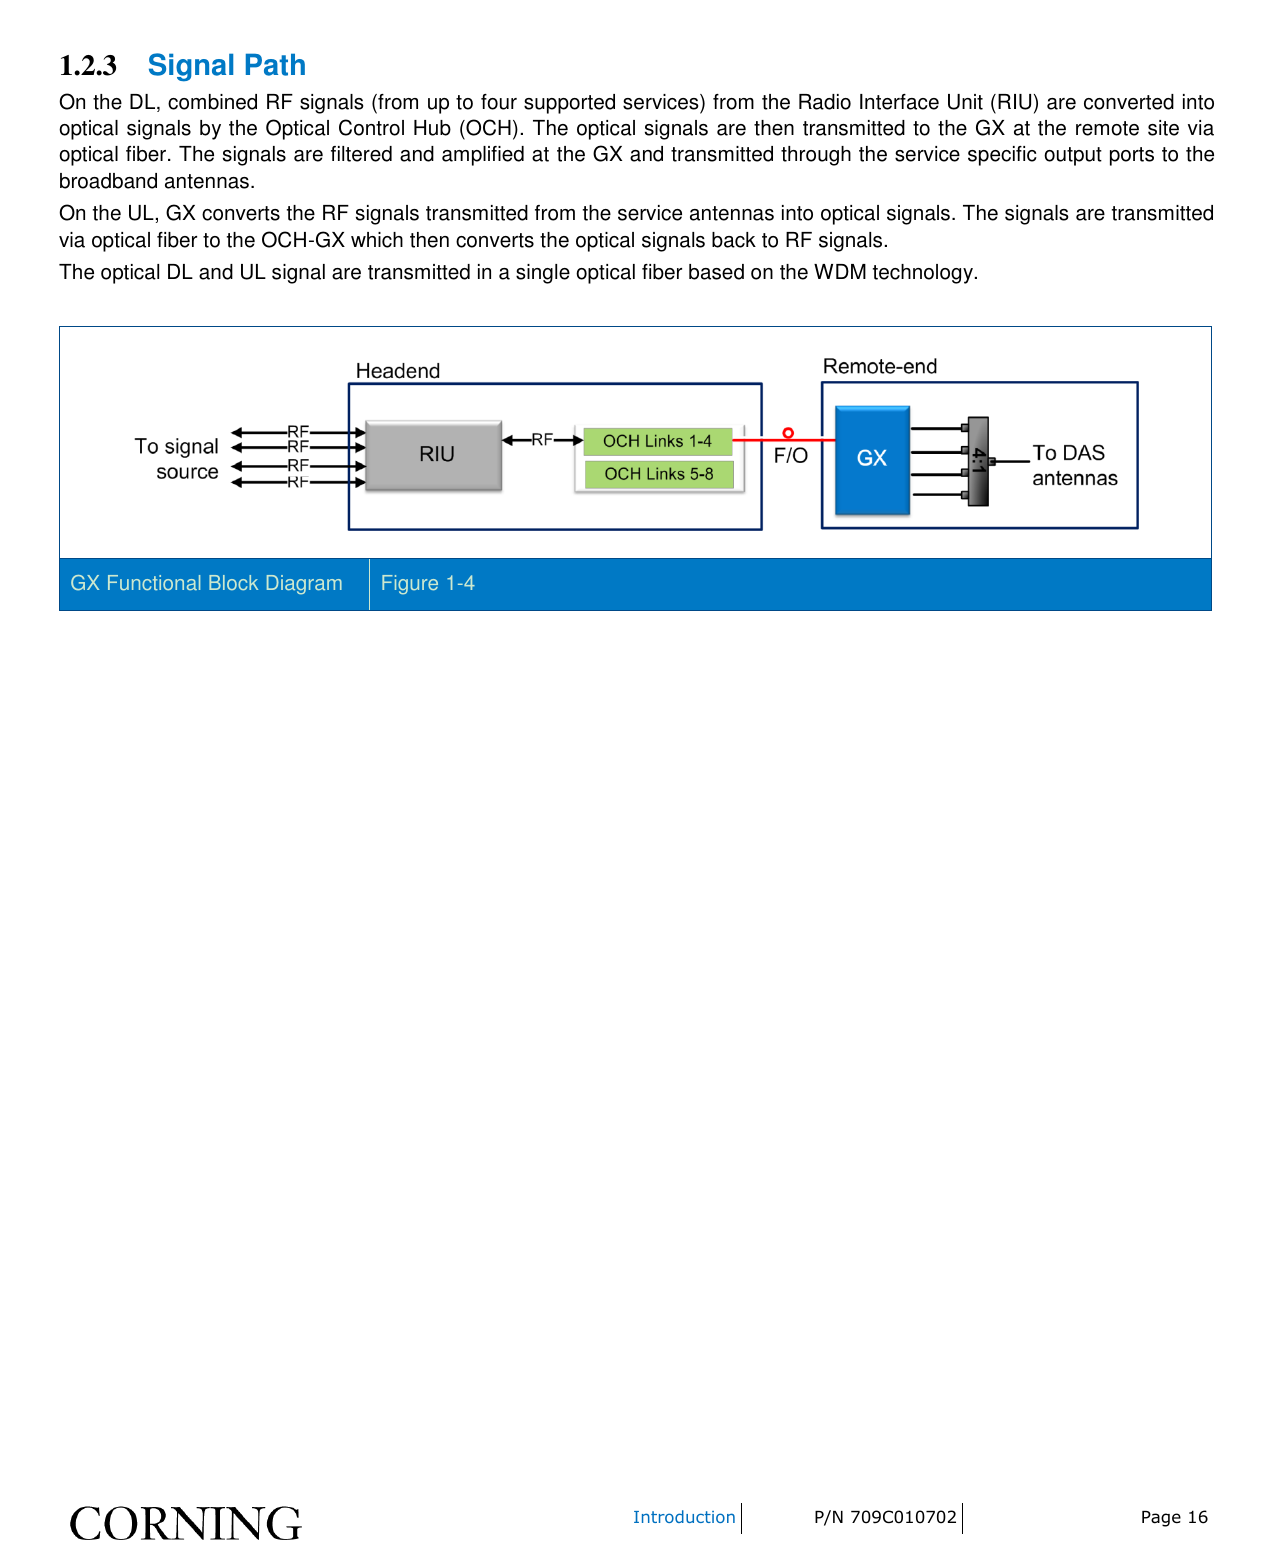
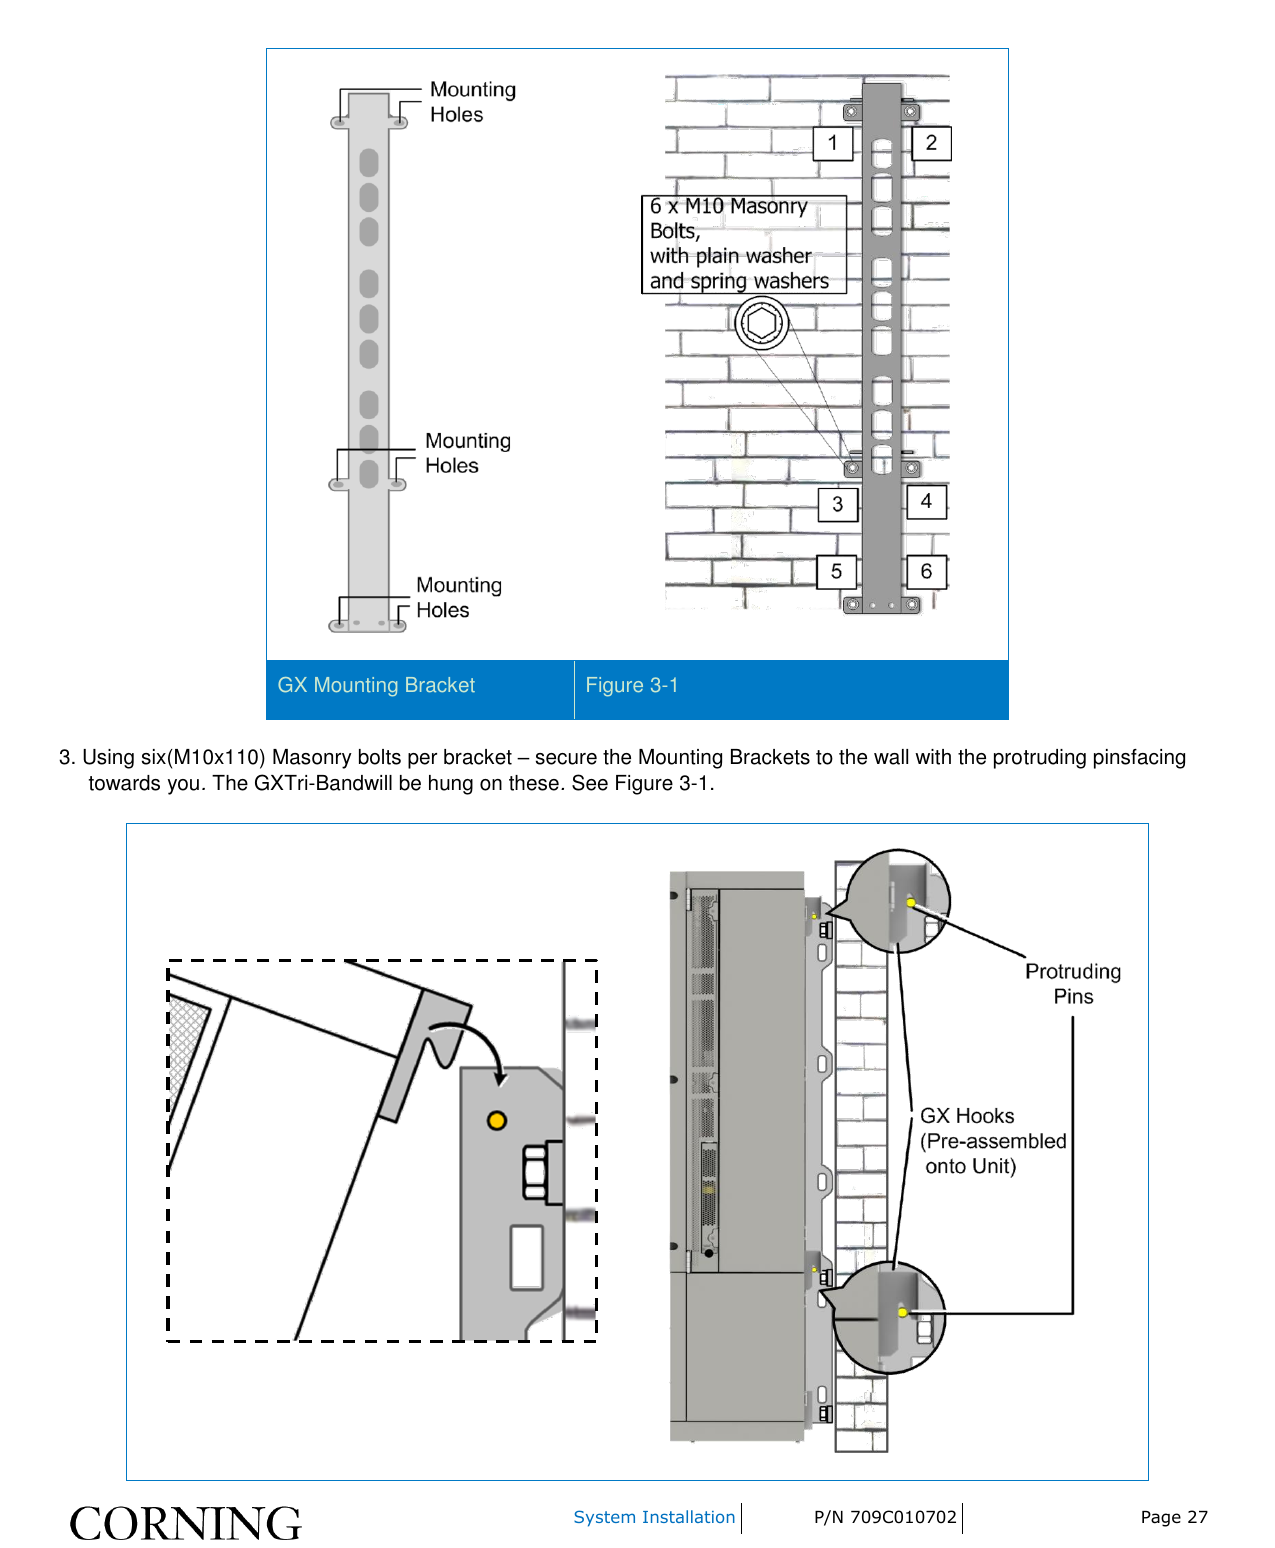
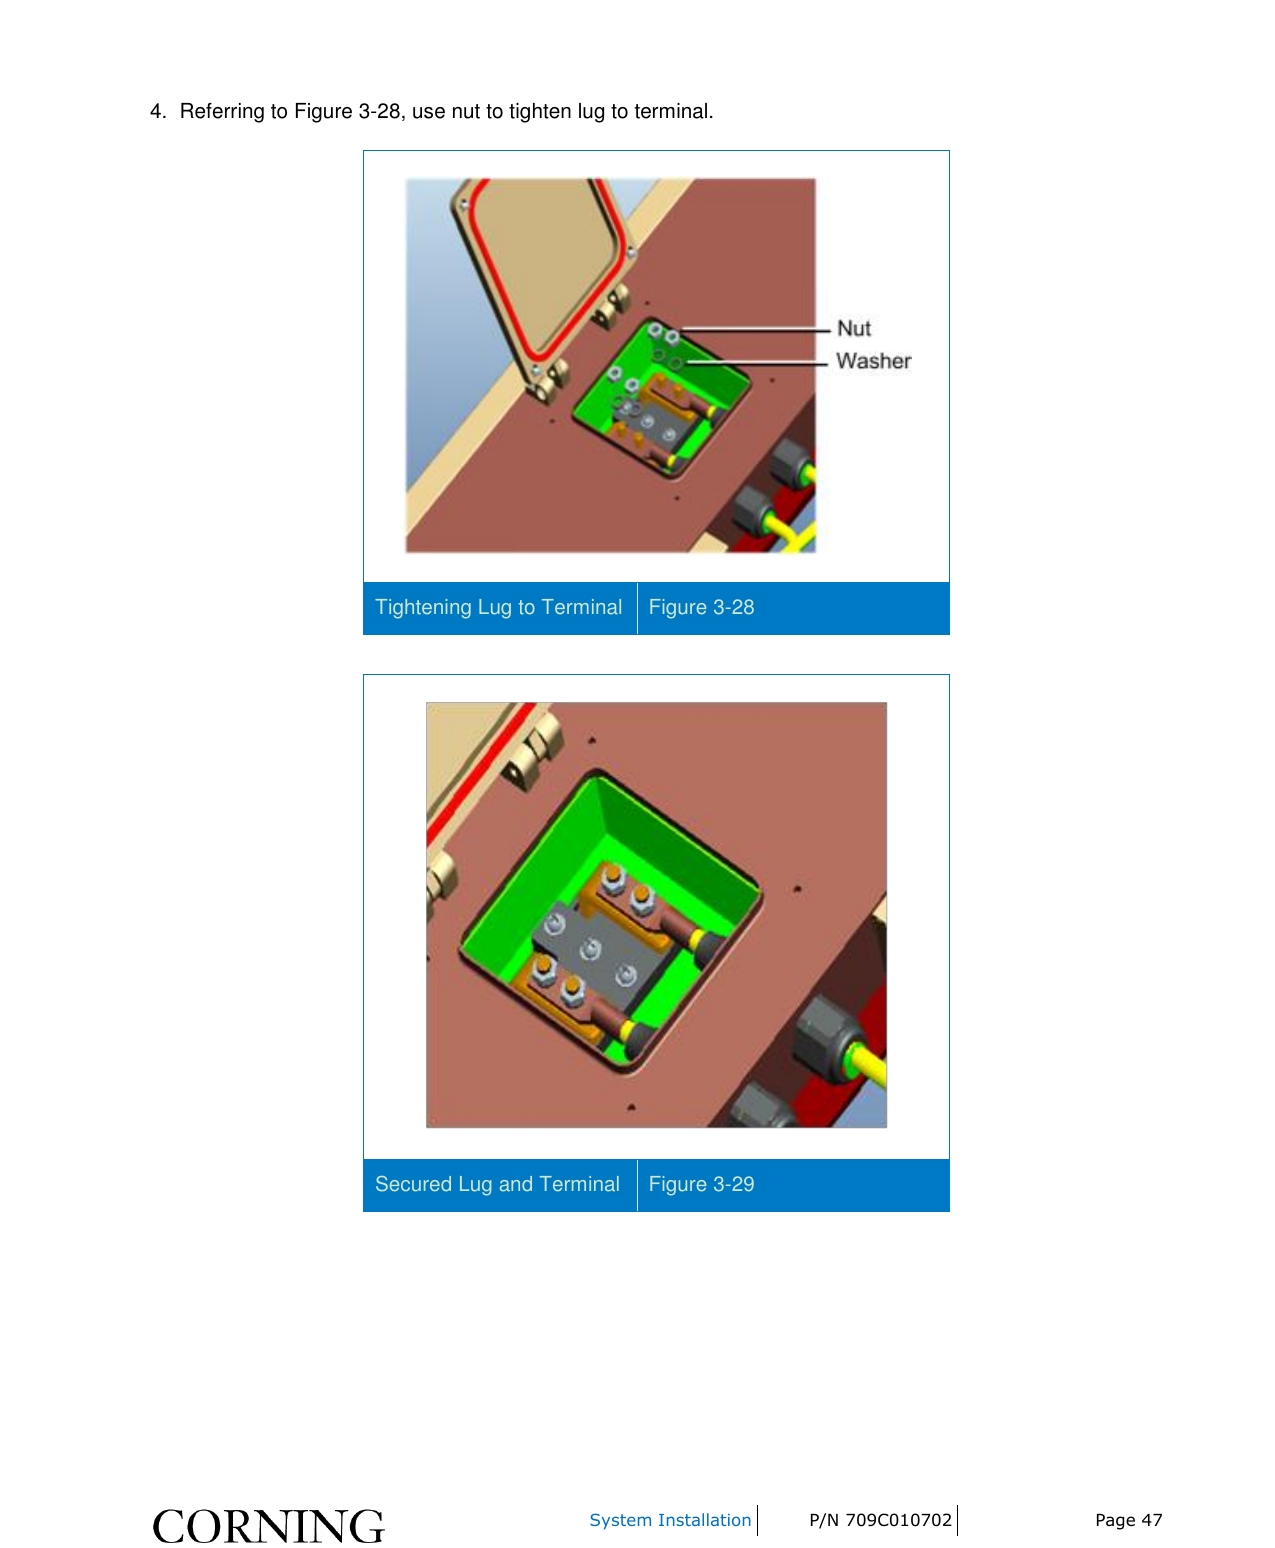
![Introduction P/N 709C010702 Page 17 1.3 System Monitoring and Management The GX-Tri Remote Unit is centrally managed via the MobileAccess SC-450 Controller. Note: The GX Tri-Band solution is supported by SC-450 v5.4 and higher. GX-Tri is not connected directly to the controller; it is connected to the OCH-GX element (that is connected to the controller). Thus, the controller monitors views and manages the GX-Trivia the OCH-GX, hosting the GX unit. The following shows the Config [uration] tab of the selected GX unit. The system configuration and management is described in the SC-450 UM (v5.4 and higher). Example of GX Tri-Band Configuration Tab Figure 1-5](https://usermanual.wiki/Corning-Optical-Communication/GXSPA-40/User-Guide-2307654-Page-17.png)