Craftsman 917377971 User Manual 6.75HP 21 ROTARY LAWN MOWER Manuals And Guides L9080087
CRAFTSMAN Walk Behind Lawnmower, Gas Manual L9080087 CRAFTSMAN Walk Behind Lawnmower, Gas Owner's Manual, CRAFTSMAN Walk Behind Lawnmower, Gas installation guides
User Manual: Craftsman 917377971 917377971 CRAFTSMAN CRAFTSMAN 6.75HP 21 ROTARY LAWN MOWER - Manuals and Guides View the owners manual for your CRAFTSMAN CRAFTSMAN 6.75HP 21 ROTARY LAWN MOWER #917377971. Home:Lawn & Garden Parts:Craftsman Parts:Craftsman CRAFTSMAN 6.75HP 21 ROTARY LAWN MOWER Manual
Open the PDF directly: View PDF ![]() .
.
Page Count: 30
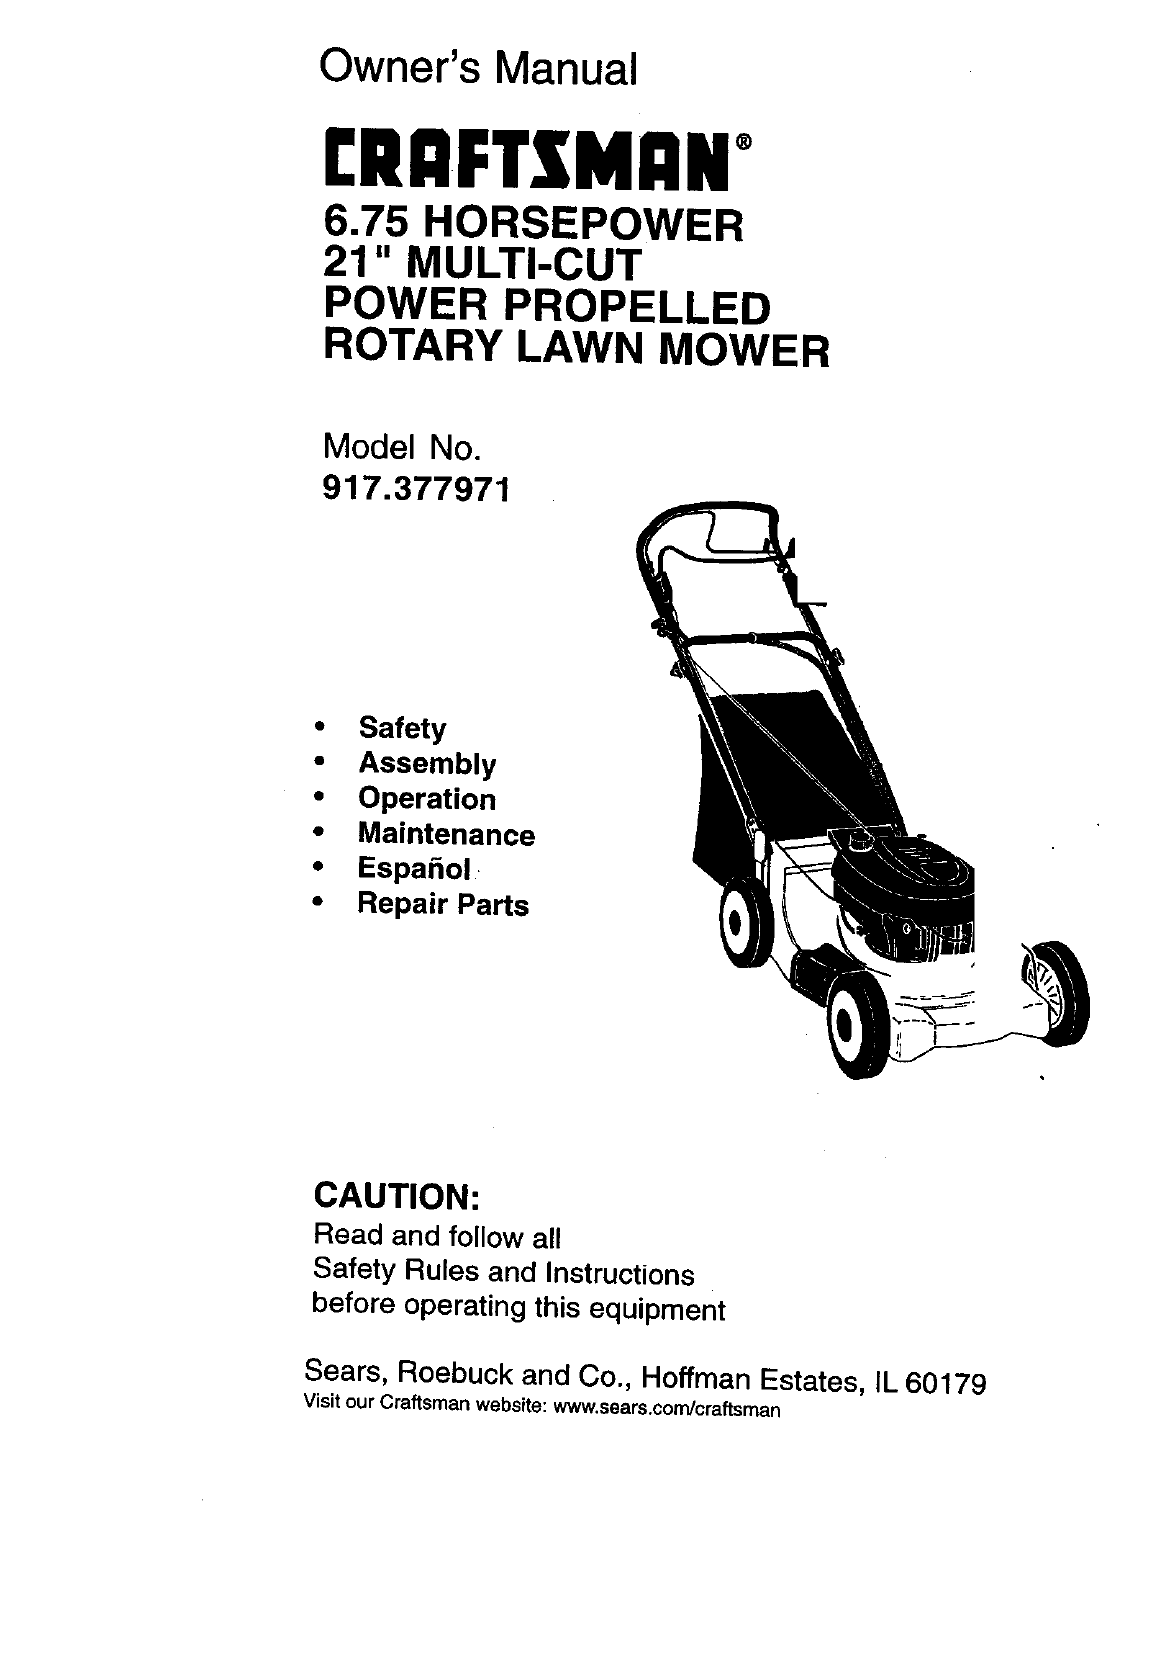
Owner's Manual
rRRFTXMRNo
6.75 HORSEPOWER
21" MULTI-CUT
POWER PROPELLED
ROTARY LAWN MOWER
Model No.
917.377971
•Safety
•Assembly
•Operation
•Maintenance
•Espa_ol
•Repair Parts
CAUTION:
Read and follow all
Safety Rules and Instructions
before operating this equipment
Sears, Roebuck and Co., Hoffman Estates, IL 60179
Visit our Craftsman website: www.sears.com/craftsman

Warranty
Safety Rules
Assembly
Operation i
Maintenance Schedule
Maintenance
2 Product Specifications 12
2 Service and Adjustments 15
4 Storage 16
6 Troubleshooting 17
11 Repair Parts 37
11 Parts Ordering Back Cover
LIMITED TWO.YEAR WARR/_NTY ON CRAFTSMAN POWER MOWER
For two years from date of purchase, when this Craftsman Lawn Mower is maintained,
lubricated, and tuned Up _ccot_ing to the operating and maintenance instructions in the
owner's manual, Sears will repair free of charge any defect in material or workmanship.
If this Craftsman Lawn Mower is used for commercialor rental purposes, this warranty
applies for only 90 days from the date of purchase.
This Warranty does not cover: .
•Expendable items which become worn during normal use, such as rotary mower
blades, blade adapters, belts, air cleaners and spark plug.
•Repairs necessary because of ot_el"atorabuse or negligence, includingbent crank-
shafts and the failure to maintain the equipment according to the instructionscon-
tained inthe owner's manual.
Warranty service is available by returning the Craftsman power mower to the nearest
Sears Service Center/Department in the United States. This warranty applies onlywhile
this product is in use in the United States.
This Warranty gives you specific legal rights,and you may also have other rights which
vary from state to state.
SEARS, ROEBUCK AND CO., D/817 WA, HOFFMAN ESTATES, ILLINOIS 60179
Safety standards require operator pres-
ence controls to minimize the risk of injury.
Your unit is equipped with such controls.
Do not attempt to defeat the function ofthe
operator presence controls under any
circumstances.
TRAINING:
•Read this operator's manual carefully.
Become farrullarwith the controls and know
how to operate your mower pmpedy. Leam
how to quickly stop mower.
• Do not allow children to use your mower.
Never allow adults to use mower without
proper instructions.
•KesptJ_ _ of _ c_of aln
persons, especially small children and pets.
•Use mower only as the manufacturer
intended and as described in this manual.
• Do not operate mower if it has been
dropped or damaged in any manner.
Alwayshave damage repairedbeforeusing
yourmower.
•Do not use accassery_t_chments thatare
notrecommendedbythe manufacturer.
Use of suchattachmontsmay be hazard-
ous,
•The bladetumswhenthe engine,isrunning.
PREPARATION:
•Always thoroughly check the area to be
mowed and dear it of all stones, sticks,
wires, bones, and other foreign objects.
These objects will be thrown by the blade
and can cause severe injury.
•Always wear safety glasses or eye shields
when starting and while using your mower.
•Dress properly. Do not operate mower
when barefoot or wearing open sandals.
Wear only solid shoes with good traction
when mowing.
2

• Checkfueltank beforestarlingangine. Do
notfll ges tankindoors, when the engine is
runningorwhen the engineis hot. Allowthe
engineto coolforseveralminutes before
tillingthe gas tank. Clean offany spilled
gasolinebeforestartingthe engine.
•Alwaysmake whealheigl_ adjustments
beforestartingyourmower, Neverattempt
to do this whilethe engineis running.
•Mow onlyindayfightor good ert_cial light.
OPERATION:
• Keep youreyes and mindon yourmower
andthe area beingcut. Do notletother
interestsdistractyou.
•Do notmowwet orslipperygrass. Never
runwhileoperatingyour mower. Alwaysbe
sureof yourfooting- keep a firmholdon the
handlesand walk.
• DOnotputhandsor feet near or under
rotatingparts. Keep clearof the discharge
openingat all times.
•Alwaysstopthe enginewhenever you leave
or ere notusing yourmower, or before
crossingdriveways,walks, roads,and any
gravel-coveredareas.
•Never directdischargeofmaterialtoward
bystandersnor allow anyone neer the
mower while you are operatingit.
•Beforecleaning,inspecting,or repairing
yourmower,stopthe engineand make
absolutelysurethe bladeand all moving
partshave stopped. Then disconnectthe
sparkplugwire and keep itawayfrom the
sparkplugto preventaccidentalstarting.
•Do notcontinue to runyourmower ifyouhit
aforeign object. Followthe procedure
outlinedabove,then repairany damage
beforerestartingand operatingyour mower.
•Do notchange thegovemorsettingsor
overspeedthe engine. Enginedamage or
personalinjury'mayresult.
• DOnotoperateyour mower if itvibrates
abnormally. Excessivevibrationis an
indicationof damage; stop the engine,
sefeiy checkfor thecause of vibrationand
repairas required.
•Do not runthe engine indoors. Exhaust
fumesam dangerous.
•Nevercutgrassbypullingthe mower
towardsyou. Mow acrossthefaceof
slopes, neverup and downoryou might
Iceeyour footing.DO notmow excessively
steepslopes, Use cautionwhen operating
the mower on uneventerrainor when
changingdirections- maintaingoodfoot;ng.
•Neveroperateyour mowerwithoutproper
guards,plates,grasscatcher or othersafety
devicesin place.
MAINTENANCE AND STORAGE:
•Check the blade and the engine mounting
bolts often to be sure they are tightened
properly.
•Check all bolts, nuts and screws at frequent
intervals for proper tightness to be sure
mower is in safe working condition.
• Keepall safety devices in place and
working.
•To reduce tire hazard, keep the engine free
of grass, leaves or excessive grease and oil.
•Check grass catcher often for deterioration
and wear and replace worn begs. Use only
replacement bags that are recommended
by and comply with specifications of the
manufacturer of your mower.
•Al,._yskeep a sharpbladeon yourmower.
• Allow engine to cool before storing in any
enclosure.
•Never store mower with fuel in the tank
inside a building where fumes may reach an
open _larne or an ign_on source such as a
hot water heater, space heater, clothes
dryer, etc.
3J_Look for t.h!ssymbol to point out
imponan[ safety precautions. It means
CAUTION!!! BECOMEALERT!!! YOUR
SAFETY IS INVOLVED.
pI_CAUTION.: ,Always dis.connect spark
ug wire ano place wire wnere it cannot
contact spark plug in order to prevent
accidental starting when setting up,
transporting, adjusting or making repairs.
WARNING: The engine e.xha.ustfrom
this proauct contains cnemicals Known to
the State of California to cause cancer,
birth defects, or other reproductive harm.
3

'ere not
shipped with your mower. They are also available at most Sears retail outlets and service
centers. Most Sears stores can also order repair parts for you, when you provide the model
number of your lawn mower. Some of these accessories may not apply to your lawn mower.
LAWN MOWER PERFORMANCE
CUPPING DEFLECTOR
FOR REAR DISCHARGE LAWN MOWERS MULCHER KITS STABILIZER
G SCATC,E.S O DATCNE.S
FOR FOR
REAR DISCHARGE ' _SIDE DISCHARGE
LAWN MOWERS iLAWN MOWERS
GAS CANS
LAWN MOWER MAINTENANCE
MUFFLERS
BUSES
AIR RLTERS
BLADE AD_RS I
SPARK PLUGS
WHEELS ENGINE OIL
Read these instructions and this manual in
itsentirety before you attempt to assemble
or operate your new lawn mower.
IMPORTANT: This lawn mower is shipped
WITHOUT OIL OR GASOLINE in the
engine.
Your new lawn mower has been as-
sembled at the factory with the exception
of those parts left unassemblad for
shipping purposes. To ensure safe and
proper operation of your lawn mower, all
parts and hardware you assemble must be
tightened securely. Use the correct tools
as necessary to ensure proper tightness.
All parts such as nuts, washers, bolts, etc.,
necessary to complete the assembly have
been placed in the parts bag.
TO REMOVE LAWN MOWER FROM
CARTON
• Remove loose parts included with
mower.
• Cut down two end corners of carton and
lay end panel down fiat.
•Remove all packing materials except
padding between upper and lower
handle and padding holding operator
presence control bar to upper handle.
•Roll lawn mower out of carton and check
carton thoroughly for additional loose
parts.
4
HOW TO SET UP YOUR LAWN
MOWER
TO UNFOLD HANDLE
IMPORTANT: Unfold handle carefully so
as not to pinch or damage control cables.
•Raise lower handle section to operating
position and squeeze the bottom ends of
lower handle towards each other until
the pin in handle can be inserted into
one of the three height adjustment
holes.
•Remove protective padding, raise upper
handle section into place on lower
handle and tighten both handle knobs.
•Remove any packing material from
around control bar.

• Your handles may be adjusted for your
mowing comfort. Refer to Service and
Adjustments section of this manual.
Operator presence
control bar
Upper handle \
lift up
Li_ up
Lower
handle
Mowing
posRion
3-position
Handle
adjustment
bracket
Handle
pin
TO INSTALL ATTACHMENTS
Your lawn mower was shipped ready to be
used as a mulcher. To convert to bagging
or discharging; See OPERATION section
of this manual.
TO PREPARE BATTERY
NOTE: Your battery must be charged
before you can start your lawn mower.
• Disconnect engine battery connector
(male) from battery connector (female)
•Connect battery charger connector
(male) to battery connector (female).
• Plug battery charger into 110 volt A.C.
outlet.
•Leave battery charger connected for 24
hours before starting your engine for
the firsttime.
•After charging, connect engine connec-
tor (male) to battery connector (female).
Your engine has an integral alternator for
partial charging. Connect your battery
charger to charge battery as required.
IMPORTANT: The engine alternator will
not charge a discharged battery.
At the end of the mowing season the
battery should be charged for 48 hours to
protect the battery during winter storage.
e_ncCnAeUTInOnN:Always disconnect the
eg" co ector (male) from the battery
connector (female) to prevent accidantal
startingwhen transporting or storing your
lawn mower after the season.
Engine
connector
(Male) \. "
_Battery
charger
_'_ Battery
•charger
_/_'/_-'_ \ _:_nector
connector
(Fettle)
5

KNOW YOUR LAWN MOWER
READ THIS OWNER'S MANUALAND SAFETY RULES BEFORE OPERATING YOUR LAWN
MOWER. Compare the illustrationswith your lawn mower to familiarize yourself with the
location of various controls and adjustments. Save this manual for future reference,
These symbols may appear on your lawn mower or In Iitersture supplied with the
product. Learn and understand their meaning.
CAUTION ENGINE ENGINE FAST SLOW CHOKE FUEL OIL DANGER, KEEP HANDS
OR WARNING ON OFF AND FEET AWAY
Operator presence control
Key start switch Speed control lever
Auxiliary Starter Cable clip
handle
Grass catcher
Wheel adjuster
lever
Engine oil cap w/dipstick
Mulcher
plug Gasoline cap
Mulcher door
IMPORTANT: This lawn mower is shipped
without oil or _asoline in the en_line. Housing
MEETS CPSC SAFETY REQUIREMENTS
Sears rotary walk-behind power lawn mowers conform to the safety standards of the
American National Standards Institute and the U.S. Consumer Product Safety Commis-
sion. The blade turns when the engine, is running.
Operator presence control - must be
held down to the handle to start the
engine. Release to stop the engine.
Primer -pumps additional fuel from the
carburetor to the cylinder for use when
starting a cold engine.
Auxiliary Starter handle -used for
starting the engine,
Drive control bar - used to engage
power-propelled foward motion of lawn
mower.
Mulcher plug - Located at the rear
discharge opening must be removed
when converting to bagging operation.
Key start switch- used to start engine
6

Theoper_onofanylawn mower can resultin
foreignobjectsthrownintotheeyes, whichcan
resultinsevere eye damage. Always wear
safe,_yglassesor eye shieldswhile operating
yourlawn mower or performingany adjust-
meritsor repairs. We recommenda wide
visionsafetymaskover spectaclesor standard
safetyglasses.
HOWTO USE YOUR LAWN MOWER
ENGINE SPEED
The engine speed was set at the factory for
optimum performance. Speed is not adjust-
able.
ENGINE ZONE CONTROL
A
_CAUTION: Federal regulaUensr_luire
an engine controlto be insr_isd on this lawn
mower inorderto minimizethe riskof blade
contactinjury.Do not underany
circumstancesattemptto defeat the function
ofthe operatorcontrol.The bbde turnswhen
the engine is running.
• Your lawn mower is equippedw_ an
operatorpresence centralbar which
requiresthe operatorto be pos'dioned
behindthelawnmower handletostartand
operate the lawn mower.
TO ADJUST CUTTING HEIGHT
•Allfourwheelsareadjustedby a single
lever.
• Pulladjusterlevertowardwheel.To raise
mower,move leverforwardtodesired
position.To lowermower,move thelever
towardtherear.
Lower Wheels for high cut
Lever
Raise Wheels for low cut
GROUND DRIVE SPEEDS
Your lawn mower provides multiple speeds
to let you select the speed that suits you
best.
• Lower speeds are for slow, heavy/thick
grass cutting or trimming.
•Medium speeds are for normal grass
cutting or trimming.
•High is for light cutting and for ground
transport.
NOTE: Do not move speed control lever
unless the engine is running
TO OPERATE DRIVE SYSTEM
•With engine running, select ground
speed by moving speed control lever to
desired position.
•To start forward motion, pull drive
control bar back against handle.
•To stop forward motion, release drive
control bar.
IMPORTANT: Always keep drive control
bar fully engaged against handle when in
use.
Speed control
lever
Operator presence
Drive control control bar
engaged _ \_,_/_
':_:)::"Drive CO_ i_:"
disengaged
TO CONVERT MOWER
Yourlawnmowerwas shippedreadytobe
used as a mulcher.To convertto baggingor
discharging:
REAR BAGGING-
. Open rear doorand remove mulcherplug.
Storemulcherplugin a safeplace.
•To convertto mulching ordischarging
operation,instaJlmulcherplugintorear
dischargeopeningofmower.
SIDE DISCHARGING-
•Rear door must be open.
•Open mulcherdoor and installdischarge
detlector underguard as shown.
• Mower is now ready for discharging
operation.
•To convert to mulching or bagging opera-
tion, discharge deflector must be removed
and mulcher door must be dosed.
7

SIMPLE STEPS TO REMEMBER
WHENCONVERTINGYOURLAWN
MOWER
FOR MULCHING -
•Rear muleher plug installed.
• Mulcher door dosed.
FOR REAR BAGGING -
•Rear mulcherplug removed.
•Grass catcherinstalled.
•Mulchardoorclosed.
FOR SIDE DISCHARGING -
•Rear muld'_r plug instalk_.
•Side di_ deflectorinstalled.
_CAUTION: Do not.run.y_.r lawn mower
withoutrear mulcherp=ug=np_aceor
approvedgrasscatcherin place.
Never attemptto operatethe lawn mower with
the rear door removedor proppedopen.
_CAUTION: Do not.runyour lawn .mower
without rear mulcherplug or approvea grass
catcherinplace. Neverattemptto operatethe
lawn mowerwith the rear door removedor
propped open. •door
slots Grass
handle
Catcher frame
hook
•Liftup on grasscatcher usingthe frame
handle.
•Remove grasscatcherwith clippingsfrom
under lawn mower handle.
•Emptyclippingsfrom bag usingbothframe
handle and bag handle.
NOTE: Do not dragthe bagwhen emptying;
itwill cause unnecessarywear.
Mulcher
Mulcher door
Open
mulcher door
Discharge deflector
TO AI"rACH GRASS CATCHER
• Lift the rear door of the lawn mower and
place the grass catcher frame hooks into
the slots of the rear door.
•The grass catcher is secured to the lawn
mower housing when the rear door is
towered onto the grass catcher 'frame.
BEFORE STARTING ENGINE
OIL
Your lawn mower is shippedwithoutoil inthe
engine.
•Be sure mower islevel and area aroundoil
fillis dean.
•Remove engineoilcap and fillto the _11
line on the dil_Ck.
NOTE: Allow oil to settle down into
engine for accurate dipstick reading.
•Engineholds 27 ozs. of oil. For typeand
grade of oilto use, see "ENGINE" in
Maintenancesectionof this rnadual.
•Pouroil slowly. Do notover fill.
•Check oil level beforeeach use. Adcloilif
needed. Fillto fulllineon dipstick.
• To read properlevel, 'dghtenengine oil cap
each time.
•Reinstallengine oil cap and tighten,
•Change the oilafterovery 25 hoursof
operationor each season. You may need
to change the oil more often underdusty,
dirty conditions.
8

GAS
•RIIfuel tank. Use fresh, dean, regular
unleaded gasolinewith a minimum of 87
octane. (Use of leaded gasolinewill
increase carbon and lead oxide deposits
and raduce valve life). Do notmix oilwith
gasoline. Purchasefuel in quantitiesthat
can be usedwithin30 daysto assure fuel
frashnees.
_WARNING: Ex_'.ence indicatesthat
alcoholblended fu_;is(called gasohol or
usingethanolor methanol)can attract
moisture which leads to seperationand
formation ofacidsduringstorage. Acidicgas
can damage the fuel systemof an engine
while in storage. To avoid engine problems,
the fuel system should be emptied before
storage of 30 days or longer. Drain the gas
tank, startthe engine and let it run until the
fu_ lines and carburetor are empty. Use fresh
fuel next season. See Storage Instructions for
additionalinforma_on. Never use engine or
carburetorcleaner productsinthe fuel tankor
permanentdamage may occur.
Gasoline
filler cap
oil cap
TO START ENGINE
• To starta coldengine,pushprimerthree(3)
times before tryingto start. Use a _rm push.
Thisstep is notusuallynecessarywhen
startingan enginewhichhas aJreadyrunfor
a few minutes.
• Move engine speedcontrol lever to fast
positJen.
•Hoid operatorpresenoe controlbar down to
the handle.
• Turn electdcstartkey olockwise to crank
engine.
IMPORTANT: Do not crankenginemorethan
fivecontinous secondsbetween each time you
tryto start. Wait 5 to 10 secondsbetween
each attempt.
• To startengine using the auxiliarystarter
handle,followthe steps above. Exchange
the use of the startkey for starterhandle.
Pullstarterhandlequickly. Do notallow
starterrope to snap bask.
•To stopengine,releaseoperator presence
control bar.
NOTE: In coolerweatherit may be necessa_
to repeat priming steps. In warmer weather
over priming may cause flooding end engine
will notstart. If you do tk_edengine wait a few
minutes before attempting to start and do not
repeat priming steps.
9

MOWING TIPS
• For mostcuttingconditionsand better
baggingperformance,the engine speed
shouldbe set inthe fast position.
•Undar certaincenditJorts,such as when
mowingverytall grass, raisethe mower
heighton the firstcutto reducepushing
effort,to avoid overheatingthe engine, and
to avoid leavingdumps of grassclippings.
Make the secondcuttothe desiredheight.
•For exb'emelyheavy cutting,reducethe
w_h of cut.
•Pores inclothgrasscatcherscan become
filledwithdirtand dustwithuseand the
catcherwillcollectlessgrass. To prevent
this, regularlyhose catcheroffwithwater
and letdrybeforeuse.
MULCHING MOWING TIPS
IMPORTANT: For bestperformance,keep
mower housingfree of built-upgrassand
bash. See "Cleaning" in MAINTENANCE
sectionof thismanual.
•The specialmulchingblade will recutthe
grass clippingsmany times and reduce
them insize sothat as theyfallontothe
lawn they will disperseintothe grassand
not be noticed, Also, the mulchedgrass
willbiodegradequicklyto providenubients
for the lawn. Always mulchwithyour
highestengine (blade)speed as this will
providethe bestrecuttingactionof the
blades.
• Avoid cutting your lawn when it is wet. Wet
grass tends to form dumps and interferes
with the mulching action. The best time to
mow your lawn is the early afternoon. At
this time the grass has driedand the newly
cutarea willnotbe exposedto the direct
SUn.
•For bestresults,adjustthe lawn mower
cuttingheight so that the lawn mower cuts
offonlythe topone-thirdof the grass
blades. If the lawn is overgrownitwillbe
necessaryto raisethe heightofcutto
reducepushingeffortand to keepfrom
overloadingthe engine and leaving
clumpsof mulchedgrass.For extremely
heavy mulching,reduceyour width of cut
by overlappingpreviouslycut pa_ _md
moo slowly.
•Certaintypesof grassand grass cond_ons
may requirethat an area be mulcheda
secondtime to completelyhidethe
clippings. When doing asecond cut,mow
acrossor perpendicularto the tirstcutpath.
•Change yourcuttingpattemfmmweekto
week. Mow northto southone weak than
change toeast to westthe nextweak. This
willhelp prevent matting and grainingof
the lawn.
Max 1/3
10

MAINTENANCE SCHEDULE
FILL IN DATES
AS YOU COMPLETE
REGULAR SERVICE
Checkfor Loose Fasteners "ll_ " " "
=Clean/Inspeot Grass Catcher Me
(if Equipped)
MiClean Lawn Mower v
Clean under DriveCover
(Power-PropelledMowers!
E_f Check drivebelt/pulleys
R Power-PropelledMowers) If#
3ERVICE DATE6
Check/Sharpen/Replace Blade _3
Lubrication Chart I_
Clean Battery/Recharge
IElectric Start Mowers/ _ _4
I E Check Engine Oil Level
Change Engine Oil Met.,'z
!N Clean AirFilter
Clean or Replace Spark Plug
EiReplace Air FilterPaper Cartridge i_=
1-Change mine often when opemitng under aheavy _or in high ambient temperatures,
2 - Service more olten when operating Indirty or dusty conditions,
3-RepFace blades more often when mowing Insandy soil
4 * Charge 48 hours at end of season,
GENERAL RECOMMENDATIONS
The warranty on this lawn mower does not
cover itexnsthat have been subjected to
operator abuse or negligence. To receive full
va/ue from the warranty, operator must
maintain mower as instructed in this rnanuai.
Some adjustments w_l need to pe rr_u:le
pedodicelly to properly rnaJntainyour unit.
All adjustments in the Service and Adjust-
ments sec_on of this manual should be
checked atleestonce e,ad_ season.
•Once a year, replace the spark plug,
replace air filter element and check blade for
wear. A new spark plug and dean/new air
filter element assures proper air-fuel mixture
and helps your engine run better and last
longer.
•Follow the maintenance schedule in this
manual.
BEFORE EACH USE
•Check engine oil level.
•Check for loose fasteners.
LUBRICATION
Keep unit well lubricated (See "LUBRICATION
CHART").
LUBRICATION CHART
(_ Wheel
uster
,======i_
_adj(_ Engine oil
(_ Spray lubricant
(_) Refer to MAINTENANCE
"ENGINE" section.
IMPORTANT: Do not oil or grease plastic
wheel bearings. Viscous lubricants will
attract dust and dirt that will shorten the
life of the self lubric_ng bearings. If you
feel they must be lubricated, use only a
dry, powdered graphite type lubricant
sparingly.
11

PRODUCT SPECIFICATIONS
MODEL NUMBER 917.377971
SERIAL NUMBER
DATE OF PURCHASE
HORSEPOWER: 6.75
GASOLINE CAPACITY/TYPE: 1.5 QUARTS
UNLEADED REGULAR
OlLTYPE (API-SF/SG/SH): SAE 30 (ABOVE 32°F)
SAE 5W-30 (BELOW 32°F)
OIL CAPACITY: 27 OZS.
SPARK PLUG(GAP: .030") CHAMPION RJ19LM or J19LM
VALVE CLEARANCE: INTAKE: .004 - .008
EXHAUST: .004 - .008
SOLID STATE IGNITION
AIR GAP: .0125 IN.
BLADE BOLTTORQUE: 35-40 FT. LBS.
The model and serial numbers will be found on a decal attached to the rear of the
lawn mower housing.Record both serial number and date of purchase in space
provided above.
LAWN MOWER
Alwaysobserve safety ruleswhen performing
any maintenance.
TIRES
• Keep tires free of gasoline, oil, or insect
control chemicals which can harm rubber.
• Avoid stumps, stones, deep ruts, sharp
objects and other hazards that may cause
tiredamage.
BLADE CARE
For best results, mower blade must be
kept sharp. Replace bent or damaged
blades.
TO REMOVE BLADE
•Disconnect spark plug wire from spark
plug and place wire where it cannot
come in contact with spark plug.
•Turn lawn mower on its side. Make sure
air filter and carburetor are up.
•Use a wood block between blade and
mower housing to prevent blade from
turning when removing blade bolt.
•Protect your hands with gloves and/or
wrap blade with heavy cloth.
•Remove blade bolt by turning counter-
clockwise.
•Remove blade and attaching hardware
(bolt, lock washer and hardened
washer).
NOTE: Remove the blade adapter and
check the key inside hub of blade adapter.
The key must be in good condition to work
properly. Replace adapter if damaged.
TO REPLACE BLADE
•Position the blade adapter on the engine
crankshaft. Be sure key in adapter and
crankshaft keyway are aligned.
•Position blade on the blade adapter
aligning the two (2) holes in the blade
with the raised lugs on the adapter.
• Be sure the trailing edge of blade
(opposite sharp edge) is up toward the
engine.
•Install the blade bolt with the lock
washer and hardened washer into blade
adapter and crankshaft.
•Use block of wood between blade and
lawn mower housing and tighten the
blade bolt, turning clockwise.
•The recommended tightening torque is
35-40 ft. tbs.
IMPORTANT: BLADE BOLT IS GRADE 8
HEAT TREATED.
12

TO SHARPEN BLADE
NOTE: We do not recommend sharpening
blade -but if you do, be sure the blade is
balanced.
Care should be taken to keep the blade
balanced. An unbalanced blade will cause
eventual damage to lawn mower or
engine.
• The blade can be sharpened with a file
or on a grinding wheel. Do not attempt
to sharpen while on the mower.
•To check blade balance, drive a nail into
a beam or wall. Leave about one inch of
the straight nail exposed. Place center
hole of blade over the head of the nail.
If blade is balanced, it should remain in
a horizontal position. If either end of the
blade moves downward, sharpen the
heavy end until the blade is balanced.
Blade Crank-
adapter shaft
keyway
• If you remove the drive pinions, wipe
clean with dry cloth. Reassemble dry.
Do not lubricate. Do not use oil or
grease.
•The pinion gear, on both sides of the
mower, are the same, however, they
must be installed correctly, If installed
incorrectly, the drive system will not
work.
•There are arrows embossed on both
sides of the pinion gear. With the arrow
at the top of the pinion, the arrow must
point towards front of mower. If the
arrow points to the rear, turn the pinion
around and assemble to mower.
•Place wheels back on adjuster axles.
•Replace Iocknuts and hubcaps.
Correct Incorrect
Wave
Blade
Blade
bolt
Pinion
E-ring
Lock
washer Crank-
Hardened
washer Trailing shaft
edge adapter
GRASS CATCHER
•The grass catcher may be hosed with
water, but must be dry when used.
•Check your grass catcher often for
damage or deterioration. Through
normal use it will wear. If catcher needs
replacing, replace only with a manufac-
turer approved replacement catcher.
Give the lawn mower model number
when ordering.
DRIVE WHEELS
Check rear drive wheels each time you
mow to be sure they move freely. The
wheels not turning freely means trash,
grass cuttings, etc., may be inside the
drive wheel and dust cover area and must
be cleaned out to free drive wheels.
If necessary to clean the drive wheels, "
check both rear wheels.
• Remove hubcaps and Iocknuts.
•Remove wheels from wheel adjuster
axles.
•Remove any trash or grass cuttings from
inside the dust cover, pinion and/or drive
wheel gear teeth.
Locknut
_Hubcap
Washer
ENGINE '
LUBRICATION
Use only high quality detergent oil rated with
API service classificatien SF, SG or SH.
Select the oil's SAlE viscosity grade according
to your expected operating temperature.
SAE VISCOSITY GRADES
"C _0. .20" 10" 20"
TEMPERATURE RANGE/_ITICIPATEO BEFORE NEXT O4L CHANGE
NOTE: Although multi-viscosity oils (5W30,
10W30 etc.) improve starting in cold weather,
these multi-viscosity oils will result in increased
oil consump'don when used above 32°F.
Check your engine oil level more frequently to
avoid possible engine damage from running
low on oil.
Change the oil after every 25 hours of
operalion or at least once a year if the lawn
mower is not used for 25 hours in one year.
13

Check _crankcase oil level before starling
the engine and after each five (5) hours of
cor_dnuoususe, T_jhten oil plug securely each
ti_ _ d-N_ckII_ oil_.
TO CHANGE ENGINE OIL
NOTE: Before tipping lawn mower to drain oil,
drain fuel tank by running engine untilfuel tank
is empty.
• Disconnect spark plug wire from spark plug
and place wire where it cannot come in
contact with spark plug.
•Remove engine oil cap; lay as'de on a clean
surface.
• "lip lawn mower on its side as shown and
drain oil into a suitable container. Rock lawn
mower back and forth to rernove any oil
trapped inside of engine.
• Wipe off any spilled oil on lawn mower and
on side of engine.
•Fill engine with oil. RU only to the "FULL"
line on the dipstick. DO NOT OVER FILL
•Replace engine oil cap.
• Reconnect spark plug wire to spark plug.
Container
AIR FILTER
Your engine will not run properly and may
be damaged by using a dirty air filter.
Replace the air filter every year, more
often if you mow in very dusty,dirty
conditions. Do not wash air filter.
TO CHANGE AIR FILTER
•Loosen cover knob.
•Swing cover down and remove from
hinge.
•Pull paper filter out of air cleaner body.
•Clean air cleaner cover and body.
•Install a new paper filter.
•Reinstall cover to air cleaner body. Be
sure hinge is assembled properly.
•Swing cover up and tighten cover knob.
(Do not overUghten).
Air filter cover
__j Coverknob
Hinge
Paper filter
MUFFLER
Inspect and replace conoded muffler as it
could create afire hazard and/or damage.
SPARK PLUG
Change your spark plug each year to make
your engine start easier and run better. Set
spark plug gap at .030 inch.
CI.EAlelG
IMPOR'IiM_T: For best performance,keep
mower housingfTeeof built-upgrassand
trash. Clean undersideof mower housing
aftereachuse.
_i, CAUTION: Disconnect_plugwire
fromspark plugand place wirewhere it
cannotcome incontact withthesparkplug.
•Clean the underside of your lawn
mower by scraping to remove build-up
of grass and trash.
•Clean engine often to keep trash from
accumulating. A clogged engine runs
hotter and shortens engine life.
•Keep finished surfaces and wheels free
of all gasoline, oil,etc.
•We do not recommend using a garden
hose to clean lawn mower unless the
electrical system, muffler, air filter and
carburetor are covered to keep water
out. Water in engine can result in
shortened engine life.
14

_CAUTION" BEFORE PERFORMING
ANY SERVICE OR ADJUSTMENTS:
• Release controlbarand stopengine.
• Make surethe blade andall moving
partshave completelystopped.
• Disconnectsparkplugwirefrom
sparkplugand placewhere it cannot
come incontact withplug.
LAWN MOWER
TO ADJUST Cut-rING HEIGHT
See 'q'OADJUST CUTRNG HEIGHT" inthe
O_ sectionofthismanual.
REAR DEFLECTOR
The reardeflector,attachedbetweenthe rear
wheels of yourlawn mower,is providedto
minimizethepeseiblitythatobjectsw_ibe
thrown out the rear of the lawnmower intothe
operatorsmowingp_ition. If the rear
deflectorbecomesd_naged, it shouldbe
replaced.
TO ADJUST HANDLE
The handleon yourlawnmower has three (3)
heightpositions- adjustto heightthat suits
you.
•Squeezethe bottomends of lowerhandle
towardseach otheruntilthe pininhandle
can be insertedintoone ofthe three height
adjustmentholes.
Med.
Low
Handlepin
J3-position
Handle
adjustment
bracket
ENGINE
ENGINE SPEED
Yourenginespeed has been factory set. Do
not attemptto increase enginespeedor it
may resultinpersonalinjury.Ifyoubelieve
that the engine is runningtoofast ortooslow,
take yourlawn mowerto an authorized
servicecenter/departmentforrepairand
adjustmer_
CARBURETOR
Yourcarburetorhas a non-adjustablefixed
mainjetfor mixturecontrol. Ifyourengine
doesnotoperatepropedydueto suspected
carburetorproblems,take yourlawn mowerto
an authorizedservice canter/departmbntfor
repairandadjustment.
IMPORTANT,"Never tamperwiththeengine
governor,which isfactory set for properengine
speed. Overspeedingthe engineabove the
factory highspeed settingcan be dangerous.
Ifyouthinkthe engine-governedhighspeed
needs adju_ng, contactyournearest
AUTHORIZED servicecenter, which has
properequipmentand exbedanceto make
necessaryadjustments.
15

Immediatelyprepareyourlawn mowerfor
storageatthe end ofthe seasonorifthe unit
willnotbe usedfor 30 days or more.
LAWN MOWER
When lawn mower is to be stored for a period
of time, clean it thoroughly, remove all dirt,
grease, leaves, etc. Store in a clean, dry area.
• Clean entire lawn mower (See "CLEANING"
in the Maintenance section of this manual).
•Lubricate as shown in the Maintenance
section of this manual.
• Be sure that all nuts, bolts, screws, and pins
are securely fastaned. Inspect moving
parts for damage, breakage and wear.
Replace if necessary.
•Touch up all rusted or chipped paint
surfaces; sand lightly before painting.
HANDLE
•You can fold your lawn mower handle for
storage.
• Loosen the two (2) handle knobs on sides of
the upper handle and allow handle to fold
down to the rear.
•Squeeze the bottom ends of lower handle
toward each other untilpins in handle clear
the brackets and pivot e_re handle
assembly forward and allow it to rest on
mower.
•When setting up your handle from the
storage position, the lower handle will
require manually locking into the mowing
position.
IMPORTANT: When folding the handle for
storage or transportation be sure to fold the
handle as shown or you may damage the
control cabk_s.
Operator presence
control bar"_i
Upper handle _-_
Fold forward __=._,_
for storage #-_-_:_"_:
Lower _:;_
handle _
ENGINE
FUEL SYSTEM
IMPORTANT: Itis importantto prevent gum
deposits fromformingin essentialfuelsystem
partssuchas carburetor,fuel filter,fuel hose,
or tankduringstorage.Also,experience
indicatesthatalcoholblendedfuels (called
gasoholorusingethanolor methanol)can
attractmoisture whichleadsto separation and
formationof acids duringstorage.Acidic gas
can damagethe fuel systemofan engine
while instorage.
•Drainthe fuel tank.
•Startthe engineand letit rununtilthe fuel
linesand carburetorare empty.
•Never useengineor carburetorcleaner
productsinthe fuel tankor permanent
damage may occur.
•Use fresh fuel nextseason.
NOTE: Fuel stabilizeris an acceptable
altemative inminimizingthe formationof fuel
gum depositsduringstorage. Add stabilizerto
gasolineinfueltank orstoragecontainer.
Always follow the mix ratiofound on stabilizer
container. Runengineat least 10 minutes
atter addingstabilizerto allow the stabilizerto
reachthe carburetor.Do notdrainthe gas
tankand carburetorif usingfuel stabilizer.
ENGINE OIL
Drain oil (withengine warm) and replace with
clean engineoil. (See "ENGINE" inthe
Maintenance sectionof this manual).
CYUNDER
•Remove spark plug.
•Pour one ounce (29 ml) of oil through spark
plug hole into cylinder.
•Pull starter handle slowly a few times to
distribute oil.
/;_._ •Replace with new spark plug,
BA'n'ERY
_i ,;/_ Disconnect the battery from the engine
_:' }connector and charge battery 48 hours.
,:f l"*"Fold OTHER
.;/ backward.
/" I Do not store gasokne from one season to
Mowing another.
position •Replace your gasoline can if your can starts
Med.
Low
Handle pin
3-position
Handle
adjustment
bracket
to rust. Rust and/or dirt in your gasoline will
cause problems.
if possible, store your unit indoors and cover
it to give protection from dust and dirt.
16

•Cover your unit with a suitable protective
cover that does not retain moisture. Do not
use plastic. Plastic cannot breathe which
allows condensation to form and will cause
your unit to rust.
IMPORTANT: Never cover mower while
engine and exhaust areas are stillwarm.
_CAUTION: Never store the lawn
mower with gasoline in the tank inside a
building where fumes may reach an ope
flame or spark. Allow the engine to cool
before storing in any enclosure.
TROUBLESHOOTING CHART
PROBLEM CAUSE CORRECTION
Will not start
!Loss of power
Poor cut
- uneven
Excessive
vibration
Starter rope
hard to pull
1. Dirty air filter.
2. Out of fuel.
3. Stale fuel.
4. Water in fuel.
5. Spark plug wire is disconnected.
6. Bad spark plug.
7. Loose blade or broken blade
adapter.
8. Control bar in released position
9. Control bar defective
10. Weak battery.
11. Disconnected Battery connector
1. Rear of lawn mower
housing/blade dragging
In heavy grass.
2. Cutting too much grass.
3. Dirty air filter.
4. Buildup of grass, leaves
and trash under mower.
5. Too much oil in engine.
6. Walking speed too fast,
1. Worn, bent or loose blade.
2. Low engine speed.
3. Buildup of grass, leaves, and
trash under mower.
1. Worn, bent or loose blade.
2. Bent engine crankshaft.
1.
2.
3.
4.
Engine flywheel brake is
on when control bar is released.
Bent engine crankshaft
Blade adapter broken.
Blade dragging in grass.
1. Clean/raplace air filter.
2. Fillfuel tank.
3. Drain tank and refillwith fresh
clean fuel.
4. Drain fuel tank and carburetor
and refilltank with fresh gasoline.
5. Connect wire to plug.
6. Replace spark plug.
7. Tighten blade bolt or replace blad,
adapter.
8. Depress control bar to handle.
!9. Replace control bar.
10. Charge battery
1. Connect battery to engine
1. Set in "Higher Cut" position.
2. Set in "Higher Cut" position.
3. Clean/replace air filter.
4. Clean underside of mower housin_
5. Check oil level.
6. Cut at slower walking speed.
1. Replace bl,=_le.Tighten b_adebolt
2. Set engine speed control in fast
position.
3. Clean underside of mower housin(
1. Replace blade. Tighten blade bolt.
2. Contact an authodzed service
center/department.
1. Depress control bar to upper
handle before pullingstarter rope.
2. Contact an authorized service
center/department.
3. Replace blade adapter.
4. Move lawn mower to cut grass or
to hard surface to start engine.
17

TROUBLESHC OTING CHART
PROBLEM CAUSE CORRECTION
Grass catcher
not filling
(If so equipped)
Hard topush
Loss ofdr_e
1. Cutting height too low.
2. Lifton blade wom off.
3. Catcher not venting air.
4. Low engine speed,
1. Grass is too high or
wheel height is too low.
2. Rear of lawn mower
housing/blade dragging
in grass.
3. Grass catcher too full.
4. Handle height position
not rightfor you.
1. Belt wear.
2. Belt off of pulley.
3. Drive cable worn or broken.
4. Dirt in drive pinions,
1. Raise cuttingheight.
2. Replace blade.
3. Clean grass catcher.
4. Set engine speed control in
fast position.
1. Raise cutting height.
2. Raise rear of lawn mower
housingone (1)setting higher.
3. Empty grass catcher.
4. Adjust handle height to suit.
1. Check/replace drive belt.
2. Check/reinstall drive belt.
3. Replace drive cable.
4. Clean drive pinions.
18

BA'I-I'ERY
ROTARY LAWN MOWER MODEL NO.917.377971
4\
II
I
I
t,,
KEY
NO.
1
2
3
4
5
PART
NO.
161334
750909
17411312
86353
111549X
DESCRIPTION
Battery box
Batte_
Screw
Clip Connector
Battery Charger
37

ROTARY LAWN MOWER --MODEL NO. 917.377971
42
10

ROTARY LAWN MOWER --MODEL NO. 917.377971
KEY PART
NO. NO
1 167163
2 161105X479
3131036
4 132001
5 636O1
6 66426
7 131959
8 87692
9 164265
10 161551
11 73990500
12 51793
13 151501
14 850733X004
15 83816
16 162085
17 161548
18 165261
19 166907
20 161568X479
21 168227X479
22 150078
23 163183
24 63124
25 161333
26 163409
27 161550
28 88652
29 166036X4'79
30 851514
31 159267
32 851074
33 85O263
34 851084
35 166032
36 17O045
37 15O4O6
38 .....
DESCRIPTION
Handle, Upper Dtx Comf. (IncludesGrip)
Handle,Lower
Bail, Cont, Wlre DIx Comf. BIk
Guide, Rope, Side
Nut, Hex Lockwasher 1/4-20
Wire, Tie
Bolt, Handle 5/16-18 x 1.75
Knob, Handle
Gdp, HdlFoam Smooth
Bolt, Sq. Neck
Nut, Hex LockwasherIns. 5/16-18 UNC
Cotter,Hairpin
ElectricStart Control
Bracket, Upstop
Screw, Hex Washer Head Tapping 10-2
Kit,Door Rear
Seal, Door
Plug, Mulcher
Kit, Housing
Handle, BracketAsm. Left
Handle, Bracket Asm. Right
Screw,Hex Wsnd
BolL Hex Head 5/16-18 x5/8
Nut, Hex LockWshr 5/16-18
Baffle, Side
Screw 12x 5/8
Skirt
Screw, Hinge 1/4-20x 1.25
Belt Cover,Top
Adapter, Blade w/key Longer
Blade,21"
Washer,Hardened
Lockwashar,Helical Spdng 3/8
Screw, HexHead 3/8-24x 1.38
Pulley,Fixed
Beadng SupportAasy.
Bolt, Engine
Engine (See Breakdown)
Craftsman143.996712
KEY PART
NO. NO DESCRIPTION
39 169294 Grass Catcher Bag
40 161358 Grass CatcherFrame
41 85463 Danger Decal
42 144929 Screw
43 751152 Nut
44 ..... Battery (See Battery Repair Parts)
45 166034 Rod, Pulley Engage
46 166041 Bushing
48 169605 RetainerClip
49 166039X008 Clatllp
5O 54583 Screw
51 169980 Spacer
52 170047 Wave Washer
53 166037 Belt Cover, Bottom
54 750097 Screw
55 166383X479 Cable Support Bracket
56 63601 Nut
57 166391X004 Bracket Assy,
58 578_B Screw
59 166042 V-Groove Pulley
60 166(_50 IdlerArm Spacer
61 145212 Flange NUt
62 155552 Locknut
63 166022)(008 IdlerArm
64 166043 Idler Pulley
65 160829 ShouiderBolt
66 166885 Door Assy.
67 166028 Multi Cut Guard
68 88349 Nut
69 169807 ZoneControl Cable
-- 161058 WarningDecal (NotShown)
--170113 Owner'sManual
Available accessoriesnot includedwithlawn mower:
71 " 33623 Gas Can (2.5 gal.)
71 33500 FuelStabilizer
71 33300 SAE 30W Oil (27 oz.)

24
26 31
30
33 32
34
ROTARY LAWN MOWER-- MODEL NO. 917,377971
23
2i;!
7
23
35,
2O

ROTARY LAWN MOWER -- MODEL NO. 917.377971
KEY PART
NO. NO KEY PART
DESCRIPTION NO. NO DESCRIPTION
.b.
1 166047
2 167259
3 54583
4 170050
5 161552
6 750634
7 .166060
8 132010
9 166049
10 166021X004
11 17541011
12 166189
13 166388
14 145354
15 57079
16 161584
17 161602
18 160477)(004
19 167650
20 12000022
21 163365
22 169911
SpeedControl 23 161118X004
BailControlDrive 24 57808
Screw 25 170011
DriveCable 26 166450
Cover Drive 27 52160
Screw Thdrol 10-25 x .50 28 12000058
V-BaR 29 88080
Nut Lock Ranged 3/8-16 Zinc 30 67725
Pulley Driven 31 57143
Belt Keeper Bracket 32 150342
Screw Hex Wash Head 10-24 X .668 33 145212
PivotRod Cover 34 150181
TransmissionAsm. 35 160785X004
Pin SpdngThrust 36 160786_004
WasherHardened 37 161463
Rod ConneclJng 38 163409
Spring Extension 39 700279
SpdngSelector 40 150339
KnobSelector Spring 41 150182
E-Ring7/8 42 83923
BearingSupport 43 19572216
Baaring Ball 44 144929
45 751152
RetainerDriveAsm. Stmp.
Screw Hex Head Tapping 1/4-20 x .75
DrivePawl
Pinion,Drive RH
Washer
E-Ring 7/16
Cover,Dust Wheel
Washer 1/2 x 1-1/2 x .134
Wave Washer
Wheel 9 x 2
Nut Hex Range Lock
Hubcap, Mag Platinum9"
Shaft Asm. Rear
Shaft Asm. Front
Retainer Front Shaft
Screw 12 x 5/8
ClipRetainer
Wheel 8 x 2
Hubcap, Mng Platinum8"
Nut, Hex Range Lock 3/8-16
Washer
Screw 1/4 x 2.12
Locknut

_RAFTSMAN 4-CYCLE ENGINE MODEL NUMBER 143.996712
301
/
292
30O
_262
900
251
38O
45
187A
135
42

MODEL NUMBER 143.996712
I
QFIAF['SMAN 4-CYCLE ENGINE
KEY PART
NO. NO. DESCRIPTION
I 36177
2 27652
636059
9590568
10 360GZ
11 36003A
12 32447
12(3 89005A
14 28277
15 36OO6
16 36OO8
17 31335
18 651018
19 36103
20 36010
25 37149
26 65O8O2
30 36178
4O 4OO04
4O 4OO65
41 36070
41 36071
42 40006
42 411007
43 20_1
45 _
41] _610A
48 36O3O
50 36031A
52 29914
69 36032A
70 37271
75 36010
80 30574A
81 30590A
82 30591
83 36057
85 36O34
86 650924
88 31707A
89 611154
90 611171
91 611156
92 650815
93 650816
100 34443B
101 610118
103 651007
110 36054
110A 34970
IlOB 36098
115 650518
119 36061
120 36187
125 36471
125 36472
126 29314C
130 6021A
135
t50 31672
t51 31673
169 27234A
KEY
NO. PART
NO.
Cylinder(Ind. 2,10,12,20 & 172 32755
125) 174 30200
Dow_ Pin 177 6509_5A
_Bemerd 184 36183
Serew, 10-24 x 3/4" 186 360G9
BreafflerValve Body 187A 37148
ChockValve 190 36013
Bn_,therTube 191B 36122
* BmetherCover &Gasket 1_2 36016
FlatWasher 1_3 36015
GovernorROd(Machined) 194 36014
GovernorLever 195 610973
GovernorLev_Cismp 198 36017
Serew,TorxT-15, 8-32 x 19/ 199 36018
64' 239 36048
GovernorSpdng
C_ISeal 240 36190
BowerHo=_g_me
Ass'y.(IncU95) 24313 651041
Screw,1/4-20 x 5/8" 245 36046
Crankshaft 250 36191
Piston,Pin,RingSet (Std.) 251 650928
Piston,Pin,RingSet (.010 OS) 251A 650933
Piston& PinAas'y.(Std.)(Incl. 255 36193
43) 256 650_3
Piston& Pin Ass'y.(.010 m0 36189
OS)(Inc1.43) 262 650737
RingSet (Std.) 263A 36192
RingSet (.010OS) 275 36107A
PistonPinRetainingRing 276 36043
Connec_ngRod Ass'y. (Incl. 277 650927
46/ 285 34449A
Connec_ngRodBolt 287 650926
Valve Litter 290 29774
Oil PumpAss'y. 300 36189
* Mou_ng Flf_3e _301 3_46
Moun_ngFlange(IncL72thru 305 36063
85) 307 35499
OilSeal 30B 36040
GovemorShaft 310 36064
Washer 314 650767
Govemo¢Gear Ass'y.(Ind.81) 315 36095
G_emorSpo_ _2 35O13
Id,er Gear 346A 28763
Serew, 1/4-20 x 1-9/16' 347 658998A
Spacer 360 36045A
_Key 361B 29216
370A 36261
• Flyv_'_elFan 3"/0C 37318
BellevilleWasher 370R 37317
FtywheelNut 380 640_0A
SolidState Ignition
SparkPingCover .390 590739
Screw,Torx T-15, 10-24 x 15/ 396 36896
16=400 890_D
QroundW='e
GroundW_e 416 36085
O.C, StarterW_
LockWasher 417 650621
* CylinderHeadGasket 900 ----
CyfinderHead 900 ---
ExhaustValve (Std.) (Ind.
151)
ExhaustVak,e (1/32"OS)
IntakeValve (Std.) (Incl. 151)
Screw,5/16-18 x 1-1/2'
ResistorSparkPlug(FU19LM)
Valve Spring
LewerVa_e SpdngCap
*Valve SprlngBoxC-,asket
DESCRIPTION
ValveSpdngBoxCover
Screw,10-24x9/16'
CarburetorMoun_ngStud
CarburetorG,_sket
GovernorUnk
AirBaffle
BrakeLeverAss'y.
BrakeControlLever
BrakeControlLeverUnk
BrakeSpdng
Re_n_oP,_
TerminalAss_.
BrakeControlLeverSpring
BrakeLeverBlJshing
* Carbureto¢'roAir Cleaner
Gasket
AirCleener Body(Ind. 239 &
3S0)
Air CleanerStud
Air Cleane"Filter
Air CleanerCover
LockNut 1/4-30
WingNut, 1/4-20
ControlPlate
Scmw,8-32 x 1/2"
BlowerHousing
Screw, 1/4-20 x 1/2"
StarterGdll
Muft_r
LockingPlate
Screw,5/16-18 x 2--11/32"
StartorCup
Screw,8-32 x 21/_Po4"
FuelUne
FuelLineCismp
FuelTank (Ind. 301)
FudCap
OilFillTube
"O"Ring
FiUTubeClip
D_
Screw,8-32 x 27/64"
AlternatorCoil
_Body
Screw,10-32x35/64'
Screw,10-32x 27/32"
Plimer
LockNUt
Lubrk_tJonDec_
PdmerDecaJ
WarningDecal
Carburetor(Ind. 184,187A&
2_)
Re_nd Stark_
_StartorMotor(12 Volt)
Gasket Set (Ind. Items
Marked*)
SparkArrestorKrt (Ind.
417)(Op_n_
Screw,10_2 x 1/2"(Optlonal)
ReplacementEngineNONE
ReplacementShortBlock
750791C,
erderfrom71-999
RPM High2900 to3200
NOTE: Thisenginecouldhavebeen builtwith5907(_
starter
NOTE: Allcomponentdimensionsgivenin U.S. inches
1inch = 25.4 mm
43

CRAFTSMAN 4-CYCLE ENGINE MODEL NUMBER 143.996712
I
I
I
I
I
I
I
I
I
NO.
1
5
6
7
14A
25
27
28
29
3O
32
33
36
37
37A
38
38A
39
4O
47
PART
NO.
---- 640020A
632539
632541
65O5O6
632773
632875A
632544
632543
632548
6327O9
632672
632673
64OO22
632547
632547
632545
632545
632549
640021
632554
DESCRIPTION
Carburetor (Incl. 187B & 239 of Engine
Parts List)
Throttle Shaft & Lever Assembly
DustSeal
Throttle Shutter
Throttle ShutterScrew
Ventu_
Float
Float Shaft
Float
Roat Bo_ to Body Gasket
Inlet Needle & Seat
Bowl Drain Screw
Bowl Drain Washer
Main Nozzle Tube
"O"Ring
"O"Ring, Main Nozzle Tube
Spring, Main Nozzle Tube
Spring
Float BowlRetainer
Main Fuel Jet
Welch Plug, IdleMixing Well
44

CRAFTSMAN 4-CYCLE ENGINE MODEL NUMBER 143.996712
m5
KEY
NO.
1
2
3
4
5
6
7
8
11
12
13
PART
NO.
590702
590599A
59O60O
59O696
590601
590697
590698
59O699
590700
590703
•590535
590701
DESCRIPTION
Recoil Starter
Spring Pin (Incl. 4)
Washer
Retainer
Washer
Brake Spring
Starter Dog
Dog Spring
Pulley & Rewind Spring
Ass'y.
Starter HousingAss'y.
(40 degree grommet)
Starter Rope ( 98" X 9/
64" dia.)
Starter Handle
_LI4
KEY
NO.
3
6
7
8
11
12
13
14
PART
NO.
590739
590740
590616
590617
590618A
590638
590535
590701
590760
DESCRIPTION
Rewind Starter
Retainer
Starter Dog
Dog Spring
Pulley & Rewind Spring
Ass'y
Starter HousingAss'y
(40 degree grommet)
Starter Rope (Length 98"
x 9/64" dia.)
Starter Handle
Spring Clip
45

46

47

For in-home major brand repair service:
Call 24 hours a day, 7 days aweek
1-800-4-MY-HOME sM (1-800-469-4663)
Para pedir servicio de reparaci6n a domicilio
1-800-676-5811
In Canada for all your service and parts needs call
Au Canada pour tout le service ou les pi_ces
1-800-665-4455
For the repair or replacement parts you need:
Call 6 am - 11 pm CST, 7 days a week
PartsDirectsM
1-800-366-PART (1-800-366-7278)
Para ordenar piezas con entrega a domicilio
1-800-659-7084
For the location of a Sears Parts and Repair Center
in your area:
Call 24 hours aday, 7 days a week
1-800-488-1222
For information on purchasing a Sears Maintenance
Agreement or to inquire about an existing Agreement:
Call 9 am -5 pm, Monday -Saturday
1-800-827-6655
Home CentralSM
170113 07.11.99 VB Printed in U.S.A.
