Creative Labs AVPSB1250 Sound Blaster Wireless Touch Controller User Manual SBW MultiPlay System UG
Creative Labs Inc Sound Blaster Wireless Touch Controller SBW MultiPlay System UG
UserManual.wiki
>
Creative Labs
>
AVPSB1250 User Manual
User manual
Navigation menu
Upload a User Manual
Namespaces
Wiki Guide
HTML
PDF
Info
Views
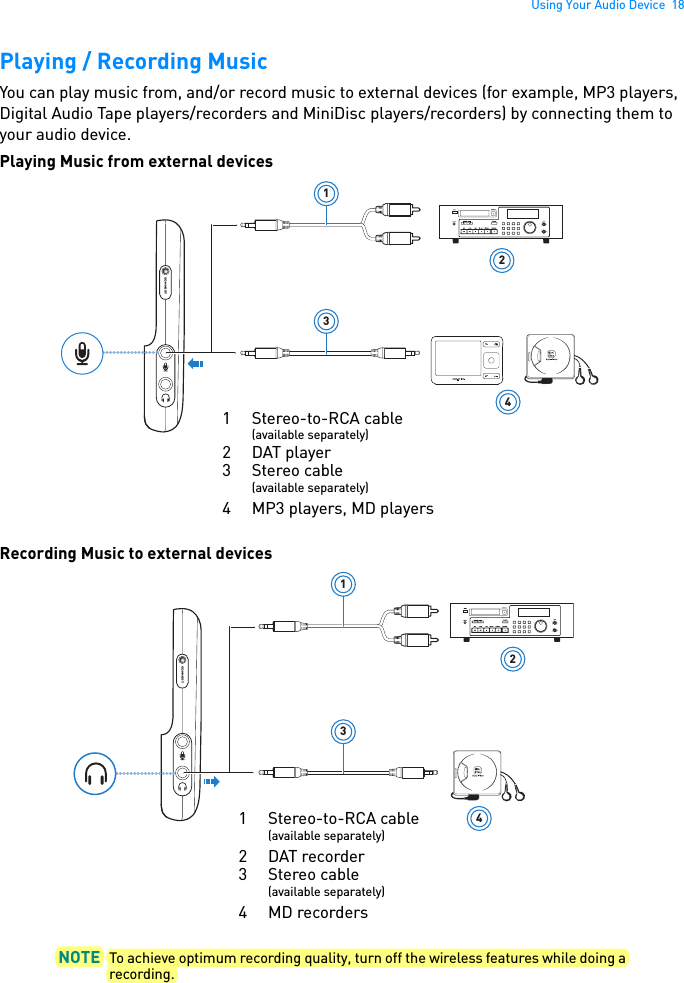
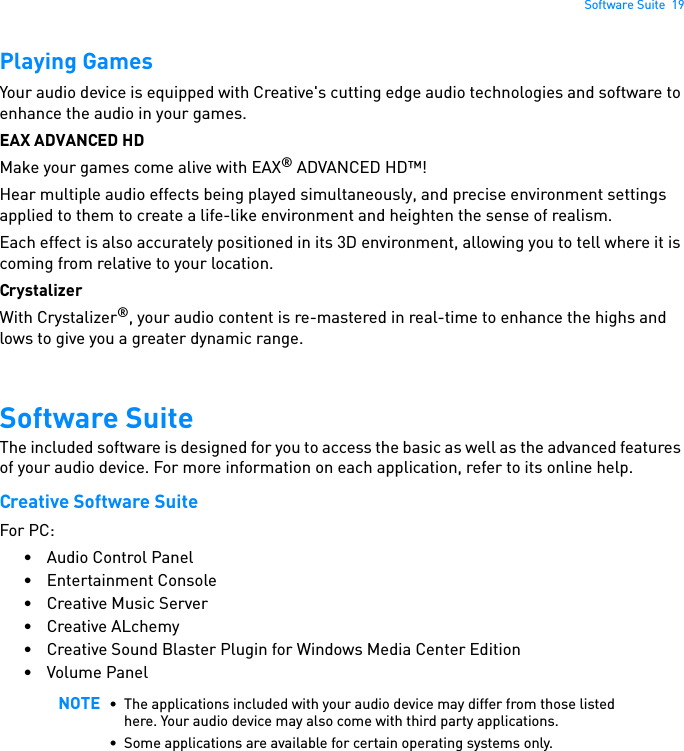
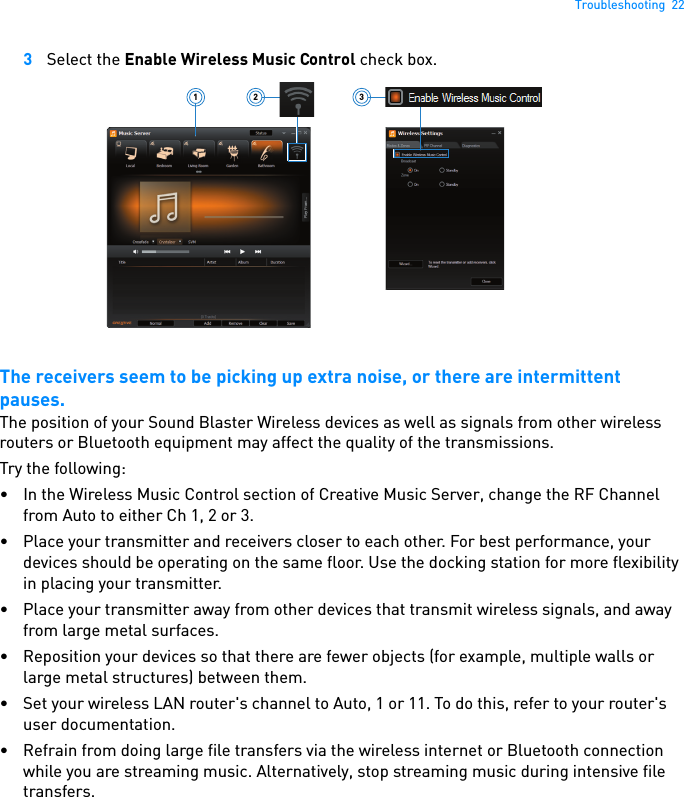
User Manual
Discussion / Help
Navigation